
GAME TRANSLATE · SNES GUIDE
Bakumatsu Kourinden ONI
Complete Walkthrough
Every main quest step, side quest, ally, summon, youkai and treasure chest, in the order you can do them, with a warning before anything becomes missable.
Nothing on this page matches your search. Try a shorter word, or clear the box.
Before you start
💿 The patch
Apply the English patch to a clean, unmodified Japanese ROM of Bakumatsu Kourinden ONI (Super Famicom, 1996). The ROM must match CRC32 1CF3C877 before patching; an already-patched or headered ROM will not work.
🏷️ Names in this guide
Every name matches the English patch: Iida Town, Mt. Minakami, Juurouta, God’sTear… Item names are written exactly as they appear in the menus, so you can search this page for what you see on screen. The hero is called Yamato (his default name).
📜 Where the information comes from
This walkthrough is built from a full decode of the game’s event script: every flag, choice, karma change and NPC condition. Where the old GameFAQs guides got something wrong, the entry says so under Old guides.
💾 Saving & healing
Save at any Jizo statue. Mayuki heals the party for free at home in Iida Town. Save before boss fights: many story battles end the game if you lose.
Karma in one minute
Karma runs from 0 to 100 and shows as a title in the status menu. Kindness raises it; stealing from homes, lying and cruelty lower it. Two thresholds matter most while you play:
⚔️ Keep it at 20 or more
Below 20, dozens of samurai and ronin, and five recruitable allies, attack you instead of talking. Beat one and he is gone for good.
✨ Aim for 100 by the end
Karma 70+ unlocks the Djinn summon; karma 100 lets Mayuki teach Yamato the Seven Gods, which the final summon needs.
Every karma choice, its exact value and the full list of low-karma duels are in the Karma Guide.
Iida Town & Mt. Maru
📍 Iida Town · Mt. Maru
Yamato comes home from a hunt in Iida Town. An errand for his mother turns into a rescue: youkai have carried the village children off to Mt. Maru. After the rescue a youkai attacks the town, and a mysterious swordsman, Juurouta, saves Yamato and tells him he has a talent for hunting youkai.
⏳ Last chances in this chapter
- Talk to Kisuke before you walk out of Iida the morning you set out, or his farewell Herb is lost (a second Herb still waits on your first return).
- Jiiya’s Suzukake stays available until the Shinsengumi messenger at Mt. Yatsuka (Ch. 4). Get it before then.
- Searching pots and shelves in homes and storehouses costs karma, and Kongouyasha remembers the thefts late in the game.
- Kisuke’s farewell Herb details
- Fight the Mt. Maru ghost at once details
Full list across the game: Missables.
Walkthrough
- MainAfter the opening, you’re at home in Iida Town with 3 Herbs. Your house is the one in the south-west corner of town. Mayuki, your mother, asks you to fetch Mom’s Box from the storehouse. It’s the small white building just south of your house.
- MainGo into the storehouse and open the chest in the top-left corner. You get Mom’s Box, and Yamato finds an Odd Bundle tucked under it. Take both back to Mayuki.
- SideOptional (not recommended): search the shelves on the left wall of the storehouse for a Pill. It isn’t yours, so it costs 1 karma. → checklist
- MainMayuki takes the box and gives you your late father’s sword, a Katana. Tarou bursts in: youkai have taken the children, and he begs you to save them at Mt. Maru, north-west of the village. Equip the Katana right away. Mayuki reminds you if you forget.
- TipFrom now on, talk to Mayuki whenever you’re hurt. Answer Yes to ‘Will you rest for today?’ to fully recover for free. Iida has no inn.
- SideOptional: Naozane stands by the tree in the north-east corner of town. Now that Tarou has asked for help, he offers to come to Mt. Maru with you. Answer Yes and he joins as an NPC ally. Your karma must be 20 or higher, or he attacks you instead. → checklist
- TipShops: the long building at the top of town has the weapon shop (left door) and the armor shop (right door). The item shop is the house with the sign on the east side. A Silk Robe (140) or Leggings (110) helps a lot before Mt. Maru.
- TipThe ronin near the south stairs warns that taking things from people’s homes lowers your karma. That’s true: any ‘Found X!!’ in a house or storehouse costs karma. Also save at the Jizo statues.
- MainLeave town and head west-north-west on the map to Mt. Maru. Climb to the cave mouth in the middle of the mountain. Two chests sit outside: a Pill near the summit on the left and a Herb on the right-hand shoulder.
- MainInside the cave, the ghost has the children locked in a cage. Answer Yes to ‘Will you fight?’. Fighting at once gives +1 karma. Each No (‘I’ll prepare a little more first’) sends you back outside and costs 1 karma.
- MainBeat Biwabokuboku. It calls you a ‘Shadow’ as it dies, and the children are freed. Losing here means Game Over, so heal first.
- SideAfter the rescue, go back into the cave for two chests you couldn’t reach during the event: a Herb in the right-hand alcove and a Dogu Shard in the left-hand alcove. Keep the Dogu Shard. It’s one of three pieces for a summon later (Niigata Village).
- MainWalk back into Iida Town. A youkai ambushes you at the entrance to avenge its comrade. You can’t win this fight. Just when it goes for the finishing blow, Juurouta cuts it down. He tells you that you have a talent for hunting youkai, then leaves.
- MainGo home and talk to Mayuki. That night Yamato asks about his father and says he wants to go with the stranger. Mayuki makes him wait until morning. Next morning you say goodbye and set off. This farewell is what Juurouta is waiting for in Ch. 2.
- SideBefore you leave, talk to Jiiya, the old retainer in your house. He gives you the Suzukake he wore as a young man, a good body armor this early. → checklist
- WarningTalk to Kisuke (the boy west of the well) before you walk out of town. He gives you a farewell Herb. If you leave town first, this gift is gone, but he still has a Herb for you next time you come back. → checklist
- SideOptional: Yachiho is in the house on the east side, just right of the well (upper door). Now that you’re setting out, she asks to come along. Answer Yes and she joins as an NPC ally. She heals a little. → checklist
- SideOptional (not recommended): the little jars on the floor just below Yachiho hold a Herb. Taking it costs 2 karma. → checklist
- MainLeave Iida Town and go north to Toyama Village (Ch. 2).
- TipAfter you’ve left once, talk to Mayuki when you come home. She offers to cook for you: answer Yes to ‘Stay the night?’ for a free full heal. Kisuke also gives you a second Herb the first time you come back.
- TipStaying the night with Mom at karma 100 teaches Yamato the Seven Gods summon. At karma below 21, Binbougami (the God of Poverty) visits your dreams once; below 1, Yakubyougami (the God of Plague) does. These two visits are only warnings. They don’t change anything.
Checklist
- Where
- Iida Town: your house (south-west corner)
- How
- Bring Mom’s Box from the storehouse south of the house back to Mayuki.
- Reward
- Katana (Mom’s Box and the Odd Bundle are taken back)
- Opens
- Ch. 1: start
- Closes
- never (story)
- Where
- Iida Town: by the tree in the north-east corner
- How
- Talk to him any time after Tarou’s plea and answer Yes to ‘Will you take him along?’. Karma must be 20 or higher.
- Reward
- NPC ally Naozane (free)
- Opens
- Ch. 1: after Tarou asks you to save the children
- Closes
- never. But at karma below 20 he attacks instead; if you win (+400 gold, −2 karma) he is gone for good.
- Where
- Iida Town: the house east of the well (upper door); she stands in the bottom-right corner of the room
- How
- Talk to her after the night talk with Mayuki and answer Yes to ‘Take them along?’. Before that she only wants to play.
- Reward
- NPC ally Yachiho (small heal)
- Opens
- Ch. 1: the morning you set out
- Where
- Iida Town: your house, Jiiya
- How
- Talk to Jiiya any time after the night talk with Mayuki.
- Reward
- Suzukake
- Opens
- Ch. 1: the morning you set out
- Closes
- Ch. 4: once the Shinsengumi messenger at Mt. Yatsuka has spoken to you, Jiiya only worries about the country.
- Where
- Iida Town: Kisuke, west of the well
- How
- Talk to him after the night talk with Mayuki, before you leave town.
- Reward
- Herb
- Opens
- Ch. 1: the morning you set out
- Closes
- Ch. 1: as soon as you walk out of Iida Town after the night talk
- Where
- Iida Town: Kisuke, west of the well
- How
- Talk to him the first time you come back to Iida after setting out.
- Reward
- Herb
- Opens
- Ch. 2: first return to Iida
- Where
- Mt. Maru: the cave
- How
- Answer Yes to ‘Will you fight?’ the first time you are asked.
- Opens
- Ch. 1
- Closes
- after the fight
- Where
- Iida Town: the storehouse south of your house, shelves on the left wall
- How
- Face the shelves and search.
- Reward
- Pill
- Opens
- Ch. 1
- Where
- Iida Town: the house east of the well (upper door), the jars just below Yachiho
- How
- Search the jars.
- Reward
- Herb
- Opens
- Ch. 1
- Where
- Iida Town: your house, Mayuki
- How
- Rest or stay the night at home while your karma is 100.
- Reward
- Yamato learns the Seven Gods summon
- Opens
- any time: any time your karma reaches 100
- Where
- Iida Town: the ronin near the stairs in the south
- How
- Talk to him with karma below 20; he attacks. Naozane does the same.
- Reward
- Ronin: 350 gold if you win (lose: −400 gold). Naozane: 400 gold (lose: −600 gold).
- Opens
- Ch. 1
- Closes
- after you beat him
Treasure chests (5)
| Item | Area | Where | |
|---|---|---|---|
| Mom’s Box | Iida Town (storehouse) | top-left corner of the storehouse south of your house Story item; an Odd Bundle comes with it. Both go to Mayuki. | |
| Pill | Mt. Maru | near the summit, on the left peak | |
| Herb | Mt. Maru | on the right-hand shoulder of the mountain, above the cave | |
| Herb | Mt. Maru (cave) | right-hand alcove of the cave Reachable after the rescue. | |
| Dogu Shard | Mt. Maru (cave) | left-hand alcove of the cave Reachable after the rescue. One of three Dogu Shards for the Dogu summon in Niigata Village. |
Bosses & key battles
🗺️ Maps for this chapter (4)
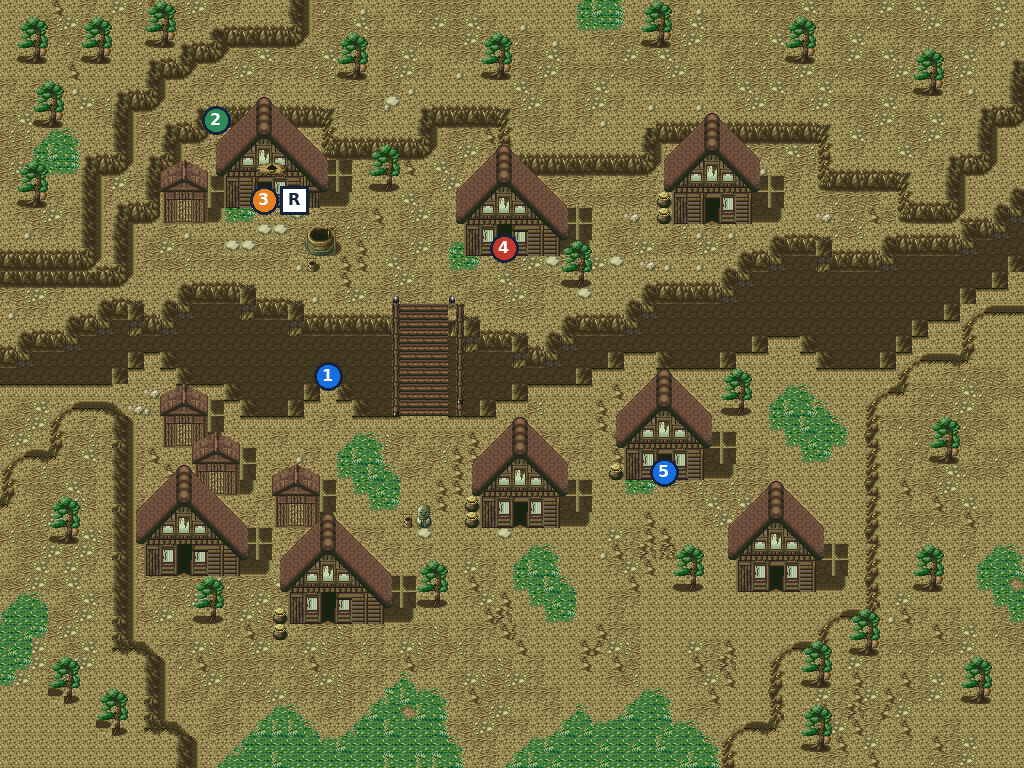
Numbers mark people and events worth a visit; letters A, B, C… mark treasure chests. A pin on a door means the person is inside that building. Pins show everything that can appear on the map over the whole game, so some people only turn up later in the story. Tap a map to open it full size.
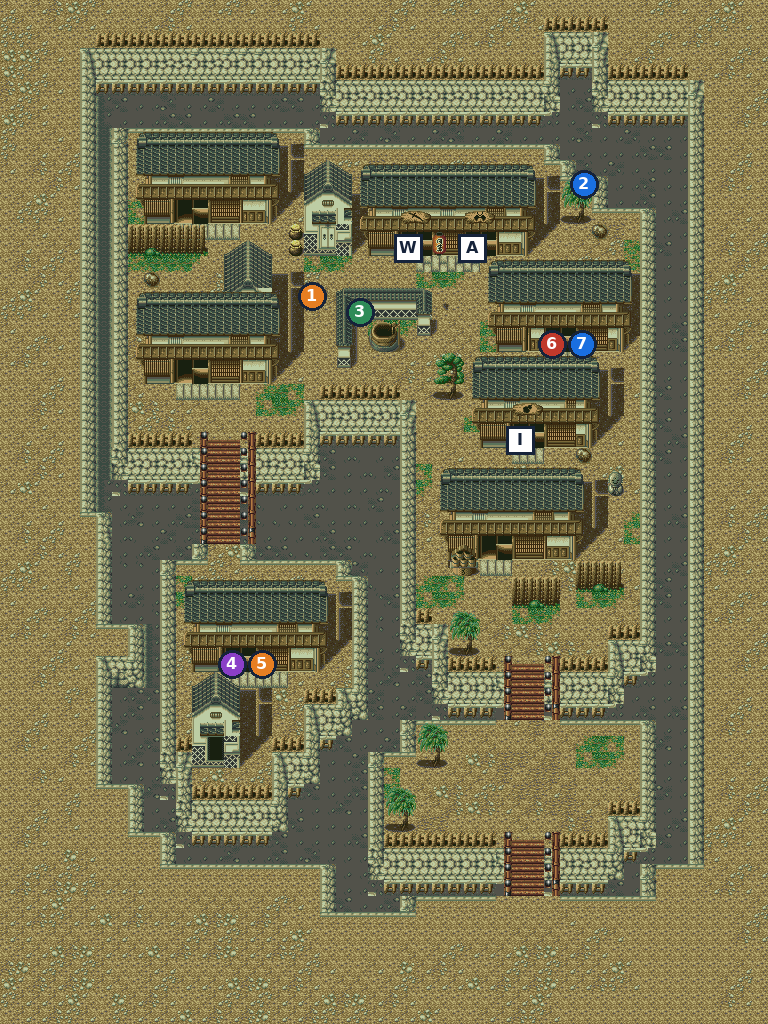
- 1Kisuke — gives Herb checklist
- 2Naozane — joins checklist
- 3Tanujou — Youkai Village, karma +2 / −2 checklist
- 4Mayuki (inside) — summon Seven Gods checklist
- 5Jiiya (inside) — gives Suzukake checklist
- 6Search spot (inside) — take Herb (theft), karma −2
- 7Yachiho (inside) — joins checklist
- AArmor shop
- IItem shop
- WWeapon shop
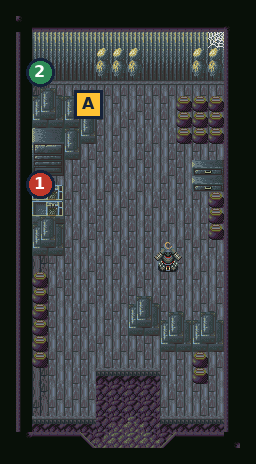
- 1Search spot — take Pill (theft), karma −1
- 2Kooni — Youkai Village, karma +2 / −2 checklist
- A Mom’s Box
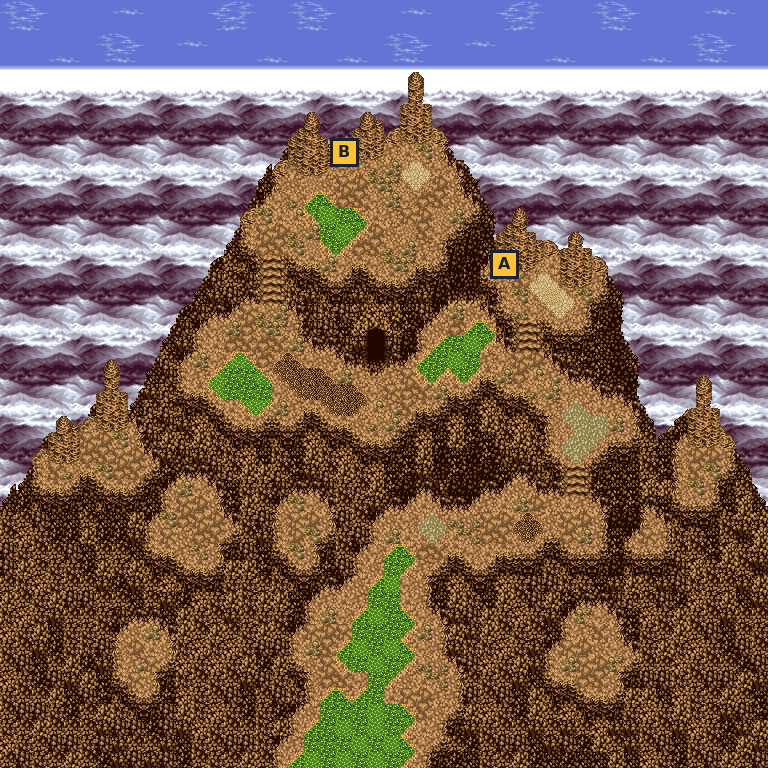
- A Herb
- B Pill
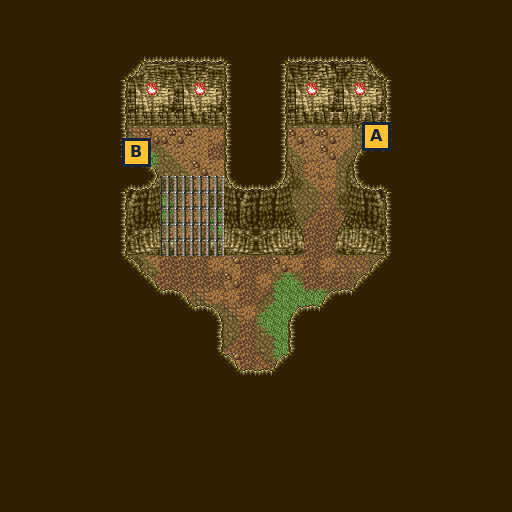
- A Herb
- B Dogu Shard
🛒 Shops in this chapter
Iida Town — Weapons
| Kodachi | 120 G |
| Katana | 180 G |
| Chakra | 150 G |
Long building at the top of town, left door.
Iida Town — Armor
| Hood | 100 G |
| Silk Robe | 140 G |
| Leggings | 110 G |
Long building at the top of town, right door.
Iida Town — Items
| Herb | 4 G |
| Pill | 6 G |
| Sandalwd. | 6 G |
| Wake Dust | 6 G |
House with the sign on the east side. No inn in Iida: Mayuki heals you for free.
Toyama Village & Mt. Minakami
📍 Toyama Village · Mt. Minakami · Checkpoint
Juurouta waits for you in Toyama Village and joins the party. The two of you follow the youkai to Mt. Minakami, open its hidden door and break up a gathering of youkai deep inside. Then Juurouta takes you to Kyoto.
⏳ Last chances in this chapter
- Mt. Minakami: grab the three chests in the second inner cave before you fight the youkai at its east end. The cave collapses afterwards.
- You can adopt only one pet in the whole game.
- Chest: H. Water (Mt. Minakami (inner cave)) details
Full list across the game: Missables.
Walkthrough
- MainToyama Village is north of Iida Town on the map. Juurouta is down in the dry riverbed, just west of the big bridge. Talk to him and answer Yes to ‘Join Juurouta?’.
- TipIf you come here before the night talk with Mayuki in Iida (Ch. 1), Yamato says he wants to say goodbye to his mother first. Go home, talk to Mayuki, then come back; Juurouta joins at once. Answering No (‘I still can’t trust you’) costs nothing, and he simply asks again.
- MainJuurouta joins the party for good. With him along, the checkpoint west of Iida will let you through, but first finish the youkai trail at Mt. Minakami, east of Toyama.
- TipToyama has no weapon, armor or item shop, only an inn (10 gold) and a pet shop. Stock up on Herbs in Iida before Mt. Minakami.
- SideThe inn is the house in the north-west, next to the well. An old man inside coughs and asks for a Herb. Answer Yes to ‘Give him a Herb?’ for +2 karma. → checklist
- SidePet shop: the house east of the bridge on the south bank. Talk to the Owner and answer Yes to ‘Will you keep a pet?’. Talk to one of the three animals at the back (puppy, kitten or chick) and answer Yes to choose it. Then talk to the Owner again; if you try to leave first, Yamato reminds himself to tell the Owner. The pet joins free. You only ever get one, so choose carefully. → checklist
- TipThe old guide describes the pets like this: the puppy (Shiba) does a weak attack that can poison, the kitten (Cat) does a weak attack that can put enemies to sleep, and the chick heals you after battle. Much later (Ch. 22) the Owner can make your pet grow up.
- SideOptional (not recommended): in the house just north of the bridge, a Speed Orb is hidden in the upper room near the bully. Taking it costs 2 karma, and Kongouyasha remembers it. → checklist
- MainMt. Minakami is east of Toyama. Outside chests: a Herb on the far-west upper ledge, and a Pill and Leggings on top of the eastern peak.
- MainAs you arrive with Juurouta, you watch a youkai slip through a hidden door in the rock face in the middle of the mountain. Walk up to the spot and examine the rock just left of the door (‘There’s a handle here!!’). Answer Yes to ‘Pull the handle?’ and the hidden door opens.
- MainFirst cave: go to the bottom-right corner and examine the wall. Yamato finds a contraption. Answer Yes to ‘Push it?’ and a passage opens to the exit in the top-right.
- WarningSecond cave: before you head east, open the H. Water chest in the centre-left, below the pond. Once you fight the youkai at the east end, the cave collapses and you can never come back. The game data also places a Reviver and a second H. Water by the pond, but both sit beyond the youkai’s trigger line, so they can’t actually be reached.
- MainGo to the east end of the second cave, where youkai are gathering around a pit. Step up to them to start the fight. Losing is Game Over. After you win, the rest of the youkai leap into the pit, something explodes, and you find yourself outside. The hidden door is buried. Juurouta says Kyoto lies to the south-west.
- MainGo back past Iida Town to the checkpoint at the western edge of the map. Until Juurouta joined, the samurai there turned everyone back ‘by order of the Shogun’. Now they let you pass. Past the checkpoint you’re on the western map, and Kyoto is the big town just south-west of where you come out (Ch. 3).
- TipSamurai and ronin all over Japan attack you if your karma is below 20. In Toyama, beating the street ronin by the west riverbank costs 3 karma. Beating the ronin in the north-east house or the two checkpoint samurai costs 2 each.
- SideFor later: once Natsume is in your party, a boy in Toyama talks about a giant bird at Mt. Minakami. Karura waits on the eastern peak. He refuses you until someone in your party has learned Naraenten (Yamashiro Village, Ch. 13). Then Natsume can call down Karura. → checklist
Checklist
- Where
- Toyama Village: pet shop, the house east of the bridge on the south bank
- How
- Answer Yes to ‘Will you keep a pet?’, pick an animal (Yes to ‘Choose the …?’), then talk to the Owner.
- Reward
- Pet ally: Shiba (puppy), Cat (kitten) or Chick. Free.
- Opens
- Ch. 2
- Closes
- never, but you can only ever take one pet
- Where
- Toyama Village: the inn (north-west house by the well)
- How
- Talk to the old man while carrying a Herb and answer Yes.
- Opens
- Ch. 2
- Where
- Toyama Village: the house just north of the bridge, upper room next to the bully
- How
- Search the spot by the back wall.
- Reward
- Speed Orb
- Opens
- Ch. 2
- Where
- Toyama Village: street ronin by the west riverbank; ronin in the north-east house. Checkpoint: two samurai.
- How
- Talk to them with karma below 20; they attack.
- Reward
- Street ronin 200 gold (lose −500); house ronin 1200 gold (lose −2000); checkpoint samurai 500 and 1000 gold (lose −800 / −1200)
- Opens
- Ch. 2
- Closes
- after you beat each one
- Where
- Mt. Minakami: top of the eastern peak
- How
- Go to the top of the eastern peak once anyone in your party has learned Naraenten (Yamashiro Village, Ch. 13). Without Naraenten he refuses. Natsume then learns Karura.
- Reward
- Natsume can call down Karura
- Opens
- after Naraenten is learned (Ch. 13 or later)
Treasure chests (4)
| Item | Area | Where | |
|---|---|---|---|
| Herb | Mt. Minakami | far-west upper ledge | |
| Pill | Mt. Minakami | top of the eastern peak, left | |
| Leggings | Mt. Minakami | top of the eastern peak, right | |
| H. Water | Mt. Minakami (inner cave) | second cave, centre-left, below the pond Lost once you beat the youkai at the east end (the cave collapses). ⚠ Gone after Chapter 2 |
Bosses & key battles
🗺️ Maps for this chapter (3)
Numbers mark people and events worth a visit; letters A, B, C… mark treasure chests. A pin on a door means the person is inside that building. Pins show everything that can appear on the map over the whole game, so some people only turn up later in the story. Tap a map to open it full size.
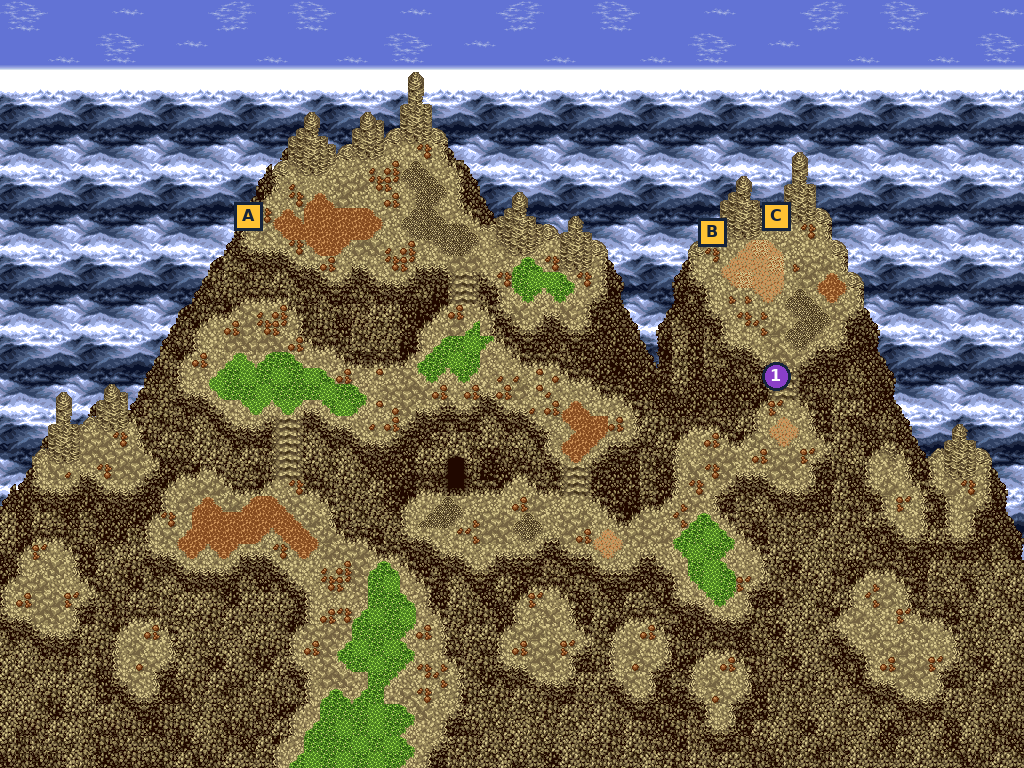
- 1Karura — summon Karura checklist
- A Herb
- B Pill
- C Leggings
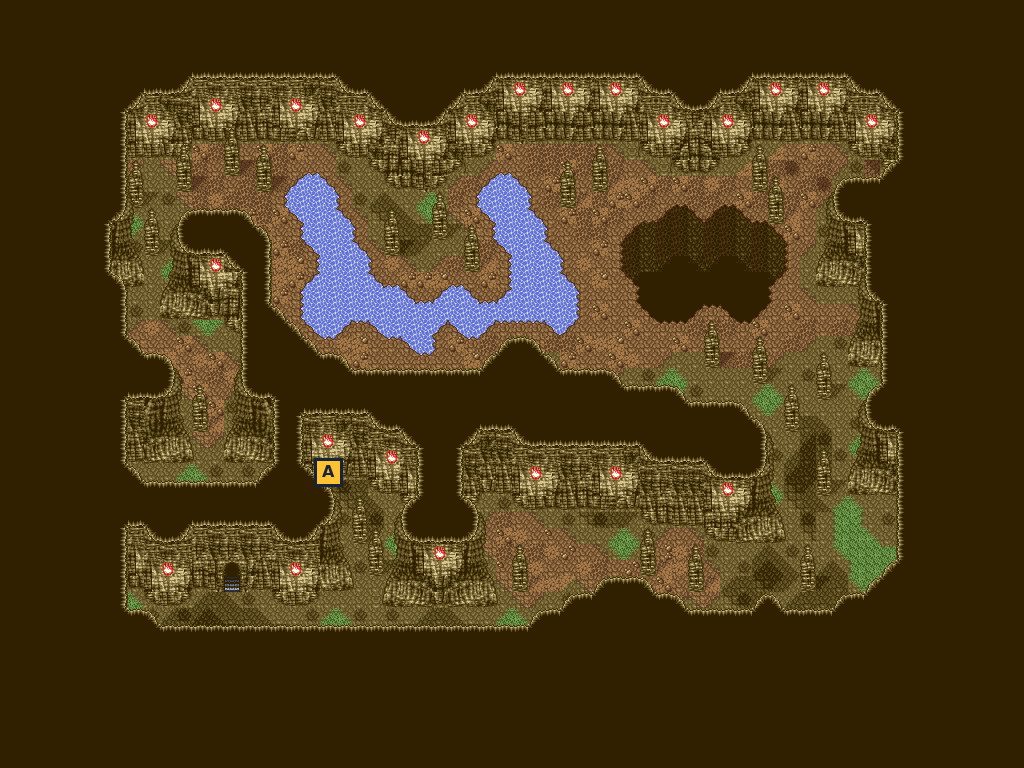
- A H. Water
🛒 Shops in this chapter
Toyama Village — Inn
| Stay | 10 G |
No weapon, armor or item shop in Toyama.
Kyoto: the Shinsengumi
📍 Kyoto · Nue Shrine · Kyoto Temple
Juurouta brings Yamato to the Shinsengumi headquarters in Kyoto and introduces him to Kondo, Hijikata and Okita, the ‘Shadow’ who hunt youkai for the Shogun. To prove himself, Yamato goes on six youkai hunts around the city, one with each of six troopers. When the last is done, the Shogun’s Spirit Hole flame goes out and new orders send you west.
⏳ Last chances in this chapter
- Leave Hijikata’s sword alone unless you want Izumi Kami badly: it costs 10 karma, and Kongouyasha remembers it.
- Refuse Shinpachi’s cut. Taking 500 gold costs 11 karma.
- Every Kyoto hunt ends in Game Over if you lose. Use the HQ cook’s free meal before each one.
- Shinpachi’s cut details
Full list across the game: Missables.
Walkthrough
- MainKyoto is just south-west of the checkpoint on the western map. Enter through the south gates. The Shinsengumi headquarters is the large building in the upper half of town, left of centre, with four troopers at the door. With Juurouta along they let you in (‘Ah, Master Mibu. Welcome back.’).
- MainInside, Okita runs up to greet Juurouta. Walk up to Kondo’s room in the top-left. Kondo, Hijikata and Okita introduce themselves and explain the ‘Shadow’ Shinsengumi. Kondo tells you to patrol the town with one trooper at a time. The door guards won’t let you out until this talk is done.
- TipThe cook in the main hall (the big room on the left) offers you a meal any time after the greeting. Answer Yes for a free full heal. The Kyoto inn costs 30 gold, so use the cook instead.
- SideHijikata’s sword sits on a stand by the left wall of the upper-right room, where Hijikata and Okita are. Examine it and answer Yes to ‘Take Hijikata’s sword?’ to get Izumi Kami, but it costs 10 karma, and Kongouyasha remembers the theft. Answer No to leave it. → checklist
- MainThe six trials: talk to a trooper and answer Yes to ‘Will you go?’. He joins for that hunt only. While you’re on one hunt, the others tell you to come back later. Refusing costs nothing. Do them in any order. Losing any of these fights is Game Over, so heal with the cook between hunts.
- MainOkita (upper-right room): a ghost is said to appear in the middle of town. Walk into the open square just south-east of the HQ entrance. A mysterious voice wants to devour your spirit power, and the Oni attack. Beat them and the town returns to normal.
- MainGenzaburou (main hall, right side): a woman’s ghost haunts Shijou Bridge. That’s the wooden bridge over the central wall on the west side of town. A woman asks you to come to her house. Answer Yes (No only makes her ask again). She shows her true form and attacks.
- MainShinpachi (main hall, upper left): the child next door is possessed. It’s the house right next to the HQ on its east side. Talk to the mother. Juurouta pulls the youkai out of the child, and you fight it.
- SideAs you step out of that house, you catch Shinpachi pocketing a fee. He asks if you want a cut. Yes gives 500 gold but costs 11 karma. No costs nothing (Shinpachi just walks off). Answer No. → checklist
- MainSaitou (top of the right-hand corridor): a monster rat plagues a temple. Leave town by the road in the north-east corner (‘Ahead: Kyoto Temple’). Talk to the Monk in front of the main hall, then examine the hall’s front door just behind him. Juurouta senses something inside. Inside you face Raigou, and Yamato fights him alone, so make sure Yamato is healed and well equipped.
- MainSanosuke (main hall, bottom left): he wants to check the Nue Shrine. Leave by the road out of the top-centre gate (‘Ahead: Nue Shrine’). As you walk up to the shrine with Sanosuke, the Nue appears. The old guide says it shrugs off physical attacks, so bring Juurouta’s arts and spells.
- MainToudou (main hall, lower left): a monster haunts the item shop to the west. That’s the west-most building in the upper half of town. Talk to the Proprietress, then examine the shelves in the back-right corner behind her. Chawankozo appears and attacks.
- MainFinishing the sixth hunt starts a cutscene. The flame of the Shogun’s Spirit Hole dies out and a stranger appears before the Shogun. Back at HQ, the Shogun’s messenger arrives, Kondo agrees, and Juurouta says it’s time to go. The blocked bridges on the western map are now open. Head west (Ch. 4).
- SideOptional, long-running: a ronin master stands by the east road, at the right end of the wall that splits the town (‘A man lives by bushido!’). His eight pupils are spread across Japan. Talk to all of them (karma 20 or higher, or they attack), then come back for +7 karma. Two are here in Kyoto (see next step). → checklist
- SidePupil ‘money’: a samurai in the house on the same row as the inn, just to its west (lower-left quarter of town). Pupil ‘compassion’: a ronin in the long building in the south-east, through its left door. Just talk to each. → checklist
- TipShops: the weapon shop is the right door of the long building along the top of town. The armor shop and item shop are the left and right doors of the long building along the bottom. The inn is the building with a sign just north of that, towards the garden. The weapon shop already stocks the Hozutsu (3,000). You’ll need one for Richard in America (Ch. 19).
- TipThe west item shop (Toudou’s hunt) sells Pills, Sandalwd. and Wake Dust, and also a Ranjatai for 50,000 gold.
Checklist
- Where
- Kyoto: right outside the house east of the HQ, after Shinpachi’s hunt
- How
- When Shinpachi asks ‘What, you want a cut?’, answer Yes to take the money or No to refuse.
- Reward
- Yes: 500 gold
- Opens
- Ch. 3: Shinpachi’s hunt
- Closes
- after you answer (one-time choice)
- Where
- Kyoto: Shinsengumi HQ, the sword stand by the left wall of the upper-right room
- How
- Examine the sword and answer Yes to ‘Take Hijikata’s sword?’.
- Reward
- Izumi Kami
- Opens
- Ch. 3: first visit to the HQ
- Closes
- Ch. 16: once the Shinsengumi leaders leave for Ezo, the door guards no longer let you into the HQ
- Where
- Kyoto: Shinsengumi HQ, the cook in the main hall
- How
- Talk to the cook and answer Yes to ‘Would you like a meal?’.
- Reward
- Free full heal, any number of times
- Opens
- Ch. 3: after Kondo’s greeting
- Closes
- Ch. 16: the HQ closes when the leaders leave for Ezo
- Where
- Kyoto: the ronin master by the east road, right end of the central wall
- How
- Talk to him, then to his eight pupils: samurai ‘money’ and ronin ‘compassion’ (Kyoto), ronin ‘guts’ (Okayama), samurai ‘honor’ (Nikkou), ronin ‘romance’ (Rokkou), ronin ‘courage’ (Yamashiro), samurai ‘courtesy’ (Herai), samurai ‘way of the warrior’ (Niigata). Then talk to the master again.
- Opens
- Ch. 3
- Closes
- never, as long as your karma is 20 or higher. Below 20 the master and his pupils attack; beating one removes him and the quest can’t be finished.
- Where
- Kyoto: the house on the same row as the inn, just west of it (lower-left quarter)
- How
- Talk to the samurai (‘A man lives for money!!’) with karma 20 or higher.
- Reward
- Counts toward the master’s quest
- Opens
- Ch. 3
- Closes
- never (at karma below 20 he fights: 300 gold, −2 karma)
- Where
- Kyoto: the long building in the south-east, left door
- How
- Talk to the ronin (‘A man lives by compassion!!’) with karma 20 or higher.
- Reward
- Counts toward the master’s quest
- Opens
- Ch. 3
- Closes
- never (at karma below 20 he fights: 400 gold, −2 karma, and he’s gone)
- Where
- Kyoto: the bushido master, the samurai on duty in the north-east, and the two pupils
- How
- Talk to them with karma below 20; they attack.
- Reward
- Master 350 gold (lose −600); duty samurai 1000 (lose −2000); ‘money’ samurai 300 (lose −600); ‘compassion’ ronin 400 (lose −700)
- Opens
- Ch. 3
- Closes
- after you beat each one
- Where
- Kyoto: the west item shop (the one from Toudou’s hunt)
- How
- Buy it.
- Reward
- Ranjatai
- Opens
- Ch. 3
- Closes
- Ch. 22: after the Yokohama ambush, Kyoto’s shops refuse to serve you
Bosses & key battles
🗺️ Maps for this chapter (2)
Numbers mark people and events worth a visit; letters A, B, C… mark treasure chests. A pin on a door means the person is inside that building. Pins show everything that can appear on the map over the whole game, so some people only turn up later in the story. Tap a map to open it full size.
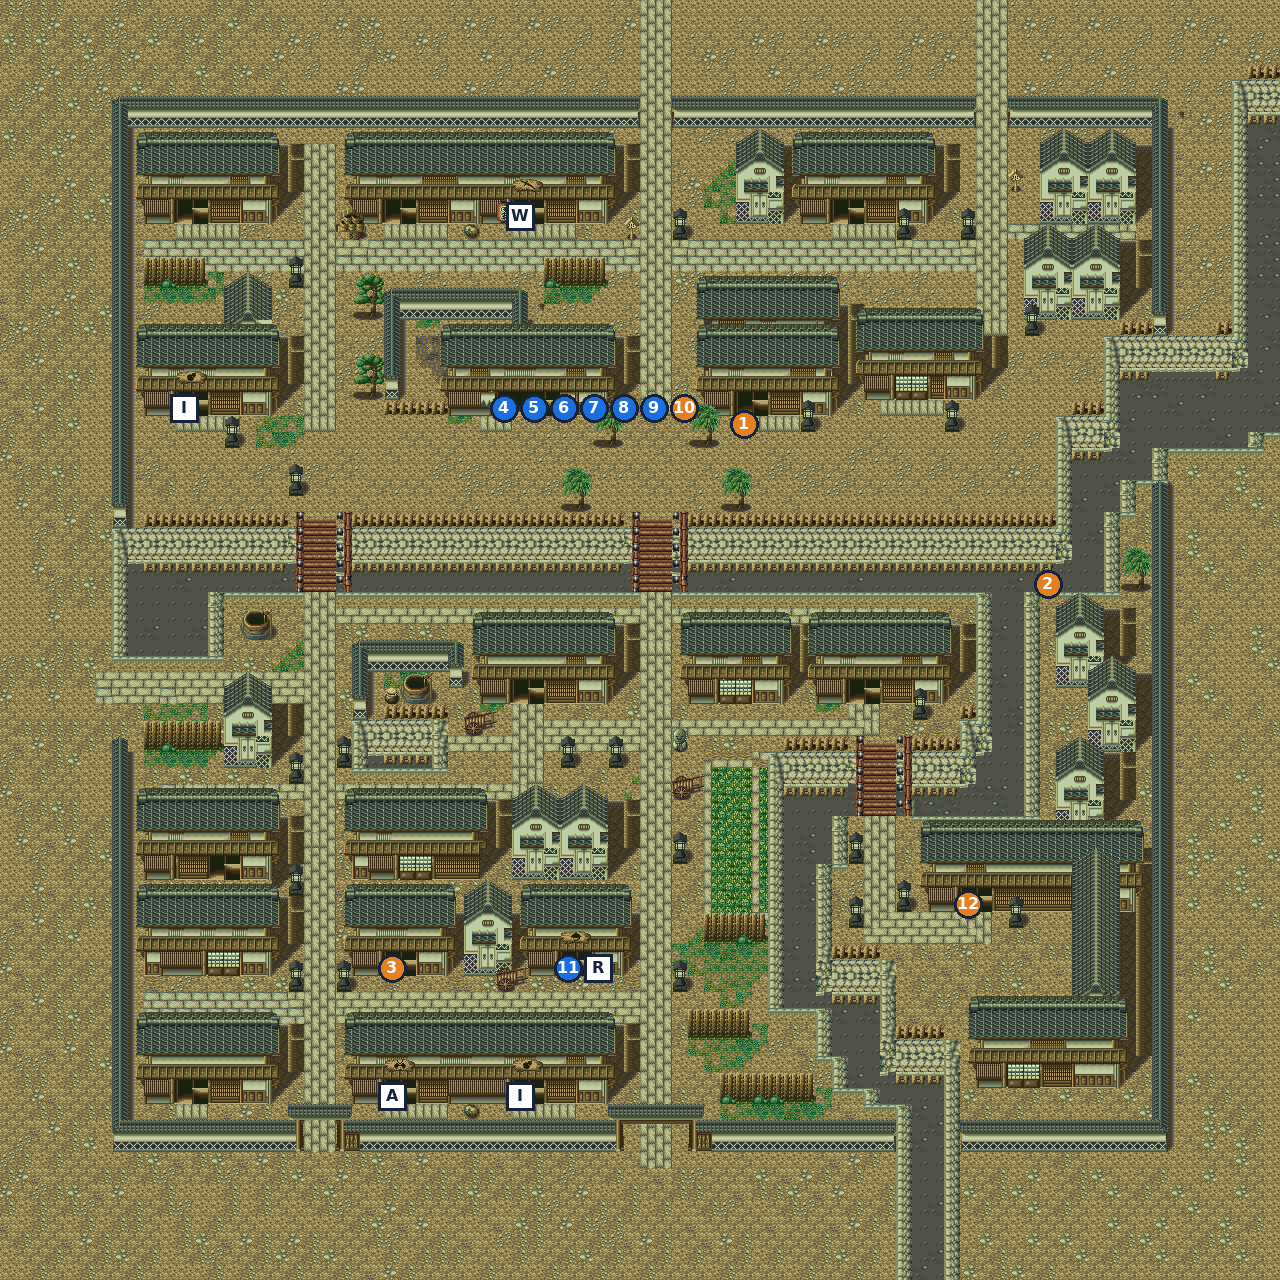
- 1Shinpachi — karma −11 checklist
- 2Bushido master — hidden quest, karma +7 checklist
- 3Bushido pupil (inside) — ‘money’ (bushido master’s quest) checklist
- 4Okita (inside) — joins checklist
- 5Genzaburou (inside) — joins
- 6Shinpachi (inside) — joins checklist
- 7Saitou (inside) — joins
- 8Sanosuke (inside) — joins
- 9Toudou (inside) — joins
- 10Search spot (inside) — gives Izumi Kami, karma −10
- 11Kanpei (inside) — joins checklist
- 12Bushido pupil (inside) — ‘compassion’ (bushido master’s quest) checklist
- AArmor shop
- IItem shop
- RInn
- WWeapon shop
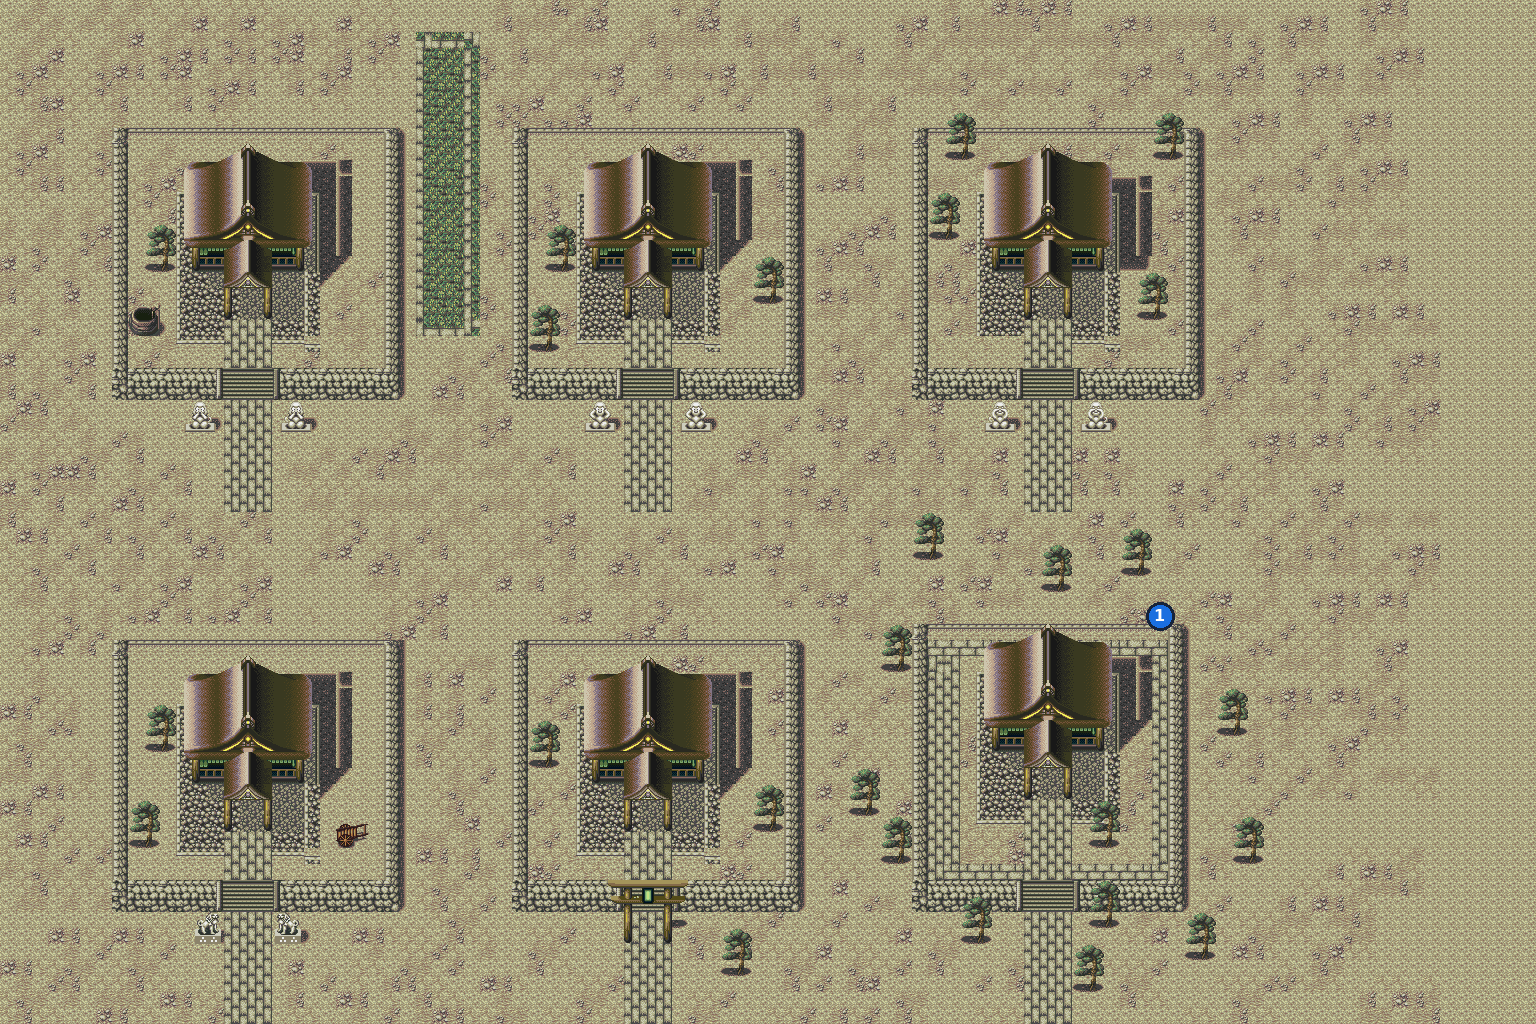
- 1Sora — joins checklist
🛒 Shops in this chapter
Kyoto — Weapons
| Kodachi | 120 G |
| Katana | 180 G |
| Zangetsu | 320 G |
| Zantetsu | 440 G |
| Chakra | 150 G |
| Javelin | 210 G |
| Monk Staff | 280 G |
| Bow | 130 G |
| Kakute | 160 G |
| Hozutsu | 3,000 G |
Right door of the long building along the top of town. Same stock as Edo.
Kyoto — Armor
| Hood | 100 G |
| Tokin | 210 G |
| Kabuto | 420 G |
| Silk Robe | 140 G |
| Suzukake | 450 G |
| Quilt Robe | 180 G |
| Chain Mail | 680 G |
| Leggings | 110 G |
| Chain Legs | 330 G |
Left door of the long building along the bottom of town. Same stock as Edo.
Kyoto — Items
| Herb | 4 G |
| H. Water | 8 G |
| Reviver | 10 G |
| SleepDust | 4 G |
Right door of the long building along the bottom of town.
Kyoto — Items (west shop)
| Pill | 6 G |
| Sandalwd. | 6 G |
| Wake Dust | 6 G |
| Ranjatai | 50,000 G |
West-most building in the upper half of town.
Kyoto — Inn
| Stay | 30 G |
Building with a sign just north of the bottom row. The HQ cook heals for free.
Izumo, Okayama & Mt. Yatsuka (Natsume joins)
📍 Izumo Village · Okayama Village · Mt. Yatsuka
With the Shinsengumi’s trust earned, head west to Izumo, home of the Saigami clan of sealers. You find the clan’s last survivor, Natsume, hiding under the ruins. She joins you at Mt. Yatsuka, but its sacred cave is sealed, and a Shinsengumi messenger sends you back east.
⏳ Last chances in this chapter
- Jiiya’s Suzukake (Ch. 1) can no longer be collected after the Shinsengumi messenger at the foot of Mt. Yatsuka has spoken to you.
- Keep karma at 20 or higher: at lower karma Takeaki attacks you, and beating him loses him as an ally forever.
- Jiiya’s Suzukake (from Chapter 1) details
Full list across the game: Missables.
Walkthrough
- MainAfter Kondo’s thanks at the end of the Kyoto missions, new bridges open on the western map. Izumo Village is far to the west-north-west of Kyoto. Okayama Village is due south of Izumo, and Mt. Yatsuka sits between the two, a little to the west.
- TipIf you walk into Mt. Yatsuka before meeting Natsume, Juurouta senses something ominous and you turn back. Go to Izumo first.
- MainIzumo Village: the villagers tell you the Saigami family was attacked by youkai a few days ago and is believed dead. The big house in the north-west is the inn (20 gold), the big house in the south-west is the weapon shop and the big house in the south-east is the item shop. There is no armor shop here.
- SideOptional: enter the house just south of the burned estate (right of the village centre). A boy there broke his father’s kabuto. If you carry a Kabuto (420 gold in Kyoto, Okayama or Edo), give it to him for +3 karma. → checklist
- SideOptional: the middle house on the west side holds the yokozuna Kouryuzeki. He joins as the NPC ally Kouryu if you hand him a Power Orb. A Power Orb sits in the pot by the back wall of the upper house on the west side, but taking it from their home costs 2 karma. → checklist
- MainGo to the burned Saigami estate behind the fence in the north-east corner. Examine the round lid in the floor near the top of the ruins. Yamato notices something odd about the floor, and Juurouta spots a hidden passage. Step onto it to climb down.
- MainIn the underground passage, walk toward the girl lying on the floor. As you reach her, you see her memory of the night the Saigami house burned. Her father, mother and brothers Seishuu and Shunki stay behind to fight the youkai, and they send her through this passage to find her eldest brother, Touya.
- MainShe is Saigami Natsume. She is wary of Yamato but warms to Juurouta. She suggests Mt. Yatsuka, the sacred mountain south of the village that the Saigami guard, but she stays behind in the passage for now.
- SideOptional: once Natsume joins you on Mt. Yatsuka (see below), Kanpei, a travelling merchant, appears in the Kyoto inn. He isn’t there before that. He joins for free. → checklist
- SideOkayama Village: the armor shop is the best one in the region, and the item shop sells H. Water and Reviver. Takeaki stands in the north-west corner by the fence. He wants a Magoroku sword, which you can’t buy yet. Keep your karma at 20 or higher, or he attacks you instead. → checklist
- TipOkayama’s Ferryman sits by the gap in the east wall. He won’t take you to Shikoku because he’s ‘drinkin”. Leave him for now; he matters much later (Ch. 13).
- SideOptional: talk to the ronin in front of the long central building while your karma is 20 or higher (‘A man’s got to have guts!’). He is one of the eight pupils of the bushido ronin in Kyoto (see Ch. 3). → checklist
- WarningLast chance: if you never got the Suzukake from Jiiya at home in Iida Town, he stops offering it once the Shinsengumi messenger at Mt. Yatsuka (below) has spoken to you. Fetch it before climbing Mt. Yatsuka.
- MainMt. Yatsuka: as you set foot on the mountain, Natsume runs after you (‘Waaaait! Take me with you!’) and joins the party for good. She insists on not being called ‘girl’.
- SideMt. Yatsuka has four chests: a White Garb on the plateau right of the lower meadow, a Feather on the west ledge at cave level, a Herb near the east side of the summit, and a Dogu Shard at the very top. Keep the Dogu Shard; it is one of three pieces for a summon later.
- MainClimb to the cave mouth in the middle of the mountain, below the summit. It is sealed by Natsume’s father’s sealing spell, and she can’t undo it. Only her brother Touya might. You’ll return in Ch. 10.
- MainHead back down. Near the foot of the mountain a Shinsengumi messenger reports that the youkai are gathering near the big rock close to Toyama Village. Yamato fears for his mother in Iida Town. Head back east (Ch. 5).
- TipWith Natsume in the party, the way east of Toyama Village is open on the central map. This leads to Ooishi Shrine, Nikkou and Edo.
Checklist
- Where
- Izumo Village: the middle house on the west side (door facing the village centre)
- How
- Talk to the yokozuna Kouryuzeki while carrying a Power Orb and answer Yes to ‘Hand over a Power Orb?’.
- Reward
- NPC ally Kouryu (costs 1 Power Orb)
- Opens
- Ch. 4: first visit to Izumo
- Where
- Izumo Village: the upper house on the west side, the pot by the back wall (where the old man and old woman sit)
- How
- Face the pot by the back wall and search it.
- Reward
- Power Orb
- Opens
- Ch. 4
- Closes
- never (but see note: defeating the Izumo street ronin at karma < 20 empties this spot)
- Where
- Izumo Village: the house just south of the burned Saigami estate
- How
- Talk to the boy who broke his father’s kabuto while you carry a Kabuto; answer Yes.
- Opens
- Ch. 4
- Where
- Kyoto: the inn
- How
- Talk to Kanpei, the travelling merchant, and answer Yes to ‘Take Kanpei along?’.
- Reward
- NPC ally Kanpei (free)
- Opens
- Ch. 4: once Natsume joins on Mt. Yatsuka
- Where
- Okayama Village: north-west corner, by the wooden fence
- How
- Bring a Magoroku (weapon shops in Yamashiro Village, Ch. 13, and Hakodate, 1,350 gold) and answer Yes. Karma must be 20 or higher.
- Reward
- NPC ally Takeaki
- Opens
- Ch. 13: once you can buy a Magoroku
- Closes
- If you talk to him with karma below 20 he attacks; winning gives 1,000 gold and −2 karma, and he is gone for good.
- Where
- Izumo Village: behind the inn in the north-west corner
- How
- Appears only after you have talked to Korobo in Nikkou Village (late game, after helping Tanukichi in Beppu). Answer Yes to ‘Listen to Ayashibi?’ and Natsume invites her to the youkai village. No: Yamato drives her off.
- Reward
- Youkai village resident
- Opens
- Ch. 13 or later: after Korobo in Nikkou
- Closes
- She vanishes if you have already sent Tsurube in Takachiho Village to the youkai village. Listen to Ayashibi first.
- Where
- Okayama Village: south-east corner
- How
- A ‘Man’ who is really a youkai appears after you give the kappa at Kourai its Ranjatai. Answer No to ‘Exterminate the youkai?’ (Natsume objects).
- Reward
- Youkai village resident
- Opens
- late game: after the Kourai kappa event
- Closes
- after either answer
- Where
- Izumo Village (ronin and samurai in the street, ronin in the house south of the ruins); Okayama Village (ronin)
- How
- Only if your karma is below 20: talking to them starts a fight. Win = gold but −2 karma and the person is gone; lose = you pay.
- Reward
- Izumo ronin 100 (lose −200) · Izumo samurai 400 (−800) · Izumo house ronin 200 (−1,000) · Okayama ronin 150 (−500)
- Opens
- Ch. 4
Treasure chests (4)
| Item | Area | Where | |
|---|---|---|---|
| White Garb | Mt. Yatsuka | the plateau right of the lower meadow, south-east of the path | |
| Feather | Mt. Yatsuka | west ledge, level with the sealed cave | |
| Herb | Mt. Yatsuka | east side, just below the summit | |
| Dogu Shard | Mt. Yatsuka | the very top of the summit One of the three Dogu Shards for the Dogu summon in Niigata Village. |
🗺️ Maps for this chapter (3)
Numbers mark people and events worth a visit; letters A, B, C… mark treasure chests. A pin on a door means the person is inside that building. Pins show everything that can appear on the map over the whole game, so some people only turn up later in the story. Tap a map to open it full size.
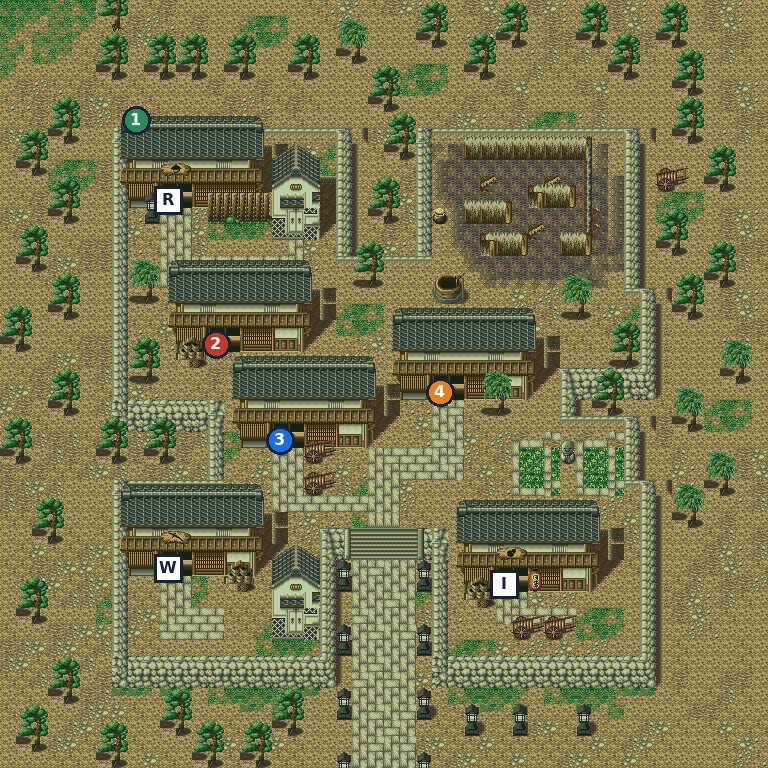
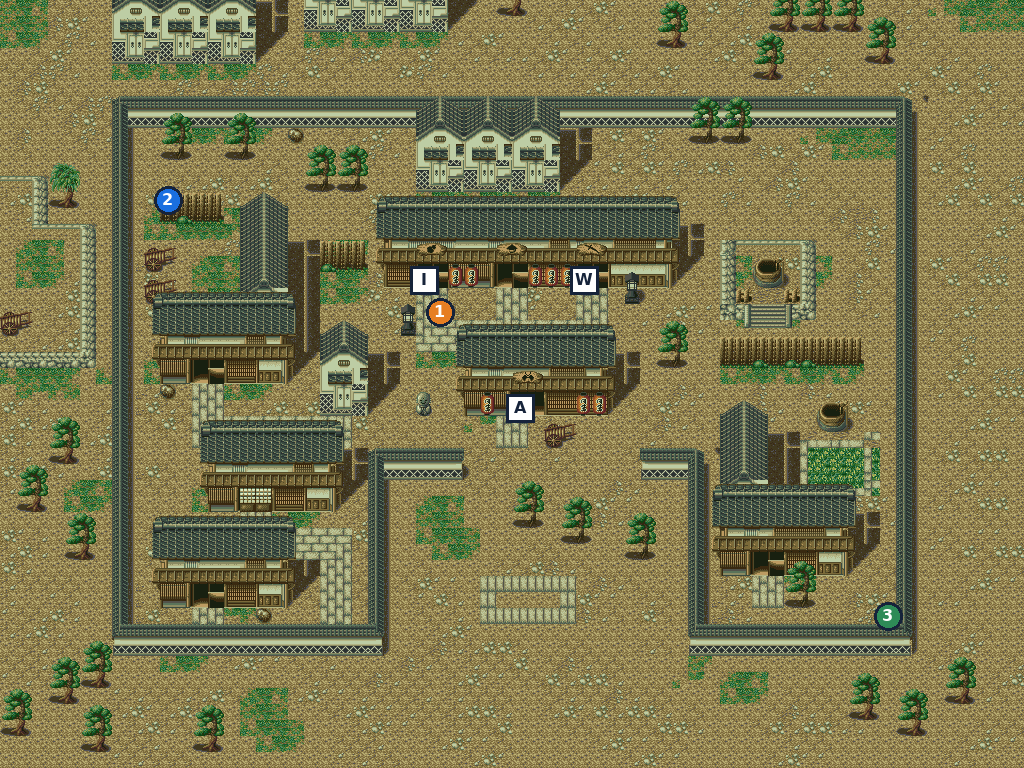
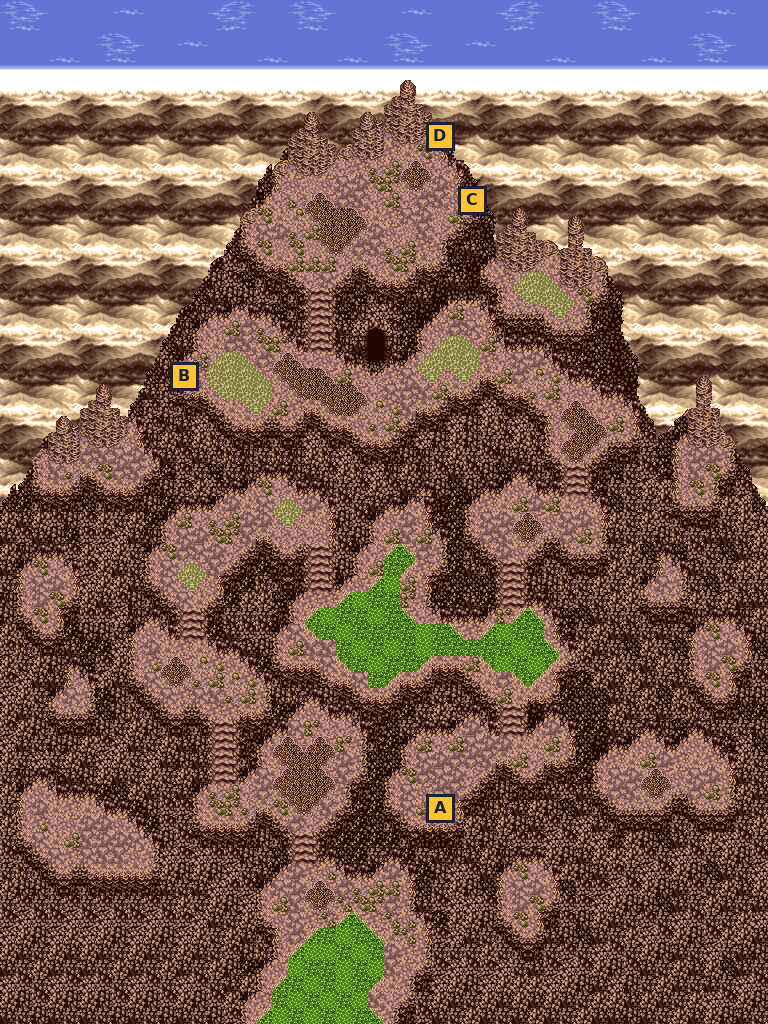
- A White Garb
- B Feather
- C Herb
- D Dogu Shard
🛒 Shops in this chapter
Izumo Village — Weapons
| Zangetsu | 320 G |
| Bow | 130 G |
| Kakute | 160 G |
big house, south-west
Izumo Village — Items
| Herb | 4 G |
| Pill | 6 G |
| Sandalwd. | 6 G |
| Wake Dust | 6 G |
big house, south-east; inn 20 gold in the north-west house
Okayama Village — Weapons
| Zantetsu | 440 G |
| Javelin | 210 G |
| Monk Staff | 280 G |
| Bow | 130 G |
Okayama Village — Armor
| Kabuto | 420 G |
| Suzukake | 450 G |
| Quilt Robe | 180 G |
| Chain Mail | 680 G |
| Chain Legs | 330 G |
Okayama Village — Items
| Herb | 4 G |
| H. Water | 8 G |
| Pill | 6 G |
| Sandalwd. | 6 G |
| Wake Dust | 6 G |
| Reviver | 10 G |
inn 20 gold
Ooishi Shrine
📍 Toyama Village · Ooishi Shrine
Back in the east, a priest in Toyama has lost his shrine to youkai. At Ooishi Shrine a Mysterious Voice guides you to a Spirit Hole, where you defeat the Stone God and Natsume performs her first seal.
Walkthrough
- MainTravel back east past Kyoto and Iida Town to Toyama Village. A Priest now stands just west of the Jizo statue in the south of the village. He laments that youkai took his shrine. You must talk to him; without his story Juurouta turns you away from Ooishi Shrine (‘We have no business in a place like this’).
- MainOoishi Shrine is east of Toyama, past the newly opened crossing, and south-west of Nikkou. As you arrive, a Mysterious Voice calls to ‘you of righteous heart’. Yamato repeats what it tells him: the second tree from the left, of the five behind the shrine.
- TipYoukai crowd the fenced plaza east of the shrine, around the great sacred rock. If you step toward them, Natsume stops you. You don’t need to fight them.
- MainWalk around the outside of the shrine wall to the row of five trees on its north side. Stand below the second tree from the left and examine it. Natsume confirms it’s the one; answer Yes to ‘Push it?’. A hole opens in the ground.
- MainStep into the hole. The Voice says ‘Go… see with your own eyes what is happening to this land’, and you drop into a cave.
- SideThe cave winds down from the entrance in the north-east. Three chests: an N. Pill at the west end of the upper stream, a Herb on the east side of the middle level, and Leggings by the pond in the south-east. Save the N. Pill if you want Midori as an ally later (Ch. 7).
- MainAt the bottom left, Natsume admires a glowing spot and the Voice says ‘Come below’. Step onto the glowing spot at the bottom of the cave.
- MainBelow lies a glowing Spirit Hole. The Voice explains that the Spirit Holes that feed the land’s prosperity have begun running wild, and this is why the youkai rampage. If they aren’t sealed, the land will slowly die.
- MainThe Stone God, guardian deity of Ooishi Shrine, awakens, revived by the spirit power. It wants more power to make all humans its believers. Boss fight.
- MainAfter the battle, the Voice gives you the Soul Stone, the Stone God’s crystallized power, and tells you to hold it up before the Spirit Hole and pray. Natsume steps up and seals it.
- TipThe cave stays open afterwards, so any chests you missed can be picked up later. The Toyama Priest returns to his shrine.
Checklist
- Where
- Ooishi Shrine: the Spirit Hole below the cave
- How
- Defeat the Stone God; the Mysterious Voice hands it over.
- Reward
- Soul Stone (key item)
- Opens
- Ch. 5
- Closes
- never (story)
Treasure chests (3)
| Item | Area | Where | |
|---|---|---|---|
| N. Pill | Ooishi Shrine cave | west end of the upper stream Midori (Ch. 7) asks for an N. Pill. | |
| Herb | Ooishi Shrine cave | east side of the middle level | |
| Leggings | Ooishi Shrine cave | by the pond in the south-east |
Bosses & key battles
🗺️ Maps for this chapter (1)
Numbers mark people and events worth a visit; letters A, B, C… mark treasure chests. A pin on a door means the person is inside that building. Pins show everything that can appear on the map over the whole game, so some people only turn up later in the story. Tap a map to open it full size.
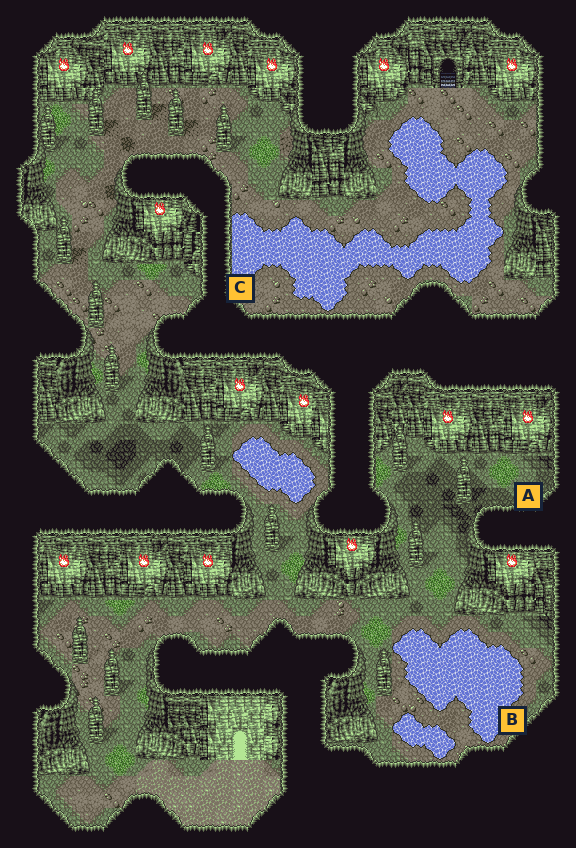
- A Herb
- B Leggings
- C N. Pill
Nikkou Village & Edo
📍 Nikkou Village · Edo
On the way to Mt. Houju you pass Nikkou, a village living in fear of a sacrifice-demanding demon. A short detour south to Edo pays off: an escort job for karma, three hireable allies and the biggest shops so far.
⏳ Last chances in this chapter
- Hire Densuke before Kotarou if you want both; Densuke refuses while Kotarou is in the party.
Full list across the game: Missables.
Walkthrough
- MainNikkou Village lies north-east of Ooishi Shrine. The villagers talk about a demon that demands a sacrifice every year, and the elder (house in the north centre) turns outsiders away. The village’s story comes later (Ch. 9).
- TipNikkou has a weapon shop and an inn (20 gold) but no item shop.
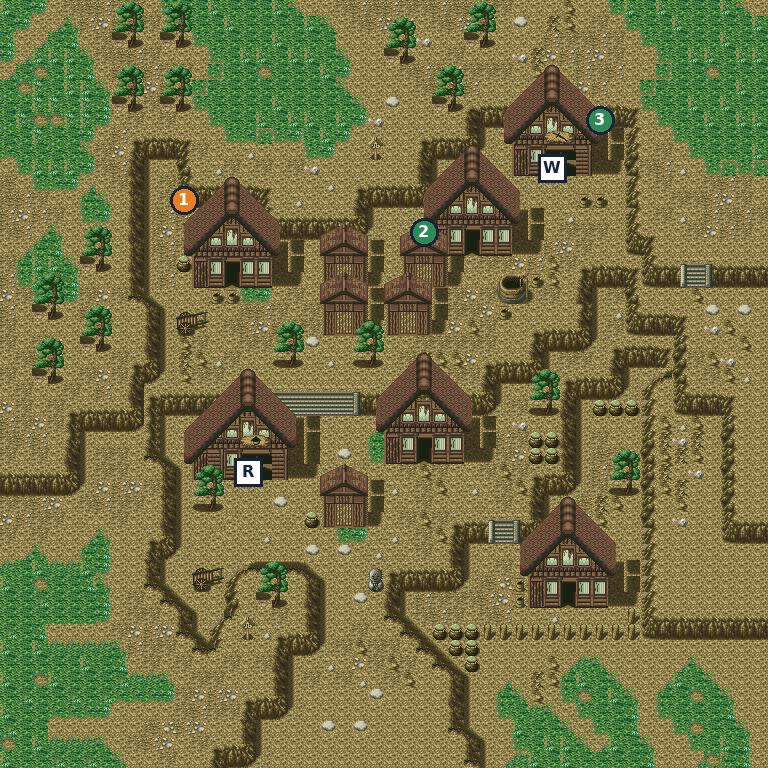
- SideIn the house in the north-west of Nikkou, next to the samurai, an Old Woman asks you to take her to Edo. Answer Yes. She doesn’t fight; she simply travels with you. → checklist
- SideOptional: talk to the samurai in the north-west (‘A man’s life is honor!!’) while your karma is 20 or higher. He is another of the Kyoto bushido ronin’s pupils (Ch. 3). → checklist
- MainEdo is south-south-east of Nikkou; you enter from the south. If the Old Woman is with you, she thanks you as you arrive (‘Now I can see my grandchild’s face’) for +2 karma.
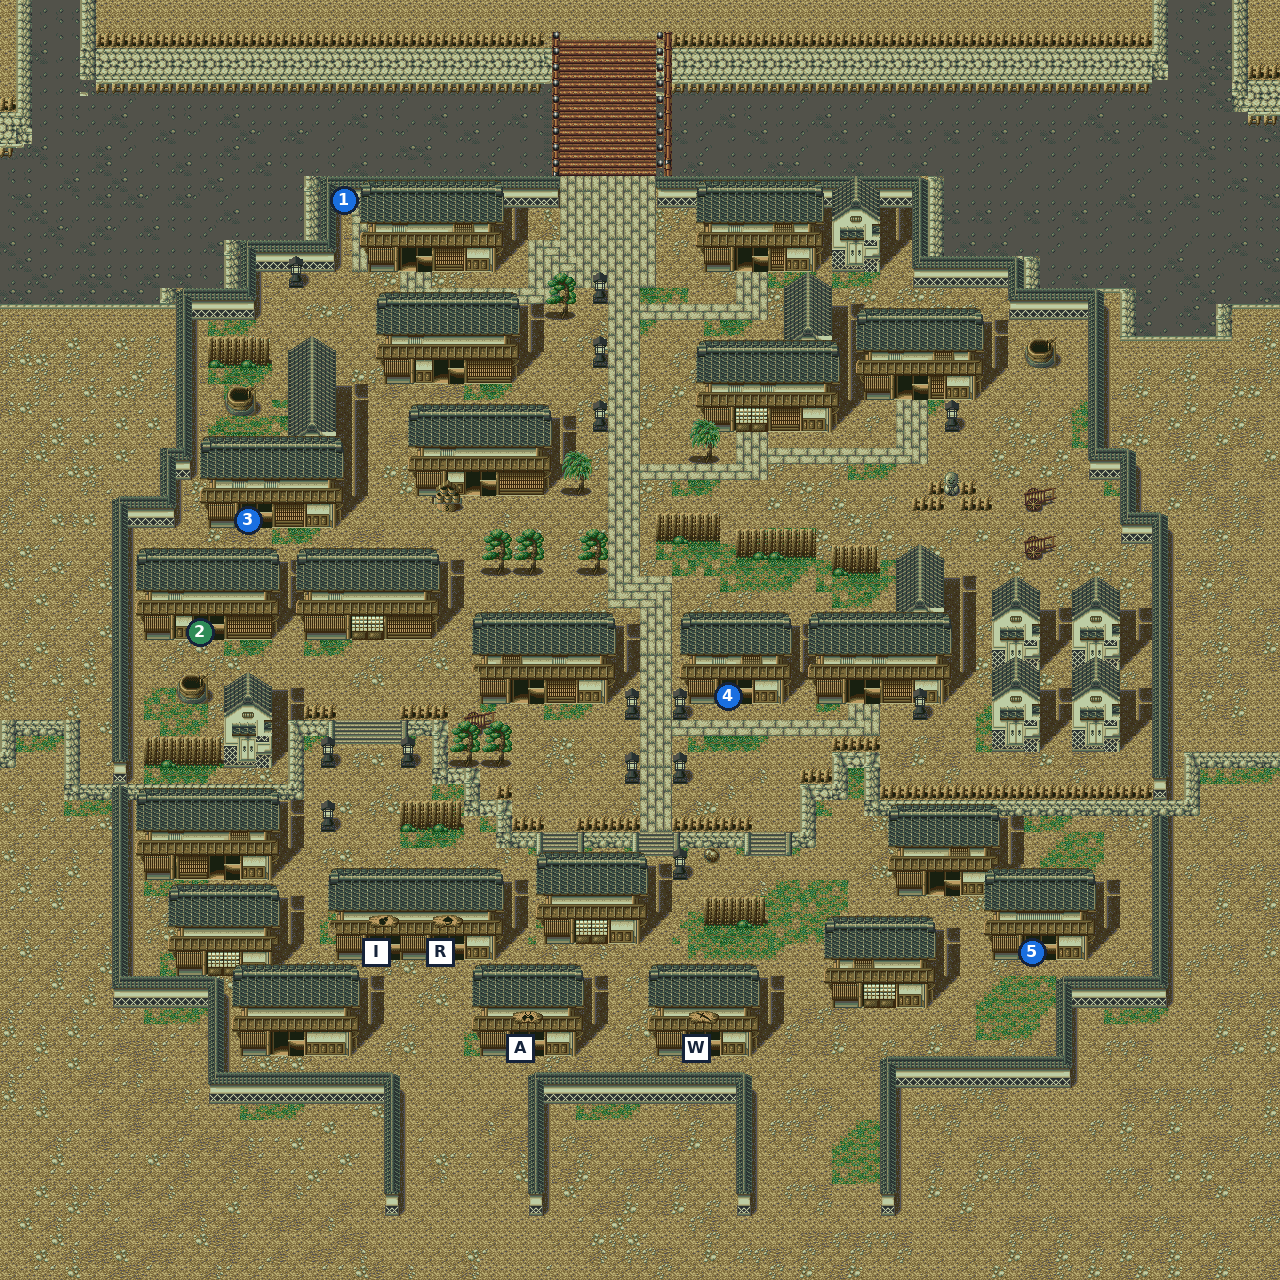
- SideHire the firemen in this order. Densuke of the Ha brigade stands in the far north-west corner of town, by the moat. He costs 400 gold, and he refuses to join if Kotarou is already in the party. → checklist
- SideKotarou of the I brigade is in the house in the south-east corner of town. He costs 200 gold and has no objection to Densuke. → checklist
- SideThe sumo wrestler Kamonoseki is in the middle house of the central row, just east of the main street. He joins for free. → checklist
- SideTasuke the merchant is in the house on the west side, just south of the well. He only joins in exchange for a Bishamon spear, which you can’t get until late in the game. → checklist
- WarningIn the western house of the pair one row south of Tasuke’s, a woman and a girl guard a jar with their savings. Searching it gives 200 gold, costs 2 karma and counts as theft when Kongouyasha questions you later. → checklist
- TipEdo’s shops stock almost everything from Kyoto plus ChainPill and Haze Bell. The shops and inn (20 gold) are in the south of town. Stock up before the long trip north.
- MainWhen you’re ready, head north past Nikkou to Mt. Houju (Ch. 7).
- TipMuch later (after Tanukichi’s request in Beppu, Ch. 13), two youkai appear in Nikkou: Korobo by the elder’s house and Tanumi in the north-east. Spare them for the youkai village.
Checklist
- Where
- Nikkou Village: house in the north-west, next to the samurai
- How
- Answer Yes to ‘Take the old woman to Edo?’, then enter Edo. Saying No costs nothing, and you can ask again later.
- Opens
- Ch. 6
- Where
- Edo: the western house of the pair on the west side, one row south of Tasuke’s house
- How
- Face the jar behind the woman and girl and search it.
- Reward
- 200 gold
- Opens
- Ch. 6
- Where
- Edo: far north-west corner, by the moat
- How
- Pay 400 gold and answer Yes. He refuses if Kotarou is already with you, so hire Densuke first.
- Reward
- NPC ally Densuke
- Opens
- Ch. 6
- Where
- Edo: house in the south-east corner
- How
- Pay 200 gold and answer Yes.
- Reward
- NPC ally Kotarou
- Opens
- Ch. 6
- Where
- Edo: middle house of the central row, just east of the main street
- How
- Answer Yes to ‘Take him along?’.
- Reward
- NPC ally Kamono (free)
- Opens
- Ch. 6
- Where
- Edo: house on the west side, south of the well
- How
- Bring a Bishamon spear (sold by the Ihika’s shop late in the game, 1,990 gold) and answer Yes to ‘Hand over the Bishamon?’.
- Reward
- NPC ally Tasuke
- Opens
- late game
- Where
- Nikkou Village: beside the elder’s house
- How
- Appears after you help Tanukichi in Beppu. Just talk to it.
- Reward
- Youkai village resident; also makes Ayashibi (Izumo) and Tsurube (Takachiho) appear
- Opens
- Ch. 13: after Tanukichi in Beppu
- Where
- Nikkou Village: north-east, near the top of the village
- How
- Appears after the Kourai kappa event. Answer No to ‘Exterminate the Tanumi?’.
- Reward
- Youkai village resident
- Opens
- late game: after the Kourai kappa event
- Closes
- after either answer
- Where
- Nikkou (samurai; the ronin only after Ch. 9), Edo (samurai at the north bridge, patrolling ronin in the east)
- How
- Only if your karma is below 20. Win = gold, −2 karma and they’re gone; lose = you pay.
- Reward
- Nikkou samurai 200 (lose −300) · Nikkou ronin 1,000 (−3,000) · Edo samurai 150 (−500) · Edo ronin 500 (−1,000)
- Opens
- Ch. 6
🗺️ Maps for this chapter (2)
Numbers mark people and events worth a visit; letters A, B, C… mark treasure chests. A pin on a door means the person is inside that building. Pins show everything that can appear on the map over the whole game, so some people only turn up later in the story. Tap a map to open it full size.
🛒 Shops in this chapter
Nikkou Village — Weapons
| Katana | 180 G |
| Chakra | 150 G |
| Bow | 130 G |
| Kakute | 160 G |
inn 20 gold; no item shop
Edo — Weapons
| Kodachi | 120 G |
| Katana | 180 G |
| Zangetsu | 320 G |
| Zantetsu | 440 G |
| Chakra | 150 G |
| Javelin | 210 G |
| Monk Staff | 280 G |
| Bow | 130 G |
| Kakute | 160 G |
| Hozutsu | 3,000 G |
same list as Kyoto
Edo — Armor
| Hood | 100 G |
| Tokin | 210 G |
| Kabuto | 420 G |
| Silk Robe | 140 G |
| Suzukake | 450 G |
| Quilt Robe | 180 G |
| Chain Mail | 680 G |
| Leggings | 110 G |
| Chain Legs | 330 G |
same list as Kyoto
Edo — Items
| Herb | 4 G |
| H. Water | 8 G |
| Pill | 6 G |
| Sandalwd. | 6 G |
| Wake Dust | 6 G |
| Reviver | 10 G |
| ChainPill | 6 G |
| Haze Bell | 4 G |
inn 20 gold
Mt. Houju & Mt. Hiei (Oodenta)
📍 Mt. Houju · Mt. Hiei
Mt. Houju’s Spirit Hole lies under a locked storehouse. To borrow the key you must fetch holy fire from Mt. Hiei near Kyoto. Below the storehouse, a vision of five heroes from long ago leads Juurouta to the sword Oodenta.
⏳ Last chances in this chapter
- The Mt. Houju cave (under the storehouse) closes for good once you leave it with Oodenta. Take its three chests first.
- The storehouse chests (Kunai, Gold Pin) cost −2 karma each and count as theft for Kongouyasha.
- Chest: S. Dew (Mt. Houju cave) details
- Chest: N. Pill (Mt. Houju cave) details
- Chest: Feather (Mt. Houju cave) details
Full list across the game: Missables.
Walkthrough
- MainLeave the central map heading north past Nikkou. Mt. Houju is on the northern map. Two chests on the way up: an N. Pill on the western summit and Chain Legs on the west ledge.
- MainAt the eastern summit stand a white storehouse and a temple. Examine the storehouse door: it’s locked, and Juurouta senses tremendous spirit energy leaking out.
- MainEnter the temple and talk to the Monk: youkai attacked and the holy flame went out. Ask him about the storehouse (talk again if needed). It isn’t a storehouse but the entrance to an underground cave. He’ll lend you the key if you bring holy fire from Mt. Hiei in Kyoto.
- SideOptional: Akane trains alone in a tiny closed-off room at the east end of the temple, reached by a hidden passage. Talk to her and answer Yes to take her along. She joins for free. → checklist
- MainTravel to Mt. Hiei on the western map, just north-west of Kyoto. It’s a long trip, so a Feather (you have found at least one) warps you to a town you’ve visited. Mt. Hiei has three chests: H. Water on the west ledge, Reviver on the east ledge and a Cloak low in the middle.
- MainEnter the temple on the summit. The Monk in the main hall gives you the Holy Flame.
- SideIn the west room, Saikaku gives you food that restores your party (‘Strength restored!!’). It’s free and you can come back for more any time.
- SideAt the west end of the corridor, Midori offers to fight with you for one N. Pill (‘Ninja Pill’). You got one from Ooishi Shrine or Mt. Houju. → checklist
- MainReturn to the Mt. Houju monk and hand over the Holy Flame. He gives you the Store Key.
- MainUnlock the storehouse. In the north-west room, Natsume reads a talisman: ‘The path ahead was made by beings other than humans. Those without the resolve to die shall not pass.’
- WarningThe storehouse holds two chests: a Kunai in the small middle room and a Gold Pin in the lower-left room. They belong to the temple, and each costs 2 karma. Kongouyasha later asks whether you ever took what belonged to another, and he knows about these. → checklist
- MainStep onto the cave entrance where the talisman hangs. A vision plays: long ago, Hokutomaru, Yoritoo, Akoya, Hourin and Hidaka entered this very cave to face something evil. Then you wake up in the cavern.
- WarningTake the three cave chests now: S. Dew in the west, an N. Pill in the middle and a Feather in the north-east. Once you leave the cave with Oodenta, you can’t come back in.
- MainThe Spirit Hole is at the big pit in the eastern cavern. Walk up to its south edge and Natsume seals it.
- MainA second vision follows, and you control Hokutomaru’s party through a long cave. At the dead end, a Nurikabe bars the way. Boss fight. If you lose, you only restart at the start of the vision’s cave; it isn’t game over.
- MainBack in the present, Yamato spots a sword down in the pit. The visions were its memories. Juurouta hears its name, Oodenta, and it lends him its power. You get Oodenta.
- MainLeave through the entrance at the top of the cave. In the storehouse, a Shinsengumi messenger reports youkai running rampant in Rokkou Village, Juurouta’s birthplace, west of Kyoto (Ch. 8).
- SideBefore leaving Mt. Houju, return the Store Key to the monk for +5 karma. Keeping it has no penalty, but you miss the bonus. → checklist
- TipThe Okayama Ferryman now remarks that he has seen Oodenta somewhere. He still won’t sail.
Checklist
- Where
- Mt. Houju: temple, the Monk
- How
- After you get Oodenta, talk to the Monk while carrying the Store Key.
- Opens
- Ch. 7: after Oodenta
- Where
- Mt. Houju storehouse: Kunai (small middle room), Gold Pin (lower-left room)
- How
- Opening either chest.
- Reward
- Kunai, Gold Pin
- Opens
- Ch. 7: after unlocking the storehouse
- Where
- Mt. Hiei: temple, west end of the corridor
- How
- Carry an N. Pill and answer Yes to ‘Accept her help?’.
- Reward
- NPC ally Midori (costs 1 N. Pill)
- Opens
- Ch. 7 (Mt. Hiei can be visited earlier)
- Where
- Mt. Houju: temple, tiny hidden room at the east end
- How
- Reach her room through the hidden passage and answer Yes to ‘Take her along?’.
- Reward
- NPC ally Akane (free)
- Opens
- Ch. 7
- Where
- Mt. Hiei: temple, west room
- How
- Talk to Saikaku.
- Reward
- Party restored (‘Strength restored!!’), repeatable
- Opens
- Ch. 7
- Where
- Mt. Houju: cave below the storehouse
- How
- Seal the Spirit Hole and win the Nurikabe fight in the vision.
- Reward
- Oodenta (Juurouta’s sword)
- Opens
- Ch. 7
- Closes
- never (story)
Treasure chests (10)
| Item | Area | Where | |
|---|---|---|---|
| N. Pill | Mt. Houju | western summit | |
| Chain Legs | Mt. Houju | west ledge Not in 77488. | |
| Kunai ☯ Karma −2 | Mt. Houju storehouse | small middle room Temple property; Kongouyasha counts it. | |
| Gold Pin ☯ Karma −2 | Mt. Houju storehouse | lower-left room Temple property; Kongouyasha counts it. | |
| S. Dew | Mt. Houju cave | western cavern Missable: the cave can’t be re-entered after you leave with Oodenta. ⚠ Gone after Chapter 7 | |
| N. Pill | Mt. Houju cave | middle of the cave Missable (see above). ⚠ Gone after Chapter 7 | |
| Feather | Mt. Houju cave | north-east corner of the eastern cavern Missable (see above). ⚠ Gone after Chapter 7 | |
| H. Water | Mt. Hiei | west ledge | |
| Reviver | Mt. Hiei | east ledge | |
| Cloak | Mt. Hiei | low in the middle of the mountain |
Bosses & key battles
🗺️ Maps for this chapter (6)
Numbers mark people and events worth a visit; letters A, B, C… mark treasure chests. A pin on a door means the person is inside that building. Pins show everything that can appear on the map over the whole game, so some people only turn up later in the story. Tap a map to open it full size.
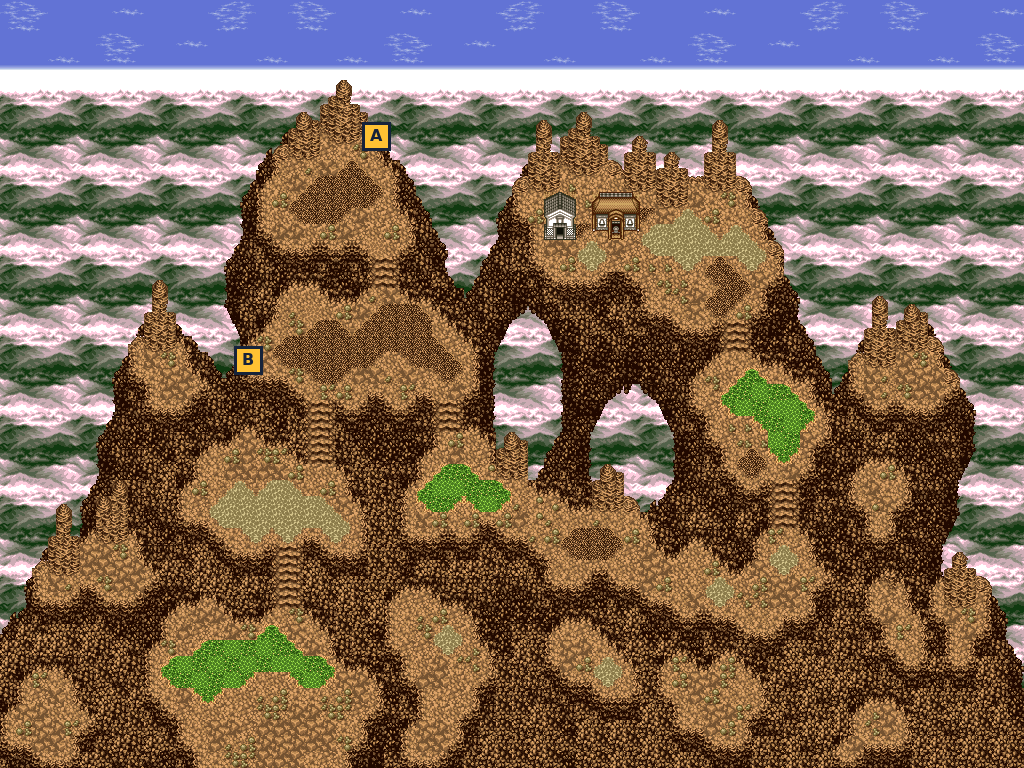
- A N. Pill
- B Chain Legs
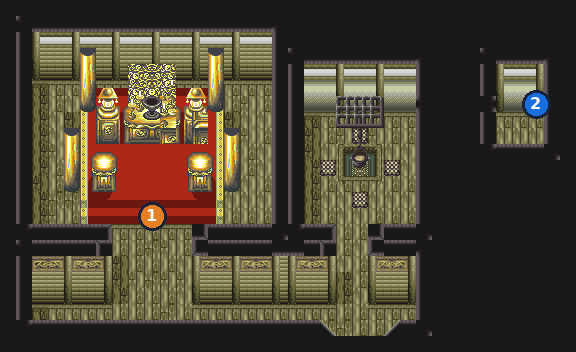
- 1Head monk — gives Store Key, karma +5
- 2Akane — joins checklist
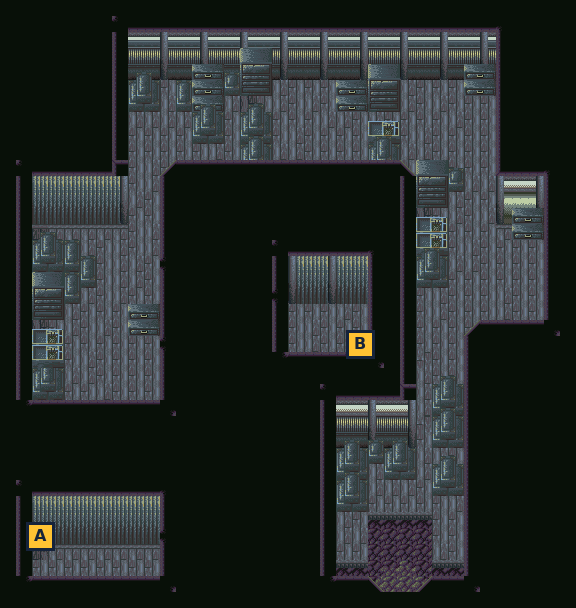
- A Gold Pin (−2 karma)
- B Kunai (−2 karma)
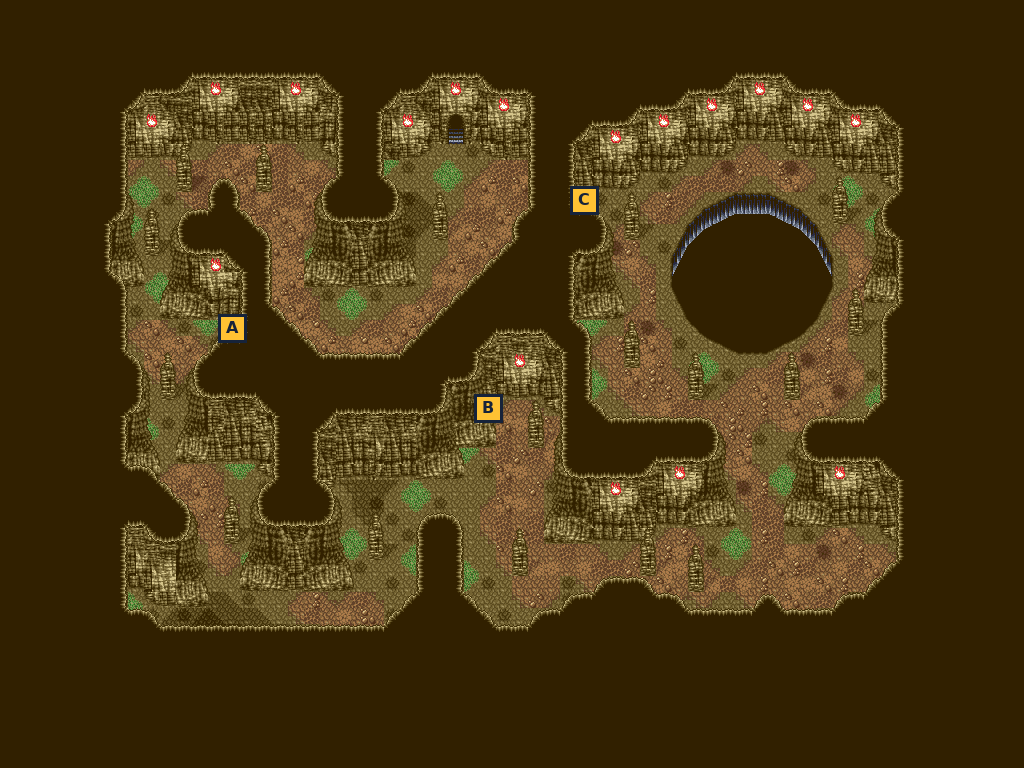
- A S. Dew
- B N. Pill
- C Feather
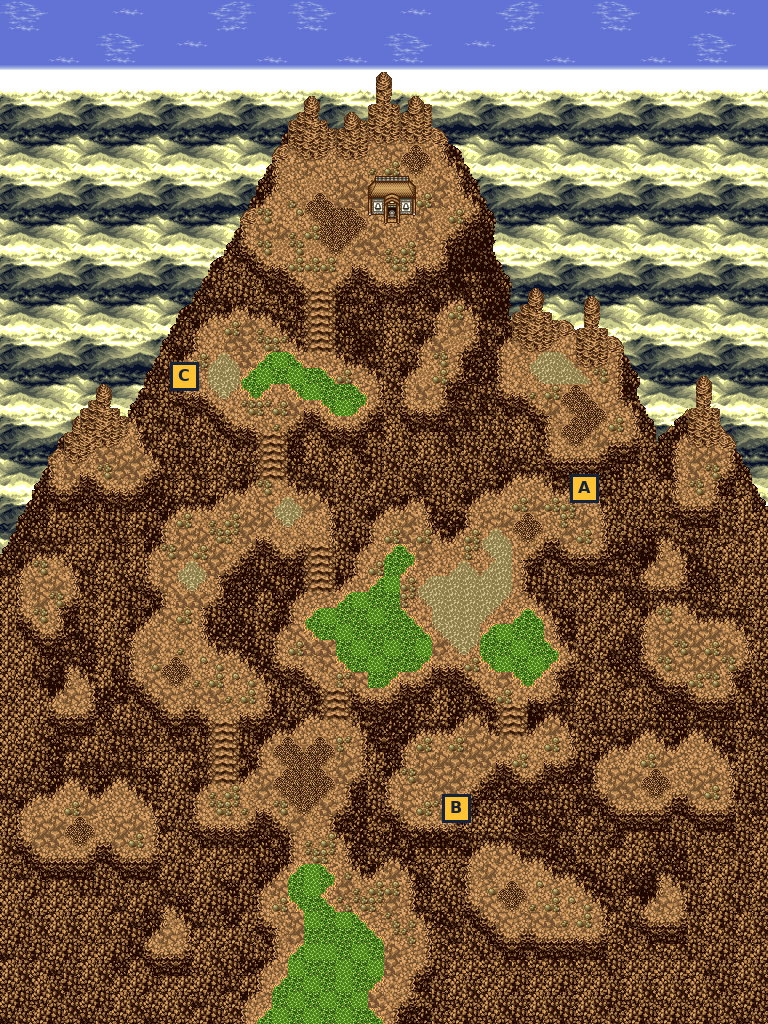
- A Reviver
- B Cloak
- C H. Water
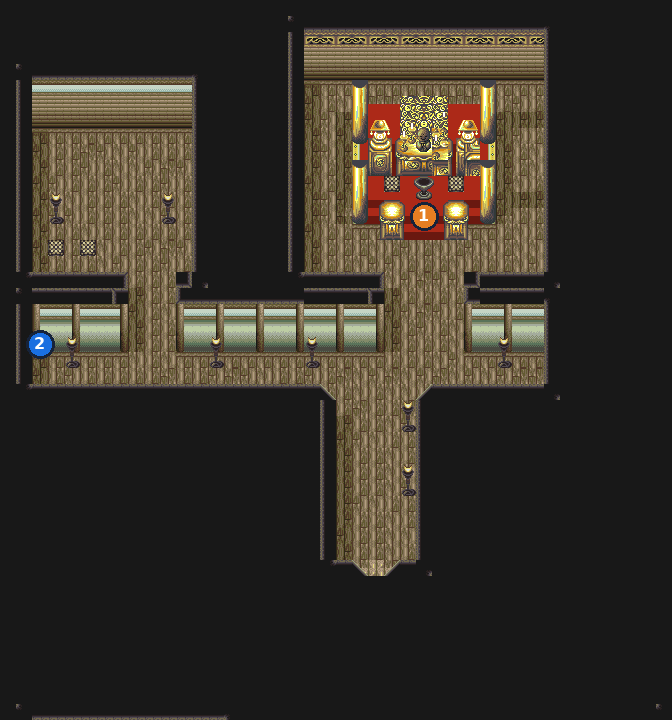
- 1Monk — gives Holy Flame
- 2Midori — joins checklist
Rokkou Village & the Wastelands (Juzumaru)
📍 Rokkou Village · Rokkou Wasteland · Awaji Island Wasteland
A Shinsengumi messenger reports youkai around Rokkou Village, Juurouta’s hometown. At the Mibu family home you learn a secret about Juurouta, then cross the Rokkou Wasteland by its stone warp circles to seal a Spirit Hole on Awaji Island and claim the second of the Five Great Swords, Juzumaru.
⏳ Last chances in this chapter
- The fight past the stone door on Awaji Island starts immediately, and losing is Game Over. Heal first.
- Keep karma at 20 or more in Rokkou, or the samurai, the ronin and Kaishuu attack you (and Kaishuu can never join after that).
Full list across the game: Missables.
Walkthrough
- MainRokkou Village lies west of Kyoto on the world map, on the way toward Izumo. When you arrive, Natsume muses about Juurouta’s birthplace.
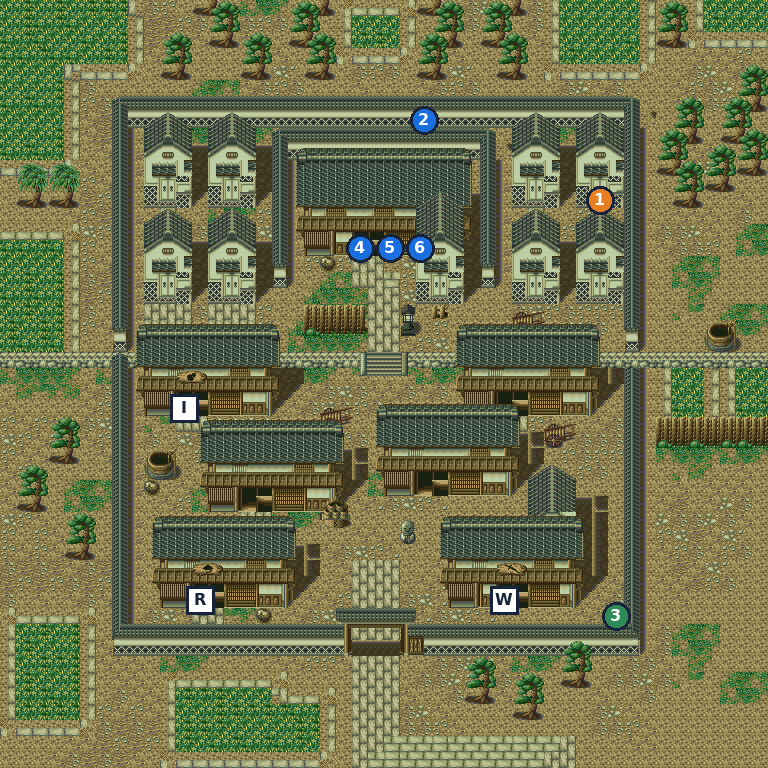
- MainA scream comes from the large mansion at the north end of the village. Walk up to its door (above the stone steps in the middle of town) to go in. This is Juurouta’s family home: a youkai is going after Otoki, the housekeeper, and the party drives it off in a cutscene.
- MainJuurouta’s father, Ichirouta, and his three pupils welcome her home. After she changes clothes comes the big reveal: Juurouta is a woman. The heir of the Mibu house always takes the name “Juurouta”.
- MainBefore you leave, Ichirouta mentions a rocky wasteland south of the village. Nobody goes there, but it was once said to heal wounds and illness. He also offers to lend you his pupils.
- SideOptional: Pupil 1, Pupil 2 and Pupil 3 are standing around the house. Talk to each one and answer Yes to take them along as NPC allies. It costs nothing. → checklist
- TipTalk to Otoki and say Yes to her amazake. It fully restores the whole party for free, and you can come back for more at any time. That makes the Mibu house a free healing spot near Kyoto for the rest of the game.
- SideThe man by the north wall, behind the mansion, is Kaishuu. He will join if you give him a Masamune. You can’t get one yet (it’s sold much later, in Hill Village in America), so just remember where he is. → checklist
- SideThe ronin in the north-east part of town shouts “A man’s life is romance!!” He is one of the pupils of the ronin master in Kyoto, so talking to him counts toward that quest. → checklist
- TipShops: the item shop is in the west house on the middle row, the weapon shop is in the south-east long house, and the inn (30 gold) is in the south-west long house.
- WarningIf your karma is below 20, the samurai and both ronin in Rokkou (and Kaishuu) attack you instead of talking. Winning gives gold but costs 2 karma each, and they are gone for good.
- MainLeave through the south gate. The Rokkou Wasteland is the small brown patch just south of the village. If you try it before the scene at the Mibu house, Juurouta refuses to go in.
- MainOn your first visit the Mysterious Voice speaks again. Some of the rocks here form a pattern, and stepping onto one moves you instantly to the matching pattern elsewhere. The Voice confirms that a Spirit Hole lies ahead and breaks the seal for you.
- MainThe warp circles are the flat spots ringed by four stones. The pad in the centre of the wasteland takes you to the north-west corner. From there, follow the northern ledge east to the pad in the north-east, which leads to the Awaji Island Wasteland. The other two pads (south and east) just take you back and forth.
- MainOn Awaji Island, a huge stone door blocks the way north. Examine it: Juurouta’s Oodenta reacts and the door swings open.
- WarningThe fight starts the moment you step through the door, and losing it means Game Over. Heal up first. You can walk back through the warp pads to Rokkou for Otoki’s free amazake.
- MainA youkai has been lying in wait to take the Spirit Hole’s power for itself. Beat it, then Natsume seals the Spirit Hole. A sword much like Oodenta is lying there, and more youkai show up for revenge…
- MainThe sword shows you its memory. You now control Hokutomaru and his friends Yoritoo, Akoya, Hourin and Hidaka in a cave long ago. Head east through the cave and defeat Hyousube. If you lose, you’re simply sent back to the start of the flashback. Afterwards the group finds an injured girl with no memory, who names herself Minami.
- MainBack in the present the sword speaks: Got Juzumaru!! It explains the Five Great Swords. Three more sleep in Spirit Holes around Japan. The next one, Mikazuki, is at the bottom of Takachiho Falls in Kyushu, but you need the Blue Orb from Nikkou Village and the magatama from Mt. Yatsuka to get there.
- TipJuzumaru says none of the current party can wield it properly. Keep it in your inventory; its owner joins in the next chapter.
- MainThe magatama is a Saigami heirloom kept in the sealed cave on Mt. Yatsuka, so Natsume needs her brother Touya to break the seal. Juurouta suggests starting at Nikkou. After a short scene with the Shogun, you’re back on the world map beside Rokkou. Head east to Nikkou Village (Ch. 9).
Checklist
- Where
- Rokkou Village — inside the Mibu mansion (north end of the village)
- How
- After the scene at Juurouta’s house, talk to each pupil and answer Yes.
- Reward
- NPC allies Pupil 1, Pupil 2, Pupil 3
- Opens
- Ch. 8: after the scene at the Mibu house
- Where
- Rokkou Village — by the north wall, behind the Mibu mansion
- How
- Give him a Masamune (answer Yes). Your karma must be 20 or more, otherwise he attacks you instead.
- Reward
- NPC ally Kaishuu (costs your Masamune)
- Opens
- Ch. 8 (he is here from your first visit); the Masamune is first sold in Ch. 20 (Hill Village, 3140 gold)
- Closes
- never, unless you talk to him with karma below 20 and win the fight (he leaves for good)
- Where
- Rokkou Village — the ronin in the north-east part of town
- How
- Talk to him with karma 20 or more. He is one of eight pupils the ronin master in Kyoto asks you to meet.
- Reward
- Counts toward the ronin master’s quest in Kyoto (+7 karma when all eight are met)
- Opens
- Ch. 8
- Closes
- never, unless you beat him in a fight at karma below 20
- Where
- Awaji Island Wasteland — the Spirit Hole beyond the stone door
- How
- Story: beat the youkai at the Spirit Hole and finish the Hokutomaru flashback.
- Reward
- Juzumaru
- Opens
- Ch. 8
- Closes
- never (story)
Bosses & key battles
🗺️ Maps for this chapter (1)
Numbers mark people and events worth a visit; letters A, B, C… mark treasure chests. A pin on a door means the person is inside that building. Pins show everything that can appear on the map over the whole game, so some people only turn up later in the story. Tap a map to open it full size.
🛒 Shops in this chapter
Rokkou Village — Weapons
| Katana | 180 G |
| Zangetsu | 320 G |
| Zantetsu | 440 G |
South-east long house.
Rokkou Village — Items
| Herb | 4 G |
| H. Water | 8 G |
| Pill | 6 G |
| Sandalwd. | 6 G |
| Wake Dust | 6 G |
| Reviver | 10 G |
West house on the middle row. Inn: 30 gold (south-west long house).
Nikkou & Mt. Futara (Touya joins)
📍 Nikkou Village · Mt. Futara
To get the Blue Orb you return to Nikkou Village, where the elder’s daughter has been picked as this year’s sacrifice to the youkai of Mt. Futara. Natsume stands in as bait, and the rescue brings in someone unexpected: her eldest brother, Touya.
⏳ Last chances in this chapter
- The Sarugami fight on Mt. Futara is Game Over if you lose. Heal before stepping onto the summit plaza.
Full list across the game: Missables.
Walkthrough
- MainTravel east to Nikkou Village (north of Edo). The villagers now talk about the Blue Orb, a treasure kept by the village elder, and about his daughter being chosen as this year’s sacrifice.
- SideIf you never took the old woman in Nikkou to Edo back in Ch. 6, she is still waiting in her house and the offer still stands (+2 karma when you deliver her).
- TipThe samurai here who shouts “A man’s life is honor!!” is another pupil for the ronin master’s quest in Kyoto. Talk to him if you haven’t yet (karma 20+).
- MainThe elder lives in the house at the top of the village. Talk to him: every year a youkai on Mt. Futara, north of the village, demands a sacrifice, and this year it’s his daughter Sawa. He wants to grab her and run.
- MainJuurouta suggests Sawa pretend to be the sacrifice under the party’s protection. The elder instead demands that Natsume take Sawa’s place, and Natsume agrees. The scene moves to the foot of Mt. Futara, where the elder promises to give you anything you ask if you beat the youkai.
- SideOn the way up, grab the two chests if you haven’t already: a Gold Pill on the lower-left ledge near the entrance, and a Quilt Robe on the upper-left peak. Keep the Gold Pill; an old woman in Kagoshima (Ch. 11) asks for one. → checklist
- MainClimb to the plaza at the summit (top middle of the mountain, just below the highest peaks). Natsume is tied up as bait while the others wait in hiding. When it gets dark, a Sarugami appears and you charge it. Losing this fight is Game Over.
- MainAfter the win, a second, bigger Sarugami grabs Natsume. It says you killed its little brother. A passing stranger kills it with the holy art “Reihyouha”. Natsume recognizes the voice: it’s her brother Touya. When he hears the word “sacrifice”, he storms off to deal with the elder.
- MainYou’re taken back to the elder’s house, where Touya is throttling him. Yamato offers help in exchange for the Blue Orb, and Natsume gets her brother to calm down. Sawa keeps her father’s promise: Got the Blue Orb!!
- MainOutside, Natsume asks Touya to break the seal on Mt. Yatsuka. He agrees because you saved his sister: Touya joined the party!! Juzumaru announces that this man can wield it.
- TipEquip Juzumaru on Touya. The Five Great Swords are the party’s ultimate weapons, and Juzumaru is his.
- TipNikkou’s inn (20 gold) is in the big south-west house; the weapon shop is in the north-east house.
- MainNext stop: the sealed cave on Mt. Yatsuka, south-west of Izumo Village on the western Honshu map (Ch. 10).
Checklist
- Where
- Nikkou Village — the elder’s house (top of the village)
- How
- Story: beat the Sarugami on Mt. Futara. Sawa hands over the orb afterwards.
- Reward
- Blue Orb (key item, used up in the Waterfall in Ch. 11)
- Opens
- Ch. 9
- Closes
- never (story)
- Where
- Nikkou Village — outside the elder’s house
- How
- Story, right after you receive the Blue Orb.
- Reward
- Main character Touya
- Opens
- Ch. 9
- Closes
- never (story)
Treasure chests (2)
| Item | Area | Where | |
|---|---|---|---|
| Gold Pill | Mt. Futara | lower-left ledge, a short way up from the entrance Needed for the Kagoshima old woman’s request (Ch. 11). | |
| Quilt Robe | Mt. Futara | top of the upper-left peak |
Bosses & key battles
🗺️ Maps for this chapter (2)
Numbers mark people and events worth a visit; letters A, B, C… mark treasure chests. A pin on a door means the person is inside that building. Pins show everything that can appear on the map over the whole game, so some people only turn up later in the story. Tap a map to open it full size.
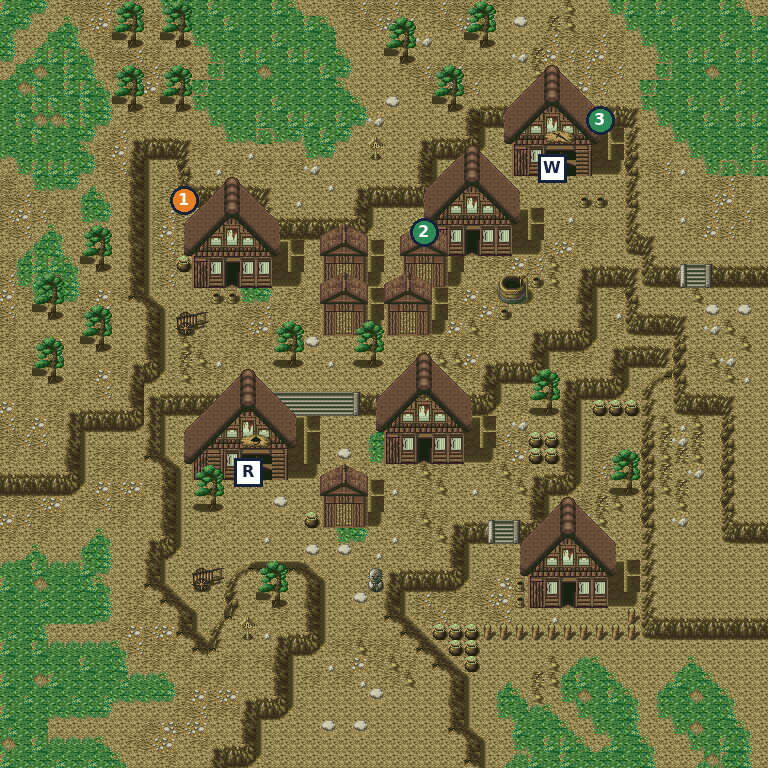
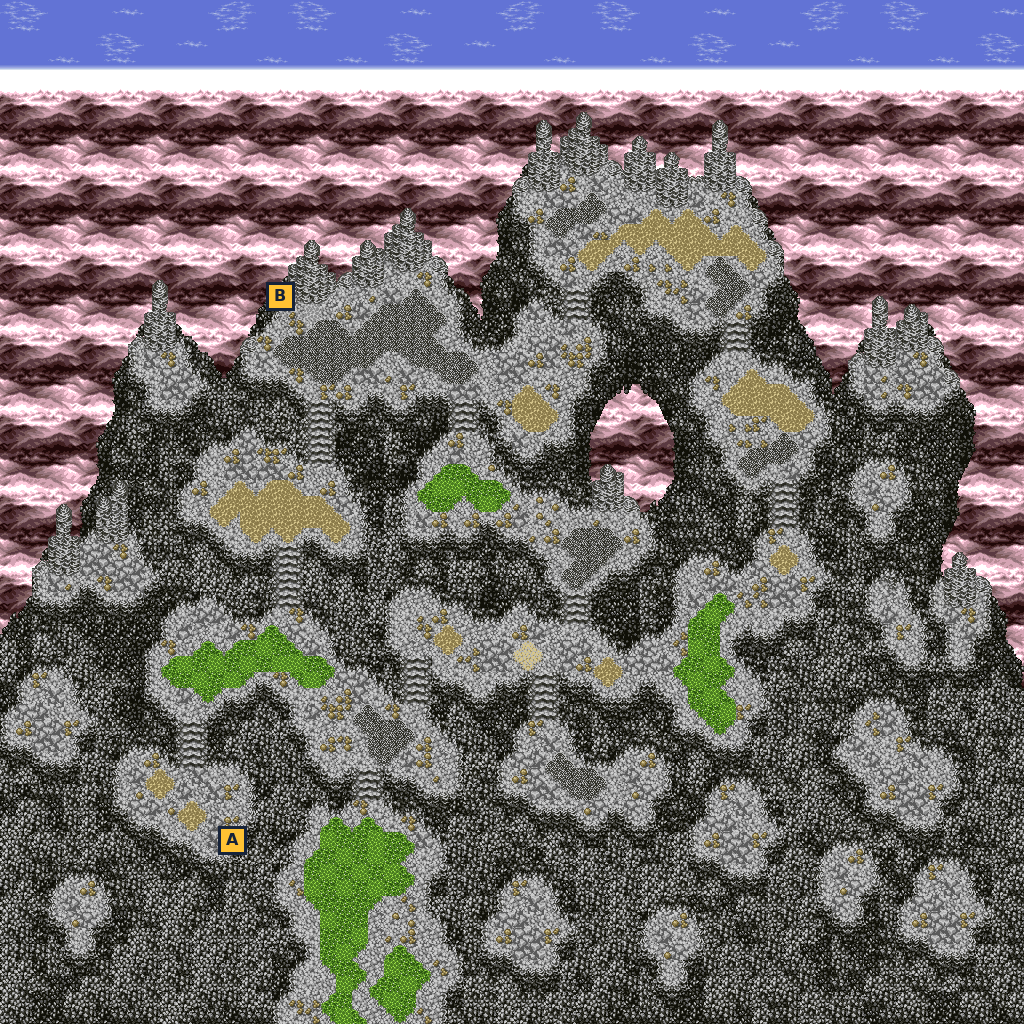
- A Gold Pill
- B Quilt Robe
Mt. Yatsuka cave & the crossing to Kyushu
📍 Izumo Village · Mt. Yatsuka · Mt. Yatsuka (cave) · Boatman to Kyushu
With Touya in the party, you return to Mt. Yatsuka so he can break his father’s seal on the Saigami clan’s cave. Natsume retrieves the magatama from a spider’s web, and a boatman at the western tip of Honshu takes you across to Kyushu.
⏳ Last chances in this chapter
- The three spider fights at the magatama are back to back, and losing any of them is Game Over.
- The boatman to Kyushu wants 100 gold, and the ride back costs 150.
Full list across the game: Missables.
Walkthrough
- MainTravel back to western Honshu. Mt. Yatsuka is south-west of Izumo Village and north-west of Okayama Village.
- SideOptional: with Touya in the party, walk into Izumo Village and Natsume asks if you’d like to stay the night. Answer Yes to rest in the village. Sometimes this plays a short dream about the Saigami family before the attack: the brothers practising their arts, a wedding-day tease, or Touya leaving on his training journey. There is no item reward. → checklist
- MainClimb Mt. Yatsuka to the cave mouth on the upper terrace, in the middle of the mountain. This is the seal Natsume couldn’t open back in Ch. 4. Face it and Touya dispels the seal.
- TipIf you missed any of the mountain’s outdoor chests on your first visit (White Garb, Feather, Herb, Dogu Shard), they are still here.
- MainInside, Touya explains that the Saigami clan has guarded this cave and the magatama hidden deep inside. The first floor has two chests (Javelin, Kunai), and the next floor has two more (Reviver, Cloak).
- WarningThe event at the end of the cave is three fights in a row, and losing any of them is Game Over. Heal before you walk onto the ledge over the pit.
- MainAt the back, the magatama hangs in a huge web over a pit. Natsume insists on crawling out along the thread to get it herself. A monster spider appears, and Touya, Juurouta and Yamato move to cut it off. You fight three spider battles back to back.
- MainNatsume grabs the prize: Got the Magatama!! The web gives way and she falls, but on reflex she casts the Saigami “barrier” art and lands safely. It’s the first time she has used an art, and Touya says she’s no failure anymore.
- MainWith the Blue Orb and the magatama in hand, it’s time for Takachiho. Walk out of the cave. If you go back to the web, Juurouta just says it’s time to leave.
- MainGo to the dock at the far south-western tip of the western Honshu map. The boatman only shows up once you have the magatama. He charges 100 gold for the trip to Kyushu (Juurouta thinks that’s a rip-off). Answer Yes to board.
- TipThe boatman on the Kyushu side charges 150 gold to bring you back. Keep some money in reserve, and remember that Kagoshima’s fox event (Ch. 11) needs 2000 gold on hand.
Checklist
- Where
- Izumo Village — Natsume asks when you enter the village
- How
- Enter Izumo with Touya in the party and answer Yes. Can be repeated on later visits; which dream plays seems to vary.
- Reward
- Story scenes only
- Opens
- Ch. 10 (Touya in the party)
- Closes
- when Touya leaves the party (a variant without him is used later)
Treasure chests (4)
| Item | Area | Where | |
|---|---|---|---|
| Javelin | Mt. Yatsuka (cave 1F) | west side of the first cave floor | |
| Kunai | Mt. Yatsuka (cave 1F) | east side of the first cave floor | |
| Reviver | Mt. Yatsuka (cave 2F) | south-west part of the second floor | |
| Cloak | Mt. Yatsuka (cave 2F) | north-east part of the second floor |
Bosses & key battles
🗺️ Maps for this chapter (4)
Numbers mark people and events worth a visit; letters A, B, C… mark treasure chests. A pin on a door means the person is inside that building. Pins show everything that can appear on the map over the whole game, so some people only turn up later in the story. Tap a map to open it full size.
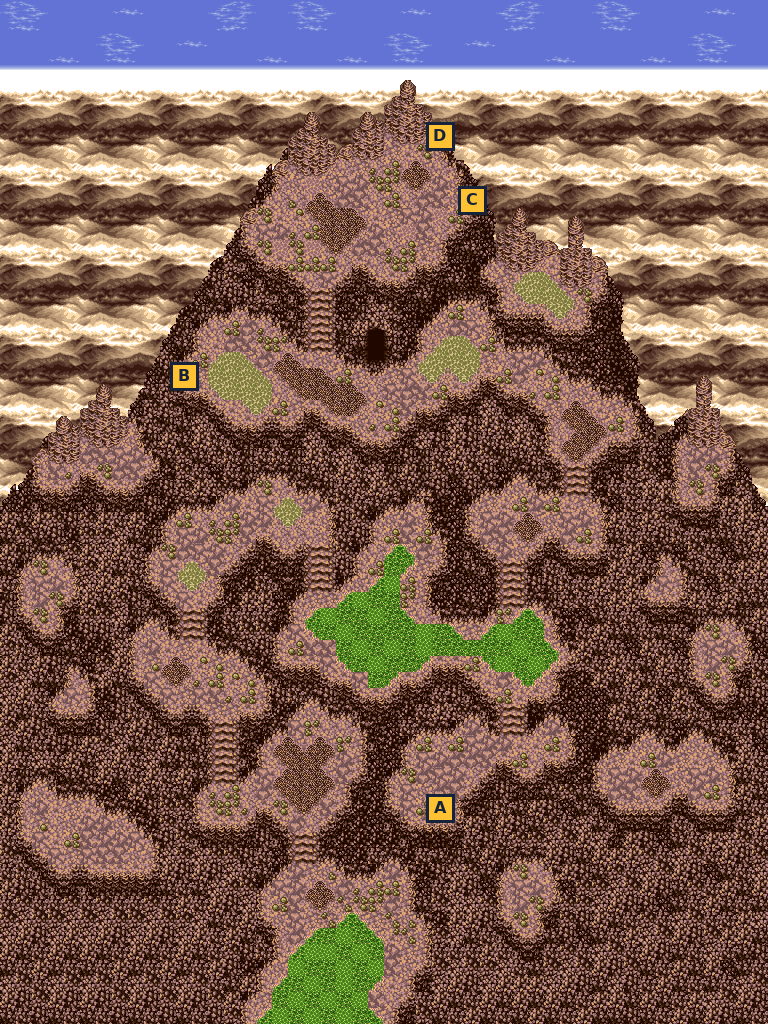
- A White Garb
- B Feather
- C Herb
- D Dogu Shard
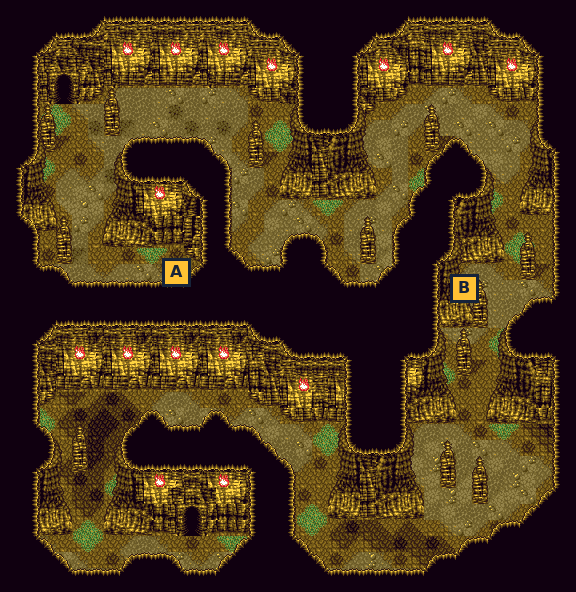
- A Javelin
- B Kunai
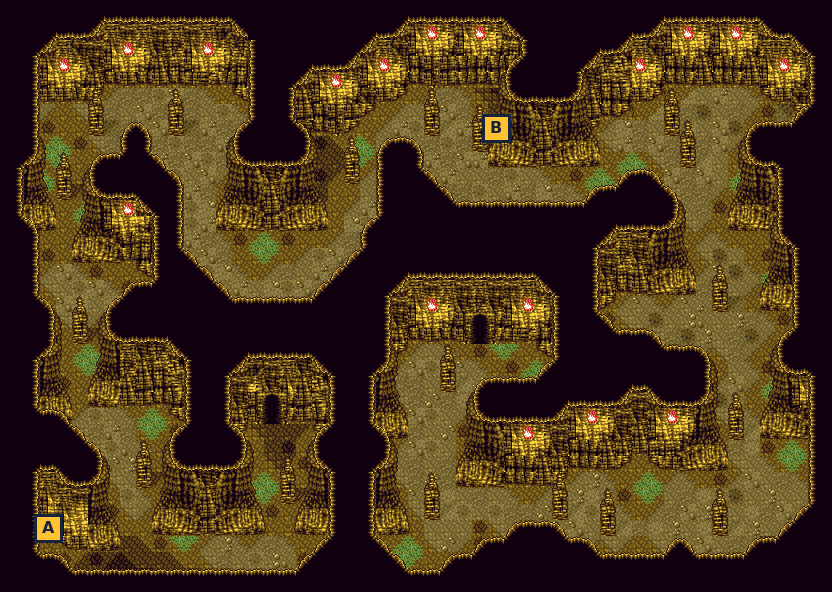
- A Reviver
- B Cloak
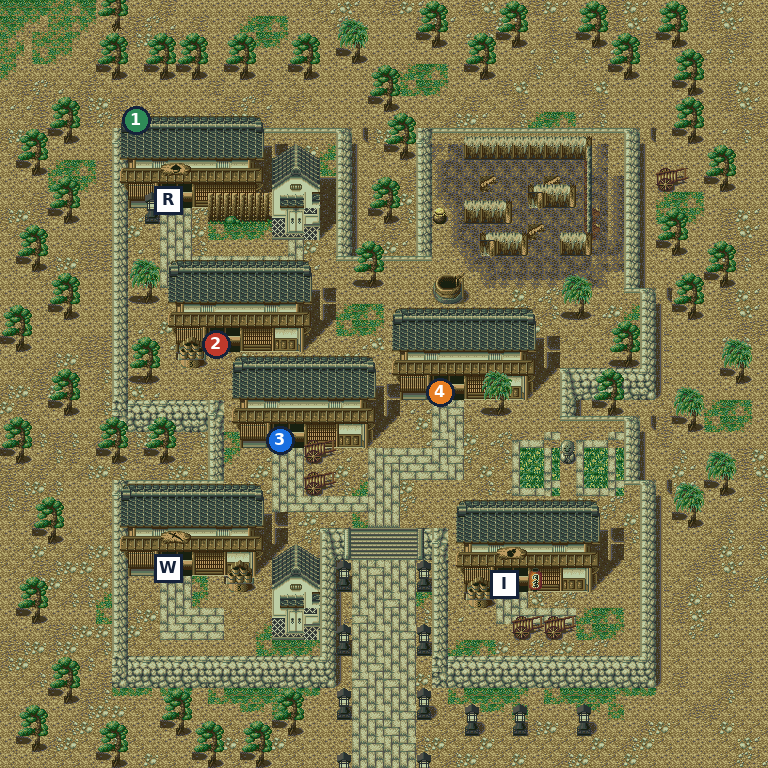
Takachiho & the Waterfall (Mikazuki)
📍 Kyushu · Stray Ittan shrine · Takachiho Village · Kagoshima Village · Komainu shrine · Waterfall (Spirit Hole) · Underground Waterway
On Kyushu you pick up a flying youkai friend and several optional summons and karma events. Then you take on the white snake of Takachiho Falls. With the Blue Orb and the magatama you dive to the Spirit Hole beneath the falls, where the third Great Sword, Mikazuki, is waiting for Natsume.
⏳ Last chances in this chapter
- Once you dive into the falls you can’t leave until the Spirit Hole is sealed (the Blue Orb crumbles, and there’s no inn below). Prepare at Takachiho first.
- Grab the three chests in the Underground Waterway before stepping on the rock circle. The falls are closed afterwards, and the cave can only be reached again very late in the game.
- Kagoshima fox: answering No to the 2000 gold kills the fox and loses the Inari summon forever (−4 karma). If you can’t pay yet, just leave and come back.
Full list across the game: Missables.
Walkthrough
- MainThe boat drops you at Kyushu’s north-east dock. Takachiho Village is to the south-west, with the big waterfall just north-east of it.
- SideJust south of the dock is a small shrine. Go in and examine the little youkai hiding at the back. Yamato wants to cut it down, but Natsume calms it: Got Stray Ittan!! Press START on the world map to ride her and fly. → checklist
- MainEnter Takachiho Village. Natsume confides that she still can’t use her art on purpose. Touya and Juurouta cheer her up, and Touya gets carried away as usual.
- TipTakachiho has the best gear so far. The weapon seller is in the north-east of the village, the armor seller in the north-west and the item seller in the south-west. The inn is the big house in the middle (20 gold).
- SideIn the inn, Okuni offers to come along for 800 gold, because there’s “a fine man” in your party. Natsume disapproves, but you can hire her anyway. → checklist
- SideKagoshima Village is at the far south of Kyushu. In its north-west corner, a man is about to turn a girl’s fox into a scarf because it ate his prize chicken. He wants 2000 gold. If you have 2000 gold and pay, the fox turns out to be a messenger of the god Inari: +4 karma, you choose who learns the Inari summon, and the 2000 gold is given back. If you refuse, the fox is killed (−4 karma) and the summon is lost for good. If you don’t have 2000 gold, nothing is lost; come back when you do. → checklist
- SideIn Kagoshima, go into the small south-west house. An old woman who feels sluggish asks for a Gold Pill. Give her one for +3 karma (Mt. Futara in Ch. 9 has one in a chest). → checklist
- TipKagoshima’s item seller stocks Kunai, Maelstrom and Reishi. Its armor seller has the same stock as Takachiho’s. Kagoshima has no inn.
- SideThe Komainu shrine is in the north-west of Kyushu (easiest with Stray Ittan). Examine the guardian-dog statue: a sleepy Shisa pops out, claims it was waiting for you all along, and you choose who learns the Shisa summon. → checklist
- WarningWith karma below 20, the samurai and ronin in Takachiho and Kagoshima attack you instead of talking.
- MainEnter the Waterfall north-east of Takachiho. An eerie voice tells you to go home. Then the Snake Yokai bursts out of the falls and attacks. Losing is Game Over.
- MainOnce beaten, the snake changes into a girl and begs for mercy (she even offers to marry Juurouta, and gets a surprise). Natsume feels sorry for her: Snake Yokai joined the party! You’re put back on the world map outside the falls.
- WarningPoint of no return until the Spirit Hole is sealed. On your next entry the party is swept into the water, and inside, the Blue Orb crumbles, so you can’t go back out the way you came. There’s no inn below. Rest at Takachiho’s inn and stock up on healing items before you go back in.
- MainEnter the falls again. The orb shines and you’re pulled underwater, but the Blue Orb lets everyone breathe. Swim toward the light in the north-east.
- MainYou surface in a cave (the Underground Waterway). The Blue Orb crumbles away. Explore for three chests: a Dream Robe north-east of where you arrive, a Genji Armr on the west side and an N. Pill in the middle passage.
- MainHead south down the west side to the spot by the underground pool. The magatama glows and is used up, and another sword memory begins.
- MainFlashback: you control Hokutomaru’s party again, with Minami along. Work your way down through the cave. Youkai ambush you at set spots (“Fooound you!!”), and Kiyohime waits at the bottom-left. Losing any of these fights only restarts the flashback. Afterwards Hidaka openly suspects Minami, because Kiyohime seemed to know her.
- MainBack in the present, the sword introduces itself and joins you: Got Mikazuki!! It is Natsume’s sword. Equip it on her. Mikazuki then leads you toward the Spirit Hole in the eastern chamber.
- WarningThe fight at the Spirit Hole is Game Over if you lose. Heal before you walk up to the glowing hole in the east chamber.
- MainAt the Spirit Hole a voice orders you not to seal it. It belongs to a cloaked man who draws on the Spirit Hole’s power, turns into a monster and attacks.
- MainAfter the battle, the real Mysterious Voice speaks up. The man was a former comrade of its people, a traitor corrupted by the Spirit Holes, and its people are a different race from humans. It refuses to show itself because you serve the Shogun. Natsume then seals the Spirit Hole.
- SideOptional: examine the note the cloaked man left behind. It describes his plan to take the Spirit Holes’ power from “THEM”.
- WarningLast chance for now: once you leave, the falls stay closed. You won’t be back in this cave until very late in the game, when the Ihika route reaches it. Grab the Dream Robe, Genji Armr and N. Pill before you leave.
- MainWalk back to the ring of rocks just south-east of where you arrived (it looks like the warp circles in the Rokkou Wasteland). Step on it to return to the basin of the falls. Juzumaru and Mikazuki say the next Great Sword that knows about the cloaked man sleeps at Mt. Towari in Tohoku (Ch. 12).
- TipThe boatman at the Kyushu dock takes you back to Honshu for 150 gold.
- TipTwo places on Kyushu don’t do anything yet. The cave west of Takachiho pushes you back with an invisible force, and the pond in central Kyushu has no effect. Both matter much later.
Checklist
- Where
- Kyushu — the small shrine just south of the dock
- How
- Examine the youkai at the back of the shrine.
- Reward
- Stray Ittan: press START on the world map to fly
- Opens
- Ch. 11 (first arrival on Kyushu)
- Where
- Takachiho Village — inside the inn (big central house)
- How
- Talk to her and answer Yes; costs 800 gold.
- Reward
- NPC ally Okuni
- Opens
- Ch. 11
- Where
- Waterfall (Spirit Hole), north-east of Takachiho
- How
- Story: beat her on your first visit to the falls.
- Reward
- NPC ally Snake Yokai
- Opens
- Ch. 11
- Closes
- never (story)
- Where
- Kagoshima Village — north-west corner
- How
- Talk to the man with 2000 gold or more on hand and answer Yes to paying. The money is refunded.
- Reward
- Inari summon (you choose who learns it) + 2000 gold back
- Opens
- Ch. 11 (first arrival on Kyushu)
- Closes
- the moment you answer No: the fox is killed
- Where
- Kagoshima Village — the small south-west house
- How
- Give her a Gold Pill (answer Yes).
- Reward
- Karma
- Opens
- Ch. 11
- Where
- Komainu shrine — north-west Kyushu
- How
- Examine the komainu statue (face it from below).
- Reward
- Shisa summon (you choose who learns it)
- Opens
- Ch. 11 (first arrival on Kyushu)
- Where
- Underground Waterway beneath Takachiho Falls
- How
- Story: finish the Kiyohime flashback.
- Reward
- Mikazuki (Natsume’s sword)
- Opens
- Ch. 11
- Closes
- never (story)
Treasure chests (3)
| Item | Area | Where | |
|---|---|---|---|
| Dream Robe | Underground Waterway (Waterfall) | north part of the western cave section, north-east of where you arrive The falls close behind you, but this part of the cave is reachable again from the Ihika side late in the game (Ch. 25). | |
| Genji Armr | Underground Waterway (Waterfall) | west side, about halfway down toward the pool The falls close behind you, but this part of the cave is reachable again from the Ihika side late in the game (Ch. 25). | |
| N. Pill | Underground Waterway (Waterfall) | the long middle passage The falls close behind you, but this part of the cave is reachable again from the Ihika side late in the game (Ch. 25). |
Bosses & key battles
🗺️ Maps for this chapter (3)
Numbers mark people and events worth a visit; letters A, B, C… mark treasure chests. A pin on a door means the person is inside that building. Pins show everything that can appear on the map over the whole game, so some people only turn up later in the story. Tap a map to open it full size.
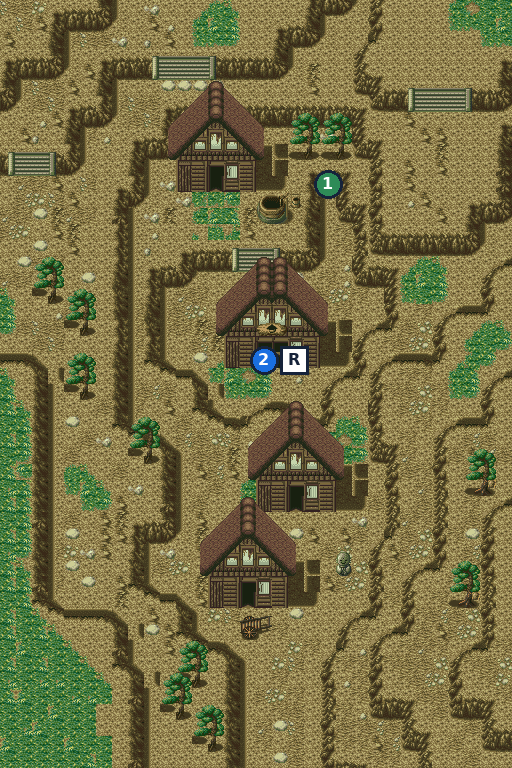
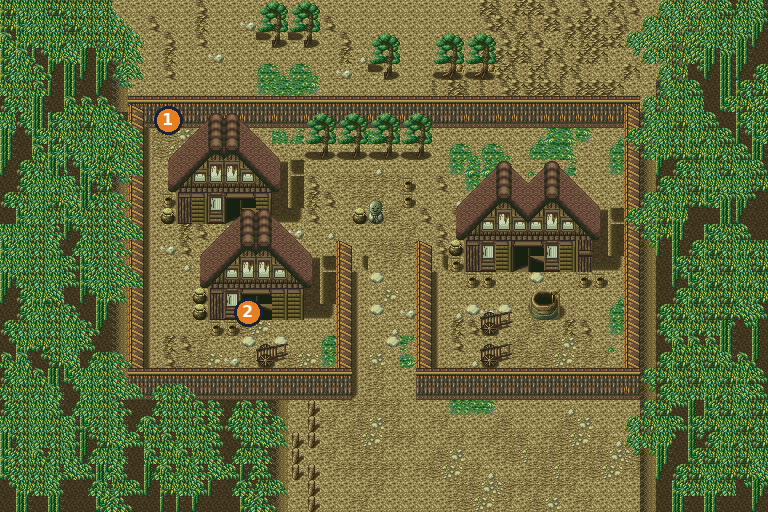
- 1Man with the fox — karma +4 / −4
- 2Old Woman (inside) — karma +3 checklist
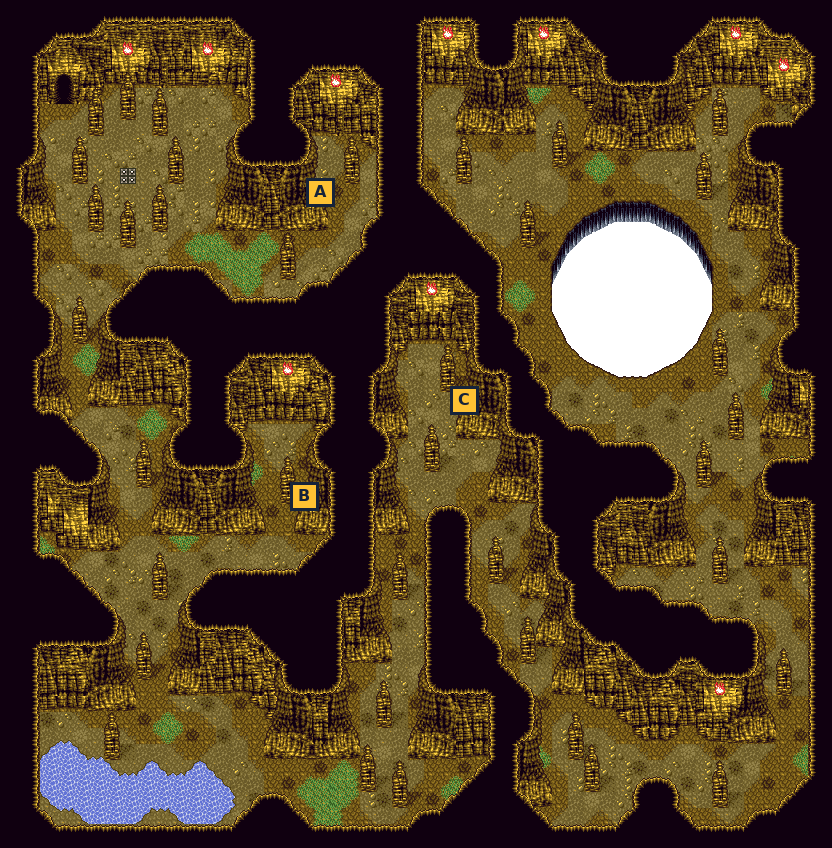
- A Dream Robe
- B Genji Armr
- C N. Pill
🛒 Shops in this chapter
Takachiho Village — Weapons
| Zantetsu | 440 G |
| Kikuichi | 620 G |
| Dawn Sword | 840 G |
| Seven Star | 1,090 G |
| Kama Spear | 410 G |
| Vajra | 550 G |
| Hama Bow | 310 G |
| Kirisame | 590 G |
| Cat Claw | 290 G |
| Jizai Claw | 450 G |
Seller in the north-east of the village.
Takachiho Village — Armor
| Kabuto | 420 G |
| Star Helm | 510 G |
| Spike Helm | 640 G |
| Quilt Robe | 180 G |
| Crane Robe | 1,020 G |
| Chain Mail | 680 G |
| Lion Robe | 810 G |
| Ooyoroi | 1,050 G |
| Genji Armr | 1,320 G |
| Chain Legs | 330 G |
| Swift Shoe | 460 G |
| Herb Legs | 590 G |
Seller in the north-west. Kagoshima’s armor seller has the same list.
Takachiho Village — Items
| Herb | 4 G |
| N. Pill | 20 G |
| H. Water | 8 G |
| S. Dew | 16 G |
| Pill | 6 G |
| Sandalwd. | 6 G |
| Wake Dust | 6 G |
| Reviver | 10 G |
Seller in the south-west. Inn: 20 gold (big central house).
Kagoshima Village — Items
| Kunai | 20 G |
| Maelstrom | 4 G |
| Reishi | 4 G |
No inn in Kagoshima.
Kagoshima Village — Armor
| Kabuto | 420 G |
| Star Helm | 510 G |
| Spike Helm | 640 G |
| Quilt Robe | 180 G |
| Crane Robe | 1,020 G |
| Chain Mail | 680 G |
| Lion Robe | 810 G |
| Ooyoroi | 1,050 G |
| Genji Armr | 1,320 G |
| Chain Legs | 330 G |
| Swift Shoe | 460 G |
| Herb Legs | 590 G |
Same list as Takachiho.
Herai, Derarezu Forest & Hiramitsu Tower (Doujigiri)
📍 Herai Village · Mt. Towari · Derarezu Forest · Hiramitsu Tower · Hachinohe Village · Niigata Village
The swords point you to Mt. Towari in the far north of Honshu. An old woman in Herai Village says the mountain is really Hiramitsu, a tower built by people long ago. Trade her four stalks of Fluffy Grass for the tablet that opens it, wake the Great Sword Doujigiri deep inside, seal the Spirit Hole and run for your lives.
⏳ Last chances in this chapter
- Before you enter the hot inner chamber on Hiramitsu Tower B4F, collect every chest on 1F to 6F, especially the Red Tachi on 3F (Kurama’s only price). Once the escape starts, the party refuses to go up from 1F or back down, and it stays that way.
- The escape fights are mandatory and losing one is a game over. Save before entering the B4F chamber.
- Kurama joins details
- Chest: Gold Pill (Hiramitsu Tower 2F) details
- Chest: Maelstrom (Hiramitsu Tower 2F) details
- Chest: Red Tachi (Hiramitsu Tower 3F) details
- Chest: S. Dew (Hiramitsu Tower 3F) details
- Chest: Maelstrom (Hiramitsu Tower 3F) details
- Chest: Kunai (Hiramitsu Tower 3F) details
- Chest: Herb (Hiramitsu Tower 4F) details
- Chest: Cloak (Hiramitsu Tower 4F) details
- Chest: ChainPill (Hiramitsu Tower 4F) details
- Chest: H. Water (Hiramitsu Tower B1F) details
- Chest: Star Helm (Hiramitsu Tower B1F) details
- Chest: Herb Legs (Hiramitsu Tower B3F) details
Full list across the game: Missables.
Walkthrough
- MainTravel to the northern Honshu map. Herai Village sits in the east of it. Mt. Towari rises just north of Herai, Derarezu Forest lies north-west of Herai (west of Mt. Towari), and Hachinohe Village is north of Mt. Towari.
- MainHerai Village: the people call the northern mountain ‘Hiramitsu’ after Grandma’s old tales. The big north house is an item shop, the big north-east house is a second item shop (it also sells Reishi) and the big south-east house is the inn (20 gold). A Jizo statue (save point) stands on the east side.
- SideOptional: the samurai at the west edge of the sunken square in the middle (‘A man’s life is courtesy!!’) is one of the eight pupils of the bushido ronin in Kyoto (see Ch. 3). Talk to him while your karma is 20 or higher. → checklist
- MainWalk north to Mt. Towari. Near the foot of the mountain, left of a dark doorway in the rock, there is a square hollow. Examine it once (‘What’s this square hollow!?’), then examine it a second time so Touya wonders whether something should fit in it. Only after this second look will the old woman talk about her tablet.
- SideMt. Towari has two chests: an S. Dew on the ledge just left of the summit and a Feather on the east side, about halfway up.
- MainBack in Herai, enter the small house on the west side, just north of the west gate. The old woman there says Hiramitsu is man-made and that she has the secret tablet for getting in. She lends it only if you bring her four stalks of Fluffy Grass from the big forest west of the mountain.
- TipDerarezu Forest won’t let you in before the old woman has asked for the Fluffy Grass: Natsume refuses to enter such a dense forest.
- MainDerarezu Forest: the four Fluffy Grass plants (Puffgrass in the menu) are small plants you examine. One is in the north-west part, under the big clump of trees. One is just to its east, at the foot of the tree trunks in the north. One is in the centre, and one is a little further east of the centre. After the fourth, Juurouta says you can now borrow the tablet.
- SideIn the same forest, a chest in the south-west part, half hidden by the trees, holds a Dogu Shard. It is the last of the three shards for the Dogu summon in Niigata (see below). → checklist
- MainGive the Fluffy Grass to the old woman. You receive the Old Tablet and the Puff Sake (Puff Sake in the menu). She warns that a burning river runs inside Hiramitsu and that the sake protects you from the heat.
- MainAt Mt. Towari, examine the square hollow again and fit the tablet in. A doorway opens. Step into it to enter Hiramitsu Tower.
- MainHiramitsu Tower is long. On 1F, take the stairs up and climb through 2F, 3F, 4F and 5F to 6F. There are Jizo statues (save points) on 2F and B3F. Open every chest on the way; the full list is below.
- Side3F has the Red Tachi (west part of the floor). Keep it: Kurama in Hachinohe Village joins you for it, and this is the only one in the game. → checklist
- Main6F: Juurouta points at a contraption on the far wall. Examine the lever and answer Yes to pull it. The net over the opening lifts. Walk through: it is a lift down to B1F. From now on, the stairs on 1F lead straight down to B1F too.
- MainGo down through B2F and B3F to B4F. On B4F the way into the hot inner chamber is in the west half of the floor.
- WarningPoint of no return: when you walk into B4F’s inner chamber, the heat uses up the Puff Sake at once, and Juurouta won’t let you turn back. From here the story runs straight into an escape, and afterwards the tower’s upper floors stay closed. Collect every chest on 1F to 6F first.
- MainIn the inner chamber, walk up to the stone tower in the middle: Juzumaru senses a comrade inside. Face the stone and examine it: Mikazuki calls on him, and the tower vanishes.
- MainA memory of the ancient hero Hokutomaru plays: his party (with Yoritoo and Minami) fights the youkai Futachi for this Spirit Hole. If they lose, they are sent back and can simply try again.
- MainThe Great Sword Doujigiri wakes up and joins you (‘Got Doujigiri!!’). He says the Spirit Hole is below and that the river of fire has kept the youkai away. Take the passage out of the room down to the Spirit Hole.
- MainNatsume seals the Spirit Hole. The fires die down, and the youkai that the fire held back pour in. Run!
- MainThe escape: you start on B4F. The way down is blocked (‘The floor below is overflowing with youkai!’). Each set of stairs up (B4F to B3F, B3F to B2F, B2F to B1F) starts a battle, and losing one is a game over. The B1F lift is dead now, so take the stairs from B1F up to 1F and leave by the 1F exit, which also starts a battle.
- TipDuring the escape you still pass through B3F and B1F, so you can grab any chests you missed there (Herb Legs on B3F, Star Helm and H. Water on B1F). The B3F Jizo statue is on your route.
- MainOutside, the party tries to shut the tower door. Touya and Natsume seal it, and Natsume collapses. You end up back in Herai, where the old woman takes you into her house.
- MainCutscenes: the Shogun hears that the ‘Shadow’ Shinsengumi keep sealing Spirit Holes. Then a figure called Rishu takes over Lord Shimazu and orders him to overthrow the Shogun. Shimazu summons Sakamoto Ryouma and Izou.
- MainThat night, walk toward the door of the old woman’s house. Touya is awake, and Doujigiri tells you about an ancient clan that lived underground and died out. Then a cheer outside: a traveller has just come home.
- MainTalk to the traveller just inside the west gate (his wife and child stand next to him). He heard the samurai in Kyoto talk about a Spirit Hole at Mt. Tsurugi in Shikoku. Natsume has recovered, and Yamato decides to go to Shikoku. You can’t leave Herai until you have heard him.
- MainTo reach Shikoku, take a ship from Okayama Village (Ch. 13).
- SideOptional: in Hachinohe Village, Kurama waits in the back of the second house from the north on the west side. Give him the Red Tachi and he joins as an NPC ally. Keep your karma at 20 or higher, or he attacks you instead. → checklist
- SideOptional: Tajikara stands in the north-west corner of Hachinohe. Answer Yes to ‘Test your strength?’ to fight him. Win and Yamato can call down Tajikarao. He hits very hard, so come back when you are much stronger; losing is not a game over, and you can challenge him again any time. → checklist
- SideOptional: Niigata Village (south-west of Herai on the northern map). Talk to the man in front of the second house on the top row first; he tells you about the three Dogu Shards. Return with all three (Mt. Maru cave, Mt. Yatsuka summit, Derarezu Forest) and Juurouta can summon Dogu. → checklist
- SideOptional: in Niigata, a woman cries on the west side of the village, left of the north-west house. She is to be sacrificed to a youkai. Answer Yes to ‘Fight the youkai?’ and win two fights in a row (losing is a game over). She is Princess Kushinada in disguise, and Yamato can then summon Kushinada. → checklist
- SideOptional: the samurai in the north-west corner of Niigata (‘A man follows the way of the warrior!!’) is another bushido pupil for the Kyoto ronin (karma 20 or higher). → checklist
- SideFor later: in Herai, the man in the north of the village, between the two big northern houses, tells you that a god lives in the village pond and appears if you throw in a spear. The pond is the water in the sunken square in the middle; stand below it facing up. Only a Gale Spear, Fire Spear, Tube Spear, Fudou Rod or Raijin Spr works, and weaker spears are simply lost. The first good spears turn up in Ezo (Ch. 16). Do this before Touya leaves the party (Ch. 21): Gundari becomes Touya’s summon. → checklist
Checklist
- Where
- Herai Village: the old woman in the small house north of the west gate
- How
- Examine the square hollow at Mt. Towari twice, talk to the old woman, bring her 4 Fluffy Grass (Puffgrass) from Derarezu Forest.
- Reward
- Old Tablet (opens Hiramitsu Tower), Puff Sake (Puff Sake; protects you from the heat on B4F)
- Opens
- Ch. 12
- Closes
- never (story)
- Where
- Hiramitsu Tower B4F: the stone tower in the hot inner chamber
- How
- Walk up to the stone (Juzumaru speaks), then face it and examine it (Mikazuki wakes him). After the Hokutomaru memory, Doujigiri joins.
- Reward
- Doujigiri (Great Sword)
- Opens
- Ch. 12
- Closes
- never (story)
- Where
- Hachinohe Village: the back of the second house from the north on the west side
- How
- Talk to him with karma 20 or higher, carrying the Red Tachi, and answer Yes to ‘Hand over the Red Tachi?’.
- Reward
- NPC ally Kurama (costs the Red Tachi)
- Opens
- Ch. 12 (once you have the Red Tachi)
- Closes
- The only Red Tachi is the chest on Hiramitsu Tower 3F, which is closed once the escape starts. Beating Kurama at low karma also loses him.
- Where
- Hachinohe Village: north-west corner
- How
- Answer Yes to ‘Test your strength?’ and win the fight. Losing is not a game over; he asks ‘Want another match?’ next time.
- Reward
- Yamato can call down Tajikarao
- Opens
- as soon as you can reach Hachinohe
- Closes
- never (he leaves only after you have won)
- Where
- Niigata Village: the man in front of the second house on the top row
- How
- Talk to him once to hear about the shards, then come back with all three Dogu Shards (Mt. Maru cave, Mt. Yatsuka summit, Derarezu Forest).
- Reward
- Juurouta can summon Dogu (the three shards are used up)
- Opens
- Ch. 12: after the Derarezu Forest shard
- Where
- Niigata Village: the crying woman on the west side, left of the north-west house
- How
- With Natsume in the party, answer Yes to ‘Fight the youkai?’ and win two battles against Snake Youkai. Losing either is a game over. Answering No does nothing; you can ask again.
- Reward
- Yamato can summon Kushinada
- Opens
- Ch. 4 (Natsume joins) or whenever you first reach Niigata
- Where
- Herai Village: the pond in the sunken square in the middle (stand below it, facing up)
- How
- First hear the man in the north of the village (between the two big northern houses) talk about the pond god (Touya must be in the party). Then examine the pond, answer Yes and pick a spear. Only Gale Spear, Fire Spear, Tube Spear, Fudou Rod or Raijin Spr work. Chakra, Javelin, Monk Staff, Kama Spear, Vajra, Twin Spear, Sun Staff, Naginata and Kongoujou are thrown away for nothing.
- Reward
- Touya learns the Gundari summon (the spear is used up)
- Opens
- Ch. 16 at the earliest (Tube Spear from the Hakodate weapon shop, Gale Spear chest in Ezo); the hint is available from Ch. 12
- Closes
- Ch. 21: Touya leaves the party for good (flag 072)
- Where
- Niigata Village: the samurai in the north-west corner
- How
- Talk to him while your karma is 20 or higher. Counts toward the Kyoto bushido ronin’s pupils (Ch. 3).
- Opens
- whenever you reach Niigata
- Closes
- Lost if you fight and beat him at karma < 20.
- Where
- Herai: the two samurai in the village · Hachinohe: the ronin near the top house · Niigata: the samurai in the north-west corner and the ronin resting in a house
- How
- Only if your karma is below 20: talking to them starts a fight. Win = gold, −2 karma and the person is gone; lose = you pay.
- Reward
- Herai samurai 400 (lose −800) · Herai samurai 100 (−200) · Hachinohe ronin 400 (−800) · Niigata samurai 400 (−500) · Niigata house ronin 200 (−400)
- Opens
- Ch. 12
Treasure chests (17)
| Item | Area | Where | |
|---|---|---|---|
| Dogu Shard | Derarezu Forest | south-west part of the forest, half hidden by trees One of three shards for the Dogu summon in Niigata. | |
| S. Dew | Mt. Towari | ledge just left of the summit | |
| Feather | Mt. Towari | east side, about halfway up | |
| N. Pill | Hiramitsu Tower 1F | north-west corner | |
| Wind Hood | Hiramitsu Tower 1F | north-east corner | |
| Gold Pill | Hiramitsu Tower 2F | west part ⚠ Gone after Chapter 12 | |
| Maelstrom | Hiramitsu Tower 2F | south part ⚠ Gone after Chapter 12 | |
| Red Tachi | Hiramitsu Tower 3F | west part Needed for Kurama in Hachinohe; the only one in the game. ⚠ Gone after Chapter 12 | |
| S. Dew | Hiramitsu Tower 3F | south-west part ⚠ Gone after Chapter 12 | |
| Maelstrom | Hiramitsu Tower 3F | north part, left of centre ⚠ Gone after Chapter 12 | |
| Kunai | Hiramitsu Tower 3F | north-east corner ⚠ Gone after Chapter 12 | |
| Herb | Hiramitsu Tower 4F | centre ⚠ Gone after Chapter 12 | |
| Cloak | Hiramitsu Tower 4F | east part ⚠ Gone after Chapter 12 | |
| ChainPill | Hiramitsu Tower 4F | south-east part ⚠ Gone after Chapter 12 | |
| H. Water | Hiramitsu Tower B1F | north part Still reachable during the escape. ⚠ Gone after Chapter 12 | |
| Star Helm | Hiramitsu Tower B1F | east part Still reachable during the escape. ⚠ Gone after Chapter 12 | |
| Herb Legs | Hiramitsu Tower B3F | north-west corner, just above the Jizo statue Still reachable during the escape. ⚠ Gone after Chapter 12 |
Bosses & key battles
🗺️ Maps for this chapter (11)
Numbers mark people and events worth a visit; letters A, B, C… mark treasure chests. A pin on a door means the person is inside that building. Pins show everything that can appear on the map over the whole game, so some people only turn up later in the story. Tap a map to open it full size.
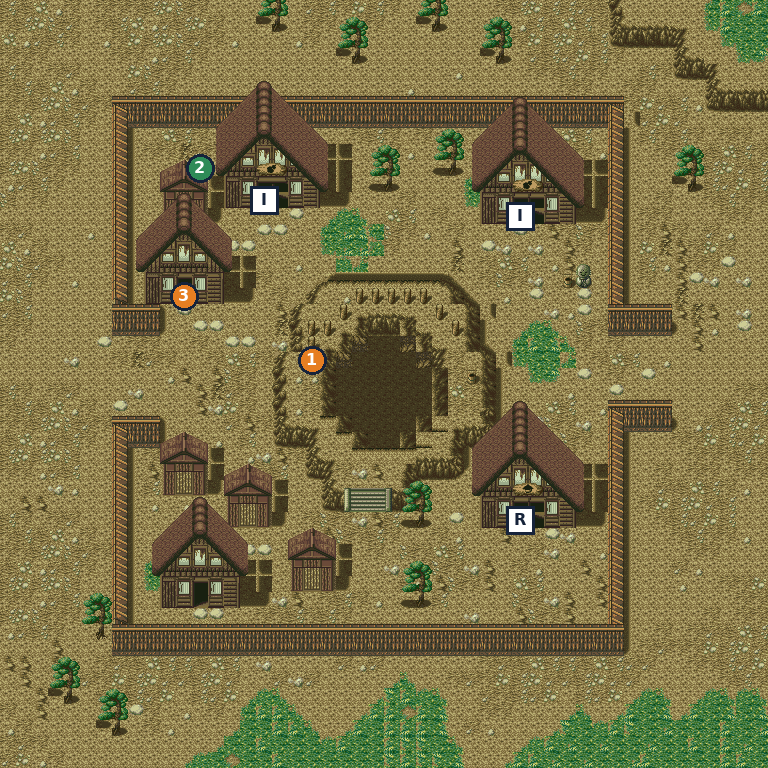
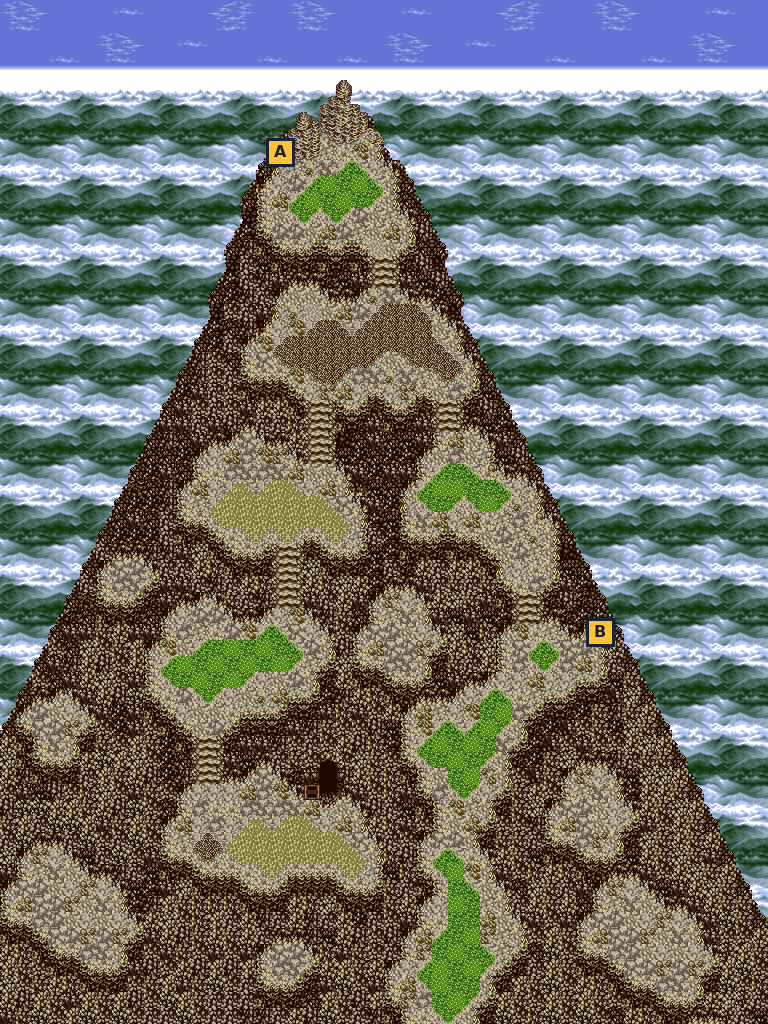
- A S. Dew
- B Feather
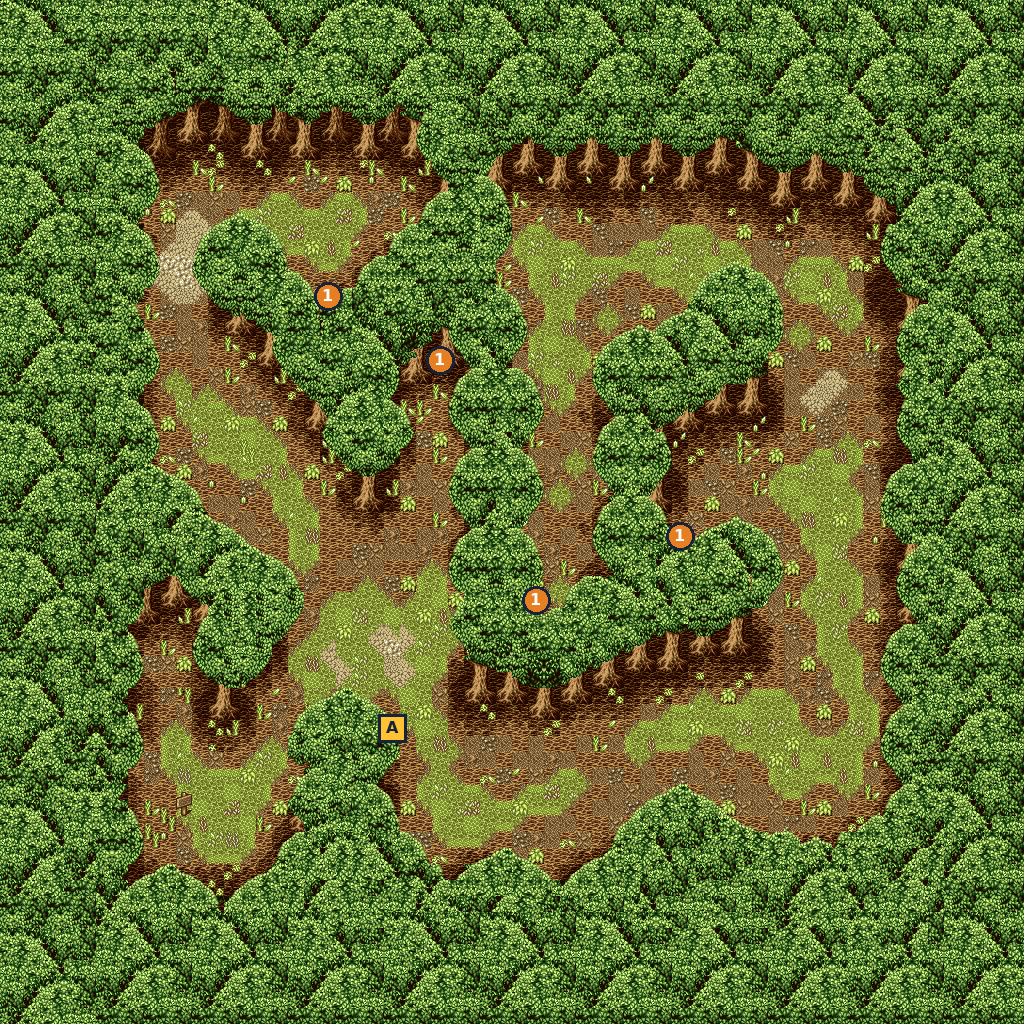
- 1Search spot — gives Puffgrass
- A Dogu Shard
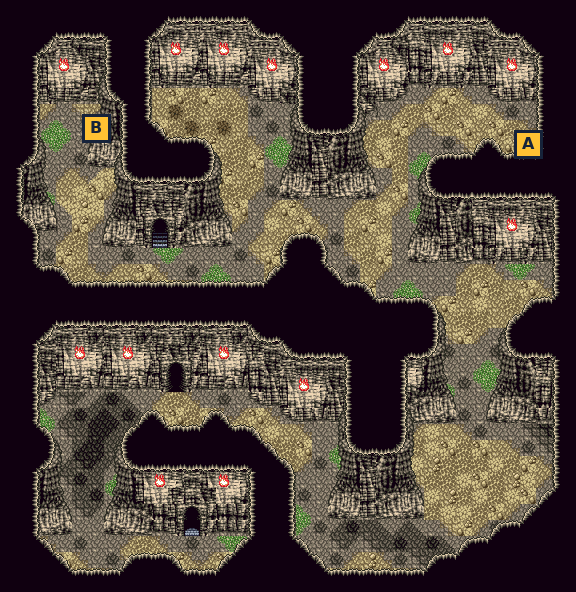
- A Wind Hood
- B N. Pill
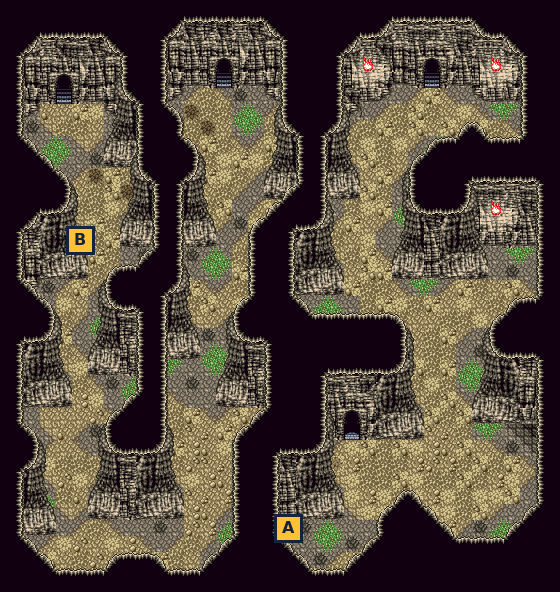
- A Maelstrom
- B Gold Pill
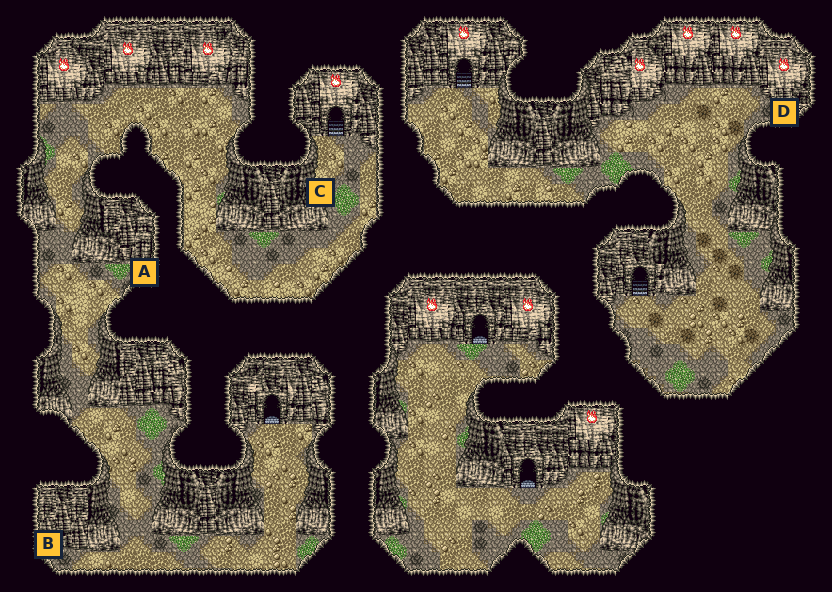
- A Red Tachi
- B S. Dew
- C Maelstrom
- D Kunai
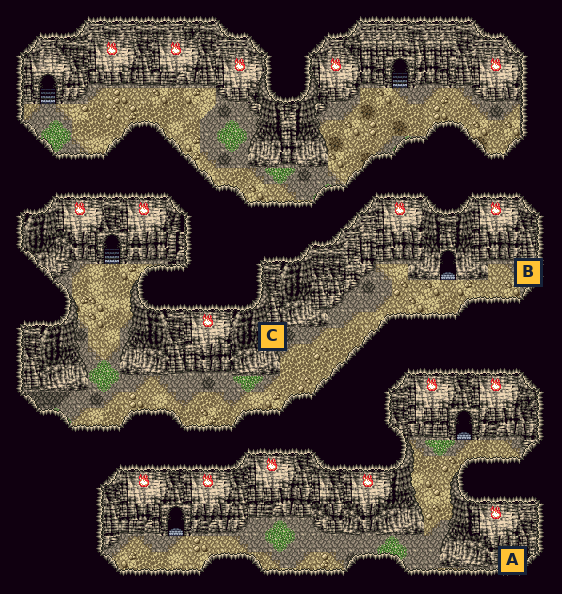
- A ChainPill
- B Cloak
- C Herb
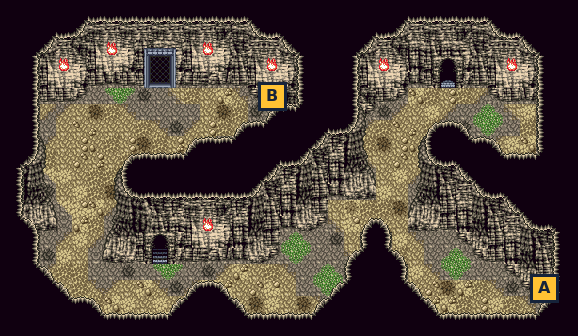
- A Star Helm
- B H. Water
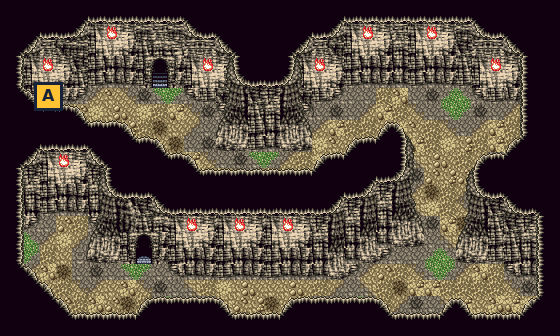
- A Herb Legs
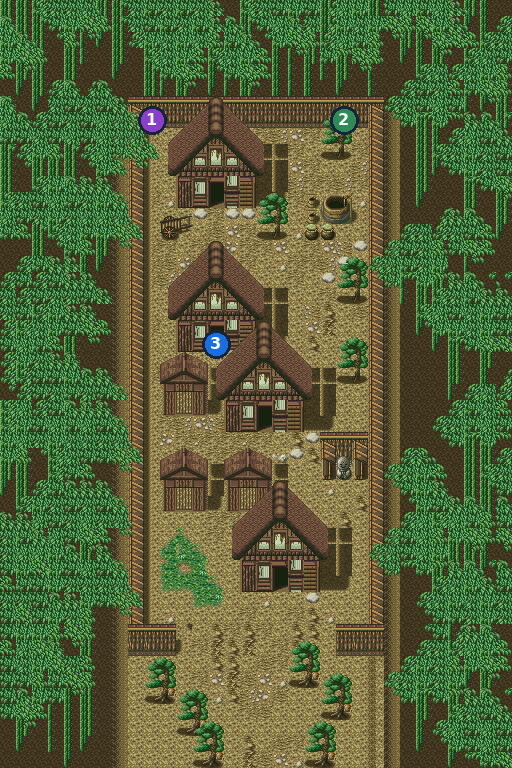
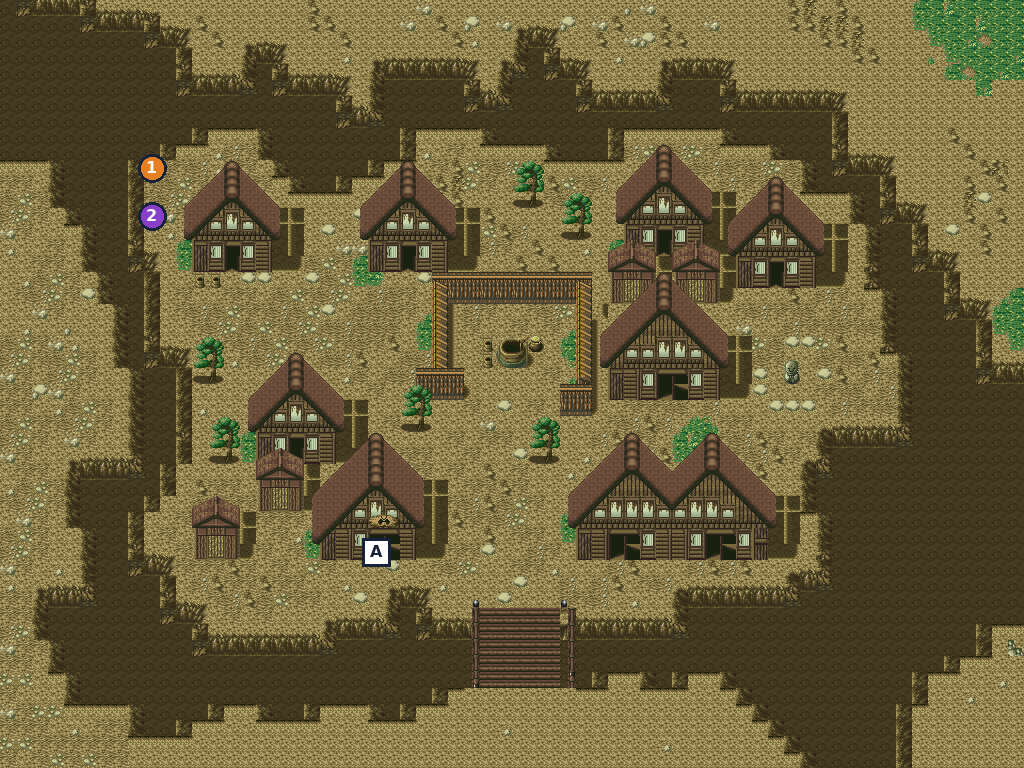
- 1Bushido pupil — ‘way of the warrior’ (bushido master’s quest) checklist
- 2Snake Youkai — summon Kushinada
- AArmor shop
🛒 Shops in this chapter
Herai Village — Items
| Herb | 4 G |
| H. Water | 8 G |
| Pill | 6 G |
| Sandalwd. | 6 G |
| Wake Dust | 6 G |
| Reviver | 10 G |
big north house
Herai Village — Items
| Pill | 6 G |
| Sandalwd. | 6 G |
| Wake Dust | 6 G |
| Reviver | 10 G |
| Maelstrom | 4 G |
| Reishi | 4 G |
big north-east house. Reishi is one of the five offerings for the Jizaiten summon in Yokohama. Inn: big south-east house, 20 gold.
Niigata Village — Armor
| Tokin | 210 G |
| Kabuto | 420 G |
| Chain Mail | 680 G |
| Chain Legs | 330 G |
No weapon or item shop, no inn.
Shikoku: Beppu, Yamashiro & Mt. Tsurugi
📍 Okayama Village · Shikoku · Beppu Village · Youkai Village · Yamashiro Village · Five Mounds (relic shrines) · Mt. Tsurugi · Kyoto (Shinsengumi headquarters)
Doujigiri unmasks Okayama’s drunken ferryman, who takes you across to Shikoku. There, Lord Shimazu’s retainer Izou is hunting the secret of Mt. Tsurugi. Rescue the captive Yuuma, gather the five treasures of the Five Mounds, and seal the last Spirit Hole, where the fifth Great Sword, Onimaru, lies frozen.
⏳ Last chances in this chapter
- Tanukichi in Beppu: answer Yes. No costs 5 karma and loses the whole youkai village side quest.
- At the Mt. Tsurugi Spirit Hole answer Yes to both ‘Go with Natsume?’ prompts (+2). Any No costs 10 karma.
- Open the two chests in the cave below the Mt. Tsurugi altar before you examine Onimaru. After that the passage is shut for good.
- Don’t take Hijikata’s sword at the Kyoto headquarters unless you accept −10 karma and a theft mark at the Kongouyasha Shrine.
- ‘Go with Natsume?’ at the Mt. Tsurugi Spirit Hole details
- Chest: Gold Pill (Mt. Tsurugi (cave below the altar)) details
- Chest: Holy Orb (Mt. Tsurugi (cave below the altar)) details
- Tanukichi founds the Youkai Village (from Chapter 15) details
Full list across the game: Missables.
Walkthrough
- MainGo to Okayama Village and talk to the Ferryman by the gap in the east wall. Doujigiri recognises him: he isn’t human. The Ferryman admits he’s a harmless youkai who ferries boats because of his ancestors’ last wish, and he goes to wait at the pier.
- TipBefore this chapter the Ferryman only says he’s ‘drinkin”. The earlier Great Swords make remarks about him, but only Doujigiri gets him moving.
- SideYamashiro’s weapon shop (below) sells the Magoroku (1,350). That is what Takeaki in Okayama wants (see Ch. 4). → checklist
- MainThe pier is on the coast just south of Okayama. Talk to the Ferryman there and answer Yes to ‘Go to Shikoku?’. The return trip works the same way from the pier on Shikoku’s north coast, as often as you like.
- MainShikoku map: you land on the north coast. Beppu Village is to the south-west, Yamashiro Village is due south in the middle of the island, and Mt. Tsurugi is in the east. Five small shrines are scattered around (see the Five Mounds below).
- MainBeppu Village: the villagers gossip that samurai have taken over Yamashiro and that there’s a treasure on Mt. Tsurugi. The item shop is the house in the middle of the village. Beppu has no inn.
- SideOptional: the man in black on the benches in front of the big southern house is Sakamoto Ryouma. He mutters about Izou in Yamashiro, and Juurouta hurries you away before he realises you’re Shinsengumi. There’s no fight.
- SideImportant: the man in the far north-west corner of Beppu is a tanuki in disguise. Stand directly below him and talk to him while facing up; from any other side he just says ‘Being human sure is nice.’ When he changes back, answer Yes to ‘Believe him?’ (+2 karma). Yamato takes him to a quiet spot in the middle of Shikoku, and Tanukichi founds the youkai village there. → checklist
- WarningAnswering No to Tanukichi costs 5 karma and loses him for good, and with him the whole youkai-village side quest (Ch. 15) and its Furinkazan reward.
- MainYamashiro Village: on your first visit you overhear women worrying about a young man called Yuuma, who was taken away by samurai four days ago. Samurai guard the front door of the biggest house (north-west).
- MainEnter the big house on the east side, second from the top. Hifumi is crying there: samurai took her dear Yuuma to the biggest house. Juurouta notes that Yuuma knows Mt. Tsurugi well.
- MainWalk round to the back of the biggest house (north side, near the north wall). Yamato finds a back door. Answer Yes to ‘Go inside?’. Inside, head through the corridors to the room where Yuuma is held; going out the front would draw attention.
- MainIzou is interrogating Yuuma about the secret of Mt. Tsurugi. When he leaves for a break, two samurai guards doze off. Talk to one: you fight the guards (losing is a game over) and get the Jail Key. Talk to Yuuma to free him.
- MainOn your way out, Izou catches you. Beat him (losing is a game over). Yamato locks Izou and the guards in the cell with the Jail Key. Leave by the back door.
- MainReturn to Hifumi’s house. Yuuma is home and greets… his cat, Hifumi. As thanks he tells you the secret: set five treasures into the great rock at the top of Mt. Tsurugi to open a hidden passage. The treasures are hidden in the Five Mounds east of the village, and each must go on the rock in the same arrangement as the mounds.
- SideOptional: if Densuke, Kanpei and Kouryu are all in your party, the ninja Saizou appears in the far north-west corner of Yamashiro. Talk to him: he hides somewhere in the village. Each time you enter Yamashiro he picks one of two hiding places at random. Find him and talk to him again and he joins. → checklist
- SideOptional: a woman in the west house second from the top mentions a tree that shakes without wind. It is the tree by the east wall of Yamashiro. Face it from below and examine it: the god Naraenten asks you to bring the Kongoujou. Offer a Kongoujou later and Yamato can summon Naraenten. → checklist
- SideOptional: the ronin near the weapon shop (‘A man’s life is courage!’) is another bushido pupil for the Kyoto ronin (karma 20 or higher). → checklist
- TipYamashiro shops: weapon shop in the big north-east house, armor shop in the west house third from the top, item shop in the big east house third from the top, inn (20 gold) in the big south-east house. An old man and old woman drop hints: remember where each treasure was found, because a treasure only shows its worth once you put it in place.
- MainThe Five Mounds: five small shrines around Mt. Tsurugi, each holding one treasure. Examine the object in each shrine. Relic Gem: north of Mt. Tsurugi. Relic Key: east of Mt. Tsurugi. Relic Book: south-east. Relic Ring: south-west of Mt. Tsurugi, east of Yamashiro. Relic Pot: north-west of Mt. Tsurugi, in the middle of the island. They only give up their treasures after Yuuma has told you the secret.
- SideIn the Relic Book shrine (south-east), the monk Gennobou is looking for a God’sTear. Give him one and he joins as an NPC ally. The first God’sTear is in Asuka Underground (Ch. 14), so come back later. → checklist
- MainMt. Tsurugi: climb to the summit. On the way, Doujigiri senses a pulse from below and calls out to ‘Onimaru’, the last of the Five Great Swords. At the top is a rock altar with five bumps arranged like a star.
- MainPlace each treasure on the bump that points toward its shrine. Stand below a bump, face it and examine it; answer Yes to ‘Place a treasure on this rock?’ and then Yes only when the right one is offered (Crystal = Relic Gem, Jar = Relic Pot). Top bump: Relic Gem. Upper right: Relic Key. Lower right: Relic Book. Lower left: Relic Ring. Upper left: Relic Pot. The order doesn’t matter, and you can take a treasure back if you misplace it.
- MainWhen the last treasure is right, Izou and his men arrive. He wants the Spirit Hole’s power to overthrow the Shogun. Beat them (losing is a game over). Izou flees, and the rock in the middle of the altar has moved aside. Face it and examine it to climb down.
- WarningWhile any treasure sits on the altar, Juurouta won’t let you leave Mt. Tsurugi (take it back first). After Izou is beaten, you can’t leave at all until the Spirit Hole business is done, so come prepared.
- MainThe cave below has two chests (Gold Pill, Holy Orb). Grab them now. Then follow the cave on to the Spirit Hole.
- MainAt the Spirit Hole, Onimaru is frozen solid: all the spirit power that the sealed holes no longer release pours in here. Touya’s seal fails. Natsume decides to go into the Spirit Hole herself. Answer Yes to ‘Go with Natsume?’ and Yes again when it asks a second time (+2 karma). Yamato goes in with her, the seal holds, and ‘Natsume’s kiss restored your strength!!’.
- WarningKarma: answering No to either ‘Go with Natsume?’ costs 10 karma. The Spirit Hole is still sealed either way.
- MainExamine Onimaru. A poison mist knocks you out, and you overhear Lord Shimazu, Lord Mouri and Izou plotting to wake the other Spirit Holes. Mouri talks the others out of killing you. You come to and take the damaged sword (‘Got Onimaru!!’; it’s Broken Oni in the menu). Doujigiri says it won’t wake without more spirit power.
- MainHijikata, Kondo and Okita arrive: the Shogun himself has come to the Shinsengumi headquarters, and you must return to Kyoto at once. You are taken straight there.
- MainKyoto headquarters: Hijikata says the Shogun is in Kondo’s room. Walk up to the Shogun there. Yoshinobu explains that a new Spirit Hole has opened in Asuka and asks you to take the Shogun and him there. Talk to Yoshinobu to set off with them (the ‘Shoguns’ join as escorts). Only then do the guards at the gate let you out.
- TipAt headquarters, the Shinsengumi cook offers a free meal that restores your strength. Yamanami tells you the new Spirit Hole is south-west of Kyoto, in Asuka (Ch. 14).
- WarningHijikata’s sword still lies in the headquarters. Taking it gives the Izumi Kami but costs 10 karma, and the Kongouyasha Shrine counts it as theft (see Ch. 3).
Checklist
- Where
- Okayama Village: the Ferryman by the gap in the east wall; then the pier just south of Okayama
- How
- Talk to him while Doujigiri is with you. He then waits at the pier; answer Yes to ‘Go to Shikoku?’.
- Reward
- Free ferry between Honshu and Shikoku, any time
- Opens
- Ch. 13: after Doujigiri joins (Ch. 12)
- Where
- Yamashiro Village: Hifumi’s house (big east house, second from the top) and the biggest house (north-west, back door)
- How
- Talk to Hifumi, enter by the back door, beat the sleeping guards for the Jail Key, free Yuuma, beat Izou, then visit Hifumi’s house again.
- Reward
- The secret of Mt. Tsurugi; the Five Mounds shrines open
- Opens
- Ch. 13
- Closes
- never (story)
- Where
- Five shrines on the Shikoku map: Relic Gem (north of Mt. Tsurugi), Relic Key (east), Relic Book (south-east), Relic Ring (south-west, east of Yamashiro), Relic Pot (north-west, centre of the island)
- How
- After Yuuma’s secret, examine the object in each shrine. On Mt. Tsurugi, place each on the bump facing its shrine: top Gem, upper right Key, lower right Book, lower left Ring, upper left Pot.
- Reward
- Opens the way to the Mt. Tsurugi Spirit Hole
- Opens
- Ch. 13: after Yuuma returns
- Closes
- never (story)
- Where
- Mt. Tsurugi: the Spirit Hole below the summit
- How
- When Natsume heads into the Spirit Hole, answer Yes, and Yes again at the second prompt.
- Reward
- ‘Natsume’s kiss restored your strength!!’ (party restored)
- Opens
- Ch. 13
- Closes
- one-time choice
- Where
- Yamashiro Village: far north-west corner at first, then one of two random hiding places
- How
- Have Densuke, Kanpei AND Kouryu in the party, or he doesn’t appear. Talk to him, then find him again: every time you enter the village he picks one of two spots at random (on the roof of the biggest house in the north-west, or on the roof of the east item-shop house).
- Reward
- NPC ally Saizou
- Opens
- Ch. 13 (Kanpei: Kyoto inn from Ch. 4; Densuke: Edo, 400 gold; Kouryu: Izumo, a Power Orb)
- Where
- Yamashiro Village: the tree by the east wall
- How
- Face the tree from below and examine it to meet Naraenten. Come back with a Kongoujou, examine the tree and answer Yes to ‘Offer the Kongoujou?’.
- Reward
- You choose who learns Naraenten (the Kongoujou is used up)
- Opens
- Ch. 13
- Where
- Shikoku: the Relic Book shrine (south-east)
- How
- Talk to the monk while carrying a God’sTear and answer Yes to ‘Give God’s Tear to him?’.
- Reward
- NPC ally Gennobou (costs 1 God’sTear)
- Opens
- Ch. 13; the first God’sTear is the chest on Asuka Underground B1 (Ch. 14)
- Where
- Yamashiro Village: the ronin near the weapon shop and the samurai at the top of the village
- How
- Only if your karma is below 20: talking to them starts a fight. Win = gold, −2 karma and the person is gone; lose = you pay.
- Reward
- Ronin 600 (lose −700) · Samurai 1,200 (lose −2,500)
- Opens
- Ch. 13
Treasure chests (6)
| Item | Area | Where | |
|---|---|---|---|
| Reishi | Mt. Tsurugi | east side, on the ledge just below and right of the summit | |
| S. Dew | Mt. Tsurugi | middle of the mountain, west of centre | |
| Gale Sword | Mt. Tsurugi | far west ledge, low on the mountain | |
| N. Pill | Mt. Tsurugi | south-east, low on the mountain | |
| Gold Pill | Mt. Tsurugi (cave below the altar) | west part of the cave The cave closes after you take Onimaru. ⚠ Gone after Chapter 13 | |
| Holy Orb | Mt. Tsurugi (cave below the altar) | north part of the cave The cave closes after you take Onimaru. ⚠ Gone after Chapter 13 |
Bosses & key battles
🗺️ Maps for this chapter (13)
Numbers mark people and events worth a visit; letters A, B, C… mark treasure chests. A pin on a door means the person is inside that building. Pins show everything that can appear on the map over the whole game, so some people only turn up later in the story. Tap a map to open it full size.
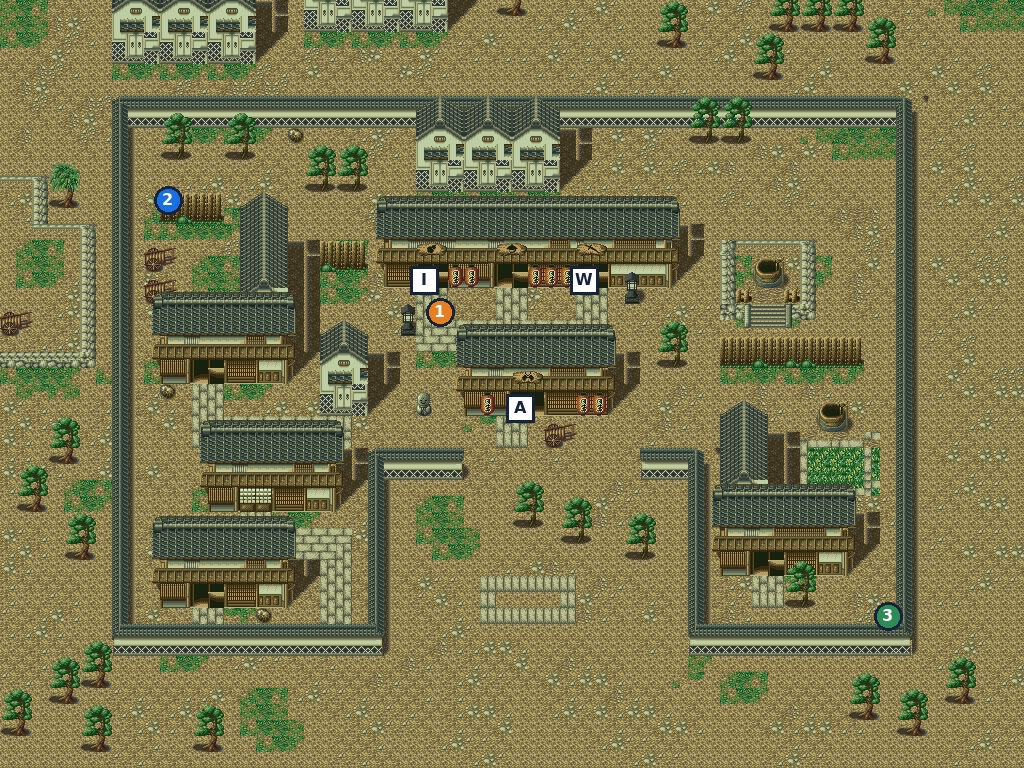
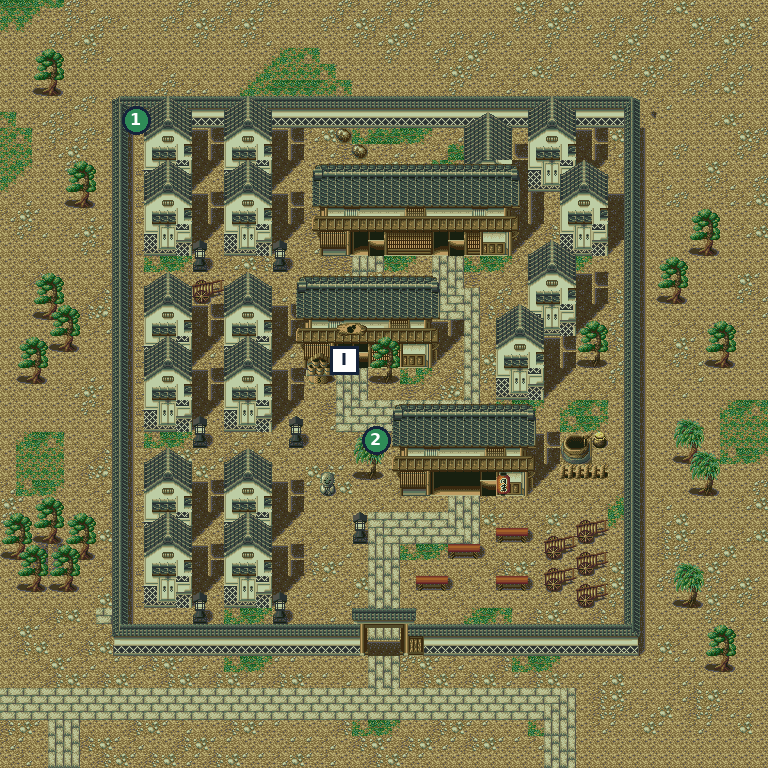
- 1Tanukichi — Youkai Village, karma +2 / −5 checklist
- 2Ayashibi (in disguise) — Youkai Village, karma +2 / −2
- IItem shop
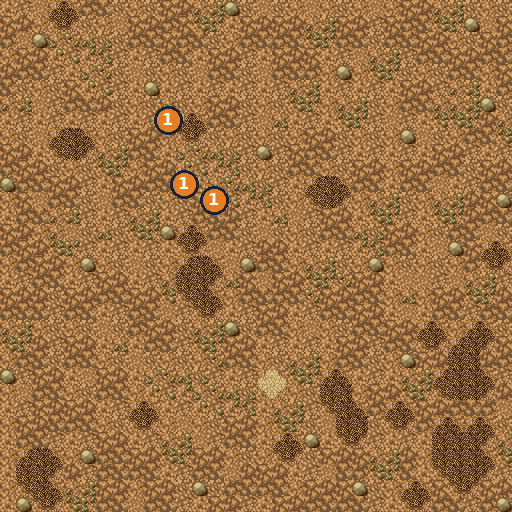
- 1Tanukichi — gives Rice Ball, gives Furinkazan checklist
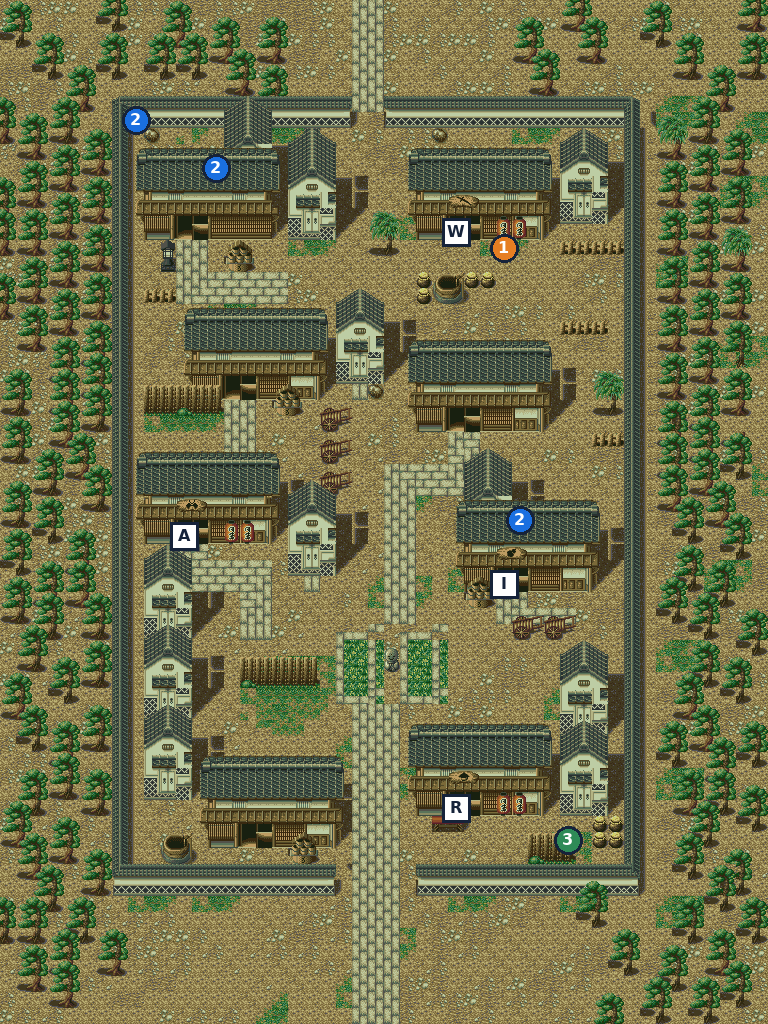
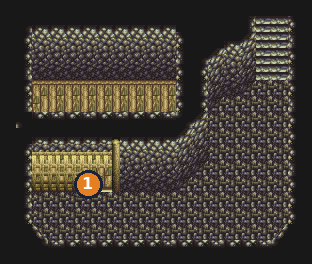
- 1Jail guards — gives Jail Key
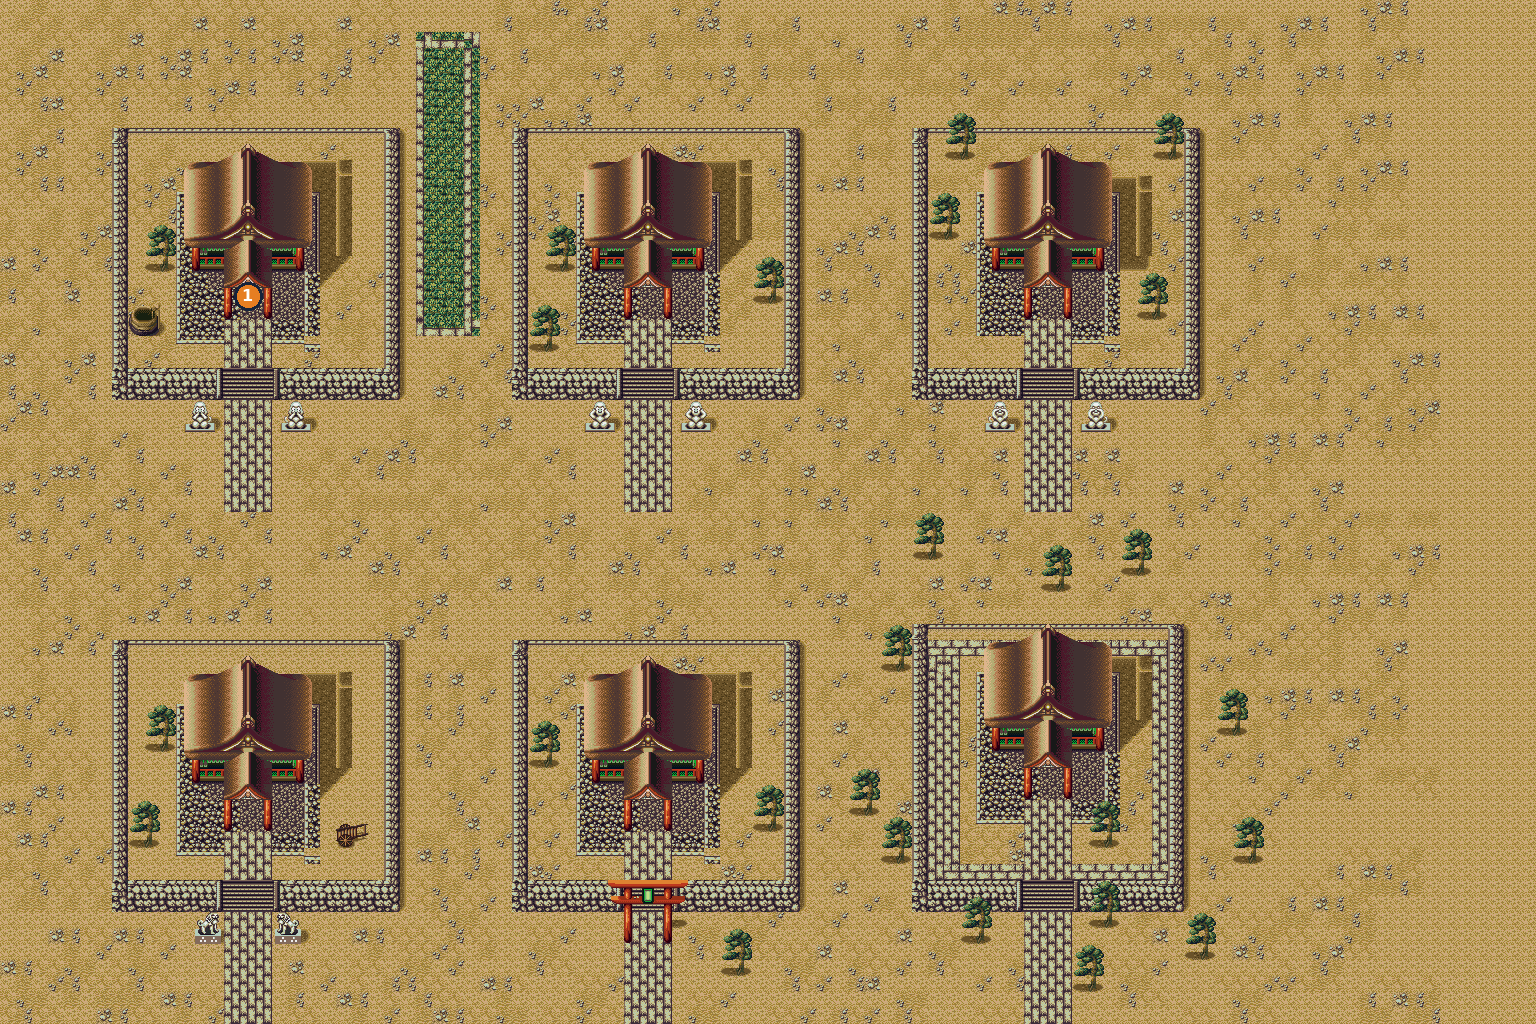
- 1Search spot — gives Relic Pot
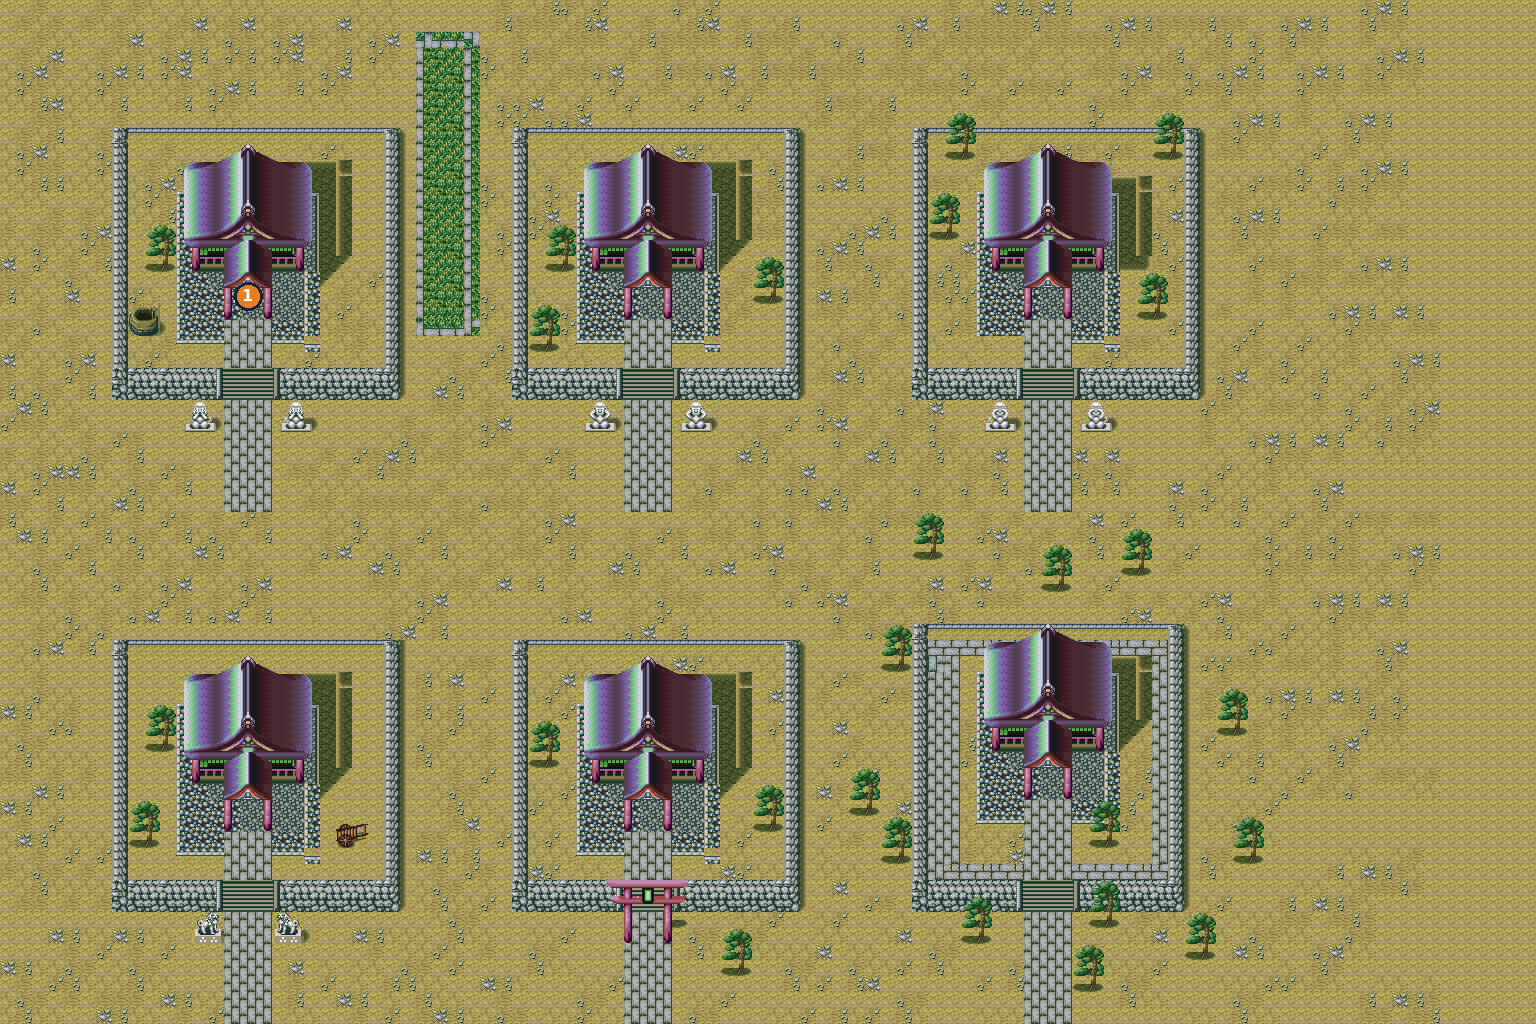
- 1Search spot — gives Relic Ring
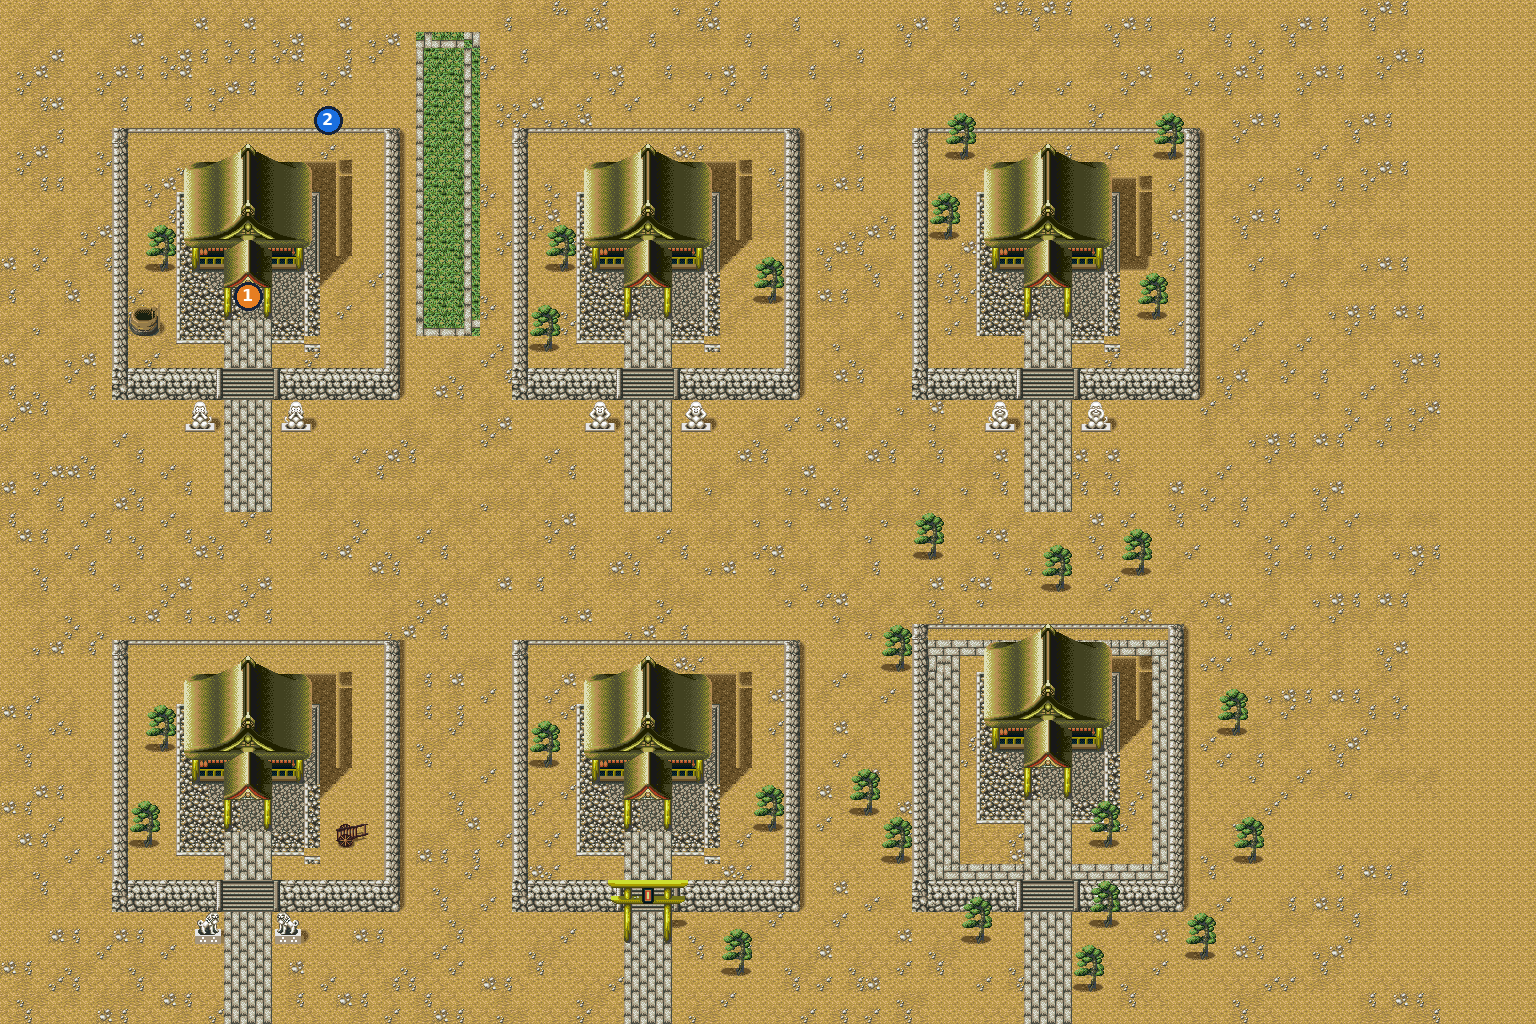
- 1Search spot — gives Relic Book
- 2Gennobou — joins checklist
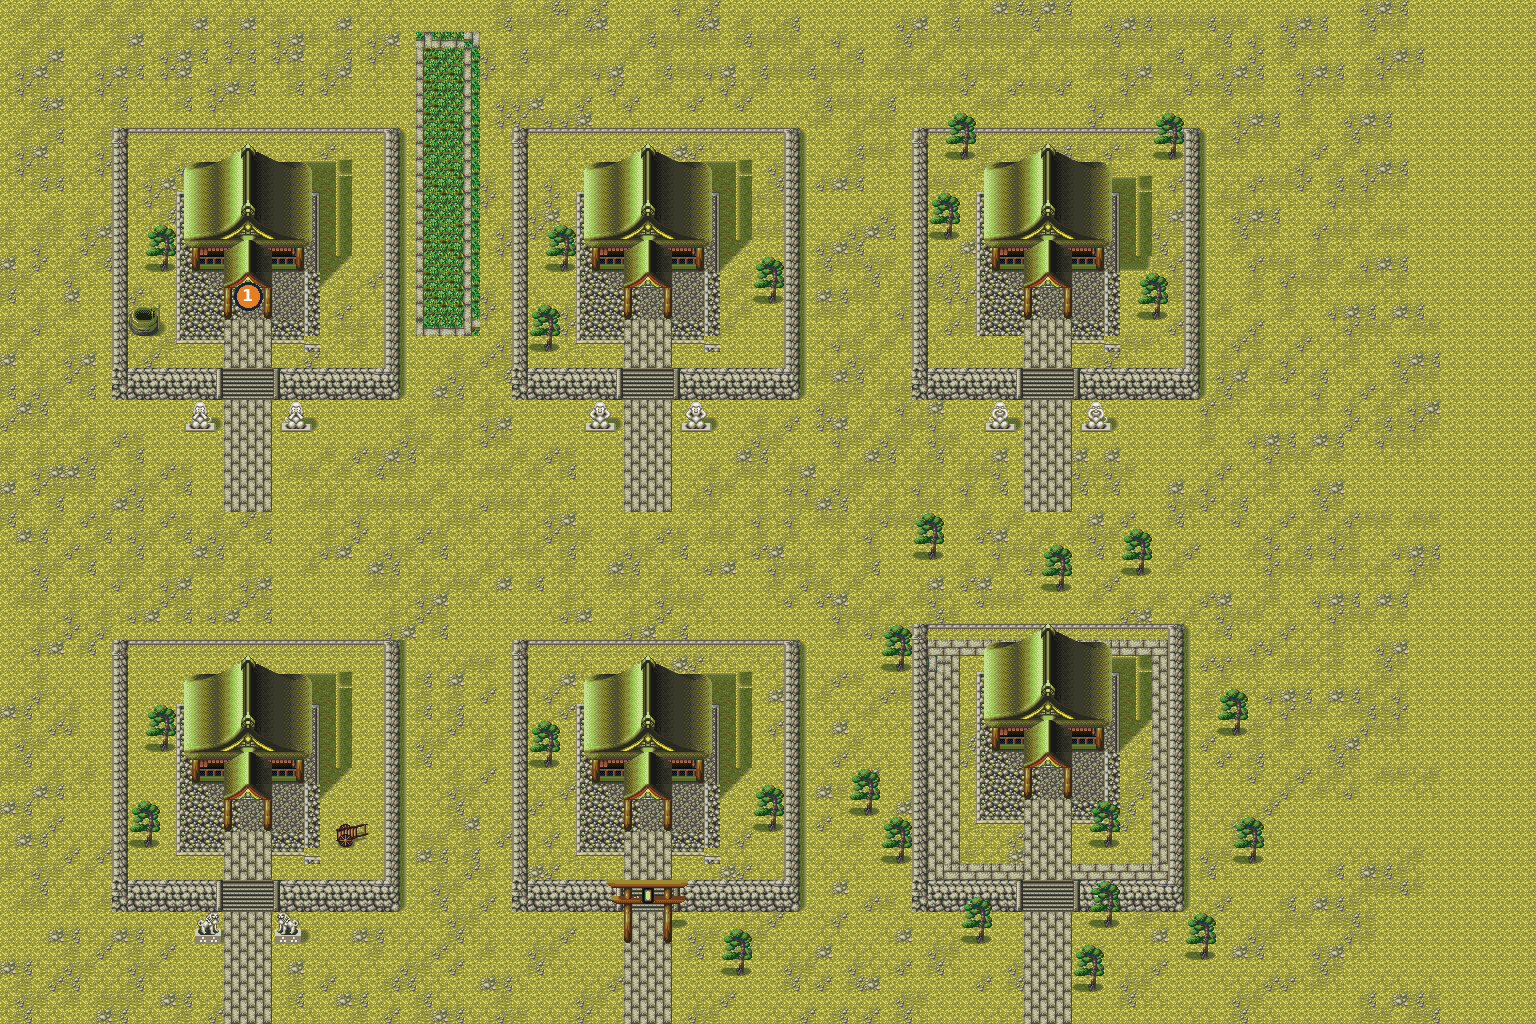
- 1Search spot — gives Relic Key
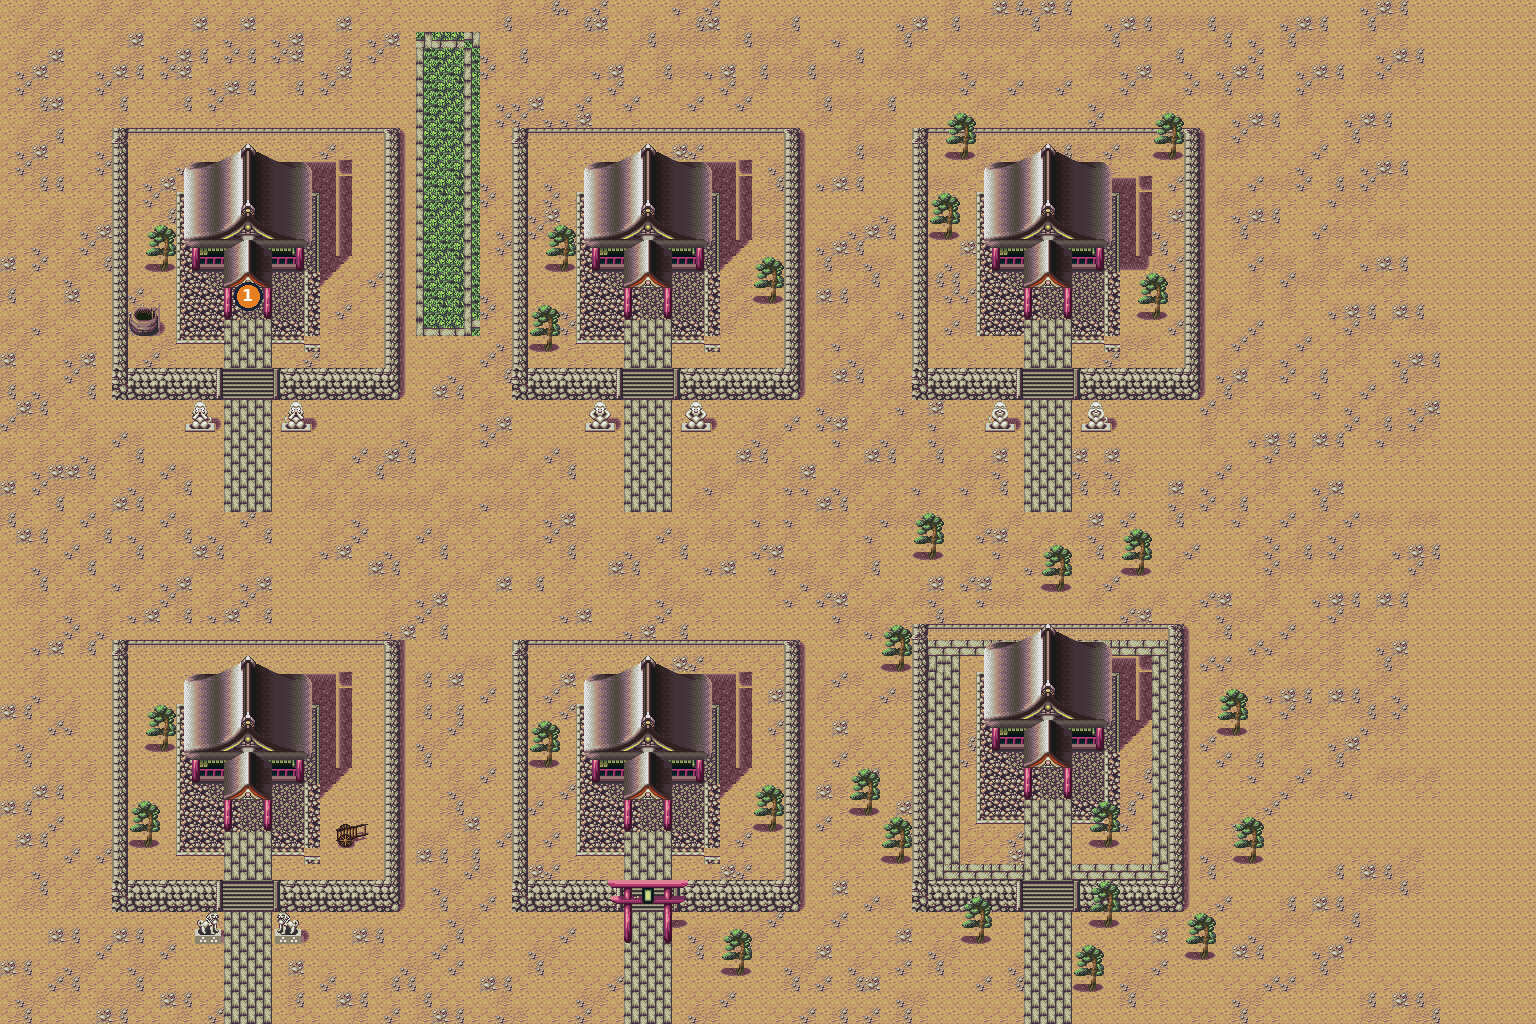
- 1Search spot — gives Relic Gem
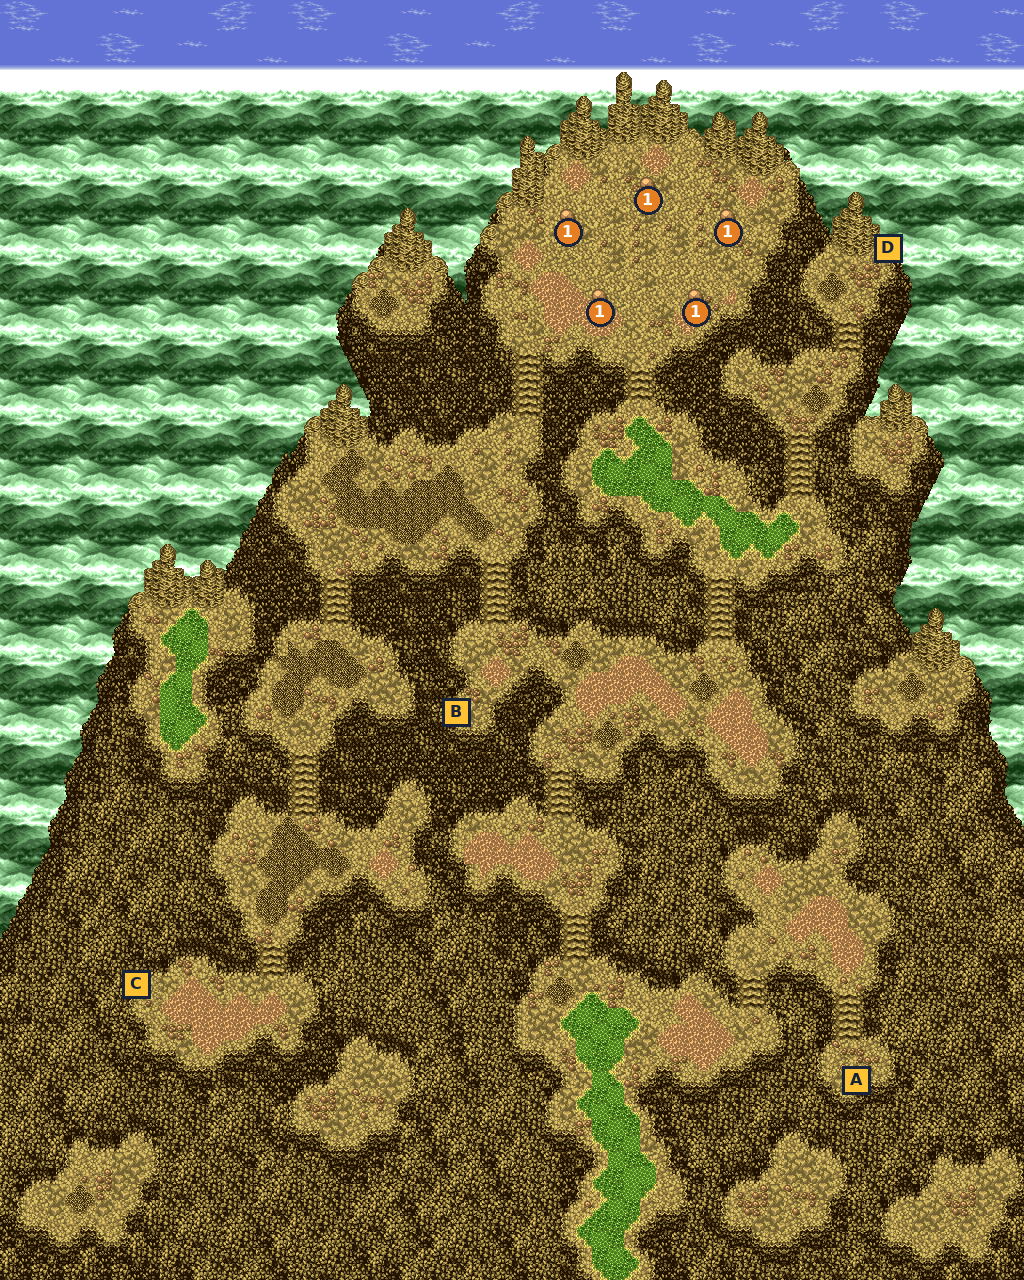
- 1Relic stones — place the five relics
- A N. Pill
- B S. Dew
- C Gale Sword
- D Reishi
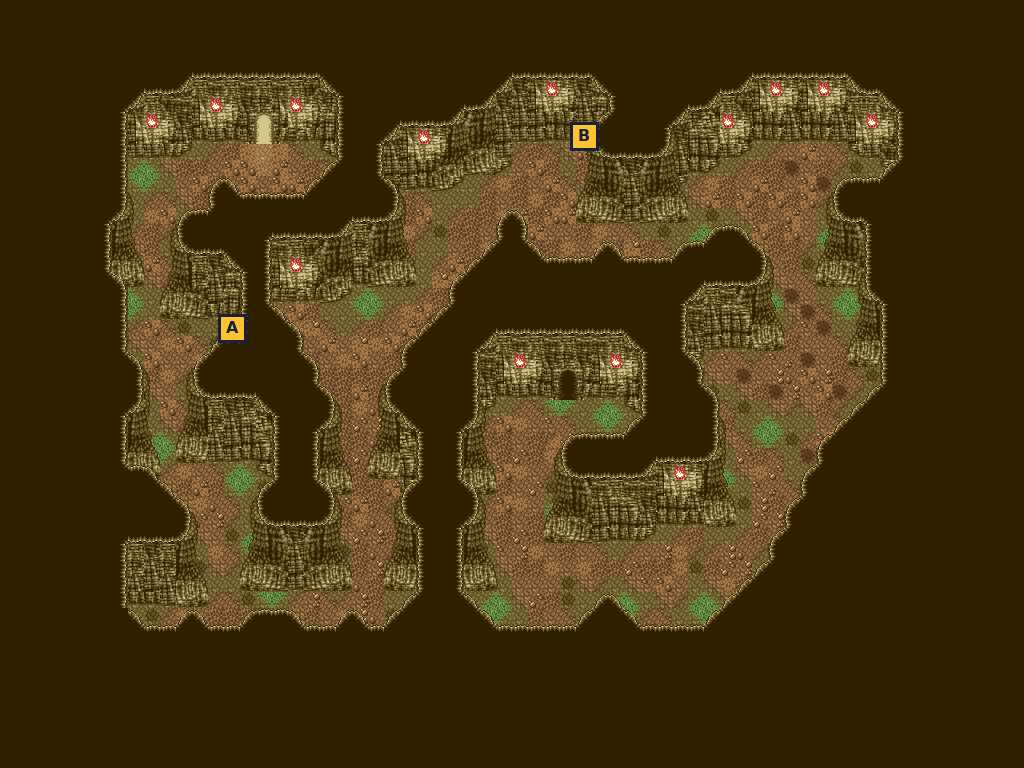
- A Gold Pill
- B Holy Orb
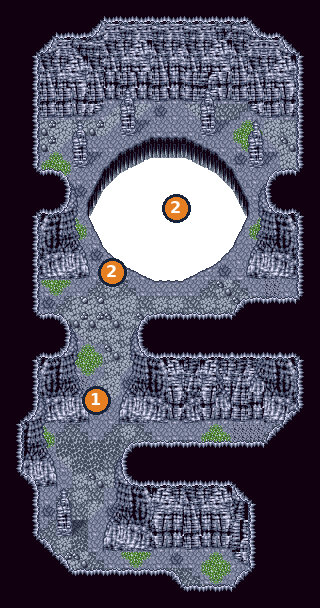
🛒 Shops in this chapter
Beppu Village — Items
| Herb | 4 G |
| N. Pill | 20 G |
| H. Water | 8 G |
| S. Dew | 16 G |
| Pill | 6 G |
| Reviver | 10 G |
| Maelstrom | 4 G |
house in the middle of the village. No inn in Beppu.
Yamashiro Village — Weapons
| Dawn Sword | 840 G |
| Seven Star | 1,090 G |
| Magoroku | 1,350 G |
| Kama Spear | 410 G |
| Vajra | 550 G |
| Sun Staff | 970 G |
| Naginata | 590 G |
| Kirisame | 590 G |
| Hourai Bow | 990 G |
| Jizai Claw | 450 G |
| Tiger Claw | 800 G |
| Shura Claw | 800 G |
| Matchlock | 6,000 G |
big north-east house. The Magoroku is what Takeaki (Okayama) wants.
Yamashiro Village — Armor
| Kabuto | 420 G |
| Star Helm | 510 G |
| Spike Helm | 640 G |
| Crane Robe | 1,020 G |
| Lion Robe | 810 G |
| Ooyoroi | 1,050 G |
| Genji Armr | 1,320 G |
| Swift Shoe | 460 G |
| Herb Legs | 590 G |
west house, third from the top
Yamashiro Village — Items
| N. Pill | 20 G |
| S. Dew | 16 G |
| Sandalwd. | 6 G |
| Wake Dust | 6 G |
big east house, third from the top. Inn: big south-east house, 20 gold.
Ishibutai & Asuka Underground (Onimaru)
📍 Ishibutai · Asuka Underground · Hokutomaru’s cave (Kyushu, optional)
Escort the Shogun and Yoshinobu to the new Spirit Hole under the stones of Asuka. Solve the monkey-statue riddle, face Lord Shimazu and Izou, and learn the truth about the Spirit Holes when the Shogun turns on you. At the bottom your heroes awaken the power of the Kishin, and Onimaru, the last Great Sword, joins you.
⏳ Last chances in this chapter
- Asuka Underground closes once you return to Ishibutai with Onimaru. Collect all nine chests on B1 to B5 before (or while) walking back up.
- Check your equipment after picking the four Great Swords back up at the bottom of the Spirit Hole.
- ‘Attack Shimazu and his men?’ (twice) details
- Chest: God’sTear (Asuka Underground B1) details
- Chest: Gold Pill (Asuka Underground B1) details
- Chest: N. Pill (Asuka Underground B2) details
- Chest: S. Dew (Asuka Underground B2) details
- Chest: Kami Charm (Asuka Underground B3) details
- Chest: Shuriken (Asuka Underground B3) details
- Chest: Life Orb (Asuka Underground B4) details
- Chest: Oni Orb (Asuka Underground B5) details
- Chest: Feather (Asuka Underground B5) details
Full list across the game: Missables.
Walkthrough
- MainLeave Kyoto with the Shogun and Yoshinobu. Ishibutai stands south-west of Kyoto on the western Honshu map: a ring of stones with a row of monkey statues.
- TipWithout the Shogun and Yoshinobu (set off from the Kyoto headquarters first, Ch. 13), Juurouta says you have no business here.
- MainExamine the right-hand of the two big rocks in the middle. The carved words give a riddle about the ten monkey statues in the row above: find the monkeys dressed like the leftmost one, see how the monkey to the right of the second one from the right is dressed, and touch the third monkey from the left that is dressed that way.
- MainThe answer: face the monkey statue that is 8th from the left (3rd from the right) and examine it. The ground opens just below the two big rocks. Don’t touch the other statues. Walk into the opening to enter Asuka Underground.
- MainAsuka Underground has five floors (B1 to B5), each with a staircase down. Open the chests as you go; the list is below. B1’s chest in the north-west corner holds a God’sTear, the one Gennobou on Shikoku wants.
- MainB5 has a Jizo statue on the east side. Save there. The way to the Spirit Hole is in the north-east part of the floor.
- MainAt the Spirit Hole, Lord Shimazu, Lord Mouri, Izou and Ryouma are already waiting. The Shogun orders you to strike them down, and you are asked twice ‘Attack Shimazu and his men?’. Yes starts a fight with Izou (losing is a game over). If you say No both times, Shimazu seizes Natsume and Touya deals with Izou himself. The story is the same either way and neither answer changes karma.
- MainShimazu is not himself: a strange technique flattens Yoshinobu. He tells you the Shogun has abused the Spirit Holes and thrown the land’s spirit energy out of balance. Beaten by the Shadows’ power, he withdraws, saying he’ll get ahead of you in Ezo. The Shogun then claims the Spirit Hole for himself. When Yamato refuses, the Shogun attacks and the party falls into the Spirit Hole.
- MainAt the bottom, an Orb of Light speaks to Yamato like a parent and awakens the power of the Kishin sleeping inside him. When you come to, all four heroes have transformed. Natsume heard her mother’s voice, Juurouta her late grandfather.
- MainThe four Great Swords (Juzumaru, Mikazuki, Oodenta and Doujigiri) fell in with you and lie on the floor, along with the broken Onimaru. Talk to each sword to take it back. Check everyone’s equipment afterwards, since the swords were taken from you in the fall.
- MainAfter the fourth sword, you see Onimaru and slip into another of Hokutomaru’s memories: his party fights the Amanojaku, who dug a false Spirit Hole into the spirit veins. If Hokutomaru’s side loses, the memory restarts. Minami’s memory returns: she is a youkai.
- MainOnimaru wakes and joins you (‘Got Onimaru!!’). He heard his father’s voice at the bottom of the Spirit Hole and says the man who forced his power to open this hole wasn’t human. He is after the Spirit Hole in Ezo. The Five Great Swords sealed their own souls in their blades to guard the land.
- TipFrom now on your heroes can take the transformed form in battle; Juzumaru says it raises strength and speed.
- WarningLast chance: walk back up through B5 to B1 and open anything you missed. Once you step out onto Ishibutai with Onimaru, the way down is closed for good (‘We have no more business here’).
- MainBack on the surface, Yamato declares: ‘Next stop, Ezo!!’. Meanwhile the Shogun comes to, finds no spirit energy left in the Spirit Hole and swears revenge on the Shadows. Head north to Umibe Village (Ch. 15).
- SideOptional: the cave south-west of Takachiho on Kyushu, which pushed you back before, now opens: Onimaru remembers it. It is a long five-part cave full of chests (listed below), and you cannot transform inside. At the far end, Minami’s voice asks you to protect the land and fully heals the party every time you return. → checklist
- SideWith the God’sTear from B1, you can recruit Gennobou in the Relic Book shrine on Shikoku (Ch. 13). Take the ferry from the pier south of Okayama. → checklist
Checklist
- Where
- Ishibutai: the row of ten monkey statues north of the two big rocks
- How
- Read the carved words on the right-hand big rock, then examine the statue 8th from the left (3rd from the right).
- Reward
- Opens Asuka Underground
- Opens
- Ch. 14 (the Shogun and Yoshinobu must be with you)
- Closes
- never (story)
- Where
- Asuka Underground B5: the Spirit Hole
- How
- Yes (either time) = you fight Izou yourself. No twice = Touya handles Izou in a cutscene.
- Reward
- Only the fight (EXP) differs
- Opens
- Ch. 14
- Closes
- one-time choice
- Where
- Asuka Underground B5: bottom of the Spirit Hole
- How
- After the fall, take back the four Great Swords, watch Hokutomaru’s memory (Amanojaku), then Onimaru wakes.
- Reward
- Onimaru (the fifth Great Sword); transformed forms available
- Opens
- Ch. 14
- Closes
- never (story)
- Where
- Kyushu map: the cave between Takachiho and Kagoshima (south-west of Takachiho, just north of Kagoshima)
- How
- Enter after you have Onimaru; the seal breaks. Go through all five areas to the end and face the spot where Minami’s voice speaks.
- Reward
- 34 chests; a full heal at the end (repeatable); flag needed for the Seima Doji summon
- Opens
- Ch. 14: after Onimaru (flag 0FF)
- Closes
- Ch. 29: point of no return
- Where
- Asuka Underground B1, chest in the north-west corner
- How
- Open the chest; bring it to Gennobou in the Relic Book shrine on Shikoku.
- Reward
- God’sTear (→ NPC ally Gennobou)
- Opens
- Ch. 14
- Closes
- Asuka closes after Onimaru; later God’sTears exist (Hokutomaru’s cave, Ezo cave, Man-Eating Mountain, Mt. Fuji, Sky Pavilion)
Treasure chests (43)
| Item | Area | Where | |
|---|---|---|---|
| God’sTear | Asuka Underground B1 | north-west corner The first God’sTear in the game: Gennobou (Shikoku, Ch. 13) joins for one. ⚠ Gone after Chapter 14 | |
| Gold Pill | Asuka Underground B1 | east part ⚠ Gone after Chapter 14 | |
| N. Pill | Asuka Underground B2 | east side, upper chest ⚠ Gone after Chapter 14 | |
| S. Dew | Asuka Underground B2 | east side, lower chest ⚠ Gone after Chapter 14 | |
| Kami Charm | Asuka Underground B3 | north-west corner ⚠ Gone after Chapter 14 | |
| Shuriken | Asuka Underground B3 | east part ⚠ Gone after Chapter 14 | |
| Life Orb | Asuka Underground B4 | south-west corner ⚠ Gone after Chapter 14 | |
| Oni Orb | Asuka Underground B5 | north part, left of centre ⚠ Gone after Chapter 14 | |
| Feather | Asuka Underground B5 | south of the centre ⚠ Gone after Chapter 14 | |
| Herb | Hokutomaru’s cave (entrance cave) | north part (left of the pair) ⚠ Gone after Chapter 29 | |
| Pill | Hokutomaru’s cave (entrance cave) | north part (right of the pair) ⚠ Gone after Chapter 29 | |
| H. Water | Hokutomaru’s cave (entrance cave) | north-east ⚠ Gone after Chapter 29 | |
| S. Dew | Hokutomaru’s cave (entrance cave) | north-west ⚠ Gone after Chapter 29 | |
| Sandalwd. | Hokutomaru’s cave (entrance cave) | middle ⚠ Gone after Chapter 29 | |
| N. Pill | Hokutomaru’s cave (entrance cave) | east side, middle ⚠ Gone after Chapter 29 | |
| Smoke Bmb | Hokutomaru’s cave (entrance cave) | south-west ⚠ Gone after Chapter 29 | |
| Wake Dust | Hokutomaru’s cave (entrance cave) | south-east ⚠ Gone after Chapter 29 | |
| Reviver | Hokutomaru’s cave (2nd area) | north-west corner ⚠ Gone after Chapter 29 | |
| Feather | Hokutomaru’s cave (2nd area) | north-west part ⚠ Gone after Chapter 29 | |
| ChainPill | Hokutomaru’s cave (2nd area) | west part ⚠ Gone after Chapter 29 | |
| Heart Orb | Hokutomaru’s cave (2nd area) | south-west ⚠ Gone after Chapter 29 | |
| Kobu Herb | Hokutomaru’s cave (2nd area) | south, left of centre ⚠ Gone after Chapter 29 | |
| Gold Pill | Hokutomaru’s cave (2nd area) | north, middle ⚠ Gone after Chapter 29 | |
| Cloak | Hokutomaru’s cave (2nd area) | north-east ⚠ Gone after Chapter 29 | |
| Reishi | Hokutomaru’s cave (2nd area) | east part ⚠ Gone after Chapter 29 | |
| Life Orb | Hokutomaru’s cave (3rd area) | north part ⚠ Gone after Chapter 29 | |
| Remedy | Hokutomaru’s cave (3rd area) | north-west ⚠ Gone after Chapter 29 | |
| Oni Orb | Hokutomaru’s cave (3rd area) | east side, middle ⚠ Gone after Chapter 29 | |
| Rice Ball | Hokutomaru’s cave (3rd area) | south part ⚠ Gone after Chapter 29 | |
| God’sTear | Hokutomaru’s cave (3rd area) | south-east ⚠ Gone after Chapter 29 | |
| Guard Orb | Hokutomaru’s cave (4th area) | north-west corner ⚠ Gone after Chapter 29 | |
| Sage Pill | Hokutomaru’s cave (4th area) | north, left of centre ⚠ Gone after Chapter 29 | |
| M. Water | Hokutomaru’s cave (4th area) | west of centre ⚠ Gone after Chapter 29 | |
| R. Salts | Hokutomaru’s cave (4th area) | north, middle ⚠ Gone after Chapter 29 | |
| Holy Orb | Hokutomaru’s cave (4th area) | north-east ⚠ Gone after Chapter 29 | |
| Maelstrom | Hokutomaru’s cave (4th area) | north-east corner ⚠ Gone after Chapter 29 | |
| Haze Bell | Hokutomaru’s cave (deepest area) | north-west ⚠ Gone after Chapter 29 | |
| Speed Orb | Hokutomaru’s cave (deepest area) | south-west ⚠ Gone after Chapter 29 | |
| K. Cure | Hokutomaru’s cave (deepest area) | south-west, lower ⚠ Gone after Chapter 29 | |
| Power Orb | Hokutomaru’s cave (deepest area) | east of centre ⚠ Gone after Chapter 29 | |
| Luck Charm | Hokutomaru’s cave (deepest area) | east part ⚠ Gone after Chapter 29 | |
| D. Dew | Hokutomaru’s cave (deepest area) | south-east ⚠ Gone after Chapter 29 | |
| Wonder Rx | Hokutomaru’s cave (deepest area) | south-east, far right ⚠ Gone after Chapter 29 |
Bosses & key battles
🗺️ Maps for this chapter (10)
Numbers mark people and events worth a visit; letters A, B, C… mark treasure chests. A pin on a door means the person is inside that building. Pins show everything that can appear on the map over the whole game, so some people only turn up later in the story. Tap a map to open it full size.
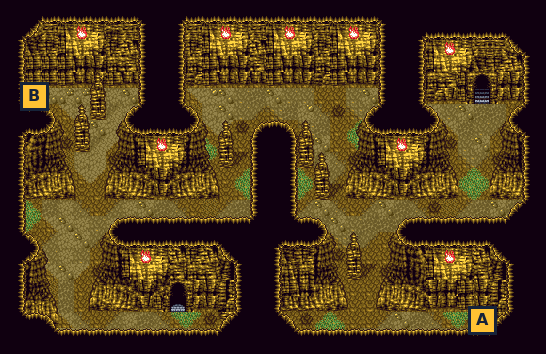
- A Gold Pill
- B God’sTear
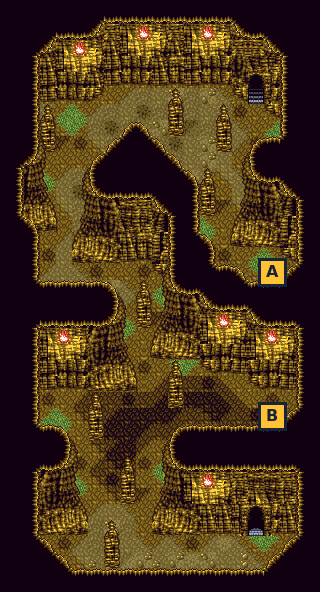
- A N. Pill
- B S. Dew
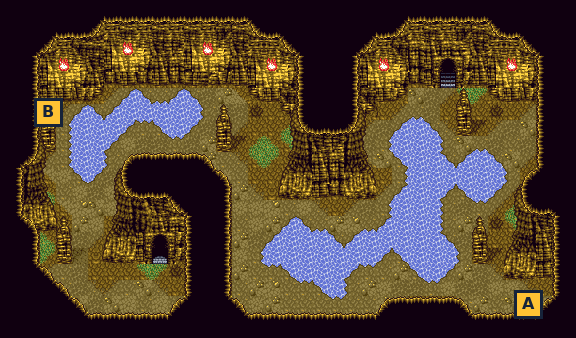
- A Shuriken
- B Kami Charm
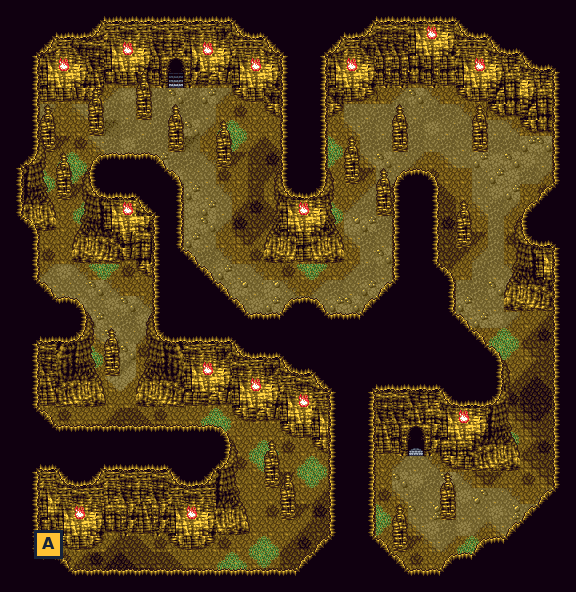
- A Life Orb
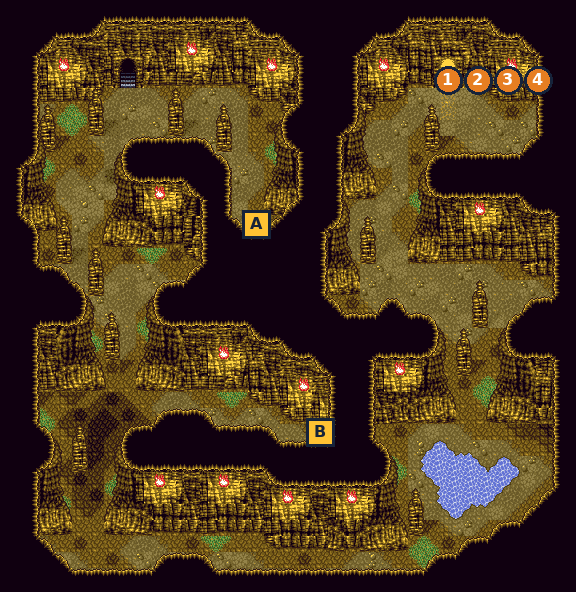
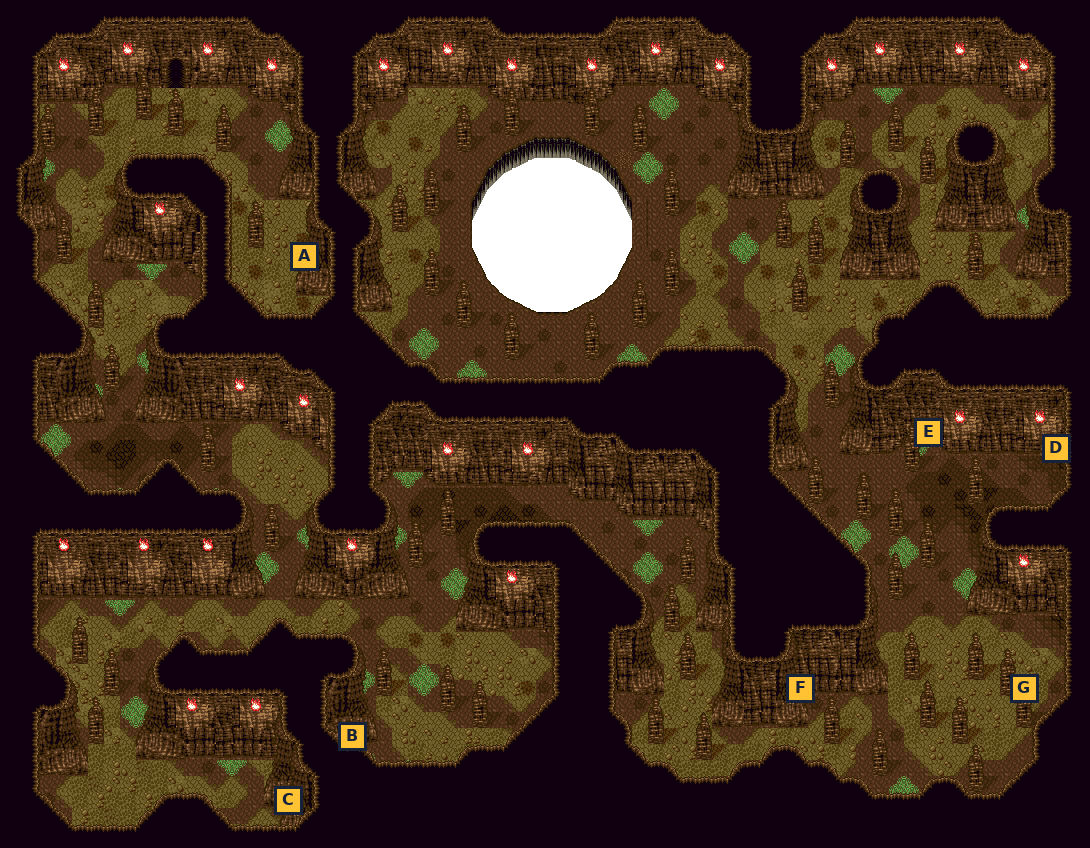
- A Haze Bell
- B Speed Orb
- C K. Cure
- D Luck Charm
- E Power Orb
- F D. Dew
- G Wonder Rx
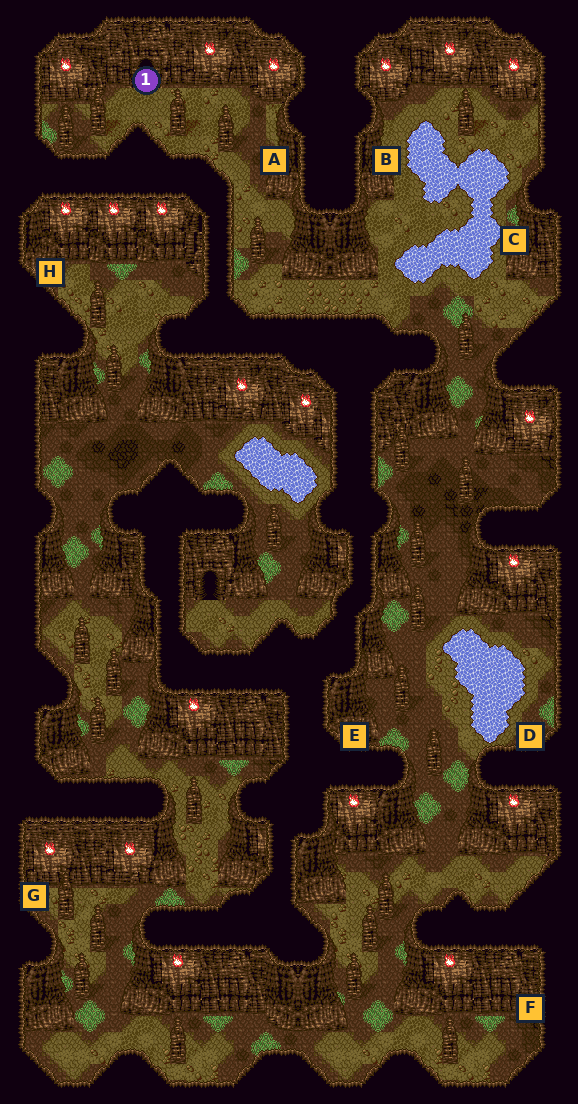
- 1Hokutomaru — summon Seima Doji checklist
- A Herb
- B Pill
- C H. Water
- D N. Pill
- E Sandalwd.
- F Wake Dust
- G Smoke Bmb
- H S. Dew
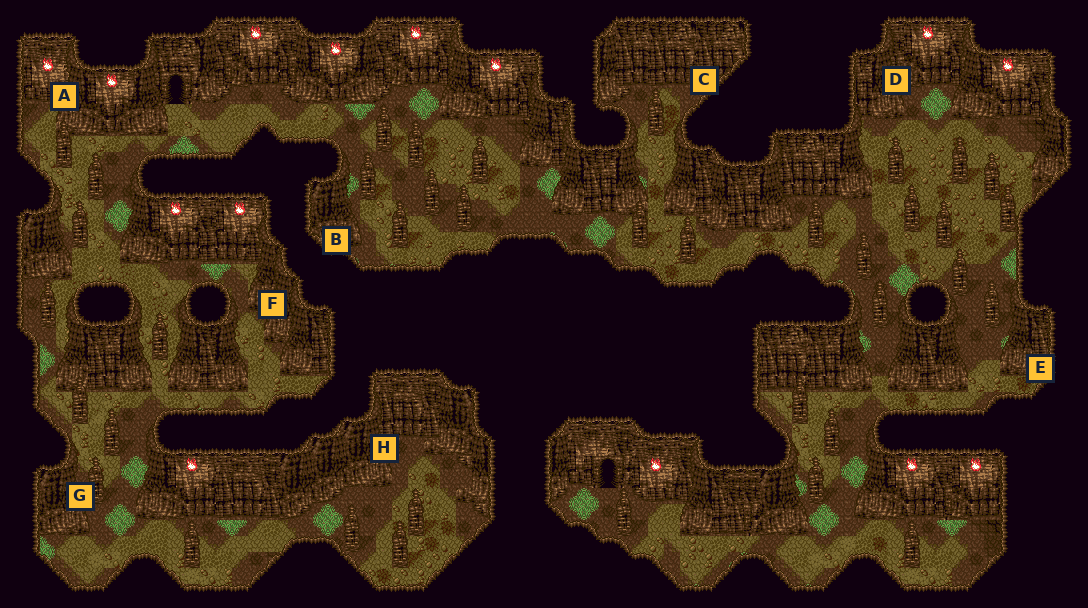
- A Reviver
- B Feather
- C Gold Pill
- D Cloak
- E Reishi
- F ChainPill
- G Heart Orb
- H Kobu Herb
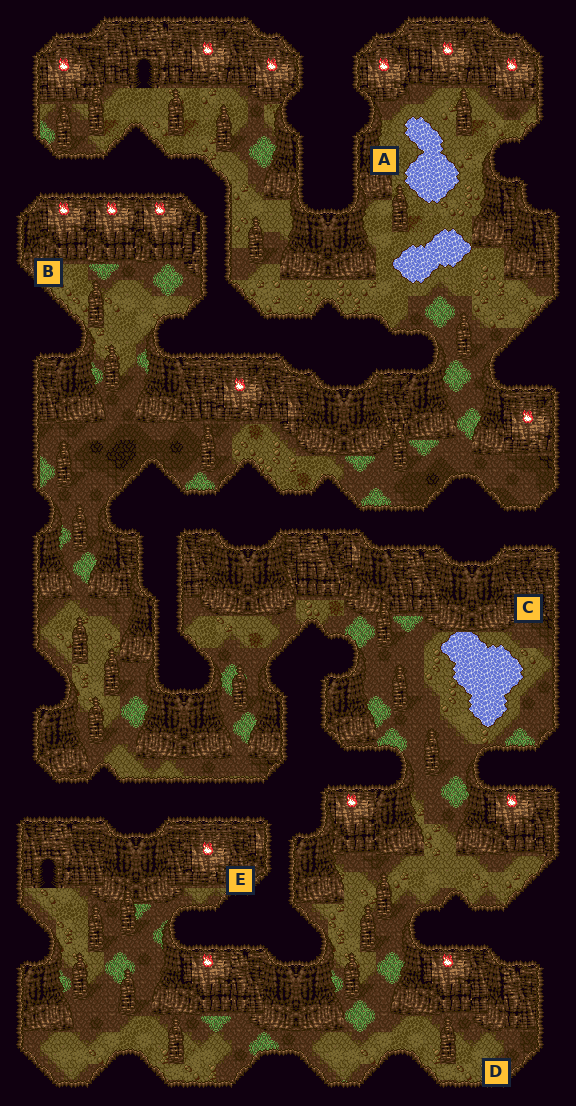
- A Life Orb
- B Remedy
- C Oni Orb
- D God’sTear
- E Rice Ball
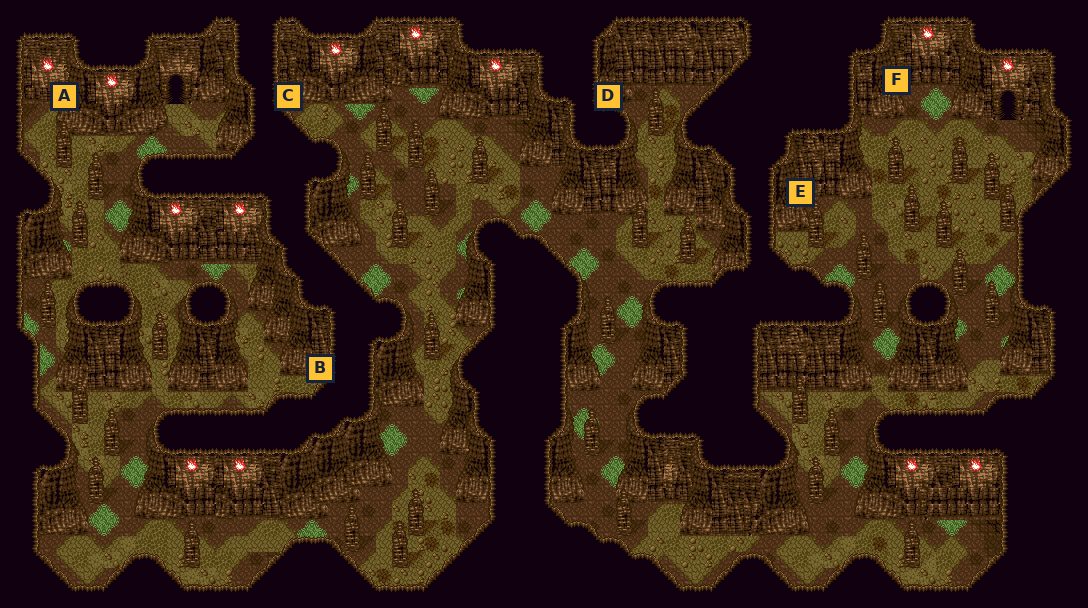
- A Guard Orb
- B M. Water
- C Sage Pill
- D R. Salts
- E Holy Orb
- F Maelstrom
Umibe Village & Ryuuga Forest
📍 Umibe Village · Ryuuga Forest · Youkai Village
With Onimaru in hand, head to Umibe Village at the northern tip of Honshu. To cross to Ezo you first need a boat of your own, and the only timber good enough grows in Ryuuga Forest, where a very old tree is waiting for you.
⏳ Last chances in this chapter
- Ryuuga Forest: answer No to “Burn it anyway?” — Yes is an instant game over.
- Youkai Village: talking to Korobo in Nikkou removes the Rokkou Kappa, the Hachinohe Tsurube-otoshi and Umibe’s Bakebi if you have not recruited them yet.
Full list across the game: Missables.
Walkthrough
- MainTravel to Umibe Village at the northern tip of Honshu. A man near the village entrance tells you to ask the village boatman if you want to cross to the island of Ezo.
- MainThe Boatman stands on the shore in the north-east corner of the village. His boat is broken, so he tells you to build a ship yourselves; then he will take you. (This conversation only happens after the Asuka events of the previous chapter.)
- MainTalk to the woman in the south part of the village again: she now tells you that Ryuuga Forest, south of the village, has timber good enough for a ship.
- SideShopping: the large house in the north-west part of the village is an Armor Shop (Hood, Tokin, Silk Robe, Leggings). There is no weapon shop, item shop or inn in Umibe, so stock up before you come.
- SideOptional: Katsura, a hungry samurai, sits in the back room of the small house just south-west of the Armor Shop. Give him a Rice Ball and he joins as an NPC ally. Rice Balls come from Tanukichi in the Youkai Village (he hands one out whenever you have none). Keep your karma at 20 or more, or he attacks you instead. → checklist
- SideYoukai Village: the boy standing in the far south-west corner of the village is Bakebi in disguise. When asked “Exterminate the youkai?”, answer No (+2 karma) and he moves to the Youkai Village. He only reveals himself if you helped Tanukichi found the village in Beppu (Ch. 13) and have NOT yet talked to Korobo in Nikkou. See the Youkai Village entry for the full order. → checklist
- TipThe man on the west side of Umibe (near the fence, north part of the village) is Korori, another youkai. He only appears late in the game, after the Kappa at the Kourai shrine has been given the Ranjatai. Answer No to “Exterminate Korori?” (+2 karma).
- MainLeave the village and enter Ryuuga Forest to the south. Follow the path to the huge tree in the middle of the forest and examine it from its south side.
- MainThe tree attacks: you fight the forest’s guardian. Losing is a game over, so heal and save first.
- WarningAfter the battle Yamato wants to burn the forest down and the game asks “Burn it anyway?”. Answer No. Answering Yes makes the Sacred Tree punish you with a game over.
- MainAnswer No and the talking Sacred Tree gives you the Raft, a raft imbued with its power.
- MainReturn to the Boatman in Umibe. His “secret trick” is a mermaid: she tows your raft across the northern sea to Ezo. The chapter continues in Ezo (Ch. 16).
- SideOptional: the small shrine just east of Umibe Village holds a treasure chest with a Tsukumogami inside. Beat it (a loss is a game over) and Hakushin, a youkai hunter, offers to join. The offering box here resets low karma (see the checklist). → checklist
Checklist
- Where
- Ryuuga Forest — the huge tree in the middle of the forest
- How
- After the Boatman asks you to build a ship, examine the tree, win the fight, then answer No to “Burn it anyway?”.
- Reward
- Raft (key item; later turned into your ship in Yokohama)
- Opens
- Ch. 15: after the Boatman’s request
- Closes
- never (answering Yes is a game over, not a lost item)
- Where
- Umibe Village — back room of the small house just south-west of the Armor Shop
- How
- Talk to him while holding a Rice Ball; he takes it and joins. Rice Balls: Tanukichi in the Youkai Village gives one whenever you have none.
- Reward
- NPC ally Katsura
- Opens
- any time you reach Umibe
- Closes
- only if you defeat him at low karma
- Where
- Umibe Village — large room of one of the village houses
- How
- At karma below 20, the samurai and the ronin attack when spoken to.
- Reward
- Samurai: 400 gold if you win; Ronin: 200 gold
- Opens
- any time
- Where
- Beppu Village (Shikoku, Ch. 13) — the man in the north-west corner
- How
- When he turns back into a tanuki, answer Yes to “Believe him?”. You are taken to the site of the new Youkai Village on the Shikoku map.
- Reward
- Starts the whole Youkai Village chain; Tanukichi later gives Rice Balls and, when the village is full, Furinkazan
- Opens
- Ch. 13: Beppu Village
- Closes
- Answering No loses Tanukichi and every other resident for good.
- Where
- Rokkou Village — south-east part of the village (a boy has caught a kappa)
- How
- Stage 1 (after Tanukichi, before Korobo). Answer Yes to “Let it go?”.
- Reward
- Youkai Village resident
- Opens
- after Tanukichi (flag 159)
- Closes
- Gone if you answer No, or once you have talked to Korobo in Nikkou (flag 240).
- Where
- Hachinohe Village — the man at the north edge of the village
- How
- Stage 1. Answer No to “Exterminate the youkai?”.
- Reward
- Youkai Village resident
- Opens
- after Tanukichi (flag 159)
- Closes
- Gone if you exterminate it, or once you have talked to Korobo in Nikkou.
- Where
- Umibe Village — the boy in the far south-west corner
- How
- Stage 1. Answer No to “Exterminate the youkai?”.
- Reward
- Youkai Village resident
- Opens
- after Tanukichi (flag 159)
- Closes
- Gone if you exterminate him. After you talk to Korobo he no longer reveals himself.
- Where
- Nikkou Village — middle of the village
- How
- Just talk to him. This moves the chain to stage 2, so do the three stage 1 youkai (Rokkou Kappa, Tsurube-otoshi, Bakebi) FIRST.
- Reward
- Youkai Village resident; unlocks stage 2
- Opens
- after Tanukichi (flag 159)
- Closes
- never (no wrong answer)
- Where
- Iida Town — the storehouse south of Yamato’s house (where Mom’s Box was)
- How
- Stage 2 (after Korobo). Answer Yes to “Tell it about the youkai village?”.
- Reward
- Youkai Village resident; later you can take Kooni along as an NPC ally from a house in the village
- Opens
- after Korobo (flag 240)
- Closes
- Gone if you answer No.
- Where
- Izumo Village — north-west corner
- How
- Stage 2. Answer Yes to “Listen to Ayashibi?”. Must be done BEFORE the Tsurube in Takachiho.
- Reward
- Youkai Village resident
- Opens
- after Korobo (flag 240)
- Closes
- Gone if you answer No, or once you recruit the Tsurube in Takachiho (flag 24D).
- Where
- Herai Village — north-west part of the village
- How
- Stage 2. Answer No to “Exterminate Pokkun?”. Must be done BEFORE the Tsurube in Takachiho.
- Reward
- Youkai Village resident
- Opens
- after Korobo (flag 240)
- Closes
- Gone if you exterminate him, or once you recruit the Tsurube in Takachiho.
- Where
- Hakodate Village (Ezo) — the easternmost of the four Jizo statues by the well in the central square
- How
- After Korobo, examine the statue and answer Yes to “Believe what the Running Jizo says?”. He then appears in the Youkai Village. He is NOT needed for Tanukichi’s reward.
- Reward
- Extra Youkai Village resident
- Opens
- after Korobo (flag 240) and once you can reach Ezo (Ch. 16)
- Closes
- Answering No loses him. (Kongouyasha does not punish a No to its youkai question for him.)
- Where
- Takachiho Village (Kyushu) — the boy in the north part of the village
- How
- Stage 2. Answer Yes (Yamato offers to tell him a good place to move to). Do Izumo’s Ayashibi and Herai’s Pokkun first: recruiting Tsurube removes them.
- Reward
- Youkai Village resident; unlocks stage 3
- Opens
- after Korobo (flag 240)
- Closes
- Gone if you answer No — and with him every stage 3 and 4 youkai, since they need flag 24D.
- Where
- Iida Town — a man in the middle of town
- How
- Stage 3 (after Tsurube). Answer Yes to “Take Tanujou to the youkai village?”.
- Reward
- Youkai Village resident
- Opens
- after Tsurube (flag 24D)
- Closes
- Gone if you answer No.
- Where
- Toyama Village — north-west part of the village
- How
- Stage 3. Answer Yes to “Tell Yukihime about the youkai village?”.
- Reward
- Youkai Village resident; later she can join you as an NPC ally from a house in the village
- Opens
- after Tsurube (flag 24D)
- Closes
- Gone if you answer No.
- Where
- Yamashiro Village (Shikoku) — south part of the village
- How
- Stage 3. Answer No to “Exterminate Kaparou?”. Must be done BEFORE the Kourai Kappa gets the Ranjatai.
- Reward
- Youkai Village resident
- Opens
- after Tsurube (flag 24D)
- Closes
- Gone if you exterminate him, or once the Kourai Kappa has taken the Ranjatai (flag 23E).
- Where
- The Kourai (Kappa) shrine on the western Honshu map — step on the spot in front of the pond
- How
- Stage 3. Carry a Ranjatai: buy one for 50,000 gold at Kyoto’s west item shop (any time before you become wanted in Ch. 22), take the one in an Abashiri house after Ch. 22 (counts as theft), or buy one at Ihika Village (Ch. 25). Step in front of the pond: Yamato drops it. Answer Yes to “Hand over the Ranjatai?” — the Kappa is delighted and you keep it.
- Reward
- Youkai Village resident; unlocks stage 4
- Opens
- after Tsurube (Takachiho) — as soon as you own a Ranjatai
- Closes
- Answering No loses him and every stage 4 youkai.
- Where
- Beppu Village — a boy in the middle of the village
- How
- Stage 4 (after the Kourai Kappa). Answer No to “Exterminate Ayashibi?”.
- Reward
- Youkai Village resident
- Opens
- after the Kourai Kappa (flag 23E)
- Closes
- Gone if you exterminate it.
- Where
- Nikkou Village — north-east part of the village
- How
- Stage 4. Answer No to “Exterminate the Tanumi?”.
- Reward
- Youkai Village resident
- Opens
- after the Kourai Kappa (flag 23E)
- Closes
- Gone if you exterminate her.
- Where
- Okayama Village — a man in the east part of the village
- How
- Stage 4. Answer No to “Exterminate the youkai?”; Natsume invites it to the village.
- Reward
- Youkai Village resident
- Opens
- after the Kourai Kappa (flag 23E)
- Closes
- Gone if you exterminate it.
- Where
- Umibe Village — the man on the west side, north part of the village
- How
- Stage 4. Answer No to “Exterminate Korori?”.
- Reward
- Youkai Village resident
- Opens
- after the Kourai Kappa (flag 23E)
- Closes
- Gone if you exterminate him.
- Where
- Youkai Village (Shikoku map) — Tanukichi
- How
- Once all 16 residents above (Running Jizo not needed) live in the village, talk to Tanukichi.
- Reward
- Furinkazan; afterwards Tanukichi keeps handing out Rice Balls
- Opens
- after the last resident
- Closes
- Lost for good if any required resident was exterminated or turned away. Script quirk: for Beppu’s Ayashibi, taking the 200 gold from the Edo savings jar counts in its place.
- Where
- The small shrine just east of Umibe Village on the northern tip of Honshu
- How
- Open the treasure chest and beat the Tsukumogami that jumps out (losing is a game over). Then talk to Hakushin and answer Yes to take him along.
- Reward
- NPC ally Hakushin
- Opens
- as soon as you can reach Umibe Village
- Closes
- Ch. 29: point of no return
- Where
- Same shrine east of Umibe Village: the offering box
- How
- Only works while your karma is below 40. Pay to reset your karma to 46 (Ordinary). Price doubles each time: 100, 200, 400, 800, 1,600, 3,200, 6,400 gold.
- Reward
- Karma set to 46
- Opens
- any time
Bosses & key battles
🗺️ Maps for this chapter (4)
Numbers mark people and events worth a visit; letters A, B, C… mark treasure chests. A pin on a door means the person is inside that building. Pins show everything that can appear on the map over the whole game, so some people only turn up later in the story. Tap a map to open it full size.
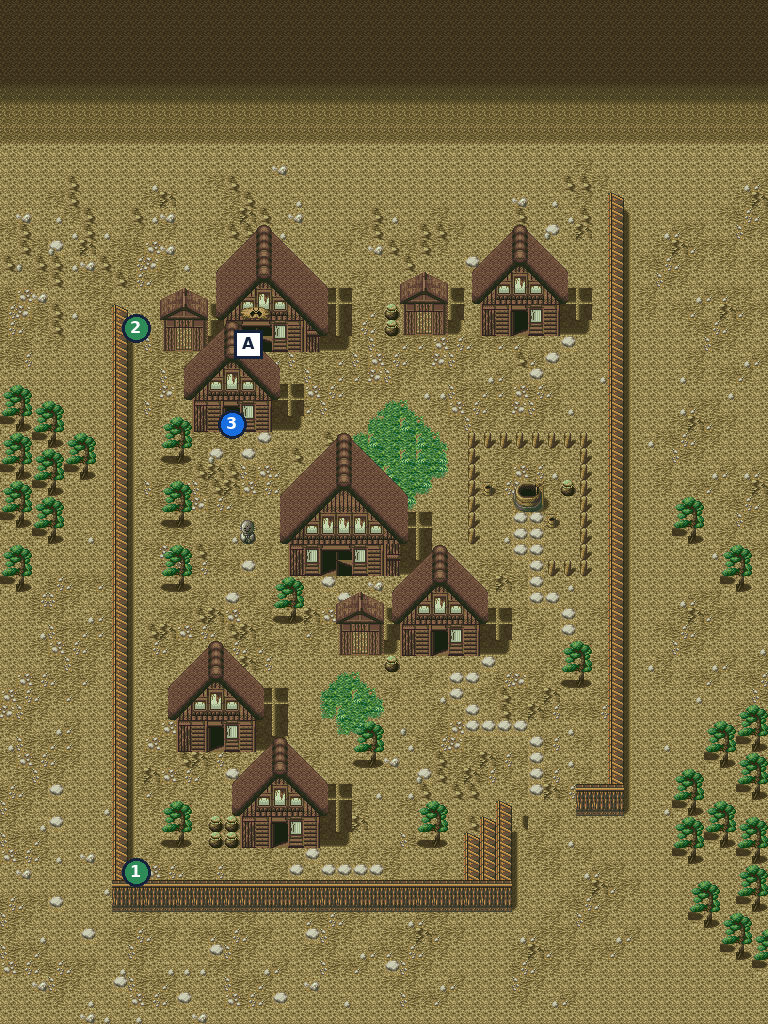
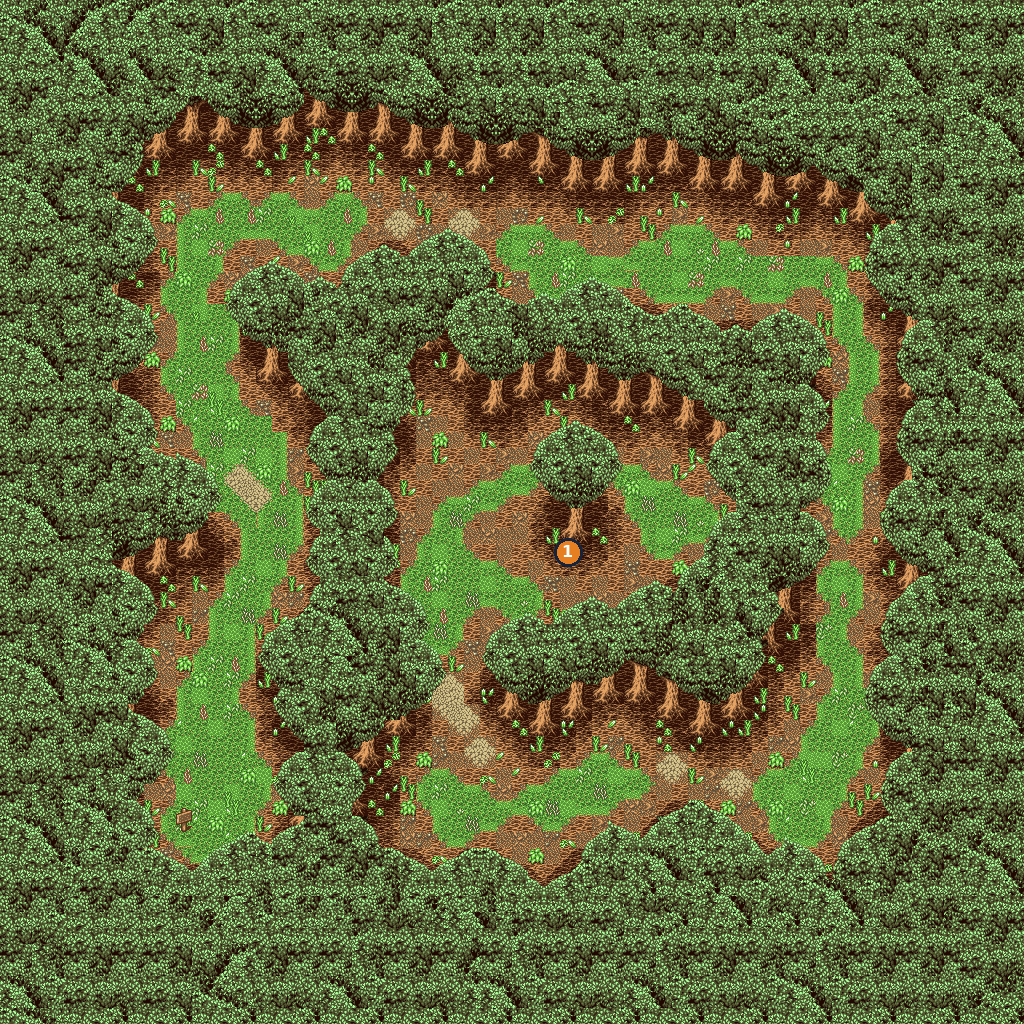
- 1Sacred Tree — gives Raft checklist
- 1Tanukichi — gives Rice Ball, gives Furinkazan checklist
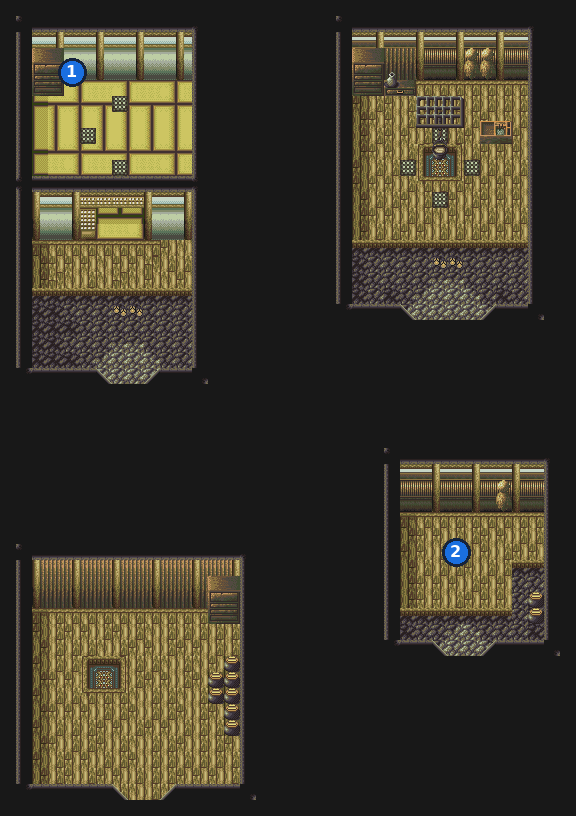
🛒 Shops in this chapter
Umibe Village — Armor
| Hood | 100 G |
| Tokin | 210 G |
| Silk Robe | 140 G |
| Leggings | 110 G |
Large house in the north-west. Refuses service after you become wanted (see ch16 cross).
Ezo: Hakodate & the hot spring
📍 Ezo · Hakodate Village · Hot spring · Gyuuki Cave · Abashiri Village · Kongouyasha Shrine
The mermaid lands you in Ezo. In Hakodate you cross paths with the foreigners Rishu and George and their servant Timba, find a Spirit Hole under a new hot spring, and fall out with the Shogun for good.
⏳ Last chances in this chapter
- The Conch works only once: do not use it until Timba’s scene at the hot spring after the Shogun confrontation.
- Open all Gyuuki Cave chests before fighting the Gyuuki; after the Spirit Hole you cannot go back in.
- Visit the Kongouyasha Shrine while your record is clean if you want Muramasa: the Ranjatai (Ch. 22) and sparing Beppu’s Ayashibi both count as theft there.
- Take Hijikata’s sword (Izumi Kami) (from Chapter 3) details
- Free meals at the Shinsengumi HQ (from Chapter 3) details
- Conch (from the mermaid) details
- Help Timba carry the cargo details
- Accept the Shogun’s order details
Full list across the game: Missables.
Walkthrough
- MainThe mermaid drops your raft on the Ezo shore. Before leaving she gives you the Conch: blow it and she will tow you back once, and then she takes it back.
- WarningThe Conch is a single trip back to Honshu. Juurouta offers to use it every time you step onto the landing spot; answer No until the hot-spring scene with Timba at the end of this chapter. Nothing in the event script brings you back to Ezo by sea afterwards.
- MainYou walk straight into Hakodate Village. Enter the inn (the house with the sign, south-centre of the village). A foreign guest, Rishu, orders George to have their servant carry all the cargo in, and a girl (Timba) struggles with it alone.
- Side“Help carry the cargo?” Answer Yes (+2 karma). Timba explains she was brought here from a land across the sea. Answering No costs 5 karma. → checklist
- SideTalk to the inn girl twice. The second time Juurouta charms her and learns that the foreigners are searching Japan for some kind of hole. Rooms at the inn cost 20 gold.
- SideShopping: the weapon shop is the top-centre house with two doors (Magoroku, Sun Sword, Kotetsu, Naginata, Tube Spear, Hourai Bow, Moon Bow, Tiger Claw, Shura Claw, Oni Claw, Matchlock). A travelling armor peddler stands in the north-east corner of the village. There is no item shop in Hakodate; Abashiri has two.
- MainLeave town and visit the hot spring on the Ezo map (the pond near Hakodate that suddenly turned hot). The first dip fully heals the party.
- MainCome back to the hot spring after the cargo scene: a villager leads George to the spring, and George kills him as his ‘reward’. Fight George, then Rishu right after. Losing either fight is a game over.
- MainRishu is carried off by Shimazu and Mouri. Bathe once more and Juurouta realises the spring’s water carries spirit power: there must be a Spirit Hole below, reached through a cave. Timba is at the spring and thanks you for beating her masters.
- MainBack in Hakodate a peddler now stands by the well in the fenced central square. Pay him 100 gold: he tells you about a cave in the mountains north-east of the village. Paying once is enough to open the cave.
- TipIf you pay him a second and a third time (100 gold each) he names the youkai inside — the legendary Gyuuki — and says only the Five Great Swords can cut it. In the cave, Natsume reminds you of this hint if you bought all three parts.
- SideYoukai Village: the easternmost of the four Jizo statues in Hakodate’s central square is the Running Jizo. Once you have talked to Korobo in Nikkou, examine it and answer Yes to “Believe what the Running Jizo says?”. → checklist
- MainGo to the cave in the north-eastern mountains. Hijikata and the Shinsengumi are camped outside. Talk to Hijikata: the Shogun is here in person, angry with you, and waiting in the hut. Enter the hut and talk to the Shogun, who calls you traitors — until a Shinsengumi trooper stumbles out of the cave, dying.
- SideThe Shogun orders the Shadow Shinsengumi to investigate. “Accept?” Yes gives +1 karma, No −3; you go in either way. → checklist
- MainWalk into the cave past Hijikata. On the first floor, open the two chests (Gale Spear and Sleep Chrm).
- WarningOn the lower floor, open all three chests (God’sTear, Gold Pill, BreezeRobe) BEFORE you approach the Gyuuki. Once it is beaten you are swept down to the Spirit Hole and cannot walk back out, and after this chapter the cave entrance is guarded.
- MainChallenge the Gyuuki. After the fight the ground keeps sinking and the party ends up underwater — strangely able to breathe. Follow the light to the Spirit Hole, a calm and healthy one; Juurouta decides it must not be sealed.
- MainTouya suggests stopping at the spring beside the Spirit Hole. Examine it and answer Yes to take a bath: you are sucked through a hole and pop out in the hot spring outside. Timba asks to come with you.
- MainWalk back to the cave entrance. You overhear the Shogun planning to drain this Spirit Hole for himself, no matter what it does to the country. Yamato and Touya strike him; he declares you traitors and orders the troopers to attack. Win the fight (losing is a game over); Okita pretends to be knocked aside so you can flee.
- MainYou regroup at the hot spring. Timba invites you to her country, where a ‘Guardian’ protects a holy land much like a Spirit Hole, and says the ship she came on is in Yokohama. Touya: Yokohama is west of Edo.
- MainReturn to the landing spot where the mermaid dropped you and answer Yes to “Will you use the conch?”. She tows the raft back to northern Honshu and takes the Conch back. Head south to Yokohama (Ch. 17) with the Raft.
- SideOptional, but best done now: the Kongouyasha Shrine on the Ezo map. Talk to the priest first, then step in front of the altar and answer Kongouyasha’s two questions truthfully. With no thefts on your record you also get Muramasa. See the checklist entry for exactly what is checked. → checklist
- SideOptional: Abashiri Village on the Ezo map. Chuuta, a thief-for-hire, stands in the north-west corner inside the fence and joins for 1500 gold. The two left-hand doors of the long houses lead to an item shop (N. Pill, S. Dew, K. Herb, Gold Pill, Feather); the right-hand long house has a second item shop (Pill, Sandalwd., Wake Dust, Kunai, Maelstrom, Reishi).
- SideAbashiri: in the right-hand small house, a boy has dropped his grandfather’s medicine. Hand over a Pill for +2 karma. → checklist
- TipThe hot spring heals the whole party for free every time you examine it, for as long as you stay in Ezo.
Checklist
- Where
- Ezo landing spot, on arrival
- How
- Given automatically when the mermaid lands you in Ezo. Use it on the landing spot to be towed back to Honshu once; the mermaid then takes it back.
- Reward
- Conch (single use)
- Opens
- Ch. 16: arrival in Ezo
- Closes
- used up on the return trip
- Where
- Hakodate Village — the inn, on your first visit
- How
- Answer Yes to “Help carry the cargo?”.
- Opens
- Ch. 16: first entry into the inn
- Closes
- one-time choice
- Where
- Hakodate Village — by the well in the central square
- How
- Appears after the hot-spring fight. Pay 100 gold once to learn about the cave (this opens it). Pay twice more (300 gold total) for Gyuuki’s name and its weak point (the Five Great Swords).
- Reward
- Opens Gyuuki Cave; hint about Gyuuki
- Opens
- Ch. 16: after beating George and Rishu
- Closes
- He leaves later in the game (flag 044, Ch. 19).
- Where
- Gyuuki Cave entrance, Ezo
- How
- After talking to the Shogun in the hut, answer Yes to “Accept?”.
- Opens
- Ch. 16
- Closes
- one-time choice
- Where
- Kongouyasha Shrine, on the Ezo map
- How
- Talk to the priest first. Then step before the altar and answer (1) “Have you ever taken what belongs to another?” and (2) “Have you ever abandoned a youkai with a righteous heart?”. Question 1 must match your record: No if you never stole, Yes if you did. For question 2, Yes is accepted only if you really turned away or exterminated a youkai; No is only called a lie if you refused Tanukichi in Beppu. No thefts and truthful answers = Muramasa + the summon. An honest Yes to either question = the summon only. A lie = “You liar!” and nothing: leave the shrine and come back to try again.
- Reward
- Kongouyasha summon; Muramasa if your record is clean
- Opens
- Ch. 16: arrival in Ezo
- Closes
- never (a wrong answer can be retried after leaving the shrine)
- Where
- Abashiri Village — north-west corner, inside the fence
- How
- Answer Yes to “Hire Chuuta?”.
- Reward
- NPC ally Chuuta (steals money)
- Opens
- Ch. 16: once you reach Ezo
- Where
- Abashiri Village — right-hand small house (south row)
- How
- Talk to the boy while holding a Pill and answer Yes.
- Opens
- Ch. 16
- Where
- Hakodate Village — in the square and in two houses
- How
- At karma below 20 they attack when spoken to.
- Reward
- 300 / 400 / 1000 / 500 / 600 gold if you win
- Opens
- any time
- Where
- Abashiri Village — house behind the right-hand long house’s left door
- How
- At karma below 20 the two ronin attack when spoken to.
- Reward
- 800 / 400 gold if you win
- Opens
- any time
Treasure chests (5)
| Item | Area | Where | |
|---|---|---|---|
| Gale Spear | Gyuuki Cave 1F | first floor (tile 27,33) You can come back for it on the second Gyuuki Cave visit (Ch. 23); it is gone once you meet the Ihika. ⚠ Gone after Chapter 23 | |
| Sleep Chrm | Gyuuki Cave 1F | first floor (tile 18,16) You can come back for it on the second Gyuuki Cave visit (Ch. 23); it is gone once you meet the Ihika. ⚠ Gone after Chapter 23 | |
| God’sTear | Gyuuki Cave (lower floor) | lower floor (tile 25,29) Open before fighting the Gyuuki. You can come back for it on the second Gyuuki Cave visit (Ch. 23); it is gone once you meet the Ihika. ⚠ Gone after Chapter 23 | |
| Gold Pill | Gyuuki Cave (lower floor) | lower floor, far south-west (tile 8,51) Open before fighting the Gyuuki. You can come back for it on the second Gyuuki Cave visit (Ch. 23); it is gone once you meet the Ihika. ⚠ Gone after Chapter 23 | |
| BreezeRobe | Gyuuki Cave (lower floor) | lower floor, north-east (tile 32,8) Open before fighting the Gyuuki. You can come back for it on the second Gyuuki Cave visit (Ch. 23); it is gone once you meet the Ihika. ⚠ Gone after Chapter 23 |
Bosses & key battles
🗺️ Maps for this chapter (4)
Numbers mark people and events worth a visit; letters A, B, C… mark treasure chests. A pin on a door means the person is inside that building. Pins show everything that can appear on the map over the whole game, so some people only turn up later in the story. Tap a map to open it full size.
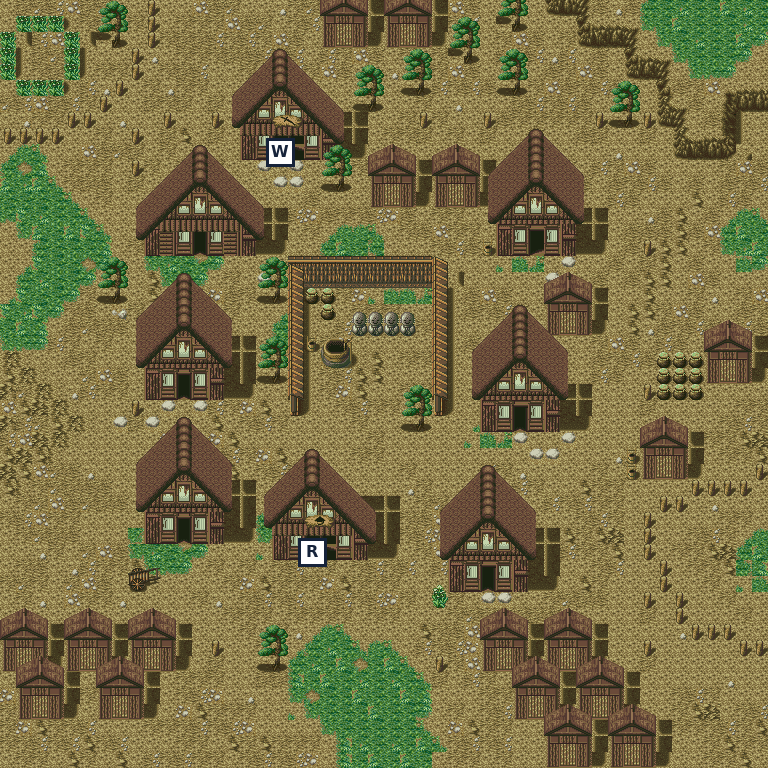
- RInn
- WWeapon shop
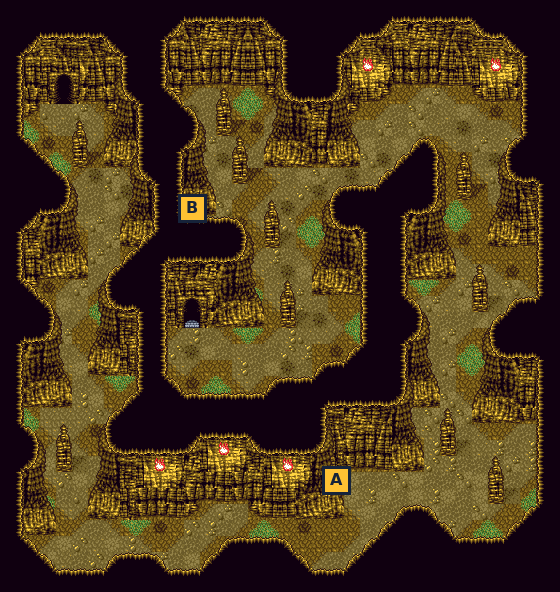
- A Gale Spear
- B Sleep Chrm
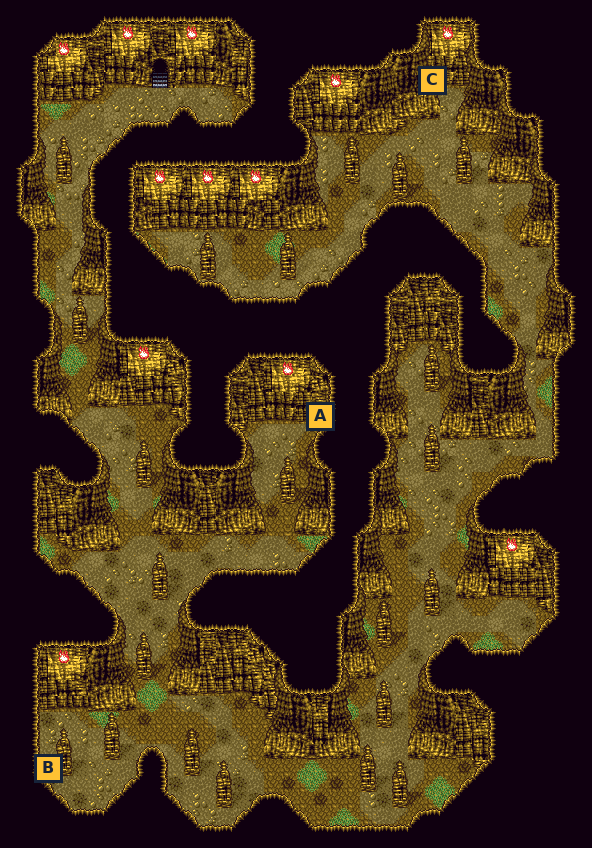
- A God’sTear
- B Gold Pill
- C BreezeRobe
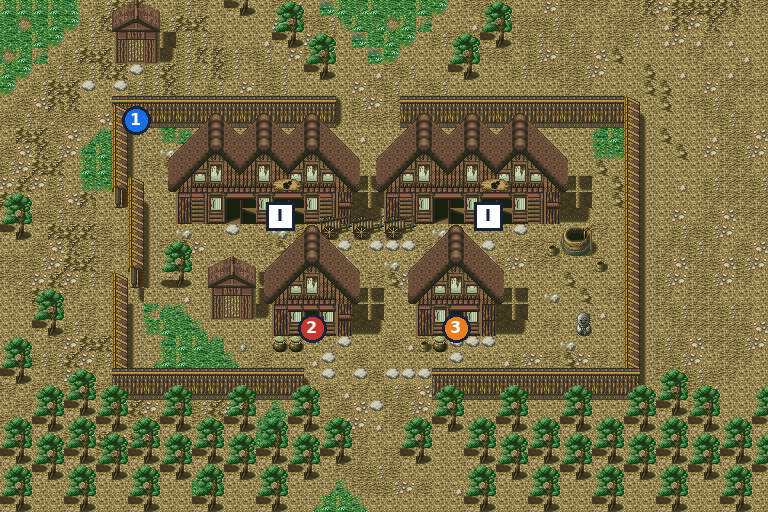
- 1Chuuta — joins checklist
- 2Search spot (inside) — take Ranjatai (theft), karma −5
- 3Boy who dropped grandpa’s medicine (inside) — give a Pill, karma +2
- IItem shop
🛒 Shops in this chapter
Hakodate Village — Weapons
| Magoroku | 1,350 G |
| Sun Sword | 1,850 G |
| Kotetsu | 2,250 G |
| Naginata | 590 G |
| Tube Spear | 970 G |
| Hourai Bow | 990 G |
| Moon Bow | 1,540 G |
| Tiger Claw | 800 G |
| Shura Claw | 800 G |
| Oni Claw | 800 G |
| Matchlock | 6,000 G |
Top-centre house. Refuses service once you are wanted (ch22).
Hakodate Village — Armor (travelling peddler)
| Spike Helm | 640 G |
| Houou Hood | 730 G |
| Lucky Helm | 770 G |
| Crane Robe | 1,020 G |
| Genji Armr | 1,320 G |
| Miracle Ar | 1,590 G |
| Ushiwaka | 1,980 G |
| Herb Legs | 590 G |
| Kirin Shoe | 850 G |
North-east corner of the village. Refuses service once you are wanted (ch22).
Hakodate Village — Inn
| Night’s stay | 20 G |
Calls the officers (a battle) once you are wanted.
Abashiri Village — Items
| N. Pill | 20 G |
| S. Dew | 16 G |
| K. Herb | 10 G |
| Gold Pill | 50 G |
| Feather | 30 G |
Right-hand door of the left long house. The only shop in the game with no ‘wanted’ check — it keeps selling in ch22.
Abashiri Village — Items
| Pill | 6 G |
| Sandalwd. | 6 G |
| Wake Dust | 6 G |
| Kunai | 20 G |
| Maelstrom | 4 G |
| Reishi | 4 G |
Right-hand door of the right long house. Refuses service once you are wanted.
Yokohama & the ship
📍 Yokohama · The Pacific Ocean
Timba’s ship is in Yokohama, but its crew will not take you. An old shipwright, Yuemon, offers to turn your raft into an ocean-going ship, and you finally sail east toward Timba’s homeland.
⏳ Last chances in this chapter
- You cannot set sail while Yuemon is still working on a remodel: sleep at the inn and collect the ship first.
- The Stray Ittan cannot cross the sea and leaves the party when you sail.
Full list across the game: Missables.
Walkthrough
- MainWalk from northern Honshu to Yokohama, the port town west of Edo. On arrival, go to the easternmost pier on the waterfront: sailors from the foreign ship are throwing out an old man who offered to improve their ship. He is Yuemon.
- MainTalk to the man on the middle pier (the foreign ship’s crewman). He won’t take you across, but points out that you have a raft and suggests having it remodelled into a ship.
- MainTalk to Yuemon, who now stands on the east pier. Answer Yes to “Ask him to remodel the raft?”. He calls himself a genius shipwright and asks for 1000 gold.
- MainBring 1000 gold and answer Yes to “Do you have the money ready?”. You hand over the Raft and the money. The remodel takes a day, so stay at the inn.
- SideThe inn is in the building in the middle of town (30 gold a night). Goemon waits in the inn’s guest room and joins as an NPC ally for 300 gold.
- MainThe next day, talk to Yuemon: “Got a ship!!”. He warns you that the ship has a cannon and you should buy strong shells.
- SideShip supplies: the building just inside the north-west of town is the Travel Goods shop (Feather). After you get the ship, a man in the same shop sells shells and repair kits for ship battles.
- SideOptional loan: once you have been through the Gyuuki Cave, a man in the back of the item-shop building (upper-left block, north of the main street) lends 10000 gold interest-free. Borrowing costs 10 karma; paying the full 10000 back later returns the 10 karma, and you can borrow again after that. → checklist
- SideOptional: Gin-san, a man of leisure, stands just inside the north gate. He tells you to pray at the stone lantern south-west of town (on the waterfront road, west end). Examine it and a Mysterious Voice asks for offerings one at a time: Herb, then H. Water, then SleepDust, then a Haze Bell, then Reishi. After the last one Gin-san reveals himself as the god Jizaiten and lends you his power. → checklist
- TipWhere to find the offerings: Herbs and H. Water are sold almost everywhere, SleepDust in a Kyoto shop, the Haze Bell in the Edo item shop, and Reishi in the Abashiri and Herai item shops. You can leave and come back between offerings.
- SideYokohama’s own shops (weapon, armor and item, in three buildings north of the harbour road) only sell basic early-game gear. Buy real equipment in Hakodate before you sail.
- SideShip upgrades: whenever your ship’s rank reaches 3, 8, 13 and 18, Yuemon offers a remodel for 3000, 5000, 7000 and 10000 gold. Each takes a night at the inn; collect the ship from him the next day. You cannot sail while a remodel is in progress. → checklist
- MainWhen ready, go to the westernmost pier and step onto the ship. Timba rejoices at finally going home. If the Stray Ittan is with you, it stays behind (it cannot cross the sea) but you can call it again whenever you are back in Japan.
- MainA cutscene shows the Shogun learning that you have left by ship, and Okita collapsing with a cough in front of Hijikata.
- MainAt sea, sail east across the Pacific. Crossing the eastern edge of this sea takes you to the eastern ocean, where Harbor Town lies on the far coast (Ch. 18). Sailing west brings you back to Yokohama.
- TipIn Yokohama’s weapon shop a ronin warns that you pass out in underwater battles if you run out of breath, and a samurai says ship ammunition is sold at the item shop. Save often during the crossing; ship battles can be dangerous until your ship has ranked up.
Checklist
- Where
- Yokohama — Yuemon on the east pier
- How
- After the eviction scene, talk to the crewman on the middle pier, then ask Yuemon to remodel the raft and pay 1000 gold. Sleep at the inn and collect the ship.
- Reward
- Ship
- Opens
- Ch. 17: after the Ezo events (flag 16E)
- Where
- Yokohama — Yuemon on the east pier
- How
- Talk to Yuemon when the ship reaches rank 3, 8, 13 and 18; pay, sleep at an inn, then collect the improved ship.
- Reward
- Four stronger ship versions
- Opens
- Ch. 17: after getting the ship
- Where
- Yokohama — back room of the item-shop building
- How
- Appears after the Gyuuki Cave. Borrow: answer Yes to “Borrow money?”. Repay: talk to him with 10000 gold and answer Yes.
- Reward
- 10000 gold (repayable)
- Opens
- Ch. 16: after the Gyuuki Cave dive (flag 16B)
- Closes
- never; repaying resets it so you can borrow again
- Where
- Yokohama — Gin-san inside the north gate; the stone lantern on the south-west waterfront road
- How
- Talk to Gin-san, then examine the lantern and offer, one at a time: Herb, H. Water, SleepDust, Haze Bell, Reishi.
- Reward
- Summon Jizaiten
- Opens
- any time (Yokohama is open from early in the game)
- Where
- Yokohama — the inn’s guest room (central building)
- How
- Answer Yes to “Hire him?” and pay 300 gold.
- Reward
- NPC ally Goemon (steals items)
- Opens
- any time
- Where
- Yokohama — east side of town
- How
- At karma below 20 he attacks when spoken to.
- Reward
- 2000 gold if you win (lose: −3000 gold)
- Opens
- any time
🗺️ Maps for this chapter (2)
Numbers mark people and events worth a visit; letters A, B, C… mark treasure chests. A pin on a door means the person is inside that building. Pins show everything that can appear on the map over the whole game, so some people only turn up later in the story. Tap a map to open it full size.
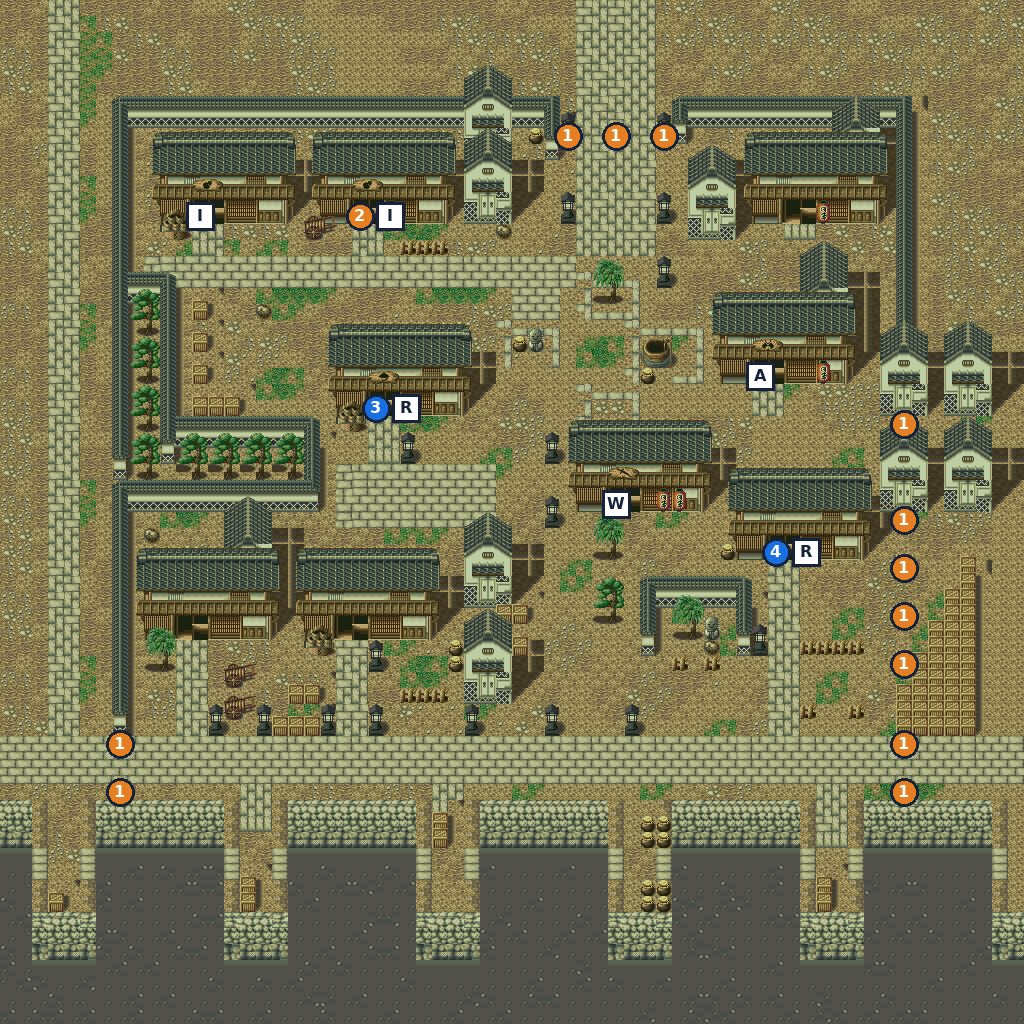
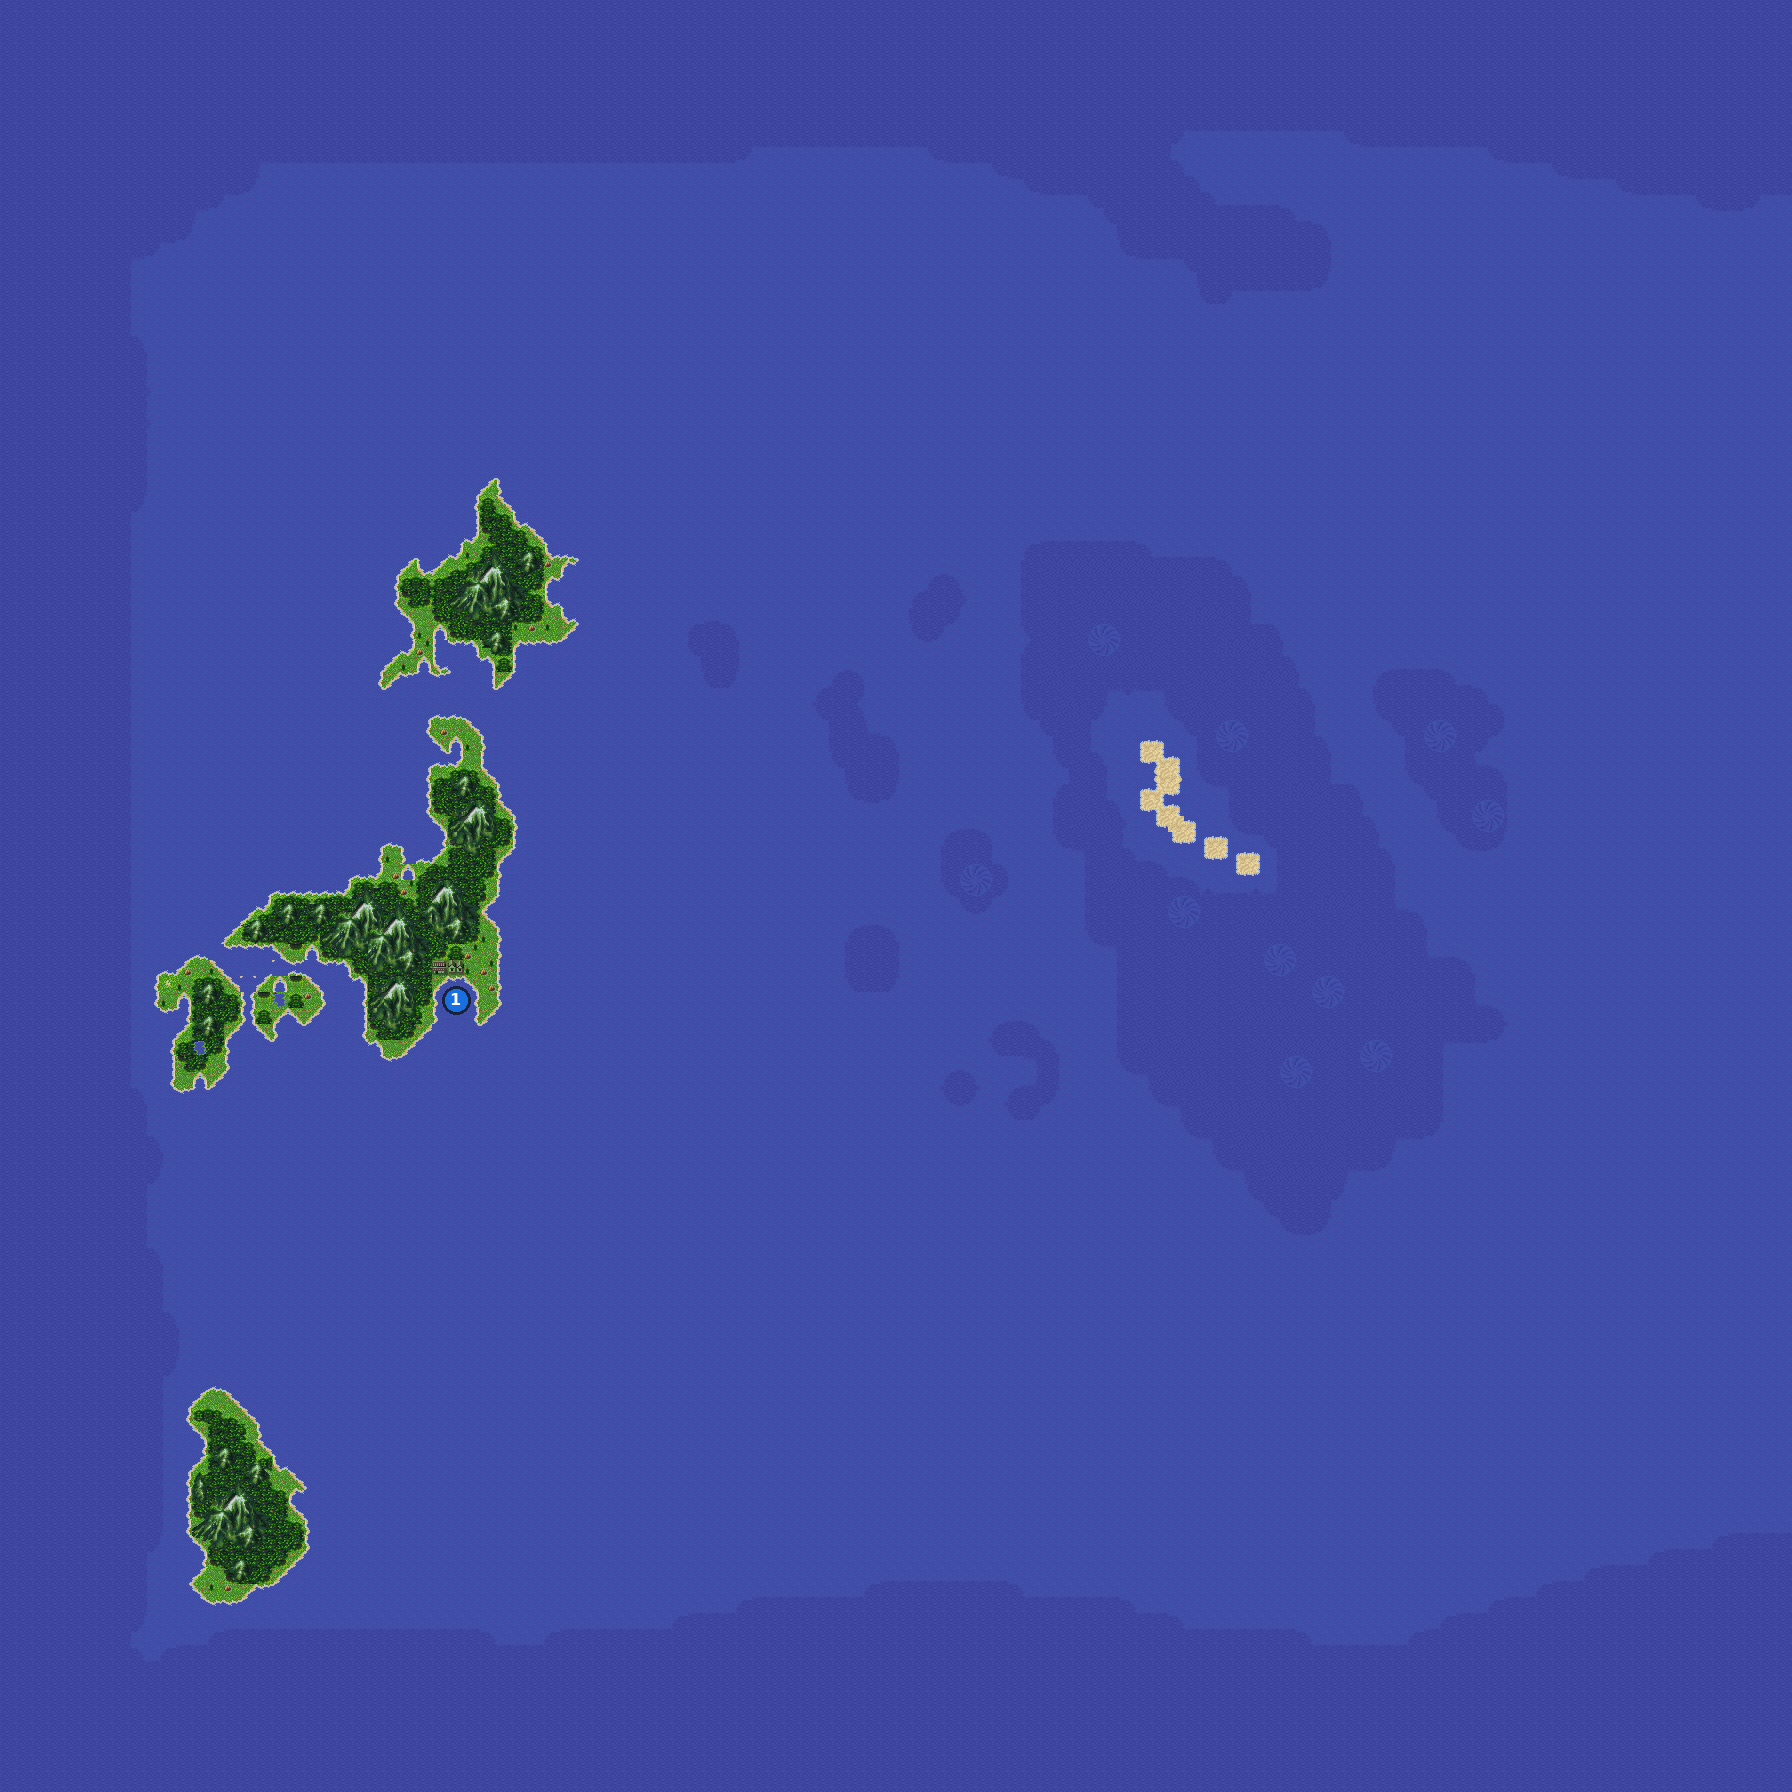
- 1Stray Ittan — joins checklist
🛒 Shops in this chapter
Yokohama — Weapons
| Kodachi | 120 G |
| Katana | 180 G |
| Chakra | 150 G |
| Kakute | 160 G |
Building in the middle-right of town. Refuses service once you are wanted (ch22).
Yokohama — Armor
| Hood | 100 G |
| Silk Robe | 140 G |
| Suzukake | 450 G |
| Leggings | 110 G |
Building on the east side. Refuses service once you are wanted.
Yokohama — Items
| Herb | 4 G |
| H. Water | 8 G |
| Pill | 6 G |
| Sandalwd. | 6 G |
| Wake Dust | 6 G |
Upper-left block; the loan man is in the back. Refuses service once you are wanted.
Yokohama — Travel Goods
| Feather | 30 G |
North-west building. After you get the ship, a second man here sells ship shells and repair kits (prices not in the event script). Never refuses service.
Yokohama — Inn
| Night’s stay | 30 G |
Central building. Needed to finish each ship remodel. Calls the officers once you are wanted.
America: Harbor Town & Grassland Village
📍 Harbor Town · Eastern ocean · Dryad island · Grassland Village
You land in Harbor Town on the American coast, where the townsfolk want nothing to do with outsiders. Timba goes ahead to her people in Grassland Village to the east, who welcome you as guests.
Walkthrough
- MainSail east until you reach the coast and enter Harbor Town. Everyone is amazed by the strange town. Timba thanks you, gives you the Light Chrm and goes ahead to her village in the east.
- SideThe locals are cold to outsiders; most doors are shut. The only shop you can enter is the house on the west side, near the docks: its owner grudgingly sells Dut. Pill and Am. Pill.
- SideOptional: Tony, a wandering gunman, stands near the south fence. Pay 2000 gold and he joins as an NPC ally. → checklist
- TipYour ship is moored at the north-west dock. Walk onto it and answer Yes to “Cross the sea?” whenever you want to sail again.
- SideOptional: on the eastern ocean there is a tiny island far to the south-west of Harbor Town. Land on it and talk to the two Dryads of the secret forest; they lend you the Dryad summon for making it that far. → checklist
- MainLeave Harbor Town and head east across the American map to Grassland Village, a village of tents.
- MainTalk to the man in the south-west part of the village: since you helped Timba, the village welcomes you as guests. Now the villagers will talk to you.
- SideFree services: the woman near the north tents offers fruit — answer Yes and the whole party is refreshed. The tent on the east side is the inn: the man inside lets you stay for free.
- SideThe girl on the east side tells a story about the Guardian of the Holy Land, a god who looks like an ordinary person and was trapped deep in a valley by a traitor. Remember it for later.
- SideShopping: a Japanese merchant hides behind the tree by the north fence and sells armor ‘from Japan’ (Iron Cap, Buddha Hlm, Kiraikou, Niou Plate, DragonShoe, Light Shoe). These are strong, so buy what you can.
- MainTimba is in the tent in the south-west of the village. Talk to her: the lands to the south withered some years ago and monsters multiplied. Juurouta suspects a Spirit Hole, and Timba decides to come with you again.
- MainThe man at the entrance now warns about a big river on the way south. Continue south to Grande Village (Ch. 19).
Checklist
- Where
- Harbor Town — on arrival
- How
- Automatic on your first arrival.
- Reward
- Light Chrm
- Opens
- Ch. 18
- Where
- Harbor Town — near the south fence
- How
- Answer Yes to “Pay 2000 gold?”.
- Reward
- NPC ally Tony (gunman)
- Opens
- Ch. 18
- Where
- Eastern ocean — tiny island far south-west of Harbor Town
- How
- Sail to the island and talk to either Dryad.
- Reward
- Summon Dryad
- Opens
- Ch. 18: once you can sail the eastern ocean
- Where
- Grassland Village — the man in the south-west
- How
- Talk to him on arrival; afterwards the fruit (free heal) and the Guardian story become available.
- Reward
- Free party refresh from the fruit woman; free inn
- Opens
- Ch. 18
🗺️ Maps for this chapter (2)
Numbers mark people and events worth a visit; letters A, B, C… mark treasure chests. A pin on a door means the person is inside that building. Pins show everything that can appear on the map over the whole game, so some people only turn up later in the story. Tap a map to open it full size.
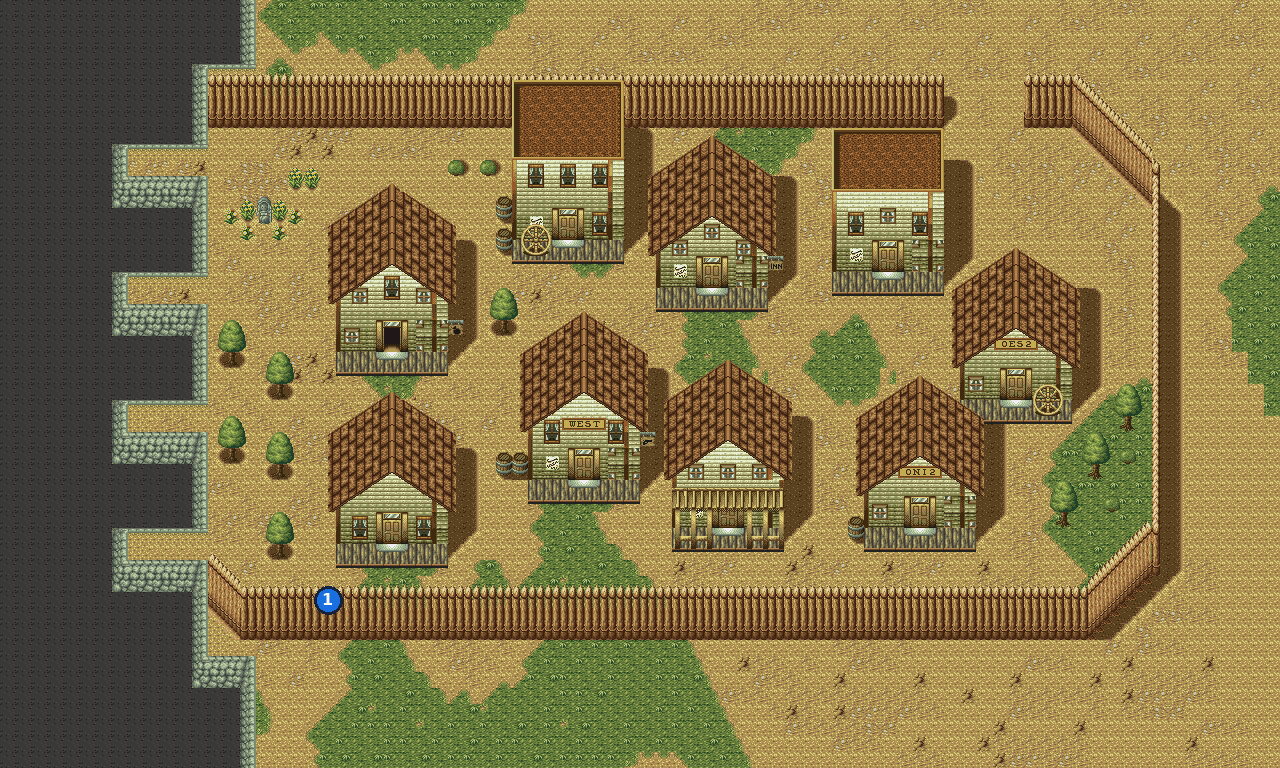
- 1Tony — joins checklist
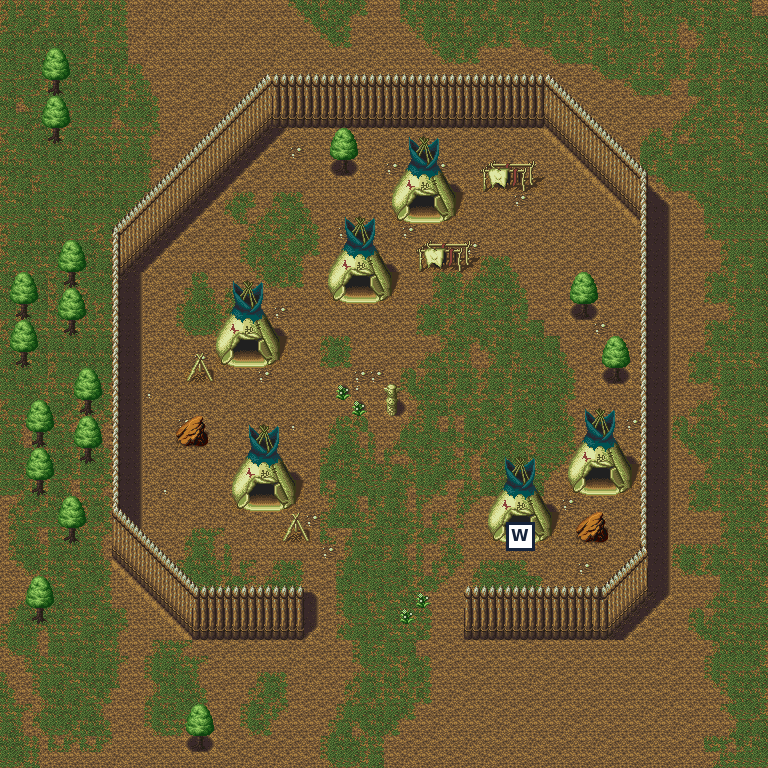
- WWeapon shop
🛒 Shops in this chapter
Harbor Town — Items
| Dut. Pill | 40 G |
| Am. Pill | 32 G |
The only open house, on the west side near the docks.
Grassland Village — Armor (Japanese merchant)
| Iron Cap | 1,010 G |
| Buddha Hlm | 1,330 G |
| Kiraikou | 2,270 G |
| Niou Plate | 2,530 G |
| DragonShoe | 1,020 G |
| Light Shoe | 1,350 G |
Behind the tree at the north fence.
Grassland Village — Inn
| Night’s stay | 0 G |
East tent; free.
Grande, Port Village, the Rio Grande & Niji Forest
📍 Grande Village · Port Village · Rio Grande crossing · Seiren’s house (river bottom) · Niji Forest
South of Grassland Village the Rio Grande blocks the way. You meet the Water Demon, escape from its lair at the bottom of the river with Seiren’s help, and run a long trading chain with the Treants of Niji Forest to win the Rainbow Feather that buys you a ride across.
⏳ Last chances in this chapter
- On the river bottom, running out of air with no Air Flower left is a game over. Carry a spare from Seiren’s jar.
- Losing to Johnny or to the Water Demon is a game over.
- The peddler’s story (100 gold, up to 3 times) (from Chapter 16) details
Full list across the game: Missables.
Walkthrough
- MainFrom Grassland Village head south to Grande Village, a ring of tents behind a wooden fence in the east of the continent.
- MainTalk to the woman standing by the drying rack in the middle of Grande. She wants to visit her grandpa across the river but is afraid of the Water Demon. You must hear her story, or nothing happens at the river later.
- SideThe girl by the north fence dropped her father’s medicine. Give her an Am. Pill (Harbor Town’s item shop sells them for 32 gold) for +3 karma. → checklist
- TipGrande’s shops: the armor seller stands outside near the south-east gap in the fence; the weapon shop is inside the north tent. The weapons (bows, axes, boomerangs) don’t suit your current party; they become useful for a companion who joins later.
- TipThe west tent in Grande has a fire in it. Nothing happens there yet; you come back with Blessing Powder in Ch. 20 to meet Ifrit.
- MainGo west to Port Village. The locals are hostile to outsiders, but you can still use the inn in the middle-right house (100 gold).
- SideEnter the big two-door building in the north-west through its LEFT door. The man at the table secretly sells guns, and the man at the counter sells armor.
- SideIn the same room, Richard asks if you have a rare gun. Hand him a Hozutsu (sold for 3000 gold in the Kyoto and Edo weapon shops) and he joins as an NPC ally. → checklist
- SideJohnny stands in the north-east corner of Port Village and picks a fight with any stranger. He is possessed by Huey. Beat him to learn the Huey summon (you pick who learns it). Losing is a game over, so save first. The right door of the big building leads to his worried wife. → checklist
- MainWalk south from Port Village to the river crossing. After the Grande woman’s story, Natsume mentions the Water Demon and Yamato shouts for it. It drags the whole party underwater.
- MainYou wake in the Water Demon’s lair on the river bottom. Seiren offers a deal: she helps you escape if you bring back her Rainbow Feather from the forest to the north-west. Refusing just repeats the question, and the Water Demon soon forces your hand, so agree.
- MainSeiren gives you an Air Flower. Its air lasts about two minutes, and the next flower in your bag is used automatically when it runs out. If you run out of air with no flower left, the game is over.
- TipYou start just outside Seiren’s house. Go back inside first and take a spare Air Flower from the jar on the right. The jar only gives one if you are carrying none, so do this right after the first flower starts.
- MainSwim out of the maze: head south, then west across the middle, then north up the west side to the stairs at the top-left. Climb them to reach the surface.
- MainThe Water Demon chases you onto the bank and attacks. You must win (losing is a game over). Natsume then reminds you to fetch the Rainbow Feather from the north-west forest.
- MainGo to Niji Forest, west of Port Village on the north side of the river. Its trees are Treants, and one of them has the feather. They only respond once the Water Demon is gone.
- MainWake the chain in order. Tickle the huge Treant in the east (it waits for the Green Veil). Then talk to the Green Veil tree (west), the Red Water Jar tree (south-centre), the Orange Bangle tree (south-east), the Blue Horn tree (north-west), the Violet Crystal tree (north-east), the Yellow Tablet tree (north-centre) and the Indigo Mirror tree (south-west). Each tree names the one it wants.
- MainThe Indigo Mirror tree wants ten Crosses. Crosses drop from enemies, so fight until you have ten, then talk to it again to get the Indigo Mirror.
- MainTrade back up the chain: Mirror to the Yellow Tablet tree, Tablet to the Violet Crystal tree, Crystal to the Blue Horn tree, Horn to the Orange Bangle tree, Bangle to the Red Water Jar tree, Water Jar to the Green Veil tree, and finally the Green Veil to the huge Treant. It gives you the Rainbow Feather.
- TipAfter the trade, the huge Treant fully heals your party every time you talk to it. That makes Niji Forest a free rest stop.
- SideA Treant in the middle of the forest loves pineapples. Each Pineapple you give it earns either a Gods Charm or a Rice Ball, chosen at random. You probably have none yet. One comes from a chest in Ch. 21, so come back later. → checklist
- MainReturn to the north bank of the river crossing. Seiren appears and you toss her the Rainbow Feather. From now on, stepping onto either bank’s crossing point lets Seiren carry you across.
- MainCross to the south bank and continue to Ch. 20.
Checklist
- Where
- Grande Village, outside, by the north fence
- How
- Talk to her while carrying an Am. Pill and answer Yes.
- Opens
- Ch. 19
- Where
- Grande Village, outside, by the drying rack in the centre
- How
- Talk to her once.
- Reward
- Enables the Water Demon event at the river
- Opens
- Ch. 19
- Where
- Port Village, big north-west building, left door
- How
- Talk to Richard while holding a Hozutsu and answer Yes. He keeps the gun.
- Reward
- NPC ally Richard
- Opens
- Ch. 19
- Where
- Port Village, north-east corner
- How
- Talk to Johnny and win the fight. Losing is a game over.
- Reward
- Summon Huey (you choose who learns it)
- Opens
- Ch. 19
- Where
- Seiren’s house on the river bottom, jar on the right
- How
- Search the jar while carrying no Air Flower. Seiren also gives one when you make the deal.
- Reward
- Air Flower (about 2 minutes of air)
- Opens
- Ch. 19
- Closes
- after the escape (only needed on the river bottom)
- Where
- Niji Forest
- How
- Talk down the chain from the huge Treant to the Indigo Mirror tree, give that tree 10 Crosses, then trade Mirror, Tablet, Crystal, Horn, Bangle, Water Jar and Veil back up the chain.
- Reward
- Rainbow Feather (menu: Rainbow); afterwards the huge Treant heals you for free
- Opens
- Ch. 19: after the Water Demon is beaten
- Where
- Niji Forest, centre
- How
- Examine the Treant while carrying a Pineapple and answer Yes. It is repeatable, one reward per Pineapple.
- Reward
- Random: Gods Charm or Rice Ball (50/50)
- Opens
- Ch. 19
- Where
- Rio Grande crossing, either bank
- How
- Give her the Rainbow Feather on the north bank. Afterwards, step onto either crossing point to be carried across.
- Reward
- Free river crossing both ways
- Opens
- Ch. 19
Bosses & key battles
🗺️ Maps for this chapter (4)
Numbers mark people and events worth a visit; letters A, B, C… mark treasure chests. A pin on a door means the person is inside that building. Pins show everything that can appear on the map over the whole game, so some people only turn up later in the story. Tap a map to open it full size.
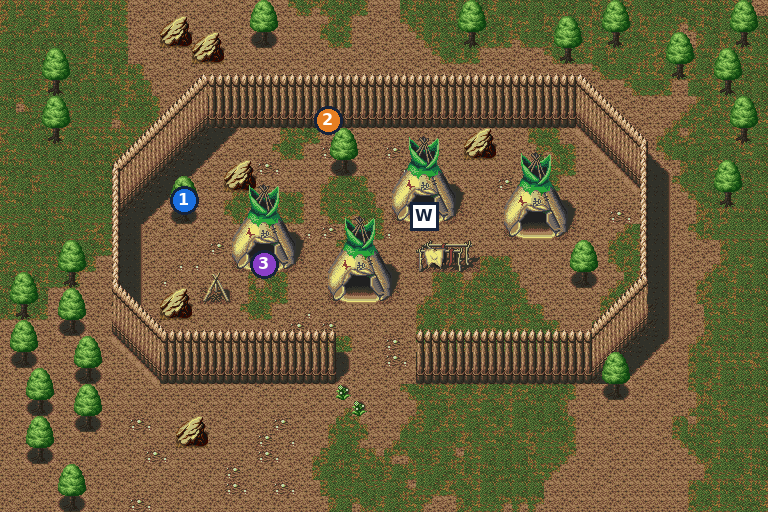
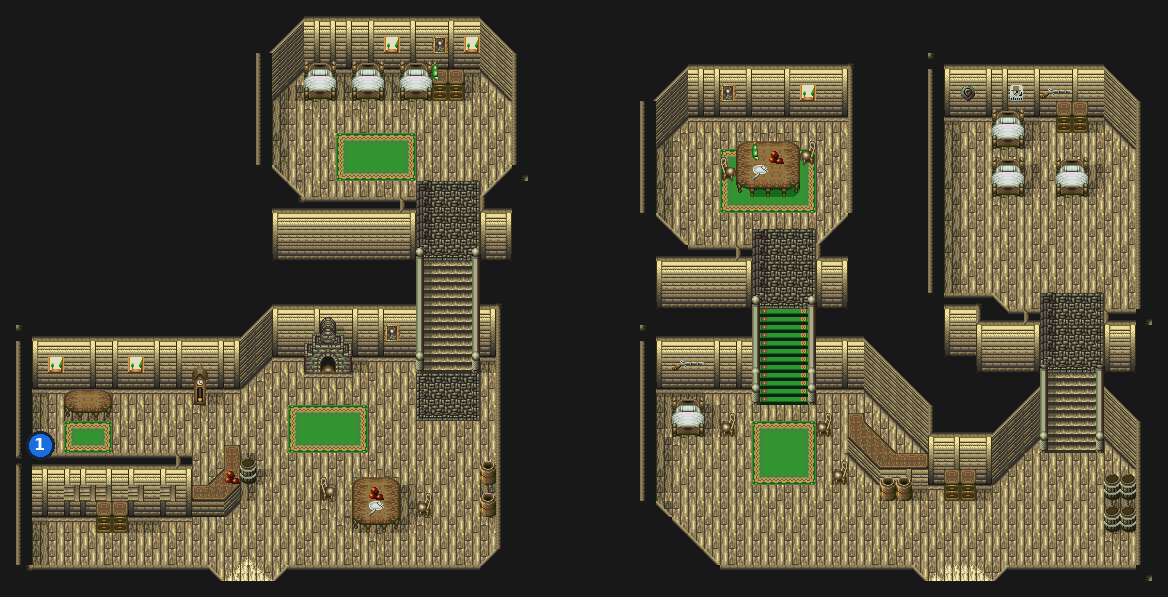
- 1Richard — joins checklist
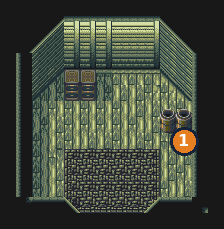
- 1Search spot — gives Air Flower
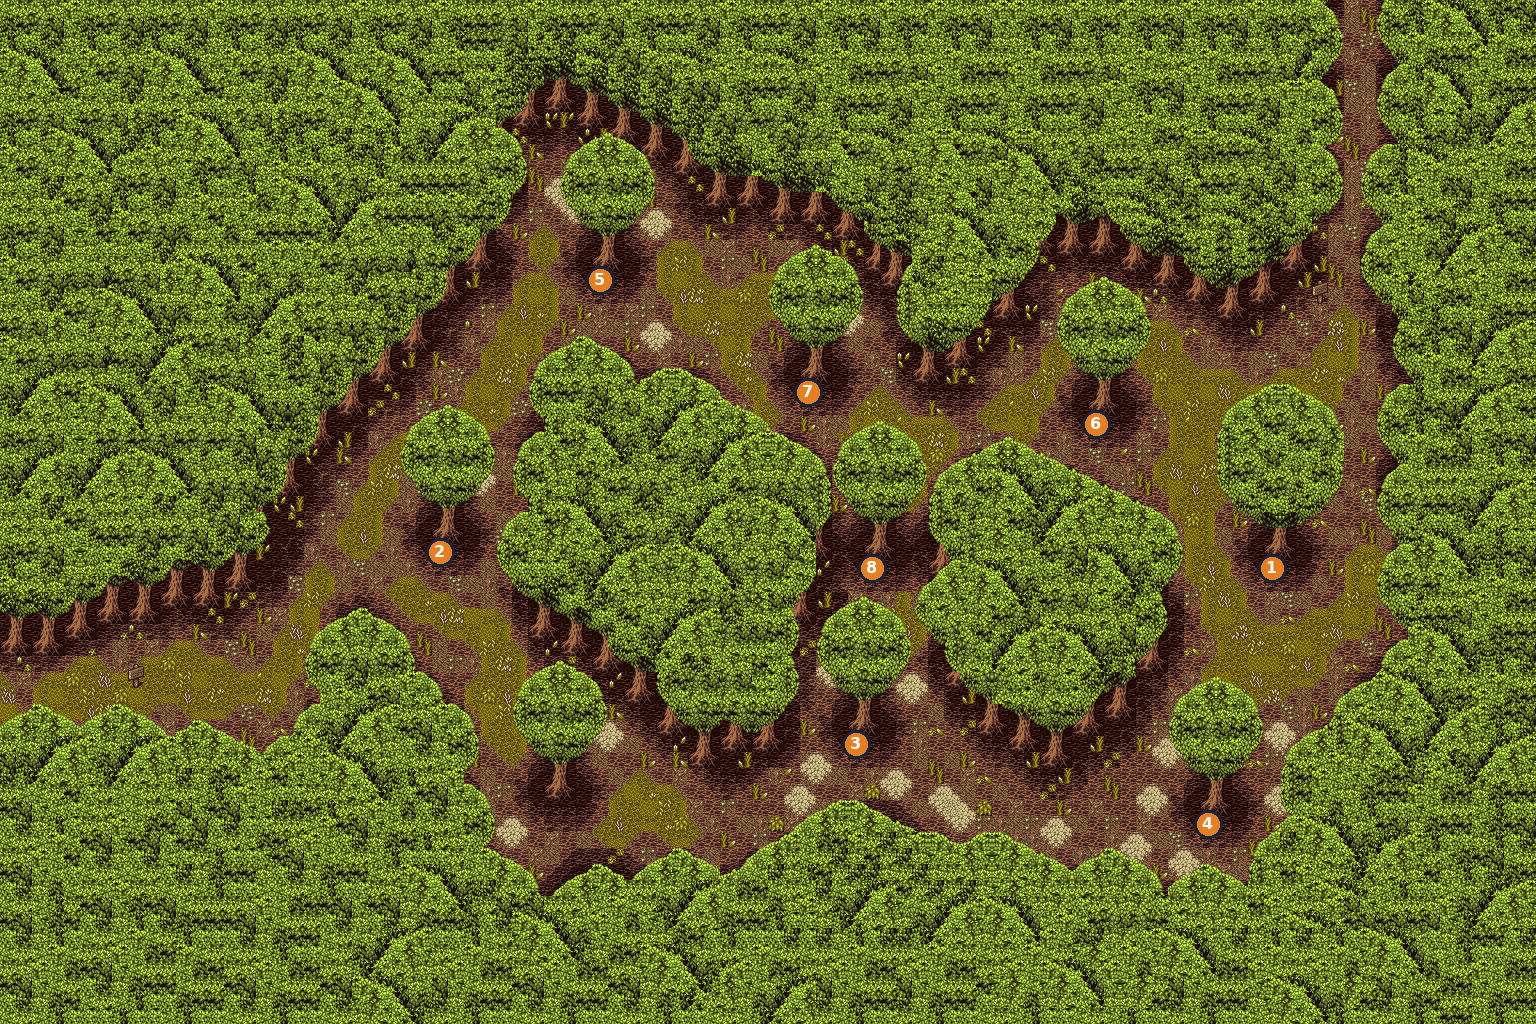
🛒 Shops in this chapter
Grande Village — Armor (seller outside by the south-east gap in the fence)
| Kettle Hat | 590 G |
| Horn Helm | 940 G |
| Beast Sash | 1,280 G |
| Wave Robe | 2,010 G |
Port Village and Hill Village sell the same list.
Grande Village — Weapons (north tent)
| Crossbow | 680 G |
| Boomerang | 730 G |
| Hunter Bow | 1,500 G |
| Bolas | 1,500 G |
| Axe | 380 G |
| Bipennis | 520 G |
| Throw Axe | 620 G |
| Tomahawk | 840 G |
| Daisenbu | 1,240 G |
Same list as Grassland Village.
Port Village — Guns (secret dealer, big building’s left door)
| Musket | 6,750 G |
| Revolver | 9,250 G |
| Enfield | 7,500 G |
| Minie Gun | 8,250 G |
| Spencer | 9,750 G |
| Chassepot | 10,500 G |
Port Village — Armor (counter, same room)
| Kettle Hat | 590 G |
| Horn Helm | 940 G |
| Beast Sash | 1,280 G |
| Wave Robe | 2,010 G |
The inn is in the middle-right house (100 gold).
Hill Village & Man-Eating Mountain
📍 Hill Village · Fort · Man-Eating Mountain · Djinn’s plain · Grande Village (return)
South of the river, Hill Village lives in fear of a man-eating monster in the southern mountains. Agree to hunt it, get the key to the villagers’ fort, and clear the path south to the ruins. Optional allies and two spirit summons (Djinn and Ifrit) are also here.
⏳ Last chances in this chapter
- Answer Yes the first time the Hill Village man asks you to beat the monster, or you lose the +2 karma for good.
- Each of the fort’s five chests costs 2 karma, and Kongouyasha later asks whether you have ever taken what belongs to others.
- Agree to hunt the man-eating monster (Fort Key) details
Full list across the game: Missables.
Walkthrough
- MainOnce Seiren has ferried you to the south bank, head south-west to Hill Village, a fenced ring of tents.
- MainEnter the right-hand tent on the upper east side and talk to the man inside. He explains the man-eating monster and the fort built to keep it out. Answer Yes on the FIRST ask: you get the Fort Key and +2 karma.
- WarningEach No costs 1 karma. Saying Yes later still gives the Fort Key, but the +2 is gone for good.
- SideDadrov waits in the north-east tent. He is worried about the spirits and joins as an NPC ally if you say Yes. → checklist
- SideIn the lower-left tent, an old woman asks for a God’sTear. Say Yes and she gives you Blessing Powder (menu: Bless Dust). → checklist
- TipIn the script she doesn’t actually take the God’sTear; you only need to have one.
- TipHill Village has an armor seller in the upper-left tent (same list as Grande). A hidden Japanese peddler stands in the south-west corner, just inside the fence, and sells Japanese weapons.
- TipThe old woman standing by the south tent offers free overnight stays.
- MainGo south to the fort. The front part is open, but the south gate is barred. Use the Fort Key there to pass through.
- WarningThe fort has five chests (Remedy, Kobu Herb, Power Orb, Speed Orb, Guard Orb). Each one costs 2 karma, 10 in all. Kongouyasha later asks whether you have ever taken what belongs to others.
- MainMan-Eating Mountain is right behind the fort. Climb it, grabbing the three chests on the way (no karma cost here).
- MainNear the top, the man-eating monster attacks. Beat it (losing is a game over). The path south then opens.
- MainGo down the far side of the mountain. The ruins of the fallen kingdom (Ruins Village) lie further south, in Ch. 21.
- SideOptional: on the plain far east of Hill Village stands a strange man, the Djinn. With karma 70 or higher he offers his power, and you pick who learns the Djinn summon. Below 70 he sends you away, but you can come back later. → checklist
- SideOnce you know Djinn, ride Seiren back north to Grande Village. Papterot, standing by the tree west of the tents, senses the wind power and joins as an NPC ally. → checklist
- SideIn Grande’s west tent, examine the fire while carrying Blessing Powder and sprinkle it. Ifrit bursts out, and Natsume can now call down Ifrit. → checklist
Checklist
- Where
- Hill Village, right-hand tent on the upper east side
- How
- Talk to the man and answer Yes the first time.
- Reward
- Fort Key (needed to pass the fort)
- Opens
- Ch. 20
- Closes
- The +2 is lost once you answer No. The key itself stays available.
- Where
- Hill Village, north-east tent
- How
- Talk to him and answer Yes.
- Reward
- NPC ally Dadrov
- Opens
- Ch. 20
- Where
- Hill Village, lower-left tent (old woman)
- How
- Have a God’sTear and answer Yes (it is not actually taken).
- Reward
- Bless Dust
- Opens
- Ch. 20
- Where
- Grande Village, west tent (fire)
- How
- Examine the fire with Blessing Powder and answer Yes.
- Reward
- Natsume learns Ifrit
- Opens
- Ch. 20: after getting Blessing Powder
- Where
- Plain far east of Hill Village (world map)
- How
- Visit with karma 70 or more.
- Reward
- Summon Djinn (choose who learns it)
- Opens
- Ch. 20: south bank reachable
- Closes
- never (retry any time)
- Where
- Grande Village, west side by the tree
- How
- Talk to him after learning Djinn and answer Yes. Before that he only says he wants more power.
- Reward
- NPC ally Papterot
- Opens
- Ch. 20: after the Djinn summon
- Where
- Fort south of Hill Village
- How
- Each of the 5 chests you open costs karma.
- Reward
- Remedy, Kobu Herb, Power Orb, Speed Orb, Guard Orb
- Opens
- Ch. 20
Treasure chests (8)
| Item | Area | Where | |
|---|---|---|---|
| Remedy ☯ Karma -2 | Fort | lower corridor, right of centre search costs karma | |
| Kobu Herb ☯ Karma -2 | Fort | small room in the middle-east | |
| Power Orb ☯ Karma -2 | Fort | end of the central corridor | |
| Speed Orb ☯ Karma -2 | Fort | west corridor, upper part | |
| Guard Orb ☯ Karma -2 | Fort | bedroom in the west (by the beds) | |
| Earth Chrm | Man-Eating Mountain | southern end of the mountain path | |
| Remedy | Man-Eating Mountain | northern end of the mountain path | |
| God’sTear | Man-Eating Mountain | middle of the mountain path |
Bosses & key battles
🗺️ Maps for this chapter (4)
Numbers mark people and events worth a visit; letters A, B, C… mark treasure chests. A pin on a door means the person is inside that building. Pins show everything that can appear on the map over the whole game, so some people only turn up later in the story. Tap a map to open it full size.
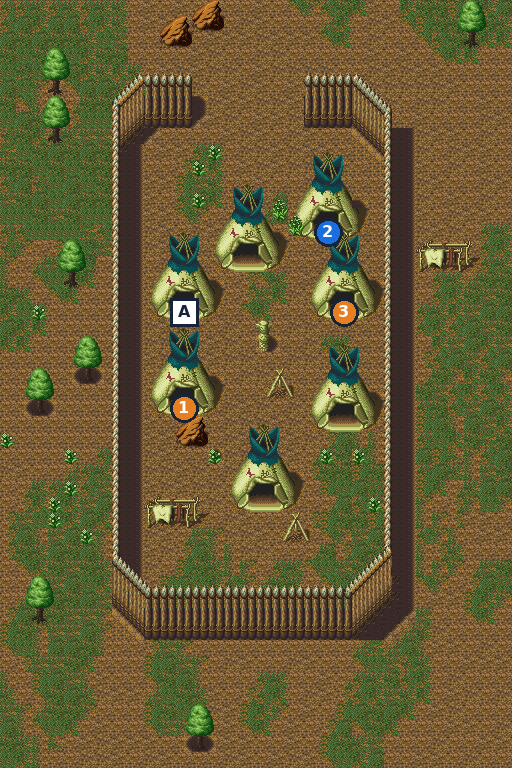
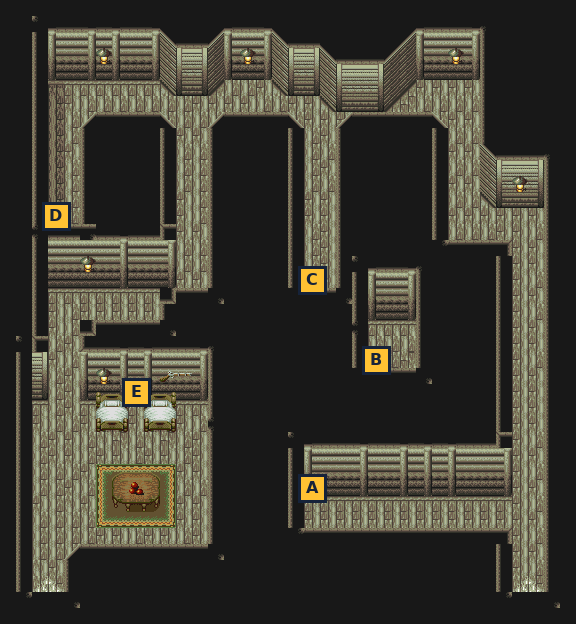
- A Remedy (-2 karma)
- B Kobu Herb (-2 karma)
- C Power Orb (-2 karma)
- D Speed Orb (-2 karma)
- E Guard Orb (-2 karma)
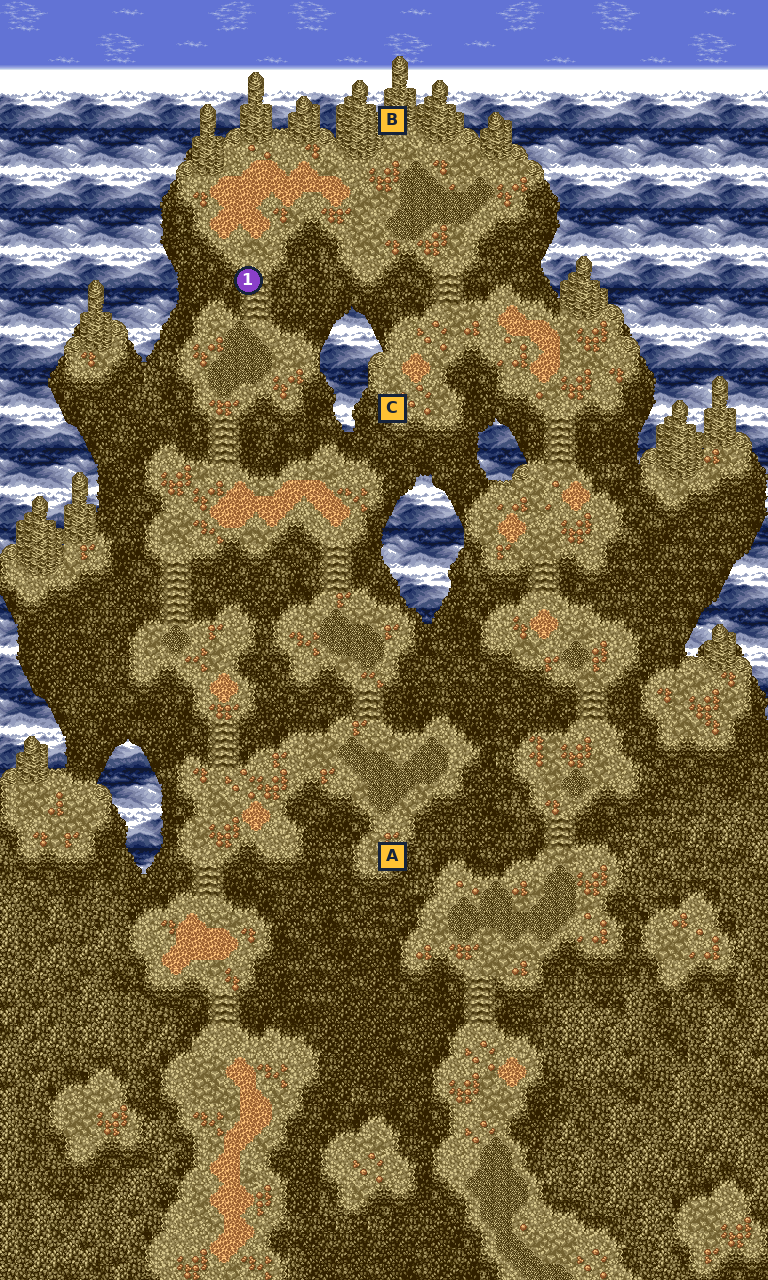
- 1Summit monster — summon Ayar Cachi
- A Earth Chrm
- B Remedy
- C God’sTear
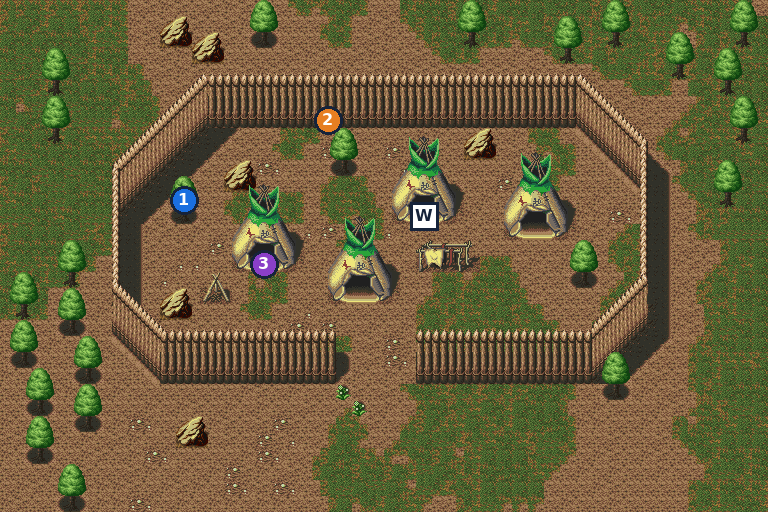
🛒 Shops in this chapter
Hill Village — Armor (upper-left tent)
| Kettle Hat | 590 G |
| Horn Helm | 940 G |
| Beast Sash | 1,280 G |
| Wave Robe | 2,010 G |
Hill Village — Weapons (hidden peddler, south-west corner)
| Futsu Tama | 2,810 G |
| Masamune | 3,140 G |
| Fudou Rod | 1,990 G |
| Bamboo Bow | 2,890 G |
| DragonClaw | 970 G |
| Red Claw | 1,230 G |
Japanese goods.
Ruins Village & Nageki Valley
📍 Ruins Village · Ruins temple · Nageki Valley · Nageki Valley cave · Spirit Hole chamber · Rio Grande crossing
In the ruins of a lost kingdom, the ghost of Queen Tamiara leads you to her guardian, Squanto, whose spirit is trapped in Nageki Valley. Rishu and the Three Doctors strike back, Touya gives his life to save the party, and Squanto takes his place.
⏳ Last chances in this chapter
- Answer No to “Fight the ghost?” at the altar: +2 karma instead of -5, plus a full heal.
- Touya dies in this chapter and cannot be saved. His equipment goes back to your bag.
- Each courtyard chest in Ruins Village costs 2 karma.
- Gundari (the god in Herai’s pond) (from Chapter 12) details
- Don’t fight Tamiara’s ghost details
- Gold Tiara & Emerald Earring details
- Touya’s sacrifice (permanent) details
Full list across the game: Missables.
Walkthrough
- MainSouth of Man-Eating Mountain lie the Ruins Village: a walled courtyard around a stepped pyramid. The temple entrance is at the top of the pyramid stairs.
- WarningThe three chests in the courtyard (Ice Charm by the stone at the foot of the pyramid, Gewehr on the east side, Holy Charm in the south-east corner) each cost 2 karma.
- MainInside, the temple is a tall hall with several levels. Take the lowest door (bottom of the hall) into the altar chamber. A ghostly woman mourns her lost kingdom and her tiara.
- MainBack in the main hall, look in the small alcove at the top-left, near where you came in: you find the Gold Tiara.
- MainReturn to the altar chamber and examine the hollow in front of the altar. Place the Gold Tiara. The ghost appears and drains your strength, and you’re asked “Fight the ghost?”
- WarningAnswer No. No gives +2 karma, and Tamiara then restores your strength. Yes costs 5 karma and you get no heal. You’re only asked once.
- MainThe ghost is Tamiara, queen of the lost kingdom. Her Guardian went to protect their Spirit Hole and never came back. Pick up the Gold Tiara and Emerald Earring she leaves on the pedestal (Natsume won’t let you leave without them).
- MainTravel far east to Nageki Valley. At the top of the pass, examine the suspicious rock face. The Gold Tiara shines and reveals a hidden cave.
- MainInside, a Spirit attacks the moment you speak to it. With the Emerald Earring its power fails. Win, and the Spirit recognizes Tamiara’s earring and calls you friends. (Without the earring you just get thrown back to the entrance.)
- SideCollect the cave’s six chests: Black Armr, Wonder Rx, Chain Chrm, Remedy, Pineapple and Kobu Herb. The Pineapple is for the Treant in Niji Forest.
- MainGo deeper to the dried-up Spirit Hole chamber. Talk to the Spirit beside the body lying there. Rishu ambushes you, powered up by the Three Doctors; you must win (losing is a game over).
- MainThe Spirit returns to its body. It is Squanto, the Guardian, who has waited here for rescue.
- MainExamine the dried Spirit Hole and take the strange Machine lying at the bottom (answer Yes twice).
- MainReturn to the Ruins temple altar and examine the pedestal. Tamiara and Squanto say their farewells, and Tamiara fades away.
- MainHead for the exit. Natsume refuses to leave Squanto like this, so Juurouta suggests resting. Take the middle door of the hall and rest in that room.
- MainSeveral scenes follow that night. You see Tamiara’s past and Rishu’s obsession with her, and the Three Doctors give Rishu a last-resort capsule.
- MainIn the morning, step outside. Rishu attacks. Win the first fight; he then transforms into a monster, and you must win again (losing either fight is a game over). His body gives out and he blows himself up.
- MainAs you leave the village, Reich, Alva and Tesla of the Three Doctors appear, and Alva summons the Phoenix. It regenerates every time you beat it; the fights keep coming until your party falls, and that loss does not end the game.
- MainTouya steps in alone and destroys the Phoenix, but he is mortally wounded. The Three Doctors head for Japan to take its Spirit Holes. Touya dies, and the party resolves to go home.
- WarningTouya leaves the party permanently. The script returns everything he had equipped to your bag.
- MainHead back north to the river crossing (or stay the night at the old woman’s in Hill Village). Squanto, alone at the ruins with Tamiara’s tiara, makes up his mind.
- MainAt the south bank, Seiren is about to ferry you when Squanto runs up. Tamiara’s tiara flies to Natsume and fills her with new power. Squanto joins the party.
- TipWhen Squanto joins, Natsume learns every holy art Touya knew, plus any more her current level qualifies her for.
- TipSquanto can use the bows and axes sold in Grande Village and Grassland Village. The Gewehr from the Ruins courtyard chest also looks like his kind of weapon.
Checklist
- Where
- Ruins temple, altar chamber (lowest door)
- How
- Place the Gold Tiara in the hollow, then answer No to “Fight the ghost?”
- Reward
- Tamiara heals the party; Gold Tiara + Emerald Earring
- Opens
- Ch. 21
- Closes
- Ch. 21: one-time choice
- Where
- Tiara: temple main hall, top-left alcove; both items again from the altar pedestal
- How
- Pick up the tiara, place it on the altar, then take both items back.
- Reward
- Gold Tiara (opens the Nageki Valley cave), Emerald Earring (needed to beat the Spirit)
- Opens
- Ch. 21
- Closes
- Tamiara takes the tiara back after Squanto is found
- Where
- Nageki Valley, dried Spirit Hole
- How
- Examine the Spirit Hole and answer Yes twice.
- Reward
- Machine (key item)
- Opens
- Ch. 21
- Where
- Ruins Village courtyard
- How
- Each of the 3 chests costs karma.
- Reward
- Ice Charm, Gewehr, Holy Charm
- Opens
- Ch. 21
- Where
- Leaving Ruins Village after Rishu’s death
- How
- Scripted. The Phoenix fight cannot be won, and Touya dies protecting the party.
- Opens
- Ch. 21
- Closes
- Ch. 21: Touya leaves forever (equipment returned to your bag)
- Where
- Rio Grande crossing, south bank
- How
- After Touya’s death, go to the south bank (or stay at the Hill Village old woman’s). Squanto arrives and joins.
- Reward
- Squanto (party member); Natsume gains Touya’s holy arts
- Opens
- Ch. 21
Treasure chests (9)
| Item | Area | Where | |
|---|---|---|---|
| Ice Charm ☯ Karma -2 | Ruins Village | at the foot of the pyramid, beside the stone tablet | |
| Gewehr ☯ Karma -2 | Ruins Village | east side of the courtyard, south of the small temple | |
| Holy Charm ☯ Karma -2 | Ruins Village | south-east corner of the courtyard | |
| Black Armr | Nageki Valley cave | north-east part of the cave | |
| Wonder Rx | Nageki Valley cave | south-east part of the cave | |
| Chain Chrm | Nageki Valley cave | south-west part of the cave | |
| Remedy | Nageki Valley cave | south-west part, just north of the Chain Chrm | |
| Pineapple | Nageki Valley cave | centre-north of the cave Trade to the Niji Forest Treant | |
| Kobu Herb | Nageki Valley cave | north-west, near the Spirit |
Bosses & key battles
🗺️ Maps for this chapter (4)
Numbers mark people and events worth a visit; letters A, B, C… mark treasure chests. A pin on a door means the person is inside that building. Pins show everything that can appear on the map over the whole game, so some people only turn up later in the story. Tap a map to open it full size.
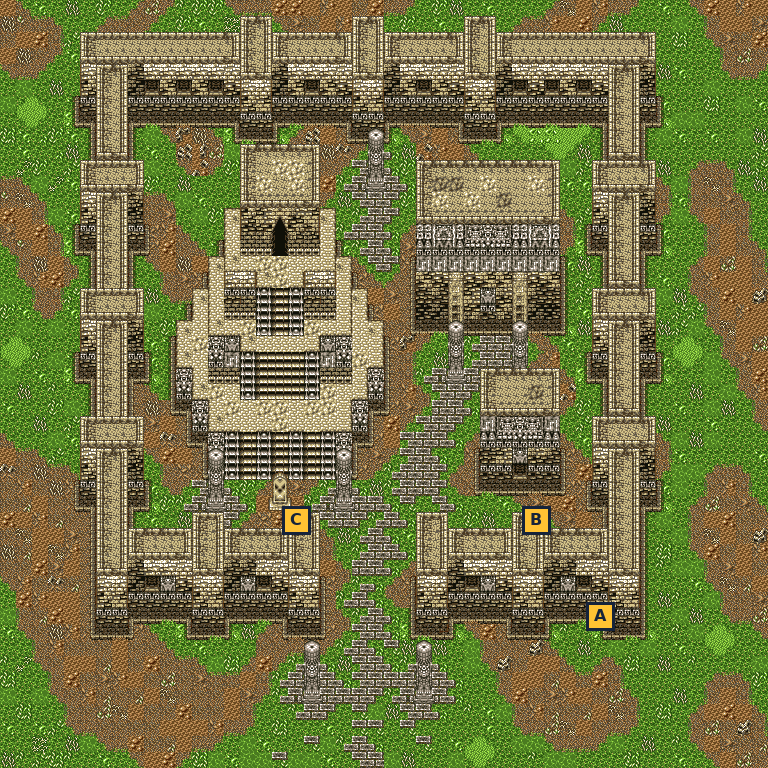
- A Holy Charm (-2 karma)
- B Gewehr (-2 karma)
- C Ice Charm (-2 karma)
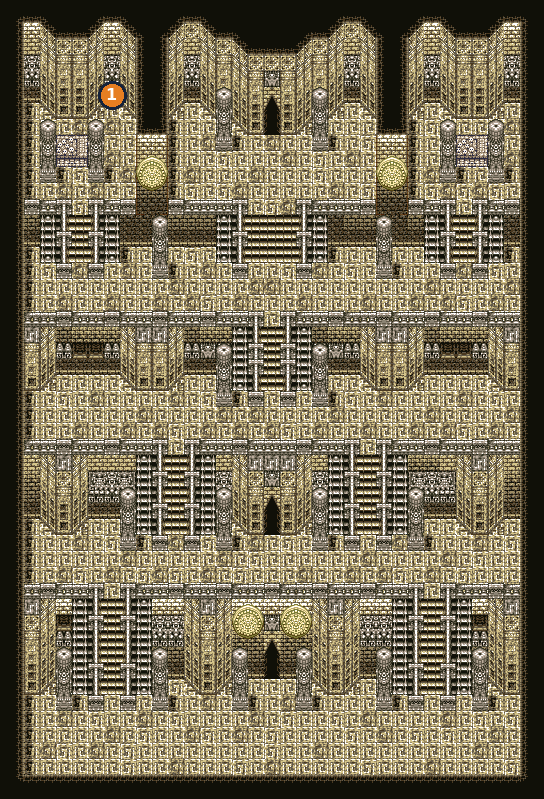
- 1Search spot — gives Tiara
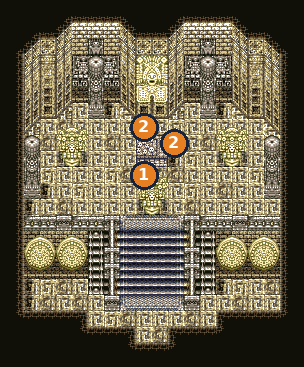
- 1Tamiara — gives Tiara, Earring, karma +2 / −5 checklist
- 2Search spot — gives Tiara, Earring
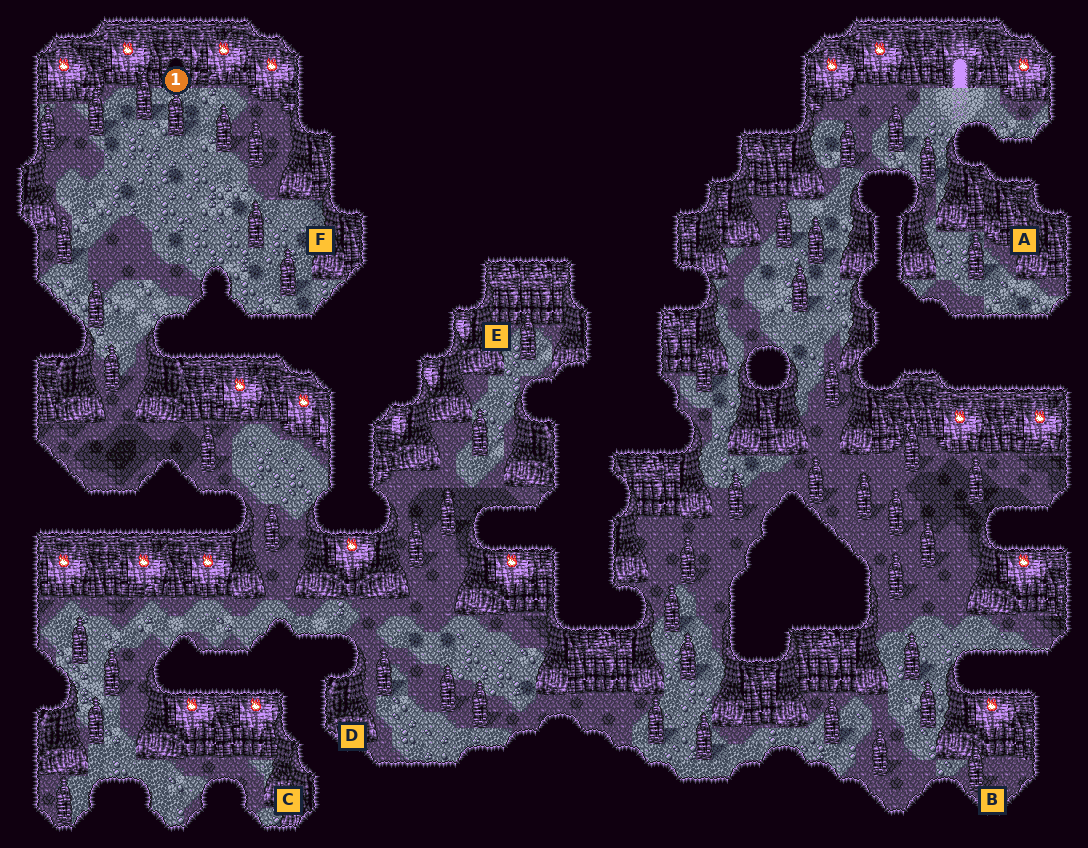
- 1Search spot (inside) — gives Machine
- A Black Armr
- B Wonder Rx
- C Chain Chrm
- D Remedy
- E Pineapple
- F Kobu Herb
Return to Japan
📍 Harbor Town (ship) · Yokohama · Ryouma’s house (Yokohama) · Kyoto · Abashiri Village · Toyama Village · Hill Village / Man-Eating Mountain (revisit)
You sail home to Yokohama, where the Shogun’s men are waiting. Sakamoto Ryouma helps you escape, a mysterious voice warns that the Spirit Hole at Hakodate is in danger, and from now on you are outlaws across Japan.
⏳ Last chances in this chapter
- After the Yokohama ambush, shops and inns across Japan refuse you or call the officers. Stock up in Yokohama before you leave town.
- At the ambush, never answer Yes twice: that is a game over.
- Ranjatai for sale (from Chapter 3) details
- Refuse to return to the Shogun details
Full list across the game: Missables.
Walkthrough
- MainSeiren ferries you back to the north bank. Walk north to Harbor Town, board your ship, and sail back to Yokohama.
- TipShop NOW. Until you walk out of Yokohama, its weapon, armor and item shops and its inn still serve you. After the next scene, almost every shop and inn in Japan refuses you.
- MainLeave Yokohama by the west exit or the north gate. The Shogun and his men corner you and ask whether you’ll return to the Shogun’s side.
- WarningAnswer No. Yes costs 5 karma and the others protest. If you say Yes a second time, Squanto turns on you and the game ends. Saying No after that first Yes still leads to the fight, but the -5 stays.
- MainFight the Shogun’s forces; you must win (losing is a game over). There are too many of them, and a voice calls you to flee: it’s Sakamoto Ryouma, who has broken with Shimazu.
- MainYou spend the night at Ryouma’s house. In a dream, the mysterious voice that first told you about the Spirit Holes warns that the Spirit Hole at Hakodate in Ezo is being targeted. Your next goal is Hakodate (continued in the next chapter).
- TipRyouma’s house is the large building on the east side of Yokohama. He lets you stay the night for free any time, which is handy now that inns turn you in. He won’t join the party yet.
- WarningYou are now wanted. In Iida, Rokkou, Izumo, Yamashiro, Kyoto, Edo, Okayama, Herai, Nikkou, Toyama, Takachiho, Kagoshima, Beppu, Umibe, Niigata, Hakodate and Yokohama the shopkeepers refuse you “by order of the Shogun”, and innkeepers call the officers, which starts a fight. The Shinsengumi in Kyoto call you traitors.
- TipPlaces that still trade with you include Yokohama’s Feather seller, the item shop in the Abashiri house that was already open to you, the youkai village shop, and all the shops in America.
- SideNow that you are outlaws, Sora in Kyoto finally agrees to travel with you. Talk to her and answer Yes. → checklist
- SideThe pet shop owner in Toyama Village now offers to take your pet for a while. A dog comes back as Wolfman and a cat as Nekomata. → checklist
- SideIn the Abashiri house, you can now find Ranjatai (costs 5 karma). The kappa Kourai’s shrine wants it. → checklist
- SideOptional trip back to America: talk to the man outside Hill Village (by the south-east tent). He says monsters have returned to the southern mountains. Go to the spot near the summit of Man-Eating Mountain and win the rematch. Squanto learns Ayar Cachi. → checklist
Checklist
- Where
- Yokohama: the first time you try to leave town after returning from America (west exit, north gate or east side)
- How
- Answer No to “Return to the Shogun?”
- Opens
- Ch. 22
- Closes
- Ch. 22: one-time scene
- Where
- Yokohama, large building on the east side
- How
- Talk to Ryouma and answer Yes to staying the night.
- Reward
- Free inn (safe from the officers)
- Opens
- Ch. 22: after the ambush
- Where
- Ryouma’s house, Yokohama
- How
- Say No to staying the night, then Yes when he asks if you want him in the party. This only works after a later Mt. Fuji story event (flag 1AE).
- Reward
- NPC ally Ryouma
- Opens
- later chapter (Mt. Fuji, Reich takes control of the Spirit Hole)
- Where
- Kyoto — outside the north-east corner of the Nue Shrine wall
- How
- Talk to her after the Yokohama ambush and answer Yes. Before that she only laments her power.
- Reward
- NPC ally Sora
- Opens
- Ch. 22: after the Yokohama ambush
- Where
- Toyama Village, pet shop
- How
- Talk to the owner with your pet in the party and answer Yes.
- Reward
- Dog becomes Wolfman, cat becomes Nekomata
- Opens
- Ch. 22: after the Yokohama ambush
- Where
- Abashiri Village, house
- How
- Search the spot after the Yokohama ambush.
- Reward
- Ranjatai
- Opens
- Ch. 22: after the Yokohama ambush
- Where
- Hill Village (man outside), then Man-Eating Mountain summit
- How
- After the Yokohama ambush, talk to the man outside Hill Village, then win the fight at the summit (losing is a game over).
- Reward
- Squanto learns Ayar Cachi
- Opens
- Ch. 22: after the Yokohama ambush + talking to the Hill Village man
Bosses & key battles
🗺️ Maps for this chapter (5)
Numbers mark people and events worth a visit; letters A, B, C… mark treasure chests. A pin on a door means the person is inside that building. Pins show everything that can appear on the map over the whole game, so some people only turn up later in the story. Tap a map to open it full size.
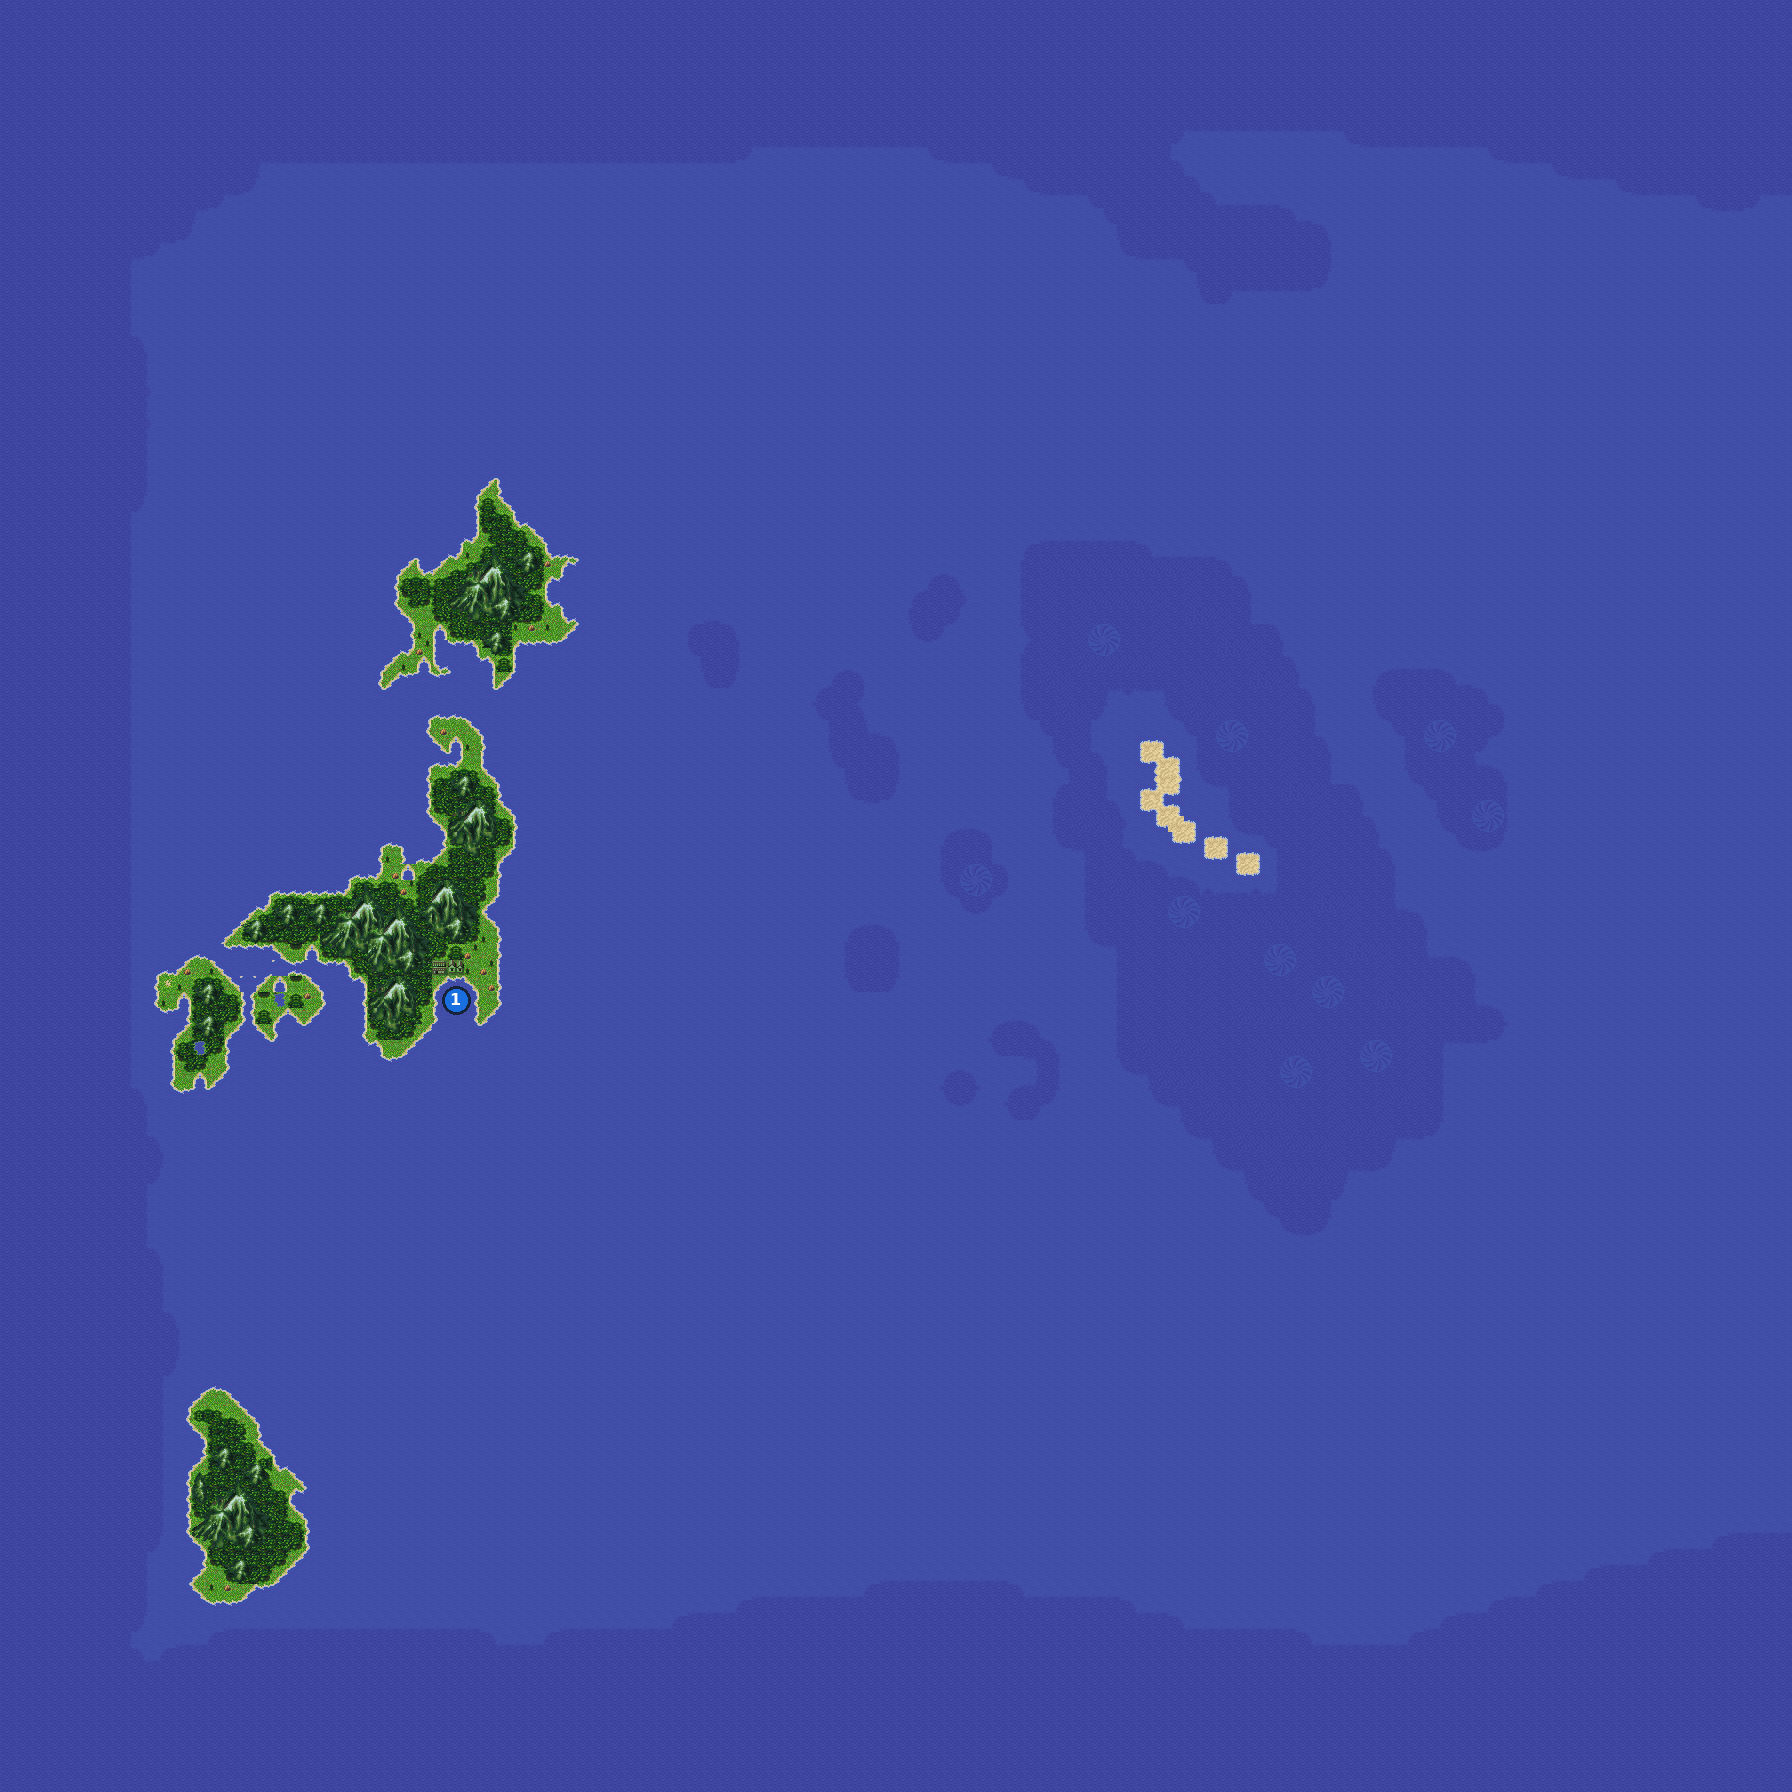
- 1Stray Ittan — joins checklist
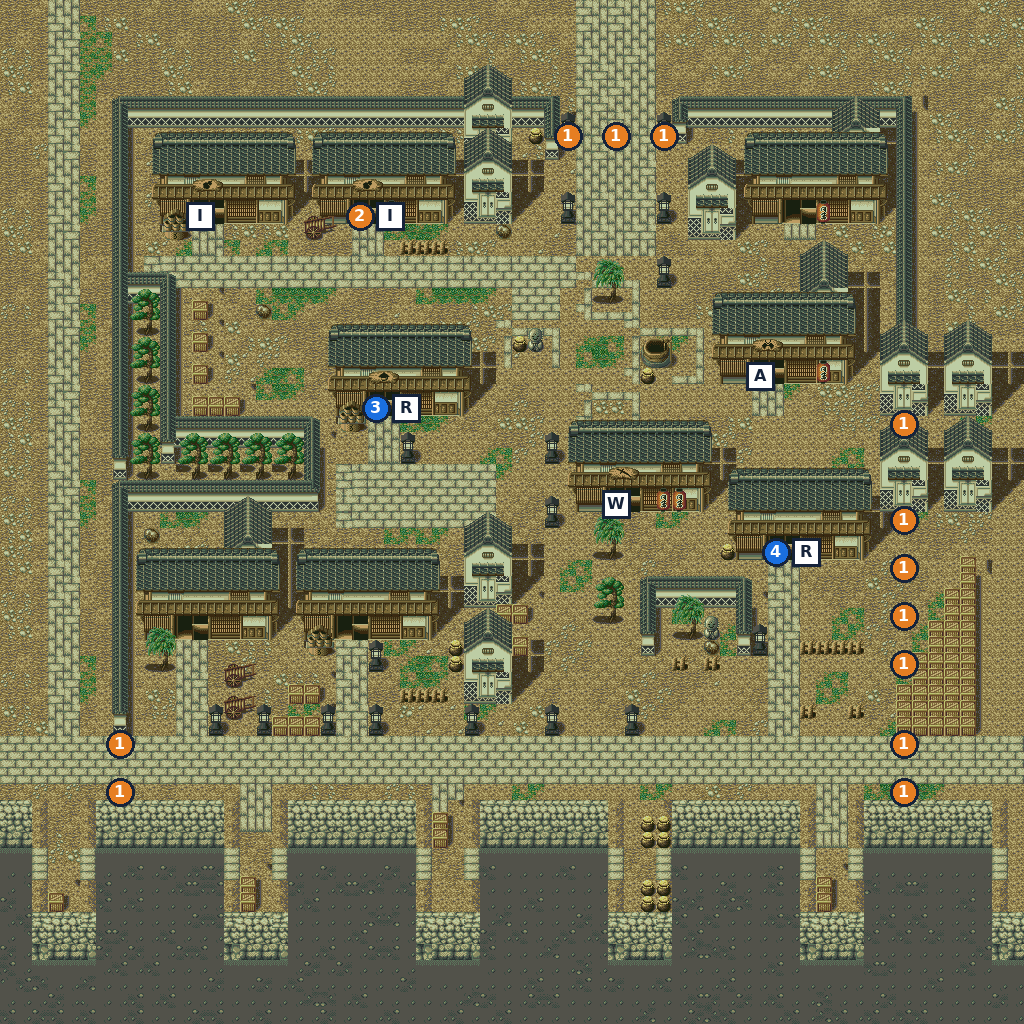
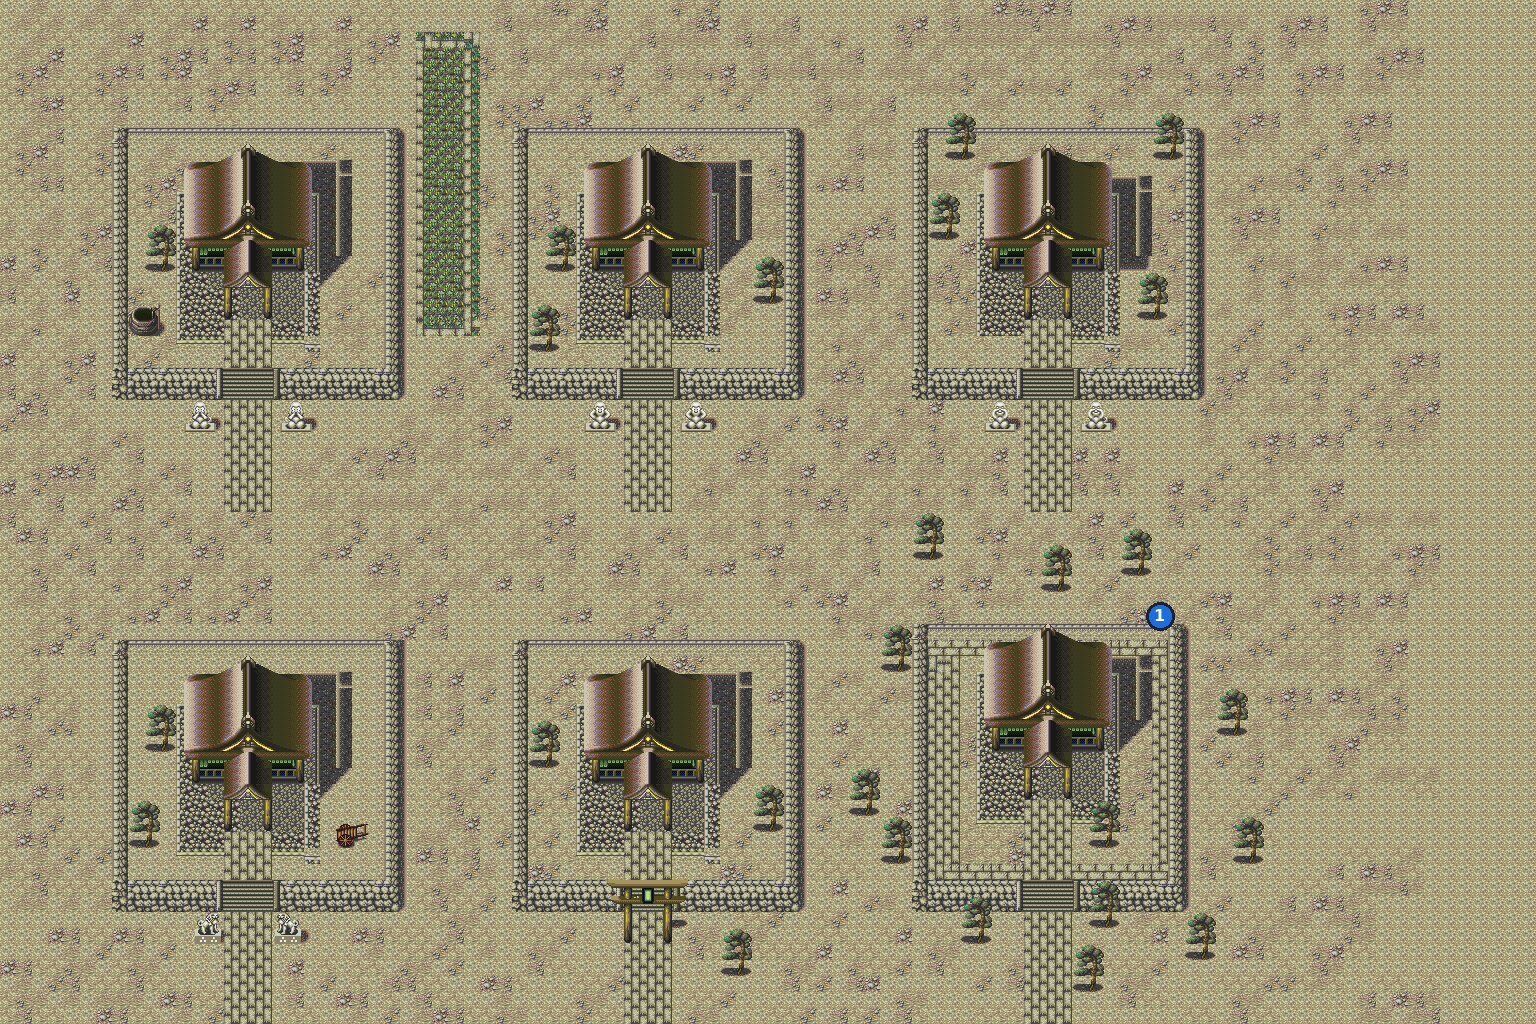
- 1Sora — joins checklist
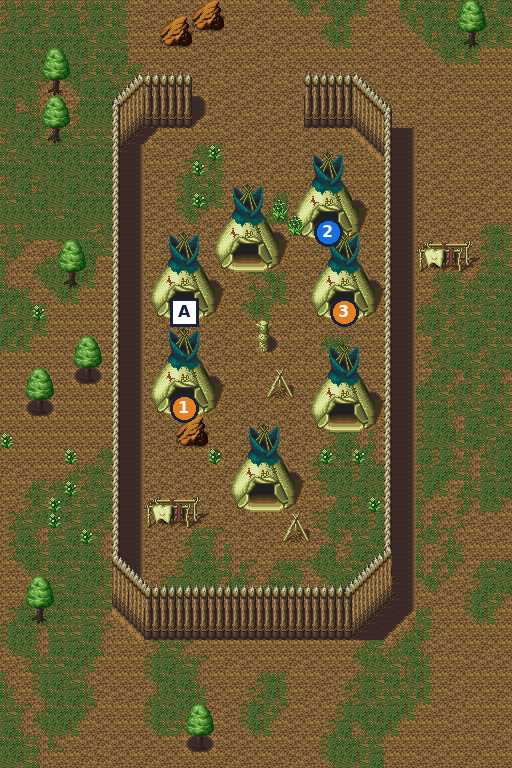
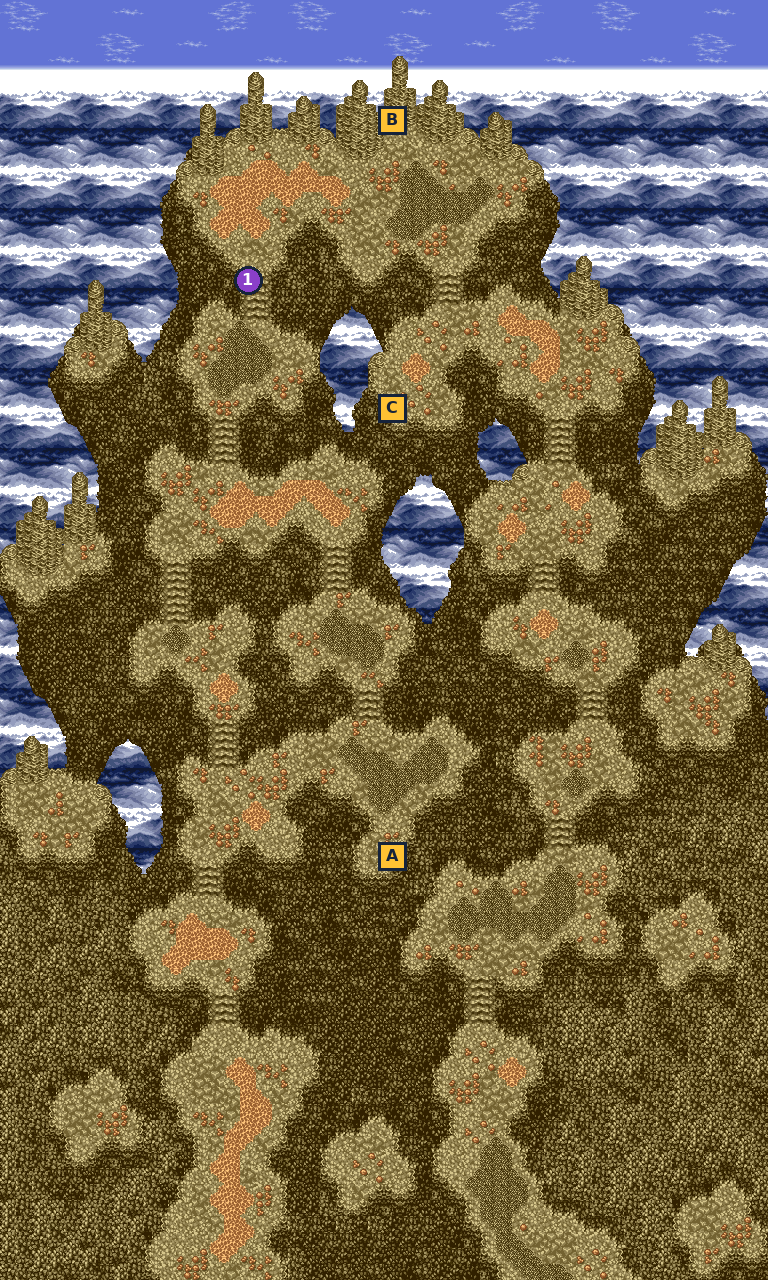
- 1Summit monster — summon Ayar Cachi
- A Earth Chrm
- B Remedy
- C God’sTear
Hakodate’s Last Spirit Hole & the Ihika
📍 Ezo (world map) · Gyuuki Cave · Hakodate Spirit Hole · Ihika meeting place
Warned in a dream, you race back to the Spirit Hole under the Gyuuki Cave in Ezo, only to find the Three Doctors draining it. The Shinsengumi blame you for its death, and a mysterious rescuer finally shows its true face: the Ihika.
⏳ Last chances in this chapter
- Last visit to the Gyuuki Cave: take any chests you missed in Ch. 16 on the way down. After you meet the Ihika the cave turns you away.
- The fight at the Spirit Hole starts the moment you arrive. Save first.
- Chest: Gale Spear (Gyuuki Cave 1F) (from Chapter 16) details
- Chest: Sleep Chrm (Gyuuki Cave 1F) (from Chapter 16) details
- Chest: God’sTear (Gyuuki Cave (lower floor)) (from Chapter 16) details
- Chest: Gold Pill (Gyuuki Cave (lower floor)) (from Chapter 16) details
- Chest: BreezeRobe (Gyuuki Cave (lower floor)) (from Chapter 16) details
Full list across the game: Missables.
Walkthrough
- MainAfter the night at Ryouma’s house, head for Ezo. Sail there or fly with the Stray Ittan (START button). Your goal is the Spirit Hole at the bottom of the Gyuuki Cave, where you fought the Gyuuki (Ch. 16).
- TipYou are wanted now. In Hakodate the shops and the travelling armor peddler refuse you, and the innkeeper calls the officers, which starts a fight (losing it is a game over). Rest at Ryouma’s house in Yokohama before you set out.
- MainEnter the Gyuuki Cave from the Ezo map. The Shogun’s men are gone. Walk to the spot where Hijikata used to stand to go down into the cave, then continue through both floors to the place where the Gyuuki fell, and dive in again to reach the Spirit Hole.
- SideSecond chance: if you missed any Gyuuki Cave chests in Ch. 16 (Gale Spear and Sleep Chrm on the first floor; God’sTear, Gold Pill and BreezeRobe on the lower floor), grab them on the way down. This is your last visit: after the next scenes the cave turns you away.
- WarningHeal and save before the dive. The fight at the bottom starts the moment you arrive, and losing it is a game over.
- MainAt the Spirit Hole you find Tesla, Alva and Reich. They have already drained its spirit energy and used it to build a new spirit beast, which attacks at once.
- MainBeat the Doctors’ new spirit beast (the old guides call it a Cyclops). Alva can’t believe you won, and the Doctors flee.
- MainWalk away from the dried-up Spirit Hole. Yoshinobu, the Shogun, Kondo and Hijikata arrive. The Shogun accuses you of draining it to steal the country, Kondo believes him, and the Shinsengumi are ordered to cut you down. A voice cries out that it won’t let you die, and everything goes white.
- MainYou wake up in the Ihika meeting place. The voice that has guided you since the start reveals its true form: the Ihika, the people who ruled this land long before humans. A vision shows how their own attempt to control a Spirit Hole destroyed their civilization.
- MainThe Ihika warn that the land’s spirit veins are warped and the last healthy Spirit Holes are being drained. They tell you to go to Mt. Fuji.
- MainTalk to the Ihika on the left and answer Yes to ‘Ask Ihika to join?’. Both Ihika join as NPC allies. You must accept at least once: the Ihika are the ones who break the seal on Mt. Fuji in the next chapter.
- TipThe other Ihika heals your whole party for free whenever you talk to it. The meeting place has its own entrance on the Ezo map, so you can come back here to rest or to recruit the Ihika again if you said No.
- MainLeave the meeting place and travel to Mt. Fuji on the Honshu map (next chapter).
Checklist
- Where
- Ihika meeting place (Ezo)
- How
- Talk to the Ihika on the left and answer Yes to ‘Ask Ihika to join?’. If you say No, come back and ask again.
- Reward
- Two NPC allies (Ihika). Also required: accepting once is what lets them break the seal on Mt. Fuji.
- Opens
- Ch. 23: after the Hakodate Spirit Hole
- Closes
- Ch. 29: all NPC allies leave when you enter Mt. Fuji for the last time
Bosses & key battles
🗺️ Maps for this chapter (4)
Numbers mark people and events worth a visit; letters A, B, C… mark treasure chests. A pin on a door means the person is inside that building. Pins show everything that can appear on the map over the whole game, so some people only turn up later in the story. Tap a map to open it full size.
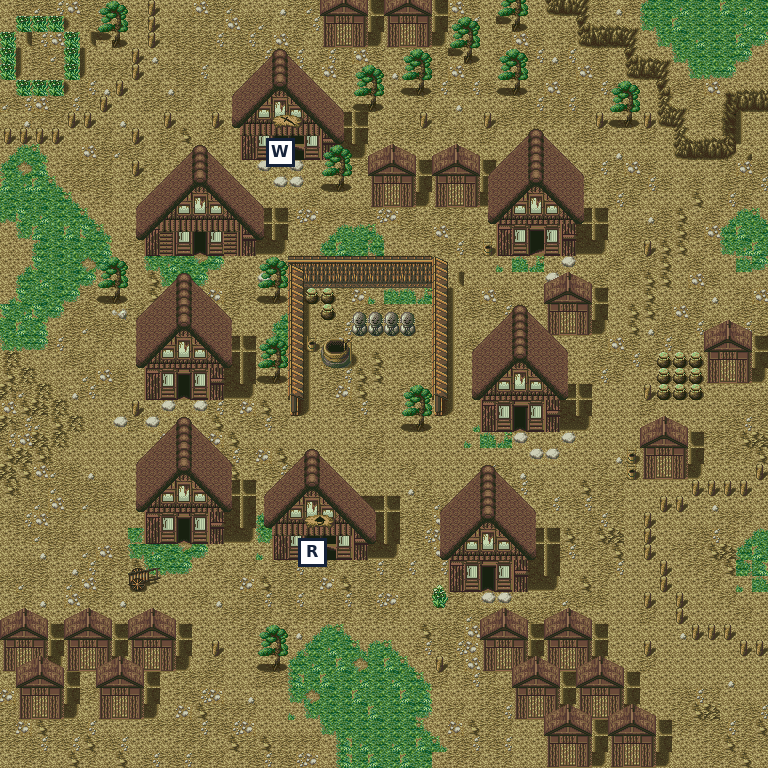
- RInn
- WWeapon shop
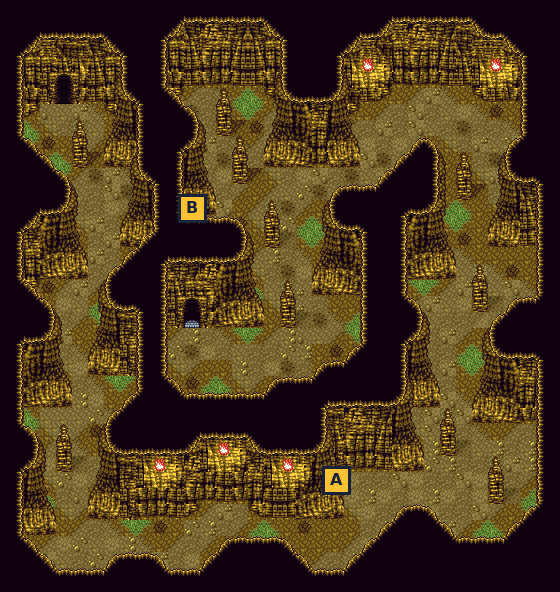
- A Gale Spear
- B Sleep Chrm
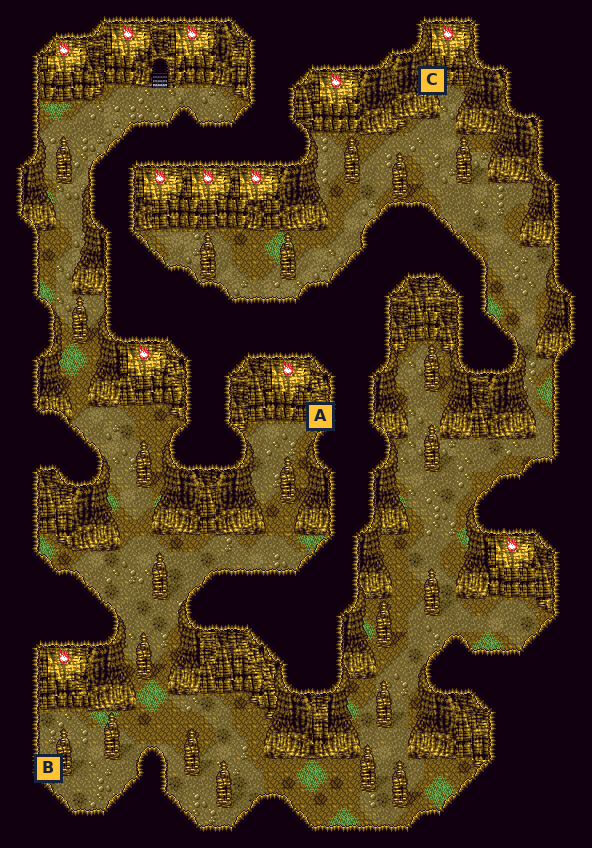
- A God’sTear
- B Gold Pill
- C BreezeRobe
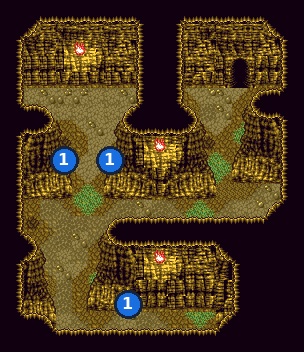
- 1Ihika — joins checklist
Mt. Fuji: Okita’s Wish
📍 Mt. Fuji · Mt. Fuji (inside) · Yokohama (Ryouma’s house)
The Ihika break the seal on Mt. Fuji, where the last unharmed Spirit Hole lies. Inside, Okita makes a desperate choice, and the Three Doctors seize the Spirit Hole and raise a flying castle over the mountain. Now all of Japan turns against you.
⏳ Last chances in this chapter
- Between this chapter and your visit to the Ihika village, a crowd at Mt. Fuji asks ‘Run away from here?’. Answer Yes; No is a game over.
- Juurouta’s duel with Okita details
Full list across the game: Missables.
Walkthrough
- MainGo to Mt. Fuji on the Honshu map. Climb the path in the lower middle of the mountain to the roped-off spot with the ‘Danger, Keep Out’ sign.
- MainWith the Ihika’s help (you must have accepted it in Ch. 23), the Ihika laugh off the human seal and break it. The way up to the cave in the middle of the mountain is open.
- SideMt. Fuji has five chests on its open slopes: God’sTear on the ledge west of the cave mouth, Red Robe on the west slope, Wind Charm low on the far west side, Hannya low on the south-east side, and Raijin Spr up near the summit. Take what you can reach now; the rest can wait until you climb to the summit in Ch. 26. They stay until the point of no return. → checklist
- MainEnter the cave in the middle of the mountain. From the entrance hall, go through a door on the north side into the next cave. A Jizo statue in its north-west corner lets you save and recover.
- MainContinue to the Spirit Hole chamber. As you approach, Squanto hears someone coming: the Shogun, Yoshinobu, Hijikata and Okita arrive. The Shogun gloats over an unharmed Spirit Hole, then takes everyone off to rest, leaving Okita on watch.
- MainTalk to Okita, who stands on guard at the north end. Juurouta begs him to believe you. Okita reveals that the youkai poison from the Ikedaya raid has been eating him away, and that he has little time left. Hoping the Spirit Hole will restore his broken body, he throws himself into it and turns into a monster.
- WarningFight the transformed Okita. You must win; losing is a game over.
- MainOkita asks for one last thing as a swordsman: a duel with Juurouta. Fight it out. Win or lose, the story goes on; either way Okita dies with no regrets, glad to have crossed swords with someone he respected.
- MainHijikata and Kondo arrive and believe you killed him, and the Shogun orders your arrest. Hijikata carries Okita’s body away. Then Alva appears, strikes Kondo down, and Reich takes control of the Spirit Hole.
- MainYou come to in the previous cave with the spirit energy running wild. Leave the mountain.
- MainOutside, a ball of light over Mt. Fuji turns into a castle. The Three Doctors declare the country theirs. Yoshinobu says the Shogun is still trapped inside and blames you, and the frightened crowd turns on you, so you run.
- MainWith every shop closed to you, the Ihika invite you to their village at the bottom of the falls at Takachiho. Since the Blue Orb crumbled, they tell you to enter the waterway under the large pond north-west of Takachiho Village instead (next chapter).
- WarningDon’t go back up Mt. Fuji before you have been to the Ihika village. An angry crowd stops you near the cave and asks ‘Run away from here?’. Answer Yes. Answering No is a game over.
- SideRyouma now joins if you ask. At his house in Yokohama, answer No to staying the night, then Yes when he asks if you want him in the party. Yes to the first question still gives you a free night’s rest. → checklist
- TipKyoto’s Shinsengumi still call you traitors. Nothing changes there until the final chapter.
Checklist
- Where
- Mt. Fuji (inside), Spirit Hole chamber
- How
- After beating the transformed Okita, fight the duel he asks for.
- Reward
- Story only. Winning or losing the duel leads to the same scene (Okita dies either way, with a different last line).
- Opens
- Ch. 24
- Closes
- Ch. 24: one-time scene
Treasure chests (5)
| Item | Area | Where | |
|---|---|---|---|
| God’sTear | Mt. Fuji | ledge just west of the cave mouth in the middle of the mountain ⚠ Gone after Chapter 29 | |
| Red Robe | Mt. Fuji | west slope, about halfway up ⚠ Gone after Chapter 29 | |
| Wind Charm | Mt. Fuji | far west side, low on the mountain ⚠ Gone after Chapter 29 | |
| Hannya | Mt. Fuji | south-east side, low on the mountain ⚠ Gone after Chapter 29 | |
| Raijin Spr | Mt. Fuji | near the summit, just east of the crater May only be reachable once the path to the summit opens (Ch. 26). ⚠ Gone after Chapter 29 |
Bosses & key battles
🗺️ Maps for this chapter (1)
Numbers mark people and events worth a visit; letters A, B, C… mark treasure chests. A pin on a door means the person is inside that building. Pins show everything that can appear on the map over the whole game, so some people only turn up later in the story. Tap a map to open it full size.
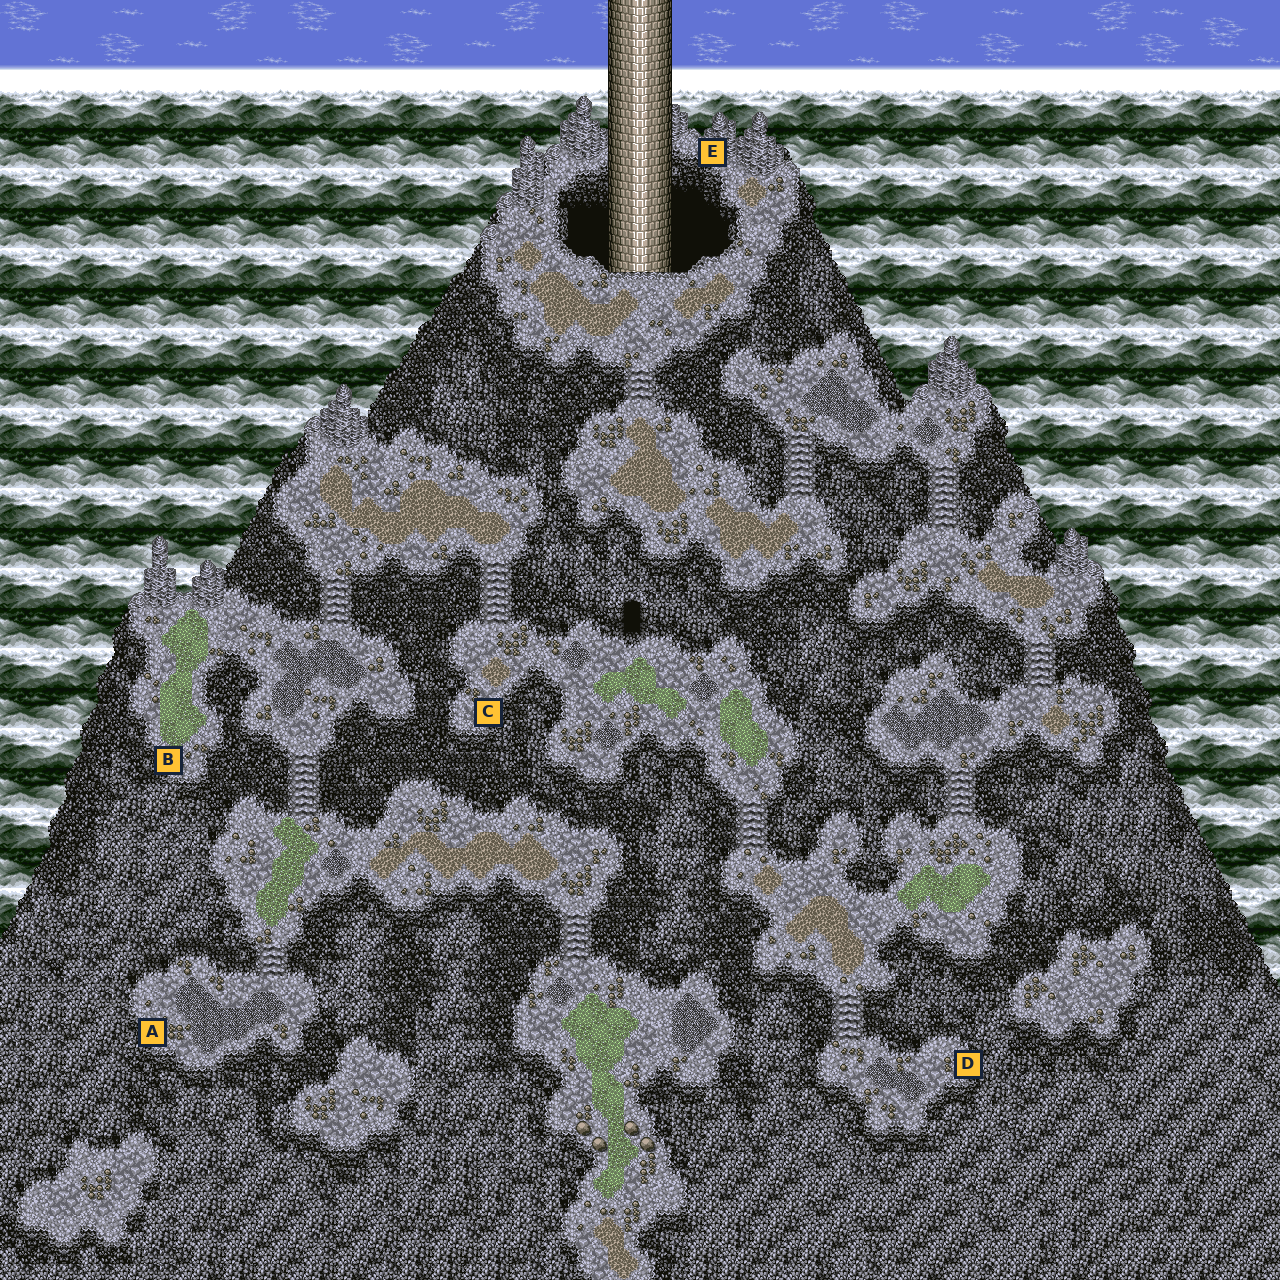
- A Wind Charm
- B Red Robe
- C God’sTear
- D Hannya
- E Raijin Spr
Ihika Village
📍 Kyushu (world map) · Pond north-west of Takachiho · Underground Waterway (Ihika route) · Ihika Village · Underground Waterway (Waterfall, revisit)
Shut out of every town, you dive into a pond in Kyushu and follow a hidden waterway to the underground village of the Ihika. Their Elder explains why they hid from the surface and offers you everything they have.
Walkthrough
- MainTravel to Kyushu (by ship, the boatman or the Stray Ittan) and go to the large pond north-west of Takachiho Village. It only opens after the flying castle appears over Mt. Fuji.
- MainWalk up to the pond. The Ihika tell you the path to their cave is below. Answer Yes to ‘Enter the pond?’. (If you say No, just walk up to it again.)
- MainYou land in a huge underground waterway. The current at the north end pushes you back, so follow the passage the other way to reach the Ihika village.
- MainTalk to the Elder in the building at the top centre of the village. He explains that the Ihika once made a Spirit Hole run wild and nearly destroyed the surface, and that no child has been born to them in decades, so they want to leave the future to humans. He offers you anything the village has.
- TipAfter this talk, the Ihika in your party stay home. The Ihika standing next to the Elder rejoins you if you answer Yes to ‘Do you need our help?’.
- TipThe building in the top-right corner is an inn: answer Yes to ‘Would you like to stay with us?’ for a free night’s rest. This is the best place to rest for the rest of the game.
- MainShop here. The centre building sells weapons (including Masamune), the building on the right sells armor, and the building at the bottom left has two item counters. Nobody here cares about the Shogun’s orders.
- SideThe first item counter sells the Ranjatai for 50000 gold. It is the honest way to get the Ranjatai for the Kourai kappa (Ch. 15): no karma loss, and Kongouyasha won’t count it as theft. → checklist
- SideThe door in the top-left building leads into the old Underground Waterway beneath the falls (Ch. 11). If you missed its chests then (Dream Robe, Genji Armr, N. Pill), they are still there.
- MainTo leave, go through that same top-left door and step on the magic circle near where you arrive. It takes you out to the basin of the Takachiho falls. To come back later, dive into the pond again.
- MainReturn to Mt. Fuji (next chapter). The crowd there now asks ‘Are you ready to fight?’. Answer Yes and they let you through.
Checklist
- Where
- Ihika Village, top centre building
- How
- Talk to the Elder.
- Reward
- Unlocks the return to Mt. Fuji (the crowd lets you pass). Your Ihika allies leave; the Ihika beside the Elder rejoins on request.
- Opens
- Ch. 25
- Where
- Ihika Village, top-right building
- How
- Answer Yes to ‘Would you like to stay with us?’.
- Reward
- Free rest
- Opens
- Ch. 25
- Closes
- Ch. 29 (point of no return)
- Where
- Ihika Village, bottom-left building, first counter
- How
- Buy it.
- Reward
- Ranjatai (for the Kourai kappa, youkai village stage 4)
- Opens
- Ch. 25
- Closes
- Ch. 29 (point of no return)
🗺️ Maps for this chapter (2)
Numbers mark people and events worth a visit; letters A, B, C… mark treasure chests. A pin on a door means the person is inside that building. Pins show everything that can appear on the map over the whole game, so some people only turn up later in the story. Tap a map to open it full size.
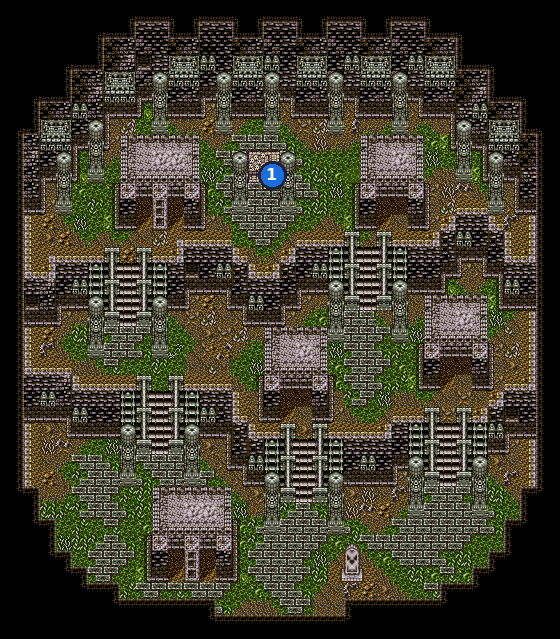
- 1Ihika — joins checklist
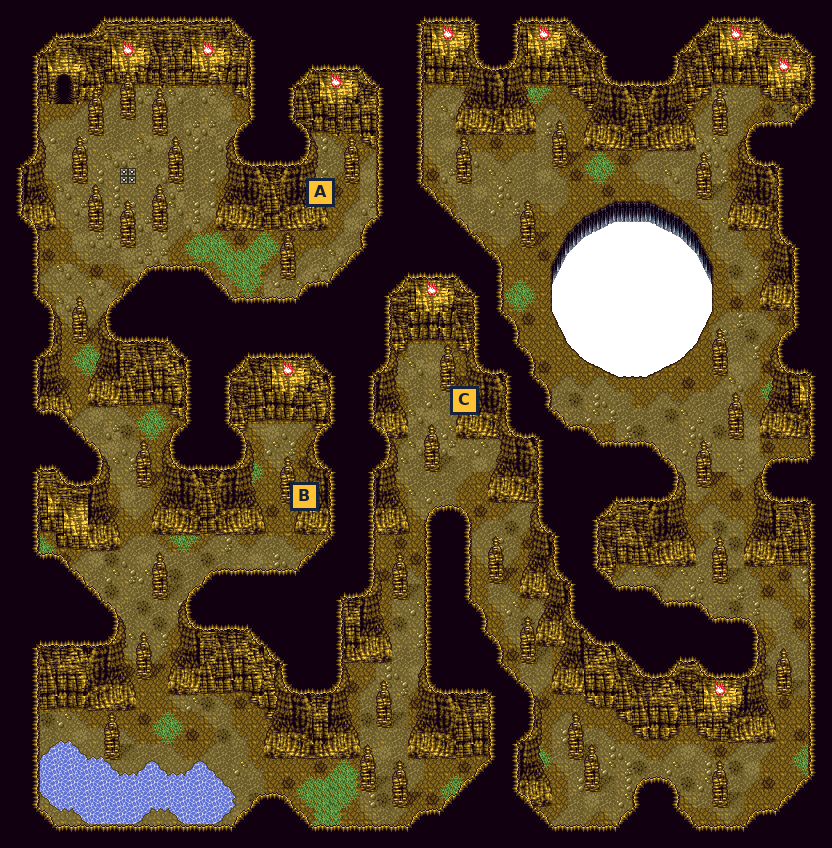
- A Dream Robe
- B Genji Armr
- C N. Pill
🛒 Shops in this chapter
Ihika Village — Weapons
| Masamune | 3,140 G |
| Moon Sword | 3,420 G |
| Totsuka | 3,670 G |
| Dragon Spr | 2,450 G |
| Bishamon | 1,990 G |
| Boomerang | 730 G |
| Hunter Bow | 1,500 G |
| Bolas | 1,500 G |
| Bamboo Bow | 2,890 G |
| Indra Bow | 4,270 G |
| DragonClaw | 970 G |
| Red Claw | 1,230 G |
| 8-Way Claw | 1,480 G |
| Tomahawk | 840 G |
| Daisenbu | 1,240 G |
Centre building. Masamune is the item Kaishuu wants in Rokkou (ch08).
Ihika Village — Armor
| Horn Helm | 940 G |
| Buddha Hlm | 1,330 G |
| Flame Head | 1,760 G |
| Wave Robe | 2,010 G |
| Brocade | 1,460 G |
| Kiraikou | 2,270 G |
| Niou Plate | 2,530 G |
| Moon Armor | 3,040 G |
| DragonShoe | 1,020 G |
| Light Shoe | 1,350 G |
| Hero Legs | 1,770 G |
Building on the right.
Ihika Village — Items
| Herb | 4 G |
| N. Pill | 20 G |
| Dut. Pill | 40 G |
| Remedy | 80 G |
| H. Water | 8 G |
| S. Dew | 16 G |
| Am. Pill | 32 G |
| M. Water | 64 G |
| Ranjatai | 50,000 G |
| Kobu Herb | 20 G |
| K. Cure | 40 G |
Bottom-left building, first counter.
Ihika Village — Items
| Pill | 6 G |
| Sandalwd. | 6 G |
| Wake Dust | 6 G |
| Reviver | 10 G |
| Gold Pill | 50 G |
| Feather | 30 G |
Bottom-left building, second counter.
The Crater & Crater Tower
📍 Mt. Fuji · Crater 4F–1F · Crater Tower 1F–4F
Back on Mt. Fuji, the crowd reluctantly lets you pass. You climb down into the crater and up the great pillar that holds the Three Doctors’ flying castle.
⏳ Last chances in this chapter
- The crater, the Crater Tower and the Sky Pavilion close for good once you stop the machine at the top of the Sky Pavilion (Ch. 27). Take every chest on the way up.
- Save at the Jizo statue on Crater Tower 4F before stepping into the Sky Pavilion.
Full list across the game: Missables.
Walkthrough
- MainReturn to Mt. Fuji. Near the cave mouth the crowd shouts ‘They’re back!!’ and asks ‘Are you ready to fight?’. Answer Yes and they let you through. (No just sends you away; you can try again.)
- SideOn your way up, collect any Mt. Fuji chests you haven’t opened yet, including the Raijin Spr near the summit (see Ch. 24). → checklist
- MainClimb to the rim of the crater at the summit. Natsume points at the pillar rising out of it: climb that, and you can get inside the castle. Answer Yes to ‘Go down into the crater?’. If you say No, stepping on the rim later takes you straight down.
- WarningEverything from here to the top of the Sky Pavilion is one trip. When you finish the Sky Pavilion (Ch. 27) you are sent back out and can never re-enter the crater, the tower or the pavilion. Open every chest on the way. You can still walk out of the crater at its entrance (‘Leave the crater?’) until then.
- MainCrater 4F: this is where you land. The Fire Charm is in the north-east part, and the Fire Armor is in the south. Take the way down to 3F.
- MainCrater 3F: a Sage Pill in the north-west and a Pineapple in the south-west. Continue down.
- MainCrater 2F: a Remedy in the north-east and an M. Water on the east side, halfway down. Continue down to 1F.
- MainCrater 1F: walk up to the foot of the pillar in the north. Squanto finds a way in. Enter the Crater Tower.
- MainCrater Tower 1F: an Evil Claw in the south-west. Climb the stairs through 2F (no chests) to 3F.
- MainCrater Tower 3F: a D. Dew near the south end. Climb to 4F.
- MainCrater Tower 4F: a Sacred Rod in the middle of the floor and a Houzouin in the north-east. A Jizo statue in the north-west lets you save. Heal and save here; the Sky Pavilion above starts with a boss.
- TipKeep the two Pineapples (Crater 3F and Sky Pavilion 2F). Each can be traded to the Treant in Niji Forest, America (Ch. 19), for a Gods Charm or a Rice Ball, but only before the point of no return.
Checklist
- Where
- Mt. Fuji, near the cave mouth
- How
- After meeting the Ihika Elder, answer Yes to ‘Are you ready to fight?’.
- Reward
- The way to the summit and the crater opens.
- Opens
- Ch. 25: after the Ihika Elder
Treasure chests (10)
| Item | Area | Where | |
|---|---|---|---|
| Fire Charm | Crater 4F | north-east part of the floor ⚠ Gone after Chapter 27 | |
| Fire Armor | Crater 4F | south part of the floor ⚠ Gone after Chapter 27 | |
| Sage Pill | Crater 3F | north-west ⚠ Gone after Chapter 27 | |
| Pineapple | Crater 3F | south-west For the Niji Forest Treant (Ch. 19). ⚠ Gone after Chapter 27 | |
| Remedy | Crater 2F | north-east ⚠ Gone after Chapter 27 | |
| M. Water | Crater 2F | east side, halfway down ⚠ Gone after Chapter 27 | |
| Evil Claw | Crater Tower 1F | south-west ⚠ Gone after Chapter 27 | |
| D. Dew | Crater Tower 3F | near the south end ⚠ Gone after Chapter 27 | |
| Sacred Rod | Crater Tower 4F | middle of the floor ⚠ Gone after Chapter 27 | |
| Houzouin | Crater Tower 4F | north-east ⚠ Gone after Chapter 27 |
🗺️ Maps for this chapter (7)
Numbers mark people and events worth a visit; letters A, B, C… mark treasure chests. A pin on a door means the person is inside that building. Pins show everything that can appear on the map over the whole game, so some people only turn up later in the story. Tap a map to open it full size.
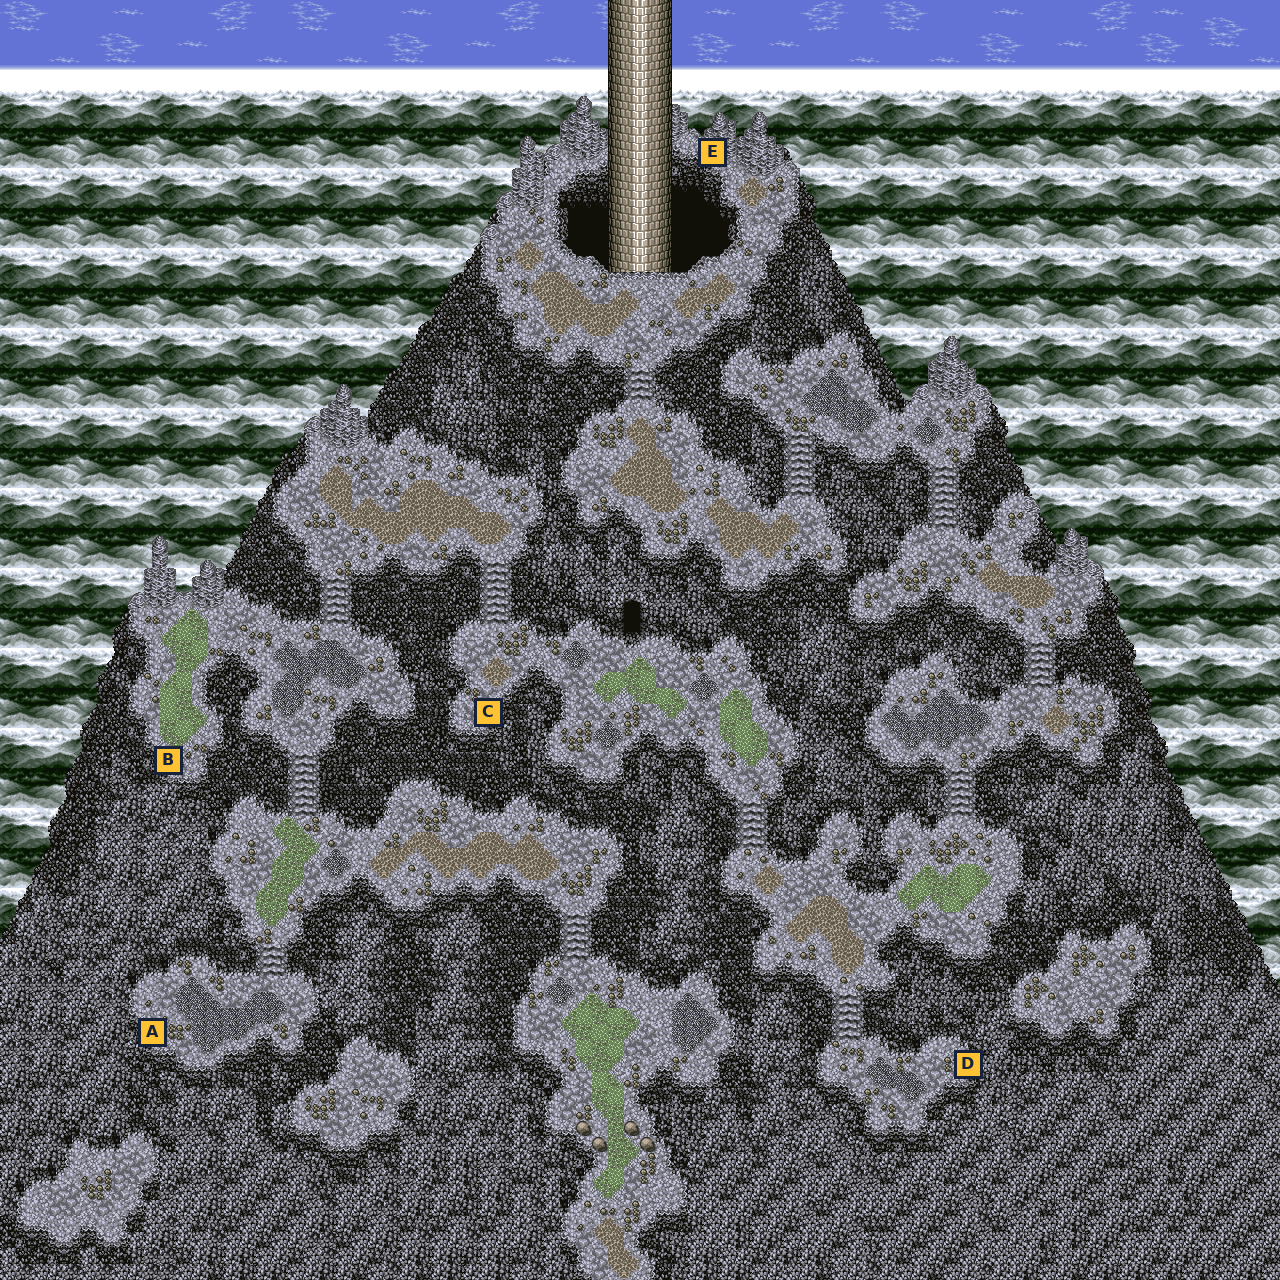
- A Wind Charm
- B Red Robe
- C God’sTear
- D Hannya
- E Raijin Spr
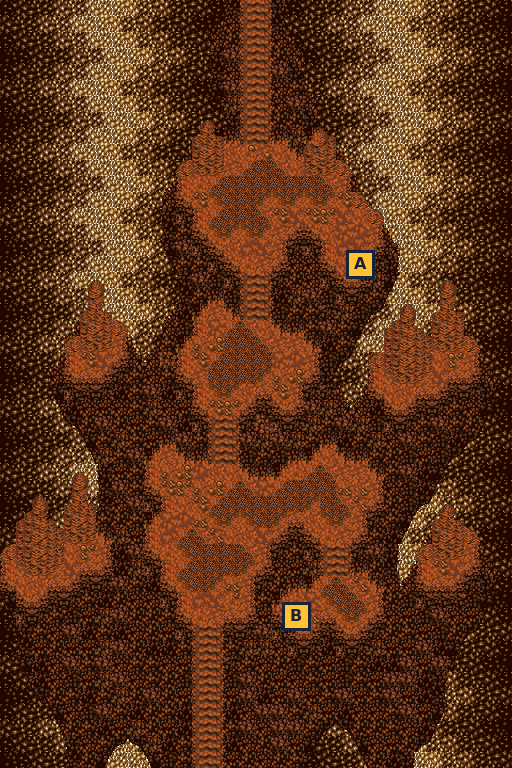
- A Fire Charm
- B Fire Armor
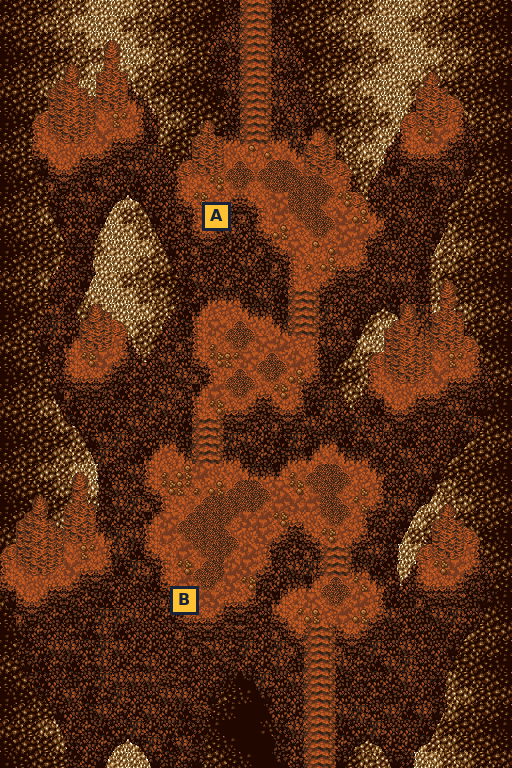
- A Sage Pill
- B Pineapple
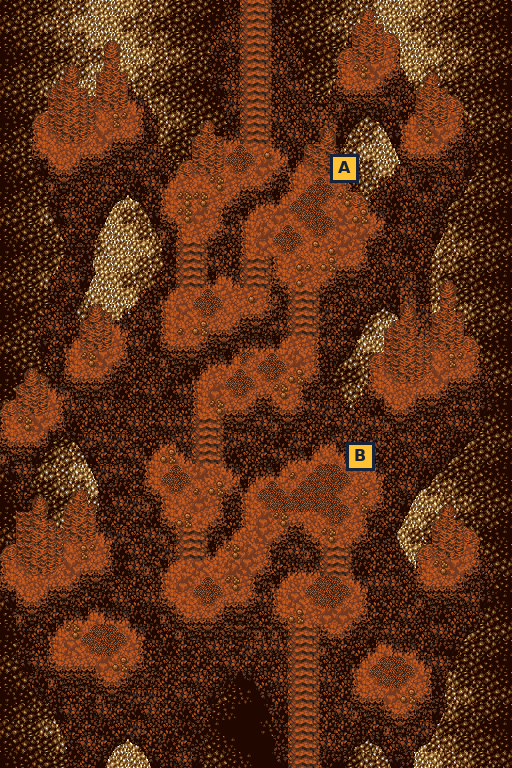
- A Remedy
- B M. Water
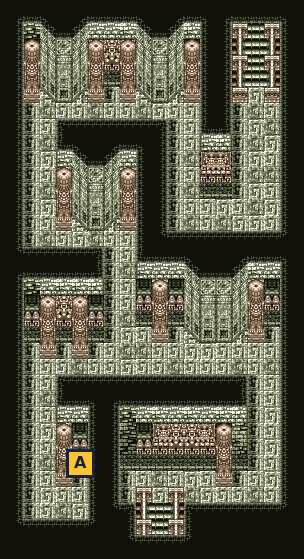
- A Evil Claw
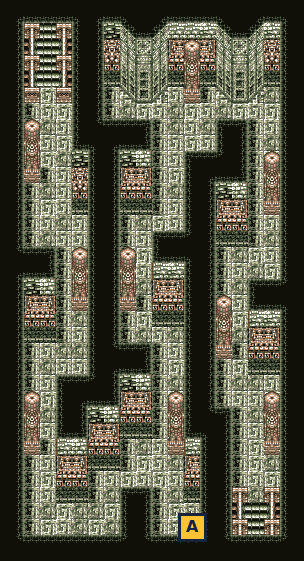
- A D. Dew
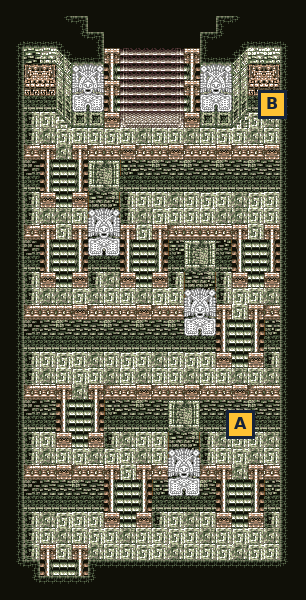
- A Sacred Rod
- B Houzouin
Sky Pavilion
📍 Sky Pavilion 1F–4F · Mt. Fuji
The Three Doctors’ flying castle is pumping spirit energy into a machine that will make their spirit beasts invincible. Beat the guardians in the right order, stop the machine, and then come back down to a mountain under attack, where Hijikata brings news of Okita.
⏳ Last chances in this chapter
- Using the Snakelace on the machine seals the crater, the Crater Tower and the Sky Pavilion for good. Open every chest first.
- After the fight on Mt. Fuji, ‘Are you ready?’ = Yes is the point of no return. Answer No and read Ch. 28 first.
- Chest: Fire Charm (Crater 4F) (from Chapter 26) details
- Chest: Fire Armor (Crater 4F) (from Chapter 26) details
- Chest: Sage Pill (Crater 3F) (from Chapter 26) details
- Chest: Pineapple (Crater 3F) (from Chapter 26) details
- Chest: Remedy (Crater 2F) (from Chapter 26) details
- Chest: M. Water (Crater 2F) (from Chapter 26) details
- Chest: Evil Claw (Crater Tower 1F) (from Chapter 26) details
- Chest: D. Dew (Crater Tower 3F) (from Chapter 26) details
- Chest: Sacred Rod (Crater Tower 4F) (from Chapter 26) details
- Chest: Houzouin (Crater Tower 4F) (from Chapter 26) details
- Chest: BentenRobe (Sky Pavilion 1F) details
- Chest: R. Salts (Sky Pavilion 1F) details
- Chest: Spirit Axe (Sky Pavilion 2F) details
- Chest: Pineapple (Sky Pavilion 2F) details
- Chest: Gold Pill (Sky Pavilion 2F) details
- Chest: K. Cure (Sky Pavilion 2F) details
- Chest: SpiritShoe (Sky Pavilion 2F) details
- Chest: God’sTear (Sky Pavilion 3F (west)) details
- Chest: Wonder Rx (Sky Pavilion 3F (west)) details
- Chest: Saint Shoe (Sky Pavilion 3F (west)) details
- Chest: Miko Crown (Sky Pavilion 4F) details
- Chest: Fox Cap (Sky Pavilion 4F) details
- Chest: Divine Bow (Sky Pavilion 4F) details
Full list across the game: Missables.
Walkthrough
- MainSky Pavilion 1F: the Orc Leader guards the way north. Beat it (losing is a game over). Squanto recognises it as one of the Three Doctors’ spirit beasts.
- Side1F chests: BentenRobe in the north-east corner and R. Salts in the north-west corner.
- TipMost of the pavilion’s guardians shrug off normal attacks. Fight in Kishin form and use holy arts, sword arts and summons. Every guardian fight is a game over if you lose, so heal between them.
- MainSky Pavilion 2F: the Gargoyle blocks the passage just north of the stairs. After you beat it, it gloats that spirit energy is gathering in the heart of the pavilion and the spirit beasts will soon be invincible. You have to stop the machine.
- Side2F chests: Spirit Axe in the middle, Pineapple a little east of it, Gold Pill north-west of the middle, K. Cure in the south-west, and SpiritShoe in the building at the top centre. → checklist
- MainThree guardians hold the secret, and the order matters: Lamia first, then the Leprechaun, then the Golem. Beating one out of order doesn’t count; it’s back in place the next time you come.
- MainTake the stairs in the top-left corner of 2F up to the western half of 3F. The Lamia waits at the top of that area. Beat her; she says only the spirit beasts in three spots know how to stop the machine.
- Side3F (west half) chests: God’sTear and Wonder Rx on the west side, and Saint Shoe just behind the Lamia. → checklist
- MainTake the stairs on the east side of that area back down to 2F, then find the Leprechaun in the building at the top centre of 2F. Beat him and he tells you: beat his pals on the top floor, but to get there you need the Golem’s key.
- MainTake the stairs in the top-right corner of 2F up to the eastern half of 3F. A Jizo statue here lets you save. The Golem stands at the bottom of this area. Beat it, then search the ground where it stood (answer Yes) to get the Golem Key.
- MainUse the Golem Key on the locked door just north of the Golem’s spot (answer Yes; the key breaks). Climb the stairs behind it to 4F.
- MainSky Pavilion 4F: the machine is right in front of you, with a snake-shaped hole. Go north to the centre and beat Medusa, then examine the same spot to pick up the Snakelace.
- Side4F chests: Miko Crown on the far west side, Fox Cap in the north-east, Divine Bow in the east, south of the middle. → checklist
- WarningBefore you use the Snakelace: this is your last look at the crater, the Crater Tower and the Sky Pavilion. Once you put it in the machine you are sent out and can’t come back. Open every chest first, and heal.
- MainExamine the machine’s hole and answer Yes to put the Snakelace in. The machine goes haywire and its defenses attack; win (losing is a game over). The Three Doctors appear in a rage: if the country won’t be theirs, they’ll make Mt. Fuji’s Spirit Hole run wild and destroy it. You escape as the pavilion shakes.
- MainYou’re back on Mt. Fuji. The Doctors let their spirit beasts loose on the people gathered below. Head down toward the cave: spirit beasts are attacking a man on the path south-east of it. Fight them (losing is a game over).
- MainThe people you saved call you monsters and refuse to help. Then Hijikata arrives with the Shinsengumi. He tells you Okita is dead: before dying, Okita asked him not to hate Juurouta or you, and to thank you. As an apology and as thanks for granting Okita’s wish, the Shinsengumi charge the spirit beasts to clear your way.
- Warning‘Are you ready?’ is the point of no return. Yes takes you straight into Mt. Fuji: every NPC ally leaves the party (pets stay) and you can’t come back out. Answer No unless you have finished everything in Ch. 28‘s checklist. No sends you out to the world map; walk back into the cave whenever you’re ready.
Treasure chests (13)
| Item | Area | Where | |
|---|---|---|---|
| BentenRobe | Sky Pavilion 1F | north-east corner ⚠ Gone after Chapter 27 | |
| R. Salts | Sky Pavilion 1F | north-west corner ⚠ Gone after Chapter 27 | |
| Spirit Axe | Sky Pavilion 2F | middle of the floor, north of the Gargoyle ⚠ Gone after Chapter 27 | |
| Pineapple | Sky Pavilion 2F | east of the middle For the Niji Forest Treant (Ch. 19). ⚠ Gone after Chapter 27 | |
| Gold Pill | Sky Pavilion 2F | north-west of the middle ⚠ Gone after Chapter 27 | |
| K. Cure | Sky Pavilion 2F | south-west area ⚠ Gone after Chapter 27 | |
| SpiritShoe | Sky Pavilion 2F | top-centre building (the Leprechaun’s) ⚠ Gone after Chapter 27 | |
| God’sTear | Sky Pavilion 3F (west) | west side ⚠ Gone after Chapter 27 | |
| Wonder Rx | Sky Pavilion 3F (west) | west side, just south of the God’sTear ⚠ Gone after Chapter 27 | |
| Saint Shoe | Sky Pavilion 3F (west) | just north of the Lamia ⚠ Gone after Chapter 27 | |
| Miko Crown | Sky Pavilion 4F | far west side ⚠ Gone after Chapter 27 | |
| Fox Cap | Sky Pavilion 4F | north-east ⚠ Gone after Chapter 27 | |
| Divine Bow | Sky Pavilion 4F | east side, south of the middle ⚠ Gone after Chapter 27 |
Bosses & key battles
🗺️ Maps for this chapter (5)
Numbers mark people and events worth a visit; letters A, B, C… mark treasure chests. A pin on a door means the person is inside that building. Pins show everything that can appear on the map over the whole game, so some people only turn up later in the story. Tap a map to open it full size.
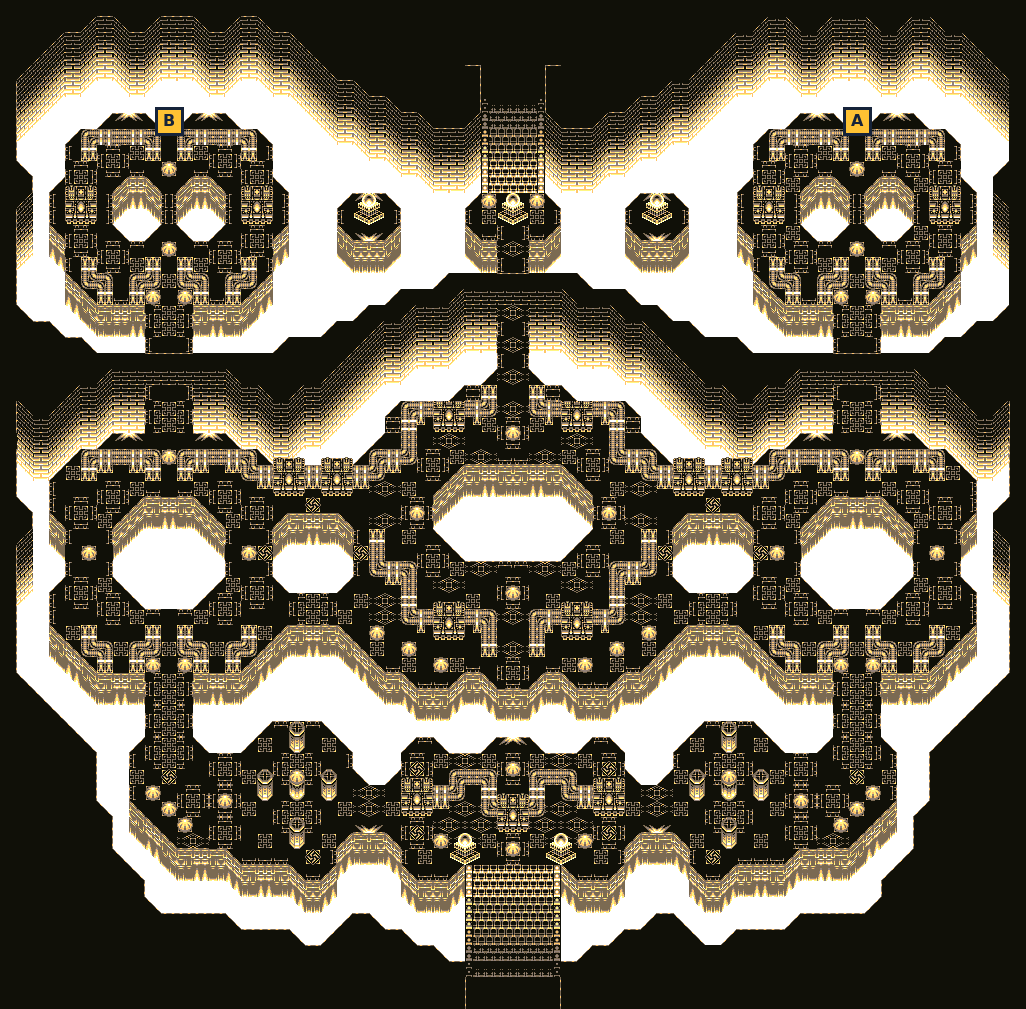
- A BentenRobe
- B R. Salts
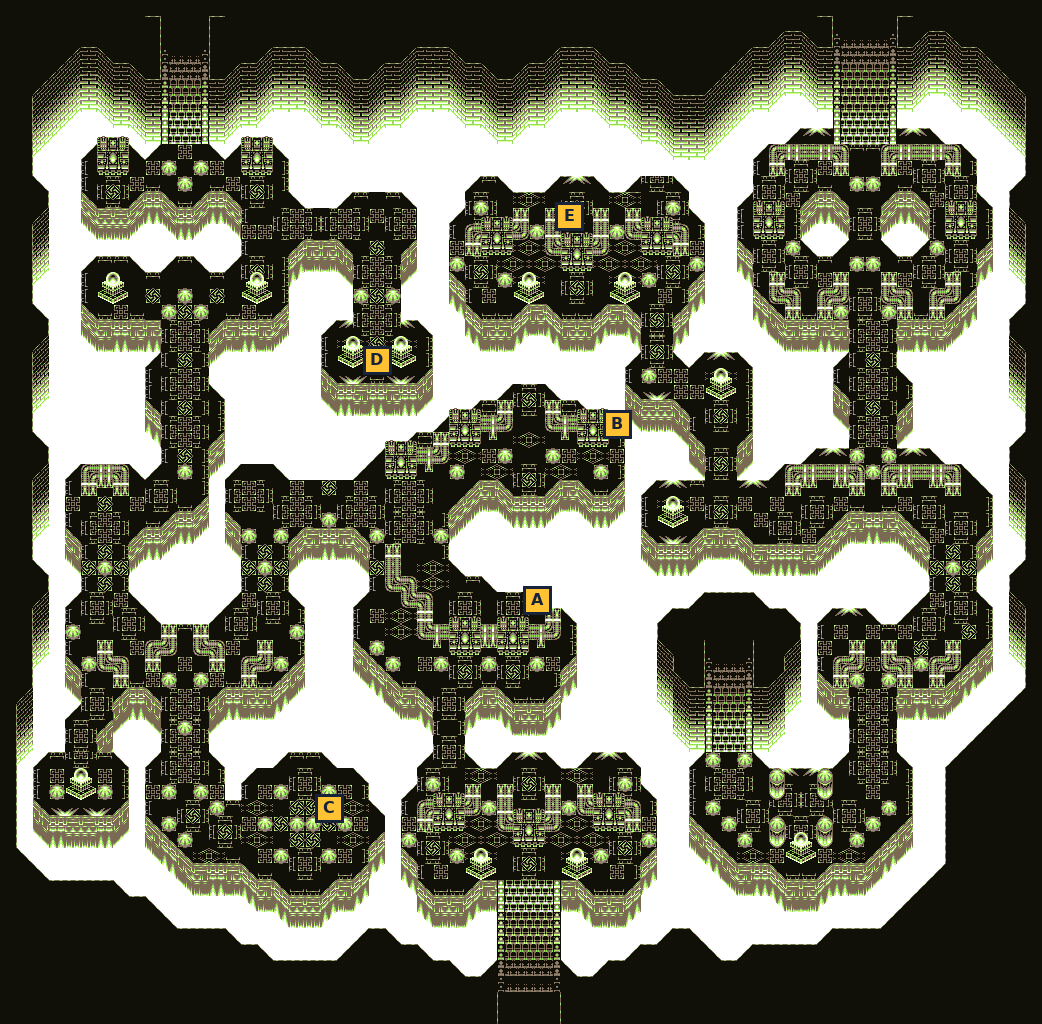
- A Spirit Axe
- B Pineapple
- C K. Cure
- D Gold Pill
- E SpiritShoe
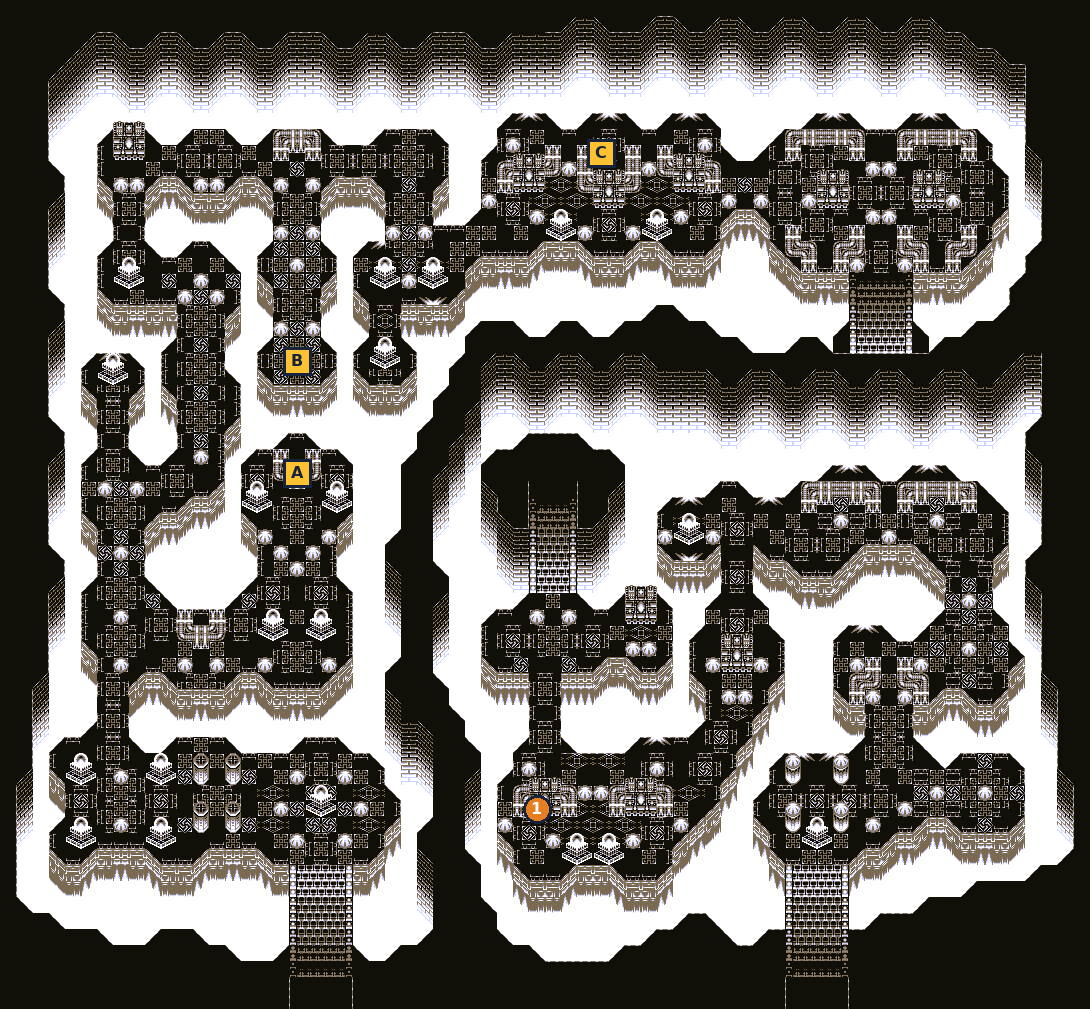
- 1Search spot — gives Golem Key
- A Wonder Rx
- B God’sTear
- C Saint Shoe
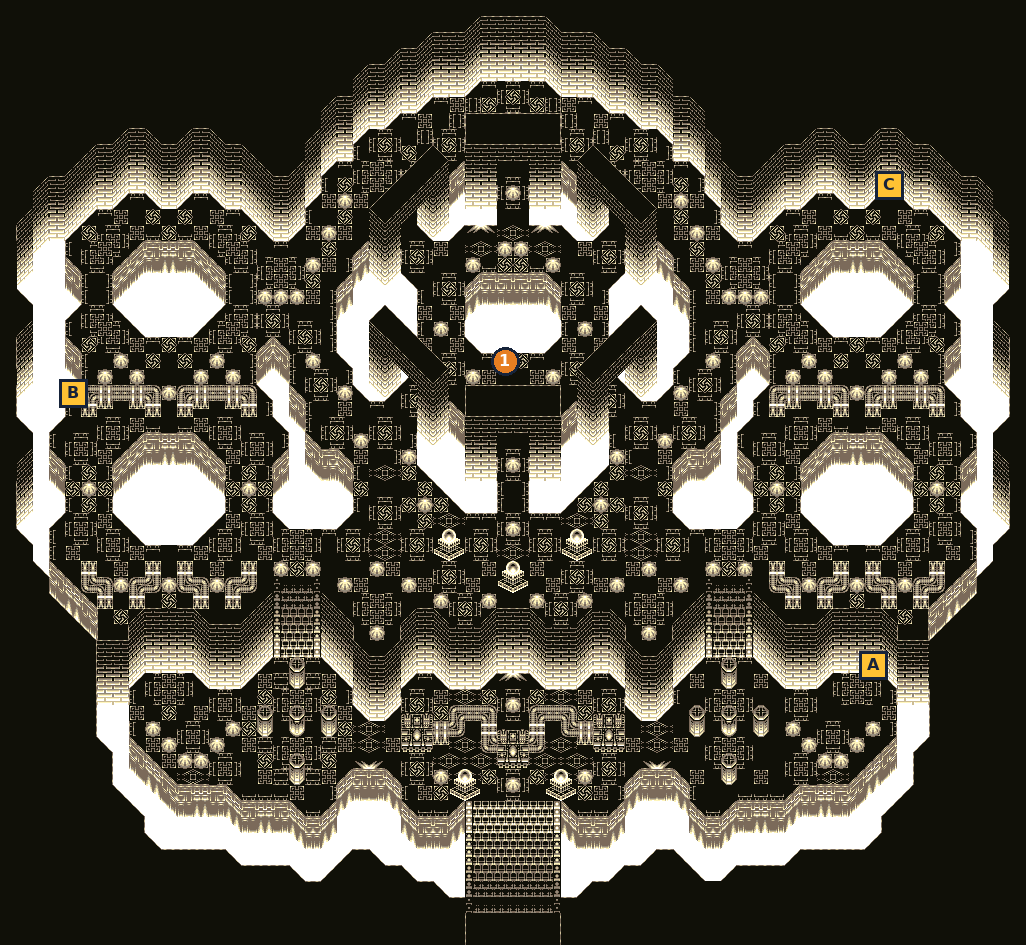
- 1Medusa — gives Snakelace
- A Divine Bow
- B Miko Crown
- C Fox Cap
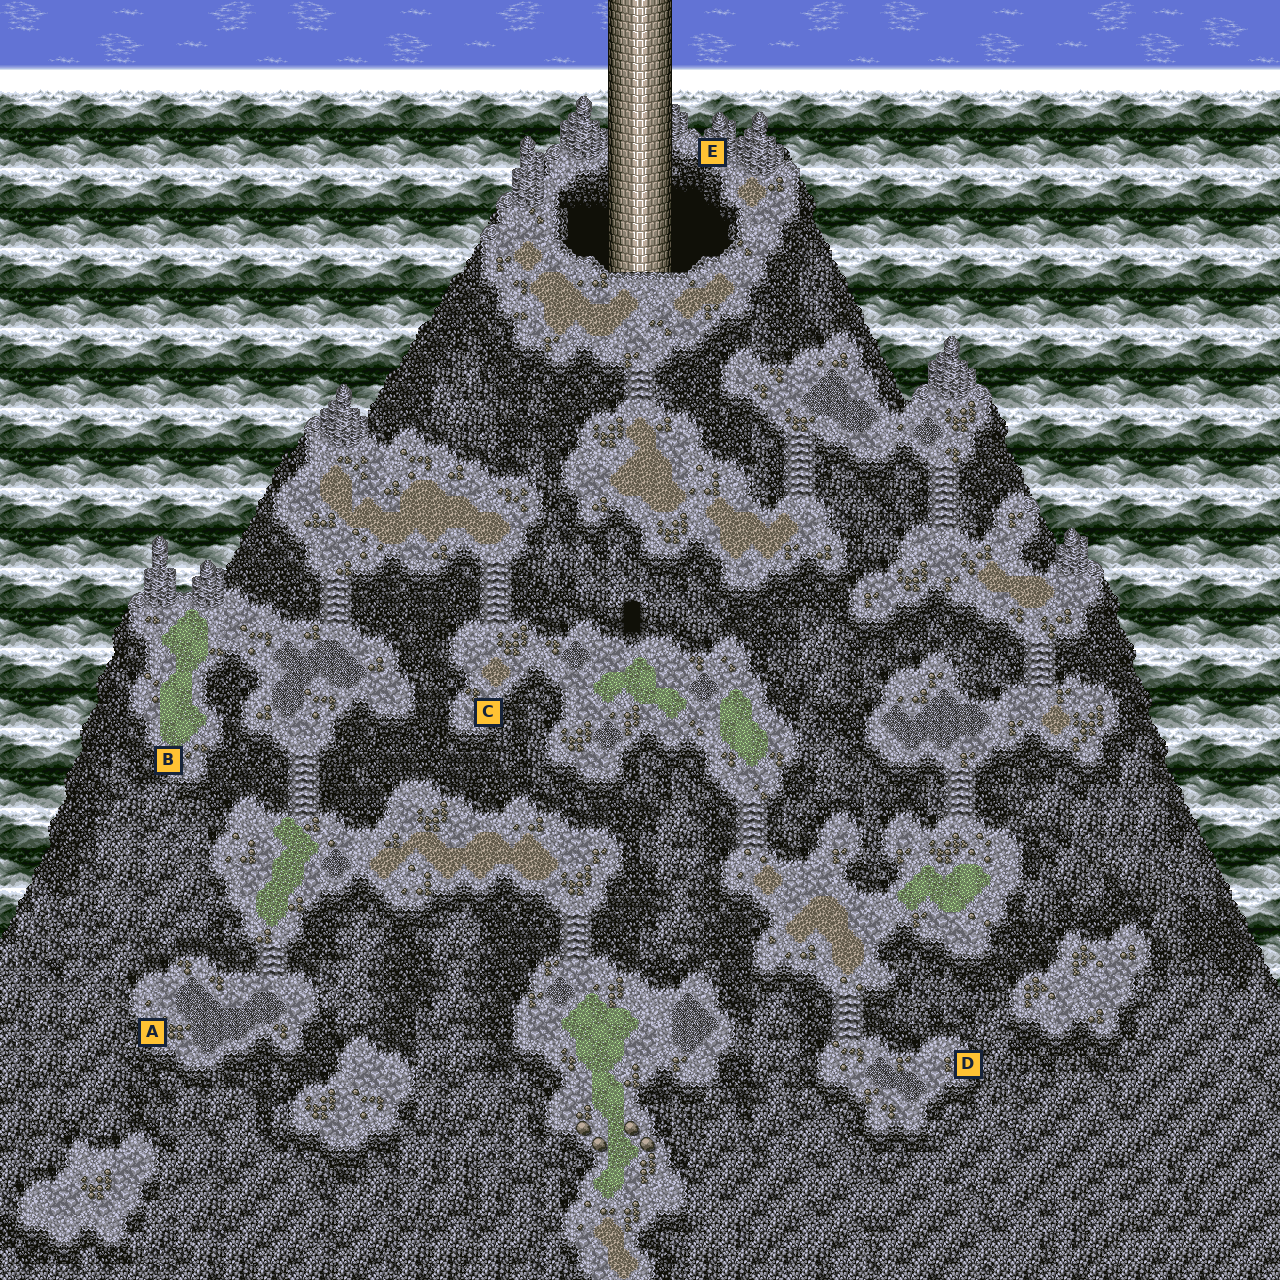
- A Wind Charm
- B Red Robe
- C God’sTear
- D Hannya
- E Raijin Spr
Before You Go In: Last Chances & the Hokutomaru’s cave
📍 Hokutomaru’s cave (Onimaru’s cave, Kyushu) · All of Japan and America (revisits)
The whole world is still open, but once you enter Mt. Fuji for the last time there is no way back. Use this chapter to finish Onimaru’s memory cave, collect the last summons, and tie up everything that can still be lost.
⏳ Last chances in this chapter
- Point of no return: ‘Are you ready?’ = Yes on Mt. Fuji, or entering the Mt. Fuji cave after answering No. All NPC allies leave and you can’t come back out.
- Seima Doji needs every other summon, including Inari (lost if you let the fox die in Ch. 11) and the Seven Gods (karma 100).
Full list across the game: Missables.
Walkthrough
- WarningWhat the point of no return takes away: after you answer Yes to ‘Are you ready?’ (or walk back into the Mt. Fuji cave after answering No), every NPC ally leaves the party and you cannot walk out of the mountain again. Your pet stays with you. Everything below must be done before that.
- MainHokutomaru’s cave: this cave on Kyushu, north of Kagoshima Village, has been open since you got Onimaru (Ch. 14). Before that an invisible force pushes you back. On your first visit with Onimaru, the sword remembers the place and the seal breaks.
- WarningA strange power in this cave stops you from transforming: no Kishin form here. Bring healing items.
- MainThe cave has five floors. The way down from the first floor is the opening on the small island of rock in the middle of the map. Each floor is packed with items and stat Orbs; see the chest list.
- MainOn the bottom floor, walk east to the spot where Onimaru falls silent. Minami’s spirit appears: she thanks Hokutomaru, asks you to protect the land, and fully heals the party. Stepping on that spot again later always heals you.
- SideSeima Doji: walk back out through the cave entrance after meeting Minami. If Yamato’s party has learned every other summon (all 16), Hokutomaru appears and Yamato learns Seima Doji. If you’re missing any, you simply leave; come back once you have them all. → checklist
- SideThe 16 summons Seima Doji needs: Inari (Kagoshima), Dogu (Niigata), Shisa (Komainu shrine, Kyushu), Tajikarao (Hachinohe), Naraenten (Yamashiro), Kushinada (Niigata), Karura (Mt. Minakami, needs Naraenten), Jizaiten (Yokohama lantern), Kongouyasha (Ezo shrine), Gundari (Herai pond), Ayar Cachi (Man-Eating Mountain rematch), Ifrit (Grande Village), Dryad (eastern ocean island), Djinn (east of Hill Village, karma 70+), Huey (Johnny, Port Village) and Seven Gods (karma 100, then stay the night at home in Iida Town). → checklist
- TipKarma 100 is needed for the Seven Gods. If you borrowed 10000 gold from the Yokohama lender, repay it now for +10 karma. The Tsukumogami shrine’s offering box only helps when your karma is below 40 (it resets you to Ordinary).
- SideYoukai Village: if all residents live there, talk to Tanukichi for Furinkazan. The Kourai kappa needs a Ranjatai; buy one in Ihika Village (50000 gold) if you don’t want to steal the Abashiri one. → checklist
- SideKongouyasha Shrine (Ezo): answer truthfully for the summon (and Muramasa with a clean record). A wrong answer can be retried after you leave the shrine. → checklist
- SideTrade the Pineapples from Crater 3F and Sky Pavilion 2F to the Treant in Niji Forest (America) for a Gods Charm or a Rice Ball each. → checklist
- SideOptional: recruit Ryouma in Yokohama for the road. He leaves at the mountain with a farewell (‘Don’t you dare go and die on me’), so this is only for fun and extra help. → checklist
- SideMt. Fuji’s own chests (Wind Charm, Red Robe, God’sTear, Hannya, Raijin Spr) and the three Waterfall chests reached from Ihika Village (Ch. 25) are gone once you go in. → checklist
- TipOther things that simply end at the point of no return: the pet upgrade in Toyama, Sora, the Tsukumogami chest and Hakushin, Tajikara at Hachinohe, the ship remodels, the bushido quest in Kyoto, and any youkai you haven’t met yet. Check the earlier chapters’ lists.
- TipGood places to level up before the end: the Sky Pavilion is sealed now, so use the Hokutomaru’s cave or America. The last fights are long; stock up at the Ihika shops (Remedies, M. Water, Gold Pills, Feathers) and rest at the Ihika inn.
- MainWhen you’re ready, go back to Mt. Fuji and walk into the cave in the middle of the mountain. Hijikata and the Shinsengumi are holding the entrance for you (next chapter).
Checklist
- Where
- Hokutomaru’s cave (Kyushu, between Takachiho and Kagoshima) — the cave entrance
- How
- Meet Minami on the bottom floor, then walk out through the entrance after learning all 16 other summons (Inari, Dogu, Shisa, Tajikarao, Naraenten, Kushinada, Karura, Jizaiten, Kongouyasha, Gundari, Ayar Cachi, Ifrit, Dryad, Djinn, Huey, Seven Gods).
- Reward
- Yamato learns Seima Doji
- Opens
- Ch. 14 (Onimaru) + meeting Minami
- Closes
- Ch. 29: point of no return
- Where
- Hokutomaru’s cave, bottom floor, east side
- How
- Walk to the spot where Onimaru reacts.
- Reward
- Story scene and a full heal; the spot heals you again on every later visit.
- Opens
- Ch. 14 (Onimaru)
- Closes
- Ch. 29: point of no return
- Where
- Mt. Fuji (inside), entrance hall, final visit
- How
- Automatic when you enter after the Sky Pavilion.
- Reward
- —
- Opens
- Ch. 27
- Closes
- Ch. 29: Takeaki, Kaishuu, Kurama, Naozane, Pupils 1–3, Katsura, Okuni, Yachiho, Kamono, Kouryu, Saizou, Gennobou, Hakushin, Kourai, Akane, Midori, Sora, Goemon, Chuuta, Kanpei, Tasuke, Dadrov, Papterot, Yukihime, Richard, Tony, Kotarou, Densuke, Kooni, Ryouma, the Snake Yokai, both Ihika and the Stray Ittan all leave. Pets (dog/Wolfman, cat/Nekomata, chick) stay.
🗺️ Maps for this chapter (5)
Numbers mark people and events worth a visit; letters A, B, C… mark treasure chests. A pin on a door means the person is inside that building. Pins show everything that can appear on the map over the whole game, so some people only turn up later in the story. Tap a map to open it full size.
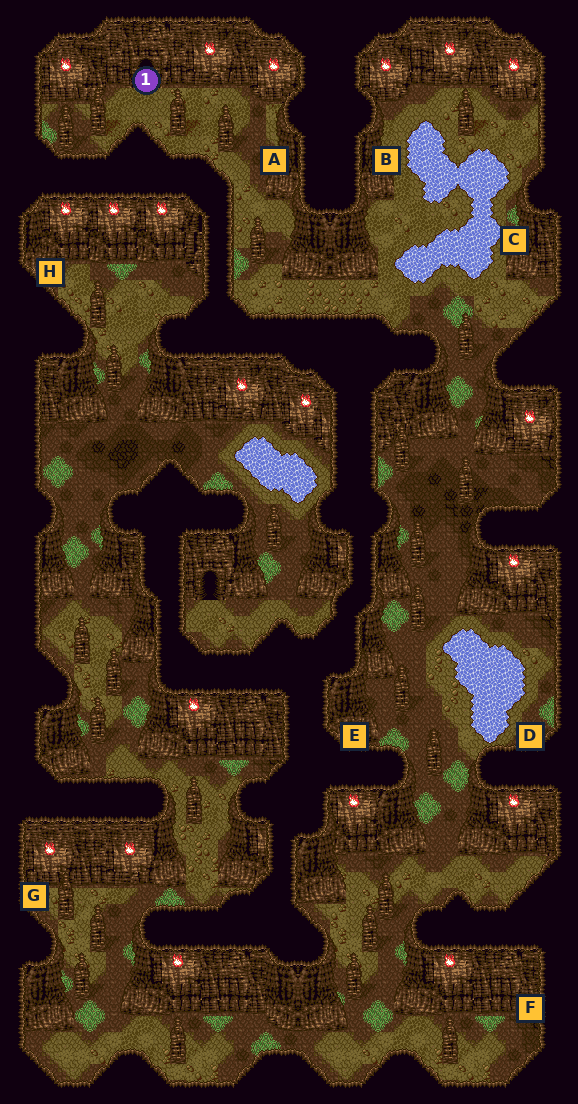
- 1Hokutomaru — summon Seima Doji checklist
- A Herb
- B Pill
- C H. Water
- D N. Pill
- E Sandalwd.
- F Wake Dust
- G Smoke Bmb
- H S. Dew
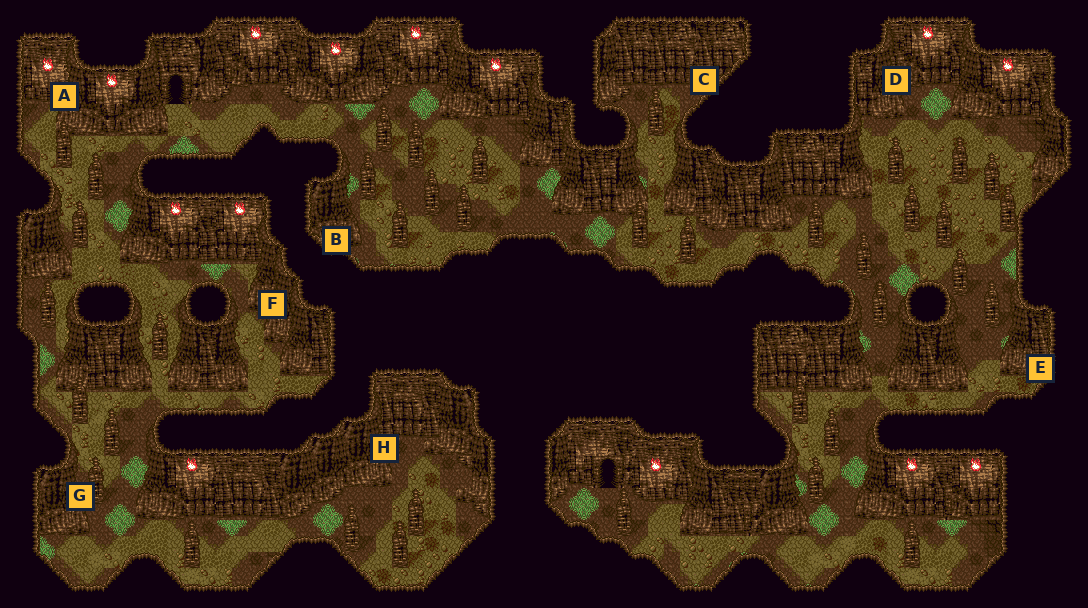
- A Reviver
- B Feather
- C Gold Pill
- D Cloak
- E Reishi
- F ChainPill
- G Heart Orb
- H Kobu Herb
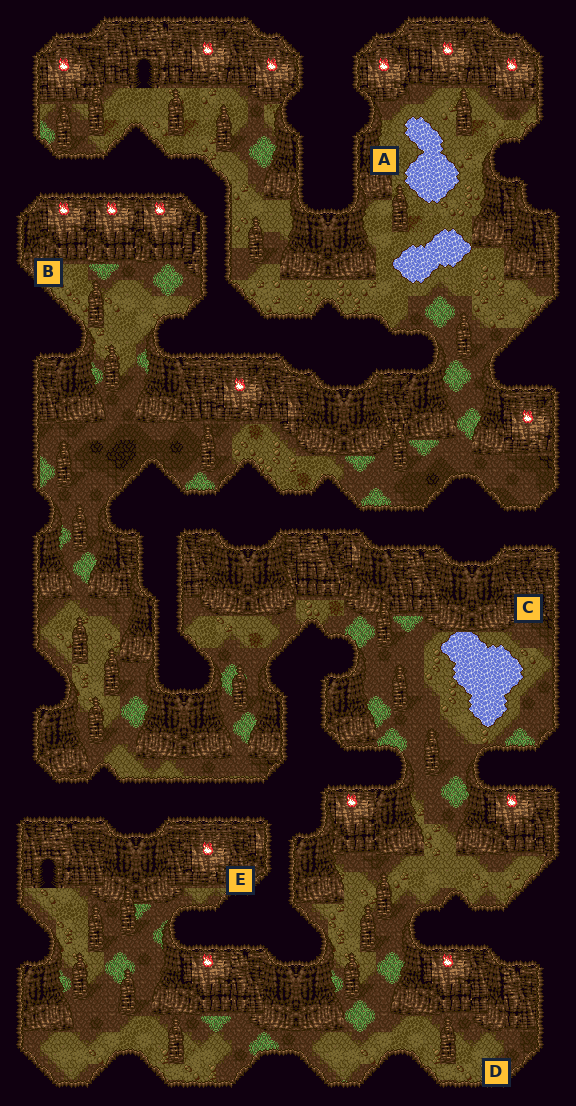
- A Life Orb
- B Remedy
- C Oni Orb
- D God’sTear
- E Rice Ball
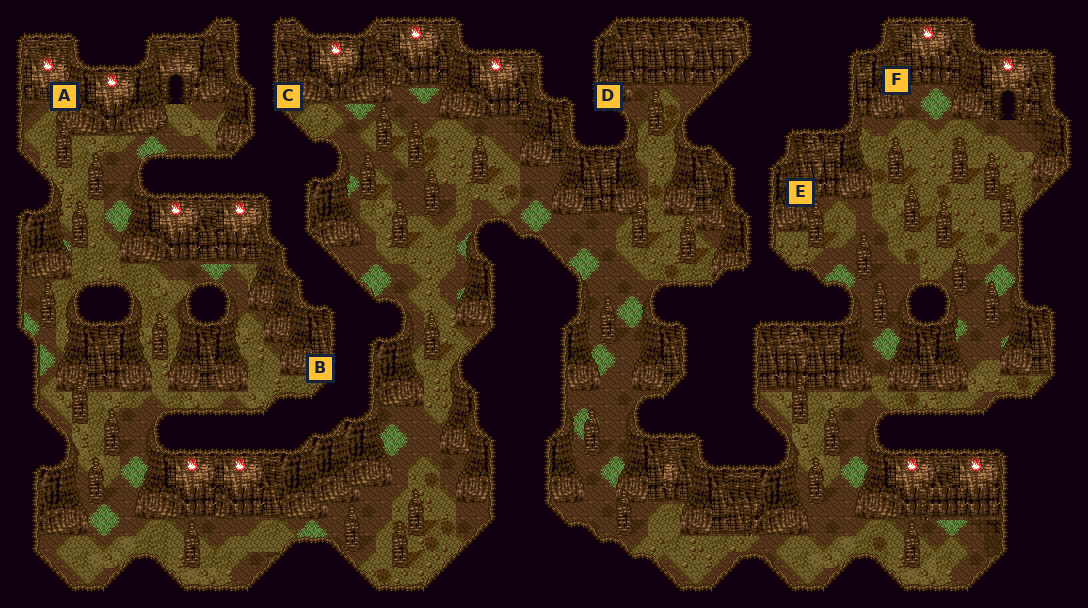
- A Guard Orb
- B M. Water
- C Sage Pill
- D R. Salts
- E Holy Orb
- F Maelstrom
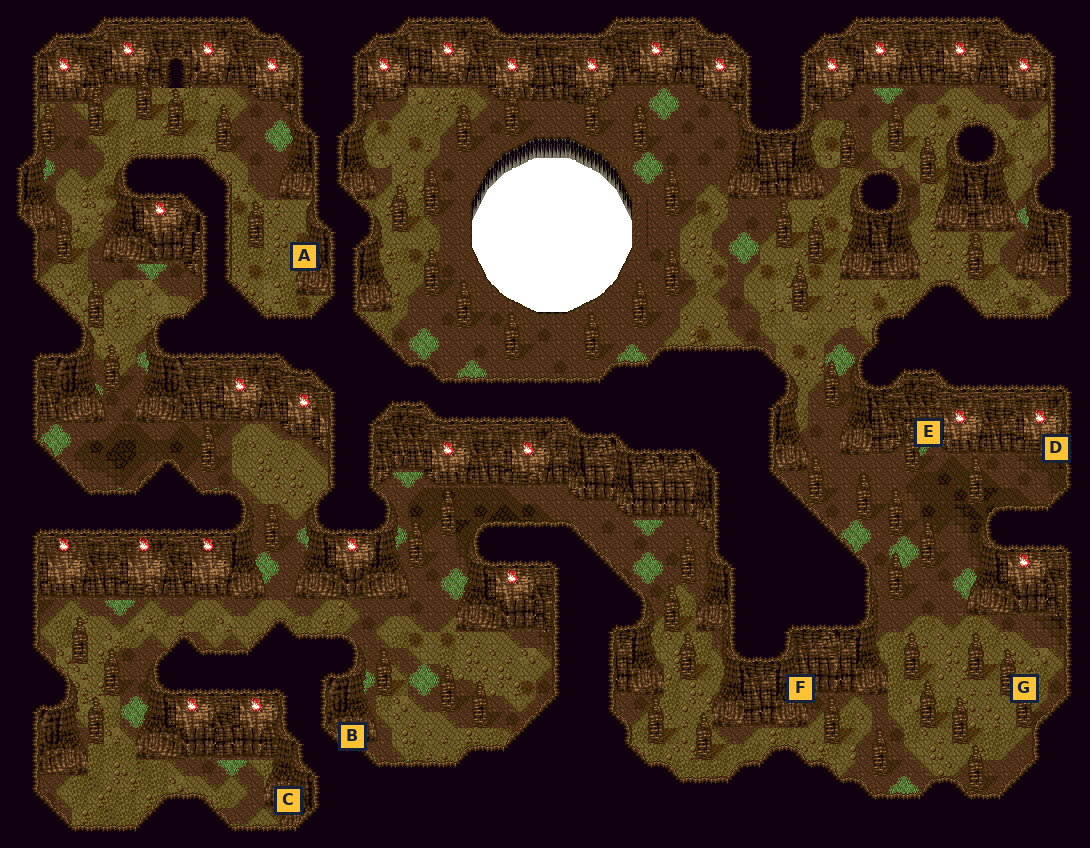
- A Haze Bell
- B Speed Orb
- C K. Cure
- D Luck Charm
- E Power Orb
- F D. Dew
- G Wonder Rx
Mt. Fuji: The Final Battle & Ending
📍 Mt. Fuji (inside) · Spirit Hole chamber
With the Shinsengumi holding the entrance, the four of you go into Mt. Fuji alone. The Three Doctors, now spirit beasts themselves, stand in the way, and at the raging Spirit Hole an old enemy is waiting for one last match.
⏳ Last chances in this chapter
- Everything in Ch. 28‘s checklist is lost once you enter.
- Four boss fights in a row with only one save point (the Jizo statue in the second cave).
- Hokutomaru’s cave (Kyushu) (from Chapter 14) details
- Chest: Herb (Hokutomaru’s cave (entrance cave)) (from Chapter 14) details
- Chest: Pill (Hokutomaru’s cave (entrance cave)) (from Chapter 14) details
- Chest: H. Water (Hokutomaru’s cave (entrance cave)) (from Chapter 14) details
- Chest: S. Dew (Hokutomaru’s cave (entrance cave)) (from Chapter 14) details
- Chest: Sandalwd. (Hokutomaru’s cave (entrance cave)) (from Chapter 14) details
- Chest: N. Pill (Hokutomaru’s cave (entrance cave)) (from Chapter 14) details
- Chest: Smoke Bmb (Hokutomaru’s cave (entrance cave)) (from Chapter 14) details
- Chest: Wake Dust (Hokutomaru’s cave (entrance cave)) (from Chapter 14) details
- Chest: Reviver (Hokutomaru’s cave (2nd area)) (from Chapter 14) details
- Chest: Feather (Hokutomaru’s cave (2nd area)) (from Chapter 14) details
- Chest: ChainPill (Hokutomaru’s cave (2nd area)) (from Chapter 14) details
- Chest: Heart Orb (Hokutomaru’s cave (2nd area)) (from Chapter 14) details
- Chest: Kobu Herb (Hokutomaru’s cave (2nd area)) (from Chapter 14) details
- Chest: Gold Pill (Hokutomaru’s cave (2nd area)) (from Chapter 14) details
- Chest: Cloak (Hokutomaru’s cave (2nd area)) (from Chapter 14) details
- Chest: Reishi (Hokutomaru’s cave (2nd area)) (from Chapter 14) details
- Chest: Life Orb (Hokutomaru’s cave (3rd area)) (from Chapter 14) details
- Chest: Remedy (Hokutomaru’s cave (3rd area)) (from Chapter 14) details
- Chest: Oni Orb (Hokutomaru’s cave (3rd area)) (from Chapter 14) details
- Chest: Rice Ball (Hokutomaru’s cave (3rd area)) (from Chapter 14) details
- Chest: God’sTear (Hokutomaru’s cave (3rd area)) (from Chapter 14) details
- Chest: Guard Orb (Hokutomaru’s cave (4th area)) (from Chapter 14) details
- Chest: Sage Pill (Hokutomaru’s cave (4th area)) (from Chapter 14) details
- Chest: M. Water (Hokutomaru’s cave (4th area)) (from Chapter 14) details
- Chest: R. Salts (Hokutomaru’s cave (4th area)) (from Chapter 14) details
- Chest: Holy Orb (Hokutomaru’s cave (4th area)) (from Chapter 14) details
- Chest: Maelstrom (Hokutomaru’s cave (4th area)) (from Chapter 14) details
- Chest: Haze Bell (Hokutomaru’s cave (deepest area)) (from Chapter 14) details
- Chest: Speed Orb (Hokutomaru’s cave (deepest area)) (from Chapter 14) details
- Chest: K. Cure (Hokutomaru’s cave (deepest area)) (from Chapter 14) details
- Chest: Power Orb (Hokutomaru’s cave (deepest area)) (from Chapter 14) details
- Chest: Luck Charm (Hokutomaru’s cave (deepest area)) (from Chapter 14) details
- Chest: D. Dew (Hokutomaru’s cave (deepest area)) (from Chapter 14) details
- Chest: Wonder Rx (Hokutomaru’s cave (deepest area)) (from Chapter 14) details
- The two Ihika join (from Chapter 23) details
- Free full heal (Ihika meeting place) (from Chapter 23) details
- Chest: God’sTear (Mt. Fuji) (from Chapter 24) details
- Chest: Red Robe (Mt. Fuji) (from Chapter 24) details
- Chest: Wind Charm (Mt. Fuji) (from Chapter 24) details
- Chest: Hannya (Mt. Fuji) (from Chapter 24) details
- Chest: Raijin Spr (Mt. Fuji) (from Chapter 24) details
- Free inn in Ihika Village (from Chapter 25) details
- Ranjatai for sale (50000 gold) (from Chapter 25) details
- Seima Doji (Hokutomaru) (from Chapter 28) details
- Minami’s spirit (Hokutomaru’s cave) (from Chapter 28) details
- All NPC allies leave at Mt. Fuji (from Chapter 28) details
- Farewells at the mountain details
- Your pet in the ending details
Full list across the game: Missables.
Walkthrough
- WarningThis is the point of no return. If you haven’t finished Ch. 28‘s checklist, answer No to ‘Are you ready?’ and come back later.
- MainAnswer Yes to ‘Are you ready?’ (or walk into the cave in the middle of Mt. Fuji after answering No). In the entrance hall, you tell your companions that the four of you go on alone. Every NPC ally leaves the party; your pet stays. If the Ihika or Ryouma are with you, they say goodbye (‘Don’t you dare go and die on me, y’hear’).
- TipYou can’t walk back out: the exit only gets Juurouta reminding you not to waste Hijikata’s effort.
- MainAlva stands in the doorway on the north-west side of the hall. Talk to her: she’s furious about her spirit beasts, and reveals that the Doctors have turned themselves into spirit beasts. Beat her (losing is a game over).
- MainIn the next cave, Tesla waits in the western tunnel and wants to dissect you to learn the secret of the ONI’s power. Beat him (losing is a game over).
- TipThe Jizo statue in the north-west corner of this cave lets you save and recover. Use it before Reich and again before going on: the last fight comes right after.
- MainReich blocks the northern doorway. He swears the country and its Spirit Holes are theirs. Beat him (losing is a game over).
- MainEnter the Spirit Hole chamber and walk to the Spirit Hole at the north end. Squanto warns that the raging spirit energy will shake the earth, wake the volcanoes and bring tidal waves. As Natsume gets ready to seal it, Rishu appears: the ONI power the Doctors gave him has fully awakened in the spirit energy, and he wants to settle things.
- WarningFinal battle: Rishu, with a Right Arm and a Left Arm. Losing is a game over.
- TipTransform into Kishin form and use your strongest sword arts. The old guide says the arms and head shrug off most attacks and that, in the last phase, only Kishin form can hurt him, so keep SP and MP for healing and transforming. High ultimate-weapon levels make a big difference.
- MainBeaten, Rishu asks why he could never beat Squanto. He remembers Tamiara calling him a poor man and finally understands. Squanto sends him off to see Tamiara.
- MainThe Spirit Hole is at its limit and Natsume is too worn out to seal it. Yamato decides the four of you will jump in and seal it with everything you have. Natsume, Juurouta and Squanto agree, and you jump.
- MainEnding: outside, the youkai vanish and the people cheer, but Hijikata can’t find you. Later, Hijikata tells Ryouma that you vanished into Mt. Fuji. He is leaving for Hakodate, where the last Spirit Hole in the country lies, to build a fortress over it and fight to the end. He names it Goryoukaku, after the five who fought for peace: Yamato, Natsume, Touya, Squanto and Juurouta.
- MainAfter the staff roll, a boy brings Ryouma a message from some travellers at the bridge: with the whole country against them, they’re sailing for a new land. From the description, Ryouma knows it’s you, and runs to the pier just after the ship has left. If you adopted a pet in Toyama, the boy hands it over: you asked Ryouma to look after it. A closing narration ends the game: an era is over, hardly anyone will ever know what the ‘Shadow’ Shinsengumi did, and nobody knows where they went.
Checklist
Bosses & key battles
🗺️ Maps for this chapter (1)
Numbers mark people and events worth a visit; letters A, B, C… mark treasure chests. A pin on a door means the person is inside that building. Pins show everything that can appear on the map over the whole game, so some people only turn up later in the story. Tap a map to open it full size.
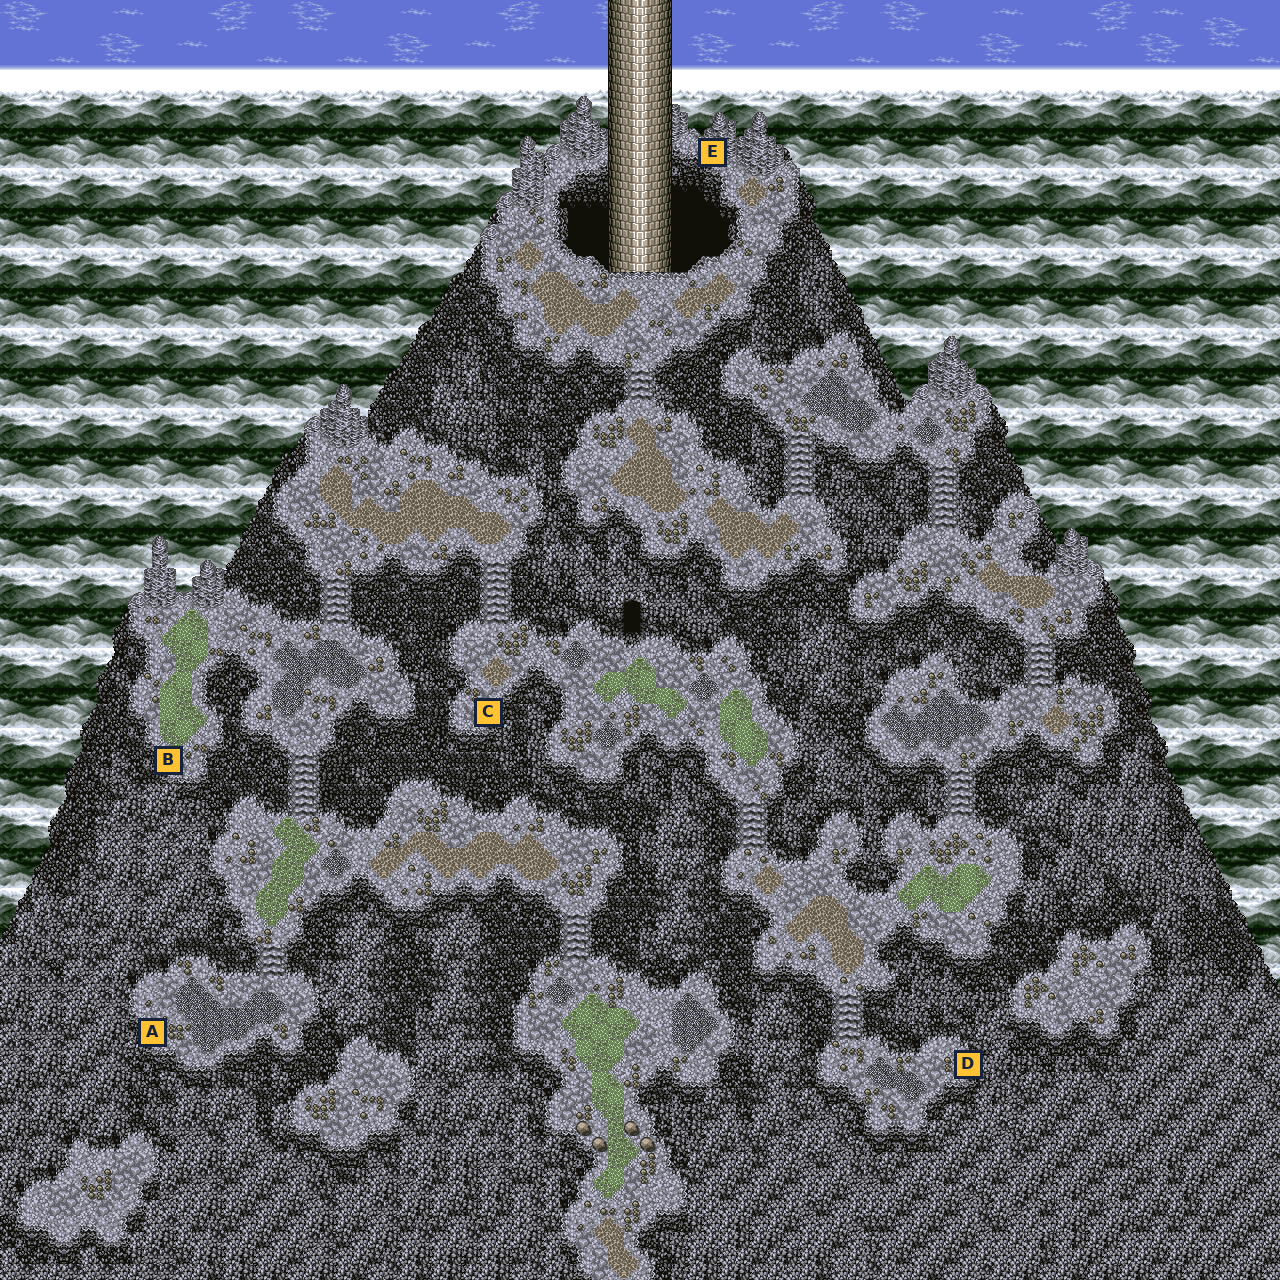
- A Wind Charm
- B Red Robe
- C God’sTear
- D Hannya
- E Raijin Spr
Reference tables
Every karma choice is listed in the Karma Guide, and every missable item in the Missables list. Treasure chests are listed at the end of each chapter.
| Name | Where | How / reward | Ch. | |
|---|---|---|---|---|
| Naozane joins | Iida Town: by the tree in the north-east corner | Talk to him any time after Tarou’s plea and answer Yes to ‘Will you take him along?’. Karma must be 20 or higher. → NPC ally Naozane (free) | 1 | |
| Yachiho joins | Iida Town: the house east of the well (upper door); she stands in the bottom-right corner of the room | Talk to her after the night talk with Mayuki and answer Yes to ‘Take them along?’. Before that she only wants to play. → NPC ally Yachiho (small heal) | 1 | |
| Adopt a pet (puppy, kitten or chick) | Toyama Village: pet shop, the house east of the bridge on the south bank | Answer Yes to ‘Will you keep a pet?’, pick an animal (Yes to ‘Choose the …?’), then talk to the Owner. → Pet ally: Shiba (puppy), Cat (kitten) or Chick. Free. | 2 | |
| Kouryu (Kouryuzeki) joins | Izumo Village: the middle house on the west side (door facing the village centre) | Talk to the yokozuna Kouryuzeki while carrying a Power Orb and answer Yes to ‘Hand over a Power Orb?’. → NPC ally Kouryu (costs 1 Power Orb) | 4 | |
| Kanpei joins | Kyoto: the inn | Talk to Kanpei, the travelling merchant, and answer Yes to ‘Take Kanpei along?’. → NPC ally Kanpei (free) | 4 | |
| Takeaki joins ⚠ | Okayama Village: north-west corner, by the wooden fence | Bring a Magoroku (weapon shops in Yamashiro Village, Ch. 13, and Hakodate, 1,350 gold) and answer Yes. Karma must be 20 or higher. → NPC ally Takeaki | 4 | |
| Densuke joins | Edo: far north-west corner, by the moat | Pay 400 gold and answer Yes. He refuses if Kotarou is already with you, so hire Densuke first. → NPC ally Densuke | 6 | |
| Kotarou joins | Edo: house in the south-east corner | Pay 200 gold and answer Yes. → NPC ally Kotarou | 6 | |
| Kamono (Kamonoseki) joins | Edo: middle house of the central row, just east of the main street | Answer Yes to ‘Take him along?’. → NPC ally Kamono (free) | 6 | |
| Tasuke joins | Edo: house on the west side, south of the well | Bring a Bishamon spear (sold by the Ihika’s shop late in the game, 1,990 gold) and answer Yes to ‘Hand over the Bishamon?’. → NPC ally Tasuke | 6 | |
| Midori joins | Mt. Hiei: temple, west end of the corridor | Carry an N. Pill and answer Yes to ‘Accept her help?’. → NPC ally Midori (costs 1 N. Pill) | 7 | |
| Akane joins | Mt. Houju: temple, tiny hidden room at the east end | Reach her room through the hidden passage and answer Yes to ‘Take her along?’. → NPC ally Akane (free) | 7 | |
| Pupil 1, 2 and 3 join | Rokkou Village — inside the Mibu mansion (north end of the village) | After the scene at Juurouta’s house, talk to each pupil and answer Yes. → NPC allies Pupil 1, Pupil 2, Pupil 3 | 8 | |
| Kaishuu joins ⚠ | Rokkou Village — by the north wall, behind the Mibu mansion | Give him a Masamune (answer Yes). Your karma must be 20 or more, otherwise he attacks you instead. → NPC ally Kaishuu (costs your Masamune) | 8 | |
| Touya joins | Nikkou Village — outside the elder’s house | Story, right after you receive the Blue Orb. → Main character Touya | 9 | |
| Stray Ittan joins (flying) | Kyushu — the small shrine just south of the dock | Examine the youkai at the back of the shrine. → Stray Ittan: press START on the world map to fly | 11 | |
| Okuni joins | Takachiho Village — inside the inn (big central house) | Talk to her and answer Yes; costs 800 gold. → NPC ally Okuni | 11 | |
| Snake Yokai joins | Waterfall (Spirit Hole), north-east of Takachiho | Story: beat her on your first visit to the falls. → NPC ally Snake Yokai | 11 | |
| Kurama joins ⚠ | Hachinohe Village: the back of the second house from the north on the west side | Talk to him with karma 20 or higher, carrying the Red Tachi, and answer Yes to ‘Hand over the Red Tachi?’. → NPC ally Kurama (costs the Red Tachi) ☯ Karma At karma < 20 he attacks: win = 1,000 gold, −2 karma and he is gone for good; lose = −1,500 gold. | 12 | |
| Saizou joins (hide-and-seek) | Yamashiro Village: far north-west corner at first, then one of two random hiding places | Have Densuke, Kanpei AND Kouryu in the party, or he doesn’t appear. Talk to him, then find him again: every time you enter the village he picks one of two spots at random (on the roof of the biggest house in the north-west, or on the roof of the east item-shop house). → NPC ally Saizou | 13 | |
| Gennobou joins | Shikoku: the Relic Book shrine (south-east) | Talk to the monk while carrying a God’sTear and answer Yes to ‘Give God’s Tear to him?’. → NPC ally Gennobou (costs 1 God’sTear) | 13 | |
| Katsura joins ⚠ | Umibe Village — back room of the small house just south-west of the Armor Shop | Talk to him while holding a Rice Ball; he takes it and joins. Rice Balls: Tanukichi in the Youkai Village gives one whenever you have none. → NPC ally Katsura ☯ Karma Needs karma 20+. Below 20 he attacks you (win: +800 gold, −2 karma and he is gone for good; lose: −1200 gold). | 15 | |
| Tsukumogami chest & Hakushin | The small shrine just east of Umibe Village on the northern tip of Honshu | Open the treasure chest and beat the Tsukumogami that jumps out (losing is a game over). Then talk to Hakushin and answer Yes to take him along. → NPC ally Hakushin | 15 | |
| Chuuta joins | Abashiri Village — north-west corner, inside the fence | Answer Yes to “Hire Chuuta?”. → NPC ally Chuuta (steals money) | 16 | |
| Goemon joins | Yokohama — the inn’s guest room (central building) | Answer Yes to “Hire him?” and pay 300 gold. → NPC ally Goemon (steals items) | 17 | |
| Tony joins | Harbor Town — near the south fence | Answer Yes to “Pay 2000 gold?”. → NPC ally Tony (gunman) | 18 | |
| Richard joins | Port Village, big north-west building, left door | Talk to Richard while holding a Hozutsu and answer Yes. He keeps the gun. → NPC ally Richard | 19 | |
| Dadrov joins | Hill Village, north-east tent | Talk to him and answer Yes. → NPC ally Dadrov | 20 | |
| Papterot joins | Grande Village, west side by the tree | Talk to him after learning Djinn and answer Yes. Before that he only says he wants more power. → NPC ally Papterot | 20 | |
| Squanto joins (main character) | Rio Grande crossing, south bank | After Touya’s death, go to the south bank (or stay at the Hill Village old woman’s). Squanto arrives and joins. → Squanto (party member); Natsume gains Touya’s holy arts | 21 | |
| Ryouma joins (later) | Ryouma’s house, Yokohama | Say No to staying the night, then Yes when he asks if you want him in the party. This only works after a later Mt. Fuji story event (flag 1AE). → NPC ally Ryouma | 22 | |
| Sora joins | Kyoto — outside the north-east corner of the Nue Shrine wall | Talk to her after the Yokohama ambush and answer Yes. Before that she only laments her power. → NPC ally Sora | 22 | |
| The two Ihika join ⚠ | Ihika meeting place (Ezo) | Talk to the Ihika on the left and answer Yes to ‘Ask Ihika to join?’. If you say No, come back and ask again. → Two NPC allies (Ihika). Also required: accepting once is what lets them break the seal on Mt. Fuji. | 23 | |
| All NPC allies leave at Mt. Fuji ⚠ | Mt. Fuji (inside), entrance hall, final visit | Automatic when you enter after the Sky Pavilion. → — | 28 |
| Name | Where | How / reward | Ch. | |
|---|---|---|---|---|
| Seven Gods | Iida Town: your house, Mayuki | Rest or stay the night at home while your karma is 100. → Yamato learns the Seven Gods summon | 1 | |
| Karura | Mt. Minakami: top of the eastern peak | Go to the top of the eastern peak once anyone in your party has learned Naraenten (Yamashiro Village, Ch. 13). Without Naraenten he refuses. Natsume then learns Karura. → Natsume can call down Karura | 2 | |
| Inari (save the fox) ⚠ | Kagoshima Village — north-west corner | Talk to the man with 2000 gold or more on hand and answer Yes to paying. The money is refunded. → Inari summon (you choose who learns it) + 2000 gold back ☯ Karma +4 (refuse: −4) | 11 | |
| Shisa (the sleeping komainu) | Komainu shrine — north-west Kyushu | Examine the komainu statue (face it from below). → Shisa summon (you choose who learns it) | 11 | |
| Tajikarao (beat Tajikara) | Hachinohe Village: north-west corner | Answer Yes to ‘Test your strength?’ and win the fight. Losing is not a game over; he asks ‘Want another match?’ next time. → Yamato can call down Tajikarao | 12 | |
| Dogu (three Dogu Shards) | Niigata Village: the man in front of the second house on the top row | Talk to him once to hear about the shards, then come back with all three Dogu Shards (Mt. Maru cave, Mt. Yatsuka summit, Derarezu Forest). → Juurouta can summon Dogu (the three shards are used up) | 12 | |
| Kushinada (Niigata sacrifice) | Niigata Village: the crying woman on the west side, left of the north-west house | With Natsume in the party, answer Yes to ‘Fight the youkai?’ and win two battles against Snake Youkai. Losing either is a game over. Answering No does nothing; you can ask again. → Yamato can summon Kushinada | 12 | |
| Gundari (the god in Herai’s pond) ⚠ | Herai Village: the pond in the sunken square in the middle (stand below it, facing up) | First hear the man in the north of the village (between the two big northern houses) talk about the pond god (Touya must be in the party). Then examine the pond, answer Yes and pick a spear. Only Gale Spear, Fire Spear, Tube Spear, Fudou Rod or Raijin Spr work. Chakra, Javelin, Monk Staff, Kama Spear, Vajra, Twin Spear, Sun Staff, Naginata and Kongoujou are thrown away for nothing. → Touya learns the Gundari summon (the spear is used up) | 12 | |
| Naraenten (the shaking tree in Yamashiro) | Yamashiro Village: the tree by the east wall | Face the tree from below and examine it to meet Naraenten. Come back with a Kongoujou, examine the tree and answer Yes to ‘Offer the Kongoujou?’. → You choose who learns Naraenten (the Kongoujou is used up) | 13 | |
| Kongouyasha summon + Muramasa | Kongouyasha Shrine, on the Ezo map | Talk to the priest first. Then step before the altar and answer (1) “Have you ever taken what belongs to another?” and (2) “Have you ever abandoned a youkai with a righteous heart?”. Question 1 must match your record: No if you never stole, Yes if you did. For question 2, Yes is accepted only if you really turned away or exterminated a youkai; No is only called a lie if you refused Tanukichi in Beppu. No thefts and truthful answers = Muramasa + the summon. An honest Yes to either question = the summon only. A lie = “You liar!” and nothing: leave the shrine and come back to try again. → Kongouyasha summon; Muramasa if your record is clean | 16 | |
| Jizaiten (the stone lantern) | Yokohama — Gin-san inside the north gate; the stone lantern on the south-west waterfront road | Talk to Gin-san, then examine the lantern and offer, one at a time: Herb, H. Water, SleepDust, Haze Bell, Reishi. → Summon Jizaiten | 17 | |
| Dryad | Eastern ocean — tiny island far south-west of Harbor Town | Sail to the island and talk to either Dryad. → Summon Dryad | 18 | |
| Huey (beat Johnny) | Port Village, north-east corner | Talk to Johnny and win the fight. Losing is a game over. → Summon Huey (you choose who learns it) | 19 | |
| Ifrit | Grande Village, west tent (fire) | Examine the fire with Blessing Powder and answer Yes. → Natsume learns Ifrit | 20 | |
| Djinn | Plain far east of Hill Village (world map) | Visit with karma 70 or more. → Summon Djinn (choose who learns it) ☯ Karma needs 70+ | 20 | |
| Ayar Cachi (Man-Eating Mountain rematch) | Hill Village (man outside), then Man-Eating Mountain summit | After the Yokohama ambush, talk to the man outside Hill Village, then win the fight at the summit (losing is a game over). → Squanto learns Ayar Cachi | 22 | |
| Seima Doji (Hokutomaru) ⚠ | Hokutomaru’s cave (Kyushu, between Takachiho and Kagoshima) — the cave entrance | Meet Minami on the bottom floor, then walk out through the entrance after learning all 16 other summons (Inari, Dogu, Shisa, Tajikarao, Naraenten, Kushinada, Karura, Jizaiten, Kongouyasha, Gundari, Ayar Cachi, Ifrit, Dryad, Djinn, Huey, Seven Gods). → Yamato learns Seima Doji | 28 |
| Name | Where | How / reward | Ch. | |
|---|---|---|---|---|
| Ayashibi in Izumo ⚠ | Izumo Village: behind the inn in the north-west corner | Appears only after you have talked to Korobo in Nikkou Village (late game, after helping Tanukichi in Beppu). Answer Yes to ‘Listen to Ayashibi?’ and Natsume invites her to the youkai village. No: Yamato drives her off. → Youkai village resident | 4 | |
| Ayashibi in Okayama (see the Youkai Village list) | Okayama Village: south-east corner | A ‘Man’ who is really a youkai appears after you give the kappa at Kourai its Ranjatai. Answer No to ‘Exterminate the youkai?’ (Natsume objects). → Youkai village resident ☯ Karma No: +2 · Yes (exterminate): −2 | 4 | |
| Korobo in Nikkou | Nikkou Village: beside the elder’s house | Appears after you help Tanukichi in Beppu. Just talk to it. → Youkai village resident; also makes Ayashibi (Izumo) and Tsurube (Takachiho) appear ☯ Karma +2 | 6 | |
| Tanumi in Nikkou | Nikkou Village: north-east, near the top of the village | Appears after the Kourai kappa event. Answer No to ‘Exterminate the Tanumi?’. → Youkai village resident ☯ Karma No: +2 · Yes: −2 | 6 | |
| Tanukichi founds the Youkai Village ⚠ | Beppu Village (Shikoku, Ch. 13) — the man in the north-west corner | When he turns back into a tanuki, answer Yes to “Believe him?”. You are taken to the site of the new Youkai Village on the Shikoku map. → Starts the whole Youkai Village chain; Tanukichi later gives Rice Balls and, when the village is full, Furinkazan ☯ Karma Yes +2 / No −5 | 15 | |
| Kappa (Rokkou Village) ⚠ | Rokkou Village — south-east part of the village (a boy has caught a kappa) | Stage 1 (after Tanukichi, before Korobo). Answer Yes to “Let it go?”. → Youkai Village resident ☯ Karma Yes +2 / No −2 | 15 | |
| Tsurube-otoshi (Hachinohe Village) ⚠ | Hachinohe Village — the man at the north edge of the village | Stage 1. Answer No to “Exterminate the youkai?”. → Youkai Village resident ☯ Karma No +2 / Yes −2 | 15 | |
| Bakebi (Umibe Village) ⚠ | Umibe Village — the boy in the far south-west corner | Stage 1. Answer No to “Exterminate the youkai?”. → Youkai Village resident ☯ Karma No +2 / Yes −2 | 15 | |
| Korobo (Nikkou Village) | Nikkou Village — middle of the village | Just talk to him. This moves the chain to stage 2, so do the three stage 1 youkai (Rokkou Kappa, Tsurube-otoshi, Bakebi) FIRST. → Youkai Village resident; unlocks stage 2 ☯ Karma +2 | 15 | |
| Kooni (Iida Town storehouse) ⚠ | Iida Town — the storehouse south of Yamato’s house (where Mom’s Box was) | Stage 2 (after Korobo). Answer Yes to “Tell it about the youkai village?”. → Youkai Village resident; later you can take Kooni along as an NPC ally from a house in the village ☯ Karma Yes +2 / No −2 | 15 | |
| Ayashibi (Izumo Village) ⚠ | Izumo Village — north-west corner | Stage 2. Answer Yes to “Listen to Ayashibi?”. Must be done BEFORE the Tsurube in Takachiho. → Youkai Village resident ☯ Karma none either way | 15 | |
| Pokkun (Herai Village) ⚠ | Herai Village — north-west part of the village | Stage 2. Answer No to “Exterminate Pokkun?”. Must be done BEFORE the Tsurube in Takachiho. → Youkai Village resident ☯ Karma No +2 / Yes −2 | 15 | |
| Running Jizo (Hakodate Village) — optional ⚠ | Hakodate Village (Ezo) — the easternmost of the four Jizo statues by the well in the central square | After Korobo, examine the statue and answer Yes to “Believe what the Running Jizo says?”. He then appears in the Youkai Village. He is NOT needed for Tanukichi’s reward. → Extra Youkai Village resident ☯ Karma none either way | 15 | |
| Tsurube (Takachiho Village) ⚠ | Takachiho Village (Kyushu) — the boy in the north part of the village | Stage 2. Answer Yes (Yamato offers to tell him a good place to move to). Do Izumo’s Ayashibi and Herai’s Pokkun first: recruiting Tsurube removes them. → Youkai Village resident; unlocks stage 3 ☯ Karma Yes +2 / No −2 | 15 | |
| Tanujou (Iida Town) ⚠ | Iida Town — a man in the middle of town | Stage 3 (after Tsurube). Answer Yes to “Take Tanujou to the youkai village?”. → Youkai Village resident ☯ Karma Yes +2 / No −2 | 15 | |
| Yukihime (Toyama Village) ⚠ | Toyama Village — north-west part of the village | Stage 3. Answer Yes to “Tell Yukihime about the youkai village?”. → Youkai Village resident; later she can join you as an NPC ally from a house in the village ☯ Karma Yes +2 / No −2 | 15 | |
| Kaparou (Yamashiro Village) ⚠ | Yamashiro Village (Shikoku) — south part of the village | Stage 3. Answer No to “Exterminate Kaparou?”. Must be done BEFORE the Kourai Kappa gets the Ranjatai. → Youkai Village resident ☯ Karma No +2 / Yes −2 | 15 | |
| Kappa (Kourai shrine) — needs the Ranjatai ⚠ | The Kourai (Kappa) shrine on the western Honshu map — step on the spot in front of the pond | Stage 3. Carry a Ranjatai: buy one for 50,000 gold at Kyoto’s west item shop (any time before you become wanted in Ch. 22), take the one in an Abashiri house after Ch. 22 (counts as theft), or buy one at Ihika Village (Ch. 25). Step in front of the pond: Yamato drops it. Answer Yes to “Hand over the Ranjatai?” — the Kappa is delighted and you keep it. → Youkai Village resident; unlocks stage 4 ☯ Karma Yes +2 / No: no change, the Kappa keeps the Ranjatai and is lost | 15 | |
| Ayashibi (Beppu Village) ⚠ | Beppu Village — a boy in the middle of the village | Stage 4 (after the Kourai Kappa). Answer No to “Exterminate Ayashibi?”. → Youkai Village resident ☯ Karma No +2 / Yes −2 | 15 | |
| Tanumi (Nikkou Village) ⚠ | Nikkou Village — north-east part of the village | Stage 4. Answer No to “Exterminate the Tanumi?”. → Youkai Village resident ☯ Karma No +2 / Yes −2 | 15 | |
| Ayashibi (Okayama Village) ⚠ | Okayama Village — a man in the east part of the village | Stage 4. Answer No to “Exterminate the youkai?”; Natsume invites it to the village. → Youkai Village resident ☯ Karma No +2 / Yes −2 | 15 | |
| Korori (Umibe Village) ⚠ | Umibe Village — the man on the west side, north part of the village | Stage 4. Answer No to “Exterminate Korori?”. → Youkai Village resident ☯ Karma No +2 / Yes −2 | 15 | |
| Youkai Village complete: Furinkazan ⚠ | Youkai Village (Shikoku map) — Tanukichi | Once all 16 residents above (Running Jizo not needed) live in the village, talk to Tanukichi. → Furinkazan; afterwards Tanukichi keeps handing out Rice Balls | 15 |
| Name | Where | How / reward | Ch. | |
|---|---|---|---|---|
| Father’s sword from Mayuki | Iida Town: your house (south-west corner) | Bring Mom’s Box from the storehouse south of the house back to Mayuki. → Katana (Mom’s Box and the Odd Bundle are taken back) | 1 | |
| Jiiya’s Suzukake ⚠ | Iida Town: your house, Jiiya | Talk to Jiiya any time after the night talk with Mayuki. → Suzukake | 1 | |
| Kisuke’s farewell Herb ⚠ | Iida Town: Kisuke, west of the well | Talk to him after the night talk with Mayuki, before you leave town. → Herb | 1 | |
| Kisuke’s mountain Herb | Iida Town: Kisuke, west of the well | Talk to him the first time you come back to Iida after setting out. → Herb | 1 | |
| Free meals at the Shinsengumi HQ ⚠ | Kyoto: Shinsengumi HQ, the cook in the main hall | Talk to the cook and answer Yes to ‘Would you like a meal?’. → Free full heal, any number of times | 3 | |
| The bushido master’s eight pupils ⚠ | Kyoto: the ronin master by the east road, right end of the central wall | Talk to him, then to his eight pupils: samurai ‘money’ and ronin ‘compassion’ (Kyoto), ronin ‘guts’ (Okayama), samurai ‘honor’ (Nikkou), ronin ‘romance’ (Rokkou), ronin ‘courage’ (Yamashiro), samurai ‘courtesy’ (Herai), samurai ‘way of the warrior’ (Niigata). Then talk to the master again. ☯ Karma +7 | 3 | |
| Bushido pupil: ‘money’ (Kyoto samurai) | Kyoto: the house on the same row as the inn, just west of it (lower-left quarter) | Talk to the samurai (‘A man lives for money!!’) with karma 20 or higher. → Counts toward the master’s quest | 3 | |
| Bushido pupil: ‘compassion’ (Kyoto ronin) | Kyoto: the long building in the south-east, left door | Talk to the ronin (‘A man lives by compassion!!’) with karma 20 or higher. → Counts toward the master’s quest | 3 | |
| Ranjatai for sale ⚠ | Kyoto: the west item shop (the one from Toudou’s hunt) | Buy it. → Ranjatai | 3 | |
| Bushido pupil: ‘guts’ (Okayama ronin) | Okayama Village: in front of the long central building | Talk to the ronin while your karma is 20 or higher. This counts toward the Kyoto bushido ronin’s pupils (+7 karma when all eight are found, see Ch. 3). | 4 | |
| Soul Stone | Ooishi Shrine: the Spirit Hole below the cave | Defeat the Stone God; the Mysterious Voice hands it over. → Soul Stone (key item) | 5 | |
| Bushido pupil: ‘honor’ (Nikkou samurai) | Nikkou Village: north-west | Talk to him while your karma is 20 or higher; counts toward the Kyoto bushido ronin’s pupils (Ch. 3). | 6 | |
| Saikaku’s food (free heal) | Mt. Hiei: temple, west room | Talk to Saikaku. → Party restored (‘Strength restored!!’), repeatable | 7 | |
| Oodenta | Mt. Houju: cave below the storehouse | Seal the Spirit Hole and win the Nurikabe fight in the vision. → Oodenta (Juurouta’s sword) | 7 | |
| Ronin master’s pupil: “romance” ⚠ | Rokkou Village — the ronin in the north-east part of town | Talk to him with karma 20 or more. He is one of eight pupils the ronin master in Kyoto asks you to meet. → Counts toward the ronin master’s quest in Kyoto (+7 karma when all eight are met) | 8 | |
| Juzumaru (one of the Five Great Swords) | Awaji Island Wasteland — the Spirit Hole beyond the stone door | Story: beat the youkai at the Spirit Hole and finish the Hokutomaru flashback. → Juzumaru | 8 | |
| Blue Orb | Nikkou Village — the elder’s house (top of the village) | Story: beat the Sarugami on Mt. Futara. Sawa hands over the orb afterwards. → Blue Orb (key item, used up in the Waterfall in Ch. 11) | 9 | |
| Magatama | Mt. Yatsuka cave — the web over the pit at the far end | Story: after Touya breaks the seal, reach the web and win the three spider fights. → Magatama (key item, used up at the Waterfall in Ch. 11) | 10 | |
| Overnight stay in Izumo (Saigami family dreams) | Izumo Village — Natsume asks when you enter the village | Enter Izumo with Touya in the party and answer Yes. Can be repeated on later visits; which dream plays seems to vary. → Story scenes only | 10 | |
| Mikazuki (one of the Five Great Swords) | Underground Waterway beneath Takachiho Falls | Story: finish the Kiyohime flashback. → Mikazuki (Natsume’s sword) | 11 | |
| Old Tablet and Puff Sake | Herai Village: the old woman in the small house north of the west gate | Examine the square hollow at Mt. Towari twice, talk to the old woman, bring her 4 Fluffy Grass (Puffgrass) from Derarezu Forest. → Old Tablet (opens Hiramitsu Tower), Puff Sake (Puff Sake; protects you from the heat on B4F) | 12 | |
| Doujigiri joins | Hiramitsu Tower B4F: the stone tower in the hot inner chamber | Walk up to the stone (Juzumaru speaks), then face it and examine it (Mikazuki wakes him). After the Hokutomaru memory, Doujigiri joins. → Doujigiri (Great Sword) | 12 | |
| Bushido pupil: ‘courtesy’ (Herai samurai) | Herai Village: the samurai at the west edge of the sunken square in the middle | Talk to him while your karma is 20 or higher. Counts toward the Kyoto bushido ronin’s pupils (Ch. 3). | 12 | |
| Bushido pupil: ‘way of the warrior’ (Niigata samurai) | Niigata Village: the samurai in the north-west corner | Talk to him while your karma is 20 or higher. Counts toward the Kyoto bushido ronin’s pupils (Ch. 3). | 12 | |
| The Okayama Ferryman (way to Shikoku) | Okayama Village: the Ferryman by the gap in the east wall; then the pier just south of Okayama | Talk to him while Doujigiri is with you. He then waits at the pier; answer Yes to ‘Go to Shikoku?’. → Free ferry between Honshu and Shikoku, any time | 13 | |
| Rescue Yuuma (Hifumi’s request) | Yamashiro Village: Hifumi’s house (big east house, second from the top) and the biggest house (north-west, back door) | Talk to Hifumi, enter by the back door, beat the sleeping guards for the Jail Key, free Yuuma, beat Izou, then visit Hifumi’s house again. → The secret of Mt. Tsurugi; the Five Mounds shrines open | 13 | |
| The five treasures of the Five Mounds | Five shrines on the Shikoku map: Relic Gem (north of Mt. Tsurugi), Relic Key (east), Relic Book (south-east), Relic Ring (south-west, east of Yamashiro), Relic Pot (north-west, centre of the island) | After Yuuma’s secret, examine the object in each shrine. On Mt. Tsurugi, place each on the bump facing its shrine: top Gem, upper right Key, lower right Book, lower left Ring, upper left Pot. → Opens the way to the Mt. Tsurugi Spirit Hole | 13 | |
| Bushido pupil: ‘courage’ (Yamashiro ronin) | Yamashiro Village: the ronin in front of the weapon shop (north-east) | Talk to him while your karma is 20 or higher. Counts toward the Kyoto bushido ronin’s pupils (Ch. 3). | 13 | |
| Ishibutai monkey-statue riddle | Ishibutai: the row of ten monkey statues north of the two big rocks | Read the carved words on the right-hand big rock, then examine the statue 8th from the left (3rd from the right). → Opens Asuka Underground | 14 | |
| ‘Attack Shimazu and his men?’ (twice) ⚠ | Asuka Underground B5: the Spirit Hole | Yes (either time) = you fight Izou yourself. No twice = Touya handles Izou in a cutscene. → Only the fight (EXP) differs ☯ Karma none | 14 | |
| Onimaru joins | Asuka Underground B5: bottom of the Spirit Hole | After the fall, take back the four Great Swords, watch Hokutomaru’s memory (Amanojaku), then Onimaru wakes. → Onimaru (the fifth Great Sword); transformed forms available | 14 | |
| Hokutomaru’s cave (Kyushu) ⚠ | Kyushu map: the cave between Takachiho and Kagoshima (south-west of Takachiho, just north of Kagoshima) | Enter after you have Onimaru; the seal breaks. Go through all five areas to the end and face the spot where Minami’s voice speaks. → 34 chests; a full heal at the end (repeatable); flag needed for the Seima Doji summon | 14 | |
| God’sTear for Gennobou | Asuka Underground B1, chest in the north-west corner | Open the chest; bring it to Gennobou in the Relic Book shrine on Shikoku. → God’sTear (→ NPC ally Gennobou) | 14 | |
| Raft (from the Sacred Tree) | Ryuuga Forest — the huge tree in the middle of the forest | After the Boatman asks you to build a ship, examine the tree, win the fight, then answer No to “Burn it anyway?”. → Raft (key item; later turned into your ship in Yokohama) | 15 | |
| Conch (from the mermaid) ⚠ | Ezo landing spot, on arrival | Given automatically when the mermaid lands you in Ezo. Use it on the landing spot to be towed back to Honshu once; the mermaid then takes it back. → Conch (single use) | 16 | |
| The peddler’s story (100 gold, up to 3 times) ⚠ | Hakodate Village — by the well in the central square | Appears after the hot-spring fight. Pay 100 gold once to learn about the cave (this opens it). Pay twice more (300 gold total) for Gyuuki’s name and its weak point (the Five Great Swords). → Opens Gyuuki Cave; hint about Gyuuki | 16 | |
| The ship (Raft + 1000 gold) | Yokohama — Yuemon on the east pier | After the eviction scene, talk to the crewman on the middle pier, then ask Yuemon to remodel the raft and pay 1000 gold. Sleep at the inn and collect the ship. → Ship | 17 | |
| Ship remodels (3000 / 5000 / 7000 / 10000 gold) | Yokohama — Yuemon on the east pier | Talk to Yuemon when the ship reaches rank 3, 8, 13 and 18; pay, sleep at an inn, then collect the improved ship. → Four stronger ship versions | 17 | |
| Light Chrm (from Timba) | Harbor Town — on arrival | Automatic on your first arrival. → Light Chrm | 18 | |
| Guests of Grassland Village | Grassland Village — the man in the south-west | Talk to him on arrival; afterwards the fruit (free heal) and the Guardian story become available. → Free party refresh from the fruit woman; free inn | 18 | |
| Hear the Grande woman’s story (needed for the river) | Grande Village, outside, by the drying rack in the centre | Talk to her once. → Enables the Water Demon event at the river | 19 | |
| Air Flowers | Seiren’s house on the river bottom, jar on the right | Search the jar while carrying no Air Flower. Seiren also gives one when you make the deal. → Air Flower (about 2 minutes of air) | 19 | |
| Treant trading chain (Rainbow Feather) | Niji Forest | Talk down the chain from the huge Treant to the Indigo Mirror tree, give that tree 10 Crosses, then trade Mirror, Tablet, Crystal, Horn, Bangle, Water Jar and Veil back up the chain. → Rainbow Feather (menu: Rainbow); afterwards the huge Treant heals you for free | 19 | |
| Pineapple Treant | Niji Forest, centre | Examine the Treant while carrying a Pineapple and answer Yes. It is repeatable, one reward per Pineapple. → Random: Gods Charm or Rice Ball (50/50) | 19 | |
| Seiren’s ferry | Rio Grande crossing, either bank | Give her the Rainbow Feather on the north bank. Afterwards, step onto either crossing point to be carried across. → Free river crossing both ways | 19 | |
| Blessing Powder | Hill Village, lower-left tent (old woman) | Have a God’sTear and answer Yes (it is not actually taken). → Bless Dust | 20 | |
| Gold Tiara & Emerald Earring ⚠ | Tiara: temple main hall, top-left alcove; both items again from the altar pedestal | Pick up the tiara, place it on the altar, then take both items back. → Gold Tiara (opens the Nageki Valley cave), Emerald Earring (needed to beat the Spirit) | 21 | |
| Machine | Nageki Valley, dried Spirit Hole | Examine the Spirit Hole and answer Yes twice. → Machine (key item) | 21 | |
| Touya’s sacrifice (permanent) ⚠ | Leaving Ruins Village after Rishu’s death | Scripted. The Phoenix fight cannot be won, and Touya dies protecting the party. | 21 | |
| Free rest at Ryouma’s house | Yokohama, large building on the east side | Talk to Ryouma and answer Yes to staying the night. → Free inn (safe from the officers) | 22 | |
| Pet evolves | Toyama Village, pet shop | Talk to the owner with your pet in the party and answer Yes. → Dog becomes Wolfman, cat becomes Nekomata | 22 | |
| Free full heal (Ihika meeting place) ⚠ | Ihika meeting place (Ezo) | Talk to the right-hand Ihika. → Full recovery, any number of times | 23 | |
| Juurouta’s duel with Okita ⚠ | Mt. Fuji (inside), Spirit Hole chamber | After beating the transformed Okita, fight the duel he asks for. → Story only. Winning or losing the duel leads to the same scene (Okita dies either way, with a different last line). | 24 | |
| Meet the Ihika Elder | Ihika Village, top centre building | Talk to the Elder. → Unlocks the return to Mt. Fuji (the crowd lets you pass). Your Ihika allies leave; the Ihika beside the Elder rejoins on request. | 25 | |
| Free inn in Ihika Village ⚠ | Ihika Village, top-right building | Answer Yes to ‘Would you like to stay with us?’. → Free rest | 25 | |
| Ranjatai for sale (50000 gold) ⚠ | Ihika Village, bottom-left building, first counter | Buy it. → Ranjatai (for the Kourai kappa, youkai village stage 4) ☯ Karma none (unlike the Abashiri one, −5) | 25 | |
| Face the Mt. Fuji crowd | Mt. Fuji, near the cave mouth | After meeting the Ihika Elder, answer Yes to ‘Are you ready to fight?’. → The way to the summit and the crater opens. | 26 | |
| Minami’s spirit (Hokutomaru’s cave) ⚠ | Hokutomaru’s cave, bottom floor, east side | Walk to the spot where Onimaru reacts. → Story scene and a full heal; the spot heals you again on every later visit. | 28 | |
| Farewells at the mountain ⚠ | Mt. Fuji (inside), entrance hall | Have the Ihika and/or Ryouma in the party when you enter for the last time. → Extra farewell lines only | 29 | |
| Your pet in the ending ⚠ | Ending | Adopt a pet at the Toyama pet shop at any point. → The boy brings your dog, cat or chick to Ryouma in the ending | 29 |
Iida Town — Weapons
| Kodachi | 120 G |
| Katana | 180 G |
| Chakra | 150 G |
Long building at the top of town, left door.
Iida Town — Armor
| Hood | 100 G |
| Silk Robe | 140 G |
| Leggings | 110 G |
Long building at the top of town, right door.
Iida Town — Items
| Herb | 4 G |
| Pill | 6 G |
| Sandalwd. | 6 G |
| Wake Dust | 6 G |
House with the sign on the east side. No inn in Iida: Mayuki heals you for free.
Toyama Village — Inn
| Stay | 10 G |
No weapon, armor or item shop in Toyama.
Kyoto — Weapons
| Kodachi | 120 G |
| Katana | 180 G |
| Zangetsu | 320 G |
| Zantetsu | 440 G |
| Chakra | 150 G |
| Javelin | 210 G |
| Monk Staff | 280 G |
| Bow | 130 G |
| Kakute | 160 G |
| Hozutsu | 3,000 G |
Right door of the long building along the top of town. Same stock as Edo.
Kyoto — Armor
| Hood | 100 G |
| Tokin | 210 G |
| Kabuto | 420 G |
| Silk Robe | 140 G |
| Suzukake | 450 G |
| Quilt Robe | 180 G |
| Chain Mail | 680 G |
| Leggings | 110 G |
| Chain Legs | 330 G |
Left door of the long building along the bottom of town. Same stock as Edo.
Kyoto — Items
| Herb | 4 G |
| H. Water | 8 G |
| Reviver | 10 G |
| SleepDust | 4 G |
Right door of the long building along the bottom of town.
Kyoto — Items (west shop)
| Pill | 6 G |
| Sandalwd. | 6 G |
| Wake Dust | 6 G |
| Ranjatai | 50,000 G |
West-most building in the upper half of town.
Kyoto — Inn
| Stay | 30 G |
Building with a sign just north of the bottom row. The HQ cook heals for free.
Izumo Village — Weapons
| Zangetsu | 320 G |
| Bow | 130 G |
| Kakute | 160 G |
big house, south-west
Izumo Village — Items
| Herb | 4 G |
| Pill | 6 G |
| Sandalwd. | 6 G |
| Wake Dust | 6 G |
big house, south-east; inn 20 gold in the north-west house
Okayama Village — Weapons
| Zantetsu | 440 G |
| Javelin | 210 G |
| Monk Staff | 280 G |
| Bow | 130 G |
Okayama Village — Armor
| Kabuto | 420 G |
| Suzukake | 450 G |
| Quilt Robe | 180 G |
| Chain Mail | 680 G |
| Chain Legs | 330 G |
Okayama Village — Items
| Herb | 4 G |
| H. Water | 8 G |
| Pill | 6 G |
| Sandalwd. | 6 G |
| Wake Dust | 6 G |
| Reviver | 10 G |
inn 20 gold
Nikkou Village — Weapons
| Katana | 180 G |
| Chakra | 150 G |
| Bow | 130 G |
| Kakute | 160 G |
inn 20 gold; no item shop
Edo — Weapons
| Kodachi | 120 G |
| Katana | 180 G |
| Zangetsu | 320 G |
| Zantetsu | 440 G |
| Chakra | 150 G |
| Javelin | 210 G |
| Monk Staff | 280 G |
| Bow | 130 G |
| Kakute | 160 G |
| Hozutsu | 3,000 G |
same list as Kyoto
Edo — Armor
| Hood | 100 G |
| Tokin | 210 G |
| Kabuto | 420 G |
| Silk Robe | 140 G |
| Suzukake | 450 G |
| Quilt Robe | 180 G |
| Chain Mail | 680 G |
| Leggings | 110 G |
| Chain Legs | 330 G |
same list as Kyoto
Edo — Items
| Herb | 4 G |
| H. Water | 8 G |
| Pill | 6 G |
| Sandalwd. | 6 G |
| Wake Dust | 6 G |
| Reviver | 10 G |
| ChainPill | 6 G |
| Haze Bell | 4 G |
inn 20 gold
Rokkou Village — Weapons
| Katana | 180 G |
| Zangetsu | 320 G |
| Zantetsu | 440 G |
South-east long house.
Rokkou Village — Items
| Herb | 4 G |
| H. Water | 8 G |
| Pill | 6 G |
| Sandalwd. | 6 G |
| Wake Dust | 6 G |
| Reviver | 10 G |
West house on the middle row. Inn: 30 gold (south-west long house).
Takachiho Village — Weapons
| Zantetsu | 440 G |
| Kikuichi | 620 G |
| Dawn Sword | 840 G |
| Seven Star | 1,090 G |
| Kama Spear | 410 G |
| Vajra | 550 G |
| Hama Bow | 310 G |
| Kirisame | 590 G |
| Cat Claw | 290 G |
| Jizai Claw | 450 G |
Seller in the north-east of the village.
Takachiho Village — Armor
| Kabuto | 420 G |
| Star Helm | 510 G |
| Spike Helm | 640 G |
| Quilt Robe | 180 G |
| Crane Robe | 1,020 G |
| Chain Mail | 680 G |
| Lion Robe | 810 G |
| Ooyoroi | 1,050 G |
| Genji Armr | 1,320 G |
| Chain Legs | 330 G |
| Swift Shoe | 460 G |
| Herb Legs | 590 G |
Seller in the north-west. Kagoshima’s armor seller has the same list.
Takachiho Village — Items
| Herb | 4 G |
| N. Pill | 20 G |
| H. Water | 8 G |
| S. Dew | 16 G |
| Pill | 6 G |
| Sandalwd. | 6 G |
| Wake Dust | 6 G |
| Reviver | 10 G |
Seller in the south-west. Inn: 20 gold (big central house).
Kagoshima Village — Items
| Kunai | 20 G |
| Maelstrom | 4 G |
| Reishi | 4 G |
No inn in Kagoshima.
Kagoshima Village — Armor
| Kabuto | 420 G |
| Star Helm | 510 G |
| Spike Helm | 640 G |
| Quilt Robe | 180 G |
| Crane Robe | 1,020 G |
| Chain Mail | 680 G |
| Lion Robe | 810 G |
| Ooyoroi | 1,050 G |
| Genji Armr | 1,320 G |
| Chain Legs | 330 G |
| Swift Shoe | 460 G |
| Herb Legs | 590 G |
Same list as Takachiho.
Herai Village — Items
| Herb | 4 G |
| H. Water | 8 G |
| Pill | 6 G |
| Sandalwd. | 6 G |
| Wake Dust | 6 G |
| Reviver | 10 G |
big north house
Herai Village — Items
| Pill | 6 G |
| Sandalwd. | 6 G |
| Wake Dust | 6 G |
| Reviver | 10 G |
| Maelstrom | 4 G |
| Reishi | 4 G |
big north-east house. Reishi is one of the five offerings for the Jizaiten summon in Yokohama. Inn: big south-east house, 20 gold.
Niigata Village — Armor
| Tokin | 210 G |
| Kabuto | 420 G |
| Chain Mail | 680 G |
| Chain Legs | 330 G |
No weapon or item shop, no inn.
Beppu Village — Items
| Herb | 4 G |
| N. Pill | 20 G |
| H. Water | 8 G |
| S. Dew | 16 G |
| Pill | 6 G |
| Reviver | 10 G |
| Maelstrom | 4 G |
house in the middle of the village. No inn in Beppu.
Yamashiro Village — Weapons
| Dawn Sword | 840 G |
| Seven Star | 1,090 G |
| Magoroku | 1,350 G |
| Kama Spear | 410 G |
| Vajra | 550 G |
| Sun Staff | 970 G |
| Naginata | 590 G |
| Kirisame | 590 G |
| Hourai Bow | 990 G |
| Jizai Claw | 450 G |
| Tiger Claw | 800 G |
| Shura Claw | 800 G |
| Matchlock | 6,000 G |
big north-east house. The Magoroku is what Takeaki (Okayama) wants.
Yamashiro Village — Armor
| Kabuto | 420 G |
| Star Helm | 510 G |
| Spike Helm | 640 G |
| Crane Robe | 1,020 G |
| Lion Robe | 810 G |
| Ooyoroi | 1,050 G |
| Genji Armr | 1,320 G |
| Swift Shoe | 460 G |
| Herb Legs | 590 G |
west house, third from the top
Yamashiro Village — Items
| N. Pill | 20 G |
| S. Dew | 16 G |
| Sandalwd. | 6 G |
| Wake Dust | 6 G |
big east house, third from the top. Inn: big south-east house, 20 gold.
Umibe Village — Armor
| Hood | 100 G |
| Tokin | 210 G |
| Silk Robe | 140 G |
| Leggings | 110 G |
Large house in the north-west. Refuses service after you become wanted (see ch16 cross).
Hakodate Village — Weapons
| Magoroku | 1,350 G |
| Sun Sword | 1,850 G |
| Kotetsu | 2,250 G |
| Naginata | 590 G |
| Tube Spear | 970 G |
| Hourai Bow | 990 G |
| Moon Bow | 1,540 G |
| Tiger Claw | 800 G |
| Shura Claw | 800 G |
| Oni Claw | 800 G |
| Matchlock | 6,000 G |
Top-centre house. Refuses service once you are wanted (ch22).
Hakodate Village — Armor (travelling peddler)
| Spike Helm | 640 G |
| Houou Hood | 730 G |
| Lucky Helm | 770 G |
| Crane Robe | 1,020 G |
| Genji Armr | 1,320 G |
| Miracle Ar | 1,590 G |
| Ushiwaka | 1,980 G |
| Herb Legs | 590 G |
| Kirin Shoe | 850 G |
North-east corner of the village. Refuses service once you are wanted (ch22).
Hakodate Village — Inn
| Night’s stay | 20 G |
Calls the officers (a battle) once you are wanted.
Abashiri Village — Items
| N. Pill | 20 G |
| S. Dew | 16 G |
| K. Herb | 10 G |
| Gold Pill | 50 G |
| Feather | 30 G |
Right-hand door of the left long house. The only shop in the game with no ‘wanted’ check — it keeps selling in ch22.
Abashiri Village — Items
| Pill | 6 G |
| Sandalwd. | 6 G |
| Wake Dust | 6 G |
| Kunai | 20 G |
| Maelstrom | 4 G |
| Reishi | 4 G |
Right-hand door of the right long house. Refuses service once you are wanted.
Yokohama — Weapons
| Kodachi | 120 G |
| Katana | 180 G |
| Chakra | 150 G |
| Kakute | 160 G |
Building in the middle-right of town. Refuses service once you are wanted (ch22).
Yokohama — Armor
| Hood | 100 G |
| Silk Robe | 140 G |
| Suzukake | 450 G |
| Leggings | 110 G |
Building on the east side. Refuses service once you are wanted.
Yokohama — Items
| Herb | 4 G |
| H. Water | 8 G |
| Pill | 6 G |
| Sandalwd. | 6 G |
| Wake Dust | 6 G |
Upper-left block; the loan man is in the back. Refuses service once you are wanted.
Yokohama — Travel Goods
| Feather | 30 G |
North-west building. After you get the ship, a second man here sells ship shells and repair kits (prices not in the event script). Never refuses service.
Yokohama — Inn
| Night’s stay | 30 G |
Central building. Needed to finish each ship remodel. Calls the officers once you are wanted.
Harbor Town — Items
| Dut. Pill | 40 G |
| Am. Pill | 32 G |
The only open house, on the west side near the docks.
Grassland Village — Armor (Japanese merchant)
| Iron Cap | 1,010 G |
| Buddha Hlm | 1,330 G |
| Kiraikou | 2,270 G |
| Niou Plate | 2,530 G |
| DragonShoe | 1,020 G |
| Light Shoe | 1,350 G |
Behind the tree at the north fence.
Grassland Village — Inn
| Night’s stay | 0 G |
East tent; free.
Grande Village — Armor (seller outside by the south-east gap in the fence)
| Kettle Hat | 590 G |
| Horn Helm | 940 G |
| Beast Sash | 1,280 G |
| Wave Robe | 2,010 G |
Port Village and Hill Village sell the same list.
Grande Village — Weapons (north tent)
| Crossbow | 680 G |
| Boomerang | 730 G |
| Hunter Bow | 1,500 G |
| Bolas | 1,500 G |
| Axe | 380 G |
| Bipennis | 520 G |
| Throw Axe | 620 G |
| Tomahawk | 840 G |
| Daisenbu | 1,240 G |
Same list as Grassland Village.
Port Village — Guns (secret dealer, big building’s left door)
| Musket | 6,750 G |
| Revolver | 9,250 G |
| Enfield | 7,500 G |
| Minie Gun | 8,250 G |
| Spencer | 9,750 G |
| Chassepot | 10,500 G |
Port Village — Armor (counter, same room)
| Kettle Hat | 590 G |
| Horn Helm | 940 G |
| Beast Sash | 1,280 G |
| Wave Robe | 2,010 G |
The inn is in the middle-right house (100 gold).
Hill Village — Armor (upper-left tent)
| Kettle Hat | 590 G |
| Horn Helm | 940 G |
| Beast Sash | 1,280 G |
| Wave Robe | 2,010 G |
Hill Village — Weapons (hidden peddler, south-west corner)
| Futsu Tama | 2,810 G |
| Masamune | 3,140 G |
| Fudou Rod | 1,990 G |
| Bamboo Bow | 2,890 G |
| DragonClaw | 970 G |
| Red Claw | 1,230 G |
Japanese goods.
Ihika Village — Weapons
| Masamune | 3,140 G |
| Moon Sword | 3,420 G |
| Totsuka | 3,670 G |
| Dragon Spr | 2,450 G |
| Bishamon | 1,990 G |
| Boomerang | 730 G |
| Hunter Bow | 1,500 G |
| Bolas | 1,500 G |
| Bamboo Bow | 2,890 G |
| Indra Bow | 4,270 G |
| DragonClaw | 970 G |
| Red Claw | 1,230 G |
| 8-Way Claw | 1,480 G |
| Tomahawk | 840 G |
| Daisenbu | 1,240 G |
Centre building. Masamune is the item Kaishuu wants in Rokkou (ch08).
Ihika Village — Armor
| Horn Helm | 940 G |
| Buddha Hlm | 1,330 G |
| Flame Head | 1,760 G |
| Wave Robe | 2,010 G |
| Brocade | 1,460 G |
| Kiraikou | 2,270 G |
| Niou Plate | 2,530 G |
| Moon Armor | 3,040 G |
| DragonShoe | 1,020 G |
| Light Shoe | 1,350 G |
| Hero Legs | 1,770 G |
Building on the right.
Ihika Village — Items
| Herb | 4 G |
| N. Pill | 20 G |
| Dut. Pill | 40 G |
| Remedy | 80 G |
| H. Water | 8 G |
| S. Dew | 16 G |
| Am. Pill | 32 G |
| M. Water | 64 G |
| Ranjatai | 50,000 G |
| Kobu Herb | 20 G |
| K. Cure | 40 G |
Bottom-left building, first counter.
Ihika Village — Items
| Pill | 6 G |
| Sandalwd. | 6 G |
| Wake Dust | 6 G |
| Reviver | 10 G |
| Gold Pill | 50 G |
| Feather | 30 G |
Bottom-left building, second counter.
Credits & sources
Written for Game Translate from our own decode of the game’s event script: every flag, choice, karma value, NPC condition, chest and shop list comes from the ROM. Structure and some boss notes were cross-checked against two GameFAQs guides: the 2020 walkthrough by 3vrB257A5gq3fg and the 1999 guide by akujin. Thanks to both authors for mapping this game long before a translation existed.
Found a mistake? Leave a comment with your save point and a screenshot.