
GAME TRANSLATE · SNES GUIDE
Haou Taikei Ryuu Knight
Complete Walkthrough
All 12 episodes of Lord of Paladin, the tournament and both endings: every step, chest, shop and boss, with annotated maps and a warning before anything can be lost.
Nothing on this page matches your search. Try a shorter word, or clear the box.
Before you start
Patch a clean Japanese ROM
The English patch is a BPS patch for the Japanese cartridge, Haou Taikei Ryuu Knight: Lord of Paladin (Japan) (Rev 1), with no copier header. Before patching, check that your file's CRC32 is CRC32 2740560B. Apply the patch with any BPS patcher (Floating IPS works) and keep the original file as it is.
Names in this guide
Every name is written as the English patch shows it. Older FAQs romanize differently: Derias is Delias, Herr Lied is Hellreet, Garden is Galden, Gobrem is Goblem, Bublin is Bubblin. Bopplin and Bubblin are two different goblins who work as partners.
Where the information comes from
This guide is built from three sources: the patch's English script (lines are cited by record ids such as M02-017), data read straight from the ROM (maps, chests, exits, shop stock and prices), and tests in an emulator (controls, saving, chest contents, the map images). A few facts come from older public guides and say so. The few things we could not test in the emulator say so where they come up.
Saving
Press X and choose System > Save. The save screen shows each file's level and the place you saved in, such as 'Westguns' or 'Chamber's Fort'. Saving worked everywhere we tried, including inside a dungeon. Save before every boss and before you answer Ballena in Episode 12: that is the point of no return, and from there to the ending there is no chance to save.
Healing
Inns restore you for a fee; if you're still in good shape, the innkeeper sends you off with 'You can fight plenty more!!'. ★Emerald Power★ spots on the Gigamazon River, the Friedel field, in Etania and in Whale's Valley restore your HP for free. In the field, Healmond ('HP recovers before your eyes!') and Powan Herb ('Restores [a lot of] HP to one ally!') keep you going.
Money is shown as GG
The menu shows your money in GG (for example '1000 GG'); shop lists and money chests use the same amounts, and so does dialogue, which just writes the unit as 'G'. When Dos asks [1000G] for the Lantern, 1000 comes off your counter; a smith's [100G] is 100 G. People also call the currency 'Golgol'.
How the game works
Equip your key items
Carrying a tool or key item isn't enough: most of them only work while they sit in the Item slot of Adeu or Sarutobi (X > Status > pick the character > the 4th slot). In the game's code, and tested in the emulator: the Lantern lights Border Fort, the Aqualung lets you dive to Purple Town, the Fire Orb opens the gate into the Friedel strongholds, Goblem's Eye opens the Lava Cave and the Hidden Item protects its wearer on foot (not in Ryu battles). The same check guards every hand-over (checked in the code): give the Banana to the hungry beast, Mary's Letter to Jinny, the Fern Herb to the Elf chief and the Mithril Ring to the mayor, set the three Orbs in Chamber's Fort, and use Jada's Wood Box at the ruins, each time with the item equipped. Each character has one Item slot, so swap as you go. Tools work the same way: the Wing Sandals let you walk on the open sky in Whale's Valley, the Sand Shoes stop the desert sand from sweeping you away, the Snow Shoes stop you sliding on ice, the Speed Shoes make you walk faster, the Spring makes Jump Mats work, and the Magic, Cactus and Fire Gloves (on your leader) let you pick up and throw stones, cacti and flames.
Controls
A: attack, talk, and open chests (stand on the chest and press A). B: jump. X: menu (System, Status, World Map, Exit). Y: item bar. SELECT: summon or dismiss Zephyr, only where a Ryu is allowed. L/R: swap the party leader when you have two or more members. START: pause.
Zephyr and Ryu battles
Zephyr is Adeu's Ryu Knight, a gift from the Great Sage Naji. Press SELECT to call it or send it away where the game allows a Ryu. Big fights against enemy Ryu and Solids start with Adeu's cry 'Ryu Knight!! Zephyr!!'. Some places are too small for it, and a sheriff tells you not to bring it out in town. Zephyr can shift things Adeu can't, such as the tombstone in front of Madora Castle (with the Stone Glove equipped).
Mist Rune and the Mist Tank
Ryu and Solids run on the Mist Rune in the air. The Pirani call the Mist Tank a 'portable Mist Rune'. Equipped, it lets Zephyr slowly recover HP even indoors and in caves (read from the code); it does not let you call Zephyr where a Ryu isn't allowed. It costs 50000 GG at Nyanko's Item Shop (Friedel Town) and at the Pirani Item Shop. Near Earth's Blade, the Mist Rune in the air grows unstable.
Equipment wears out
Gear only works once it's equipped, and weapons and armor need regular upkeep. Weapon shops temper weapons and armor shops repair armor for 100 G. If your gear is still fine, the smith just tells you so. The dwarf shops only sell.
Smiths upgrade your gear
Tempering a weapon or repairing armor (100 G) can do more than fix wear. The smith looks at the gear of whoever is leading the party (switch the leader with L/R) and, once that character has reached the next level band (level 11, 21, 31, 41 and 51), swaps the piece for the next model. Below that level he only fixes it, and you pay 100 G either way. Adeu's swords: Knife → Bronze Sword → Iron Sword → Bastard Sword → Great Sword → Mithril Sword. His armor: Leather Armor → Scale Armor → Chain Mail → Plate Armor → Suit Armor → Mithril Armor. Sarutobi's weapons: Bronze Shuriken → Iron Shuriken → Bronze Ninjato → Iron Ninjato → Mithril Shuriken → Mithril Ninjato. His garb: Hemp → Cotton → Silk Ninja Garb → Iron Mail Shirt → Chainmail Shirt → Mithril Mail Shirt. Two smiths give better gear at that same step: Dradd's Weapon Shop in Pafuricia Town (Great Sword → Holy Tempest, Mithril Shuriken → Ninto Blade) and Master Smith Gladd's Armory in Mithril Town (Suit Armor → Sordin Shield, Chainmail Shirt → Sordin Gauntlet). No smith upgrades a Mithril piece, and each step happens once: take the level-51 step anywhere else and that line's best gear is gone for good. The dwarf shops don't temper or repair.
The world map and the 12 episodes
Naji says this part of Earthtia is divided into 12 areas, and you can start training anywhere. Each area is an episode in this guide, named as on the World Map screen. The World Map is also fast travel, from the very start: press X, choose World Map, pick an episode with Left/Right and press A to warp to its starting area. Two exceptions: while you're stuck in Purple Town every choice leads back there, and once you've told Ballena 'Go on ahead!' every choice leads to Earth's Blade. Episode 8 (Purple Town) only works while the Aqualung is equipped.
Continues
When you're beaten on foot, Naji appears and asks whether you'll give up. Answer 'I won't give up!' (or 'Of course!' when Sarutobi leads) and you get back up with full HP. His lines get sterner ('This is your last chance!'), but there is no counter: continues are unlimited. Answer 'I give up…' and the game resets, losing anything since your last save. Ryu battles are different: lose a Ryu battle outside the Grand Tournament and the game goes straight back to the title screen, so save before them.
Shops: buying and selling
Item and herb shops offer Buy, Sell and Leave; armor and weapon shops offer Buy, Repair or Temper, and Leave. Selling pays about half the price, rounded down (Powan Herb: 150 GG to buy, 70 GG to sell). Not every shop buys: the Dope Shop says you need a license to sell herbs, Pirani wants nothing, and the dwarf shops and Rain General Store have no Sell option. Some items you can only carry one of ('You already have that!'), and the bag has a limit.
The item bar
Press Y to open the item bar and use herbs and fruit for healing and curing. Tools such as the Magic Glove or the Spring ('A spring is needed!') work only when equipped in the Item slot (see above). Each item has a one-line help text.
Upgrade tables, prices and armor stats: Equipment & Smiths. Hidden rules straight from the code: Secrets.
Recommended order
The game is free-scenario: Naji tells you to start your training anywhere on the continent. Each episode is one area of the World Map (the screen in the X menu names the episode you're standing in), so an episode covers the places in that area even when the story there continues from another one. This is a suggested route built from the script's gates (key items, party members, people who send you on). The story moves back and forth between areas, so some episodes are visited more than once (6, 9 and 10 especially); each is listed where it first matters. The Grand Tournament and the ending (Finale) come after Episode 12.
| # | Episode | Areas | Why now |
|---|---|---|---|
| 1 | Episode 1 Back!? Delias & the Menchi Brothers! | Westguns · Westguns Region · Onion Town | Start here (Westguns, Onion Town). Delias and the Menchi Brothers bring your first Ryu battle, and Dos sells the Lantern that Border Fort (Episode 10) needs for 1000 G. |
| 2 | Episode 2 Bounty Hunter & Merchant Katze!! | Westguns Region · North Hill · Onion Cave · West Hill | After you beat Delias and Rald, Zinnia says you'll need Jada, the mage in Onion Cave. Banbara's bounty at North Hill, Katze and the West Hill side jobs are in this area too. |
| 3 | Episode 3 Reunion! A Great Guy in the Woods!! | Gratches Village · Jerock Forest · Elf Village | Gratches joins in his village because he wants to go to Rain Town (Episode 11). Mary's parcel from West Hill goes to Elf Village. |
| 4 | Episode 4 No Way!? The Dwarves' Stolen Voices! | Jerock Forest · Gigamazon River · Dwarf Kingdom | The dwarves say only Jada can help: ask him at the far end of Onion Cave (Episode 2) to open the hidden cave, then beat the Arm Dragon. Jada's Wooden Box (Episode 12) is your reward. The Banana for Episode 7 appears later on map 35, by the river. |
| 5 | Episode 5 No Magic? Beat the 3 Phantom Knights! | Friedel · Friedel Town · Magic School | The Gigamazon River can't be crossed, so Friedel is reached through the Dwarf Kingdom. Floi gives you the Stone Glove for the tombstone, Madora Castle frees Izumi, and Principal Yudis gives you the Fire Orb (its help text: 'Lifts Friedel Castle's barrier!'). |
| 6 | Episode 11 Teru-Teru Doll & a Rain-Washed Bond! | Chamber's Fort · Etania · Rain Town · Etania Cave | Bring Gratches to Rain Town: Yagumo explains the three orbs that undo Chamber's Fort's trap, and you report back here once Hellreet is beaten. Sarutobi also joins in Rain Town, at Lazania's house, after Gesshin makes him and Adeu call a truce. You need him for Episode 6. |
| 7 | Episode 9 Showdown!! Mithril Mine & Town Below! | Chamber's Fort · Goblin Kingdom · Mithril Town · Friedel | The Chamber's Fort dungeon (orb puzzle, Jump Mat that needs a Spring, Snow Shoes, Gratches's rescue) belongs to this area; Episode 11 tells the Hellreet story around it. Mithril Town and the Goblin Kingdom are here too, and Gladd's Armory in Mithril Town gives the best body armor. |
| 8 | Episode 6 A Black Shadow! Who Is That Knight!? | Friedel · V-Jan Village | Friedel Castle, first visit, with Izumi and Sarutobi (who joins in Episode 11; until then a seal, Idoro's Curse, blocks the way): Idoro and the Skull Whale. Yudis then sends you to the King of Pafuricia. You come back here later for Galden. |
| 9 | Episode 10 Forest Kingdom! A Stolen Princess!? | Kingdom of Pafuricia · Border Fort · Pafuricia Town · Pafuricia Castle | Border Fort is dark without the Lantern from Episode 1. At Pafuricia Castle the King is too worried about the missing Paffy to listen; the Fern Seed is said to be in Border Fort. |
| 10 | Episode 7 Brrr! Rafflesil, Land of Snow and Ice! | Rafflesil Cave · Ice Town | Paffy is in Ice Town, past Rafflesil Cave; give the beasts a Banana for the Aqualung. Back at Pafuricia Castle (Episode 10) the King grants the Warp Gate, then Idoro takes Paffy and you return to Friedel Castle (Episode 6) to face Galden. |
| 11 | Episode 8 Battle Underwater!? Outlaw Pirani!! | Purple Town | Purple Town lies under the lake and needs the Aqualung from Episode 7. Pirani says the Mist Tank is sold here. |
| 12 | Episode 12 Death Match!! Flying Whale Continent! | Whale's Valley · Sky Tower · Desert of Ruins · Flying Whale Castle · Earth's Blade | With Galden beaten, Yudis sends you to Whale's Valley. You need the Warp Gate (Episode 10), the Wing Sandals (30000 G), the Sand Shoes from the Elf Village chief (Episode 3; his Fern Herb errand needs Izumi, Sarutobi and Paffy with you) and Jada's Wood Box for the Ruins of Lemuriad. |
Prologue: Great Sage Naji
Adeu is wrapping up a day of training when an old man who calls himself the Great Sage Naji turns up with a present: Zephyr, a Ryu Knight of Adeu's very own. Naji sets the goal for the whole game: train across the continent, gather companions, and win the Grand Tournament at Earth's Blade on the Road to Paladin. This chapter also covers what happens when you lose.
Walkthrough
- MainThe game opens with Adeu calling it a day after training. Someone is watching: an old man who introduces himself as the Great Sage Naji. Adeu tells him he looks like a plain old geezer, which Naji does not appreciate.
- MainNaji tells you about Earthtia, the Realm of the Sword, where knights, mages, gunmen and ninja all train to become the greatest hero in the world. He says he sees promise in Adeu and has brought him a present.
- MainThe present is Zephyr, a Ryu Knight, and it's yours from today. Earthtia's greatest hero is decided at the Grand Tournament, and Naji wants you to test your might there and become the Lightspeed Paladin. → checklist
- MainNaji's instructions: your training can start anywhere on this continent, so do whatever you like. Find companions, then set out from Whale's Valley for Earth's Blade, where the tournament is held. This part of Earthtia is divided into 12 areas, and Naji will be waiting for you at Earth's Blade. → checklist
- TipNaji's 12 areas are the 12 episodes of this guide. Press X and choose World Map: the area you're in is outlined and its episode title appears at the top. Press Left/Right to pick another episode and A to warp to its starting area. This works from the very first screen (Episode 8, Purple Town, only with the Aqualung equipped). → checklist
- TipPress SELECT to summon or dismiss Zephyr, but only where the game allows a Ryu. Before a Ryu battle Adeu calls it with 'Ryu Knight!! Zephyr!!'. Your first Ryu battle is against Delias in Episode 1.
- TipGear does nothing until you equip it; just carrying it is no use. Adeu says so himself in Episode 1. Weapons and armor also need regular upkeep at the shops.
- TipSave from the X menu: System > Save. The save screen shows each file's level and the place you saved in. Saving worked everywhere we tried, including inside a dungeon.
- TipIf the party falls, Naji appears and asks if you'll give up. Answer 'I won't give up!' (or 'Of course!' when Sarutobi leads) and you get back up with full HP. 'I give up…' (or 'Alas…') resets the game: anything since your last save is lost. → checklist
- TipNaji sounds sterner each time ('This is your last chance!'), but continues are unlimited: the game keeps no count. The exception is a story Ryu battle: lose one and the game resets, so save before them. → checklist
- TipNaji's question changes with the leader: 'Defeat ill becomes a ninja!' when Sarutobi leads, the Lightspeed Paladin speech when Adeu does.
- TipIf your save data is damaged, Adeu tells you the data is all messed up and to reset and start over.
Checklist
- Where
- Opening scene
- How
- Story: the Great Sage Naji gives it to Adeu.
- Reward
- Zephyr (summon and dismiss with SELECT where a Ryu is allowed)
- Opens
- Prologue
- Closes
- never (story)
- Where
- Opening scene
- How
- Story.
- Reward
- Your goal: gather companions, leave from Whale's Valley and win the Grand Tournament at Earth's Blade
- Opens
- Prologue
- Closes
- Finale (the tournament itself)
- Where
- X menu > World Map
- How
- X > World Map. Left/Right picks an episode, A warps to its starting area; B cancels.
- Reward
- Fast travel to the start of any episode (Episode 8 only with the Aqualung equipped; locked to Purple Town while you are stuck there, and to Earth's Blade after Ballena)
- Opens
- Prologue
- Closes
- never
- Where
- After a defeat on foot
- How
- Answer 'I won't give up!' or 'Of course!' to continue; 'I give up…' or 'Alas…' to stop.
- Reward
- Another chance from Naji
- Opens
- Prologue
- Closes
- never: continues are unlimited
Back!? Delias & the Menchi Brothers!
📍 Westguns · Westguns Region · Westguns desert · Onion Town
Great Sage Naji hands Adeu the Ryu Knight Zephyr and sends him off to win the Grand Tournament at Earth's Blade. In the outlaw town of Westguns, Delias and the Menchi Brothers want Zephyr for themselves, while in Onion Town the Brat Kid Gang is fencing stolen goods with a little help from the sheriff. Beat them all, and Delias comes back with a hired Solid pilot, Rald.
You need: Nothing (start of the game)
⏳ Last chances in this chapter
- Make the Lucky Goblin appear (Hidden Item) details
Full list across the game: Missables.
Walkthrough
- MainAfter the opening, Great Sage Naji gives you Zephyr, your own Ryu Knight. Your goal: train anywhere on the continent, gather companions, then set out from Whale's Valley for the Grand Tournament at Earth's Blade. → checklist
- TipControls: A attacks, talks and opens chests (stand on the chest), B jumps, X opens the menu, Y the item bar. SELECT summons or dismisses Zephyr, but only where a Ryu is allowed: not inside Westguns or Onion Town.
- TipLose a fight and Great Sage Naji offers you another chance, as often as you need. Story Ryu battles are the exception: losing one resets the game.
- WarningWestguns is an outlaw hangout. If you talk to a certain boy while carrying 100 G or more, he asks Adeu for 100 G and runs off with it while Adeu recites his Ethos of Chivalry. It only happens once. To avoid it, talk to the Cactus Factory worker or Foreman Scott first, or carry less than 100 G. → checklist
- MainTalk around Westguns. You hear that an outlaw is running wild on North Hill, that West Hill is where the money is, and that the Menchi Brothers are up to something again.
- TipThe young man in house 13 tells you about a ruin in the Desert of Ruins with its top broken off. Talk to him: the Ruins of Lemuriad (Episode 12) only react once you've heard this.
- SideAnna says you'll need a Lantern for Border Fort in the Kingdom of Pafuricia and sends you to Shanis. Shanis tells you thieves from Onion Town stole it. Dos refuses to sell you anything for now. → checklist
- WarningBefore you talk to Rina in Westguns, walk onto the marked spot north of town on map 06. Adeu remembers that gear needs upkeep, and this places the Lucky Goblin in the Lava Cave (Episode 9), who gives the Hidden Item (equipped, it protects Adeu or Sarutobi on foot from enemies, lava, poison and status effects; it does nothing in Ryu battles). Once Rina has warned you, that spot only triggers the Delias ambush and the goblin can never appear. Afterwards, a World Map warp to Episodes 2-7 or 10-12 removes him for good; warps to Episodes 1, 8 and 9 are safe. → checklist
- TipRina warns you that the Menchi Brothers and Delias are after your Ryu, and that Delias hired a Solid pilot, Rald. Westguns' shops are next to her: herbs from 150 GG, shields from 5000 GG, and the Sunrise West inn. Gear only works once you equip it. → checklist
- MainLeave Westguns north into the Westguns Region (map 06, chest A holds 2500 GG). Delias and the Menchi Brothers ambush you there, on the spot marked on map 06. Adeu calls Zephyr for your first Ryu battle. → checklist
- SideOptional: the east edge of map 03 leads to the abandoned Mist Station (map 07). Vice's gang guards it with Solid Bombers, and chest A there holds 4500 GG. Beat Vice and Foreman Scott pays you 100 G. → checklist
- MainIn Onion Town everyone warns you about the Brat Kid Gang: Arena and the brothers Dowaru and Kowaru, who deal in stolen goods. The sheriff tells bounty hunters to get lost, and a boy says he's been acting strange lately.
- MainConfront the gang and accuse them of fencing stolen goods through Dos. The sheriff steps in on their side: he's in on it. Beat Arena, her brothers and the sheriff in the fight that follows (map EA). → checklist
- MainArena and the sheriff run off. The sheriff turns out to be a fake. The real one thanks you and says the gang had a bounty on their heads: collect it from the sheriff in West Hill. → checklist
- SideTalk to Zinnia, the old mage in Onion Town. She warns you that Delias and his Solid pilot Rald are after you, and asks you to visit her again if you win.
- TipEterna's Tavern won't serve you before the gang is dealt with. Once you've saved the town, the barkeeper says drinks are on her. → checklist
- SideLantern: back in Westguns, Dos now has it and admits the game is up. Tell Shanis, who says the Lantern is yours. Dos still wants 1000 G and won't knock a single Golgol off. Answer Yes to pay 1000 G and get the Lantern. → checklist
- MainDelias ambushes you again, this time with his bodyguard Rald, the best Solid pilot in the Westguns Region. Win the Ryu battle and the pair run off. The game drops you in the Westguns Region north of Onion Town (map 11). → checklist
- SideVisit Zinnia again. Impressed that you beat Rald, she says you'll need Jada's help to reach the Grand Tournament: he's a mage in Onion Cave, and his box (the item is called Jada's Wood Box) holds a fragment of the Ruins of Lemuriad, which must go to the Desert of Ruins. → checklist
- TipRina is relieved you beat Delias and Rald and reminds you she runs a real item shop. People in Westguns start praising your bounties. → checklist
- TipShields and Gauntlets each block one ailment: Doxi = Poison, Slip = Paralysis, Conf = Confusion, Ston = Stone, Ashiria = all four. Weapons and armor wear out, so drop by a smith now and then.
- TipSmiths do more than sharpen. Tempering (weapon shop) or repairing (armor shop) costs 100 G, and when the party leader has reached level 11, 21, 31, 41 or 51 the smith swaps the equipped piece for the next model: Knife → Bronze Sword → Iron Sword → Bastard Sword → Great Sword → Mithril Sword, and Leather Armor → Scale Armor → Chain Mail → Plate Armor → Suit Armor → Mithril Armor. Below that level he only fixes it. Full table on the equipment page.
Checklist
- Where
- Opening scene
- How
- Automatic: Great Sage Naji gives it to Adeu.
- Reward
- Zephyr (summon with SELECT where a Ryu is allowed)
- Opens
- Ep. 1: Ryu battles
- Closes
- never
- Where
- Westguns
- How
- Talk to the boy with 100 G or more before you've spoken to anyone at the Cactus Factory. He takes 100 G and disappears for good.
- Reward
- none (you lose 100 G)
- Opens
- Ep. 1
- Where
- Westguns: Anna, Shanis, then Dos
- How
- Hear about it from Anna and Shanis. After the Brat Kid Gang is beaten, Dos has it; tell Shanis, then pay Dos 1000 G (answer Yes).
- Reward
- Lantern ('A handy tool for dark places.')
- Opens
- Border Fort in the Kingdom of Pafuricia (later episode)
- Where
- Westguns Region, map 06 (marked on the map)
- How
- They ambush you outside Westguns; Ryu battle with Zephyr.
- Opens
- Ep. 1
- Where
- Onion Town (fight on map EA)
- How
- Confront Arena, Dowaru and Kowaru about the stolen goods; the sheriff joins them.
- Reward
- 10000 G bounty, paid by the West Hill sheriff (Ep. 2)
- Opens
- Dos's Lantern deal; Eterna's Tavern; the West Hill bounty
- Where
- Onion Town: the real sheriff
- How
- Talk to him after the gang is beaten.
- Reward
- 10000 G from the West Hill sheriff
- Opens
- Ep. 2: West Hill sheriff
- Where
- Westguns Region (fight on map 43)
- How
- Delias ambushes you with his hired Solid pilot; Ryu battle with Zephyr.
- Opens
- Zinnia's tip about Jada; Rina's thanks
- Where
- Cactus Factory: Westguns desert, map 05 (worker and Foreman Scott); Mist Station: map 07
- How
- Foreman Scott of the Cactus Factory asks you to teach Vice a lesson. At Mist Station, Vice's boys combine their Solid Bombers; Ryu battle.
- Reward
- 100 G from Scott when you report back
- Opens
- Ep. 1
- Closes
- never: Scott asks you to keep them in line, and Vice comes back for rematches
- Where
- Onion Town: Zinnia
- How
- Talk to her after beating Delias and Rald.
- Reward
- Lead: Jada, a mage in Onion Cave, has Jada's Wood Box
- Opens
- Ep. 2: Jada in Onion Cave
- Where
- Westguns: Rina's Item Shop (map 18), Jiro's Drugstore (16), Safe & Sound Armor (15), Ganko's Weapons (14), Sunrise West inn (BC)
- How
- Rina's Item Shop: Healmond 20000 GG, Magic Glove 1000 GG, Spring 5000 GG. Jiro's Drugstore: Powan Herb 150, Bitter Seed 40, Sour Fruit 50, Slap Fruit 60, Konnya Fruit 70 GG. Safe & Sound Armor: Doxi Shield 5000, Slip Shield 6000, Doxi Gauntlet 4000, Slip Gauntlet 5000 GG. Ganko's Weapons: Hono Smash 10000, Hyun Smash 15000, Flame Art 10000, Blaze Art 15000 GG. Inn: Sunrise West. Tempering and repair: 100 G each, can upgrade your gear (see Tips).
- Opens
- Ep. 1
- Where
- Onion Town
- How
- Anything Shop: Magic Glove 1000, Fire Glove 2000, Spring 5000 GG. Castle Southeast Herbacy: Powan Herb 150, Soesoe Herb 500, Bitter Seed 40, Sour Fruit 50, Slap Fruit 60, Konnya Fruit 70, Tomioka Seed 250 GG. Tenshin Carefree Armor: Conf Shield 7000, Ston Shield 8000, Conf Gauntlet 6000, Ston Gauntlet 7000 GG. Clang-Clang Arms: Hyun Smash 15000, Kira Smash 20000, Blaze Art 15000, Flying Dragon Art 20000 GG. Inn: Hotel Onion. Also Eterna's Tavern. Tempering and repair: 100 G each, can upgrade your gear (see Tips).
- Opens
- Ep. 1
- Where
- Westguns Region, map 06 (the marked spot north of town)
- How
- Walk onto the spot before your first talk with Rina; then get to the Lava Cave (Ep. 9) without warping to Episodes 2-7 or 10-12.
- Reward
- The Lucky Goblin in the Lava Cave gives the Hidden Item (no damage on foot while equipped; not in Ryu battles)
- Opens
- Ep. 9: the Lucky Goblin
- Closes
- your first talk with Rina (if you haven't stepped on the spot), or any World Map warp to Episodes 2-7 / 10-12 before you meet him
Treasure chests (3)
| Contents | Area | Where | |
|---|---|---|---|
| Bitter Seed | Westguns desert (chest A: Bitter Seed) | Map 03, chest A | |
| 2500 GG | Westguns Region, north of town (chest A: 2500 GG) | Map 06, chest A | |
| 4500 GG | Mist Station (Vice; chest A: 4500 GG) | Map 07, chest A |
Bosses
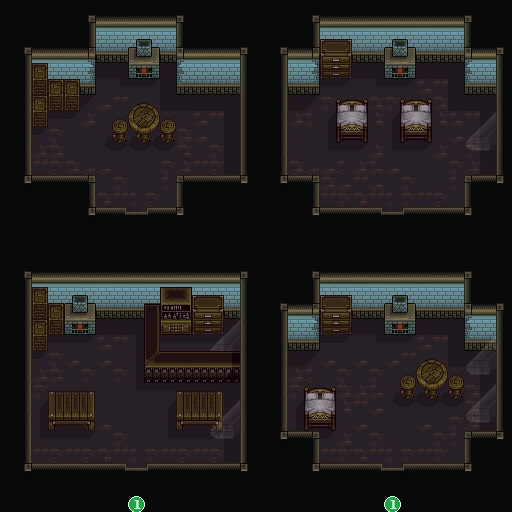
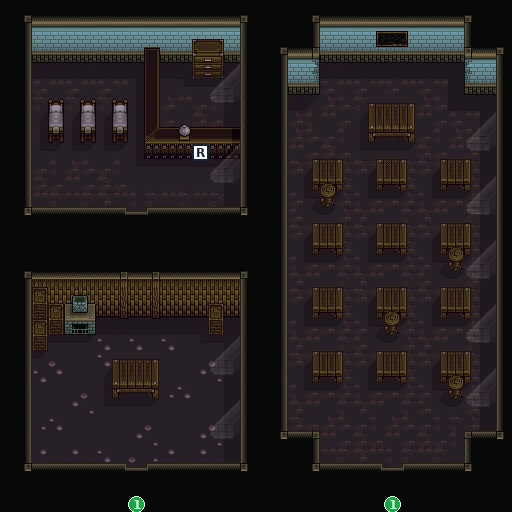
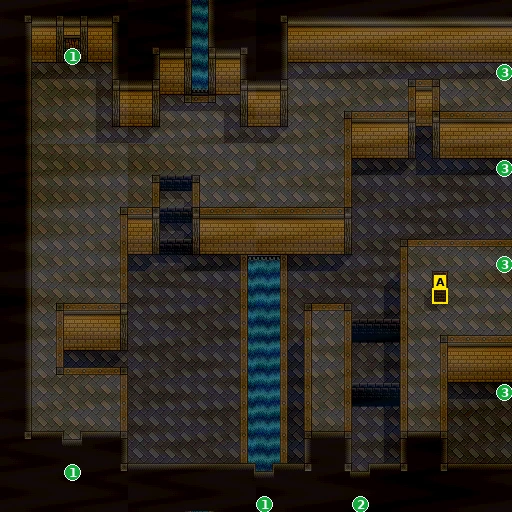
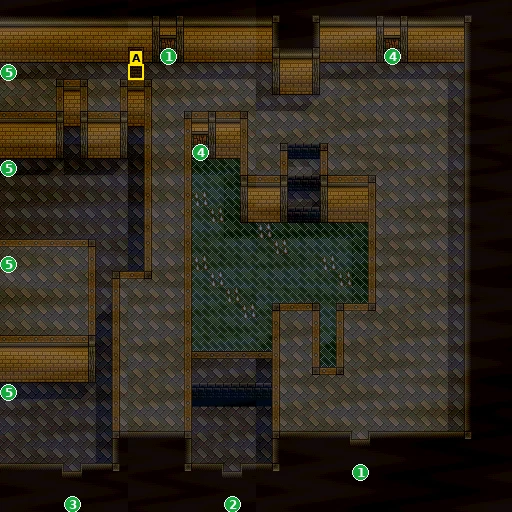
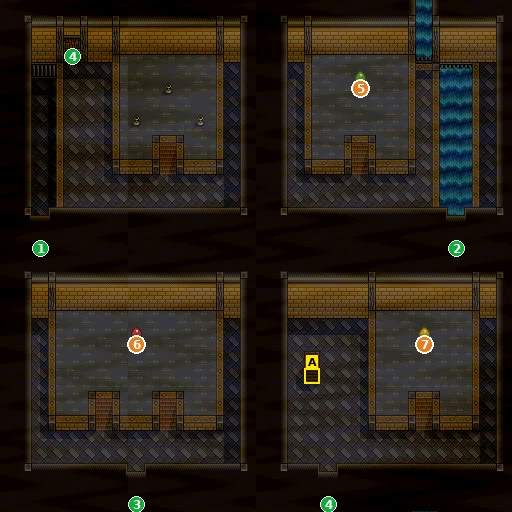
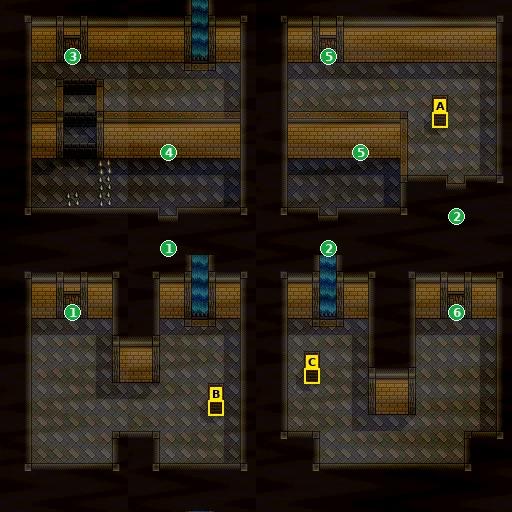
🗺️ Maps for this chapter (21)
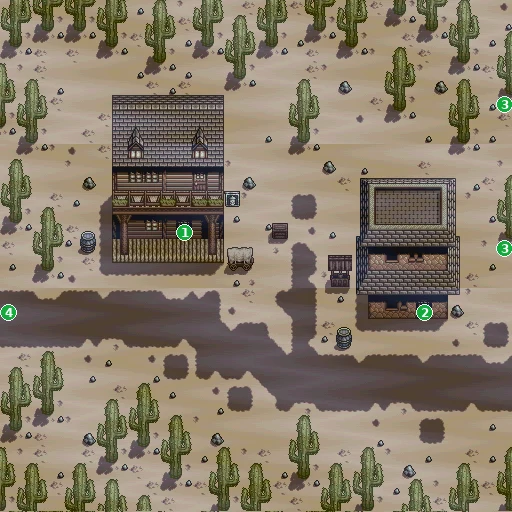
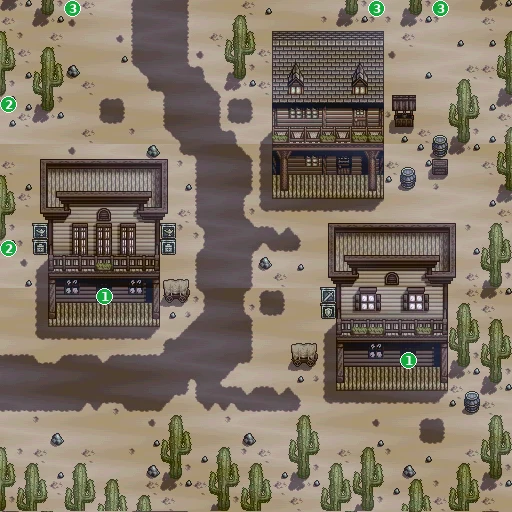
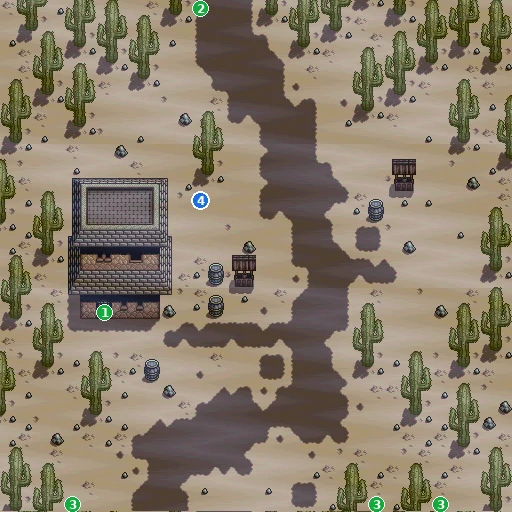
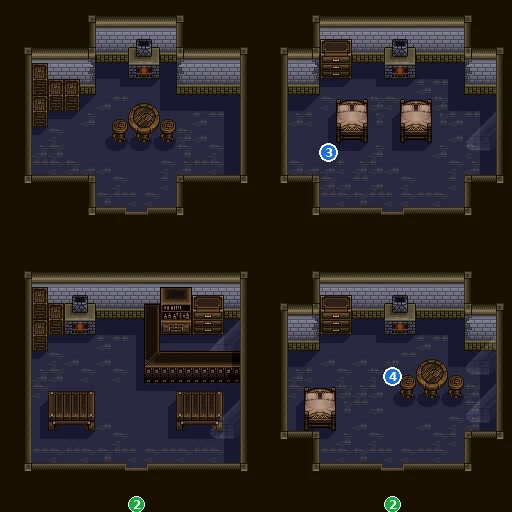
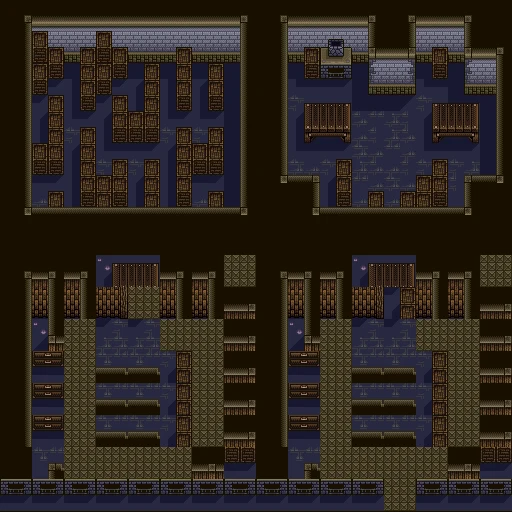
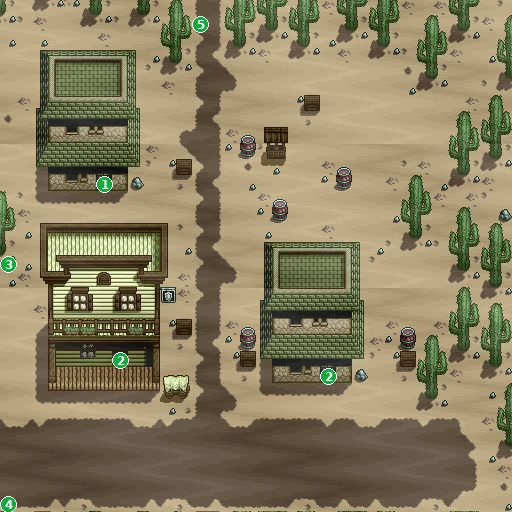
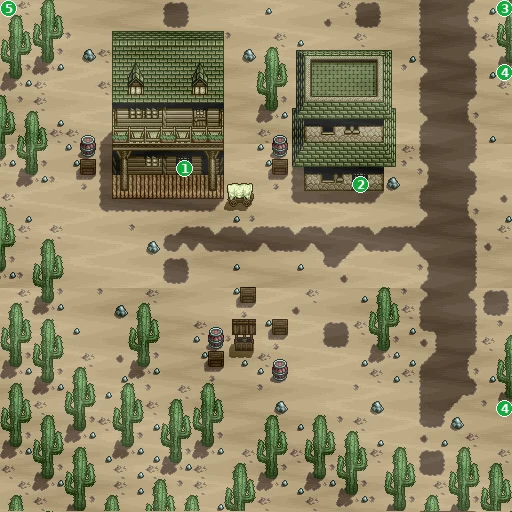
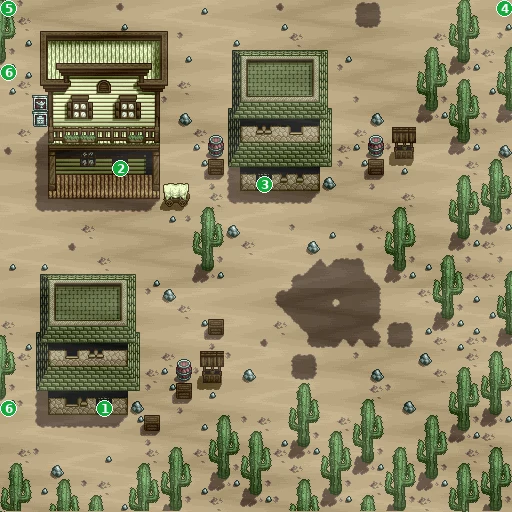
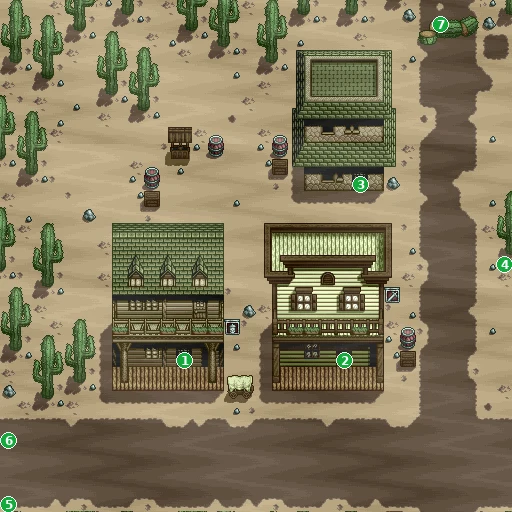
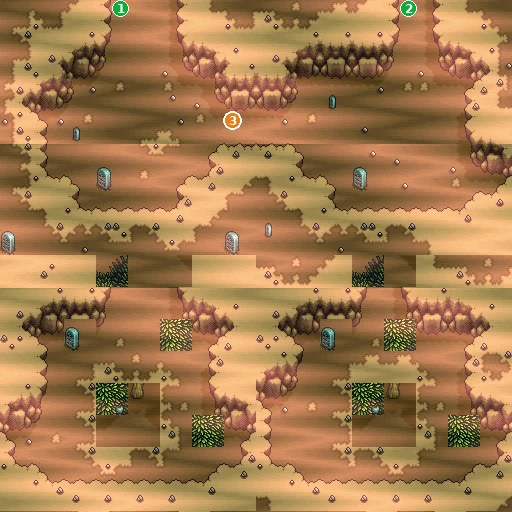
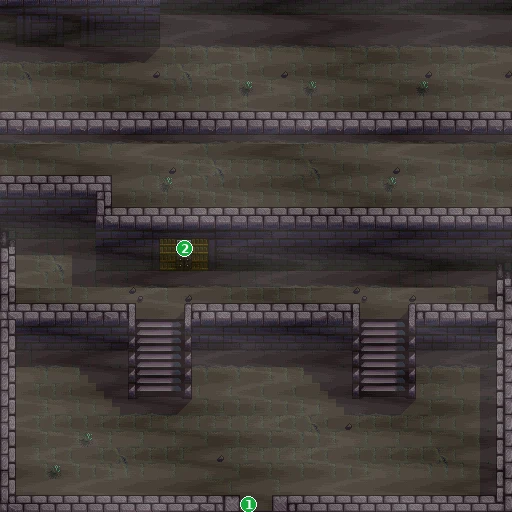
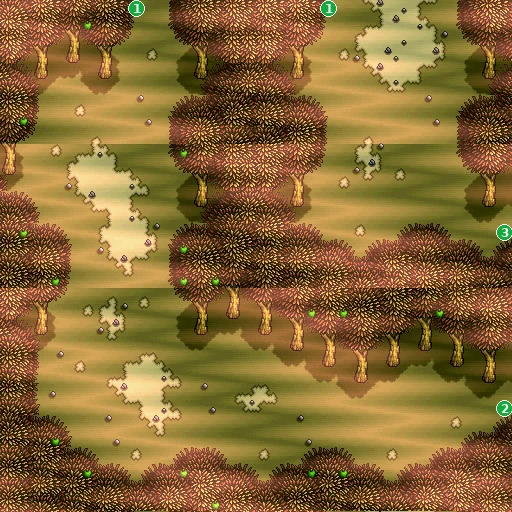
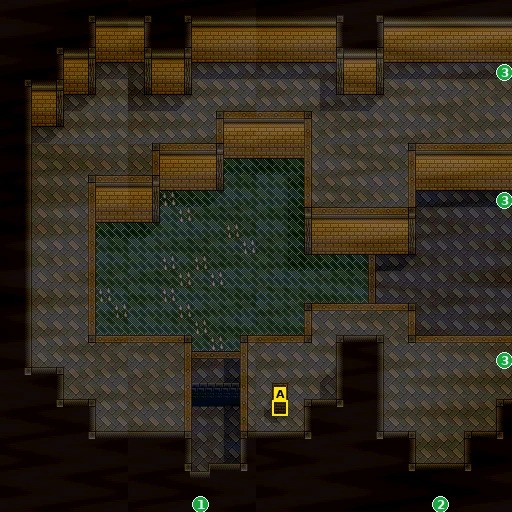
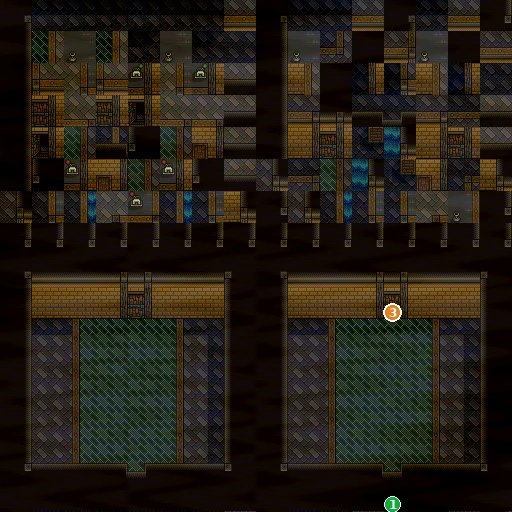
Blue numbers mark people, orange numbers events and pickups, green numbers exits (doors, gateways and screen edges). Yellow letters A, B, C… are treasure chests; white squares are shop counters (I items, H herbs, A armor, W weapons, R inn); red L marks a wall lever. People who walk around are shown where they start. Tap a map to open it full size.
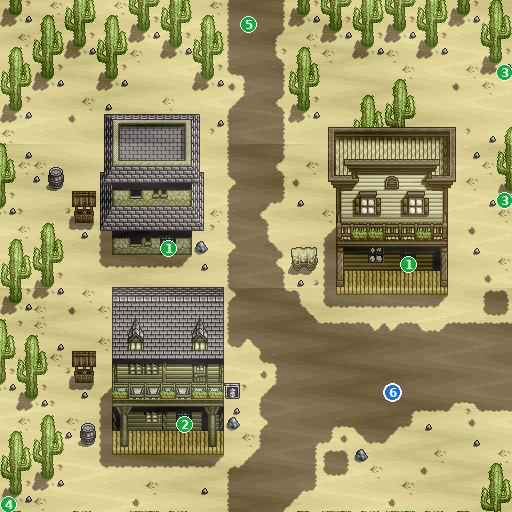
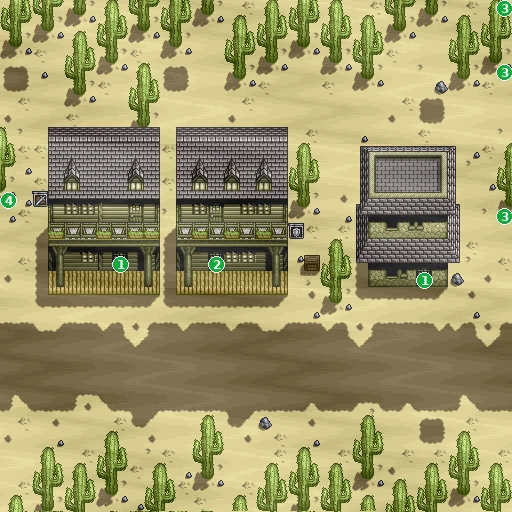
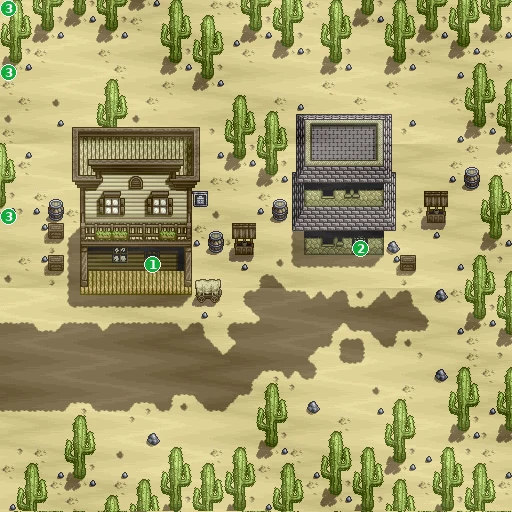
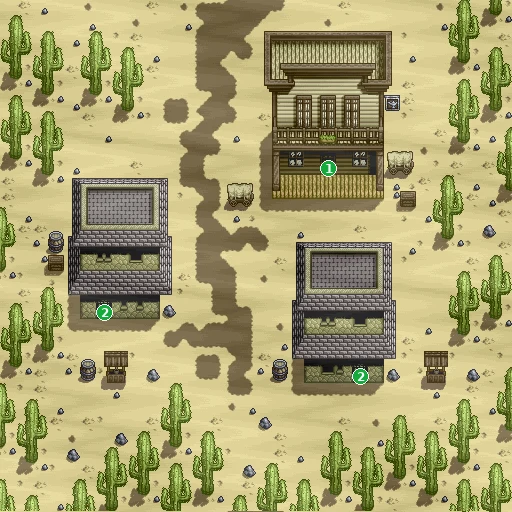
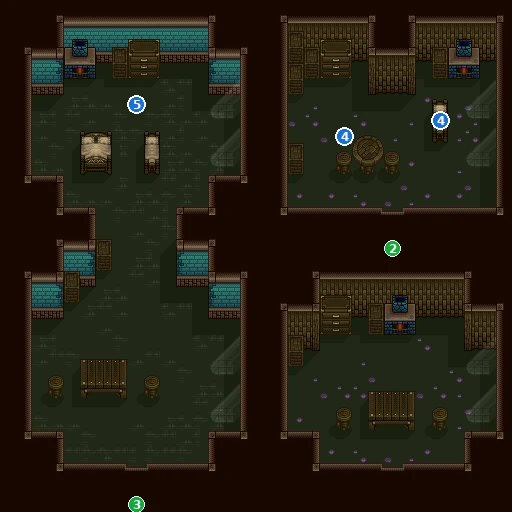
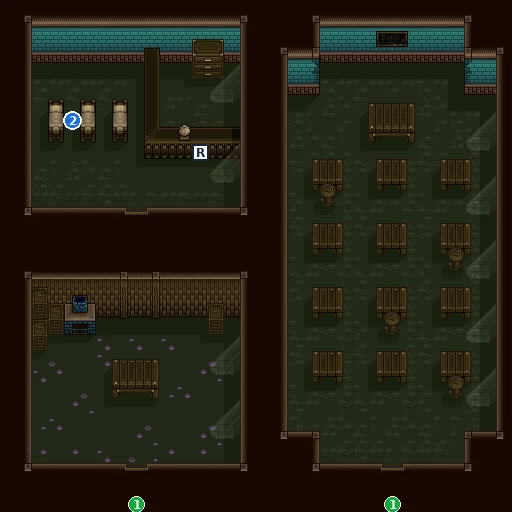
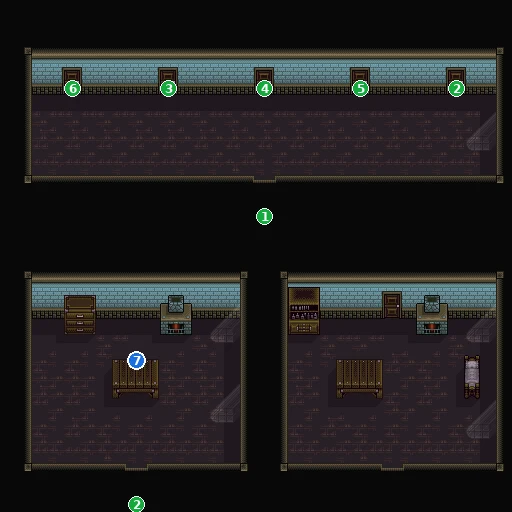
- 1Door to Westguns (map 18)
- 2Door to Westguns: large building (doors from 0A, 0B, 0C) map 15
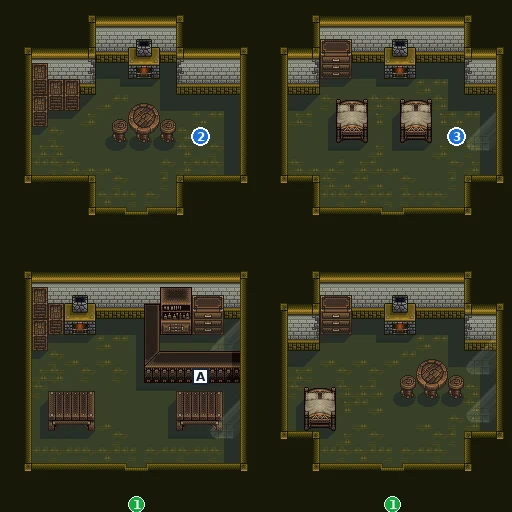
- 2Anna — Border Fort needs a Lantern (walks around)
- 3Shanis — her Lantern was stolen (walks around)
- ASafe & Sound Armor: smith: repair
- 1Edge to Westguns: east of 09 map 0A
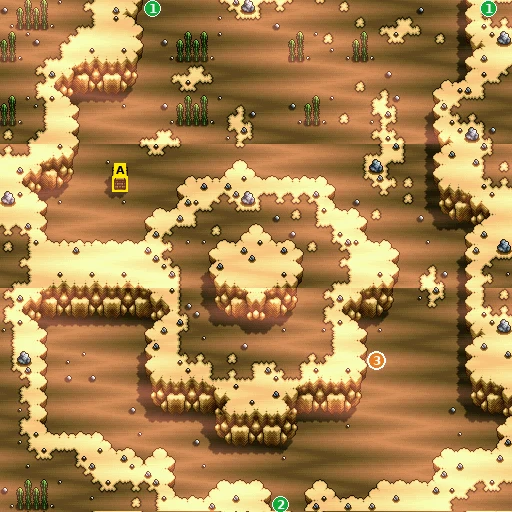
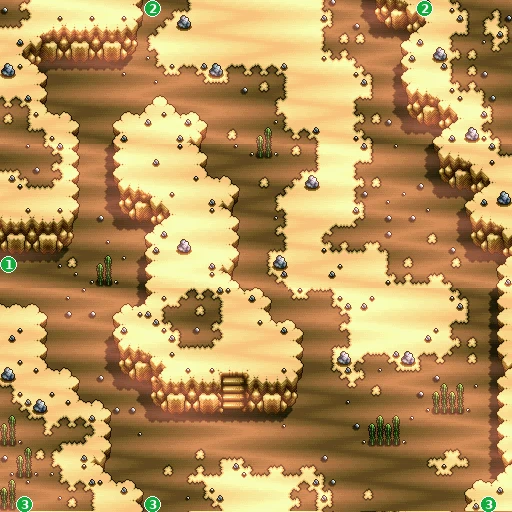
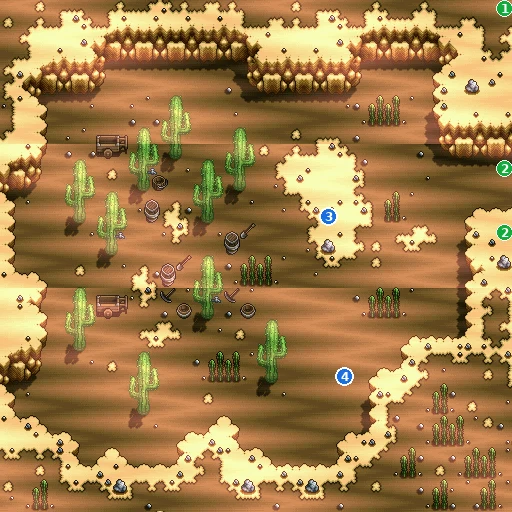
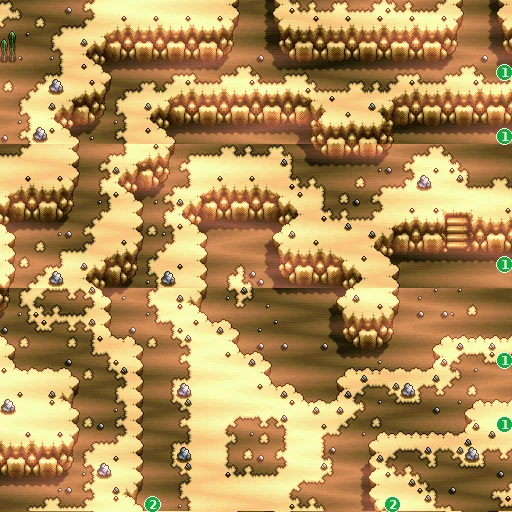
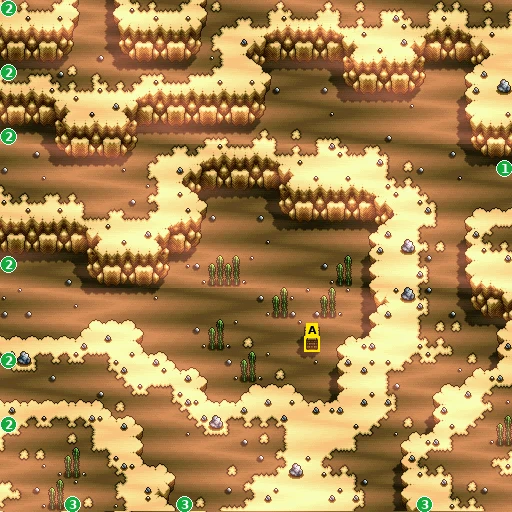
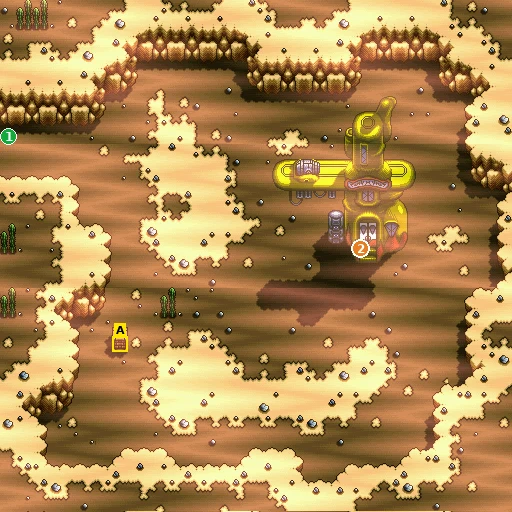
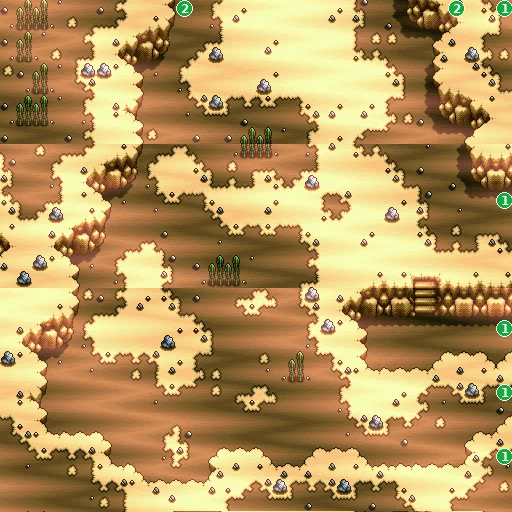
- A 4500 GG
- 2Vice's gang — Ryu battle at Mist Station (repeatable)
- 1Edge to Westguns desert (chest A: Bitter Seed) map 03
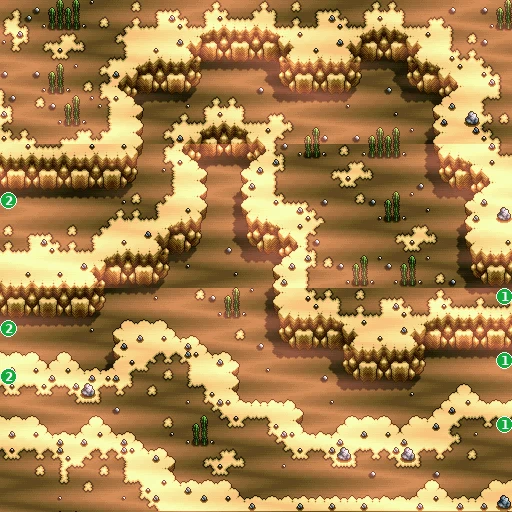
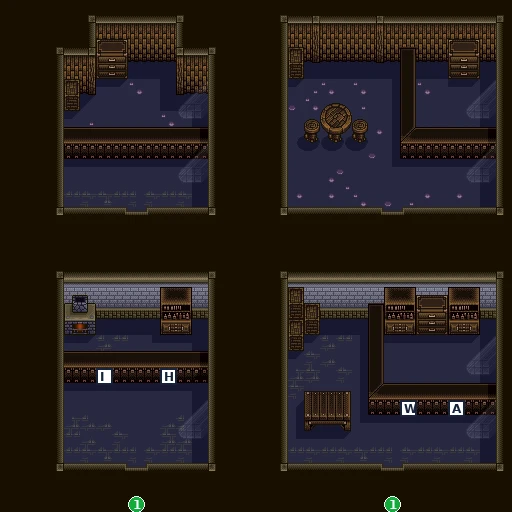
- IAnything Shop
- HCastle Southeast Herbacy
- WClang-Clang Arms: smith: temper
- ATenshin Carefree Armor: smith: repair
- 1Edge to Onion Town: east part (shop building 1E) map 0E
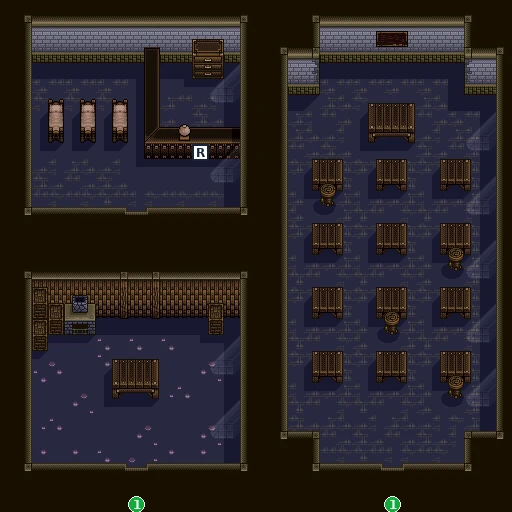
- RHotel Onion: inn
- 1Edge to Onion Town: west part map 0D
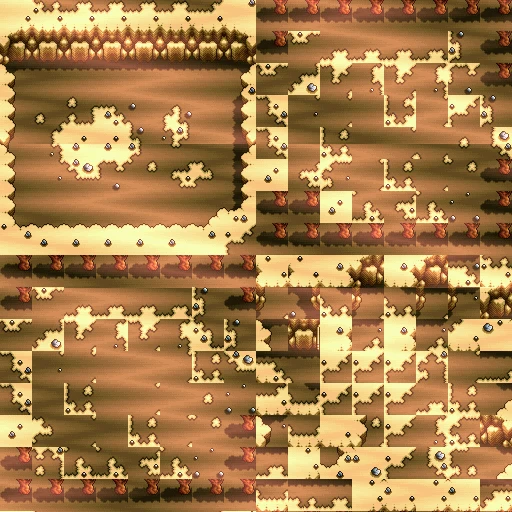
Bounty Hunter & Merchant Katze!!
📍 Westguns Region · Onion Cave · West Hill · North Hill
With Onion Gorge buried by a landslide, the road north runs through Onion Cave, home of the cranky mage Jada. In West Hill the sheriff pays your first bounty and hands out side jobs. In North Hill the bandit Banbara holds the mayor's house, and your old acquaintance Katze shows up in the middle of the showdown, trying to sell weapons.
You need: Beat the Brat Kid Gang in Onion Town (Ep. 1) to have a bounty to collect in West Hill; nothing else is known to be required.
Walkthrough
- MainFrom Onion Town's north edge you reach the Westguns Region (map 11). Its two cave doors lead into Onion Cave. Onion Gorge is blocked, so the cave is the only way on.
- SideJada, the mage Zinnia told you about, lives at the far end of Onion Cave: take the door at the top of map 12 and he stands on map 3F (marked on the map). On this visit he has nothing to tell you and brushes off Zinnia's name. Remember him: he matters in Episode 4. → checklist
- MainHead on to West Hill. Talk to the sheriff: he can hardly believe you beat the Brat Kid Gang and pays you the reward from HQ, 10000 G. → checklist
- MainThe sheriff then offers you a side job. Answer Yes and pick one: Banbara Trouble, Tavern waiter or Delivery boy. Ask him again for the others. → checklist
- SideDelivery boy: go to Mary's house. She gives you Mary's Letter for Jinny in Elf Village (Episode 3). Its description: 'Mary's letter… no peeking!' → checklist
- SideTavern waiter: Mama at the tavern asks you to take orders. Gen wants a beer, Shige wants edamame. Serve both and Mama pays you 50 G. → checklist
- TipWest Hill shops: Miyan's Item Shop, West Herbacy, Thomas's Armor Shop and Jack's Weapon Shop, plus the New Holiday Inn. Townsfolk recommend keeping your sword honed and resting at the inn. → checklist
- TipSmiths do more than sharpen. Tempering (weapon shop) or repairing (armor shop) costs 100 G, and when the party leader has reached level 11, 21, 31, 41 or 51 the smith swaps the equipped piece for the next model: Knife → Bronze Sword → Iron Sword → Bastard Sword → Great Sword → Mithril Sword, and Leather Armor → Scale Armor → Chain Mail → Plate Armor → Suit Armor → Mithril Armor. Below that level he only fixes it. Here: Jack's Weapon Shop and Thomas's Armor Shop. → checklist
- MainNorth Hill is crawling with bandits, and the townsfolk are too scared to speak. The sheriff laughs at the idea of a kid bounty hunter, but if you mean it, the bandits are using the mayor's house as their base.
- MainGo into the mayor's house (map ED, the door on map 2E). Banbara threatens the townsfolk if you try anything. As the fight is about to start, Katze barges in trying to sell everyone weapons. → checklist
- MainAdeu shoves Katze aside and she leaves you to it. Beat Banbara (battle map E9). He runs off swearing revenge. → checklist
- MainKatze praises you a bit too much, then asks to join. This time Adeu turns her down, and she leaves saying you'll meet again. → checklist
- MainCollect Banbara's bounty, 10000 G, from the North Hill sheriff. The mayor thanks you, and back in West Hill the sheriff suggests giving Mama at the tavern a hand. → checklist
- TipNorth Hill shops: Yanyan's Item Shop (Spring, Wing Sandals, Speed Shoes) and the North Herb Shop, which pays top price for herbs. Todo's Armor Shop sells one piece per character (Ashiria Shield or Gauntlet, depending on who leads). Narman's Weapon Shop is closed for the day. Inn: Hotel 555. → checklist
- TipKatze isn't gone for good. When you come back to North Hill later with Paffy and Izumi, she asks to come along again. → checklist
- TipRumors worth remembering: Vice's Solid Bombers at Mist Station (Episode 1), Master Smith Gladd's armor, and the Warp Gate from the Kingdom of Pafuricia to Whale's Valley, the only way to Earth's Blade.
- MainIf you took the Delivery job, take Mary's Letter to Jinny in Elf Village (Episode 3) (equip it first: X > Status > Item slot), then come back to Mary for 5000 G. → checklist
Checklist
- Where
- Onion Cave
- How
- Talk to him. On this visit he only sends you home.
- Reward
- none yet
- Opens
- Ep. 4: the Arm Dragon and Jada's Wooden Box
- Where
- West Hill: the sheriff
- How
- Talk to him after beating the gang in Onion Town.
- Reward
- 10000 G
- Opens
- the side-job offer
- Where
- West Hill: the sheriff
- How
- 'Want to try?' Yes opens the list: Banbara Trouble / Tavern waiter / Delivery boy. No: 'that's too bad.'
- Opens
- the three jobs below
- Where
- West Hill sheriff → North Hill
- How
- Talk to the North Hill sheriff, then beat Banbara in the mayor's house.
- Reward
- 10000 G from the North Hill sheriff
- Opens
- Katze's first offer to join
- Where
- West Hill: Mama's tavern
- How
- Take Gen's order (beer) and Shige's (edamame) for Mama.
- Reward
- 50 G from Mama
- Where
- West Hill: Mary's house → Elf Village: Jinny
- How
- Take Mary's Letter from Mary, give it to Jinny in Elf Village, then return to Mary.
- Reward
- Mary's Letter (to deliver), then 5000 G from Mary
- Opens
- Ep. 3: Jinny in Elf Village
- Where
- North Hill: the mayor's house (fight on map E9)
- How
- Confront him after the North Hill sheriff points you there.
- Reward
- 10000 G bounty from the North Hill sheriff
- Where
- North Hill, after Banbara
- How
- She asks to join; this first time Adeu declines on his own.
- Reward
- none now
- Opens
- Later visit with Paffy and Izumi: she asks again (join or refuse)
- Where
- West Hill
- How
- Miyan's Item Shop: Healmond 20000, Fire Glove 2000, Wing Sandals 30000 GG. West Herbacy: Bitter Seed 40, Sour Fruit 50, Slap Fruit 60, Konnya Fruit 70 GG. Thomas's Armor Shop: Doxi Shield 5000, Ston Shield 8000, Doxi Gauntlet 4000, Ston Gauntlet 7000 GG. Jack's Weapon Shop: Hono Smash 10000, Kira Smash 20000, Flame Art 10000, Flying Dragon Art 20000 GG. Inn: New Holiday Inn. Tempering and repair: 100 G each, can upgrade your gear (see Tips).
- Where
- North Hill
- How
- Yanyan's Item Shop: Spring 5000, Wing Sandals 30000, Speed Shoes 20000 GG. North Herb Shop: Powan Herb 150, Soesoe Herb 500, Tomioka Seed 250 GG. Todo's Armor Shop: Ashiria Shield 16000 or Ashiria Gauntlet 14000 GG (one item only). Narman's Weapon Shop: closed. Inn: Hotel 555.
Bosses
🗺️ Maps for this chapter (23)
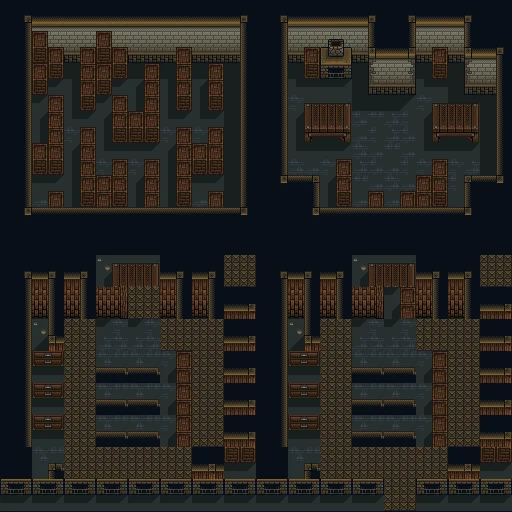
Blue numbers mark people, orange numbers events and pickups, green numbers exits (doors, gateways and screen edges). Yellow letters A, B, C… are treasure chests; white squares are shop counters (I items, H herbs, A armor, W weapons, R inn); red L marks a wall lever. People who walk around are shown where they start. Tap a map to open it full size.
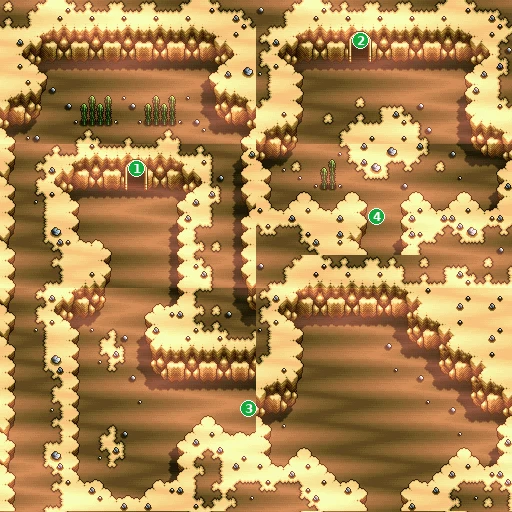
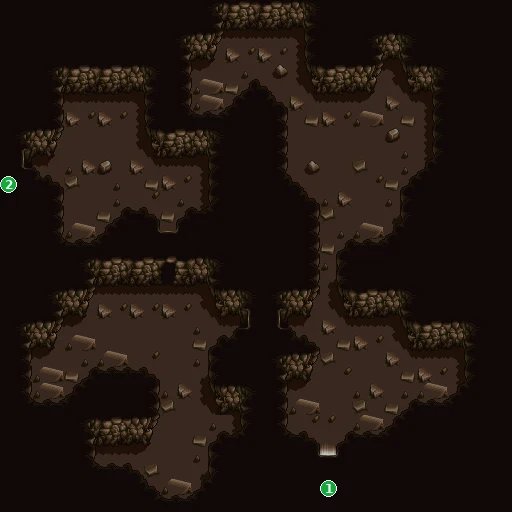
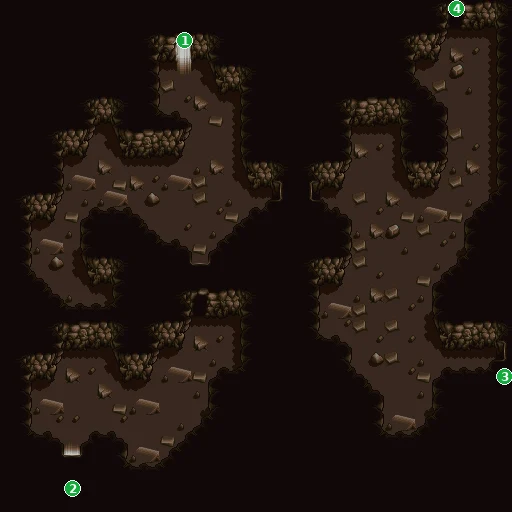
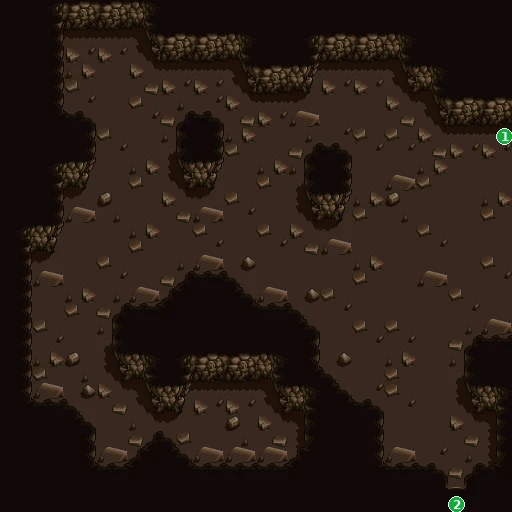
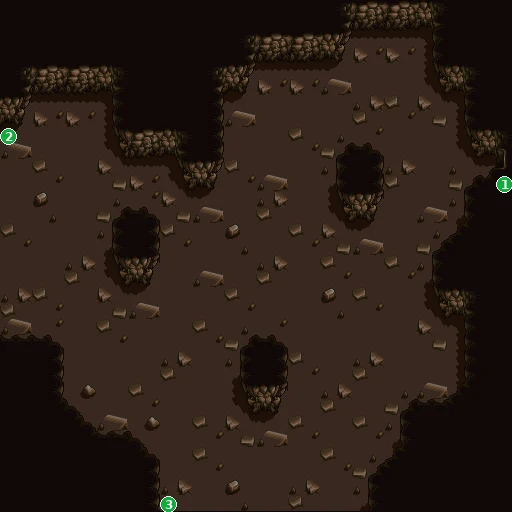
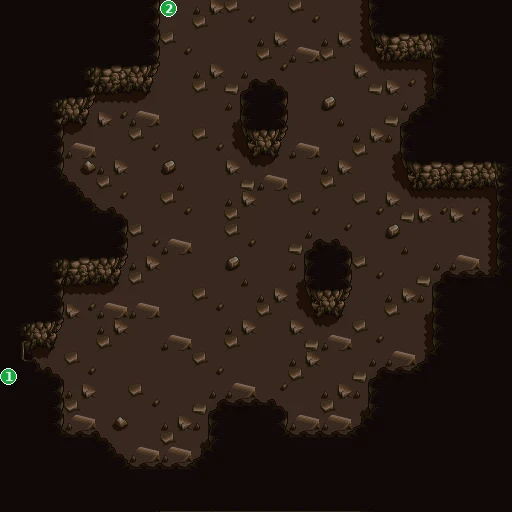
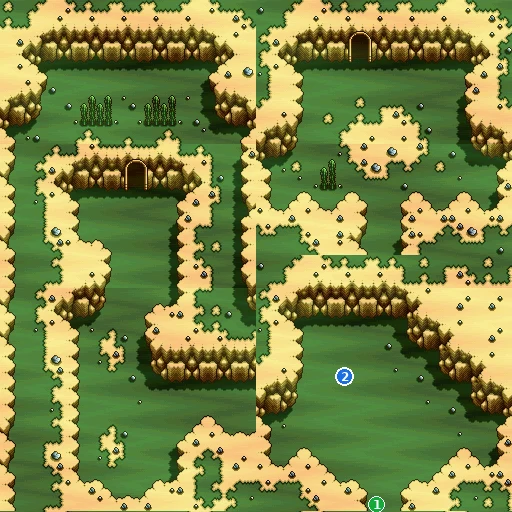
- 2Jada — opens the Arm Dragon's cave; gives Jada's Wood Box
- 1Edge to Onion Cave (north door to 3F) map 12
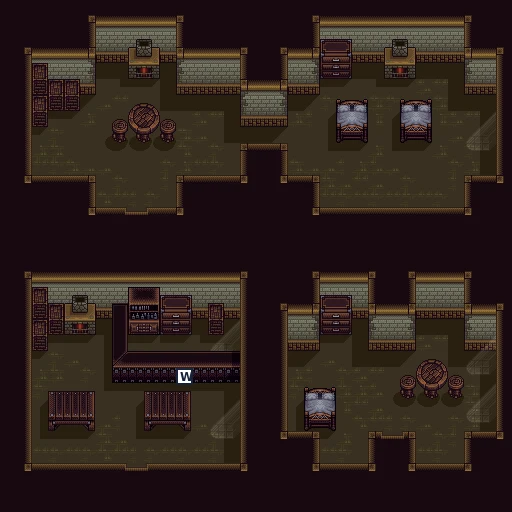
- WJack's Weapon Shop: smith: temper
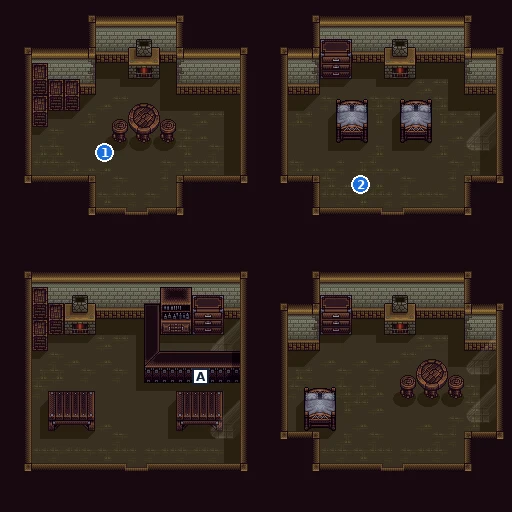
- 1Sheriff — bounty and side jobs (walks around)
- 2Mary — Mary's Letter for Jinny; 5000 G on return (walks around)
- AThomas's Armor Shop: smith: repair
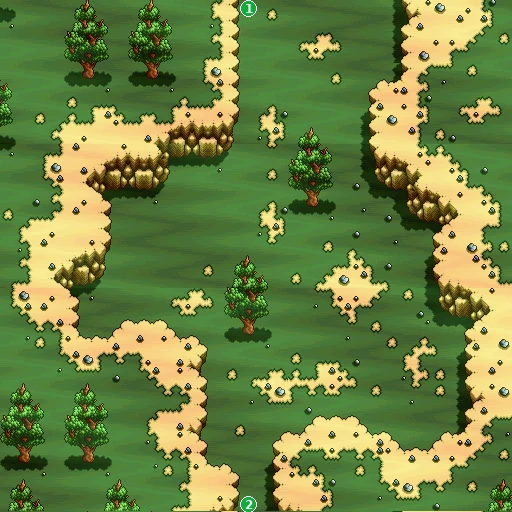
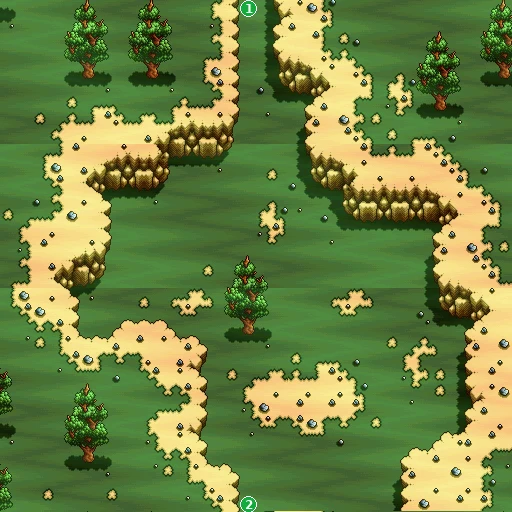
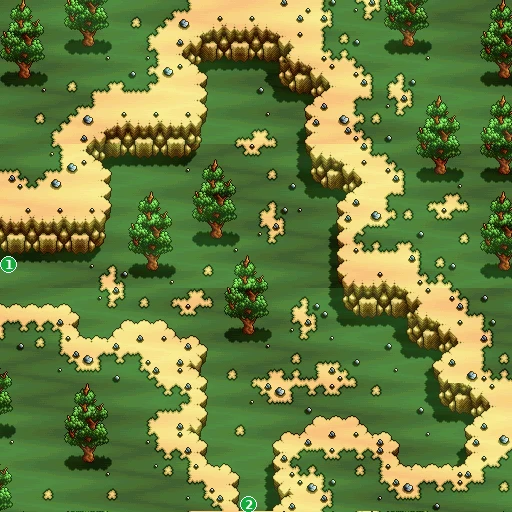
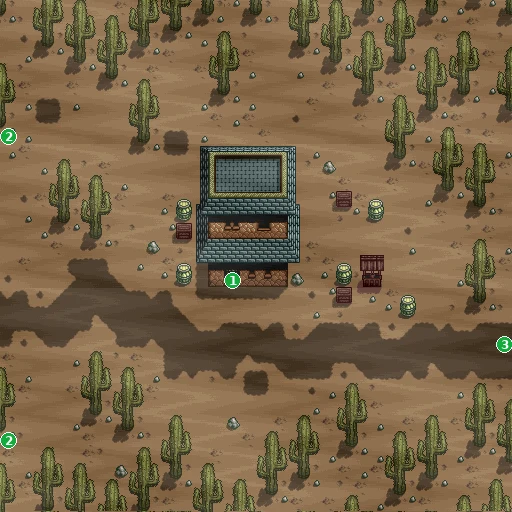
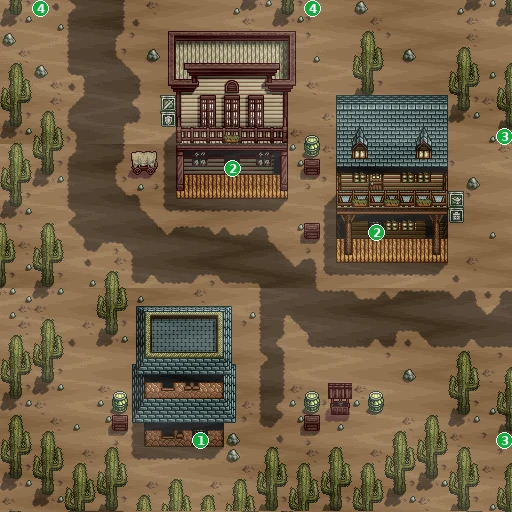
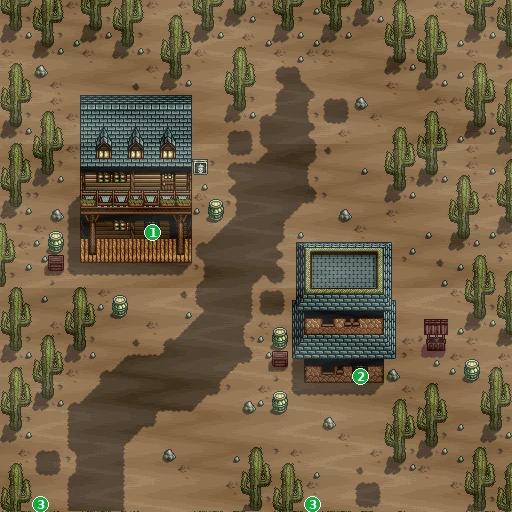
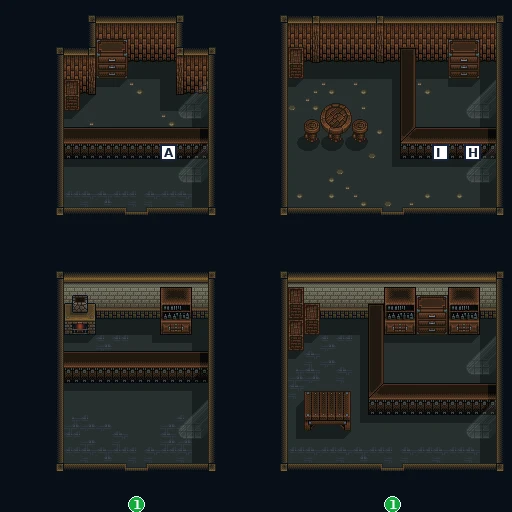
- ATodo's Armor Shop
- IYanyan's Item Shop
- HNorth Herb Shop
- 1Edge to North Hill map 2D
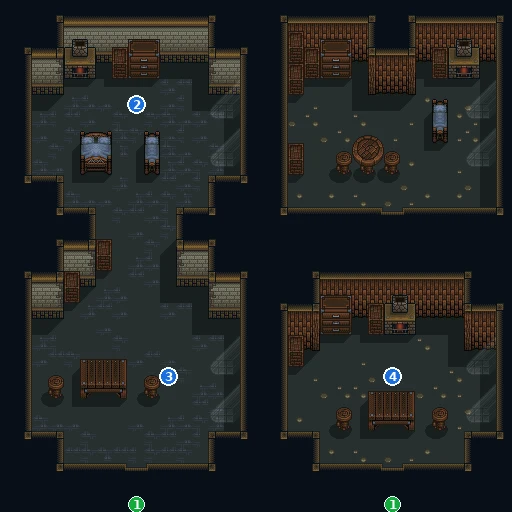
- 2Mayor — bandits hold the town
- 3Banbara — the bandit boss (walks around)
- 4Sheriff — Banbara's bounty, 10000 G (walks around)
- 1Edge to North Hill map 2D
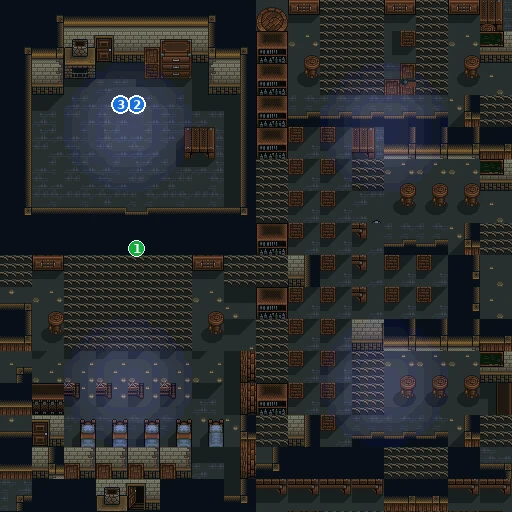
- 2Mayor
- 3Banbara — the fight
- 1Door to North Hill: east (mayor's house door) map 2E
Reunion! A Great Guy in the Woods!!
📍 Gratches Village · Jerock Forest · Elf Village
Adeu drops in on his old rival Gratches at his dojo, only to find him refusing to enter the Grand Tournament: the fiend Hellreet, who killed his brother Chamber, is back. A few harsh words from Adeu snap him out of it, and Gratches joins you. East through Jerock Forest lies Elf Village, where Mary's parcel finds its owner and the chief is hiding a worry he's too embarrassed to share.
You need: Nothing (pick the area on the world map); bring Mary's parcel from West Hill (Ep. 2) if you took the Delivery job
Walkthrough
- TipOn several field maps (Jerock Forest maps 32 and 33, among others) Adeu spots a stone he'd like to chuck at the monsters. Equip the Magic Glove on your party leader and press A to pick a stone up, then throw it. The named cameo characters you may have heard about live in V-Jan Village (Episode 6), not here.
- MainIn Gratches Village, the trainees take you for a tournament entrant. One promises they'll guard the place for Master Gratches. Gratches's dojo is the courtyard at the north end (map 23).
- MainTalk to Gratches. He says he isn't worthy of the Grand Tournament: Hellreet, the fiend who killed his brother Chamber, is back at Chamber's Fort, and he's afraid someone else from his clan will die. → checklist
- MainAdeu calls him a loser to his face, and it works. Gratches vows to slay Hellreet and asks to come with you to Rain Town, where someone from his clan knows about Hellreet and Chamber's Fort. He joins your party. → checklist
- TipWith two members in the party, L and R swap the leader. Gratches leaves his canary to watch the dojo while he's away.
- MainElf Village. The villagers point you to the chief's house and say he's been down lately. Talk to him: he only stares at you, then says it's too embarrassing to talk about and asks you to leave. You can't help him yet. → checklist
- SideDelivery boy: find Jinny, who came here from West Hill, and hand over Mary's parcel, with Mary's Letter equipped (X > Status > Item slot). She asks you to tell Mary she's doing fine. → checklist
- SideGo back to Mary's house in West Hill. She thanks you with 5000 G, enough that Adeu asks if she's sure. → checklist
- TipAn elf woman offers to let you rest in her house. Answer Yes to recover. She charges for it, and turns you away if you can't pay. → checklist
- TipA villager named Welch is sick and coughing. This is what weighs on the chief. He only explains once Sarutobi, Paffy and Izumi travel with you (a later episode); his reward then is the Sand Shoes you need to cross the desert, and Welch adds 3000 G. → checklist
- TipDirections from the elves: the Gigamazon River is north of the village, and you can't cross it to reach Friedel; go through the Dwarf Kingdom instead. The Pirani tribe by the river will cheat you of your money.
- TipCome back to the dojo later with Paffy in the party and Gratches challenges you to a Ryu duel. You can fight him again any time after that. → checklist
- MainNext: Gratches wants to go to Rain Town and then on to Chamber's Fort (later episodes). North of Jerock Forest the Gigamazon River waits (Episode 4).
Checklist
- Where
- Gratches Village: the dojo (map 23)
- How
- Talk to Gratches and let the scene play out.
- Reward
- Party member Gratches
- Opens
- Rain Town and Chamber's Fort, where he hunts Hellreet (later episodes)
- Closes
- never (story)
- Where
- Elf Village: Jinny; then West Hill: Mary
- How
- Equip Mary's Letter (Ep. 2 Delivery job), give it to Jinny, then go back to Mary.
- Reward
- 5000 G from Mary
- Where
- Elf Village: the chief's house
- How
- Talk to him now: he won't say what's wrong. Return later with Sarutobi, Paffy and Izumi.
- Reward
- later: Sand Shoes from the chief, 3000 G from Welch
- Opens
- later: the Fern Herb quest (Dwarf Kingdom)
- Where
- Elf Village
- How
- Talk to her and answer Yes to rest. It costs money (price not in the data).
- Reward
- Rest
- Where
- Gratches Village: the dojo
- How
- Visit with Paffy in the party; Adeu challenges Gratches. Repeatable.
- Opens
- later, once Paffy travels with you
- Closes
- never
🗺️ Maps for this chapter (12)
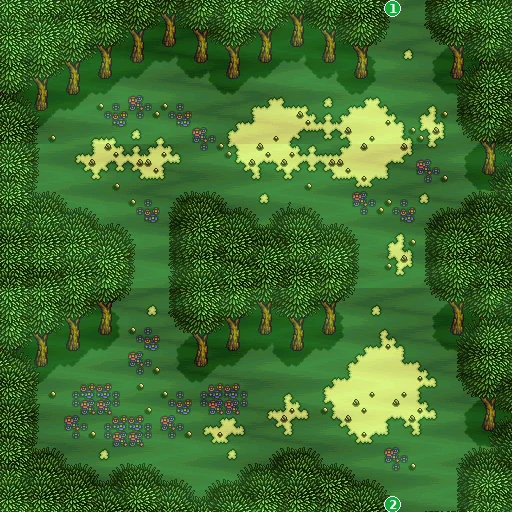
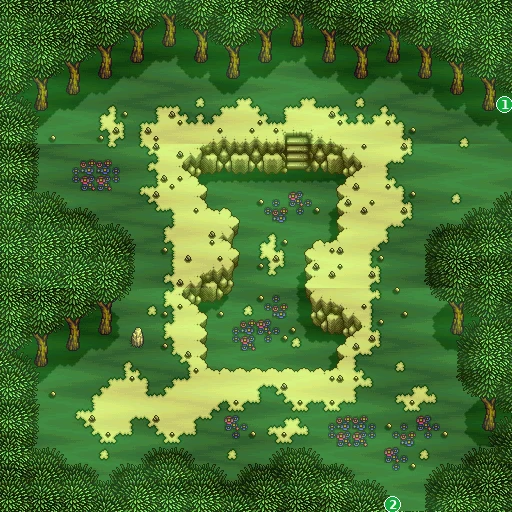
Blue numbers mark people, orange numbers events and pickups, green numbers exits (doors, gateways and screen edges). Yellow letters A, B, C… are treasure chests; white squares are shop counters (I items, H herbs, A armor, W weapons, R inn); red L marks a wall lever. People who walk around are shown where they start. Tap a map to open it full size.
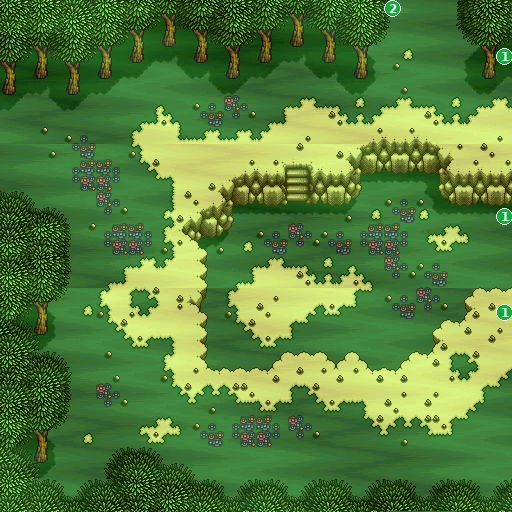
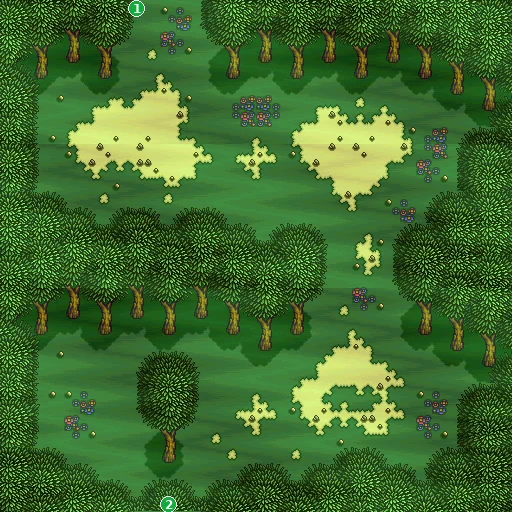
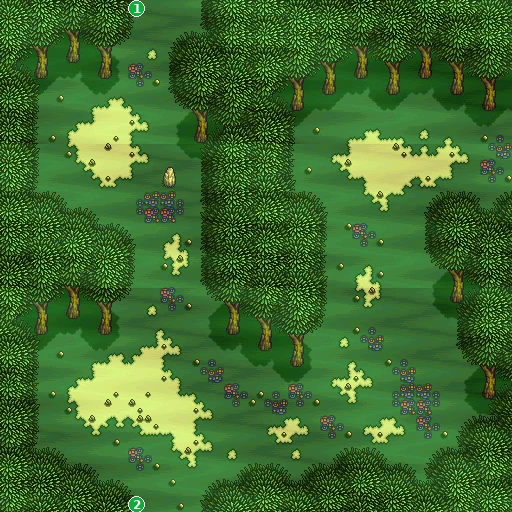
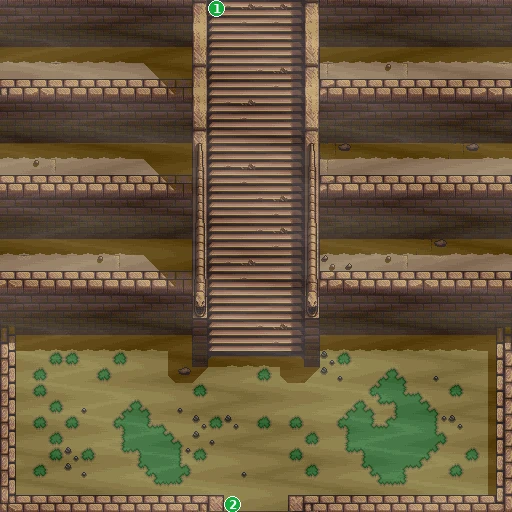
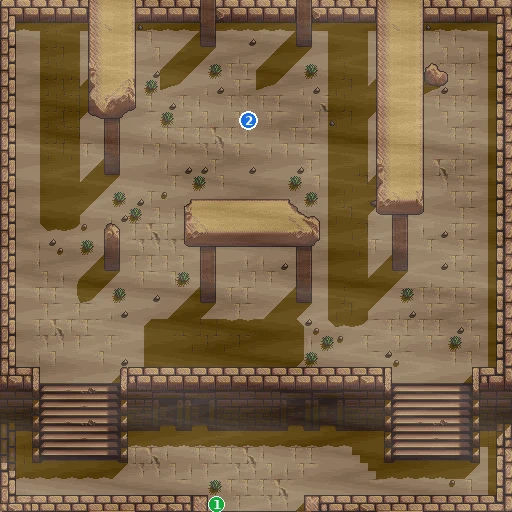
- 2Gratches — joins; later Ryu duels
- 1Edge to Gratches Village: path to the dojo map 24
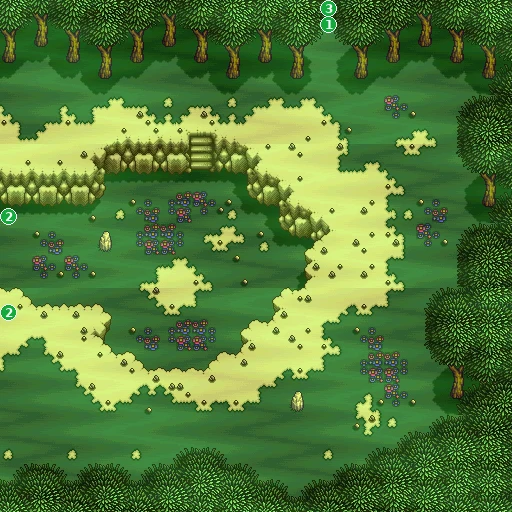
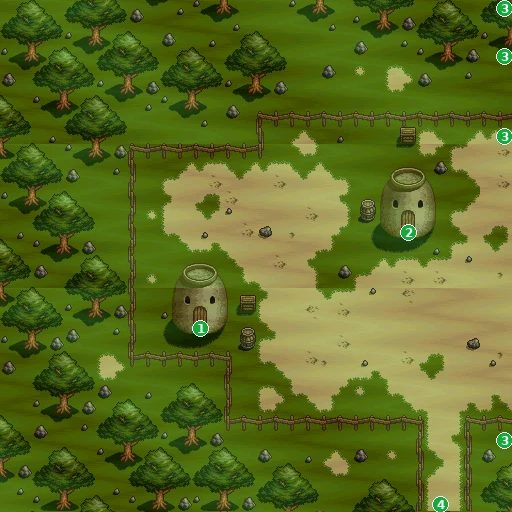
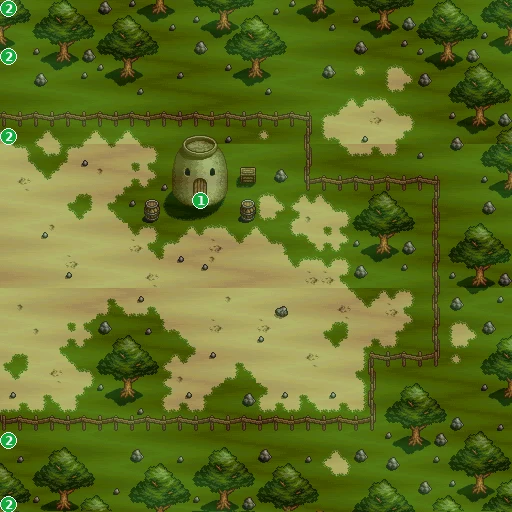
- 2Jinny — takes Mary's Letter (equipped) (walks around)
- RElf woman's house (rest): inn
- 1Edge to Elf Village map 47
No Way!? The Dwarves' Stolen Voices!
📍 Jerock Forest · Gigamazon River · Dwarf Kingdom
Past Jerock Forest the Gigamazon River blocks the way, and the only road on to Friedel runs through the Dwarf Kingdom. There every dwarf has been struck dumb: the Arm Dragon has stolen their voices. Only Jada, the cranky mage of Onion Cave, can open the hidden cave where it lurks.
You need: Nothing to start (the world map drops you on the Gigamazon River). To free the dwarves you also need a trip back to Jada in Onion Cave (Ep. 2).
Walkthrough
- WarningThe Pirani at the river dock want '[1000000G] a head' for a boat. Their cheaper '[100G]' deal really takes 100 G, and it only lets you past them: there's no boat, and they tell you to swim. Don't pay. The river can't be crossed anyway. → checklist
- SideThe Banana lies by the river on map 35 (Jerock Forest, at the river's edge), but it isn't there at first: it only appears once you have the Fire Orb (Episode 5), have sprung the water trap in Chamber's Fort (Episode 9) and have returned the Mithril Ring (Episode 9). Adeu pockets it to feed to some beast later; the beasts of Ice Town trade an Aqualung for it (Ep. 7). → checklist
- SideTunnel map 4B has a chest with 5000 G (chest A on the map).
- MainThe town is far too quiet. Every dwarf you talk to only manages '………', until one gasps that everyone's voices were stolen. They blame the Arm Dragon and say only the mage Jada can save them. Adeu remembers the odd old man in Onion Cave. → checklist
- TipThe Dwarf shops and Hotel Dwarf are silent ('………') too: the game opens them only after the dwarves get their voices back. Bring healing from outside.
- MainGo back to Jada at the far end of Onion Cave (Ep. 2). He only takes you seriously after the voices-stolen scene: you must have met him once, talked to the silent dwarves in the town and in their houses (including the man who asks 'What's going on here!'), and walked into the next tunnel (map 61) where a dwarf gasps that their voices were stolen. Then ask Jada about the Dwarf Kingdom: Adeu shouts the Ethos of Chivalry, and Jada dares him to beat the Arm Dragon. He lifts the barrier on its hidden cave ('Open… Rune, Rune!'). → checklist
- TipBefore you leave, Jada warns that the Arm Dragon is a strong one and tells you to come and see him again if you win.
- MainReturn to the Dwarf Kingdom's deep tunnel (map 62). Examine the north wall of its west room (marked on the map): you enter the hidden cave, map 63 (we couldn't test whether the spot already works before Jada's spell). The Arm Dragon is fought on foot. → checklist
- MainWith the dragon gone, Adeu sighs 'Now the dwarves can rest easy.' Back in town the dwarves can speak again and thank you.
- SideThe Dwarf shops now open. They only sell; you can't sell anything to them. The Dwarf Item Shop stocks Spring (5000 G), which Jump Mats need. The Dwarf Armor Shop carries every shield and gauntlet up to the Ashiria pair, which guard against all ailments. Hotel Dwarf takes guests again. → checklist
- TipThe Dwarf Armor and Weapon shops only sell: their menus have no repair or tempering option. For tempering, use the smiths in Friedel Town (Ep. 5).
- SidePick up the Cactus Glove in the Dwarf Kingdom tunnels (map 4A, marked on the map): Adeu says 'you could even hold a cactus with' it ('Touch a cactus… ouch… or not!'). A cactus blocks a road elsewhere, and Adeu bumps into one on the Friedel field (Ep. 6). → checklist
- TipOther spots in this block: the 'Did someone leave it behind?' spot on map 62 is the Fern Herb (you can take it once the Elf chief has told you about it); the weird rock and the vein of Mithril in an old mine are just flavor.
- TipStones Adeu would 'chuck at the monsters' lie on several field maps. Equip the Magic Glove (1000 G at the Dwarf Item Shop) on your party leader, press A at a stone to lift it and throw it. None of them blocks a path.
- MainGo back to Jada once more. Impressed, he hands you a box to use at the Ruins of Lemuriad: Jada's Wood Box. He reminds you that you need it to reach Earth's Blade. → checklist
- TipZinnia (Ep. 2) explains why: the box holds a fragment of the Ruins of Lemuriad, which has to go to the Desert of Ruins before you can reach Whale's Valley.
- SideLater, once Izumi, Sarutobi and Paffy travel with you, the Elf Village chief admits he lost a Fern Herb in a Dwarf Kingdom cave (Ep. 3). It lies on map 62 (marked on the map; 'This is what the chief meant!'). Take it back to cure Welch, with the Fern Herb equipped when you talk to the chief, and he gives you the Sand Shoes you need to cross the desert. Welch adds 3000 G. → checklist
- TipThe river and tunnels are full of named fans (a dog who can talk, a would-be dancer, a kid who calls Adeu the 'Slownic Knight'). They're just for fun.
Checklist
- Where
- Onion Cave: Jada
- How
- Talk to Jada after beating the Arm Dragon.
- Reward
- Jada's Wood Box ('Holds fragments of the ruins.')
- Opens
- Ep. 4: after the Arm Dragon
- Closes
- never (story)
- Where
- Map 35 (Jerock Forest, by the river), marked on the map
- How
- Appears only after the Fire Orb, Chamber's Fort's water trap and the Mithril Ring; then pick it up.
- Reward
- Banana ('Looks tasty… gulp.')
- Opens
- Ep. 4
- Where
- Dwarf Kingdom: shop house (map 59) and Hotel Dwarf (map BF)
- How
- Beat the Arm Dragon first; before that every keeper is silent.
- Reward
- Dwarf Item Shop: Healmond 20000 G, Magic Glove 1000 G, Fire Glove 2000 G, Spring 5000 G, Wing Sandals 30000 G, Speed Shoes 20000 G. Dwarf Herb Shop: all seven herbs (Powan Herb 150 G … Tomioka Seed 250 G). Dwarf Armor Shop: Doxi to Ashiria Shields (5000-16000 G) and Gauntlets (4000-14000 G). Dwarf Weapon Shop: Hono/Hyun/Kira Smash and Flame/Blaze/Flying Dragon Art (10000-20000 G). Hotel Dwarf: rest.
- Opens
- Ep. 4: after the Arm Dragon
- Closes
- never
- Where
- Gigamazon River: the dock
- How
- Talk to the Pirani.
- Reward
- Nothing: their '[100G]' deal takes 100 G and only buys passage past them, no boat; a boat is '[1000000G]' a head
- Opens
- Ep. 4
- Where
- Elf Village chief (Ep. 3); the herb is on Dwarf Kingdom map 62
- How
- With Izumi, Sarutobi and Paffy in the party, ask the chief what's wrong, then find the Fern Herb in the Dwarf Kingdom and bring it back.
- Reward
- Sand Shoes from the chief; 3000 G from Welch
- Opens
- after Izumi, Sarutobi and Paffy have joined
Treasure chests (1)
| Contents | Area | Where | |
|---|---|---|---|
| 5000 GG | Dwarf Kingdom tunnel 4B (5000 G chest) | Map 4B, chest A |
Bosses
🗺️ Maps for this chapter (19)
Blue numbers mark people, orange numbers events and pickups, green numbers exits (doors, gateways and screen edges). Yellow letters A, B, C… are treasure chests; white squares are shop counters (I items, H herbs, A armor, W weapons, R inn); red L marks a wall lever. People who walk around are shown where they start. Tap a map to open it full size.
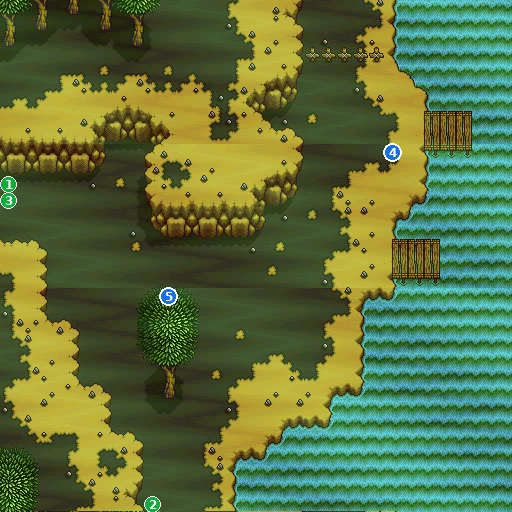
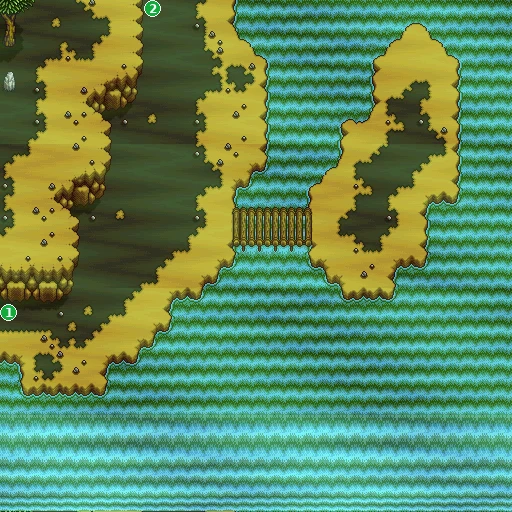
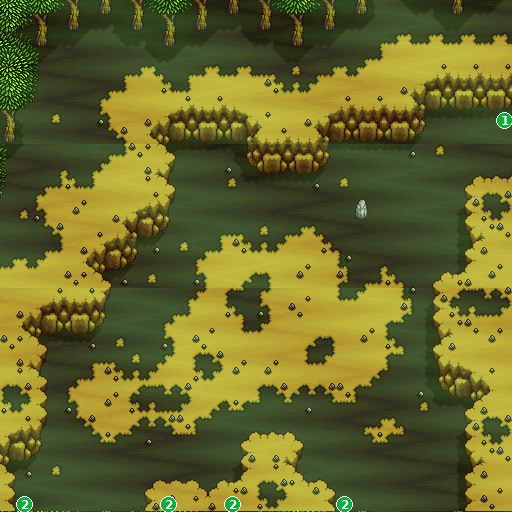
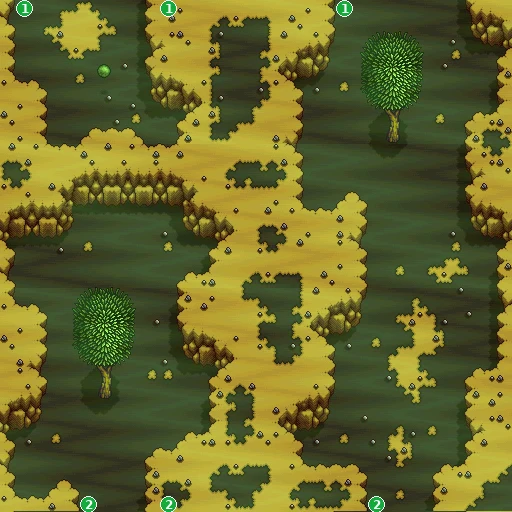
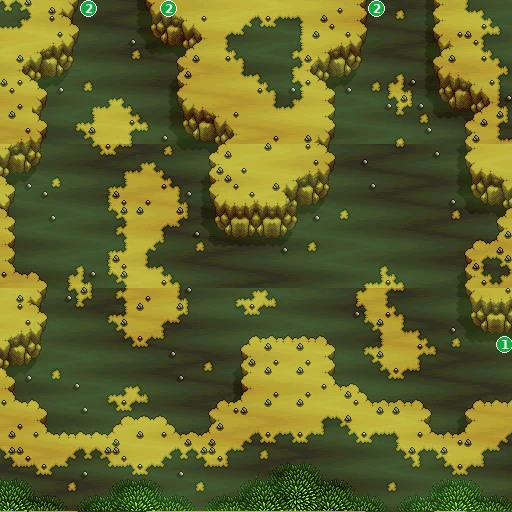
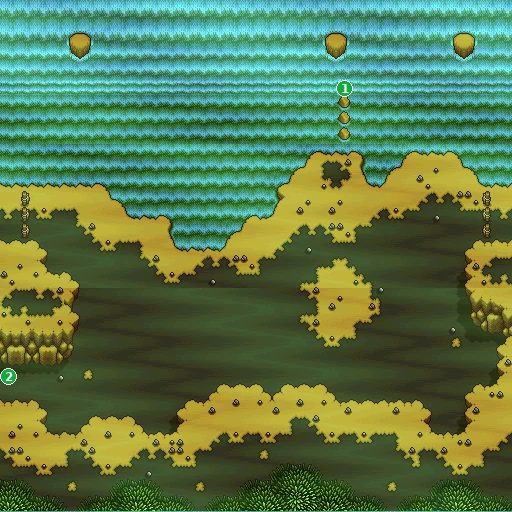
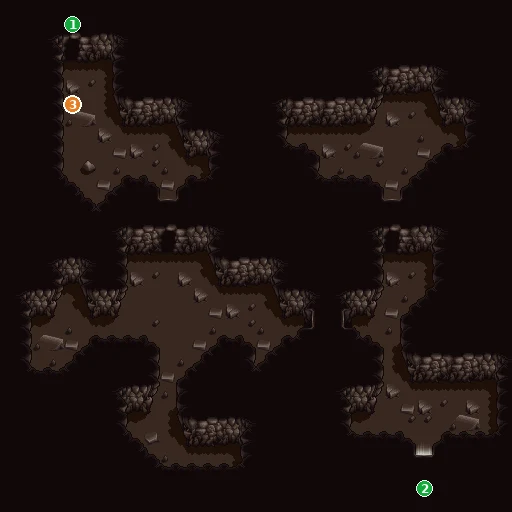
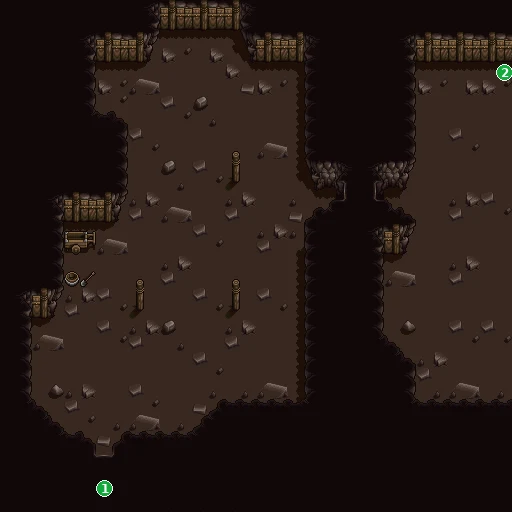
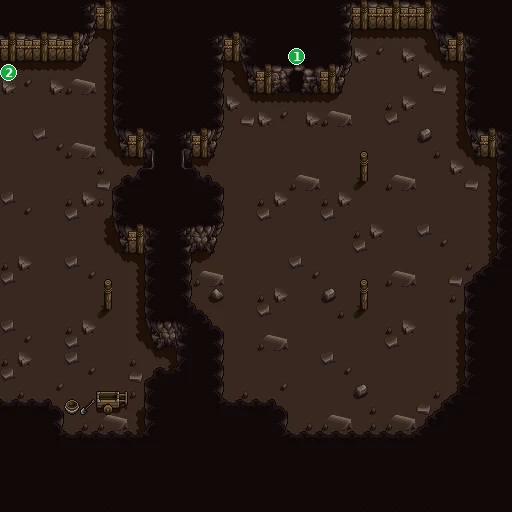
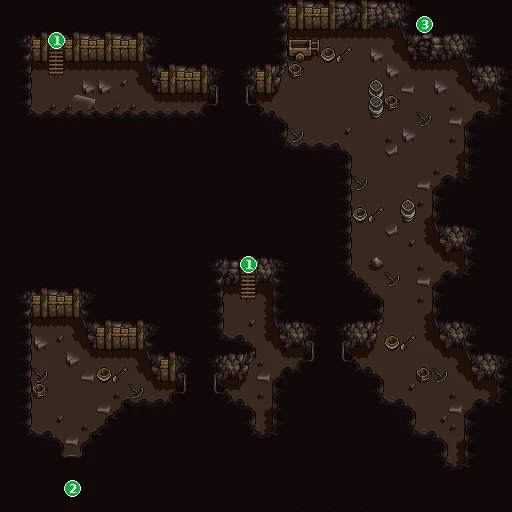
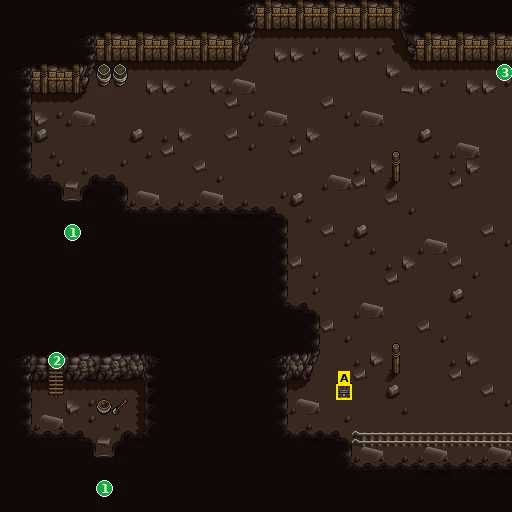
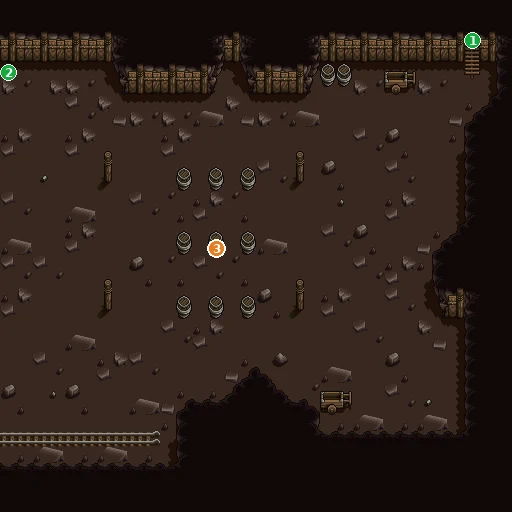
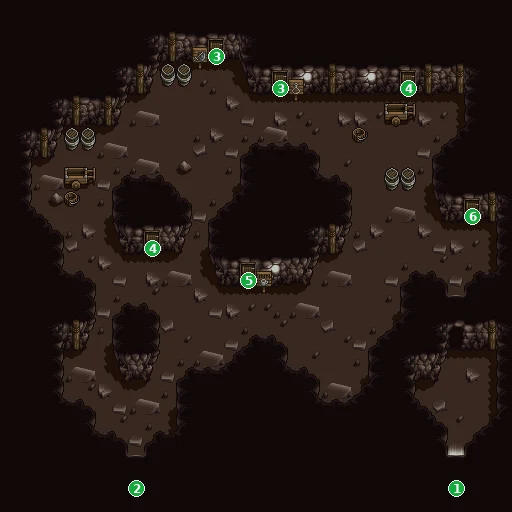
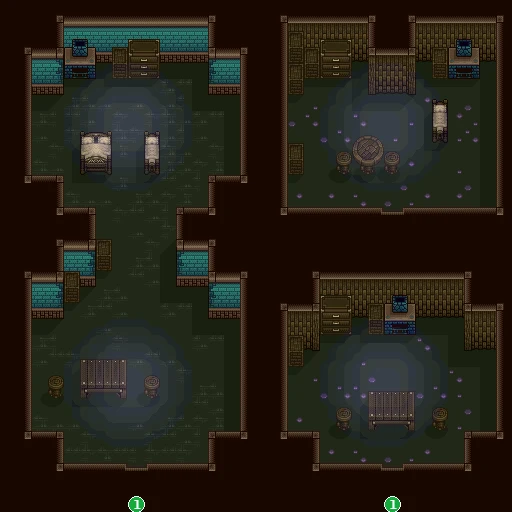
- 1Edge to Dwarf Kingdom: underground town map 49
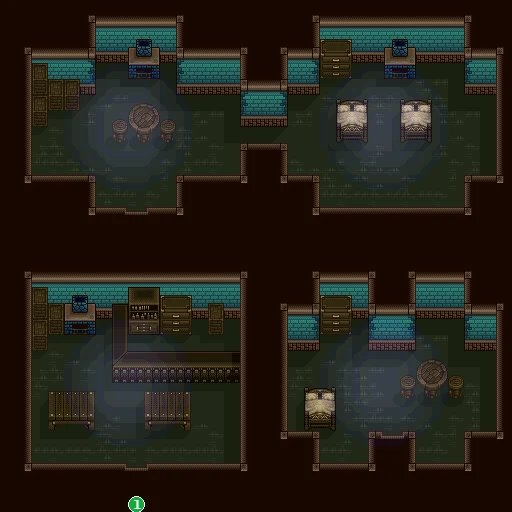
- 1Edge to Dwarf Kingdom: underground town map 49
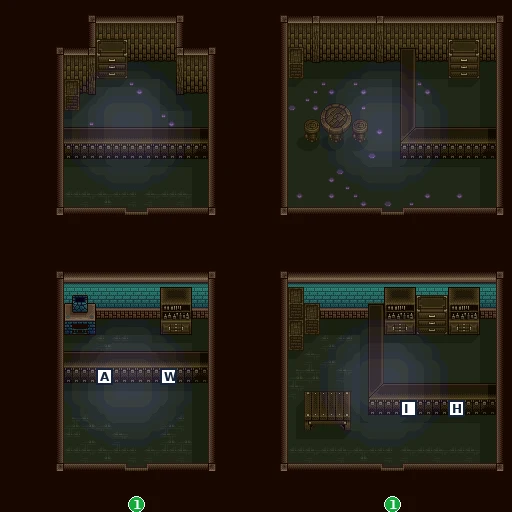
- IDwarf Item Shop
- HDwarf Herb Shop
- ADwarf Armor Shop
- WDwarf Weapon Shop
- 1Edge to Dwarf Kingdom: underground town map 49
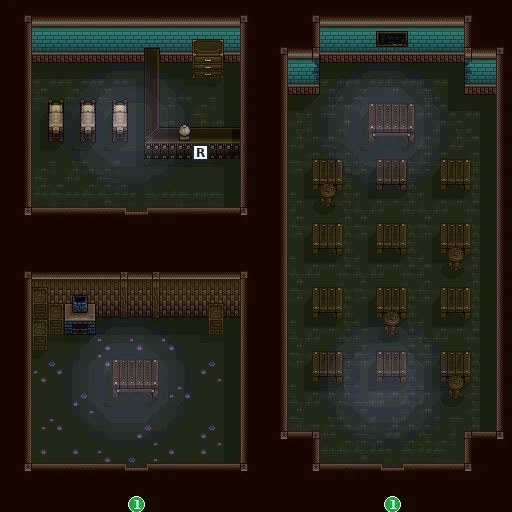
- RHotel Dwarf: inn
- 1Edge to Dwarf Kingdom: underground town map 49
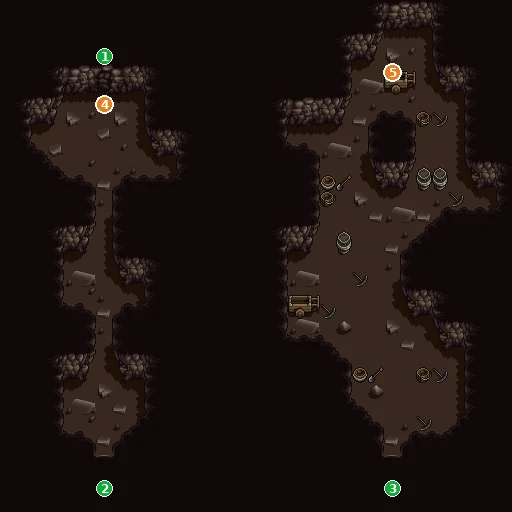
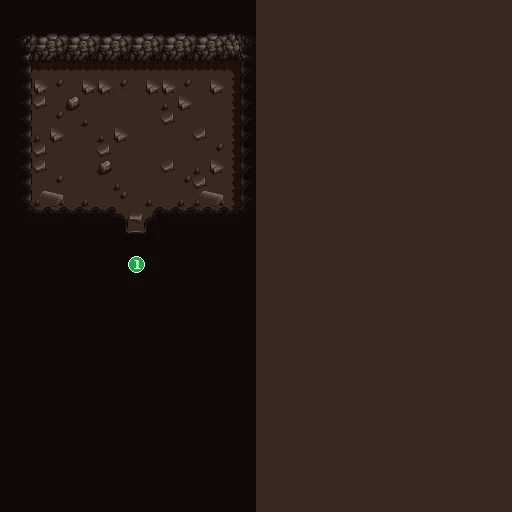
- 1Door to Dwarf Kingdom: deep tunnel 62 map 62
No Magic? Beat the 3 Phantom Knights!
📍 Friedel · Friedel Town · Magic School
Friedel Town is buzzing with rumors: Madora has started a Mage Hunt, and mages keep vanishing into Madora Castle. At the Magic School, Principal Yudis tells Adeu that Izumi has been caught as well, and Floi asks for Zephyr's strength to move the tombstone that seals the castle. Inside, the Three Phantom Knights are pulling Madora's strings.
You need: Nothing to start (the world map drops you on the Friedel field). You need Zephyr and Floi's Stone Glove (equipped) for the tombstone.
Walkthrough
- TipThe shops share one building (map 5B): Nyanko's Item Shop, the Dope Shop, Perfect Guard, Clang-Clang Arms and the Holiday Inn. Nyanko's stocks the Mist Tank (50000 G), Wing Sandals and Speed Shoes. The Dope Shop won't buy herbs ('ya need a license'). Other shops buy at half price. → checklist
- TipTempering pays off. For 100 G, Clang-Clang Arms swaps the party leader's weapon for the next model once that character has reached level 11, 21, 31, 41 or 51: Knife, Bronze Sword, Iron Sword, Bastard Sword, Great Sword, Mithril Sword (Sarutobi's line runs from Bronze Shuriken up to Mithril Ninjato). Perfect Guard's 'Repair armor!' does the same for body armor: Leather Armor up to Mithril Armor (DP 10 to 58), ninja garb up to the Mithril Mail Shirt. Warning: the level-51 step happens only once, and two other smiths give better gear at that step (see the equipment page). → checklist
- MainTalk around town. People whisper that Madora has started a Mage Hunt, mages are being taken to Madora Castle, and none have been seen lately. Make sure you talk to the girl who says 'You want to go to the Magic School? Try asking Ikuru.' Ikuru won't let you pass until you have.
- MainIkuru guards a tunnel that starts in a Friedel Town house (map E1). Before the girl's tip he says 'You can't go through here.' After it, he decides you're the person Principal Yudis mentioned and lets you through for good. → checklist
- TipFloi waits in the tunnel to town. Meet him before Principal Yudis and he only says 'Come back later!'
- MainTalk to Floi again and agree to help. He needs Zephyr's strength to move the tombstone that seals Madora Castle, and gives you the Stone Glove for it ('Strange power moves headstones!'). Bax rounds up more helpers. Keep it from the townspeople. → checklist
- TipRumors to remember: Purple Town has sunk to the bottom of the lake, you'll need an Aqualung to go there, and monkey-like beasts were seen playing with one. The lake entrance is on the block-13 Friedel field maps (Ep. 7-8).
- MainThe way to Madora Castle is blocked by a big tombstone on the Friedel field, map D7 (marked on the map). On foot Adeu only says it 'doesn't look like I can pass' (or, after Floi's talk, that Zephyr can handle it). Equip Floi's Stone Glove (X > Status > Item slot), summon Zephyr with SELECT and walk into the stone: it slides west. Then go north to map D8 and through the castle door into Madora Castle (map F1). The stone is back in place every time you return to this screen. → checklist
- MainInside Madora Castle the ghosts keep coming back: someone is controlling them. A trapped mage says the eyes of the Phantom Paintings see everything. Shift the paintings until one 'won't move any further' to find the way on. The castle runs F1 → DB → DC / EE → EF / 75 (see the maps); the trapped mages are on map DC. → checklist
- MainOther mages warn that Madora is being controlled too, by the Three Phantom Knights (the Dark Skeleton Knights, guards of Friedel Castle), and that the Great Hall door is sealed by a spell. Izumi is with Madora, under a spell, behind that door.
- MainFloi and his friends catch up, battered. Floi tells you the three knights once took Friedel Castle on their own, then holds off the enemies so you can go after Madora. (map 75)
- MainReach Izumi and Madora. Izumi is under a spell, and Madora unleashes the Three Phantom Knights. Heal first, then win the fight in the hall (map B2). → checklist
- MainAfterwards you're back outside on the Friedel field (map D7). Izumi apologizes: he went to save the mages and fell under the spell himself. Izumi joins you. Hurry back to Principal Yudis. → checklist
- MainPrincipal Yudis is relieved to see you both. Izumi blames the Three Phantom Knights and senses powerful magic at Friedel Castle. Yudis gives you the Fire Orb ('Lifts Friedel Castle's barrier!'). Equip it later to open the gate into the Friedel strongholds (Ep. 6). Floi thanks you too. → checklist
- SideTalk to the rescued mages around the school. One gives you a Tomioka Seed as thanks. If your bag is full, Adeu turns it down ('I can't carry any more!'); free a slot and talk to the mage again. → checklist
- WarningOnce Izumi is with you, beware a Poison Mud Apple on the block-13 Friedel field maps. If its mud hits Adeu, Izumi says a Fern Herb won't cure it: you'll need a Fern Seed, which is in Border Fort (Ep. 10). → checklist
- MainNext stop: Friedel Castle, where Idoro's curse waits (Ep. 6).
Checklist
- Where
- Friedel Town: the shop building (map 5B)
- How
- Walk in; each counter has its own keeper.
- Reward
- Nyanko's Item Shop: Healmond 20000 G, Magic Glove 1000 G, Spring 5000 G, Wing Sandals 30000 G, Speed Shoes 20000 G, Mist Tank 50000 G. Dope Shop: Powan Herb 150 G, Soesoe Herb 500 G, Bitter Seed 40 G, Sour Fruit 50 G, Slap Fruit 60 G, Konnya Fruit 70 G, Tomioka Seed 250 G. Perfect Guard: Doxi to Ashiria Shields (5000-16000 G) and Gauntlets (4000-14000 G). Clang-Clang Arms: Hono/Hyun/Kira Smash and Flame/Blaze/Flying Dragon Art (10000-20000 G). Holiday Inn: rest.
- Opens
- Ep. 5
- Closes
- never
- Where
- Magic School tunnel: Floi
- How
- Hear Principal Yudis out, then agree to help Floi.
- Reward
- Stone Glove ('Strange power moves headstones!')
- Opens
- Equipped while Zephyr is out, it lets you push the tombstone on map D7 aside
- Closes
- never (story)
- Where
- Madora Castle
- How
- Shift each Phantom Painting until it 'won't move any further'.
- Reward
- Probably opens the way to Madora (the mages say the paintings' eyes see all)
- Opens
- Ep. 5
- Closes
- after Madora is beaten
- Where
- Madora Castle (battle in hall map B2)
- How
- Reach Izumi and Madora deep in the castle.
- Reward
- Izumi freed; the mages are saved
- Opens
- Ep. 5
- Closes
- never (story)
- Where
- Madora Castle, after the battle
- How
- Beat Madora and the Three Phantom Knights.
- Reward
- Izumi (mage) in the party
- Opens
- Ep. 5
- Closes
- never
- Where
- Magic School: the rescued mages
- How
- Talk to the mages after the rescue with a free inventory slot.
- Reward
- Tomioka Seed (cures all of one ally's ailments)
- Opens
- Ep. 5: after Madora Castle
- Where
- Friedel field (block-13 maps), with Izumi in the party
- How
- Mud from a Poison Mud Apple hits Adeu.
- Reward
- Poisoning that only a Fern Seed cures
- Opens
- after Izumi joins
Treasure chests (4)
| Contents | Area | Where | |
|---|---|---|---|
| 1000 GG | Madora Castle: inner hall (Floi catches up; 1000 GG, Konnya Fruit) | Map 75, chest A | |
| Konnya Fruit | Madora Castle: inner hall (Floi catches up; 1000 GG, Konnya Fruit) | Map 75, chest B | |
| 3000 GG | Madora Castle: side rooms (trapped mages; 3000 GG) | Map DC, chest A | |
| 7500 GG | Madora Castle: side rooms (7500 GG) | Map EF, chest A |
Bosses
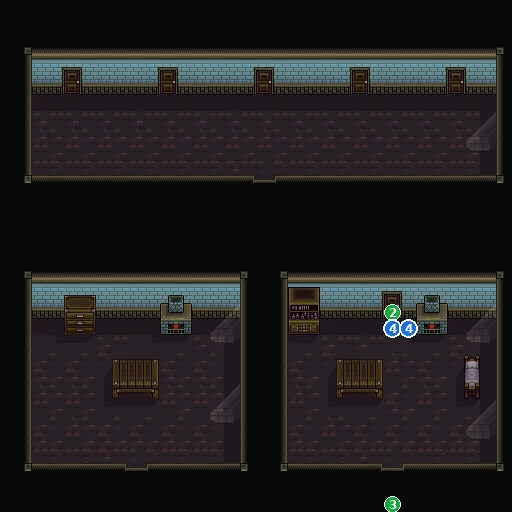
🗺️ Maps for this chapter (26)
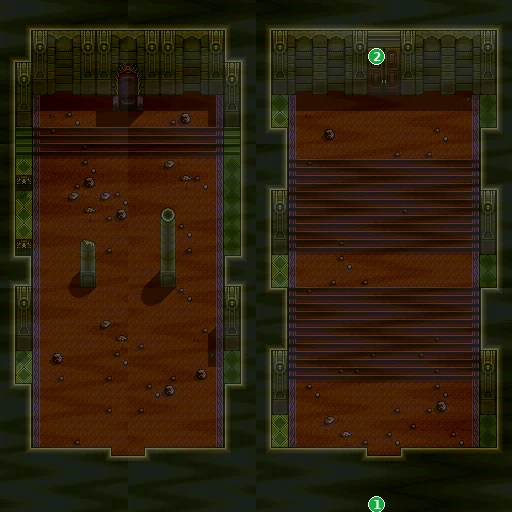
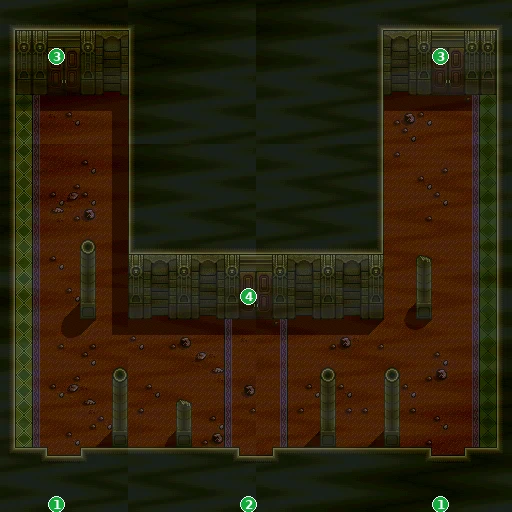
Blue numbers mark people, orange numbers events and pickups, green numbers exits (doors, gateways and screen edges). Yellow letters A, B, C… are treasure chests; white squares are shop counters (I items, H herbs, A armor, W weapons, R inn); red L marks a wall lever. People who walk around are shown where they start. Tap a map to open it full size.
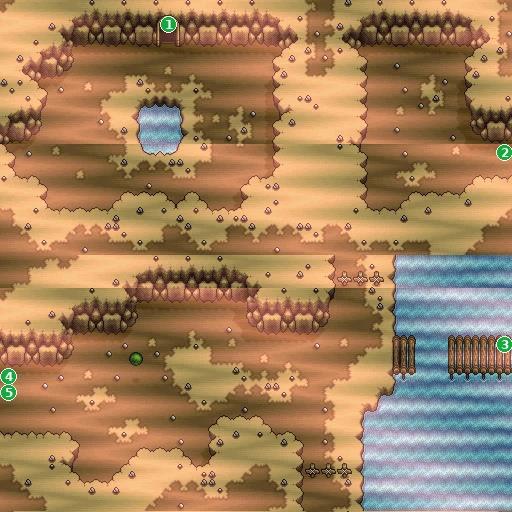
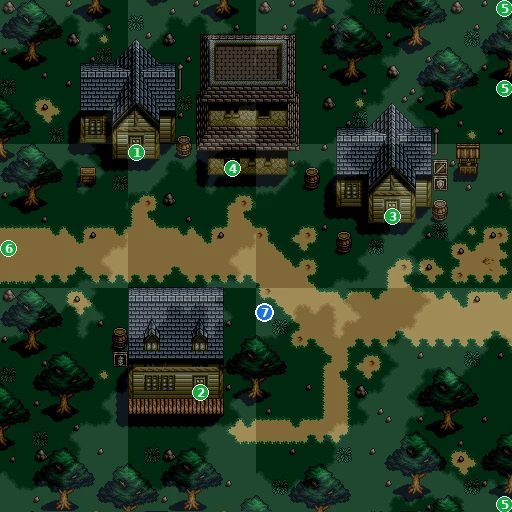
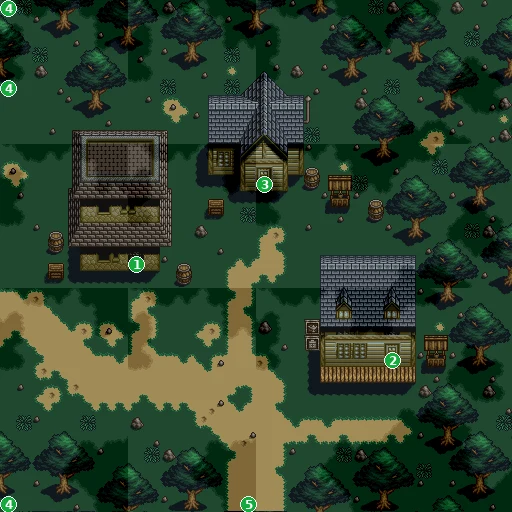
- 7Girl — "Try asking Ikuru" (talk to her first) (walks around)
- 1Door to Friedel Town: house 5A map 5A
- 2Door to Friedel Town: house C0 map C0
- 3Door to Friedel Town: shops and Holiday Inn map 5B
- 4Door to Friedel Town: house 5C map 5C
- 5Edge to Friedel Town map 56
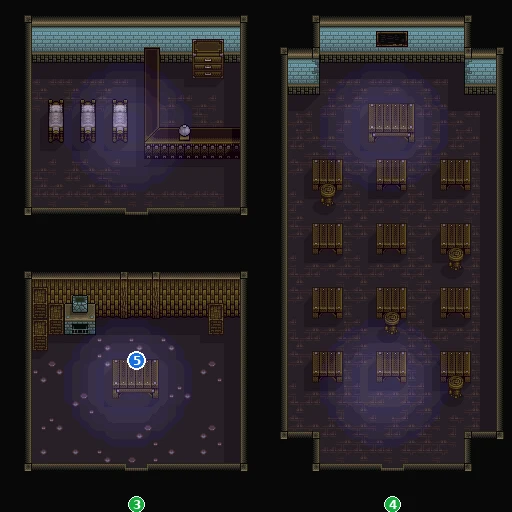
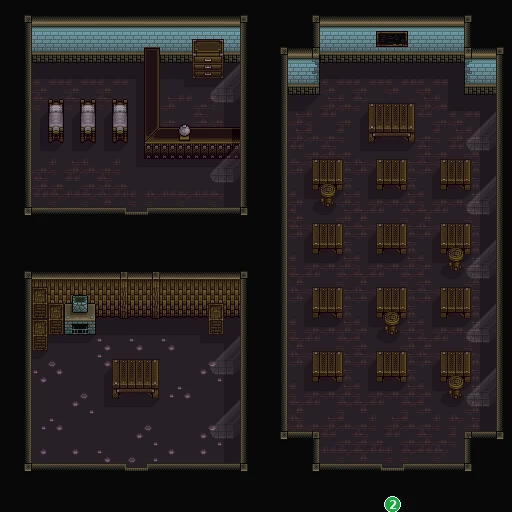
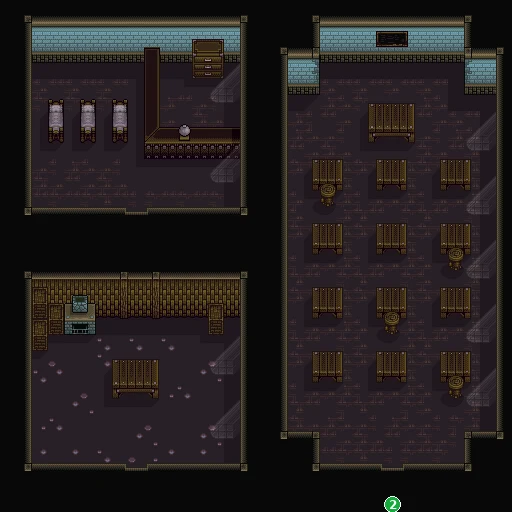
- 6Exit to Friedel field: exit from the Dwarf Kingdom map 3D
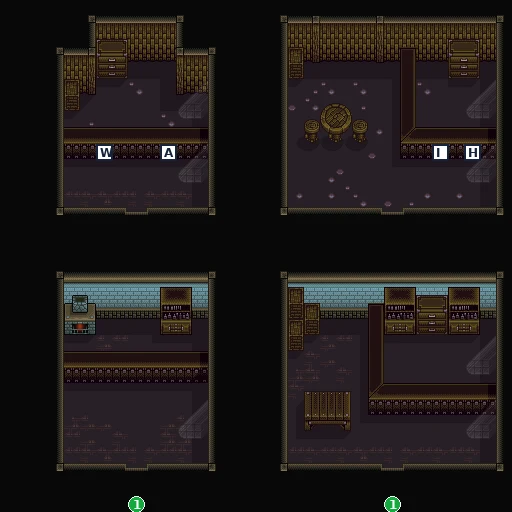
- WClang-Clang Arms: smith: temper
- APerfect Guard: smith: repair
- INyanko's Item Shop
- HDope Shop
- 1Edge to Friedel Town outskirts map 55
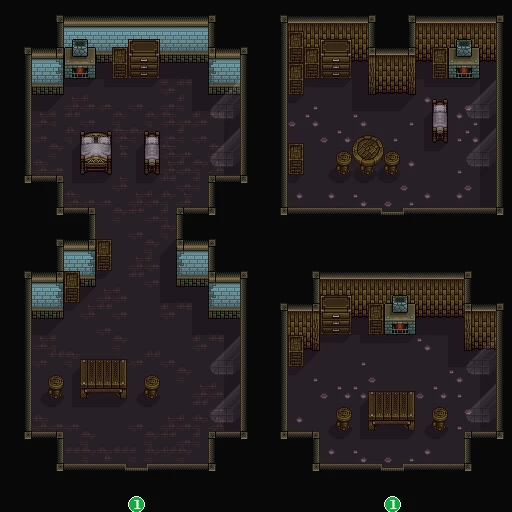
- 1Edge to Friedel Town outskirts map 55
- 1Edge to Friedel Town outskirts map 55
- RHoliday Inn: inn
- 1Edge to Friedel Town outskirts map 55
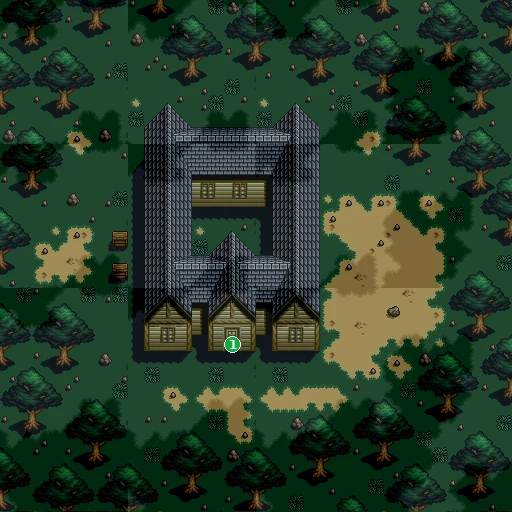
- 1Door to Magic School: main hall map CF
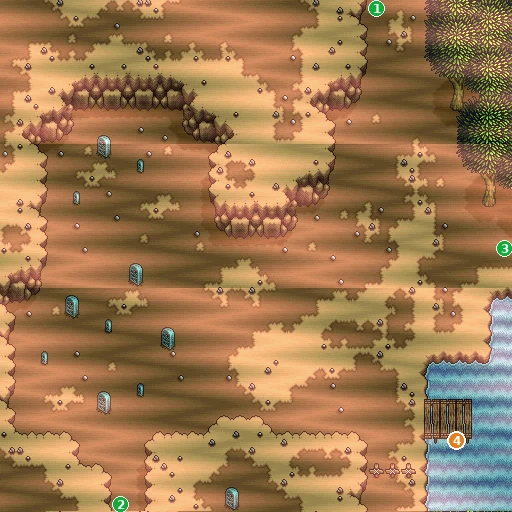
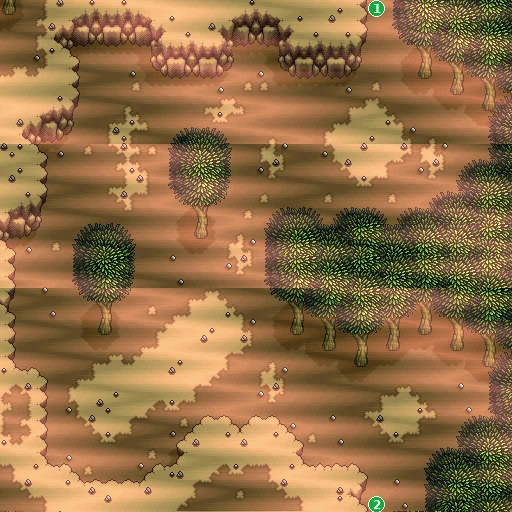
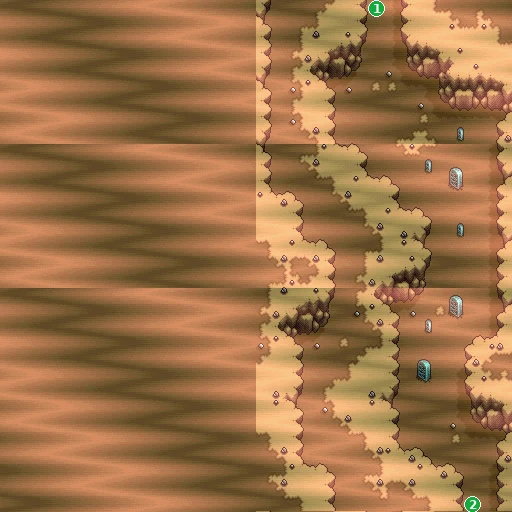
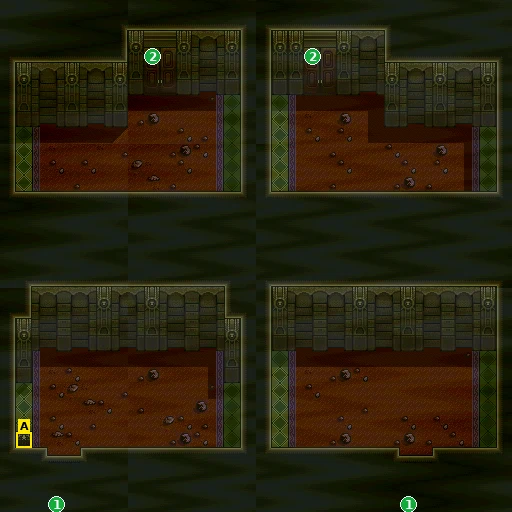
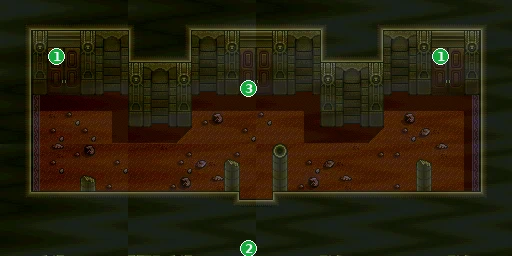
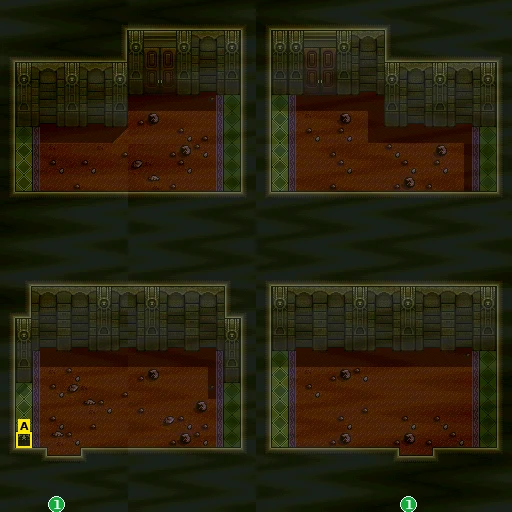
- A 7500 GG
- 1Edge to Madora Castle: sealed hall (A spell has been cast!) map EE
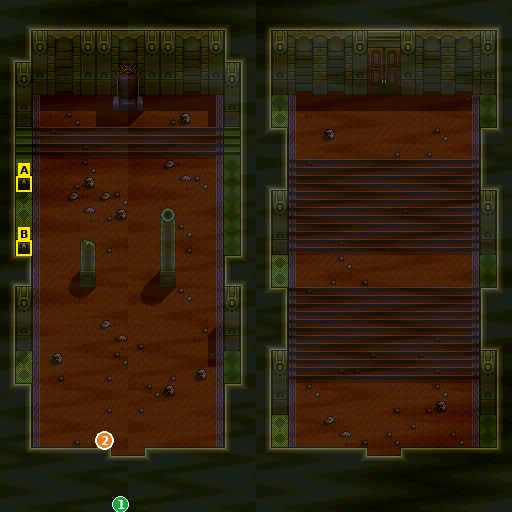
- A 1000 GG
- B Konnya Fruit
- 2Floi — Three Phantom Knights scene
- 1Edge to Madora Castle: sealed hall (A spell has been cast!) map EE
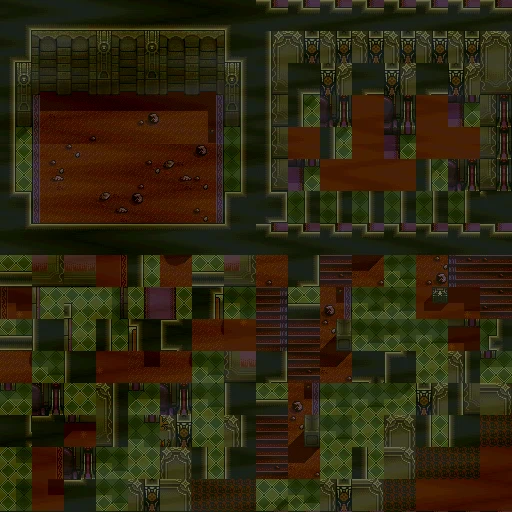
Teru-Teru Doll & a Rain-Washed Bond!
📍 Chamber's Fort · Etania · Rain Town · Etania Cave
Past Chamber's Fort lies Etania and Rain Town, where it has rained since before the mayor was born. Gratches comes here to find a member of his clan and learn how to beat Hellreet, the Fiend of Flame who killed his brother. In the same town, Lazania's grandson Gesshin brings Adeu face to face with a battered Sarutobi.
You need: Gratches in the party (snap him out of it at his dojo, Ep. 3) to start the Hellreet story. Sarutobi joins at Lazania's house once you've heard the 'Samurai Granny' man in town.
Walkthrough
- MainBring Gratches. After you shake him out of his gloom at his dojo, he asks to go to Rain Town, where someone from his clan knows all about Hellreet and Chamber's Fort. If you didn't recruit him there, he can also ask you on the road. → checklist
- MainEtania lies past Chamber's Fort. From the fort's field, go south (A3, then 83) into Etania (84, 85, 87), then west to Rain Town (86, then 94). Picking Etania on the world map drops you on 85.
- TipRain Town has the Rain General Store (items and herbs, buy only) and the Hotel Rainy Blue inn. Pick up a Spring here (5000 GG) if you don't have one: the Jump Mats in Chamber's Fort need it (without them you can't reach the chests on maps E2 and E5). → checklist
- MainFind Yagumo, Gratches's clansman. He confirms that Hellreet is running wild at Chamber's Fort and warns that it has powerful magic. To beat it you must find three orbs, gather them in a certain place and undo the fort's trap. → checklist
- MainHead back north to Chamber's Fort (orb puzzle, maps and chests in Ep. 9). Take out the Green, Red and Yellow Orbs and set each in its socket (equip the Orb first). When water pours out and a trap throws you elsewhere in the fort, you land where the Snow Shoes are. → checklist
- MainSave Gratches when he gets into trouble. He asks if he's still a loser, and the two of you hurry back to Rain Town where his people are waiting.
- MainReport to Yagumo: Hellreet is beaten. Gratches gives the credit to Adeu, then leaves the party to return to his village, promising you a match. → checklist
- TipGratches keeps his promise. Visit his dojo later with Paffy in the party to spar with him in your Ryu; you can challenge him again as often as you like.
- SideA boy asks what a Teru-Teru Doll is. Adeu tells him to hang a big one from the roof to stop the rain. Later the mayor asks if you taught him that strange charm, and the boy wonders whether it will work. No reward appears in the script. → checklist
- SideTalk to the man who tells you about the mage on the edge of town, the 'Samurai Granny' (he jokes that you'd be 'Knight Granny'). Don't skip him: Lazania's grandson only comes home after you've heard this.
- MainThen visit Lazania's house. Before the man's story she only says her grandson is out. Afterwards she hears him come home: it's Gesshin, and with him is Sarutobi. Gesshin found him badly hurt near Friedel Castle; Sarutobi says the one who beat him was Galden the Black Knight, back from the dead, and shows his scars. → checklist
- MainSarutobi insists Galden is his enemy and calls Adeu a third-rate knight, and the two are about to spar until Gesshin tells them to join forces. They call a truce, Gesshin leaves for Whale's Valley to watch the enemy, and Sarutobi joins the party. Lazania sees you both off. → checklist
- TipOn these maps Adeu can trip on rocks, and he grumbles that there's no point carrying an item while he's in Zephyr.
Checklist
- Where
- Gratches Village dojo (Ep. 3), or on the road
- How
- Shake him out of his self-blame; he asks to come with you to Rain Town.
- Reward
- Gratches in the party
- Opens
- Hellreet story in Rain Town and Chamber's Fort
- Closes
- He leaves after Hellreet is beaten (he stays available as a sparring partner at his dojo)
- Where
- Rain Town, Yagumo
- How
- Arrive with Gratches and talk to Yagumo.
- Reward
- Hellreet's defeat; Gratches's thanks
- Opens
- Chamber's Fort orb puzzle (Ep. 9)
- Closes
- when Hellreet is beaten
- Where
- Chamber's Fort (Ep. 9)
- How
- Remove the orbs and set them in their sockets.
- Reward
- The fort's trap is undone
- Opens
- the way to Hellreet
- Closes
- never
- Where
- Rain Town: Lazania's house
- How
- Talk to the man who tells you about the 'Samurai Granny' mage, then visit Lazania; Gesshin comes home with the wounded Sarutobi and the truce scene plays out.
- Reward
- Sarutobi in the party
- Opens
- Party scenes that need Sarutobi (Friedel Castle, Ep. 6; the Elf Village chief, Ep. 3 / Ep. 12)
- Closes
- never
- Where
- Rain Town
- How
- Buy items or Buy herbs (no selling).
- Reward
- Items: Healmond 20000 GG, Magic Glove 1000 GG, Fire Glove 2000 GG, Spring 5000 GG, Wing Sandals 30000 GG, Speed Shoes 20000 GG. Herbs: Powan Herb 150 GG, Soesoe Herb 500 GG, Bitter Seed 40 GG, Sour Fruit 50 GG, Slap Fruit 60 GG, Konnya Fruit 70 GG
- Opens
- Ep. 11
- Closes
- never
- Where
- Rain Town
- How
- Answer Yes to 'Will you be staying the night?'.
- Reward
- Rest (fee not shown in the script)
- Opens
- Ep. 11
- Closes
- never
- Where
- Rain Town
- How
- Talk to the boy who asks about Teru-Teru Dolls, then to the mayor and the boy again.
- Reward
- none shown in the script
- Opens
- Ep. 11
- Closes
- never
Bosses
🗺️ Maps for this chapter (19)
Blue numbers mark people, orange numbers events and pickups, green numbers exits (doors, gateways and screen edges). Yellow letters A, B, C… are treasure chests; white squares are shop counters (I items, H herbs, A armor, W weapons, R inn); red L marks a wall lever. People who walk around are shown where they start. Tap a map to open it full size.
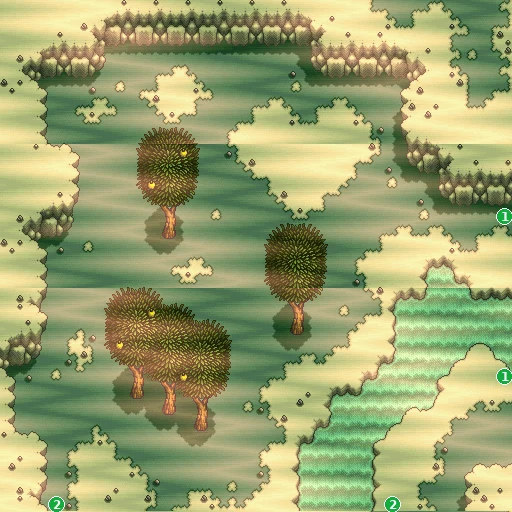
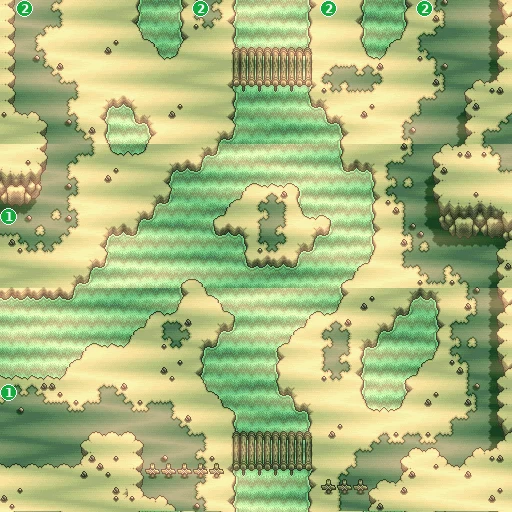
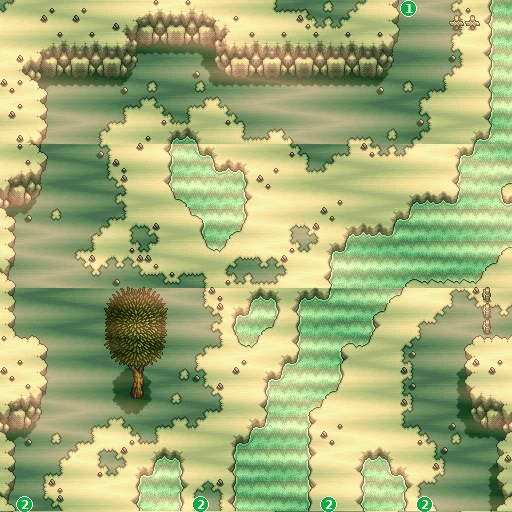
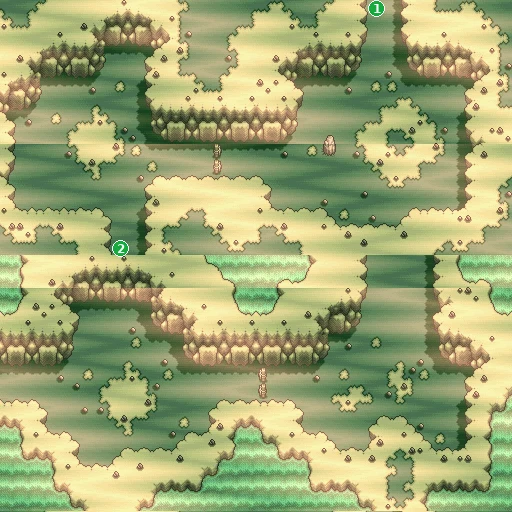
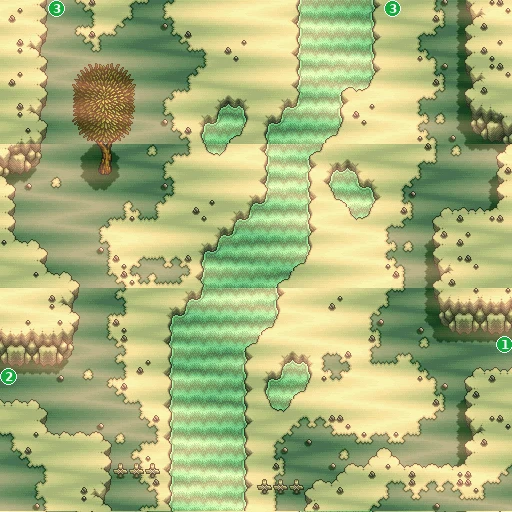
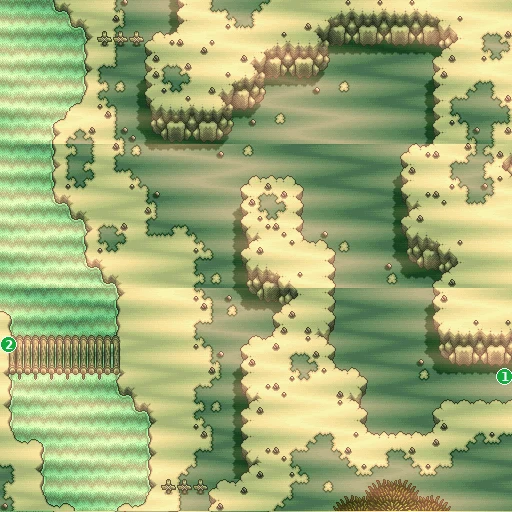
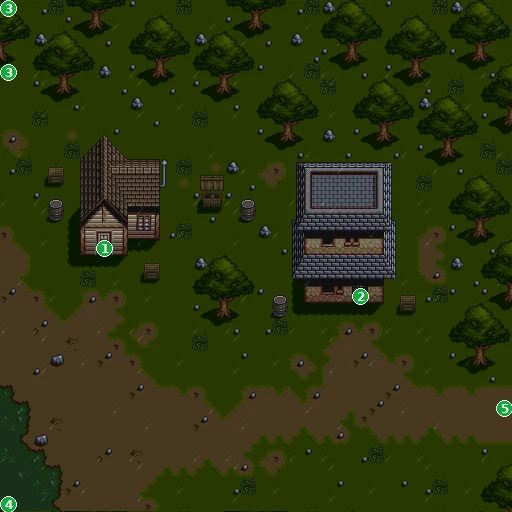
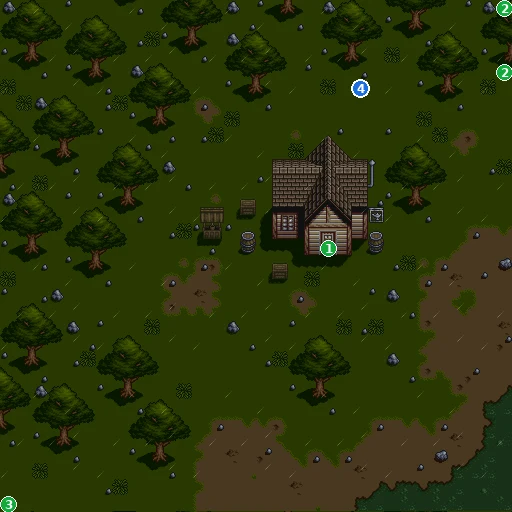
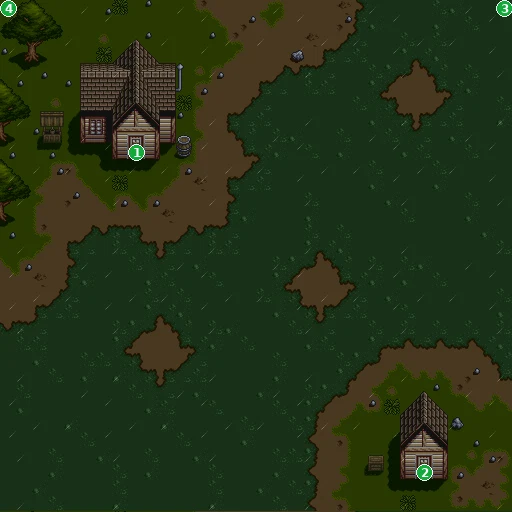
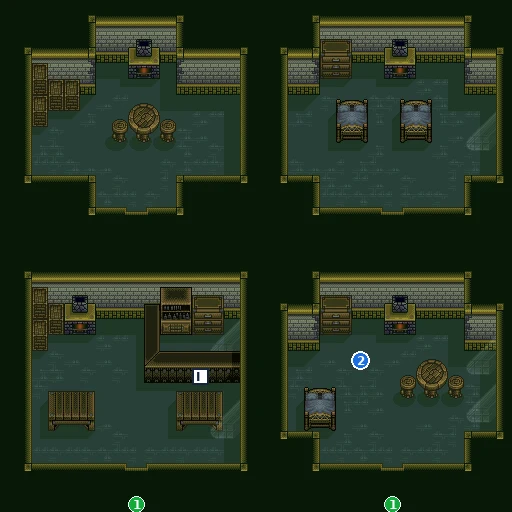
- 2Yagumo — Hellreet and the three orbs
- IRain General Store
- 1Edge to Rain Town map 94
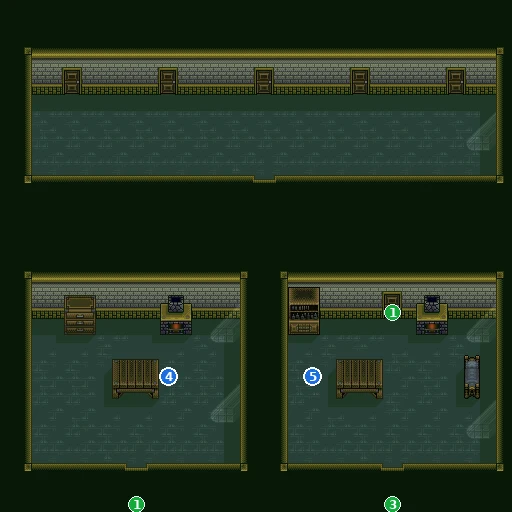
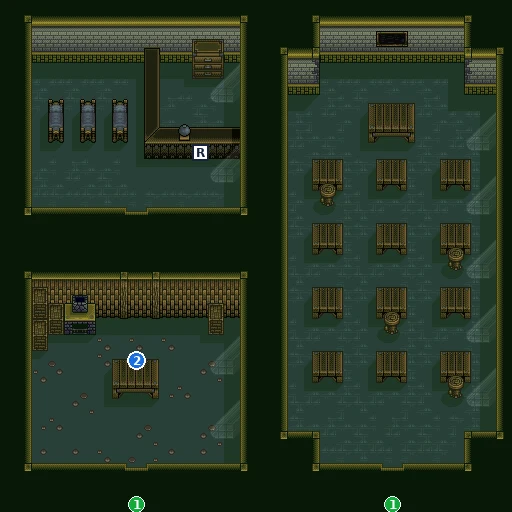
- 2Lazania — Gesshin and Sarutobi come home here
- RHotel Rainy Blue: inn
- 1Edge to Rain Town map 95
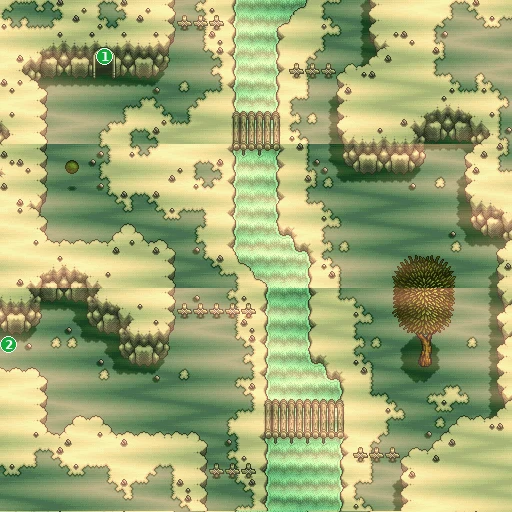
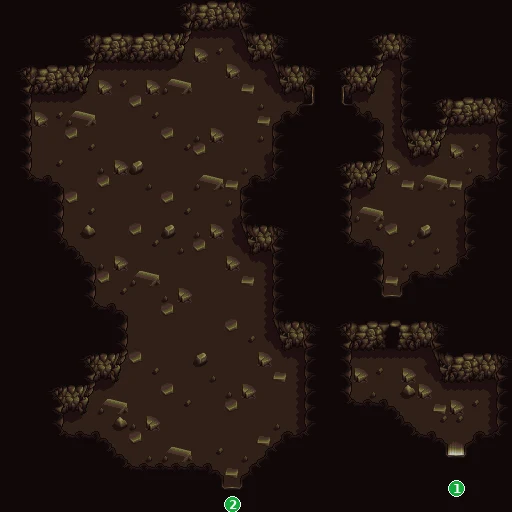
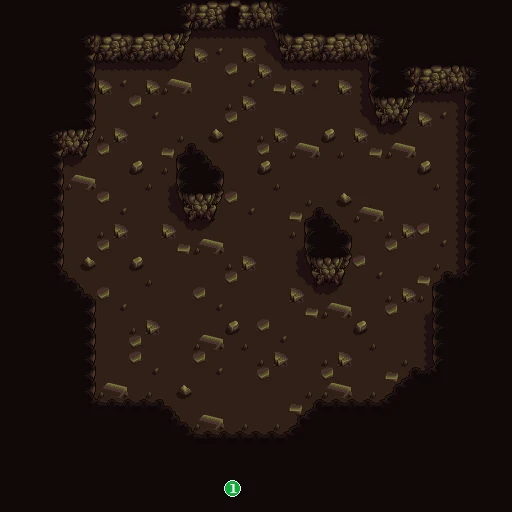
- 1Door to Etania Cave map A6
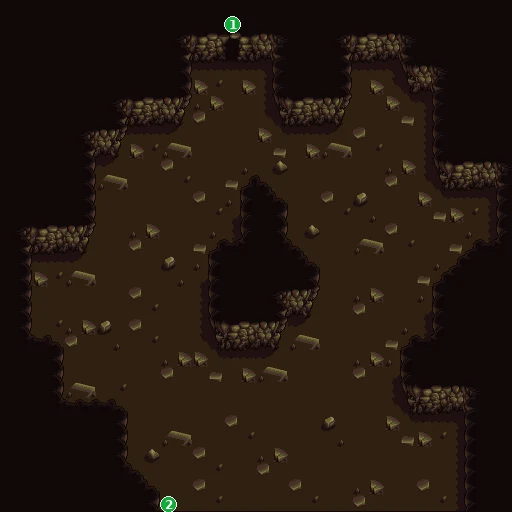
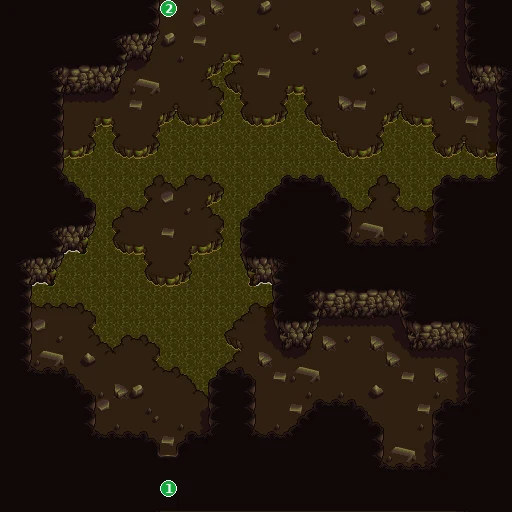
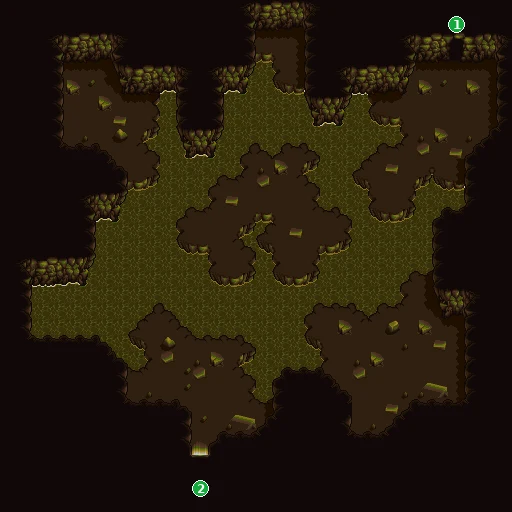
Showdown!! Mithril Mine & Town Below!
📍 Friedel · Mithril Town · Goblin Kingdom · Chamber's Fort
Goblins led by Bopplin and his partner Bubblin have taken over the Mithril Mine. They've stripped Mithril Town of weapons and armor to feed their pet Goblem, and stolen the mayor's Mithril Ring. Take the mayor's job, fight through the Goblin Kingdom and win the ring back. Chamber's Fort, the trap-filled fort where Hellreet has returned, is also in this area.
You need: Nothing to start. Chamber's Fort's Jump Mats need a Spring; the Lava Cave needs Goblem's Eye from the Goblem Shrine.
⏳ Last chances in this chapter
- Sordin Shield and Sordin Gauntlet (Gladd) details
Full list across the game: Missables.
Walkthrough
- MainChoose this area on the world map. You arrive on the Friedel field (map 80), and the first local you meet tells you: 'This is Mithril Town.' The town proper is a short walk away: leave map 80 by the right half of its south edge onto map 81, then take 81's east exit into Mithril Town (map 90). The goblins hog the Mithril Mine and take every weapon and piece of armor to feed Goblem, so the Mithril Mart and Gladd's Armory have nothing to sell.
- MainThe mayor's house is in the north-west part of town. The mayor is sobbing: Bopplin stole his Mithril Ring. Offer to help and he dares you to get it back, promising to pay you whatever you want if you can. → checklist
- MainGuards at the edge of town won't let anyone pass without the mayor's permission. Once the mayor has given you the job, they apologise and let you through.
- SideTalk to the young man who brags that everyone in town is rich. He hands you some pocket money ('Here, have this.'): 10 G. → checklist
- TipUseful hints from the townsfolk: Bopplin and his partner Bubblin are tough and have a Solid; the Poison Mud Apple is a trap for catching goblins; a Fern Seed is said to be in Border Fort, which has door traps and needs a Lantern; the Desert of Ruins needs Sand Shoes.
- SideIf Katze left your party at the Magic School, she's trading in this town. A merchant grumbles about a sharp unknown woman doing business here, and you catch her trying to sell glasses for 500 G. ★Emerald Power★ spots that restore HP are elsewhere: on the Gigamazon River (map 38), the Friedel field (3D), in Etania (88) and in Whale's Valley (C4).
- MainThe goblins inside jeer at you. The mine is theirs, Bopplin is nowhere to be found, and they hope Goblem eats you. One dares you to fight Goblem at the Goblem Shrine.
- WarningGoblem is said to eat weapons and armor, and the goblins want yours too ('All food for Goblem!'). Check your gear before the shrine. Tempering and repair are back in town only after the goblins are dealt with.
- MainThe Goblem Shrine is sealed at first ('It's sealed!'). Talk to the goblin on map D6 who dares you to take on Goblem: after that the shrine opens. Beat Goblem; afterwards you get Goblem's Eye (item text: 'Ugh… so gross…') and end up on map 6E. A goblin mourns that Goblem 'was everybody's pet'. → checklist
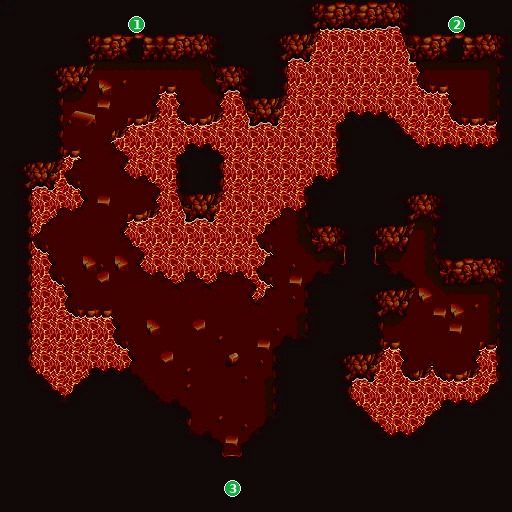
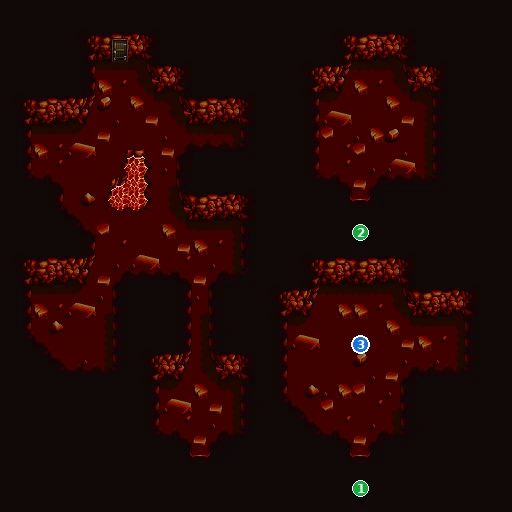
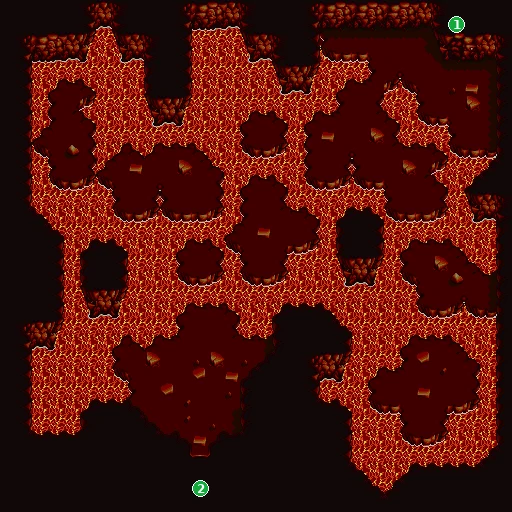
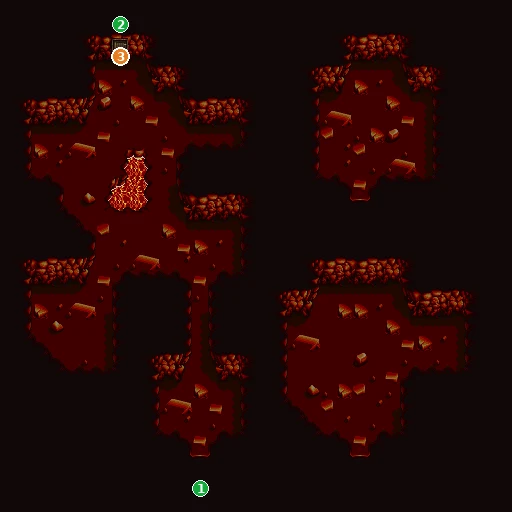
- MainThe Lava Cave door is on map 6B (the Goblin Kingdom entrance; marked on the map): 'Goblem's Eye needed!'. Equip Goblem's Eye (X > Status > pick a character > the Item slot (4th)) and examine the door; the Eye is used up and the way opens. → checklist
- TipThe Fire Glove ('Not hot, not hot… you're fine!') does not protect you from lava. Equipped on your leader, it lets you pick up and throw the flames in the Friedel strongholds (Episode 6). Mithril Mart won't sell one until the goblins are beaten, but the Anything Shop, Miyan's Item Shop, the Dwarf Item Shop and the Rain General Store do (2000 G).
- SideThe Lucky Goblin hides in the Lava Cave (map 6F, marked on the map), but only if you made him appear in Episode 1 (the spot on map 06 before Rina's warning) and haven't warped to Episodes 2-7 or 10-12 since. Talk to him and he gives you the Hidden Item. Equip it: as long as Adeu or Sarutobi wears it, he takes no damage on foot from enemies, lava floors or poison, and status effects don't stick. It does nothing in Ryu battles. → checklist
- MainBopplin taunts you: 'Can you catch me? Here, knighty! Follow the claps…'. That's the start of the Solid battle: his Solid keeps vanishing during the fight, so follow his claps to find it (we couldn't check the sound).
- MainCorner Bopplin and demand the mayor's ring back. He refuses and calls in his partner, Bubblin. Beat the pair and their Solid. A goblin warned you it 'ain't no ordinary Solid'. → checklist
- MainWith the Mithril Ring ('Ring of the mithril-rich mayor.') you're sent back out to the field (map A9), and Adeu reckons the goblins will quit their pranks now. The goblins surrender and promise to stay away from town. → checklist
- MainTake the ring back to the mayor, with the Mithril Ring equipped (X > Status > Item slot). He can hardly believe it, and Adeu makes him keep his promise: you get 10000 G. → checklist
- TipThe town's shops reopen once the goblins calm down: Mithril Mart and Master Smith Gladd's Armory (repairs armor, 100 G). Hotel Metal Wave is the inn. Even Friedel Town notices the goblins have gone quiet. → checklist
- SideGladd's Armory: when the party leader reaches level 51, repair the Suit Armor here instead of anywhere else and it becomes the Sordin Shield (DP 62, the best armor in the game); Sarutobi's Chainmail Shirt becomes the Sordin Gauntlet (DP 60). Any other armorer turns them into Mithril Armor / Mithril Mail Shirt instead, and that step can't be repeated. → checklist
- WarningPoison Mud Apple: when Izumi is in your party, a Poison Mud Apple can hit Adeu on the Friedel field (block 13 maps 82 and A9, also 3C). A Fern Herb won't cure it. You need a Fern Seed, which Mithril Town says is in Border Fort. → checklist
- TipOrb puzzle: three sockets read 'The orb is missing!'. Elsewhere you take out a Green, a Red and a Yellow Orb ('Removed it.'), then set each one in its socket with that Orb equipped ('Set it in place.'). Removing an orb can make water pour out and spring a trap that drops you on map F2. Right after the trap you find the Snow Shoes. The Jump Mats here (maps E2, E5, E6) only launch you while someone has the Spring equipped ('A spring is needed!'): 5000 G at several item shops, but not at Mithril Mart. → checklist
- TipHellreet and Gratches's rescue belong to Episode 11: in Rain Town, Yagumo tells Gratches to find three orbs and undo this fort's trap, and the fight and rescue play out here.
Checklist
- Where
- Mithril Town: the mayor's house (north-west part of town)
- How
- Offer to help, beat Bopplin and Bubblin in the Goblin Kingdom, then bring the ring back.
- Reward
- 10000 G
- Opens
- The town guards let you through; the goblins stop their pranks and the shops restock
- Closes
- never
- Where
- Goblin Kingdom
- How
- Win it back from Bopplin and Bubblin.
- Reward
- Mithril Ring ('Ring of the mithril-rich mayor.')
- Opens
- The mayor's reward
- Closes
- Handed back to the mayor
- Where
- Goblem Shrine, Goblin Kingdom
- How
- Given by the Goblem Shrine event, which then takes you to map 6E.
- Reward
- Goblem's Eye ('Ugh… so gross…')
- Opens
- The Lava Cave
- Closes
- Used up at the Lava Cave door (equip it first)
- Where
- Goblem Shrine, Goblin Kingdom
- How
- Get the shrine open and go in. The goblins dare you to try.
- Reward
- Goblem's Eye comes from the shrine event
- Opens
- The Lava Cave
- Where
- Goblin Kingdom
- How
- Catch Bopplin ('Follow the claps…') and demand the ring.
- Reward
- Mithril Ring
- Opens
- The way back to Mithril Town; the goblins give up
- Where
- Mithril Town entrance, map 90 (marked on the map)
- How
- Talk to the young man who says everyone in town is rich.
- Reward
- 10 G
- Where
- Lava Cave, map 6F (marked on the map)
- How
- Talk to him in the Lava Cave (map 6F).
- Reward
- Hidden Item: equipped, it protects its wearer on foot from enemies, lava floors, poison and status effects (not in Ryu battles)
- Closes
- see Ep. 1: talking to Rina first, or World Map warps to Episodes 2-7 / 10-12, keep him away for good
- Where
- Mithril Town
- How
- Empty until the goblins are dealt with, then open for business.
- Reward
- Mithril Mart: Healmond 20000 G, Magic Glove 1000 G, Fire Glove 2000 G, Wing Sandals 30000 G, Speed Shoes 20000 G. Master Smith Gladd's Armory: Slip Shield 6000 G, Conf Shield 7000 G, Ashiria Shield 16000 G; Slip Gauntlet 5000 G, Conf Gauntlet 6000 G, Ashiria Gauntlet 14000 G.
- Opens
- Armor repair (100 G); Hotel Metal Wave inn
- Where
- Mithril Town: Master Smith Gladd's Armory
- How
- Party leader at level 51 or higher, wearing the Suit Armor (Adeu) or Chainmail Shirt (Sarutobi): choose Repair armor! (100 G).
- Reward
- Sordin Shield DP 62 (from Suit Armor), Sordin Gauntlet DP 60 (from the Chainmail Shirt)
- Opens
- The best weapons and body armor in the game
- Closes
- as soon as another armorer does the level-51 step (it gives Mithril Armor / Mithril Mail Shirt, and no smith upgrades those)
- Where
- Item shops: Rina's, Nyanko's, Anything Shop, Yanyan's, Dwarf Item Shop, Rain General Store
- How
- Buy one for 5000 G and equip it.
- Reward
- Spring ('Lets you make huge jumps!')
- Opens
- Jump Mats in Border Fort (required) and Chamber's Fort
- Where
- Chamber's Fort
- How
- Right after the water trap drops you on map F2.
- Reward
- Snow Shoes ('Walk on ice and snow, no slipping!')
- Opens
- Equipped: no sliding on ice (Ice Town, Rafflesil Cave, Chamber's Fort)
- Where
- Chamber's Fort
- How
- Remove each orb ('Removed it.'), then set it in its socket ('Set it in place.').
- Reward
- Undoes the fort's trap
- Opens
- The way to Hellreet (Episode 11 story)
Treasure chests (9)
| Contents | Area | Where | |
|---|---|---|---|
| Powan Herb | Chamber's Fort (Powan Herb) | Map E2, chest A | |
| 1000 GG | Chamber's Fort (1000 G, 4000 G) | Map E4, chest A | |
| 4000 GG | Chamber's Fort (1000 G, 4000 G) | Map E4, chest B | |
| 500 GG | Chamber's Fort (500 G) | Map E5, chest A | |
| 4000 GG | Chamber's Fort (4000 G) | Map E6, chest A | |
| 5000 GG | Chamber's Fort (5000 G) | Map E7, chest A | |
| 2000 GG | Chamber's Fort hub (2000, 500, 3000 G) | Map E8, chest A | |
| 500 GG | Chamber's Fort hub (2000, 500, 3000 G) | Map E8, chest B | |
| 3000 GG | Chamber's Fort hub (2000, 500, 3000 G) | Map E8, chest C |
Bosses
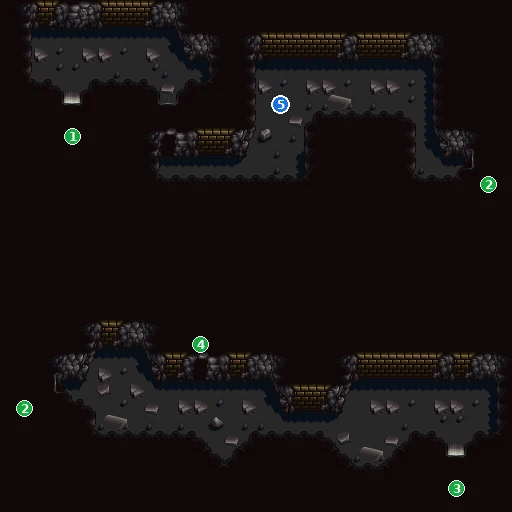
🗺️ Maps for this chapter (29)
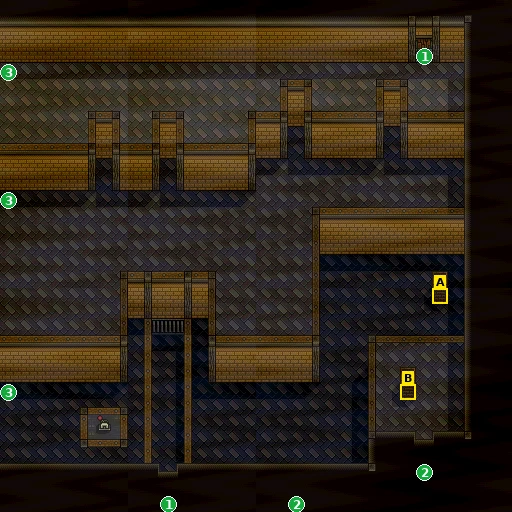
Blue numbers mark people, orange numbers events and pickups, green numbers exits (doors, gateways and screen edges). Yellow letters A, B, C… are treasure chests; white squares are shop counters (I items, H herbs, A armor, W weapons, R inn); red L marks a wall lever. People who walk around are shown where they start. Tap a map to open it full size.
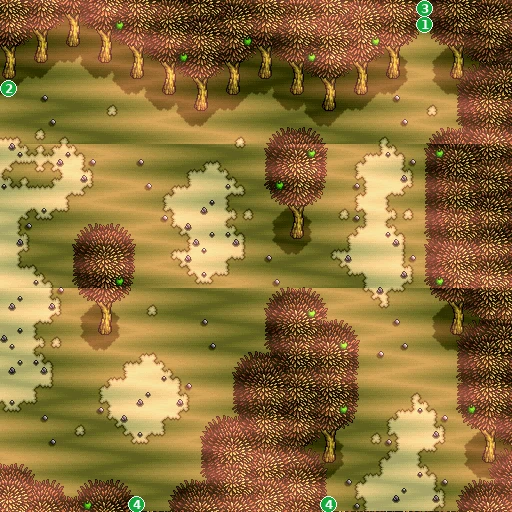
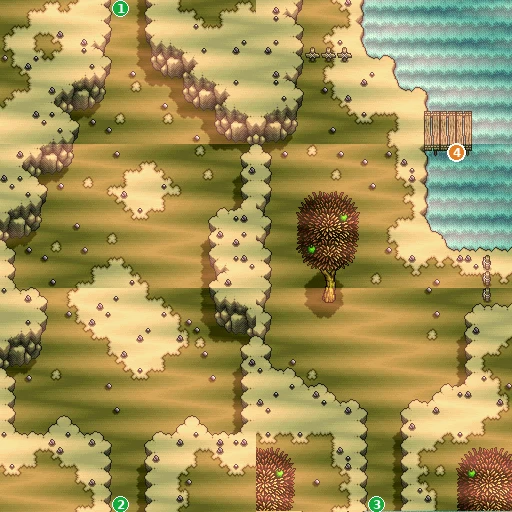
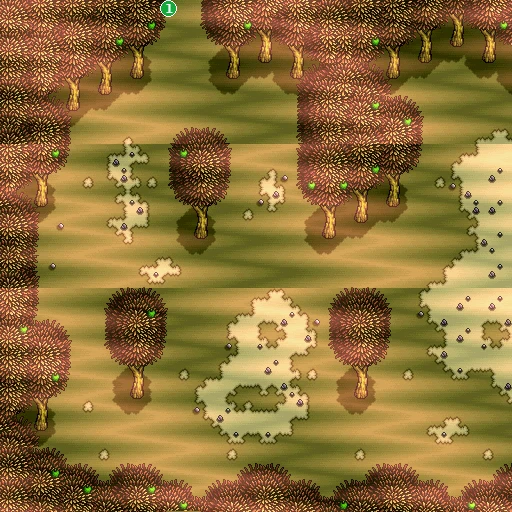
- 1Edge to Friedel field, road to Chamber's Fort map 82
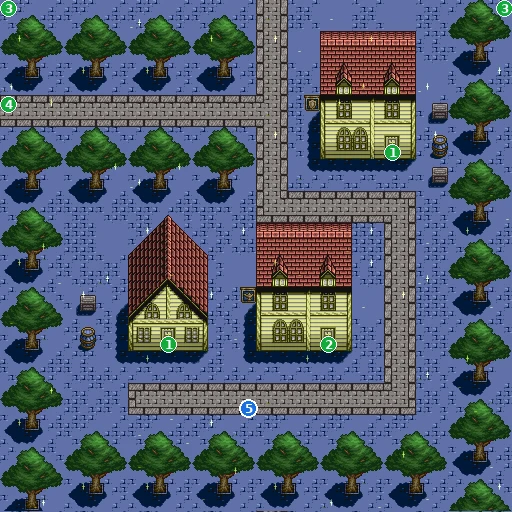
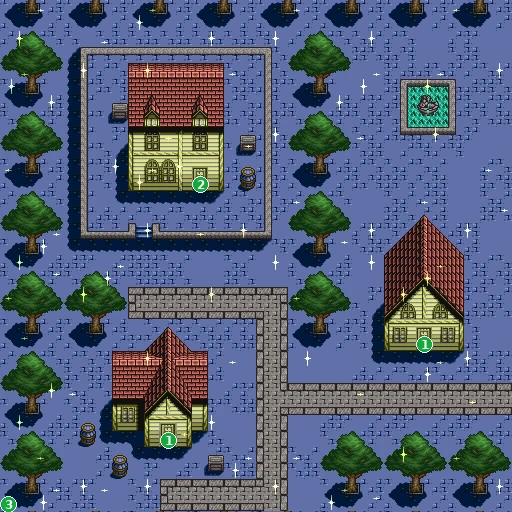
- 1Door to Mithril Town (map B5)
- 2Door to Mithril Town (map B4)
- 3Edge to Mithril Town: entrance map 90
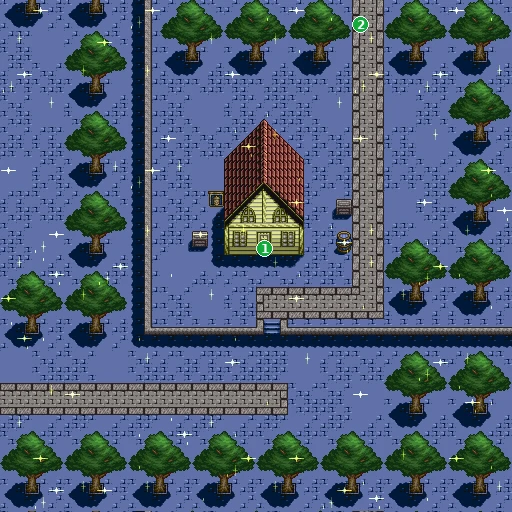
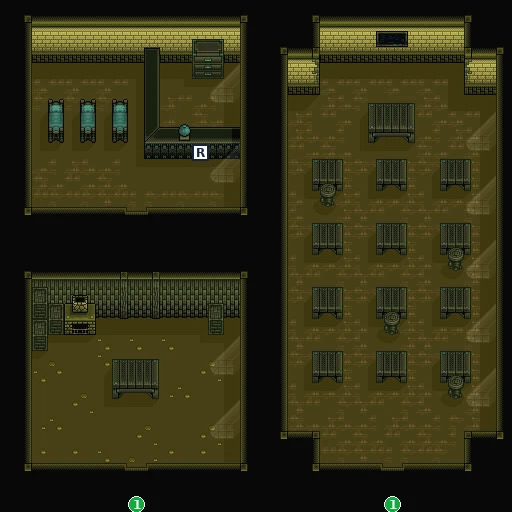
- RHotel Metal Wave: inn
- 1Edge to Mithril Town: north map 92
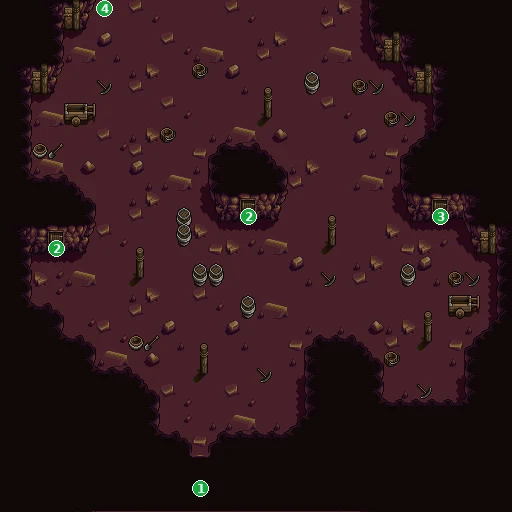
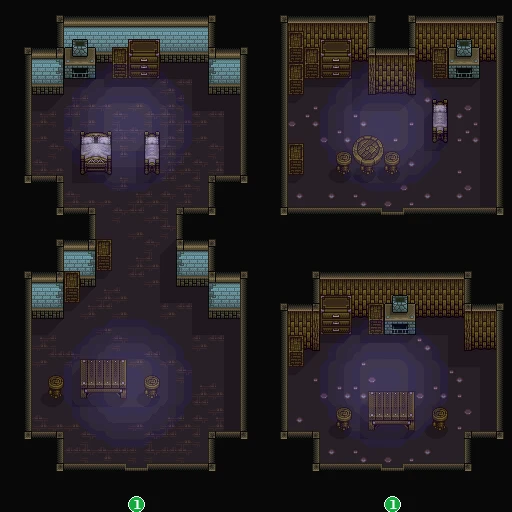
- 1Edge to Goblin Kingdom mine map 6D
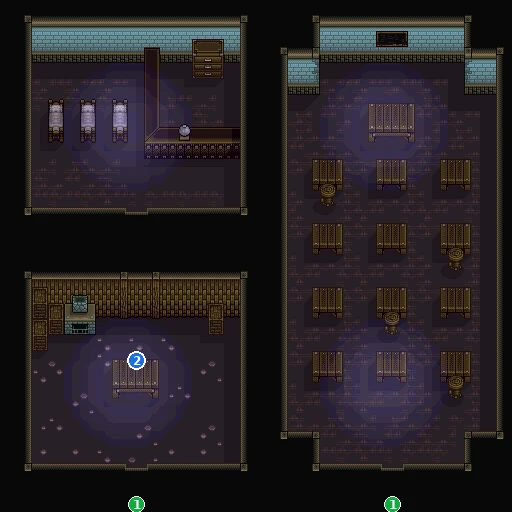
- 2Goblin — dares you to try the Goblem Shrine (talk to him first)
- 1Edge to Goblin Kingdom mine map 6D
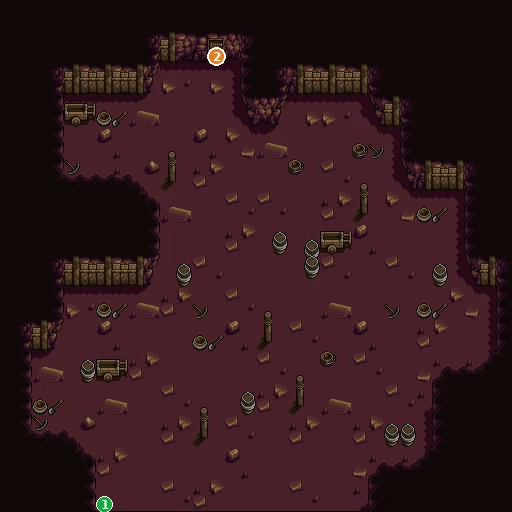
- 2Goblem Shrine — sealed until the goblin's dare
- 1Edge to Goblin Kingdom mine map 6D
A Black Shadow! Who Is That Knight!?
📍 Friedel · V-Jan Village
Galden, the Black Knight who nearly killed Sarutobi, is back, and Idoro serves him. Past Idoro's Curse, in the Friedel strongholds, Idoro admits he ran the Mage Hunt for Lord Galden and sets the undead Skull Whale on you; later you return here to save Paffy and face Galden himself. Somewhere in the Friedel desert, a hidden door leads to V-Jan Village.
You need: The Fire Orb (Ep. 5), equipped, to open the gate; Izumi and Sarutobi (joins in Rain Town, Ep. 11) in the party. The second visit needs Paffy's abduction (Ep. 10).
Walkthrough
- MainBring Sarutobi. He joins at Lazania's house in Rain Town, after Gesshin finds him badly wounded near Friedel Castle by Galden, the Black Knight, back from the dead (see Episode 11). He wants Galden for himself.
- MainGetting in: equip the Fire Orb (X > Status > pick a character > the Item slot (4th)) and walk north through the gate on map 77 of the Friedel field; it leads into the strongholds at map 74. Without it the gate is 'shut tight'. Inside, a seal at map D9 reads 'Idoro's Curse: A spell has been cast!' until Sarutobi has joined you in Rain Town (Ep. 11); it shows again after Galden is beaten. → checklist
- MainIdoro confronts you, with Izumi and Sarutobi at your side. He admits he controlled the Three Phantom Knights and Madora for Lord Galden, gathering the mages' magic until he could get the Spirit Stone. Now he has 'a splendid way' to get it, so he sets the Skull Whale on you. → checklist
- MainBeat the Skull Whale. Idoro calls it an undead soldier you can 'fight all you like', and he means it: step back onto the stronghold gate (map D9) and it attacks again, for training, until Paffy is rescued. → checklist
- MainReport to Principal Yudis at the Magic School. 'What, Idoro!?' He says they must rely on 'that stone's power' and sends you to consult the King of Pafuricia. At Pafuricia Castle (Ep. 10), though, the King is too worried about the missing Paffy to listen.
- SideA dwarf whispered that Friedel's desert hides the entrance to a mysterious village. From map 79 go east to 7C. Two cacti block the only path south: equip the Cactus Glove (Dwarf Kingdom, Ep. 4) on your party leader and press A to pick them up and toss them. Then go down to map EC: a door there leads into V-Jan Village (map EB, then the village maps 97–9A). → checklist
- TipV-Jan Village is packed with named fans: talking cats and dogs, kids who want a Ryu, would-be shopkeepers. No shop or inn script loads here, so none of them actually sell anything. Some of them address Paffy, so they have more to say once she travels with you.
- SideFind Ken Fukaki, the 'Sonic Game Designer', in house F9 (marked on the map). He offers you Powan Herb, Soesoe Herb or Tomioka Seed, then backs out: it'd 'wreck the game balance'. Ask for all three, then keep talking to him. Sooner or later he caves ('Take this, and give me a break!') and gives you an Ashiria Shield, or an Ashiria Gauntlet if you already own the shield. One piece only. → checklist
- MainSecond visit: after Idoro's trap takes Paffy from Pafuricia Castle (Ep. 10), Maria, Paffy's mother, tells you Idoro is in Friedel Castle. Go back in with Izumi and Sarutobi. → checklist
- MainPaffy refuses to hand Idoro the Spirit Stone, but Galden holds her hostage and demands it. Paffy seems to be under a spell. Idoro realizes the stone was in her rod all along, and Galden takes it. → checklist
- MainChallenge Galden. Sarutobi wants him for himself, but he gives way, looks after Paffy and tells you 'you'd better not lose!' Beat Galden one-on-one. → checklist
- MainIdoro calls on the Skull Whale again, but Izumi stands in his way, and Idoro flees, swearing revenge. Paffy is safe: take her home to Pafuricia Castle.
- MainReport to Principal Yudis. With Idoro still at large, he expects you'll have to fight again at the Grand Tournament and points you toward Whale's Valley. → checklist
- TipIf Katze joined you at North Hill (only possible once Paffy and Izumi travel with you), she says goodbye at the Magic School here and goes off to trade in Mithril Town (Ep. 9).
Checklist
- Where
- Friedel strongholds (map 73)
- How
- First visit, with Izumi and Sarutobi.
- Reward
- Idoro reveals he ran the Mage Hunt for Lord Galden and wants the Spirit Stone
- Opens
- first visit
- Where
- Friedel strongholds (map 73)
- How
- Idoro sends it at you on the first visit.
- Reward
- Way out of the strongholds; report to Principal Yudis
- Opens
- first visit
- Closes
- never (repeatable)
- Where
- Friedel field: door on map EC (reached from 7C)
- How
- Walk 79 → 7C → EC and take the door.
- Reward
- A hidden village full of fan cameos; Ken Fukaki's gift
- Opens
- Ep. 6
- Closes
- never
- Where
- V-Jan Village: house F9 (marked on the map)
- How
- Pick each of his three herbs once (he refuses each time), then keep talking.
- Reward
- One Ashiria Shield (DP 32), or the Ashiria Gauntlet (DP 28) if you already own the shield. Each guards against all four ailments.
- Opens
- Ep. 6
- Closes
- after one gift he only repeats his title
- Where
- Friedel strongholds (map 73), second visit
- How
- Story scene.
- Reward
- Galden gets the Spirit Stone from Paffy's rod
- Opens
- second visit
- Where
- Friedel strongholds (map 73), second visit
- How
- Challenge him after he seizes the Spirit Stone; Sarutobi stands aside.
- Reward
- Paffy freed; Idoro flees
- Opens
- second visit
- Closes
- never (story)
- Where
- Magic School
- How
- Visit Yudis after rescuing Paffy.
- Reward
- Hint: Idoro and Galden will likely enter the Grand Tournament; go to Whale's Valley
- Opens
- after the second visit
- Where
- Magic School, after Galden
- How
- Only if Katze joined you.
- Reward
- Katze leaves the party
- Opens
- Ep. 9: you can find her trading in Mithril Town
Treasure chests (7)
| Contents | Area | Where | |
|---|---|---|---|
| 10000 GG | Friedel stronghold 74 (10000 G, 7500 G; exit) | Map 74, chest A | |
| 7500 GG | Friedel stronghold 74 (10000 G, 7500 G; exit) | Map 74, chest B | |
| 2500 GG | Friedel stronghold DA (east exit of D9; 2500 GG) | Map DA, chest A | |
| 5000 GG | Friedel stronghold E0 (9000 G, 5000 G, 1000 G, Tomioka Seed) | Map E0, chest B | |
| 1000 GG | Friedel stronghold E0 (9000 G, 5000 G, 1000 G, Tomioka Seed) | Map E0, chest C | |
| 9000 GG | Friedel stronghold E0 (9000 G, 5000 G, 1000 G, Tomioka Seed) | Map E0, chest D | |
| Tomioka Seed | Friedel stronghold E0 (9000 G, 5000 G, 1000 G, Tomioka Seed) | Map E0, chest A |
Bosses
🗺️ Maps for this chapter (27)
Blue numbers mark people, orange numbers events and pickups, green numbers exits (doors, gateways and screen edges). Yellow letters A, B, C… are treasure chests; white squares are shop counters (I items, H herbs, A armor, W weapons, R inn); red L marks a wall lever. People who walk around are shown where they start. Tap a map to open it full size.
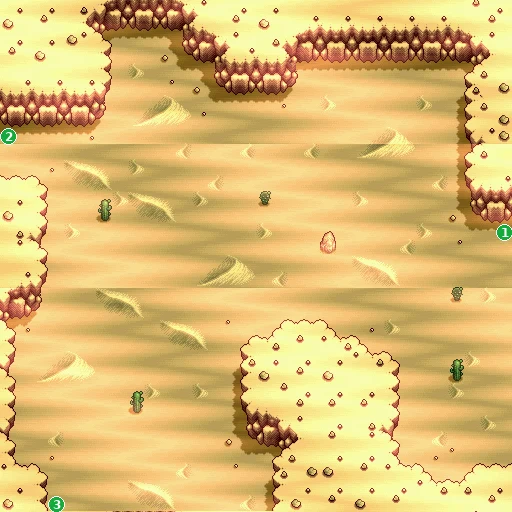
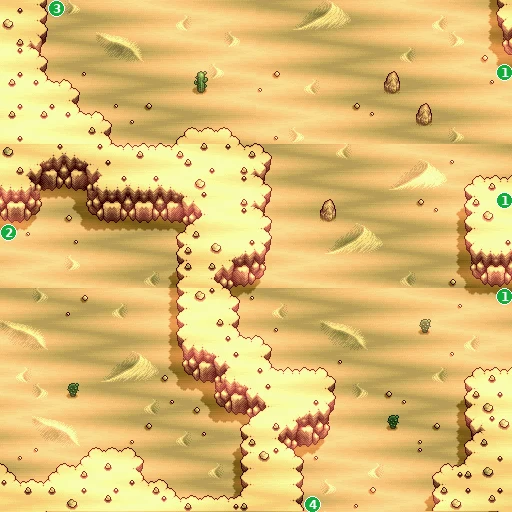
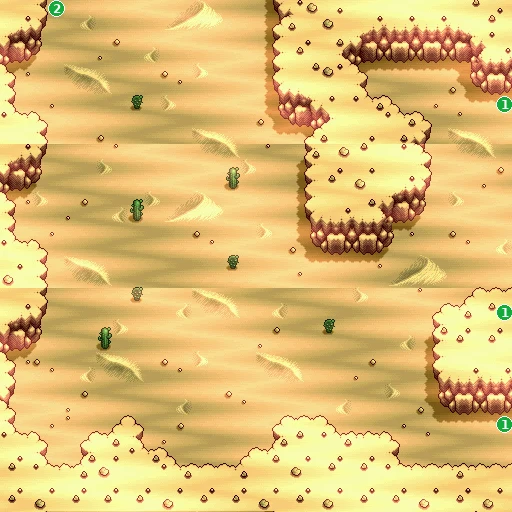
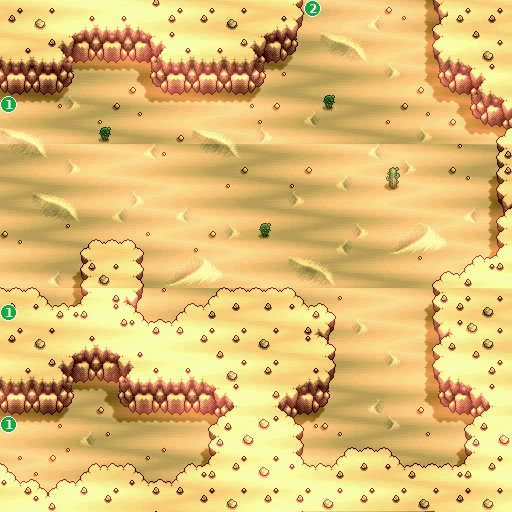
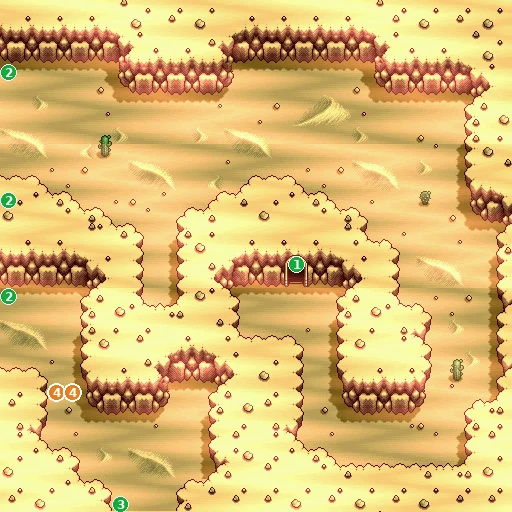
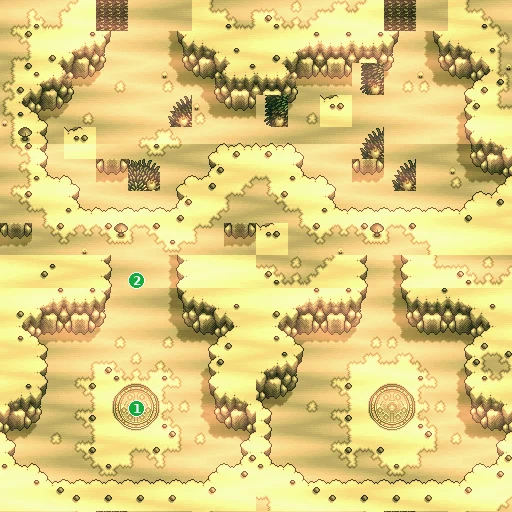
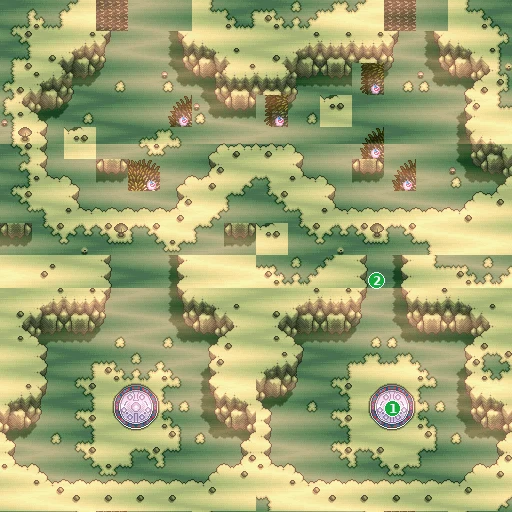
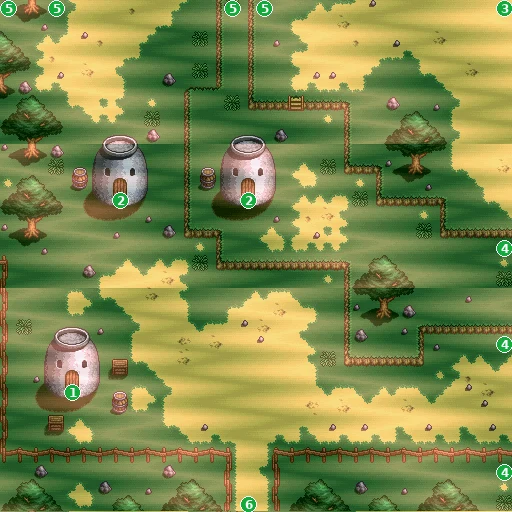
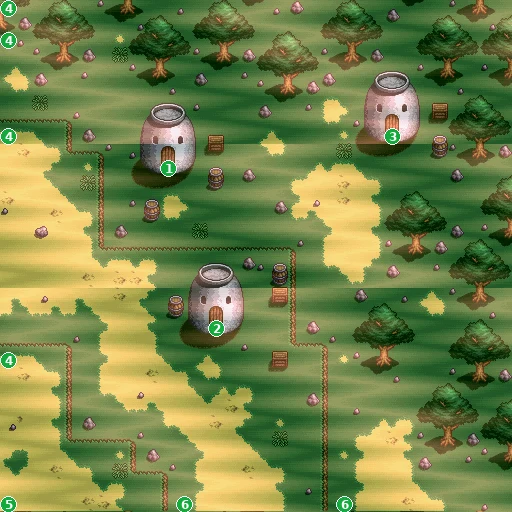
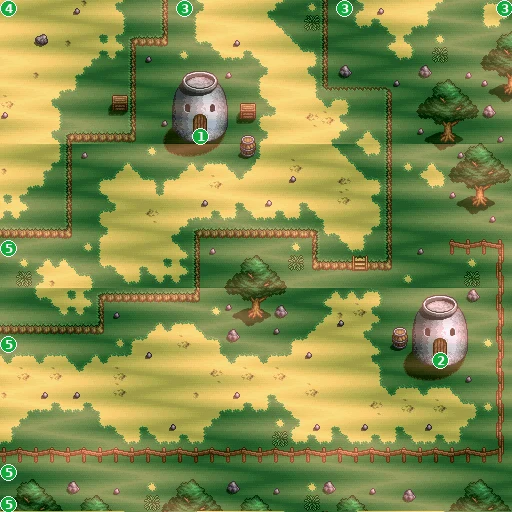
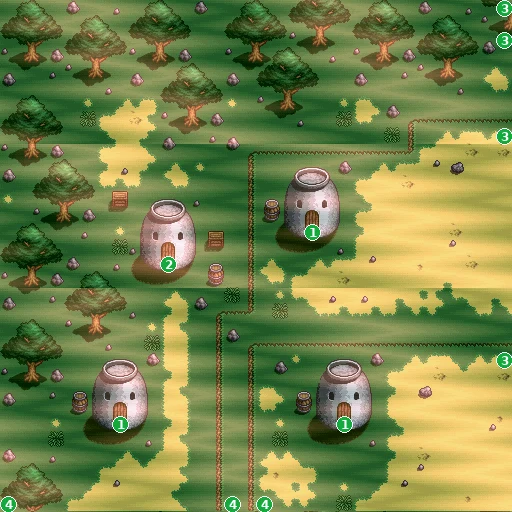
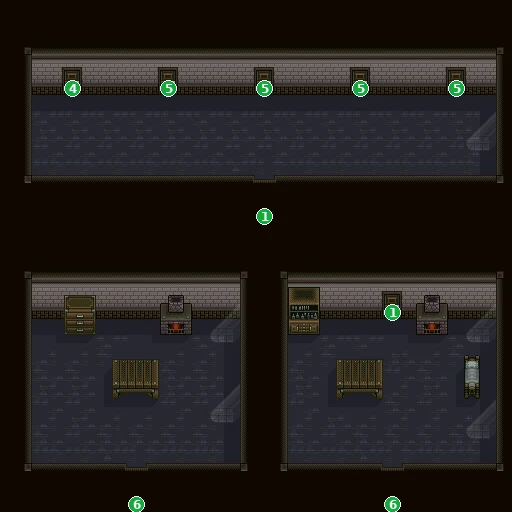
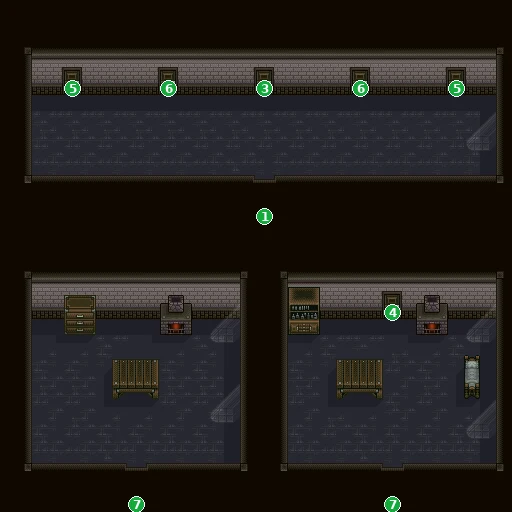
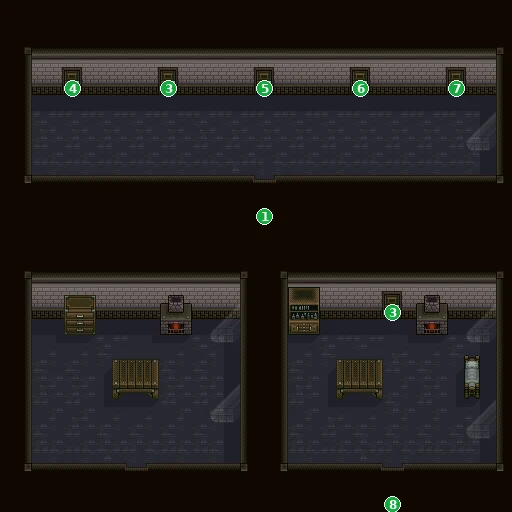
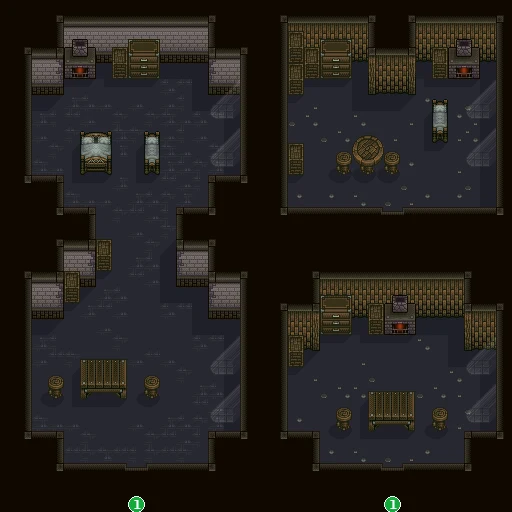
- 1Edge to V-Jan Village 99 map 99
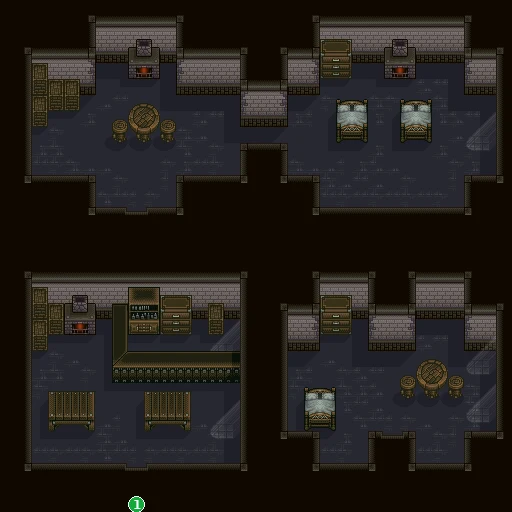
- 1Edge to V-Jan Village: house F5 map F5
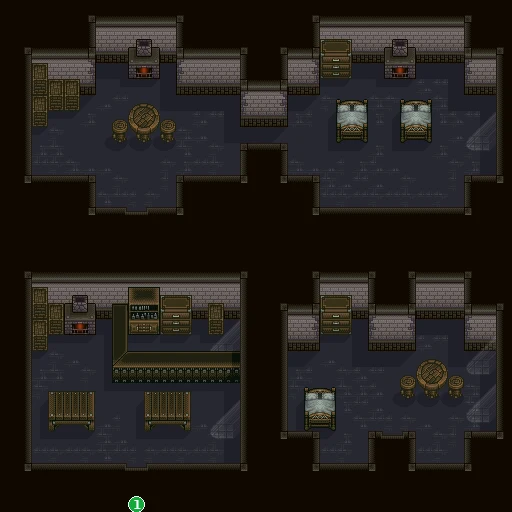
- 1Edge to V-Jan Village 9A map 9A
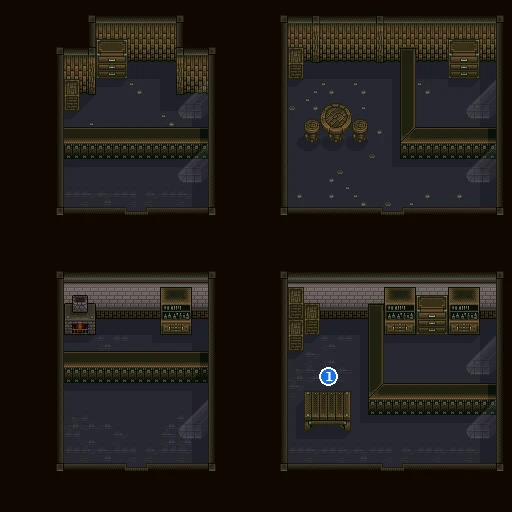
- 1Ken Fukaki — keep asking: Ashiria Shield or Gauntlet (walks around)
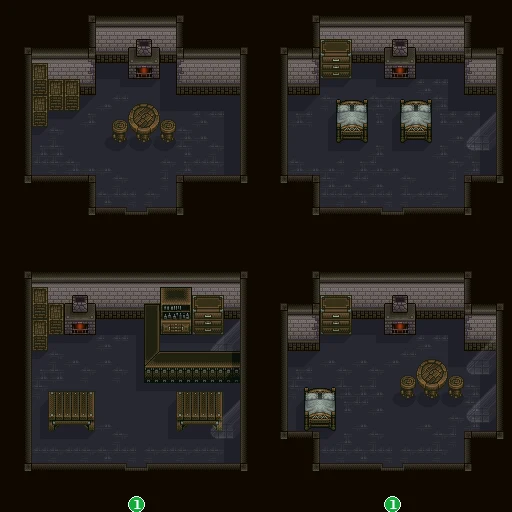
- 1Edge to V-Jan Village: house F5 map F5
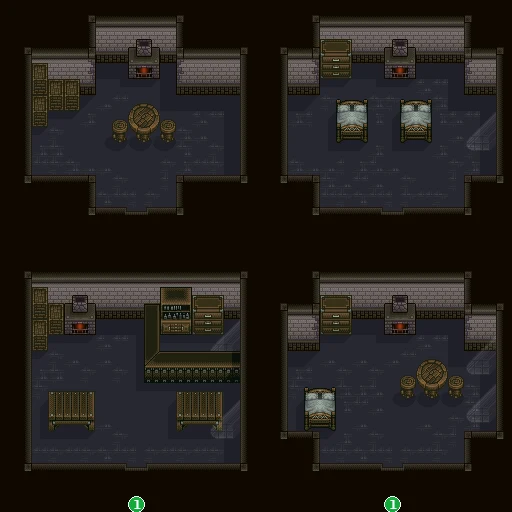
- 1Edge to V-Jan Village 97 map 97
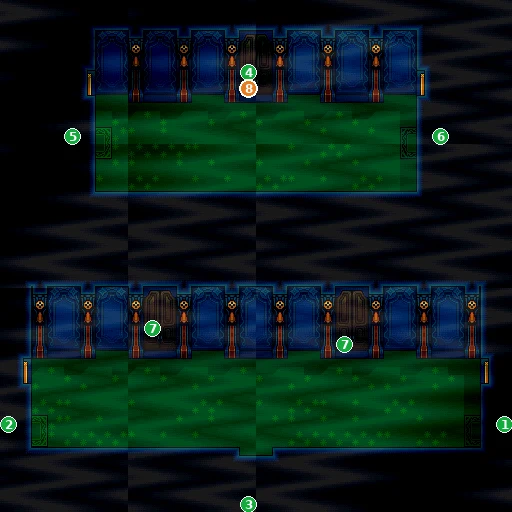
- 8Idoro's Curse — seal: passable once Sarutobi has joined
- 1Edge to Friedel stronghold E0 (9000 G, 5000 G, 1000 G, Tomioka Seed) map E0
- 2Edge to Friedel stronghold F0 map F0
- 3Edge to Friedel stronghold 74 (10000 G, 7500 G; exit) map 74
- 4Exit to Friedel stronghold 73 (Idoro, Skull Whale, Galden) map 73
- 5Exit to Friedel stronghold F0 map F0
- 6Exit to Friedel stronghold DA (east exit of D9; 2500 GG) map DA
- 7Exit to Friedel stronghold E0 (9000 G, 5000 G, 1000 G, Tomioka Seed) map E0
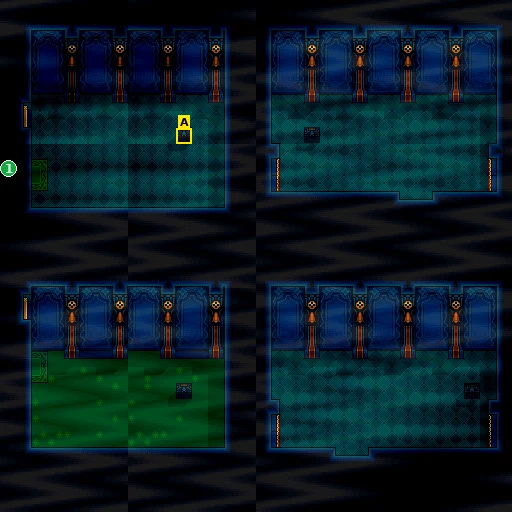
- A 2500 GG
- 1Edge to Friedel stronghold D9 (arrival from Chamber's Fort) map D9
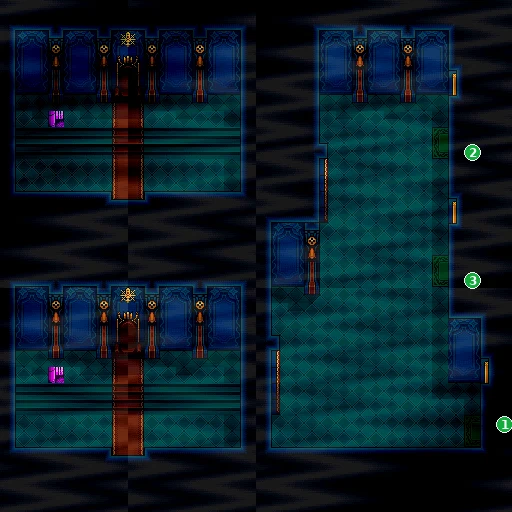
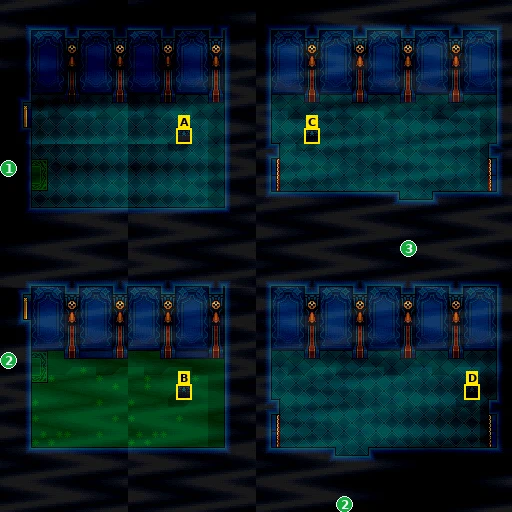
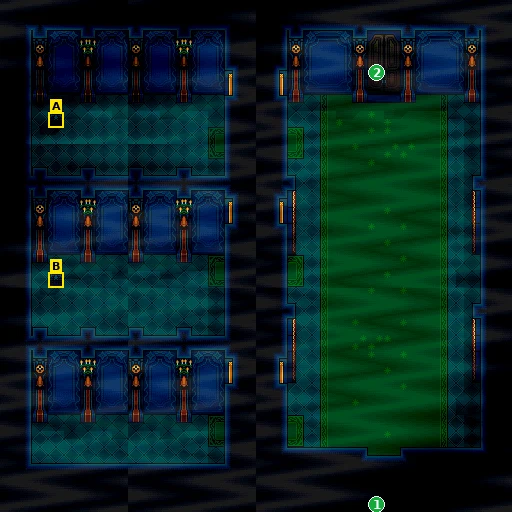
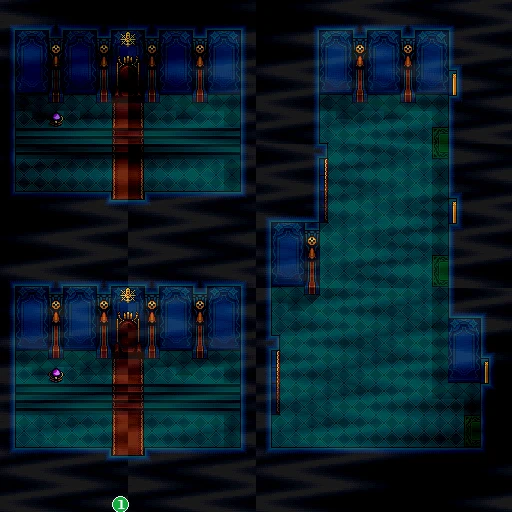
- 1Edge to Friedel stronghold D9 (arrival from Chamber's Fort) map D9
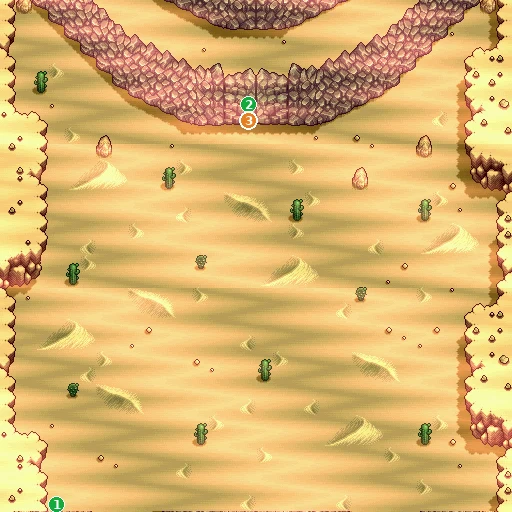
Forest Kingdom! A Stolen Princess!?
📍 Border Fort · Kingdom of Pafuricia · Pafuricia Town · Pafuricia Castle
Pafuricia is a green forest kingdom reached through Border Fort. You arrive to find the castle in an uproar: Princess Paffy has been missing for days. Once she is home, Idoro strikes the castle and carries her off, and Queen Maria finally reveals the secret of the Spirit Stone set in Paffy's rod.
You need: The Lantern for Border Fort (Dos in Westguns sells it for 1000 G). The later scenes here need Paffy found in Rafflesil (Ep. 7) and, for the ending of this episode, her rescue at Friedel Castle (Ep. 6).
⏳ Last chances in this chapter
- Holy Tempest and Ninto Blade (Dradd) details
Full list across the game: Missables.
Walkthrough
- TipBorder Fort stands between the Kingdom of Pafuricia field and the fort's inner halls. Mithril Town folk warn you about its door traps and tell you to bring a Lantern ('A handy tool for dark places'). Equip it: in the Item slot of Adeu or Sarutobi it lights the fort's dark halls. The maps in this guide show them lit. → checklist
- MainGetting in: the fort's only entrance is its front yard (map AF), reached from the Kingdom of Pafuricia field (map 8E). From the west part of 8E (coming from 89), step on the hop tile by the fence (cell 6,21) to jump over it, then leave 8E by its north edge. Either gate of AF leads into the fort (map 50).
- TipBring the Spring and equip it (X > Status > Item slot): Jump Mats just inside the fort's gates (map 50; more on 51 and 76) are the only way on, and they launch you over the walls only while someone has the Spring equipped. Without it you're stuck in the small yard behind the gates. Some spots in the fort are too cramped for Zephyr.
- SideThe Fern Seed, the only cure for Poison Mud Apple poisoning, is in a hidden chest on map 76. Examine the lever in the alcove of the upper-right room (L1 on the map) and chest D appears in the upper-left room. → checklist
- SideBorder Fort is a money run: 12000 GG in chest C on map 76, 4500, 3000 and 2000 GG on map 51, plus 2500 GG and a Soesoe Herb on map 3E. The biggest prize is hidden: examine the lever in the lower hall just below chest C (L2 on map 76) and chest E, with 99990 GG, appears in the upper-left room. → checklist
- MainFrom the fort grounds (8E) head west into the Kingdom of Pafuricia (89, chest A: 4000 GG), then south and east through 8A, 8B and 8C to Pafuricia Town. Choosing the Kingdom of Pafuricia on the world map drops you on 8A.
- MainGuards block the road to the castle: there's been trouble and nobody gets through. Talk to the mayor in town. He recognizes you as Adeu and tells you to hurry to the castle; after that the guard lets you pass. → checklist
- TipPafuricia Town's one shop is Dradd's Weapon Shop (map B8). Save your sword's last upgrade for him: at level 51 he tempers the Great Sword into the Holy Tempest (any other smith makes it a Mithril Sword, and that step can't be repeated), and Sarutobi's Mithril Shuriken into the Ninto Blade. → checklist
- MainGo north through the castle grounds (B0) into Pafuricia Castle. Steward Mayer tells you Paffy hasn't been seen for several days, the King blames Mayer, and Maria wonders where she could have gone. Adeu agrees to split up and search. → checklist
- TipIf you've already met Idoro at Friedel Castle (Ep. 6), you can try to warn the King and Mayer about him and the Spirit Stone, but neither can think of anything except the missing princess.
- MainAsk the mayor again: someone who looked like Lady Paffy was seen with some beast-like folk. That points you to the beasts' town past Rafflesil Cave (Ep. 7).
- MainWith Paffy back home, King and Maria welcome her, and Adeu asks to use the castle's Warp Gate to Whale's Valley. The King agrees, as long as you don't whine. The guard by that door turns everyone away without the King's permission. → checklist
- MainTell Mayer and the royal couple about Idoro and the Spirit Stone. The King hesitates, Paffy wants to act, and Maria decides to wait for Idoro's next move rather than play into his hands.
- MainIdoro makes his move on the Kingdom of Pafuricia field (map 8A): Mayer panics, Maria rallies the guards, and in the confusion it turns out to be a trap. Paffy is carried off before Adeu's eyes and leaves the party. → checklist
- MainBack in the great hall, Maria tells you everything: Paffy's rod holds the Spirit Stone, which unlocks the true power of the Ryu, machines the Lemuriad civilization built to fight the Evil Dragon Clan of Chaostia. Adeu, Sarutobi and Izumi swear to save her. → checklist
- MainMaria tells you Idoro is in Friedel Castle; Mayer and the King beg you to hurry before Idoro gets the Spirit Stone. The rescue itself is in Ep. 6.
- MainBring Paffy home. Mayer is relieved, and the King asks you to keep protecting her; Paffy promises not to go off alone again. You can now take the Warp Gate in the great hall to Whale's Valley (Ep. 12). → checklist
- TipCastle guards drop hints for later: entrants for the Grand Tournament are flocking to Flying Whale Castle, which is in Whale's Valley, and you can reach Whale's Valley from this castle.
Checklist
- Where
- Westguns: Dos
- How
- Earlier episodes: Shanis lost it to the Onion Town thieves, Dos ends up with it and sells it with no discount.
- Reward
- Lantern ("A handy tool for dark places")
- Opens
- Border Fort: its rooms are dark without it (Ep. 10)
- Closes
- never
- Where
- Border Fort, map 76, hidden chest D
- How
- Examine the lever in the alcove of the upper-right room (L1); the chest appears in the upper-left room. Then stand on it and press A.
- Reward
- Fern Seed (cures Poison Mud Apple poisoning)
- Opens
- a cure for Adeu if a Poison Mud Apple hits him (a Fern Herb won't work)
- Closes
- never
- Where
- Border Fort, maps 3E, 51, 76, BA
- How
- Open the chests shown on the maps. Chest E on map 76 only appears after you examine lever L2, just below chest C.
- Reward
- 31400 GG in the normal chests (largest: 12000 GG, map 76 chest C) plus a Soesoe Herb, and 99990 GG in hidden chest E on map 76
- Opens
- Ep. 10
- Closes
- never
- Where
- Pafuricia Town
- How
- Talk to the mayor while the guards are blocking the castle road.
- Reward
- The guards let you through to the castle
- Opens
- Pafuricia Castle
- Closes
- never
- Where
- Pafuricia Castle
- How
- Talk to Mayer, then the mayor in town for a lead.
- Reward
- Lead: Paffy was seen with beast-like folk
- Opens
- Rafflesil and the beasts' town (Ep. 7)
- Closes
- when Paffy is found
- Where
- Pafuricia Castle, King of Pafuricia
- How
- Bring Paffy home safely; Adeu and Paffy ask the King.
- Reward
- Access to the Warp Gate door in the great hall (map AB), which leads to Whale's Valley
- Opens
- Whale's Valley (Ep. 12)
- Closes
- never
- Where
- Kingdom of Pafuricia field (map 8A), then the great hall
- How
- Story: after Paffy comes home and you report Idoro, the castle is attacked.
- Reward
- Maria's explanation of the Spirit Stone, the Ryu and the Evil Dragon Clan
- Opens
- Friedel Castle rescue (Ep. 6)
- Closes
- Paffy is out of the party until you rescue her
- Where
- Pafuricia Castle
- How
- Rescue Paffy at Friedel Castle and return.
- Reward
- The King entrusts Paffy to you; she travels with the party
- Opens
- Whale's Valley trip with the full party (Ep. 12)
- Closes
- never
- Where
- Pafuricia Town (map B8)
- How
- Talk to Dradd at the counter.
- Reward
- Hono Smash 10000 G, Hyun Smash 15000 G, Kira Smash 20000 G; Flame Art 10000 G, Blaze Art 15000 G, Flying Dragon Art 20000 G. Weapon tempering (100 G).
- Closes
- never
- Where
- Pafuricia Town: Dradd's Weapon Shop
- How
- Party leader at level 51 or higher, wearing the Great Sword (Adeu) or Mithril Shuriken (Sarutobi): choose Temper weapons! (100 G).
- Reward
- Holy Tempest (from the Great Sword), Ninto Blade (from the Mithril Shuriken)
- Closes
- as soon as another smith does the level-51 step (it gives the Mithril Sword / Mithril Ninjato, and no smith upgrades those)
Treasure chests (16)
| Contents | Area | Where | |
|---|---|---|---|
| Soesoe Herb | Border Fort: central hall | Map 3E, chest A | |
| 2500 GG | Border Fort: central hall | Map 3E, chest B | |
| 400 GG | Border Fort: central hall | Map 3E, chest C | |
| 4500 GG | Border Fort: east wing | Map 51, chest A | |
| 2000 GG | Border Fort: east wing | Map 51, chest B | |
| 3000 GG | Border Fort: east wing | Map 51, chest C | |
| 1500 GG | Border Fort: hall with the two hidden chests (levers) | Map 76, chest A | |
| 4000 GG | Border Fort: hall with the two hidden chests (levers) | Map 76, chest B | |
| 12000 GG | Border Fort: hall with the two hidden chests (levers) | Map 76, chest C | |
| Fern Seed | Border Fort: hall with the two hidden chests (levers) | Map 76, chest D Hidden: Examine lever L1 in the alcove of the upper-right room (cells 20-21, 8-9); the chest appears in the upper-left room. | |
| 99990 GG | Border Fort: hall with the two hidden chests (levers) | Map 76, chest E Hidden: Examine lever L2 in the lower hall, just below chest C (cells 18-19, 24-25); the chest appears in the upper-left room. | |
| 4000 GG | Kingdom of Pafuricia | Map 89, chest A | |
| 2500 GG | Kingdom of Pafuricia (world-map arrival) | Map 8A, chest A | |
| Sour Fruit | Kingdom of Pafuricia (world-map arrival) | Map 8A, chest B | |
| 3500 GG | Pafuricia Castle | Map AC, chest A | |
| 1500 GG | Border Fort: north wing | Map BA, chest A |
🗺️ Maps for this chapter (18)
Blue numbers mark people, orange numbers events and pickups, green numbers exits (doors, gateways and screen edges). Yellow letters A, B, C… are treasure chests; white squares are shop counters (I items, H herbs, A armor, W weapons, R inn); red L marks a wall lever. People who walk around are shown where they start. Tap a map to open it full size.
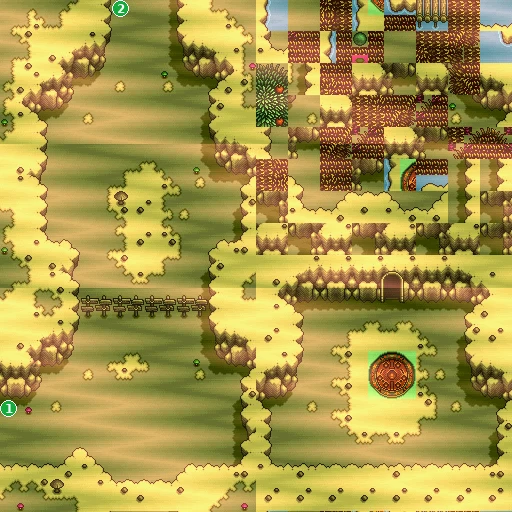
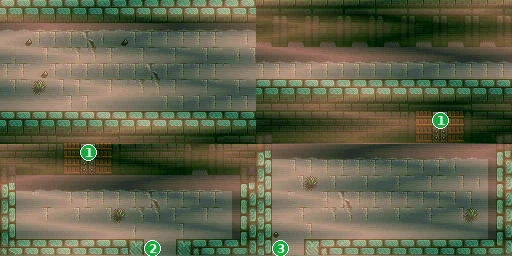
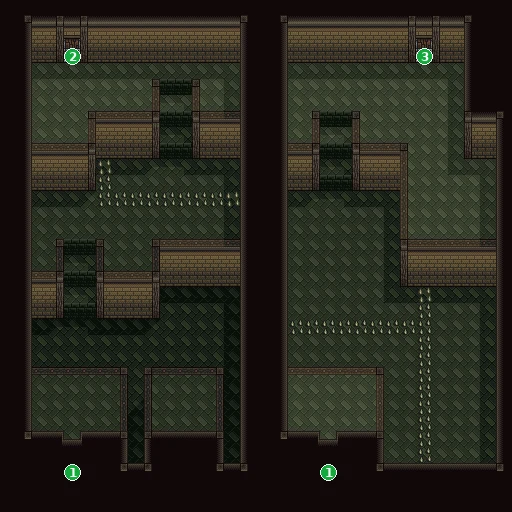
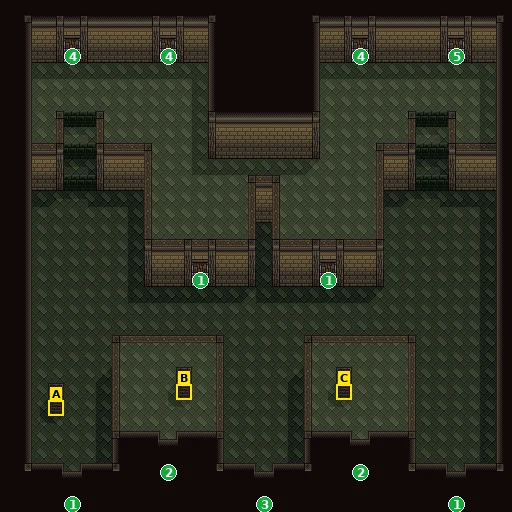
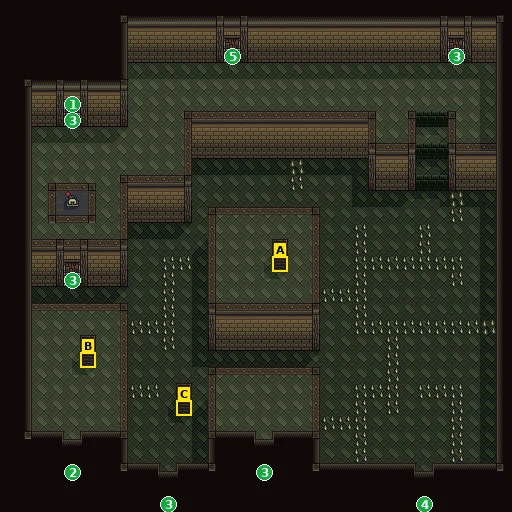
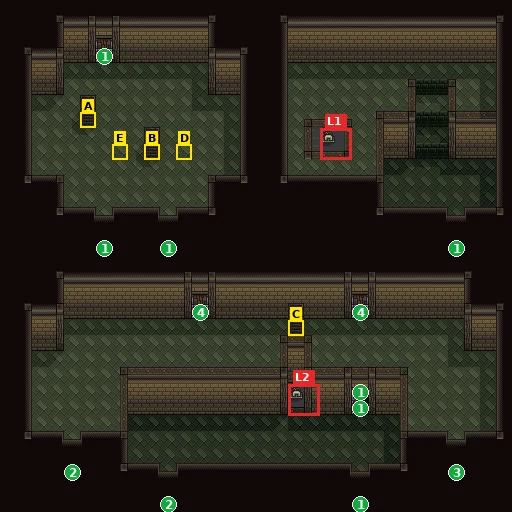
- A 1500 GG
- B 4000 GG
- C 12000 GG
- D Fern Seed (hidden: appears after lever L1)
- E 99990 GG (hidden: appears after lever L2)
- L1Wall lever: examine it (A) to make chest D (Fern Seed) appear
- L2Wall lever: examine it (A) to make chest E (99990 GG) appear
- 1Door to Border Fort: hall with the two hidden chests (levers) map 76
- 2Door to Border Fort: north wing map BA
- 3Door to Border Fort: east wing map 51
- 4Door to Border Fort: central hall map 3E
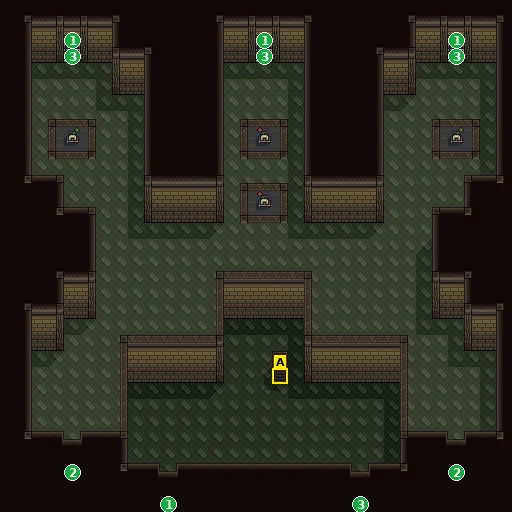
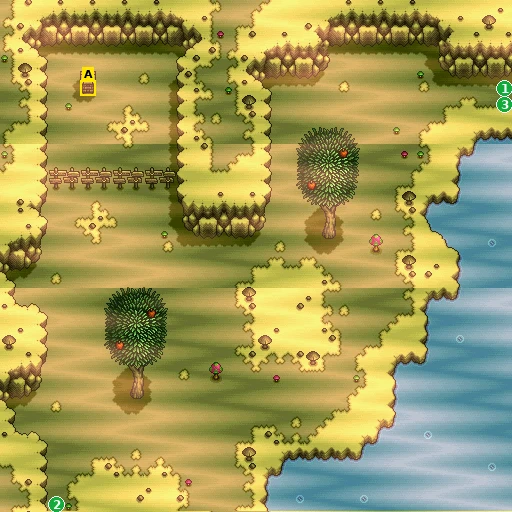
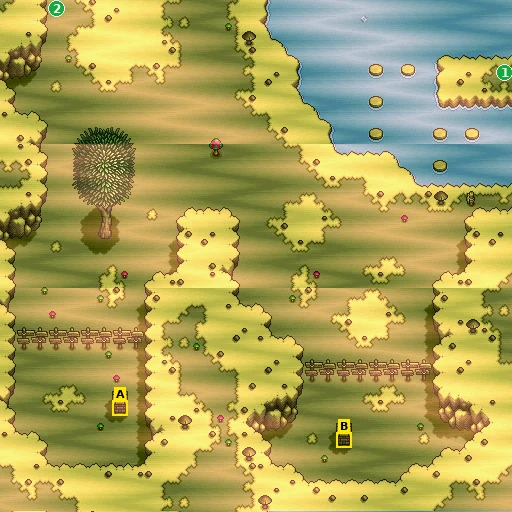
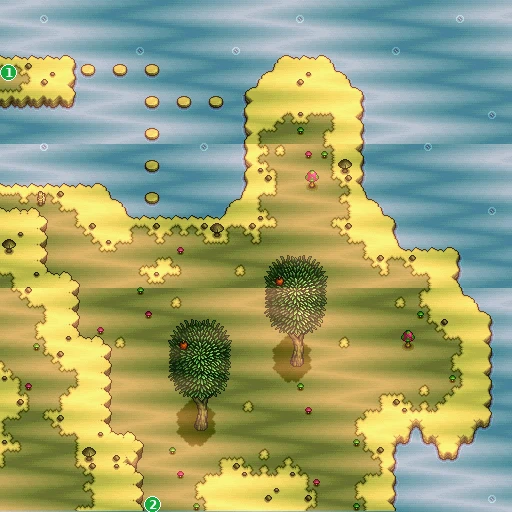
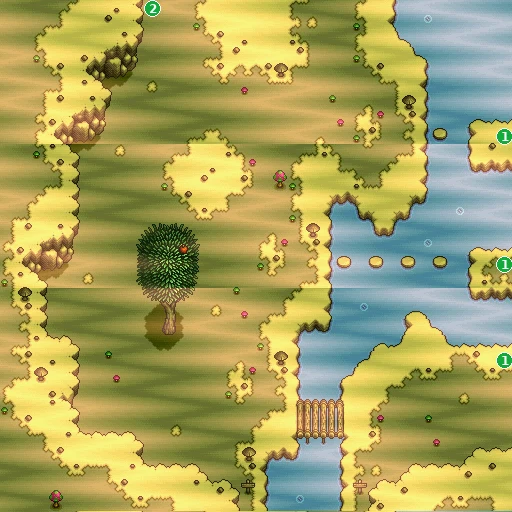
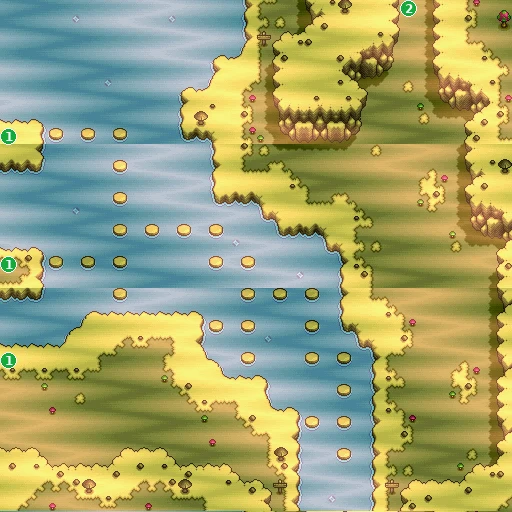
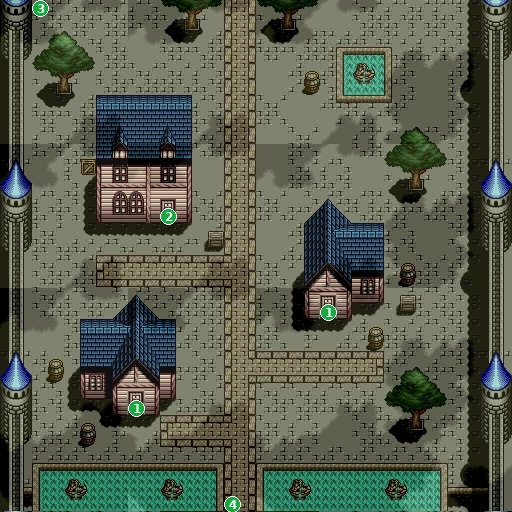
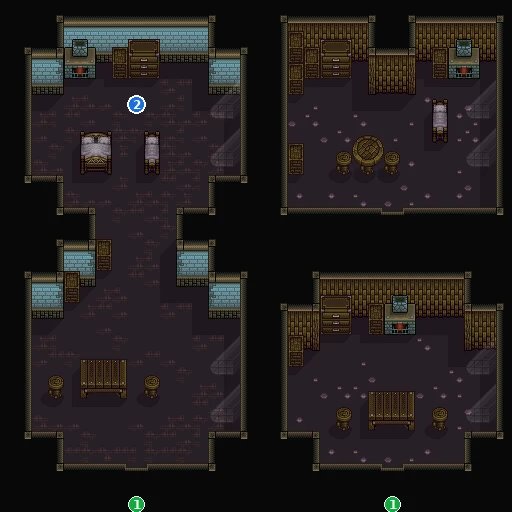
- 2Mayor — sends you on to the castle (walks around)
- 1Edge to Pafuricia Town map B1
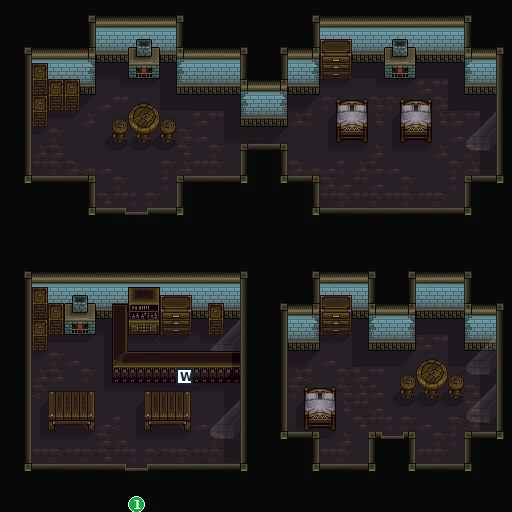
- WDradd's Weapon Shop: smith: temper
- 1Edge to Pafuricia Town map B1
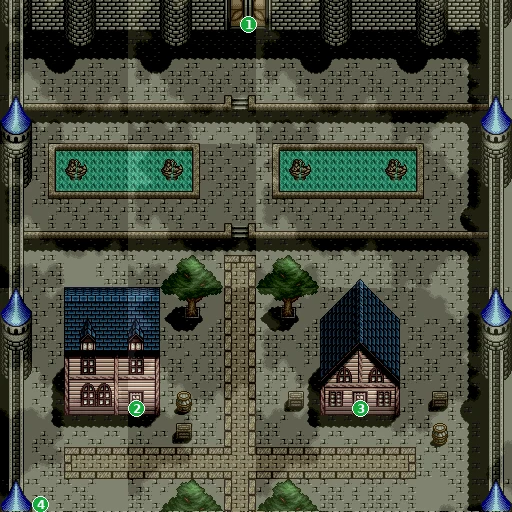
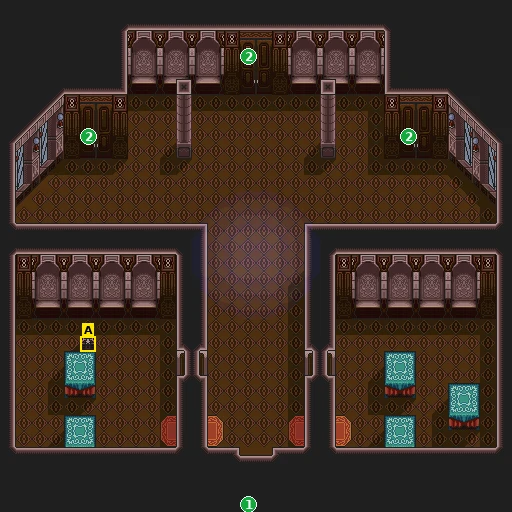
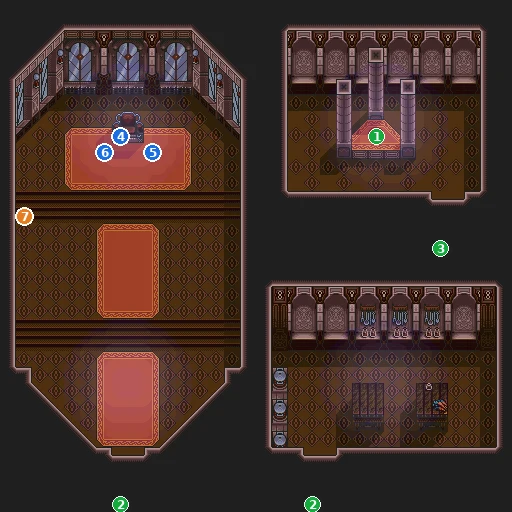
Brrr! Rafflesil, Land of Snow and Ice!
📍 Rafflesil Cave · Ice Town
Princess Paffy has been missing from Pafuricia Castle for days, and rumor says she was seen with beast-like folk. Cross Rafflesil Cave to Ice Town, a snowbound town of beasts who are afraid of humans. Win them over with a Banana to get their Aqualung, find Paffy, and take her home, where the King grants you the Warp Gate.
You need: A Banana from map 35 (it appears only after the Fire Orb, Chamber's Fort's water trap and the Mithril Ring), equipped when you give it.
Walkthrough
- TipBefore you go: Paffy has been missing from Pafuricia Castle for days, and Pafuricia Town's mayor heard someone like her was seen with beast-like folk. In Friedel Town a boy swears there's a 'town of monkeys', and an old woman saw monkey-like beasts playing with an Aqualung.
- TipBring the Banana from the river on map 35 (it appears there after the Fire Orb, Chamber's Fort's water trap and the Mithril Ring; see Ep. 4). A dwarf even tells you that beasties love Bananas. It's what wins you the Aqualung here. → checklist
- MainWork your way through the cave to Ice Town: 9D, 9E, 9F, A0, then A1. The door on A1 opens onto Ice Town (map 7E). There are no chests in the cave.
- MainIce Town belongs to the beasts ('Here our town. Humans not wanted.'). Most of them are scared of you and ask if you've come to take their friends away. Talk to everyone anyway. One admits they have an Aqualung, but says they hate humans.
- MainFind the starving beast who says it will do anything you say if you give it something to eat. With the Banana equipped (X > Status > Item slot), Adeu offers it and asks for an Aqualung. The beast promises to talk its friends into handing one over. → checklist
- MainTalk to the beasts again. Word has spread that you gave their friend a Banana, and they give you the Aqualung (item text: 'Amazing! You won't drown!'). You'll need it for Purple Town at the bottom of the lake (Episode 8). Equip it before you dive (X > Status > pick a character > the Item slot (4th)). → checklist
- MainFind Paffy in Ice Town. She got hurt on her training journey, and the beasts nursed her back to health. Adeu tells her everyone at Pafuricia Castle is worried sick, and she agrees to go home with him. Paffy joins you. → checklist
- SideA beast tries to stop you taking 'that friend': humans take everything. Paffy promises to come back and visit, and the beast asks her to bring a Banana as a present next time.
- TipOnce you've helped them, the beasts warm up ('Humans… not all bad'). Their inn still won't take a human: 'Hate humans! Won't let you stay!!'
- TipSnow Shoes ('Walk on ice and snow, no slipping!') come from Chamber's Fort (Episode 9), right after its water trap. Equipped, they stop you sliding on the ice in Ice Town, the last room of Rafflesil Cave and parts of Chamber's Fort. The ice never blocks a path, so they're a comfort, not a must.
- MainTake Paffy home. The reunion plays when you walk into the throne room of Pafuricia Castle (map AB) with her: the King and Maria are overjoyed, Adeu asks to use the Warp Gate to Whale's Valley, Paffy backs him up, and the King agrees, as long as there's no whining. → checklist
- TipThat permission matters: without it, the guard at the castle's Warp Gate says 'You need the King's permission.' Whale's Valley comes later (Episode 12).
- TipKeep Paffy in mind for later. The Elf Village chief only explains his trouble once Paffy, Izumi and Sarutobi are with you, and Katze's second offer to join also comes when Paffy and Izumi are in the party.
Checklist
- Where
- Ice Town
- How
- Find her among the beasts and talk to her. She was hurt on her training journey and the beasts looked after her.
- Reward
- Paffy joins the party
- Opens
- The reunion at Pafuricia Castle and the Warp Gate permission
- Closes
- Never here. She is taken from the castle later and rescued at Friedel Castle.
- Where
- Ice Town
- How
- Give the starving beast a Banana, then talk to the beasts again.
- Reward
- Aqualung ('Amazing! You won't drown!')
- Opens
- Purple Town, at the bottom of the lake (Episode 8)
- Closes
- never
- Where
- Gigamazon River (earlier episode)
- How
- Adeu picks it up there and decides to feed it to a beast.
- Reward
- Banana
- Opens
- The Aqualung trade in Ice Town
- Closes
- Used up in the trade
- Where
- Pafuricia Castle (reunion scene)
- How
- Bring Paffy home safely. Adeu and Paffy ask the King together.
- Reward
- Permission to use the castle's Warp Gate to Whale's Valley
- Opens
- Whale's Valley (Episode 12)
- Closes
- never
🗺️ Maps for this chapter (11)
Blue numbers mark people, orange numbers events and pickups, green numbers exits (doors, gateways and screen edges). Yellow letters A, B, C… are treasure chests; white squares are shop counters (I items, H herbs, A armor, W weapons, R inn); red L marks a wall lever. People who walk around are shown where they start. Tap a map to open it full size.
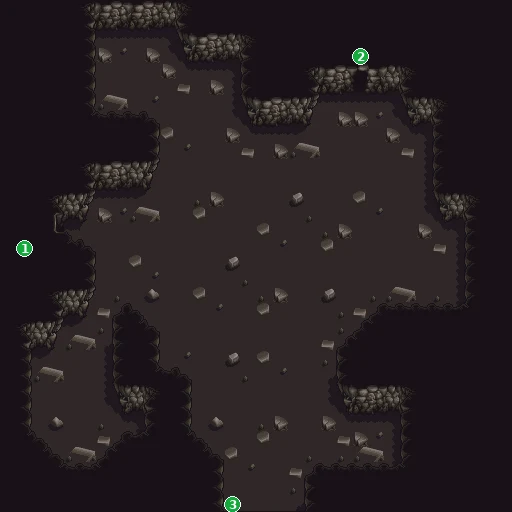
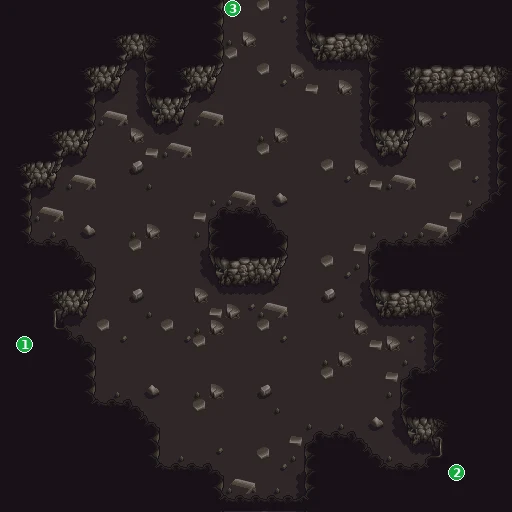
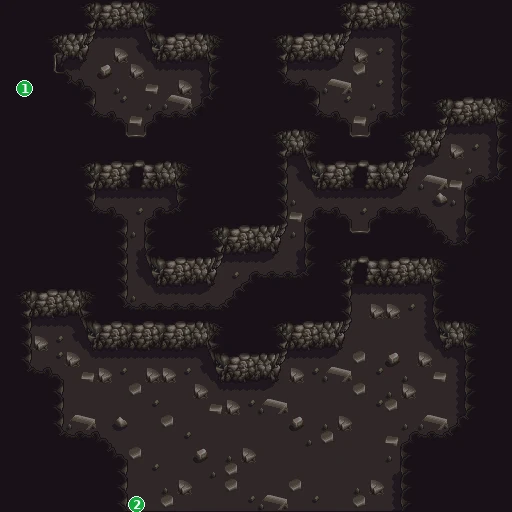
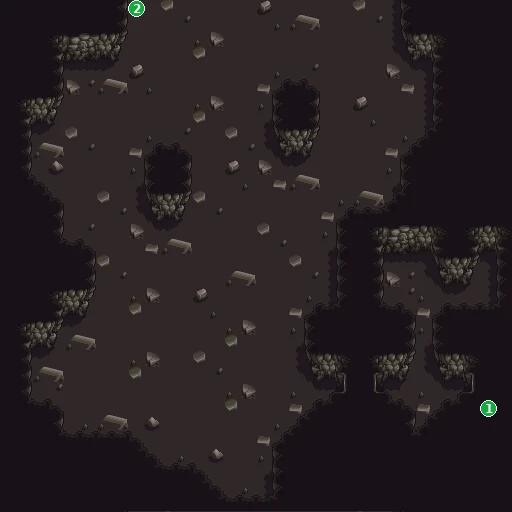
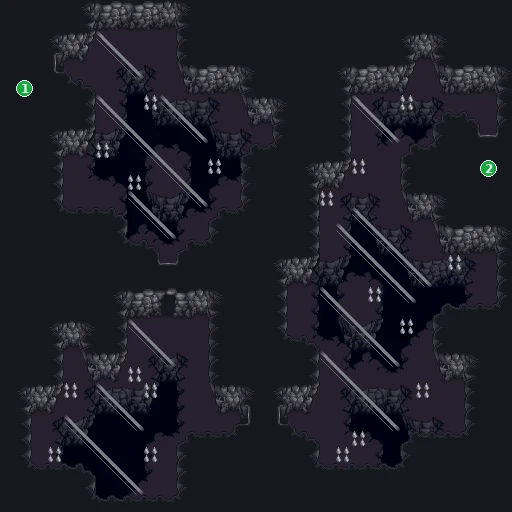
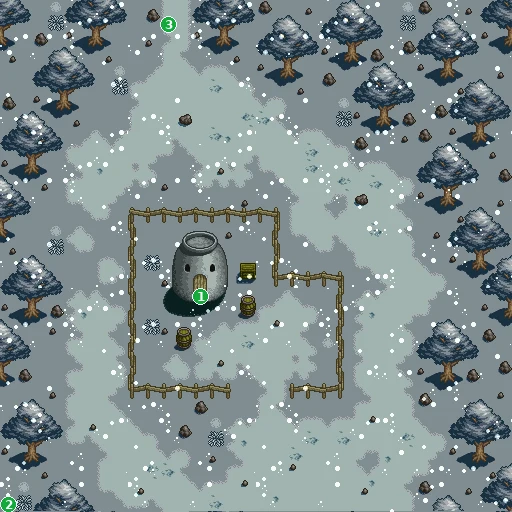
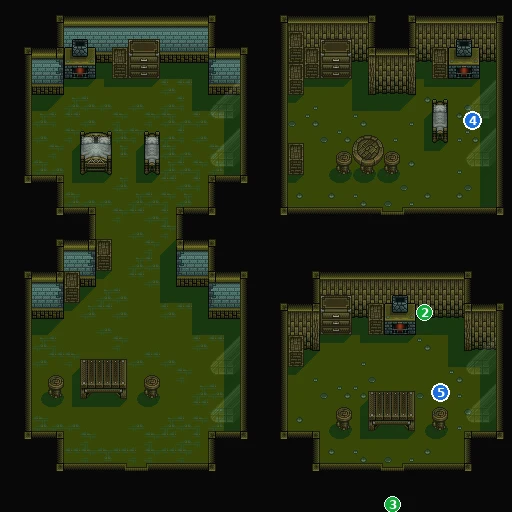
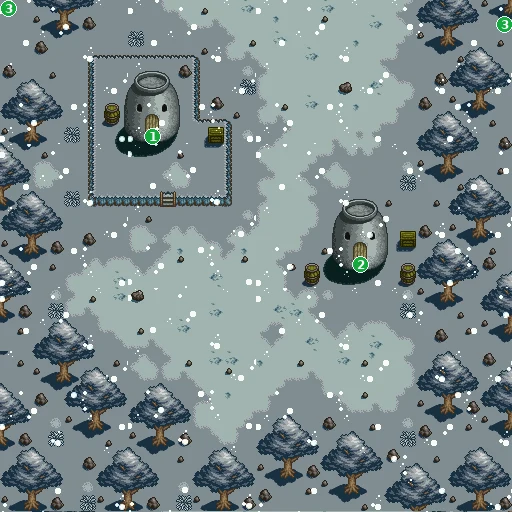
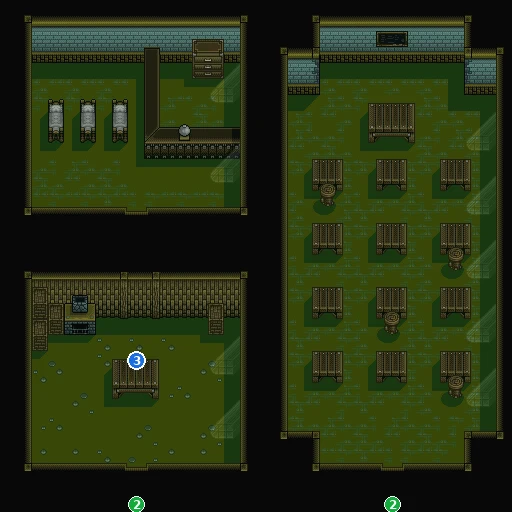
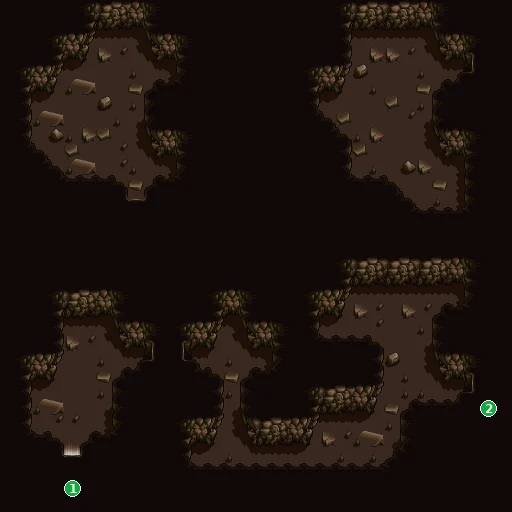
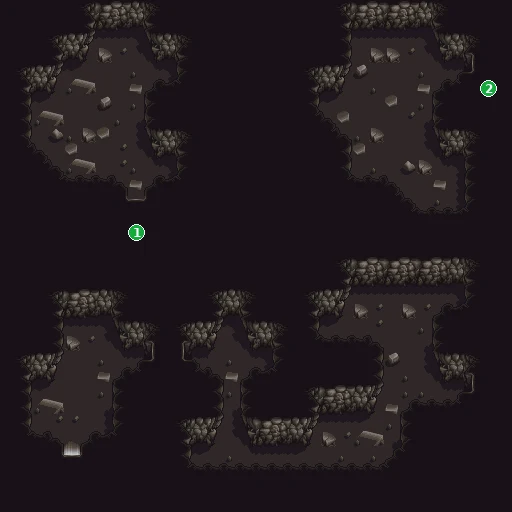
Battle Underwater!? Outlaw Pirani!!
📍 Purple Town
Purple Town has sunk to the bottom of the lake, and the Pirani run it now under their boss, Lord Gerogero. Dive in with the Aqualung, don't fall for the Pirani rip-offs, and find Gerogero, an old friend of Adeu's. Nobody gets back to the surface without his say-so.
You need: The Aqualung (from the beasts of Ice Town, Episode 7).
Walkthrough
- TipRumors first: Purple Town sank to the bottom of the lake, and you'll need an Aqualung to get there. Mithril Town says the same ('That town's under the lake now!'), and a Friedel Town woman has heard of Gerogero ('How disgusting… What on earth is that?').
- MainGet the Aqualung from the beasts of Ice Town (Episode 7) and equip it (X > Status > pick a character > the Item slot (4th)). Just carrying it does nothing. → checklist
- MainDive in from the lake on the Friedel field: the dive spots are marked on map 82 (to Purple Town map 5F) and map 3C (to map 5D). With the Aqualung equipped you can also pick Episode 8 on the World Map. While you're down here, every World Map choice brings you back to Purple Town until Gerogero lets you go.
- TipWithout the Aqualung equipped, Adeu stops at the water's edge: 'Hm? If I jumped down from here… bad news.'
- MainPurple Town is run by the Pirani. They sneer that you'll never get back up top: nobody returns to the surface without Lord Gerogero's permission.
- TipThere's a way up: the Anemone-kun can take you to the surface, but only if Gerogero allows it. → checklist
- MainTalk to the three Pirani in house 6A (one tells you about the Anemone-kun), then to the Pirani in house 68: he tells you Lord Gerogero is back home. Go to his house. He turns out to be an old friend of Adeu's. Ask for help getting out. He only says 'Gero, gero!!', and Adeu decides that means yes. → checklist
- SideThe Pirani Item Shop sells only one thing: a Mist Tank for 50000 G. The Pirani call it a 'portable Mist Rune'. Equipped, it lets Zephyr slowly recover HP even indoors and in caves (read from the code); it does not let you call Zephyr where a Ryu isn't allowed. The shop won't buy anything from you. → checklist
- TipThe Pirani say Mist Tanks are pricey and 'you can only get 'em here', but Nyanko's Item Shop in Friedel Town stocks them at the same price. You lose nothing if you skip this one. → checklist
- WarningDon't bother with the Pirani 'inn'. It charges nothing, but answer Yes and you get 'We just got full up… I'll mess with ya some more!!' and no rest at all. → checklist
- WarningSkip the Pirani Tavern. 'Everything's 100 G!', and the 100 G really comes off your money, but whatever you order (Beer, Cocktail or Sake) 'got washed away'. After a while they refuse to serve you at all. → checklist
- TipOne house has alcohol in its water, which explains the drunk Pirani trying to start a fight. Just walk away.
Checklist
- Where
- Ice Town (Episode 7)
- How
- Trade the beasts a Banana.
- Reward
- Lets you go underwater ('Amazing! You won't drown!')
- Opens
- Purple Town
- Closes
- never
- Where
- Purple Town: Lord Gerogero's house (map 68, marked on the map; he appears there once he's back home)
- How
- Talk to the three Pirani in house 6A, then to the Pirani in house 68; then visit Gerogero.
- Reward
- Permission to return to the surface
- Opens
- The Anemone-kun ride up to the Friedel field
- Closes
- never
- Where
- Purple Town
- How
- Talk to the shopkeeper and choose Buy items!. Selling is refused ('Nope… don't want it…').
- Reward
- Mist Tank: 50000 G (sells for 25000 G)
- Closes
- 'Ain't got nothin' left to sell!' once you own a Mist Tank (it's not a real stock limit)
- Where
- Purple Town
- How
- Yes: 'We just got full up…' and no rest. No: 'Then… get lost!!'
- Reward
- Nothing
- Where
- Purple Town
- How
- Pirani Beer, Pirani Cocktail or Pirani Sake, all at 100 G. Every choice ends with the drink 'washed away'.
- Reward
- Nothing: you lose 100 G per drink
- Closes
- Later: 'No drinks for you. Get lost!'
🗺️ Maps for this chapter (6)
Blue numbers mark people, orange numbers events and pickups, green numbers exits (doors, gateways and screen edges). Yellow letters A, B, C… are treasure chests; white squares are shop counters (I items, H herbs, A armor, W weapons, R inn); red L marks a wall lever. People who walk around are shown where they start. Tap a map to open it full size.
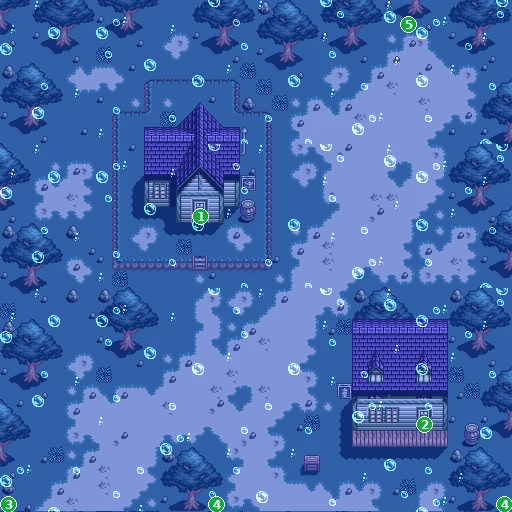
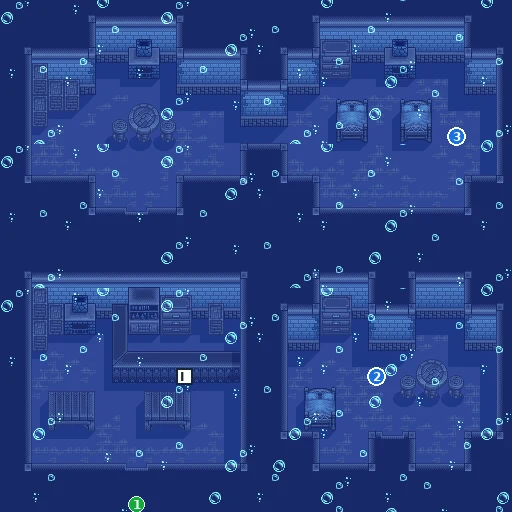
- 2Pirani — where Gerogero is
- 3Gerogero — lets you return to the surface (appears later in the story)
- IPirani Item Shop
- 1Edge to Purple Town (arrival) map 5D
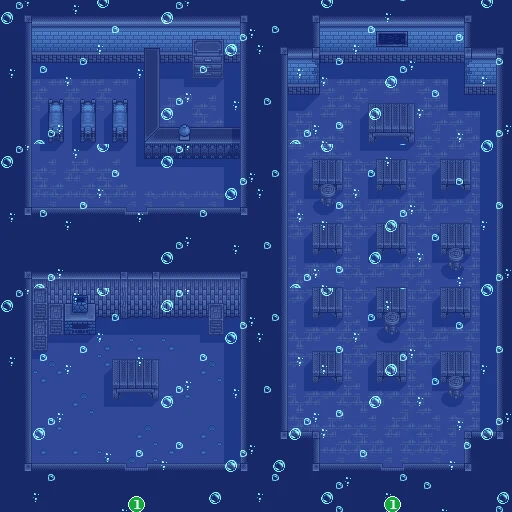
- 1Edge to Purple Town (arrival) map 5D
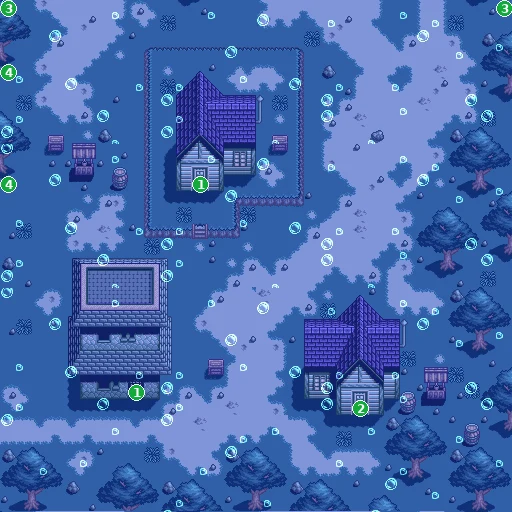
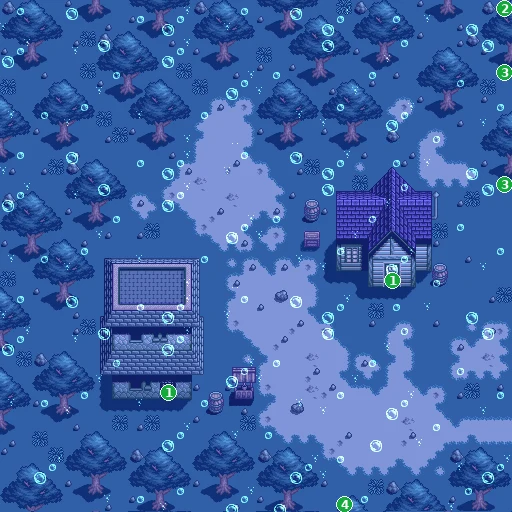
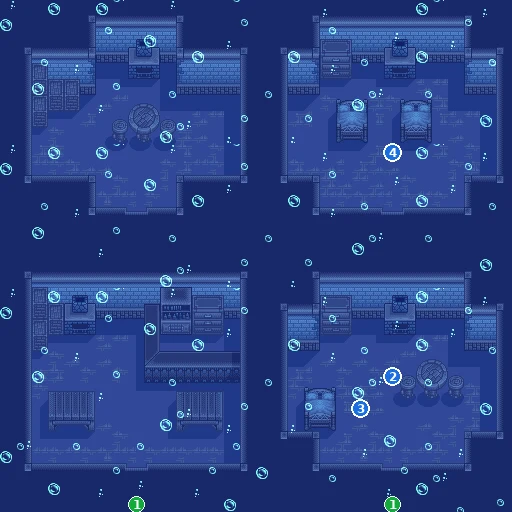
- 2Pirani — hint about Gerogero (walks around)
- 3Pirani — Gerogero rules the way up (walks around)
- 4Pirani — the Anemone-kun (walks around)
- 1Edge to Purple Town map 5F
Death Match!! Flying Whale Continent!
📍 Whale's Valley · Sky Tower · Desert of Ruins · Flying Whale Castle
Whale's Valley floats in the clouds, and Flying Whale Castle carries Grand Tournament entrants from there to Earth's Blade. But the castle can't come in until the Ruins of Lemuriad in the Desert of Ruins are repaired. Get Sand Shoes, fit the fragment from Jada's box into the ruins, then reach the flying whale to get aboard the castle.
You need: The King of Pafuricia's permission to use the Warp Gate (Ep. 10), Jada's Wood Box (from Jada after the Arm Dragon, Ep. 4), the young man's tip about the broken ruin (Westguns, Ep. 1), the Wing Sandals (any item shop that stocks them, 30000 G), and Izumi, Sarutobi and Paffy in the party for the Elf Village errand.
⏳ Last chances in this chapter
- Everything else in Earthtia: once you answer "Go on ahead!" to Ballena on Flying Whale Castle there is no going back ("Train some more" is the safe answer).
- Ballena: "From here, there's no going back" details
Full list across the game: Missables.
Walkthrough
- MainPrincipal Yudis thinks Galden will most likely enter the Grand Tournament and says you may learn something in Whale's Valley. Gesshin has already gone ahead there.
- MainIn Pafuricia Castle's great hall, go through the Warp Gate door that the guard now lets you use. You arrive on map C6 in Whale's Valley. → checklist
- TipEquip the Wing Sandals before you arrive (30000 G at Miyan's, Yanyan's, Nyanko's, the Dwarf Item Shop, Mithril Mart or the Rain General Store). Whale's Valley is a maze of cloud islands: with the sandals you walk across the open sky, without them you fall to the cave level below and only reach the C4 island. Follow the numbered exits on the maps (C6, CB and CA are the hubs).
- SideThe valley's chests are rich: 16000 GG (C3), 12000 GG each on C2 and C4, 6500 GG (C2), 2500 GG (C5) and a Sour Fruit (C7).
- MainFind Gesshin. Flying Whale Castle can't come here until the Ruins of Lemuriad in the Desert of Ruins are repaired, and to cross the desert you need Sand Shoes. He remembers that the Elf Village chief has some. → checklist
- MainGo to Elf Village (Ep. 3) with Izumi, Sarutobi and Paffy. Paffy gets the chief to open up: Welch was hit by a Poison Mud Apple, and the chief lost the Fern Herb that would cure him in a cave in the Dwarf Kingdom. → checklist
- MainSearch the Dwarf Kingdom caves (Ep. 4) until Adeu finds the lost item: "This is what the chief meant!" That's the Fern Herb. → checklist
- MainBring the Fern Herb to the chief, with it equipped. He gives you the Sand Shoes ("No sweat, even on flowing sand!"), which you need to cross the desert. Welch, now cured, thanks you with 3000 G. → checklist
- MainMake sure you have Jada's Wood Box, and equip it (X > Status > pick a character > the Item slot (4th)) before you reach the ruins. Jada handed it over after you beat the Arm Dragon, and Zinnia explained that it holds a fragment of the Ruins of Lemuriad. → checklist
- MainFind the Ruins of Lemuriad on map D0 (the Etania Cave side of the Desert of Ruins; marked on the map). They only react after you've heard the young man in Westguns (house 13) describe the ruin with its top broken off, and after the King's Warp Gate permission; until then the sign only says the head is broken off. Then step onto the ruins with Jada's Wood Box equipped: Adeu finds the fragment inside, and the whole party agrees to fit it into the broken part. → checklist
- MainThe moment the piece is in, something stirs at the Flying Whale Tower: Flying Whale Castle has flown in. Before this, the tower's entrance sign only said it was blocked. → checklist
- MainGesshin congratulates you but warns that boarding the castle is hard: 'You'll have to time your jump!' Adeu has no choice. He must reach Earth's Blade. → checklist
- MainWith the Wing Sandals equipped, walk out onto the sky next to the flying whale near map C5 and press A to talk to it: it carries you aboard Flying Whale Castle (map AD). The guards talk about the Grand Tournament, the unstable Mist Rune near Earth's Blade, the Lemuriad civilization and the Evil Dragon Clan of Chaostia; one even asks Paffy about her rod. → checklist
- SideCheck the side rooms (map AE): 14500 GG, 6500 GG, 4000 GG and a Slap Fruit.
- MainTalk to Ballena. The Mist Rune is growing unstable and the barrier to the other world may break. Fighting the Evil Dragon Clan takes the Spirit Stone and a Ryu Paladin, and the only way to become a Paladin is to win the Grand Tournament. Then he asks whether you're ready (see below).
- TipBefore you board for good, finish your gear. Smiths upgrade the leader's gear at levels 11, 21, 31, 41 and 51; for the last step go to Dradd (Pafuricia Town) for the Holy Tempest and Ninto Blade, and to Gladd (Mithril Town) for the Sordin Shield and Sordin Gauntlet. Other smiths give the Mithril pieces at that step, and no smith upgrades those.
- WarningPoint of no return. Ballena asks if you're ready. 'Train some more': nothing is locked; leave the castle by its south exit (onto the clouds of Whale's Valley, map C5) and come back by talking to the flying whale (with the Wing Sandals equipped; we could not board without them). 'Go on ahead!' flies the castle to Earth's Blade and starts the Grand Tournament at once: there's no chance to save, heal or shop until the ending. Save first. → checklist
Checklist
- Where
- Elf Village chief (Ep. 3)
- How
- With Izumi, Sarutobi and Paffy in the party, hear the chief's story, find the lost Fern Herb in a Dwarf Kingdom cave and bring it back.
- Reward
- Sand Shoes
- Opens
- Desert of Ruins
- Closes
- never
- Where
- Elf Village, Welch
- How
- Talk to Welch after the Fern Herb has cured him.
- Reward
- 3000 G
- Opens
- after the Fern Herb errand
- Closes
- never
- Where
- Onion Cave, Jada
- How
- Beat the Arm Dragon (Ep. 4) and go back to Jada.
- Reward
- Jada's Wood Box ("Holds fragments of the ruins")
- Opens
- Repairing the Ruins of Lemuriad
- Closes
- never
- Where
- Desert of Ruins, map D0 (marked on the map)
- How
- Step onto the ruins with Jada's Wood Box equipped, after the Westguns tip and the Warp Gate permission.
- Reward
- Flying Whale Castle flies in to the Flying Whale Tower
- Opens
- Boarding Flying Whale Castle
- Closes
- never
- Where
- Flying Whale Castle
- How
- Answer Ballena after the talk about the Spirit Stone and the Ryu Paladin.
- Reward
- 'Go on ahead!': the castle flies to Earth's Blade and the tournament starts. 'Train some more': Ballena offers to take the castle back to Whale's Valley; nothing is locked.
- Opens
- Grand Tournament (next chapter)
- Closes
- Go on ahead! closes everything else in the game
Treasure chests (15)
| Contents | Area | Where | |
|---|---|---|---|
| 2000 GG | Sky Tower: entrance | Map 65, chest A | |
| 6500 GG | Sky Tower: entrance | Map 65, chest B | |
| Bitter Seed | Sky Tower (10000 GG, 7000 GG) | Map 67, chest A | |
| 7000 GG | Sky Tower (10000 GG, 7000 GG) | Map 67, chest B | |
| 10000 GG | Sky Tower (10000 GG, 7000 GG) | Map 67, chest C | |
| 6500 GG | Flying Whale Castle: side rooms | Map AE, chest A | |
| 4000 GG | Flying Whale Castle: side rooms | Map AE, chest B | |
| 14500 GG | Flying Whale Castle: side rooms | Map AE, chest C | |
| Slap Fruit | Flying Whale Castle: side rooms | Map AE, chest D | |
| 6500 GG | Whale's Valley (12000 GG, 6500 GG) | Map C2, chest A | |
| 12000 GG | Whale's Valley (12000 GG, 6500 GG) | Map C2, chest B | |
| 16000 GG | Whale's Valley (16000 GG) | Map C3, chest A | |
| 12000 GG | Whale's Valley: door to Sky Tower | Map C4, chest A | |
| 2500 GG | Whale's Valley (castle exit leads here) | Map C5, chest A | |
| Sour Fruit | Whale's Valley | Map C7, chest A |
🗺️ Maps for this chapter (23)
Blue numbers mark people, orange numbers events and pickups, green numbers exits (doors, gateways and screen edges). Yellow letters A, B, C… are treasure chests; white squares are shop counters (I items, H herbs, A armor, W weapons, R inn); red L marks a wall lever. People who walk around are shown where they start. Tap a map to open it full size.
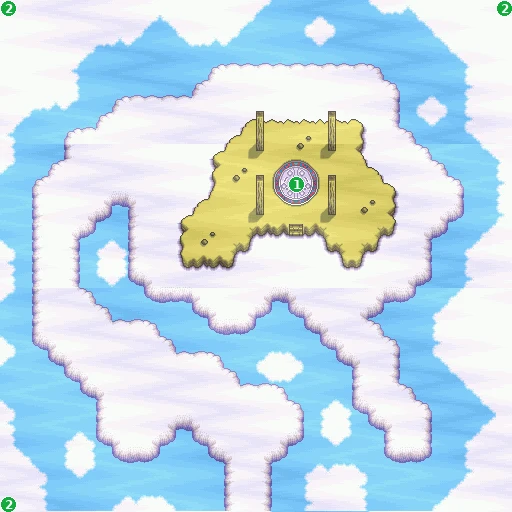
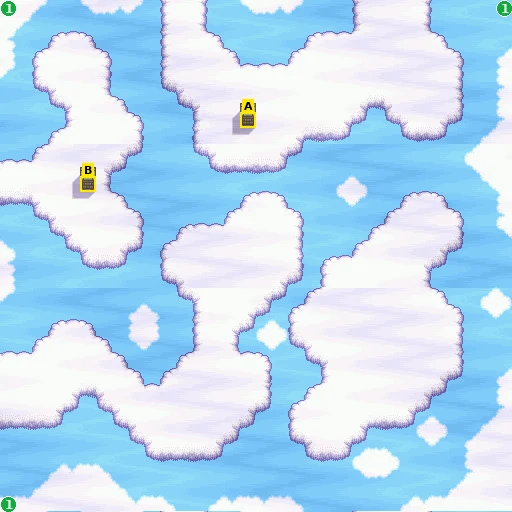
- A 6500 GG
- B 12000 GG
- 1Edge to Whale's Valley: hub (pads to C5, C6, C7) map CB
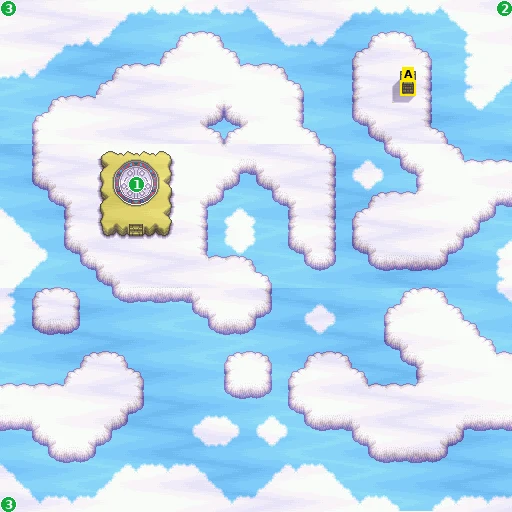
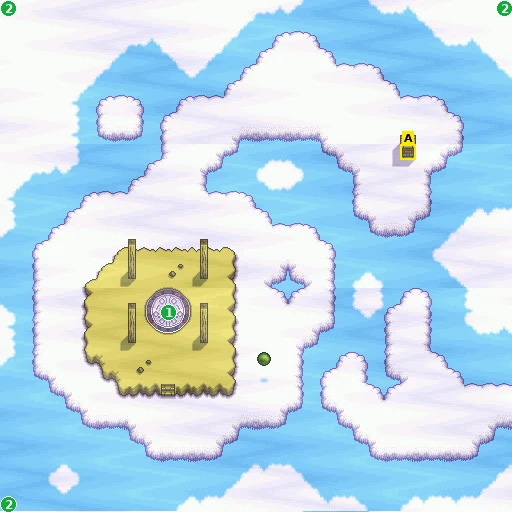
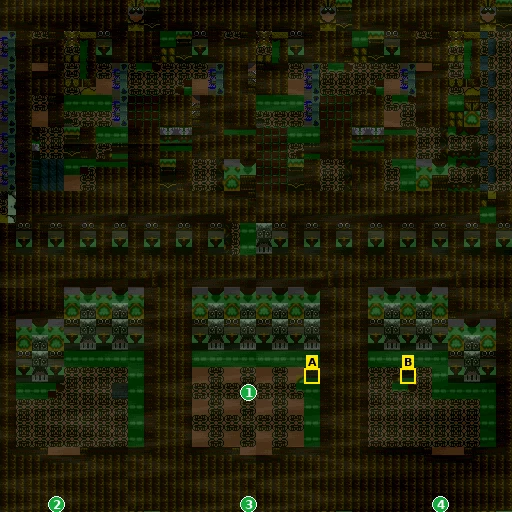
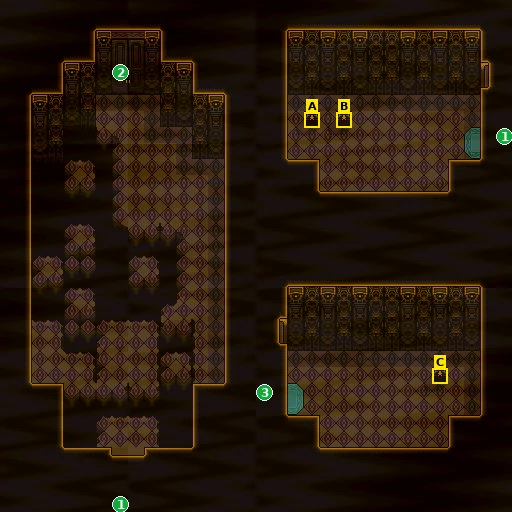
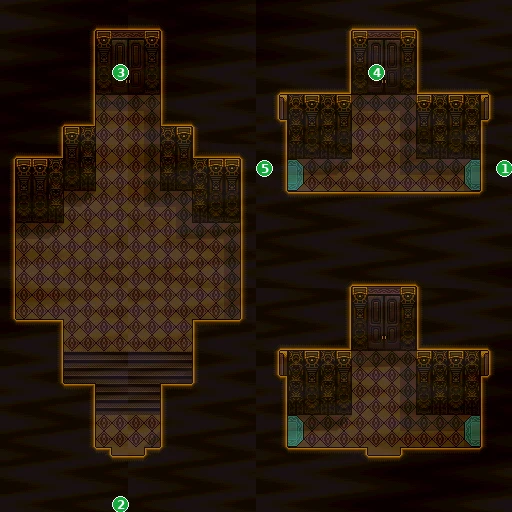
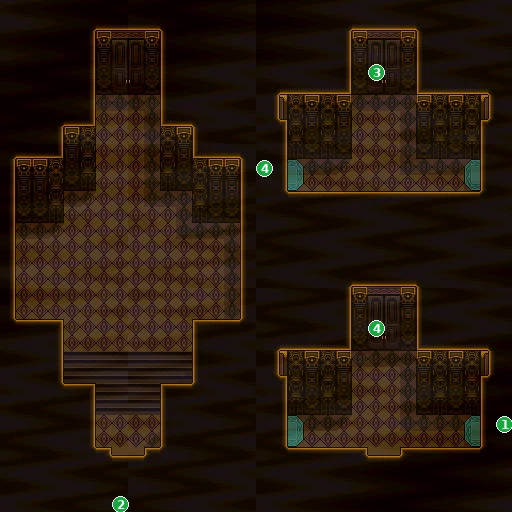
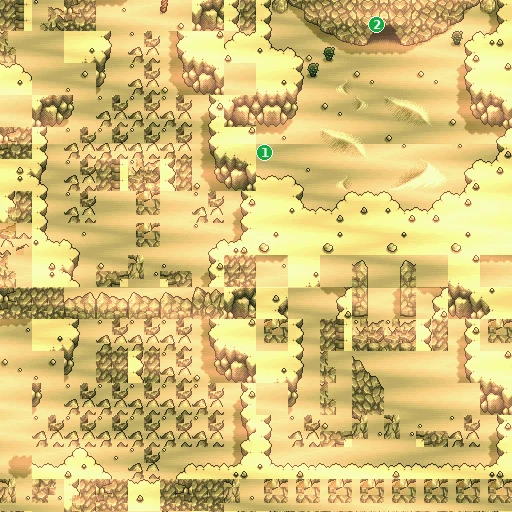
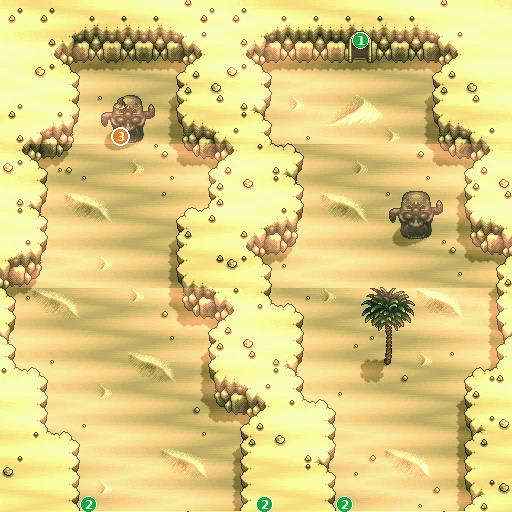
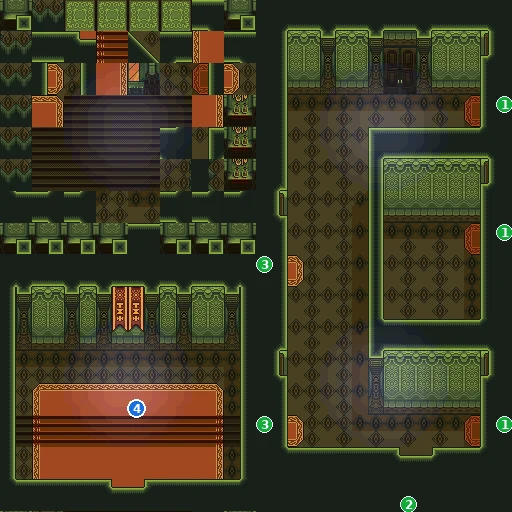
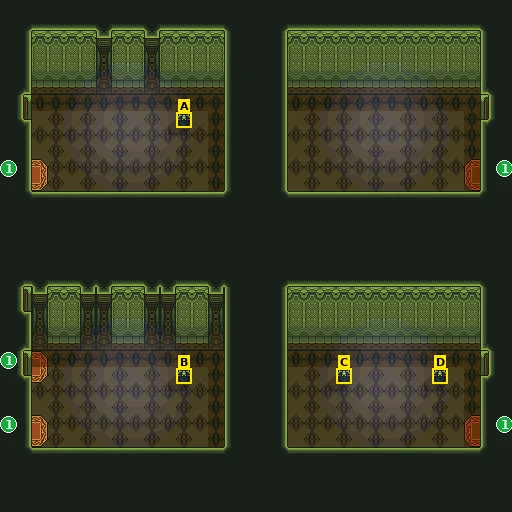
- A 6500 GG
- B 4000 GG
- C 14500 GG
- D Slap Fruit
- 1Edge to Flying Whale Castle map AD
The Grand Tournament & Ending
📍 Flying Whale Castle · Earth's Blade · Pafuricia Castle
Ballena flies you to Earth's Blade, where the Great Sage Naji is waiting and the Grand Tournament has already begun. Five bouts in a row stand between Adeu and the title, against old rivals and old friends, and the last opponent is the one everyone feared. Then the barrier around Earthtia gives way.
You need: Episode 12 finished: Flying Whale Castle boarded with Paffy, Sarutobi and Izumi, and Ballena's question answered with 'Go on ahead!'
⏳ Last chances in this chapter
- Ballena's 'Go on ahead!' on Flying Whale Castle is the point of no return ('From here, there's no going back'). Finish anything left in Episodes 1-12, stock up and save before you answer.
- The full ending needs all five tournament bouts won with at least 448 more damage dealt than taken. One lost bout and only the normal ending is left.
- The full ending: Ryu Paladin Lord Zephyr details
Full list across the game: Missables.
Walkthrough
- WarningOn Flying Whale Castle, Ballena warns: 'From here, there's no going back. If you have any doubts… you may go train a bit more!' Save first. 'Train some more' locks nothing: you can walk out through the castle's south exit and come back later. 'Go on ahead!' commits you to the finale. → checklist
- MainAnswer 'Go on ahead!'. Ballena: 'A knight… never turns back! Now, give it your all!' The castle flies off (a short flight scene) and lands you at Earth's Blade. → checklist
- MainNaji is tired of waiting: the tournament has already begun. The winner becomes the world's greatest hero, worthy to rule Earthtia and able to defeat even the Evil Dragon Clan. If Idoro or Galden won, the world would be thrown into chaos, so Adeu vows to protect Earthtia as a Holy Knight. → checklist
- TipThe bouts come one after another with no break: no shop, no inn, no saving. Go in at full strength.
- WarningLosing a bout doesn't end the tournament: the story simply goes on to the next opponent. But only a clean sweep earns the full ending: win all five bouts, and over the five fights deal at least 448 more damage than you take. → checklist
- MainBout 1: Vice and his gang. They say they're a whole other league now, and they combine their machines again, as at Mist Station in Episode 1.
- MainBout 2: Gratches. He can't entrust the world to anyone who can't beat him, and he won't hold back.
- MainBout 3: the goblins Bopplin and Bubblin in their Solid, sure that they're the ones who'll rule this world.
- MainNaji warns that the real contest starts now. Bout 4: Sarutobi, who wants to settle things with Adeu: win and he'll accept you, fair and square. Paffy begs them to stop; Izumi says Earthtia has no need for two heroes and they should watch. → checklist
- MainNaji senses Earthtia's barrier is about to break and wants to halt the tournament, but Idoro and Galden arrive. Bout 5: Galden in his Shutel, now granted the Evil Dragon Clan's power. He means to beat you and take the Spirit Stone.
- MainWin and Naji declares you the strongest knight in all Earthtia. Paffy, Izumi and Sarutobi congratulate you, but Sarutobi points out you'd still need the Spirit Stone's power to become a Paladin, and Naji agrees. → checklist
- MainThe barrier breaks and an Evil Dragon Soldier comes for the Spirit Stone. Adeu tells Izumi to take everyone back to the castle and faces it alone with Zephyr. This is the final battle. → checklist
- MainEnding (normal): Naji can hardly believe you beat the Evil Dragon Clan, and Adeu admits it was a close call. Naji says the Evil Dragon Clan is tough to fight unless you're the Lightspeed Paladin, and tells Adeu to work hard to become Ryu Paladin Lord Zephyr. → checklist
- MainEnding (full): if you won all five bouts and dealt at least 448 more damage than you took, Naji instead proclaims that Adeu has done it: he is Ryu Paladin Lord Zephyr, the Lightspeed Paladin. 'Then… I'm a [Holy Knight]?' → checklist
- MainEpilogue, with the King of Pafuricia and Maria: Adeu recites his Ethos of Chivalry, the King entrusts Earthtia to him, and Maria asks everyone to join their strength to protect the kingdom. → checklist
Checklist
- Where
- Flying Whale Castle
- How
- Answer 'Go on ahead!' or 'Train some more'.
- Reward
- 'Go on ahead!': a short flight scene, then Earth's Blade; the tournament starts at once. 'Train some more': nothing changes; leave by the castle's south exit and talk to the flying whale to board again.
- Opens
- Episode 12, once you're aboard Flying Whale Castle
- Closes
- Everything else in the game, once you go on
- Where
- Earth's Blade
- How
- Win five bouts in a row: Vice's gang, Gratches, Bopplin and Bubblin, Sarutobi, Galden.
- Reward
- Naji declares Adeu the strongest knight in all Earthtia
- Opens
- Finale
- Where
- Earth's Blade, bout 4
- How
- Story: Sarutobi enters to settle things with Adeu.
- Reward
- He promises to accept you if you win
- Opens
- Finale
- Where
- Earth's Blade, after the tournament
- How
- Story: Adeu sends Izumi back to the castle with everyone and takes on the Evil Dragon Soldier with Zephyr.
- Opens
- Finale
- Where
- After the final battle
- How
- Story.
- Reward
- Naji tells Adeu to work hard to become Ryu Paladin Lord Zephyr
- Opens
- Finale
- Where
- Pafuricia Castle, great hall
- How
- Story.
- Reward
- The King entrusts Earthtia to Adeu
- Opens
- Finale
- Where
- Earth's Blade, after the final battle
- How
- Win all five tournament bouts, and over the five fights deal at least 448 more damage than you take.
- Reward
- Naji proclaims Adeu Ryu Paladin Lord Zephyr, the Lightspeed Paladin
- Opens
- Finale
- Closes
- as soon as you lose a bout
Bosses
🗺️ Maps for this chapter (1)
Blue numbers mark people, orange numbers events and pickups, green numbers exits (doors, gateways and screen edges). Yellow letters A, B, C… are treasure chests; white squares are shop counters (I items, H herbs, A armor, W weapons, R inn); red L marks a wall lever. People who walk around are shown where they start. Tap a map to open it full size.
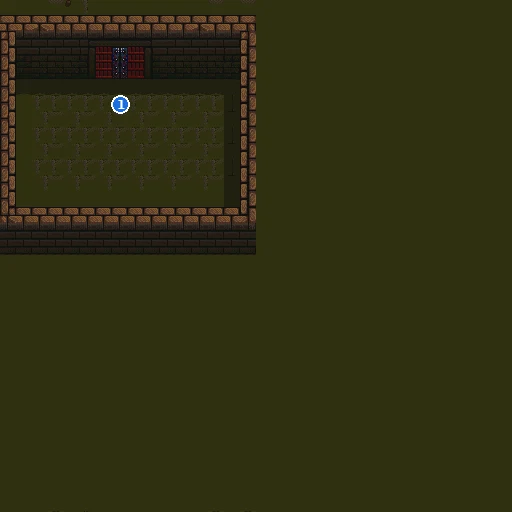
- 1Great Sage Naji — the Grand Tournament
Reference tables
| Name | Role | Joins | Leaves |
|---|---|---|---|
| Adeu | Hero; a knight-in-training and Zephyr's pilot | Start of the game | Never. He fights the final battle alone. |
| Sarutobi | Ninja and Adeu's rival | Rain Town, at Lazania's house (Episode 11): Gesshin brings him back hurt by Galden and makes him and Adeu call a truce. He has a few lines with the party before that. | Steps aside for Adeu's duel with Galden; becomes your opponent in the tournament; sent back to the castle before the final battle. |
| Izumi | Mage, taken in Madora's Mage Hunt; protects Paffy | Freed in Madora Castle | Watches the tournament from the side; takes everyone back to the castle before the final battle. |
| Paffy | Princess of Pafuricia; her rod holds the Spirit Stone | Found in Ice Town, where the beasts healed her | Taken by Idoro at the castle, rescued in Friedel Castle; watches the tournament; sent back to the castle before the final battle. |
| Gratches | Ryu pilot and dojo master; avenging his brother Chamber | At his dojo in Gratches Village, to go to Rain Town | After Hellreet is beaten he goes home. Later you can duel him at the dojo any time; he is an opponent in the tournament. |
| Katze | Merchant and bounty hunter (optional) | Optional. After Banbara she asks to come along and Adeu declines; in a later version of the scene (Paffy and Izumi with you) you can take her along. | At the Magic School after Galden she leaves for Mithril Town, where you can find her trading. |
| NPC helpers | Not playable: Floi (holds off the enemies in Madora Castle), Yagumo (Rain Town briefing), Gesshin (finds Sarutobi, guides you at Whale's Valley), Jada (opens the hidden cave, gives Jada's Wooden Box), Ballena (flies Flying Whale Castle), the Great Sage Naji | Story | Story |
55 chests in the walkthrough, 319,390 GG in money.
| Contents | Chapter | Where | |
|---|---|---|---|
| Bitter Seed | Ep. 1 | Westguns desert (chest A: Bitter Seed) · Map 03, chest A | |
| 2500 GG | Ep. 1 | Westguns Region, north of town (chest A: 2500 GG) · Map 06, chest A | |
| 4500 GG | Ep. 1 | Mist Station (Vice; chest A: 4500 GG) · Map 07, chest A | |
| 5000 GG | Ep. 4 | Dwarf Kingdom tunnel 4B (5000 G chest) · Map 4B, chest A | |
| 1000 GG | Ep. 5 | Madora Castle: inner hall (Floi catches up; 1000 GG, Konnya Fruit) · Map 75, chest A | |
| Konnya Fruit | Ep. 5 | Madora Castle: inner hall (Floi catches up; 1000 GG, Konnya Fruit) · Map 75, chest B | |
| 3000 GG | Ep. 5 | Madora Castle: side rooms (trapped mages; 3000 GG) · Map DC, chest A | |
| 7500 GG | Ep. 5 | Madora Castle: side rooms (7500 GG) · Map EF, chest A | |
| Powan Herb | Ep. 9 | Chamber's Fort (Powan Herb) · Map E2, chest A | |
| 1000 GG | Ep. 9 | Chamber's Fort (1000 G, 4000 G) · Map E4, chest A | |
| 4000 GG | Ep. 9 | Chamber's Fort (1000 G, 4000 G) · Map E4, chest B | |
| 500 GG | Ep. 9 | Chamber's Fort (500 G) · Map E5, chest A | |
| 4000 GG | Ep. 9 | Chamber's Fort (4000 G) · Map E6, chest A | |
| 5000 GG | Ep. 9 | Chamber's Fort (5000 G) · Map E7, chest A | |
| 2000 GG | Ep. 9 | Chamber's Fort hub (2000, 500, 3000 G) · Map E8, chest A | |
| 500 GG | Ep. 9 | Chamber's Fort hub (2000, 500, 3000 G) · Map E8, chest B | |
| 3000 GG | Ep. 9 | Chamber's Fort hub (2000, 500, 3000 G) · Map E8, chest C | |
| 10000 GG | Ep. 6 | Friedel stronghold 74 (10000 G, 7500 G; exit) · Map 74, chest A | |
| 7500 GG | Ep. 6 | Friedel stronghold 74 (10000 G, 7500 G; exit) · Map 74, chest B | |
| 2500 GG | Ep. 6 | Friedel stronghold DA (east exit of D9; 2500 GG) · Map DA, chest A | |
| 5000 GG | Ep. 6 | Friedel stronghold E0 (9000 G, 5000 G, 1000 G, Tomioka Seed) · Map E0, chest B | |
| 1000 GG | Ep. 6 | Friedel stronghold E0 (9000 G, 5000 G, 1000 G, Tomioka Seed) · Map E0, chest C | |
| 9000 GG | Ep. 6 | Friedel stronghold E0 (9000 G, 5000 G, 1000 G, Tomioka Seed) · Map E0, chest D | |
| Tomioka Seed | Ep. 6 | Friedel stronghold E0 (9000 G, 5000 G, 1000 G, Tomioka Seed) · Map E0, chest A | |
| Soesoe Herb | Ep. 10 | Border Fort: central hall · Map 3E, chest A | |
| 2500 GG | Ep. 10 | Border Fort: central hall · Map 3E, chest B | |
| 400 GG | Ep. 10 | Border Fort: central hall · Map 3E, chest C | |
| 4500 GG | Ep. 10 | Border Fort: east wing · Map 51, chest A | |
| 2000 GG | Ep. 10 | Border Fort: east wing · Map 51, chest B | |
| 3000 GG | Ep. 10 | Border Fort: east wing · Map 51, chest C | |
| 1500 GG | Ep. 10 | Border Fort: hall with the two hidden chests (levers) · Map 76, chest A | |
| 4000 GG | Ep. 10 | Border Fort: hall with the two hidden chests (levers) · Map 76, chest B | |
| 12000 GG | Ep. 10 | Border Fort: hall with the two hidden chests (levers) · Map 76, chest C | |
| Fern Seed | Ep. 10 | Border Fort: hall with the two hidden chests (levers) · Map 76, chest D Hidden: Examine lever L1 in the alcove of the upper-right room (cells 20-21, 8-9); the chest appears in the upper-left room. | |
| 99990 GG | Ep. 10 | Border Fort: hall with the two hidden chests (levers) · Map 76, chest E Hidden: Examine lever L2 in the lower hall, just below chest C (cells 18-19, 24-25); the chest appears in the upper-left room. | |
| 4000 GG | Ep. 10 | Kingdom of Pafuricia · Map 89, chest A | |
| 2500 GG | Ep. 10 | Kingdom of Pafuricia (world-map arrival) · Map 8A, chest A | |
| Sour Fruit | Ep. 10 | Kingdom of Pafuricia (world-map arrival) · Map 8A, chest B | |
| 3500 GG | Ep. 10 | Pafuricia Castle · Map AC, chest A | |
| 1500 GG | Ep. 10 | Border Fort: north wing · Map BA, chest A | |
| 2000 GG | Ep. 12 | Sky Tower: entrance · Map 65, chest A | |
| 6500 GG | Ep. 12 | Sky Tower: entrance · Map 65, chest B | |
| Bitter Seed | Ep. 12 | Sky Tower (10000 GG, 7000 GG) · Map 67, chest A | |
| 7000 GG | Ep. 12 | Sky Tower (10000 GG, 7000 GG) · Map 67, chest B | |
| 10000 GG | Ep. 12 | Sky Tower (10000 GG, 7000 GG) · Map 67, chest C | |
| 6500 GG | Ep. 12 | Flying Whale Castle: side rooms · Map AE, chest A | |
| 4000 GG | Ep. 12 | Flying Whale Castle: side rooms · Map AE, chest B | |
| 14500 GG | Ep. 12 | Flying Whale Castle: side rooms · Map AE, chest C | |
| Slap Fruit | Ep. 12 | Flying Whale Castle: side rooms · Map AE, chest D | |
| 6500 GG | Ep. 12 | Whale's Valley (12000 GG, 6500 GG) · Map C2, chest A | |
| 12000 GG | Ep. 12 | Whale's Valley (12000 GG, 6500 GG) · Map C2, chest B | |
| 16000 GG | Ep. 12 | Whale's Valley (16000 GG) · Map C3, chest A | |
| 12000 GG | Ep. 12 | Whale's Valley: door to Sky Tower · Map C4, chest A | |
| 2500 GG | Ep. 12 | Whale's Valley (castle exit leads here) · Map C5, chest A | |
| Sour Fruit | Ep. 12 | Whale's Valley · Map C7, chest A |
| Key item | Where | Used for | Ch. | |
|---|---|---|---|---|
| Zephyr, Adeu's Ryu Knight | Opening scene | Prologue | Prologue | |
| Shanis's Lantern | Westguns: Anna, Shanis, then Dos | Border Fort in the Kingdom of Pafuricia (later episode) | Ep. 1 | |
| Jada's Wood Box | Onion Cave: Jada | Ep. 4: after the Arm Dragon | Ep. 4 | |
| Banana | Map 35 (Jerock Forest, by the river), marked on the map | Ep. 4 | Ep. 4 | |
| Stone Glove | Magic School tunnel: Floi | Equipped while Zephyr is out, it lets you push the tombstone on map D7 aside | Ep. 5 | |
| Fire Orb | Magic School: Principal Yudis | Equipped, it opens the gate on map 77 into the Friedel strongholds (Ep. 6) | Ep. 5 | |
| Red, Green and Yellow Orbs | Chamber's Fort (Ep. 9) | the way to Hellreet | Ep. 11 | |
| Mithril Ring | Goblin Kingdom | The mayor's reward | Ep. 9 | |
| Goblem's Eye | Goblem Shrine, Goblin Kingdom | The Lava Cave | Ep. 9 | |
| Permission to use the Warp Gate | Pafuricia Castle, King of Pafuricia | Whale's Valley (Ep. 12) | Ep. 10 | |
| Aqualung | Ice Town | Purple Town, at the bottom of the lake (Episode 8) | Ep. 7 | |
| Sand Shoes | Elf Village chief (Ep. 3) | Desert of Ruins | Ep. 12 |
Prices as the shop lists them; shops buy back at half price. Inns and smiths per town are on the Equipment page.
Westguns — Rina's Item Shop
| Healmond | 20,000 GG |
| Magic Glove | 1,000 GG |
| Spring | 5,000 GG |
Westguns — Jiro's Drugstore
| Powan Herb | 150 GG |
| Bitter Seed | 40 GG |
| Sour Fruit | 50 GG |
| Slap Fruit | 60 GG |
| Konnya Fruit | 70 GG |
Westguns — Safe & Sound Armor
| Doxi Shield | 5,000 GG |
| Slip Shield | 6,000 GG |
| Doxi Gauntlet | 4,000 GG |
| Slip Gauntlet | 5,000 GG |
Westguns — Ganko's Weapons
| Hono Smash | 10,000 GG |
| Hyun Smash | 15,000 GG |
| Flame Art | 10,000 GG |
| Blaze Art | 15,000 GG |
Onion Town — Anything Shop
| Magic Glove | 1,000 GG |
| Fire Glove | 2,000 GG |
| Spring | 5,000 GG |
Onion Town — Castle Southeast Herbacy
| Powan Herb | 150 GG |
| Soesoe Herb | 500 GG |
| Bitter Seed | 40 GG |
| Sour Fruit | 50 GG |
| Slap Fruit | 60 GG |
| Konnya Fruit | 70 GG |
| Tomioka Seed | 250 GG |
Onion Town — Tenshin Carefree Armor
| Conf Shield | 7,000 GG |
| Ston Shield | 8,000 GG |
| Conf Gauntlet | 6,000 GG |
| Ston Gauntlet | 7,000 GG |
Onion Town — Clang-Clang Arms
| Hyun Smash | 15,000 GG |
| Kira Smash | 20,000 GG |
| Blaze Art | 15,000 GG |
| Flying Dragon Art | 20,000 GG |
West Hill — Miyan's Item Shop
| Healmond | 20,000 GG |
| Fire Glove | 2,000 GG |
| Wing Sandals | 30,000 GG |
West Hill — West Herbacy
| Bitter Seed | 40 GG |
| Sour Fruit | 50 GG |
| Slap Fruit | 60 GG |
| Konnya Fruit | 70 GG |
West Hill — Thomas's Armor Shop
| Doxi Shield | 5,000 GG |
| Ston Shield | 8,000 GG |
| Doxi Gauntlet | 4,000 GG |
| Ston Gauntlet | 7,000 GG |
West Hill — Jack's Weapon Shop
| Hono Smash | 10,000 GG |
| Kira Smash | 20,000 GG |
| Flame Art | 10,000 GG |
| Flying Dragon Art | 20,000 GG |
North Hill — Yanyan's Item Shop
| Spring | 5,000 GG |
| Wing Sandals | 30,000 GG |
| Speed Shoes | 20,000 GG |
North Hill — North Herb Shop
| Powan Herb | 150 GG |
| Soesoe Herb | 500 GG |
| Tomioka Seed | 250 GG |
North Hill — Todo's Armor Shop
| Ashiria Shield | 16,000 GG |
| Ashiria Gauntlet | 14,000 GG |
One piece per character: the Ashiria Shield when Adeu leads, the Ashiria Gauntlet when Sarutobi does. "Nothin' left" once the party owns both.
Dwarf Kingdom — Dwarf Item Shop
| Healmond | 20,000 GG |
| Magic Glove | 1,000 GG |
| Fire Glove | 2,000 GG |
| Spring | 5,000 GG |
| Wing Sandals | 30,000 GG |
| Speed Shoes | 20,000 GG |
Dwarf Kingdom — Dwarf Herb Shop
| Powan Herb | 150 GG |
| Soesoe Herb | 500 GG |
| Bitter Seed | 40 GG |
| Sour Fruit | 50 GG |
| Slap Fruit | 60 GG |
| Konnya Fruit | 70 GG |
| Tomioka Seed | 250 GG |
Dwarf Kingdom — Dwarf Armor Shop
| Doxi Shield | 5,000 GG |
| Slip Shield | 6,000 GG |
| Conf Shield | 7,000 GG |
| Ston Shield | 8,000 GG |
| Ashiria Shield | 16,000 GG |
| Doxi Gauntlet | 4,000 GG |
| Slip Gauntlet | 5,000 GG |
| Conf Gauntlet | 6,000 GG |
| Ston Gauntlet | 7,000 GG |
| Ashiria Gauntlet | 14,000 GG |
Dwarf Kingdom — Dwarf Weapon Shop
| Hono Smash | 10,000 GG |
| Hyun Smash | 15,000 GG |
| Kira Smash | 20,000 GG |
| Flame Art | 10,000 GG |
| Blaze Art | 15,000 GG |
| Flying Dragon Art | 20,000 GG |
Friedel Town — Nyanko's Item Shop
| Healmond | 20,000 GG |
| Magic Glove | 1,000 GG |
| Spring | 5,000 GG |
| Wing Sandals | 30,000 GG |
| Speed Shoes | 20,000 GG |
| Mist Tank | 50,000 GG |
Friedel Town — Dope Shop
| Powan Herb | 150 GG |
| Soesoe Herb | 500 GG |
| Bitter Seed | 40 GG |
| Sour Fruit | 50 GG |
| Slap Fruit | 60 GG |
| Konnya Fruit | 70 GG |
| Tomioka Seed | 250 GG |
Won't buy herbs ("ya need a license").
Friedel Town — Perfect Guard
| Doxi Shield | 5,000 GG |
| Slip Shield | 6,000 GG |
| Conf Shield | 7,000 GG |
| Ston Shield | 8,000 GG |
| Ashiria Shield | 16,000 GG |
| Doxi Gauntlet | 4,000 GG |
| Slip Gauntlet | 5,000 GG |
| Conf Gauntlet | 6,000 GG |
| Ston Gauntlet | 7,000 GG |
| Ashiria Gauntlet | 14,000 GG |
Friedel Town — Clang-Clang Arms
| Hono Smash | 10,000 GG |
| Hyun Smash | 15,000 GG |
| Kira Smash | 20,000 GG |
| Flame Art | 10,000 GG |
| Blaze Art | 15,000 GG |
| Flying Dragon Art | 20,000 GG |
Purple Town — Pirani Item Shop
| Mist Tank | 50,000 GG |
Says "nothin' left" once you own a Mist Tank. Won't buy anything.
Rain Town — Rain General Store
| Healmond | 20,000 GG |
| Magic Glove | 1,000 GG |
| Fire Glove | 2,000 GG |
| Spring | 5,000 GG |
| Wing Sandals | 30,000 GG |
| Speed Shoes | 20,000 GG |
| Powan Herb | 150 GG |
| Soesoe Herb | 500 GG |
| Bitter Seed | 40 GG |
| Sour Fruit | 50 GG |
| Slap Fruit | 60 GG |
| Konnya Fruit | 70 GG |
Mithril Town — Mithril Mart
| Healmond | 20,000 GG |
| Magic Glove | 1,000 GG |
| Fire Glove | 2,000 GG |
| Wing Sandals | 30,000 GG |
| Speed Shoes | 20,000 GG |
Mithril Town — Master Smith Gladd's Armory
| Slip Shield | 6,000 GG |
| Conf Shield | 7,000 GG |
| Ashiria Shield | 16,000 GG |
| Slip Gauntlet | 5,000 GG |
| Conf Gauntlet | 6,000 GG |
| Ashiria Gauntlet | 14,000 GG |
Pafuricia Town — Dradd's Weapon Shop
| Hono Smash | 10,000 GG |
| Hyun Smash | 15,000 GG |
| Kira Smash | 20,000 GG |
| Flame Art | 10,000 GG |
| Blaze Art | 15,000 GG |
| Flying Dragon Art | 20,000 GG |
Credits & sources
Written for Game Translate from our own work on the English patch: the full English script (every line cited by its record), data read straight from the ROM (maps, exits, chests, shop stock, prices, armor stats, the smith and tournament rules), and tests in an emulator (controls, saving, chests, hidden levers, the World Map, the maps themselves). Route and boss notes were cross-checked against the two GameFAQs guides: Rough Hike by SuperJoshua (2021) and FAQ (Incomplete) by Steven Bruck (1999). Thanks to both authors for charting this game long before a translation existed. Release facts were checked against public game databases.
Found a mistake? Leave a comment with your save point and a screenshot.