
GAME TRANSLATE · SNES GUIDE
Kenyuu Densetsu Yaiba
Complete Walkthrough
Every story step, boss, orb and treasure, in the order you can do them, with a warning before anything becomes missable.
Nothing on this page matches your search. Try a shorter word, or clear the box.
Before you start
💿 The patch
Apply the English patch to a clean, unmodified Japanese ROM of Kenyuu Densetsu Yaiba (Super Famicom, Banpresto, 1994). The ROM must match CRC32 91FE7070 (no copier header) before patching.
🏷️ Names in this guide
Every name matches the English patch: Yaiba, Sayaka, Onimaru, Gerozaemon, the RAIJIN ORB, DRINK L, REVIVAL LEAF… The menus show item names in capitals; search this page for whatever the game just showed you (the search ignores case).
🎮 Controls (TYPE A)
Y attack and open chests · B jump · X guard · A use the selected item or orb · R select item · L call a partner · START menu · SELECT area map (added by the patch; on TYPE B it moves to R). Special moves are on the Characters & Combat page.
💾 Saving & healing
Grandma in Sayaka’s house heals everyone and saves for free. Inns in the orb-hunt regions charge 1000 yen for the same. The shops inside Onimaru Castle, the Sky Castle and the Dragon God’s Fortress have a save statue that saves but does not heal. There is no other way to save.
How the game plays
Yaiba is an action RPG: you fight in real time on the field map, but you also earn experience and levels. A few rules shape everything:
⚔️ EXP = damage
Every hit gives EXP equal to the damage it does (your ATTACK minus the enemy’s DEFENSE), even if the enemy has less HP left. Orb shots give no EXP. Allies who are not out with you still get about a third of what you earn.
🛡️ Damage is a subtraction
Damage = ATTACK − DEFENSE, and never below 0. If your ATTACK is not above a boss’s DEFENSE you cannot hurt it at all, which is why the clothes and the Raijin Sword matter so much.
🔮 Orbs
Orbs are used with R and A, but only while Yaiba holds the Raijin Sword (or Rai the Toshin Sword). Healing orbs are not used by you: Sayaka and Fuu cast them when you call them out with L.
🕒 Time and weather
A game hour lasts 30 real seconds, so a day takes 12 minutes. Outdoor maps get night, cloud and rain, and the weather changes orb damage. One orb only appears at night.
Home Town: Sayaka’s House and the School
📍 Home town (Sayaka’s neighbourhood)
Yaiba Kurogane, the wild boy from the jungle, now lives with Sayaka Mine and Rai Tatsugami. Onimaru has just picked up the Fujin Sword and turned into a real oni. You start in Sayaka’s house with Sayaka in the party (Rai is the second player).
⏳ Last chances
- The three things in Sayaka’s house (Star Orb, Rice Ball, 1000 yen) stay there until you take them, and Sayaka’s house is always on Shonosuke’s travel list, so nothing here is truly missable.
Walkthrough
- MainBefore leaving Sayaka’s house, open the three things in the back room with the attack button (Y on controller TYPE A): the Star Orb, a Rice Ball and 1000 yen. Chests and stone pedestals in this game make no message: the item pops out and the counter changes. See the map below.
- TipThe Star Orb is not for Yaiba: it lets Sayaka (and later Fuu) heal you. Call her with L; while she is out she casts STAR ORB (10 HP for 10 of her MP) whenever you are missing 10 HP or more.
- TipControls on TYPE A: Y attack, B jump, X guard, A use the selected item, R switch item, L call a party member. The English patch adds an area map on SELECT (on TYPE B it is on R) with exits, shops and the chests you have not opened yet.
- TipGrandma in Sayaka’s house heals everyone and saves the game for free (H on the map). There are two shops two doors up the street: the item shop (food, the MAP for 500 yen, the CLOCK for 1000 yen) and the drugstore (Drink S/M/L and the Revival Leaf).
- TipExperience works differently from most RPGs: you earn EXP equal to the damage you deal, on every hit, even if the enemy does not die. Orb attacks and thrown objects give none. Reaching level 2 takes 1000 EXP. Your HP and MP are not refilled on level up.
- MainWalk to the school in the top-left corner of town. Onimaru waits at the door. This fight cannot be won: his DEFENSE is 50 and Yaiba’s ATTACK is 20, so every hit does 0. Dodge his wind slashes until the scene ends.
- MainBack home, Rai explains that only the Raijin Sword can stand up to the Fujin Sword, and that an old man on Mt. Tengu is said to guard it. Sayaka knows the mountain: off you go.
Checklist
- Where
- Sayaka’s house, back room (chest A)
- How
- Open it with the attack button.
- Reward
- STAR ORB: Sayaka/Fuu heal 10 HP (10 MP).
Treasure (3)
| Item | Map | Where | |
|---|---|---|---|
| Star Orb | Sayaka’s house (inside) | marker A on the map | |
| Rice Ball | Sayaka’s house (inside) | marker B on the map | |
| 1000 yen | Sayaka’s house (inside) | marker C on the map |
Bosses
🗺️ Maps for this part (2)
Yellow squares with letters are treasure (chests, or stones you hit with the attack button). Numbered circles mark events, bosses and orbs. White squares are shops (I item shop, D drugstore, W weapons, A armor) and green circles are places to rest or save (H Sayaka’s house, N inn, S shop with a save statue). Tap a map to open it full size.
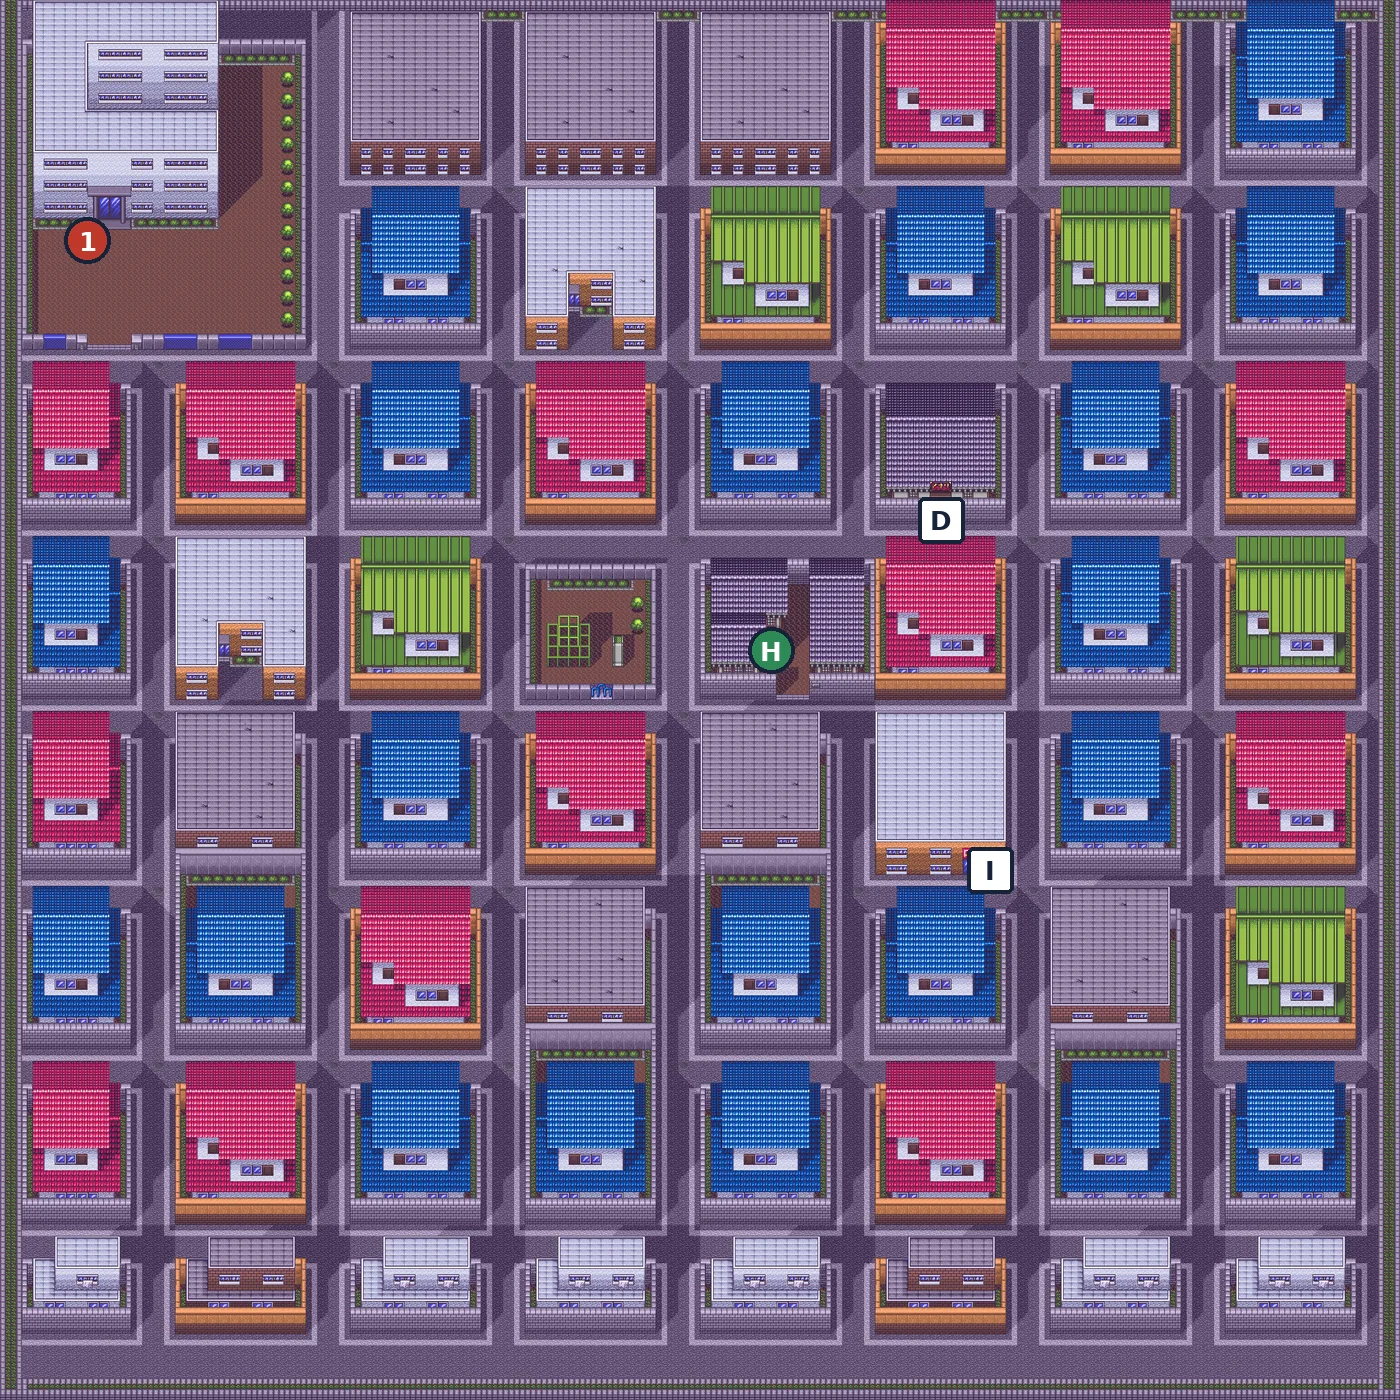
- 1School: Onimaru (you cannot win)
- DDrugstore (Drink S/M/L, Revival Leaf)
- HSayaka’s house: Grandma heals and saves for free
- IItem shop (Apple, Rice Ball, Meat, Map, Clock)
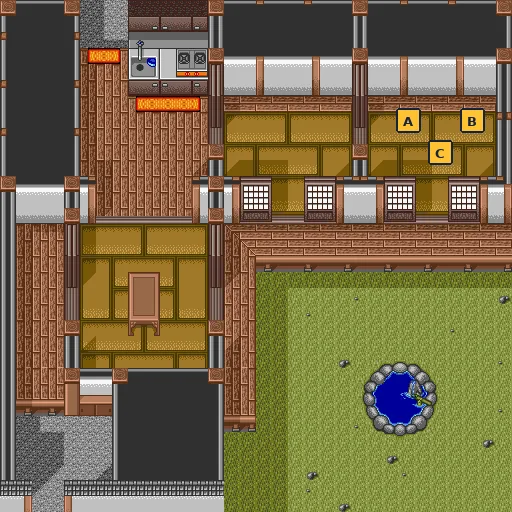
- A Star Orb
- B Rice Ball
- C 1000 yen
Mt. Tengu: the Raijin Sword
📍 Mt. Tengu path · forest · cave · Musashi’s house · summit · 🎚️ Suggested level (old FAQ): about 10–14
Rai’s sister Fuu joins on the mountain path, Rai finds the Toshin Sword, and Yaiba pulls the Raijin Sword out of the ground in front of a 400-year-old swordsman. Then Frog Man kidnaps Sayaka.
⏳ Last chances
- Mt. Tengu leaves Shonosuke’s travel list once the orb hunt starts (Part 5). Collect the forest and cave treasure before you go to Onimaru Castle.
- 10 treasures on this part’s maps can be missed: Mt. Tengu leaves Shonosuke’s travel list when the orb hunt starts (Part 5).
Walkthrough
- MainOn the mountain path, Rai meets his little sister Fuu, who tells him the Toshin Sword has turned up somewhere on this mountain. Fuu joins (Lv 3). Like Sayaka, she is a healer who uses the healing orbs.
- MainIn the forest a boulder blocks the way (pin 1 on the forest map). Yaiba cannot move it. Rai says the Toshin Sword could smash it, so explore the forest first.
- SideForest treasure (letters on the forest map): Drink M in a chest a little north-east of where you enter (E), an Apple in the stone in the top-right corner (B), then walk west along the top ledge to 1000 yen (D) and the stone with the Toshin Sword (C). Two more stones (A, G) and a chest (F) hold 100 yen each. Jump onto raised ground with B: a jump climbs at most two steps.
- MainThe stone with the Toshin Sword is the one that matters: it is Rai’s sword, and Rai uses it to smash the boulder. Go back to pin 1. (In a 2-player game, equip it on Rai: he can only use special moves and orbs with the Toshin or Raijin Sword.)
- SideThe cave beyond has 1000 yen, a Rice Ball and another 1000 yen. Past the cave, cross the cliff platforms carefully; flying enemies can knock you off.
- MainFollow the old man at the top to his house. He turns out to be Miyamoto Musashi. The Raijin Sword is stuck in the ground outside; Yaiba pulls it out, which Musashi himself never managed. Musashi joins (Lv 7), and you get the RAIJIN ORB.
- TipCheck that Yaiba has the Raijin Sword equipped (START, EQUIP). It multiplies ATTACK by 1.4, unlocks Yaiba’s special moves (CYCLONE SWORD at Lv 3, THUNDER SLASH at Lv 5, PINWHEEL at Lv 7) and lets you fire orbs with R and A. Inputs are on the Characters & Combat page.
- TipTHUNDER SLASH (jump, then Y+B together in the air) doubles your ATTACK before the enemy’s DEFENSE is subtracted, so it more than doubles your damage, and your EXP, per hit. It is the best levelling move in the game.
- MainNext morning Frog Man (one of Onimaru’s Eight Oni) snatches Sayaka and demands the Raijin Sword at the foot of the cliff behind the house. Fuu leads you there. Beat Frog Man on the summit.
- MainBack at the hut, Snake Man arrives to finish off his failed colleague. Beat him outside. Frog Man, whose real name is Geroda Gerozaemon, has nowhere left to go: Gerozaemon joins (Lv 8, axe fighter).
- MainAt Sayaka’s house Gerozaemon explains that Onimaru Castle is sealed by a barrier: you need the 8 keys held by the Eight Oni. You have Snake Man’s key and Gerozaemon’s. Three more Oni are in S Town, C City and M City; choose any order (Part 3).
Checklist
- Where
- Mt. Tengu path
- How
- Story.
- Reward
- Healer, Lv 3. Uses the healing orbs you own.
- Where
- Mt. Tengu forest, a stone on a western ledge (see map)
- How
- Hit the stone with the attack button.
- Reward
- TOSHIN SWORD: Rai only, ATTACK ×1.4, unlocks his special moves.
- Where
- Musashi’s house
- How
- Story: Yaiba draws the sword.
- Reward
- RAIJIN SWORD (Yaiba only, ATTACK ×1.4), RAIJIN ORB, Musashi (Lv 7).
- Where
- Mt. Tengu hut
- How
- Story, after Snake Man.
- Reward
- Axe fighter, Lv 8.
Treasure (10)
| Item | Map | Where | |
|---|---|---|---|
| 100 yen | Mt. Tengu: the forest | marker A on the map (hidden in a stone: hit it with the attack button) ⚠ Missable: Mt. Tengu leaves Shonosuke’s travel list when the orb hunt starts (Part 5). | |
| Apple | Mt. Tengu: the forest | marker B on the map (hidden in a stone: hit it with the attack button) ⚠ Missable: Mt. Tengu leaves Shonosuke’s travel list when the orb hunt starts (Part 5). | |
| Toshin Sword | Mt. Tengu: the forest | marker C on the map (hidden in a stone: hit it with the attack button) ⚠ Missable: Mt. Tengu leaves Shonosuke’s travel list when the orb hunt starts (Part 5). | |
| 1000 yen | Mt. Tengu: the forest | marker D on the map ⚠ Missable: Mt. Tengu leaves Shonosuke’s travel list when the orb hunt starts (Part 5). | |
| Drink M | Mt. Tengu: the forest | marker E on the map ⚠ Missable: Mt. Tengu leaves Shonosuke’s travel list when the orb hunt starts (Part 5). | |
| 100 yen | Mt. Tengu: the forest | marker F on the map ⚠ Missable: Mt. Tengu leaves Shonosuke’s travel list when the orb hunt starts (Part 5). | |
| 100 yen | Mt. Tengu: the forest | marker G on the map (hidden in a stone: hit it with the attack button) ⚠ Missable: Mt. Tengu leaves Shonosuke’s travel list when the orb hunt starts (Part 5). | |
| 1000 yen | Mt. Tengu: the cave | marker A on the map ⚠ Missable: Mt. Tengu leaves Shonosuke’s travel list when the orb hunt starts (Part 5). | |
| Rice Ball | Mt. Tengu: the cave | marker B on the map ⚠ Missable: Mt. Tengu leaves Shonosuke’s travel list when the orb hunt starts (Part 5). | |
| 1000 yen | Mt. Tengu: the cave | marker C on the map ⚠ Missable: Mt. Tengu leaves Shonosuke’s travel list when the orb hunt starts (Part 5). |
Bosses
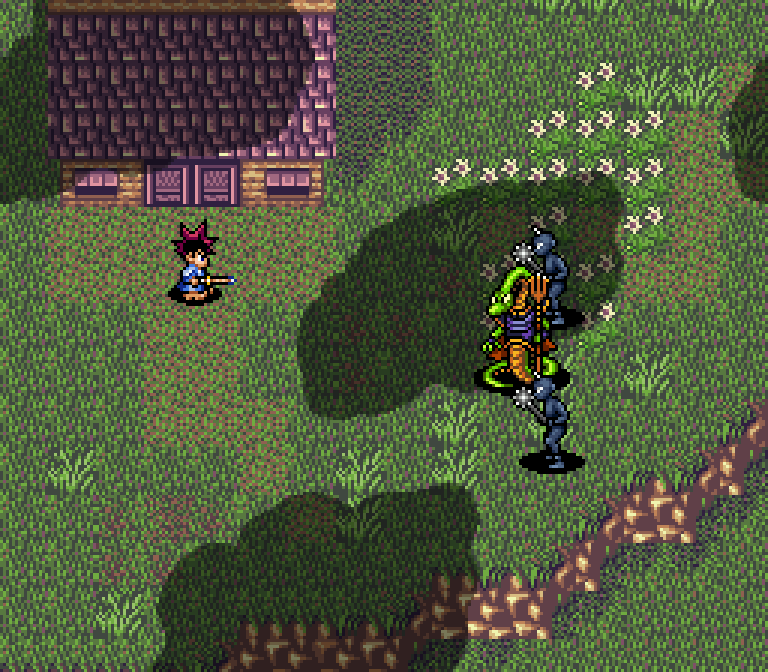 Snake Man · 1500 HP · ATK 35 · DEF 22
🗺️ Maps for this part (6)
Yellow squares with letters are treasure (chests, or stones you hit with the attack button). Numbered circles mark events, bosses and orbs. White squares are shops (I item shop, D drugstore, W weapons, A armor) and green circles are places to rest or save (H Sayaka’s house, N inn, S shop with a save statue). Tap a map to open it full size.
- 1Fuu joins
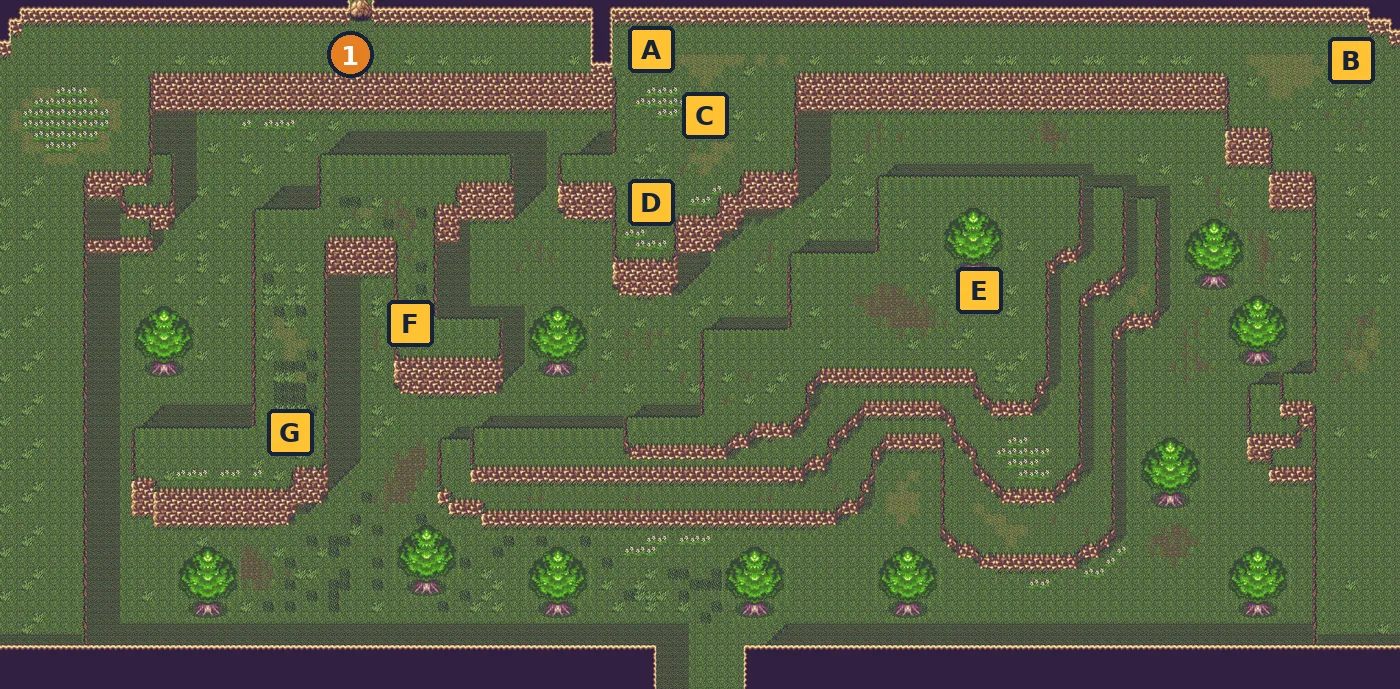
- 1Boulder: Rai smashes it with the Toshin Sword
- A 100 yen (stone)
- B Apple (stone)
- C Toshin Sword (stone)
- D 1000 yen
- E Drink M
- F 100 yen
- G 100 yen (stone)
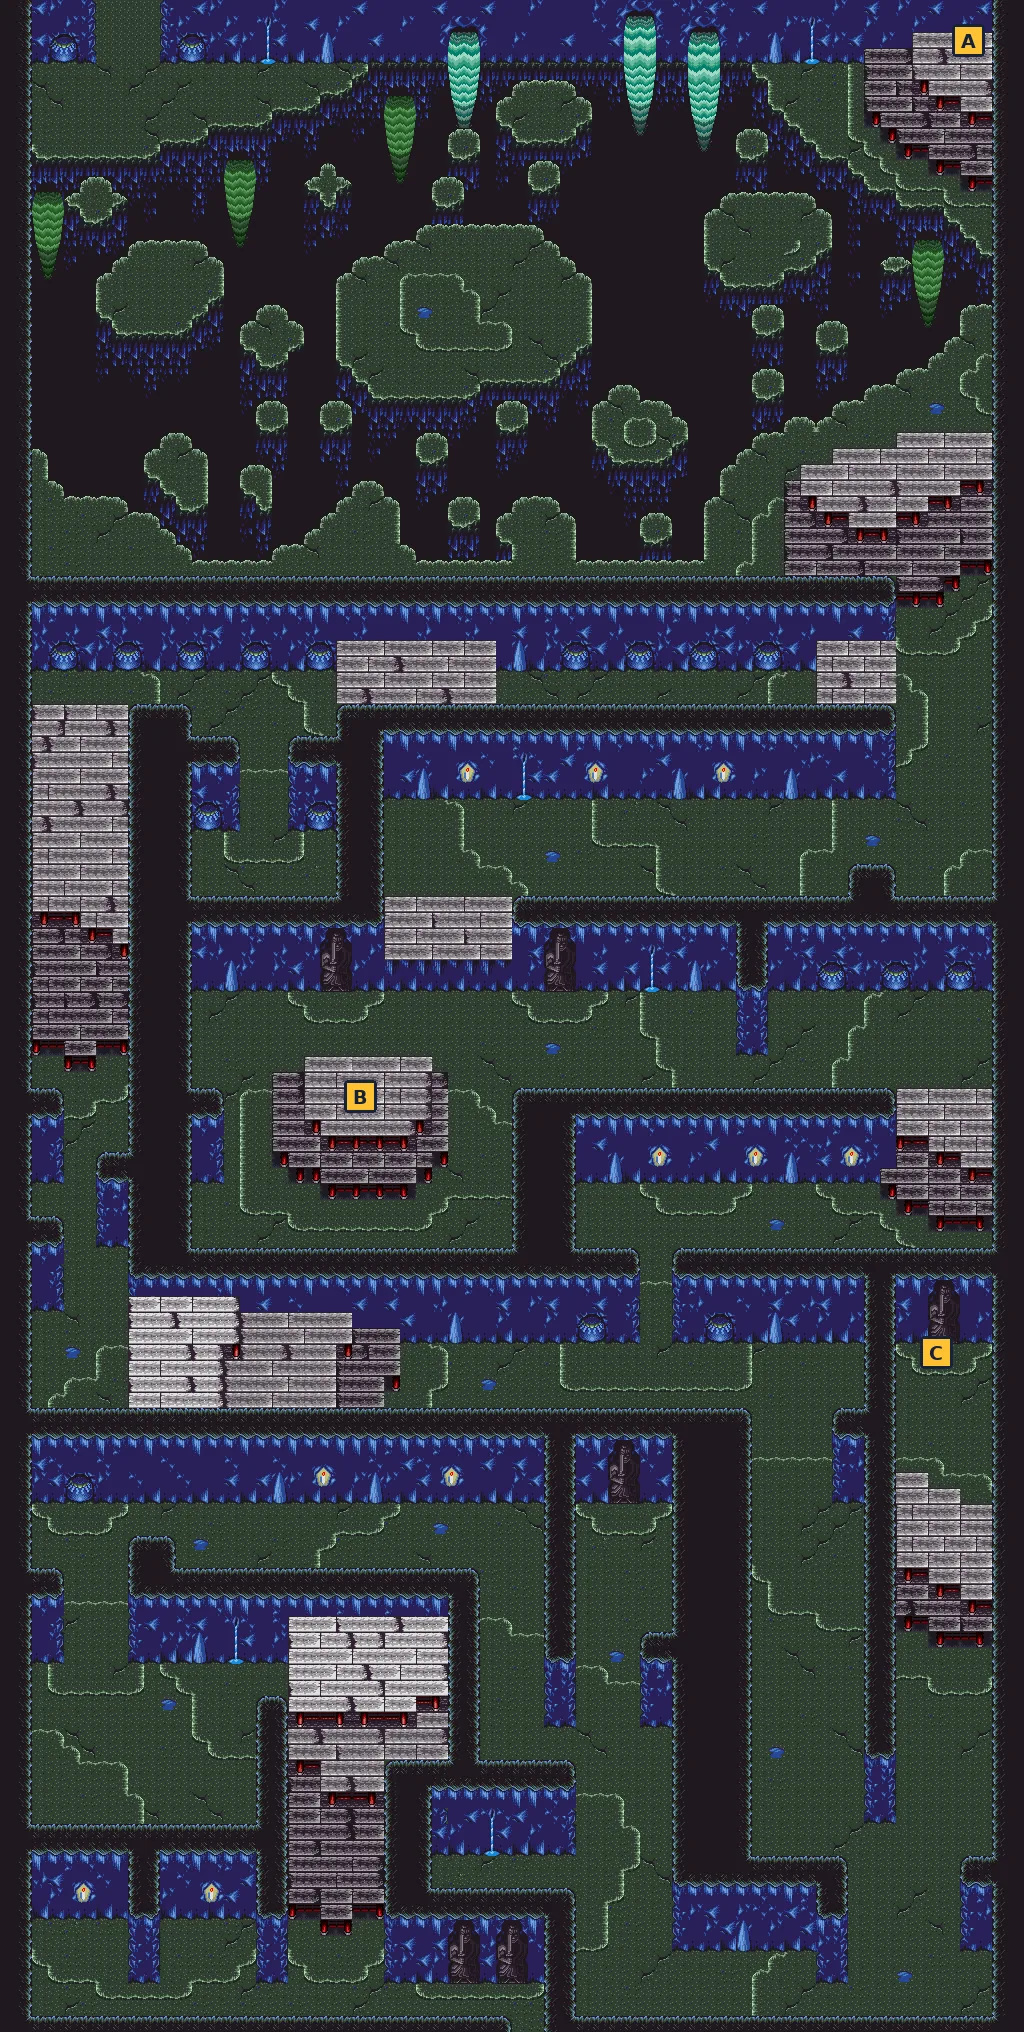
- A 1000 yen
- B Rice Ball
- C 1000 yen
- 1Musashi’s house: draw the Raijin Sword, Musashi joins
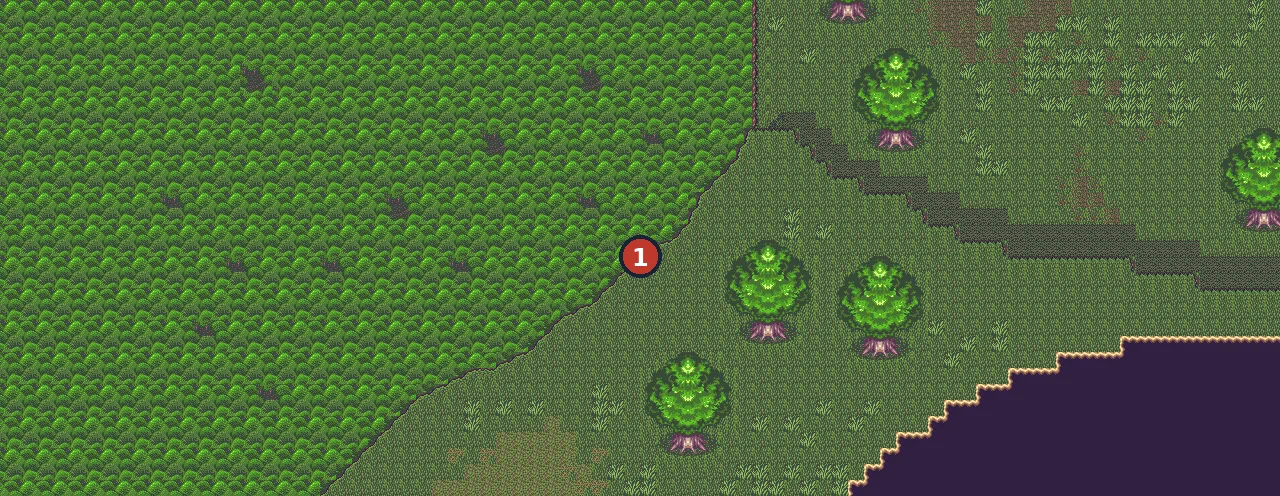
- 1Frog Man
- 1Snake Man (outside the hut)
S Town, C City and M City: Three of the Eight Oni
📍 S Town · M City · Spider Man’s airship · C City · Bat Guy’s hideout · 🎚️ Suggested level (old FAQ): 18–21
Choose your destination from Sayaka’s house; the three towns can be done in any order. Each Oni holds a key. Shonosuke the vulture takes you between Sayaka’s house and the place you picked.
⏳ Last chances
- S Town, C City, M City and the airship drop off the travel list once the orb hunt begins, and none of them has treasure.
Walkthrough
- TipTrain first. The old FAQ suggests about Lv 18-20 here. A quick check: your damage is your ATTACK minus the boss’s DEF, so look at the boss numbers below and make sure your ATTACK (STATUS screen) is comfortably higher.
- MainM City: walk to the south-west corner, where food has been left out. Sayaka smells a trap; Spider Man grabs her and flies off to his airship. Call Shonosuke: Spider Man’s Airship is now on the travel list.
- MainOn the airship, walk west to Spider Man. Do not fall off the edge. Beat him for his key and Sayaka comes back.
- MainS Town: go to the lake in the north-west and jump in. Slug Man (“call me Sluggy~!”) fights you there. Beat him for his key.
- MainC City: bats gather in the south-west; Bat Guy challenges you and flees into his hideout. Inside, head east, then down, east again and up to the green-floored room; ignore the dead end on the right. Climb the stairs, cross the gap at the cliff with PINWHEEL, climb once more and fight Bat Guy.
- MainAfter the third Oni, the remaining three (Mantis Man, Starfish Man and Sea Cucumber) sneak into Sayaka’s house at night. They are hopeless: their secret weapon misfires and they run off, leaving their keys. That makes all 8 keys.
Bosses
🗺️ Maps for this part (5)
Yellow squares with letters are treasure (chests, or stones you hit with the attack button). Numbered circles mark events, bosses and orbs. White squares are shops (I item shop, D drugstore, W weapons, A armor) and green circles are places to rest or save (H Sayaka’s house, N inn, S shop with a save statue). Tap a map to open it full size.
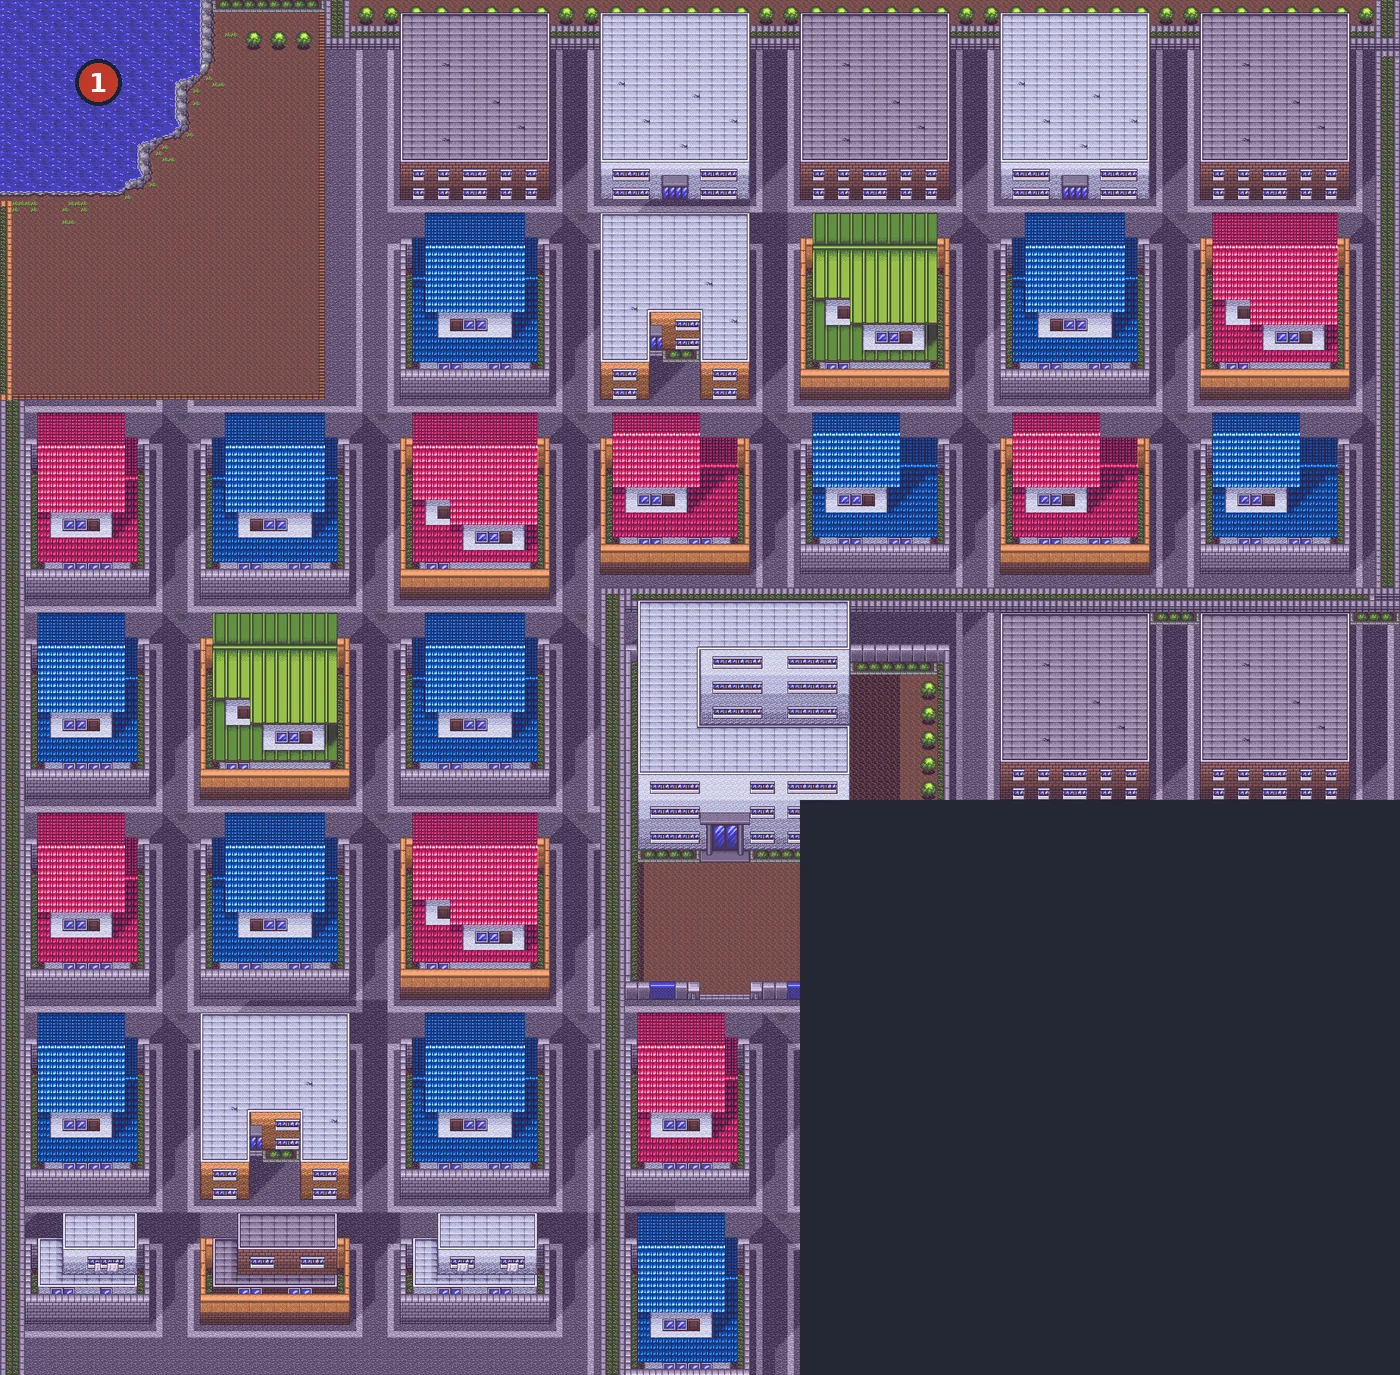
- 1The lake: Slug Man
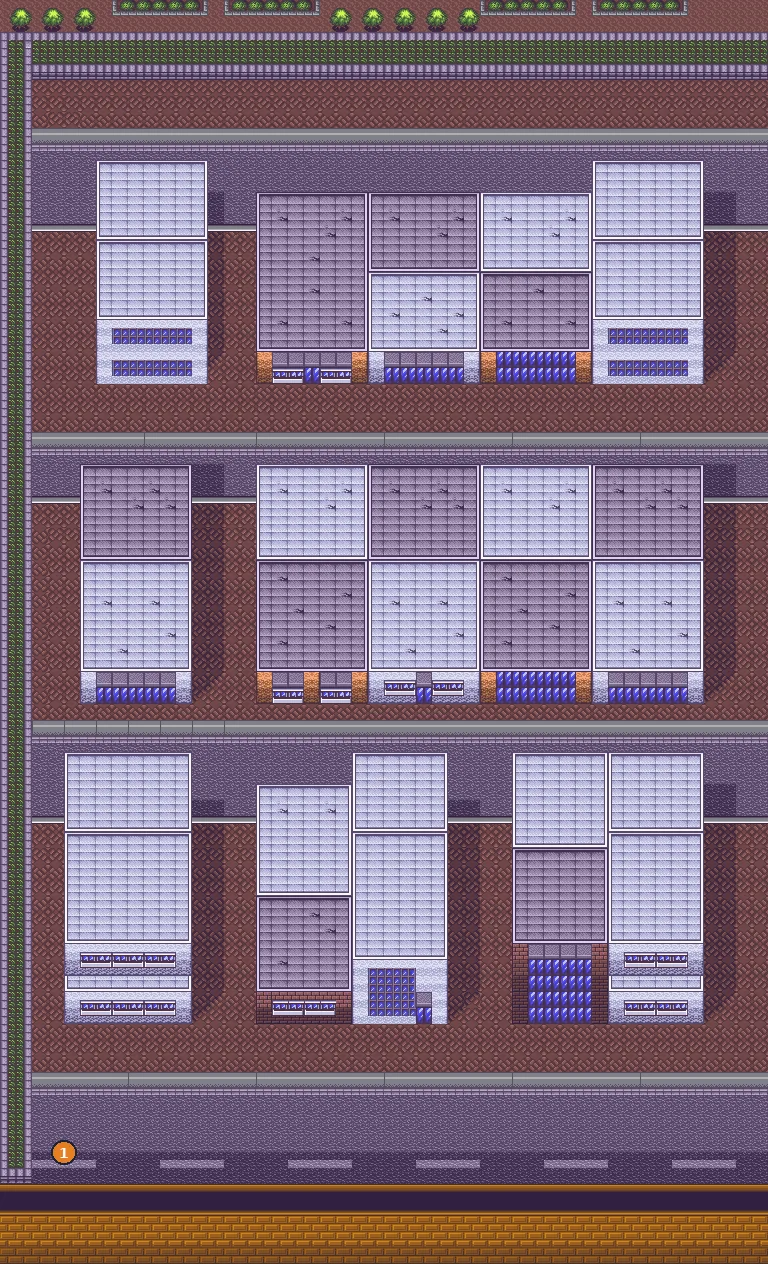
- 1Free food: Spider Man kidnaps Sayaka
- 1Spider Man
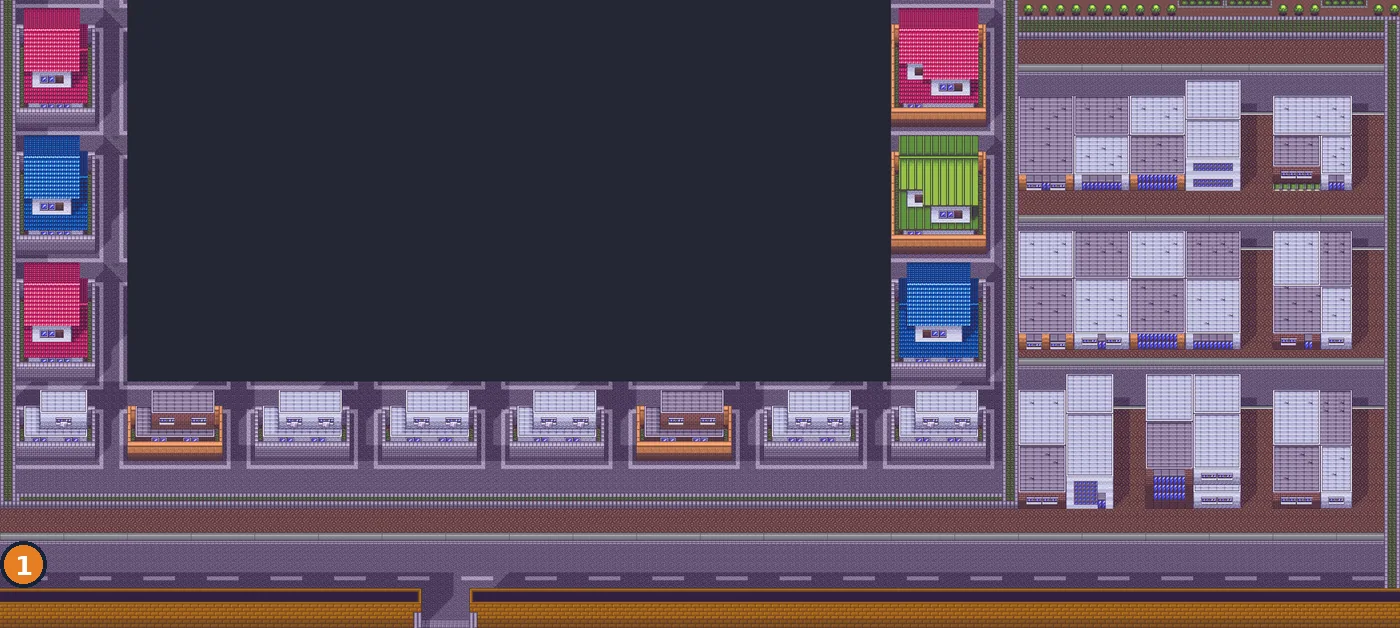
- 1Bats gather: Bat Guy
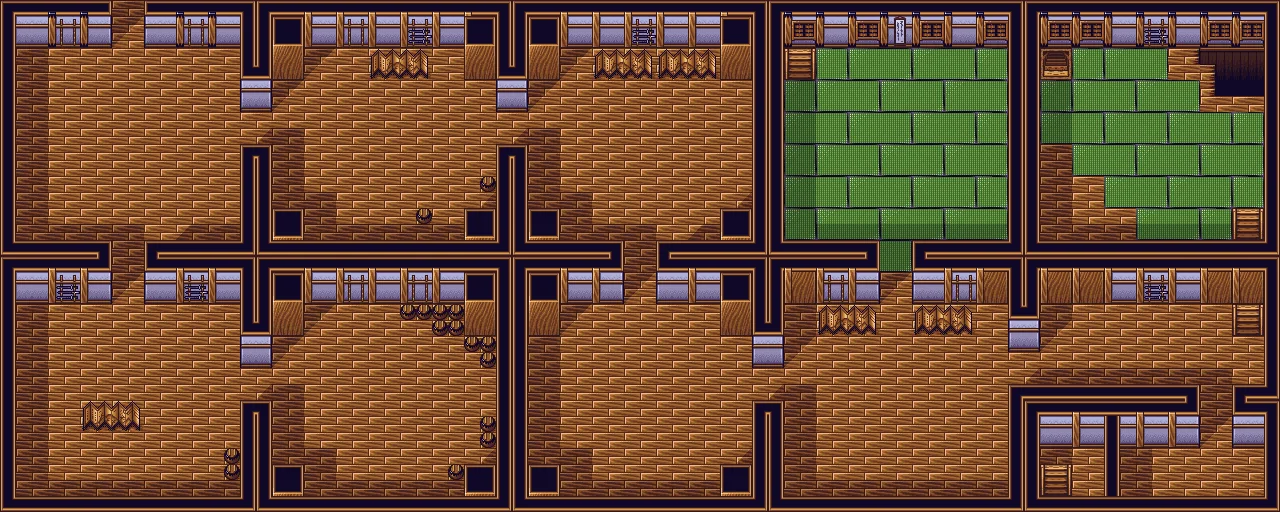
Kojiro’s Challenge and Onimaru Castle
📍 Onimaru Castle Town · Onimaru Castle (7 floors) · 🎚️ Suggested level (old FAQ): 24–25
An arrow with a letter hits Sayaka’s house: Sasaki Kojiro, brought back to life by Onimaru, challenges Yaiba outside Onimaru Castle at 5 PM. After him, the barrier is down and you storm the castle. It is a long dungeon with two shops.
⏳ Last chances
- Onimaru Castle never appears on the travel list. Its 15 treasure chests can only be collected during this visit.
- 15 treasures on this part’s maps can be missed: Onimaru Castle is never on the travel list: once Onimaru sends you home from the roof, it is gone.
Walkthrough
- TipRest and save at Sayaka’s house first; from here the fights come back to back. The old FAQ suggests about Lv 24-25. Stock up on Rice Balls (100 HP) and Meat (full HP).
- MainOnimaru Castle Town: head north-east to the building beside the castle. Sasaki Kojiro appears. Beat him; he admits he was fighting the wrong enemy and Kojiro joins (Lv 11, uses the DRYING POLE).
- MainOn the castle top, revived Bat Guy blocks the bridge to Onimaru. Do not fall in the hole in the middle. Beat him; Onimaru drops you through the floor into the underground lake.
- MainBeat Yakitori-kun, the anglerfish master of the lake. Kill his fish with THUNDER SLASH and keep hitting him when he surfaces.
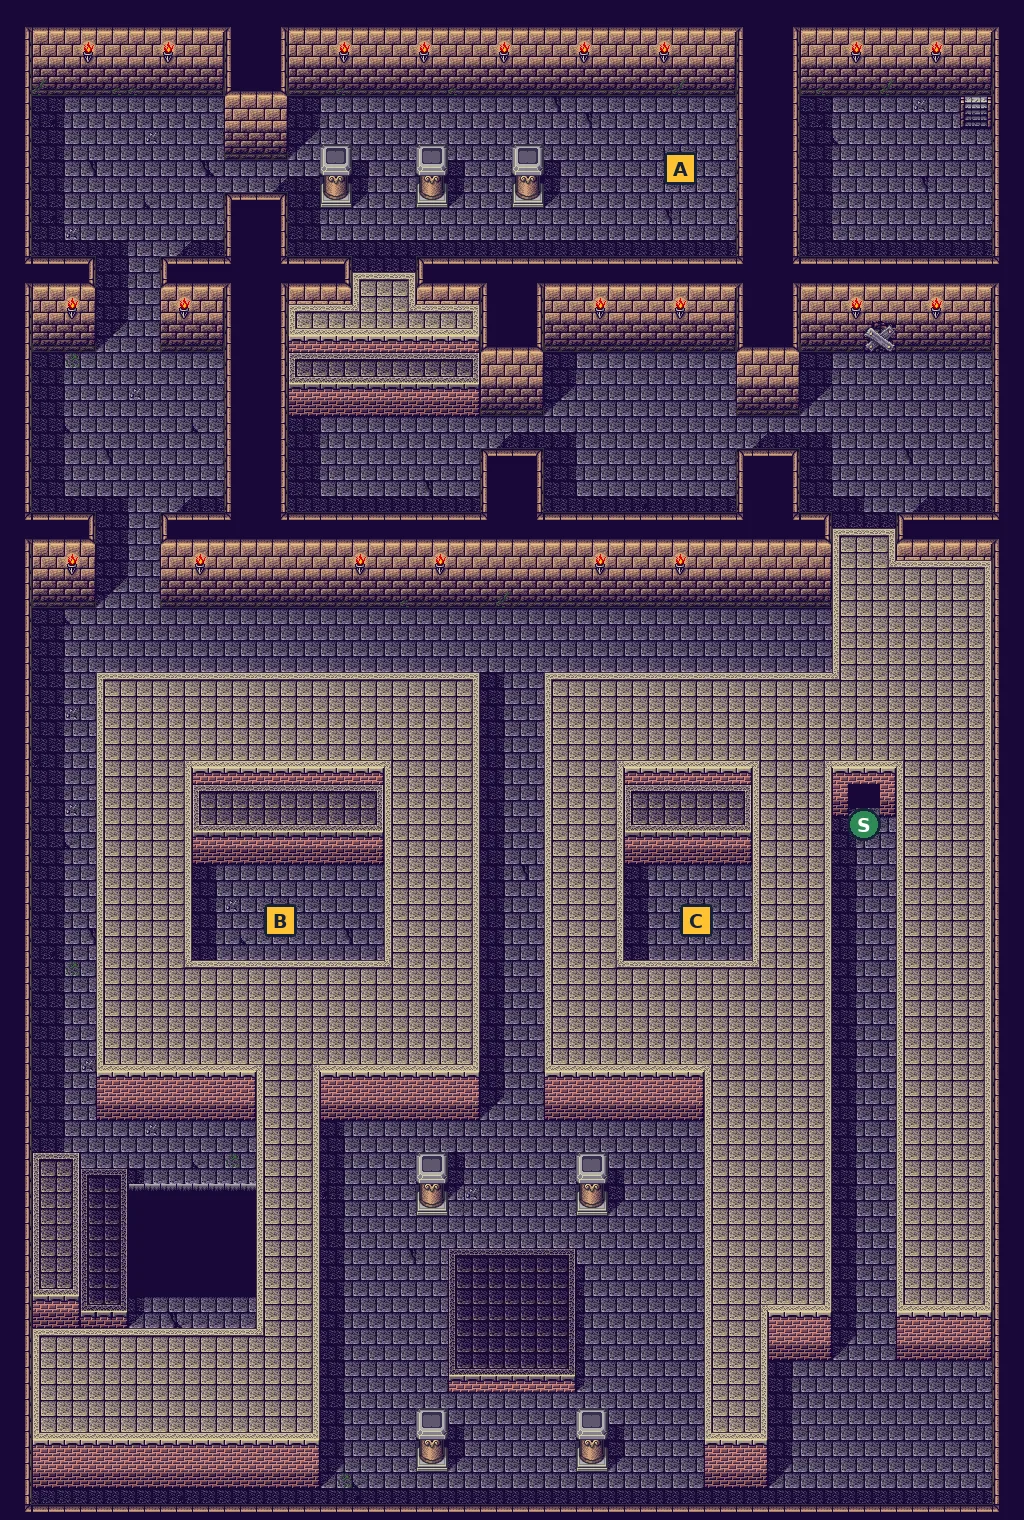
- MainUnderground floor: grab the Apple, the Rice Ball and the Drink M (map), then use the shop and save statue (S). Hit the door marked with an X with your sword to open it and go upstairs.
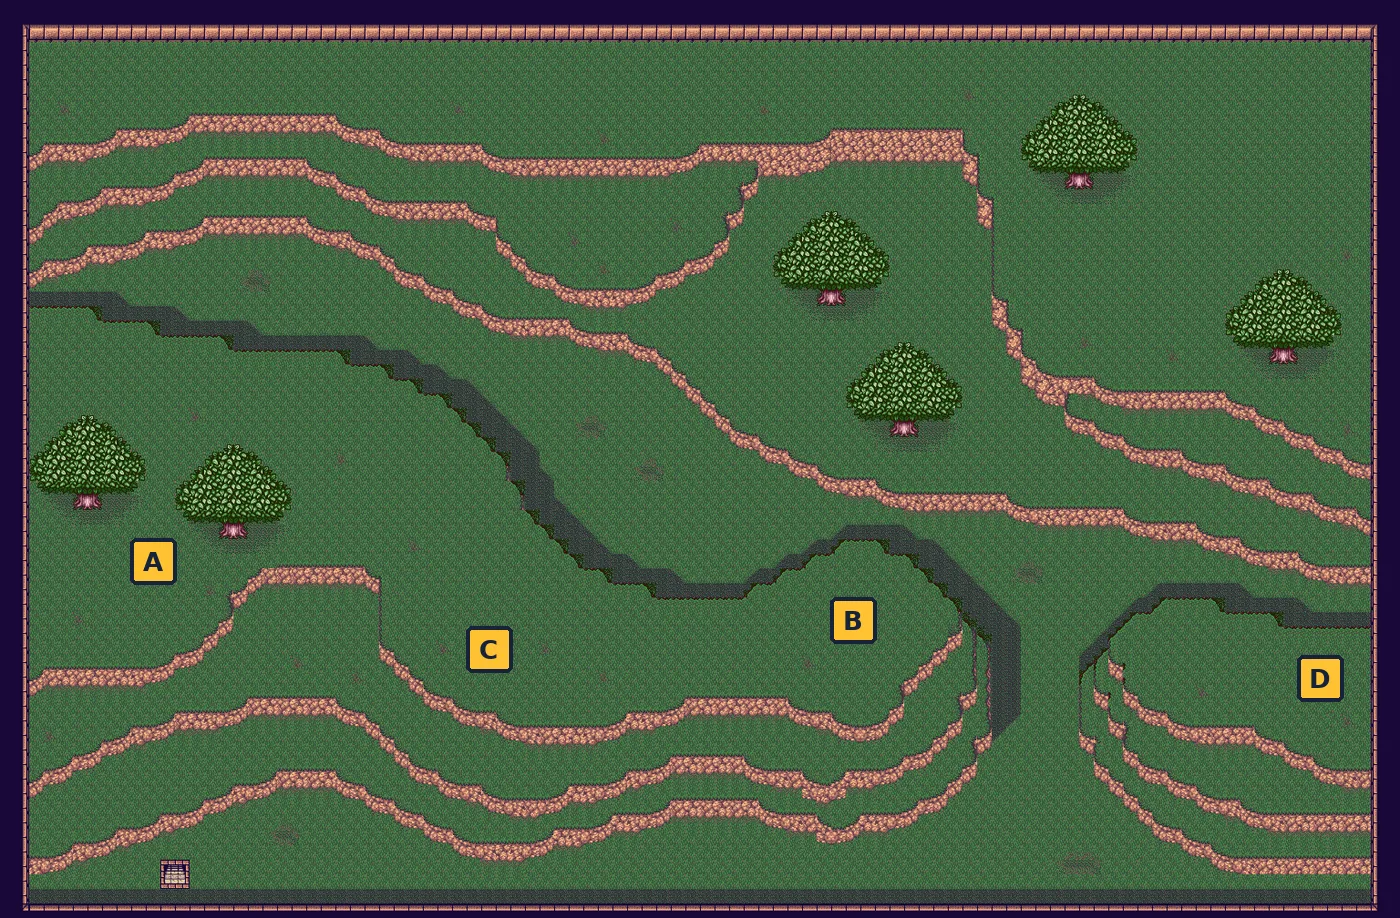
- MainForest floor: collect 1000 yen, 1000 yen, 100 yen and a Rice Ball, then go north to the open ground and fight Chameleon Bonaparte, the first of Onimaru’s Four Heavenly Kings.
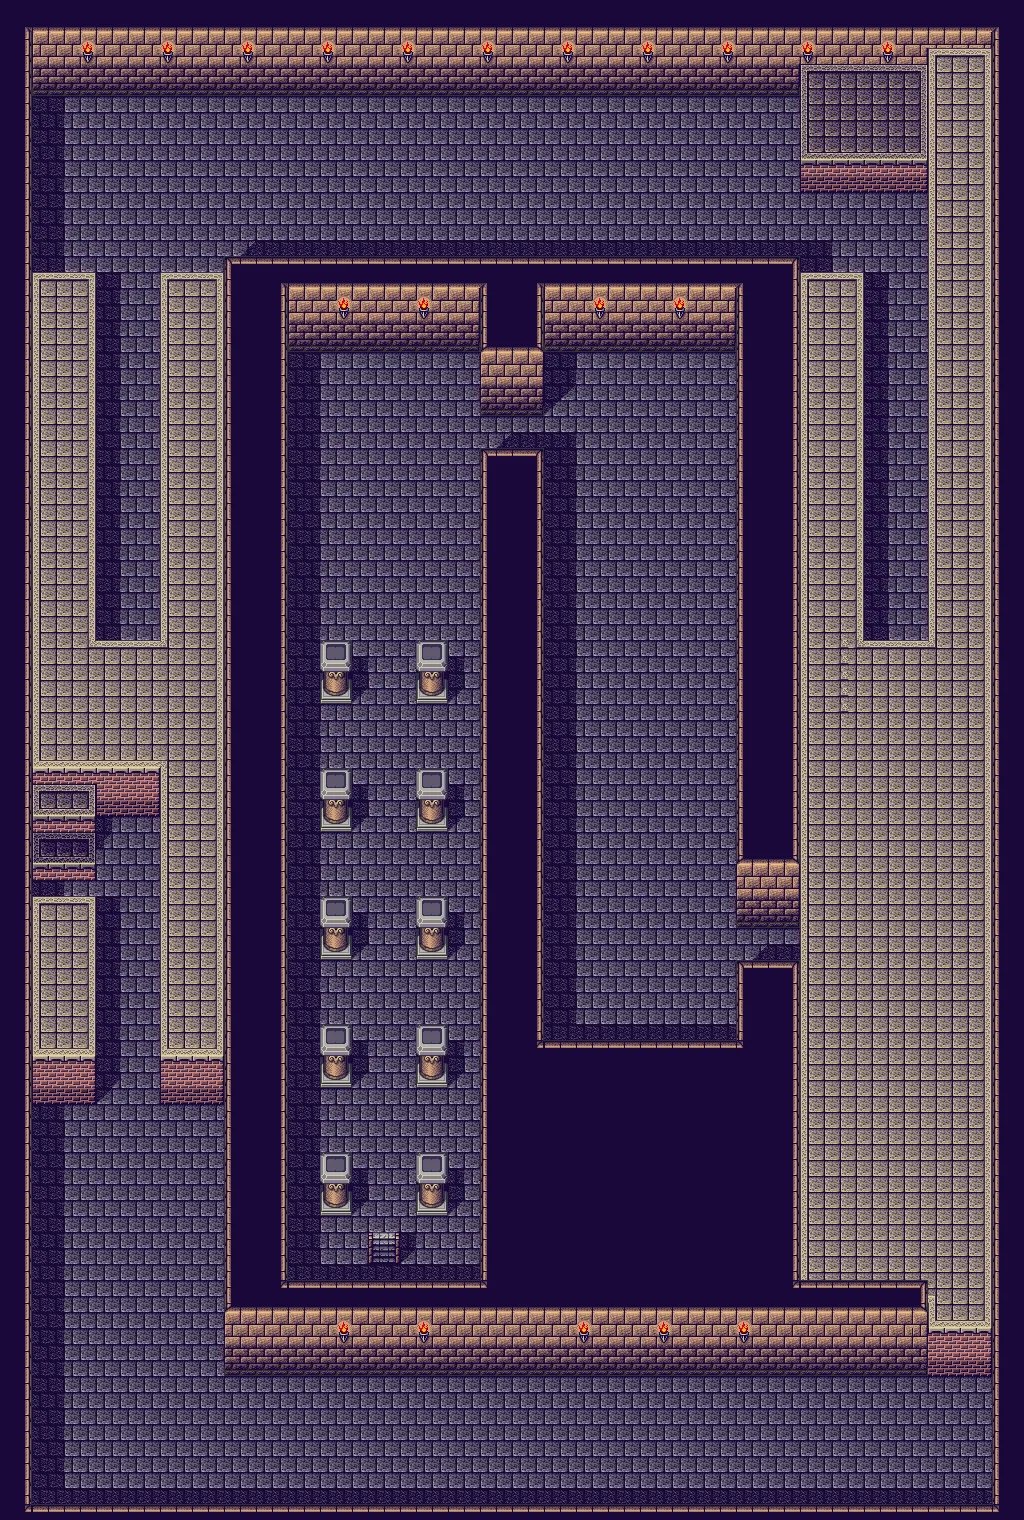
- MainHall of X-doors: a maze of doors marked with an X. Hit them with your sword to open them; head north and take the left door at each pair until you reach the next floor. Ignore the dead ends on the west side.
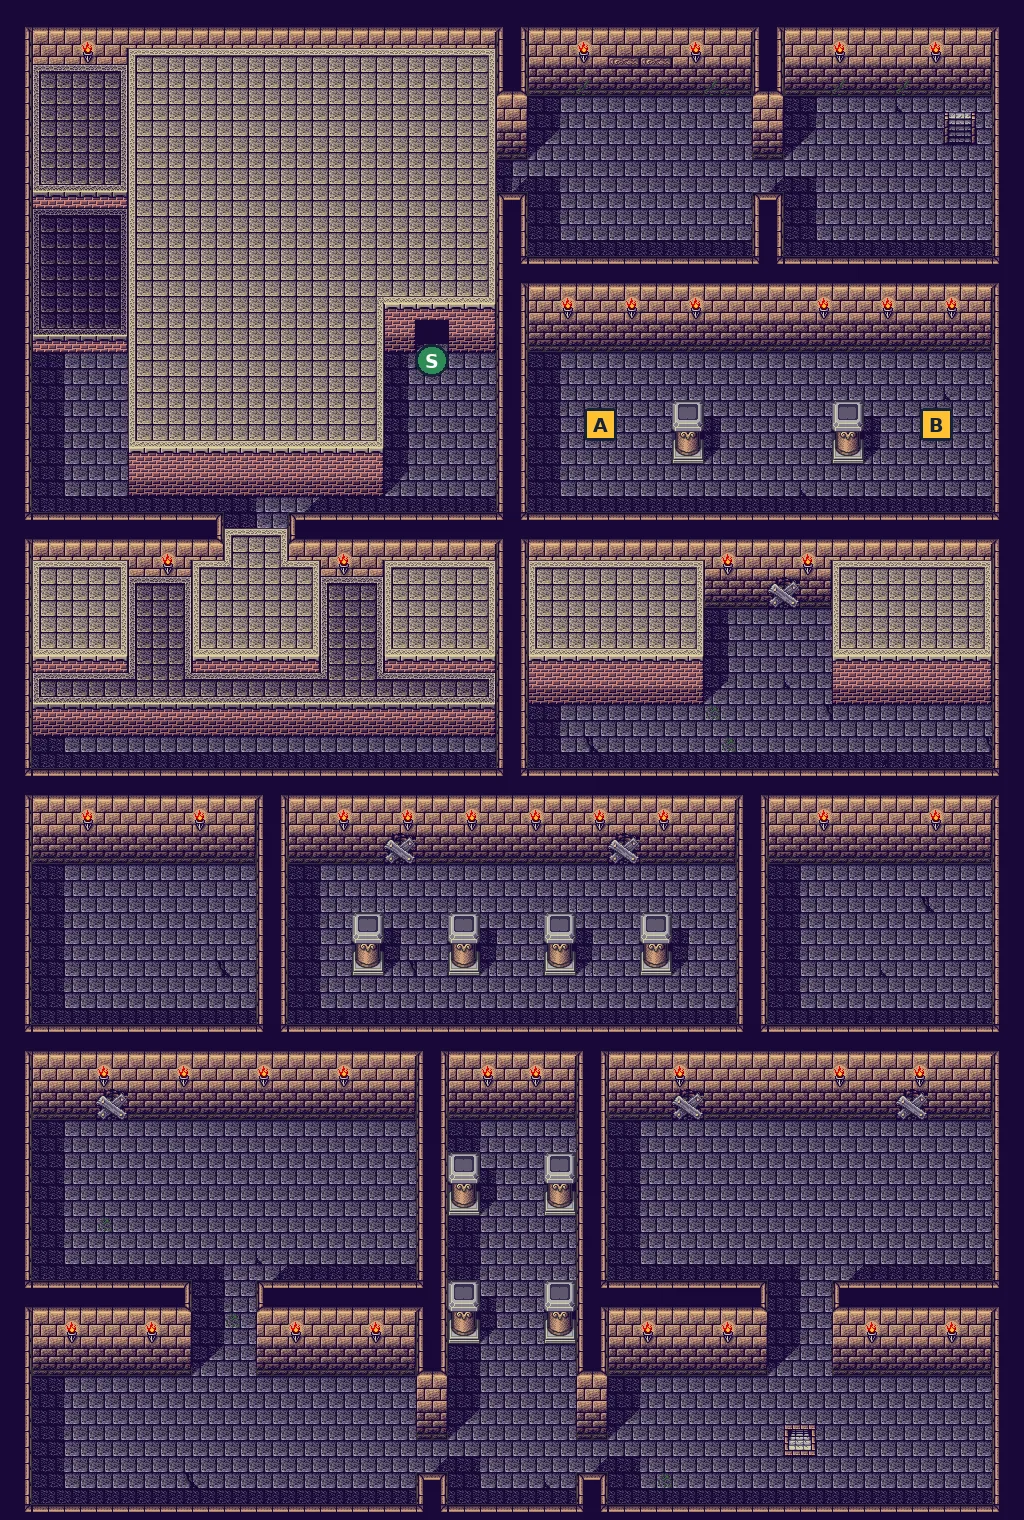
- MainDry Dry‘s floor has the second shop and save statue (S), a Good Sword and 1000 yen. Fight the “Super Gorilla” Dry Dry (he is no monkey).
- MainUpper floor: Meat (behind an X-door) and 1000 yen. Then Tortoise Europa‘s floor: beat the tortoise and its little turtles.
- MainThe last floor below the roof: three chests with a Good Wakizashi, a Rice Ball and Drink S, plus 1000 yen on the west side. Then climb to the roof.
- MainOn the roof Onimaru offers Yaiba a place at his side, then calls off the duel and flies away: “You’d better hone your skills before we meet again.” The party is sent home.
Checklist
- Where
- Onimaru Castle Town
- How
- Story, after beating him.
- Reward
- Sword fighter, Lv 11, DRYING POLE.
Treasure (15)
| Item | Map | Where | |
|---|---|---|---|
| Apple | Onimaru Castle: underground floor | marker A on the map ⚠ Missable: Onimaru Castle is never on the travel list: once Onimaru sends you home from the roof, it is gone. | |
| Rice Ball | Onimaru Castle: underground floor | marker B on the map ⚠ Missable: Onimaru Castle is never on the travel list: once Onimaru sends you home from the roof, it is gone. | |
| Drink M | Onimaru Castle: underground floor | marker C on the map ⚠ Missable: Onimaru Castle is never on the travel list: once Onimaru sends you home from the roof, it is gone. | |
| 1000 yen | Onimaru Castle: forest floor (Chameleon Bonaparte) | marker A on the map ⚠ Missable: Onimaru Castle is never on the travel list: once Onimaru sends you home from the roof, it is gone. | |
| 100 yen | Onimaru Castle: forest floor (Chameleon Bonaparte) | marker B on the map ⚠ Missable: Onimaru Castle is never on the travel list: once Onimaru sends you home from the roof, it is gone. | |
| 1000 yen | Onimaru Castle: forest floor (Chameleon Bonaparte) | marker C on the map ⚠ Missable: Onimaru Castle is never on the travel list: once Onimaru sends you home from the roof, it is gone. | |
| Rice Ball | Onimaru Castle: forest floor (Chameleon Bonaparte) | marker D on the map ⚠ Missable: Onimaru Castle is never on the travel list: once Onimaru sends you home from the roof, it is gone. | |
| Good Sword | Onimaru Castle: Dry Dry’s floor | marker A on the map ⚠ Missable: Onimaru Castle is never on the travel list: once Onimaru sends you home from the roof, it is gone. | |
| 1000 yen | Onimaru Castle: Dry Dry’s floor | marker B on the map ⚠ Missable: Onimaru Castle is never on the travel list: once Onimaru sends you home from the roof, it is gone. | |
| Meat | Onimaru Castle: upper floor | marker A on the map ⚠ Missable: Onimaru Castle is never on the travel list: once Onimaru sends you home from the roof, it is gone. | |
| 1000 yen | Onimaru Castle: upper floor | marker B on the map ⚠ Missable: Onimaru Castle is never on the travel list: once Onimaru sends you home from the roof, it is gone. | |
| Good Wakizashi | Onimaru Castle: the last floor below the roof | marker A on the map ⚠ Missable: Onimaru Castle is never on the travel list: once Onimaru sends you home from the roof, it is gone. | |
| Rice Ball | Onimaru Castle: the last floor below the roof | marker B on the map ⚠ Missable: Onimaru Castle is never on the travel list: once Onimaru sends you home from the roof, it is gone. | |
| Drink S | Onimaru Castle: the last floor below the roof | marker C on the map ⚠ Missable: Onimaru Castle is never on the travel list: once Onimaru sends you home from the roof, it is gone. | |
| 1000 yen | Onimaru Castle: the last floor below the roof | marker D on the map ⚠ Missable: Onimaru Castle is never on the travel list: once Onimaru sends you home from the roof, it is gone. |
Bosses
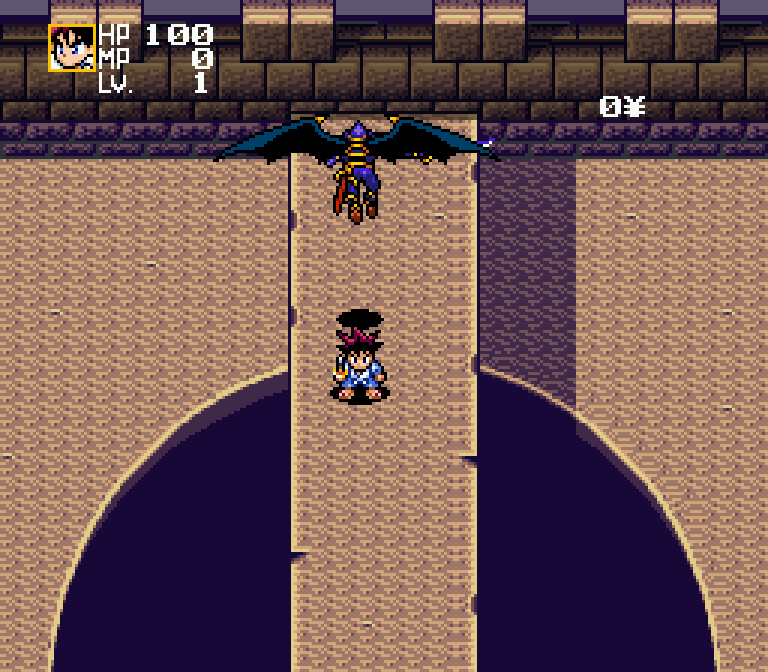 Bat Guy (revived) · 3000 HP · ATK 55 · DEF 30
🗺️ Maps for this part (8)
Yellow squares with letters are treasure (chests, or stones you hit with the attack button). Numbered circles mark events, bosses and orbs. White squares are shops (I item shop, D drugstore, W weapons, A armor) and green circles are places to rest or save (H Sayaka’s house, N inn, S shop with a save statue). Tap a map to open it full size.
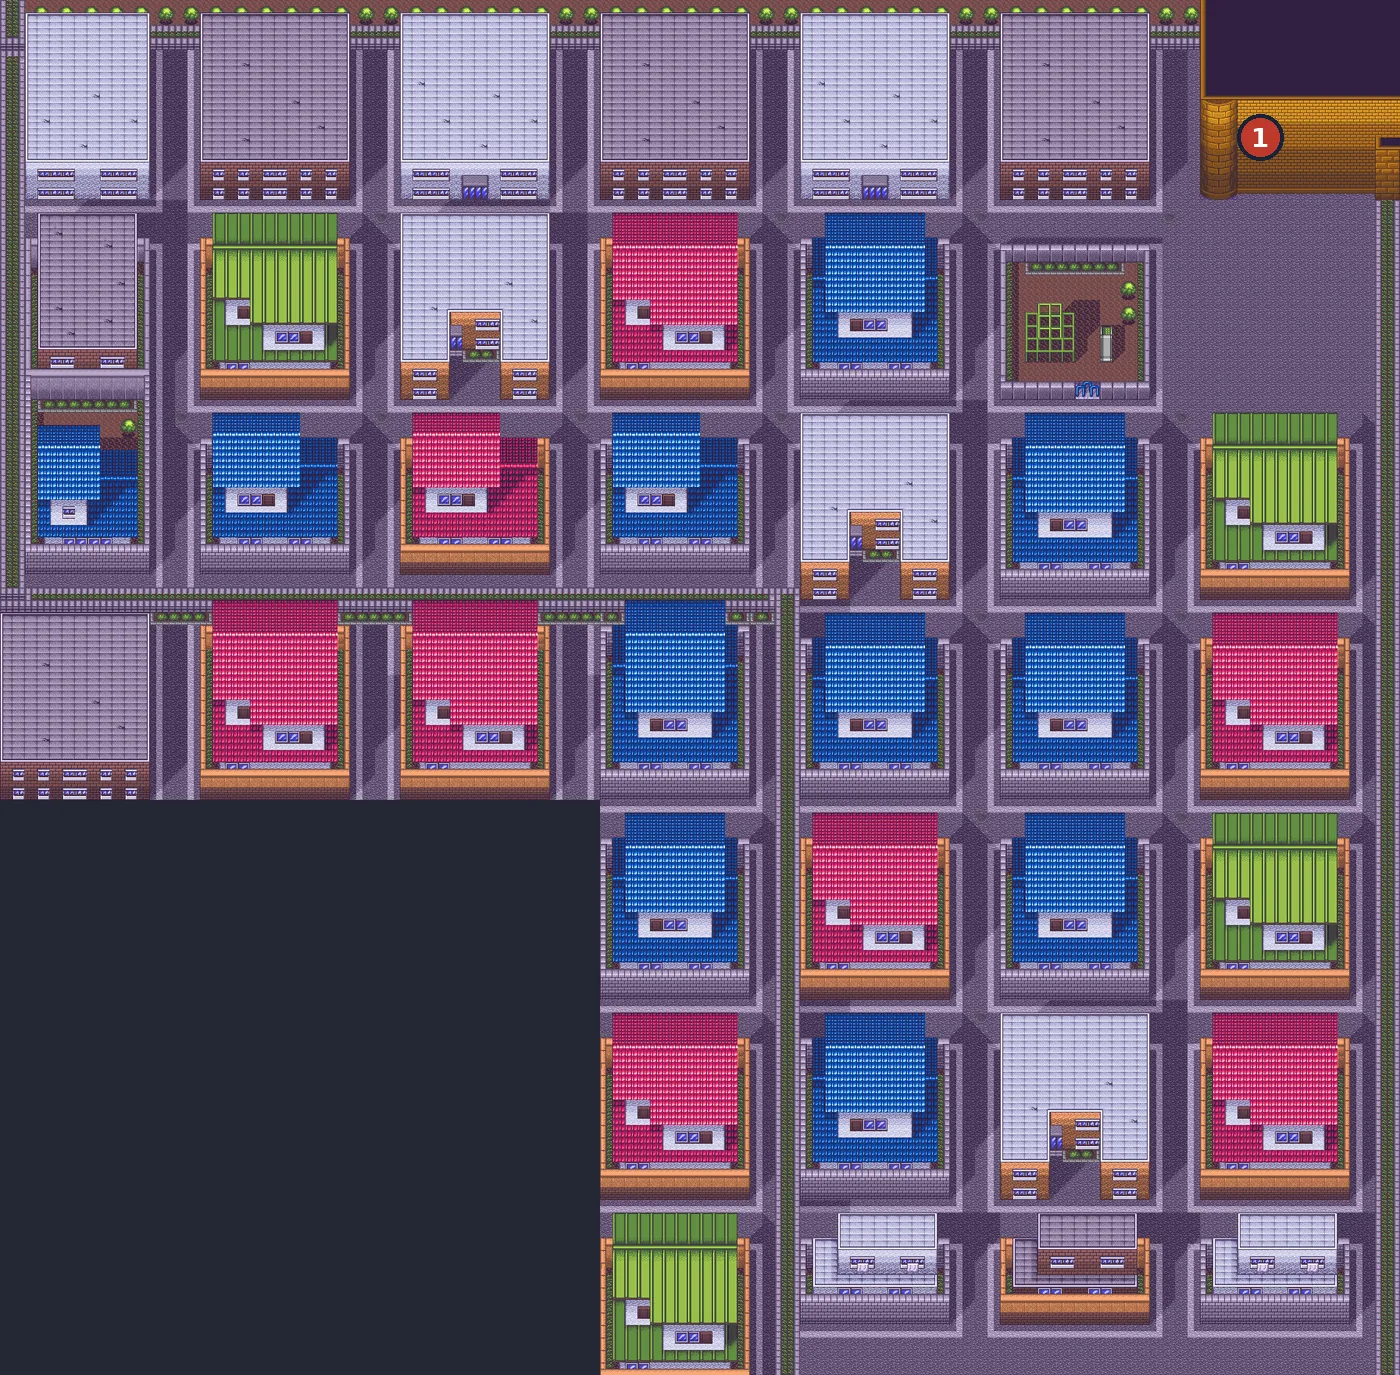
- 1Sasaki Kojiro (by the castle)
- A Apple
- B Rice Ball
- C Drink M
- SShop + save statue (Rice Ball, Meat, Drink L, Revival Leaf)
- A 1000 yen
- B 100 yen
- C 1000 yen
- D Rice Ball
- A Good Sword
- B 1000 yen
- SShop + save statue (Rice Ball, Meat, Drink L, Revival Leaf)
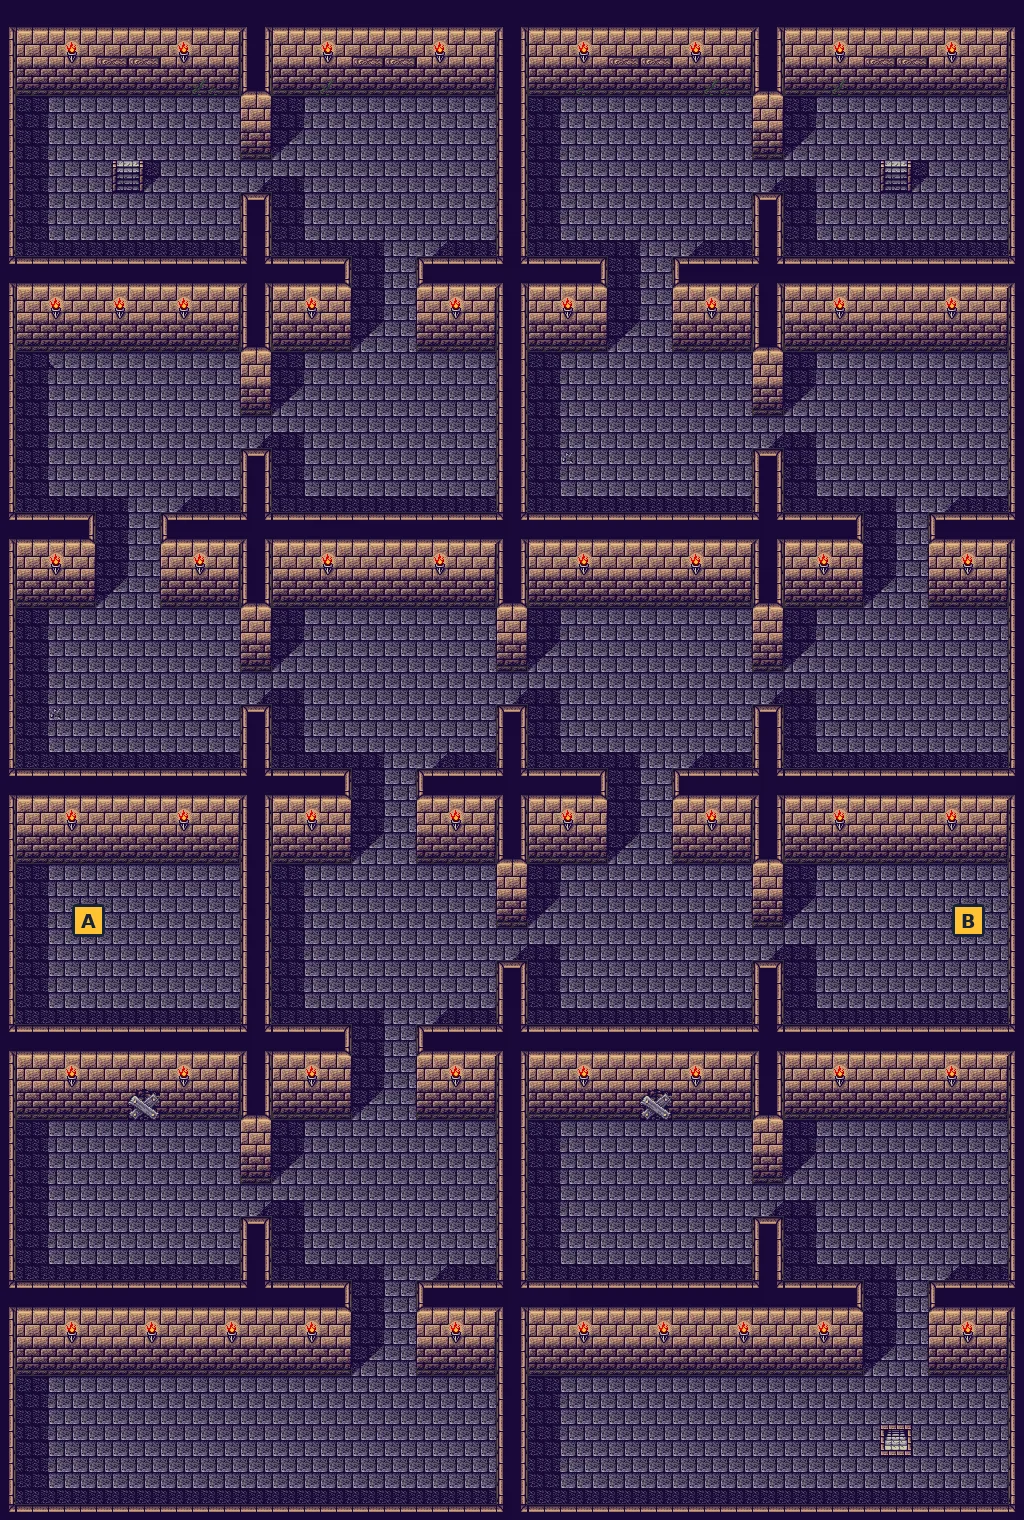
- A Meat
- B 1000 yen
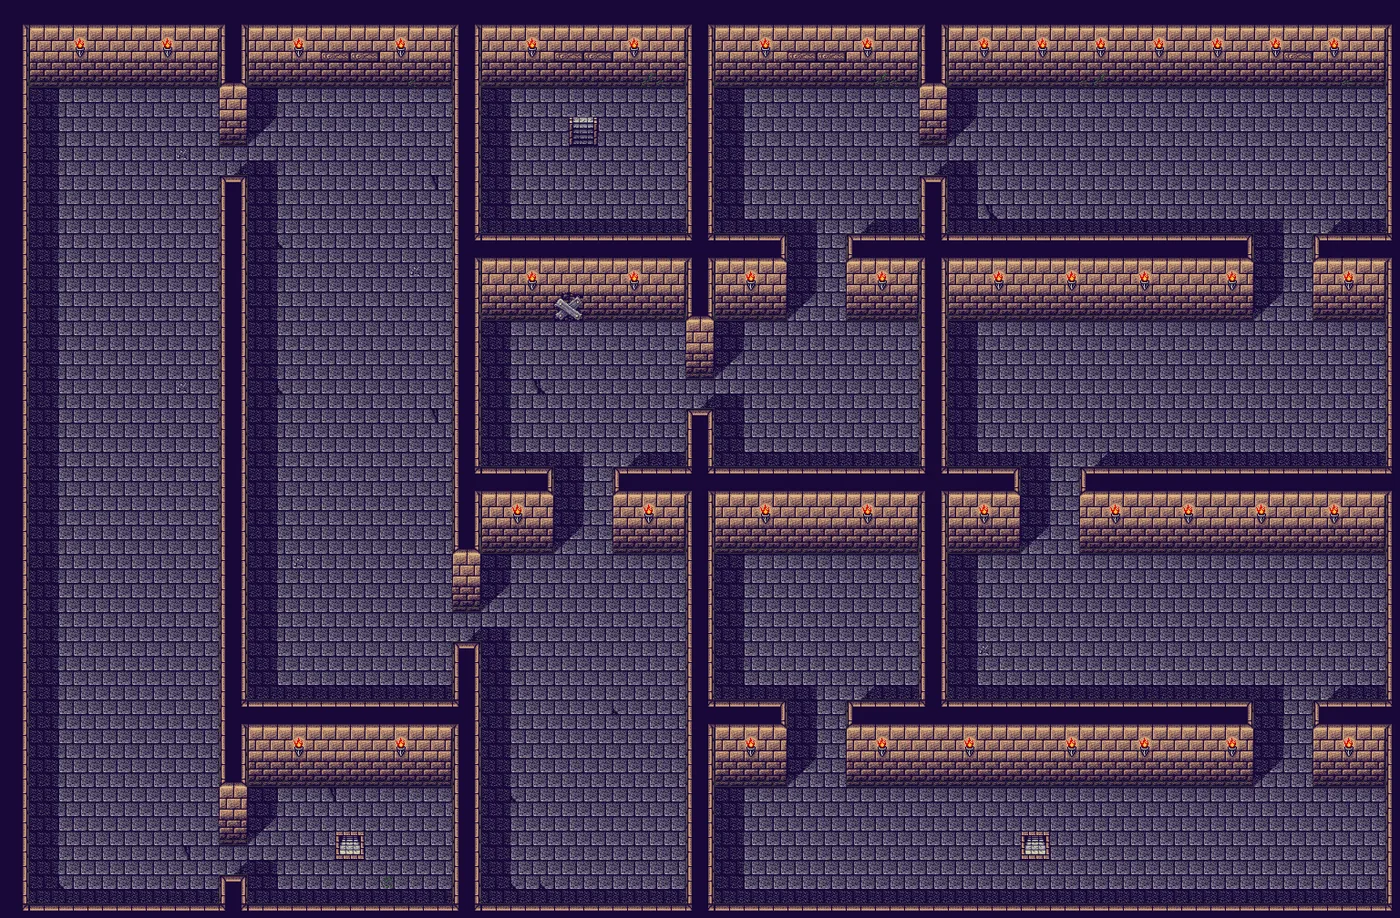
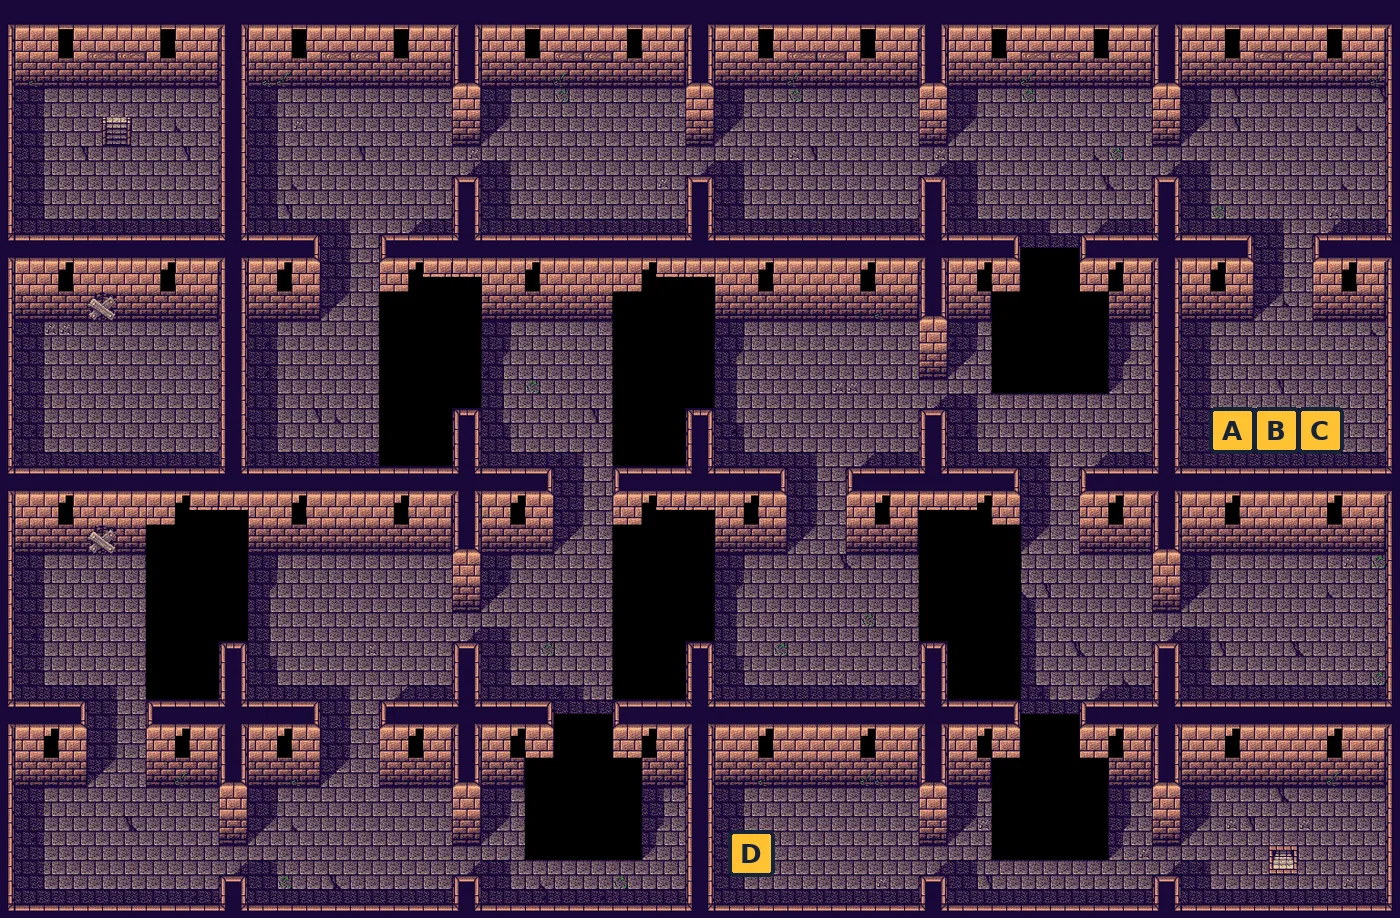
- A Good Wakizashi
- B Rice Ball
- C Drink S
- D 1000 yen
The Hunt for the Dragon Orb: How It Works
📍 Sayaka’s house · the Hanging Scroll
Musashi says Yaiba cannot beat Onimaru as he is now, but the Dragon Orb could do it. Grandma reveals that the back of the family hanging scroll is a map of the legendary orbs. From here the game opens up.
⏳ Last chances
- When the orb hunt starts, Shonosuke’s travel list is rewritten: it keeps Sayaka’s house and only the orb-hunt regions you have already visited. Mt. Tengu, the three cities and Onimaru Castle Town are gone for good.
- When you bring the seventh orb home, the Jackpot Orb names Mt. Fuji and the party leaves at once for Onimaru’s Sky Castle and the Dragon God’s Fortress. Finish everything else first, and rest at the inn of your last region before its guardian.
Walkthrough
- MainSelect the HANGING SCROLL with R and use it with A: a map of Japan with marks appears and you pick where to go. The first visit to each orb region goes through the scroll; after that the region is also on Shonosuke’s travel list.
- MainThere are seven regions, and the order is free: Hokkaido, Aomori, Niigata, Lake Biwa, Nara / Osaka, Mt. Tsurugi and Mt. Aso. Each has a guardian holding a legendary orb; several also hide a healing or buff orb in a stone.
- TipSuggested order (easiest first): Mt. Tsurugi (Part 6), Aomori (7), Lake Biwa (8), Nara and Osaka (9), Mt. Aso (10), Hokkaido (11), and Niigata last (12). Niigata has an inn right before the boss and the best levelling spot in the game. The guardians get tougher in roughly that order.
- TipBuy Good/Fine Clothes as soon as you can (armor shops in Mt. Tsurugi and Aomori). DEFENSE is multiplied by the clothes (×1.25 / ×1.5), and every point cuts the damage of each hit. Fine Swords and axes are in the weapon shops at Mt. Aso, Lake Biwa and Niigata.
- TipThe first time you come home with a legendary orb, Sayaka’s house has a short scene: Onimaru’s men are after the Dragon Orb too. The Jackpot Orb (from Aomori) gets its own scene at home, and if it is the last of the seven, the scene is different: Yaiba thinks it is the Dragon Orb.
- WarningThe Dragon God takes the FIRE, WATER, ICE, DARK, GOLD, BIG and JACKPOT ORBS away before his trials. Use the GOLD ORB to farm Meat and Revival Leaves while you still have it (Part 6).
Mt. Tsurugi: Fuma Kotaro and the Gold Orb
📍 Mt. Tsurugi town · forest · caves · plateau · staircase caves · 🎚️ Suggested level (old FAQ): 39–40
A mountain town with three shops, a forest full of staircases, and a cave where the Fuma ninja Kotaro is after “Kincho the Tanuki’s Orb”. Two orbs are here: the PEARL ORB in a stone and the GOLD ORB from Kotaro.
Walkthrough
- TipThe town has an armor shop: buy Good Clothes (2500 yen, DEFENSE ×1.25) or Fine Clothes (5000, ×1.5) for Yaiba now. The item shop and drugstore are next door. The townsfolk drop hints: an orb in a cave (Kotaro’s), and “one more orb… buried under something” (the Pearl Orb).
- MainWalk north into the forest. A villager runs up: a man with a Kansai accent and a big man in black forced him to guide them to the orb. Musashi suspects Spider Man and Onimaru.
- SideThe forest has a Drink L chest (A) and an inn (N, 1000 yen; it heals and saves). Its staircases lead into a winding cave with two chests of 1000 yen (staircase caves map, A and B).
- MainNorth of the inn is the plateau. Look for the stone ringed by bushes (A on the plateau map) and hit it: PEARL ORB. It lets Sayaka and Fuu heal 50 HP to both players, but they only cast it when both players are hurt, so it only matters in 2-player games.
- SideFive staircases leave the plateau. Four go to small dead-end caves, each with one chest: Meat, Fine Wakizashi, Rice Ball, Rice Ball. The fifth, in the north-west, leads to Kotaro’s cave.
- MainIn Kotaro’s cave, grab the Drink L (A), then walk to the tanuki statue: Fuma Kotaro, “fifth head of the Fuma ninja clan”, demands the orb. Beat him for the GOLD ORB.
- TipThe GOLD ORB (15 MP) turns a normal enemy into a reward: 100 yen half the time, otherwise 1000 yen, Meat, a Revival Leaf or Drink L (one in eight each). Bosses are immune. This is the cheapest way to fill your bag with Meat and Revival Leaves before the end game.
Checklist
- Where
- Mt. Tsurugi plateau, the stone ringed by bushes
- How
- Hit the stone.
- Reward
- PEARL ORB: heals both players 50 HP (2-player only).
- Where
- Mt. Tsurugi, Kotaro’s cave
- How
- Beat Fuma Kotaro.
- Reward
- GOLD ORB: turns enemies into money or items (15 MP).
Treasure (9)
| Item | Map | Where | |
|---|---|---|---|
| Drink L | Mt. Tsurugi: forest | marker A on the map | |
| Pearl Orb | Mt. Tsurugi: the plateau | marker A on the map (hidden in a stone: hit it with the attack button) | |
| 1000 yen | Mt. Tsurugi: staircase caves | marker A on the map | |
| 1000 yen | Mt. Tsurugi: staircase caves | marker B on the map | |
| Meat | Mt. Tsurugi: small cave 1 | marker A on the map | |
| Fine Wakizashi | Mt. Tsurugi: small cave 2 | marker A on the map | |
| Rice Ball | Mt. Tsurugi: small cave 3 | marker A on the map | |
| Rice Ball | Mt. Tsurugi: small cave 4 | marker A on the map | |
| Drink L | Mt. Tsurugi: Fuma Kotaro’s cave | marker A on the map |
Bosses
🗺️ Maps for this part (9)
Yellow squares with letters are treasure (chests, or stones you hit with the attack button). Numbered circles mark events, bosses and orbs. White squares are shops (I item shop, D drugstore, W weapons, A armor) and green circles are places to rest or save (H Sayaka’s house, N inn, S shop with a save statue). Tap a map to open it full size.
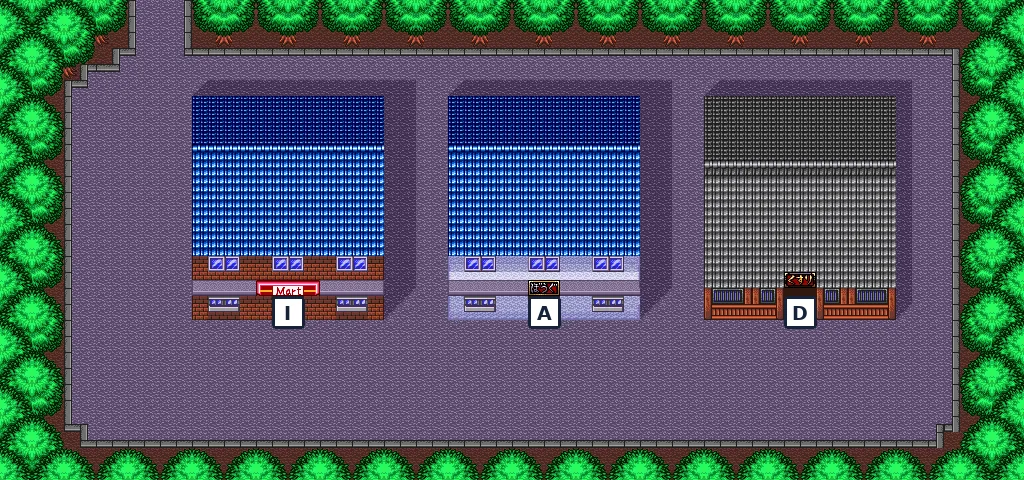
- IItem shop (Apple, Rice Ball, Meat, Map, Clock)
- AArmor shop (Good Clothes, Fine Clothes)
- DDrugstore (Drink S/M/L, Revival Leaf)
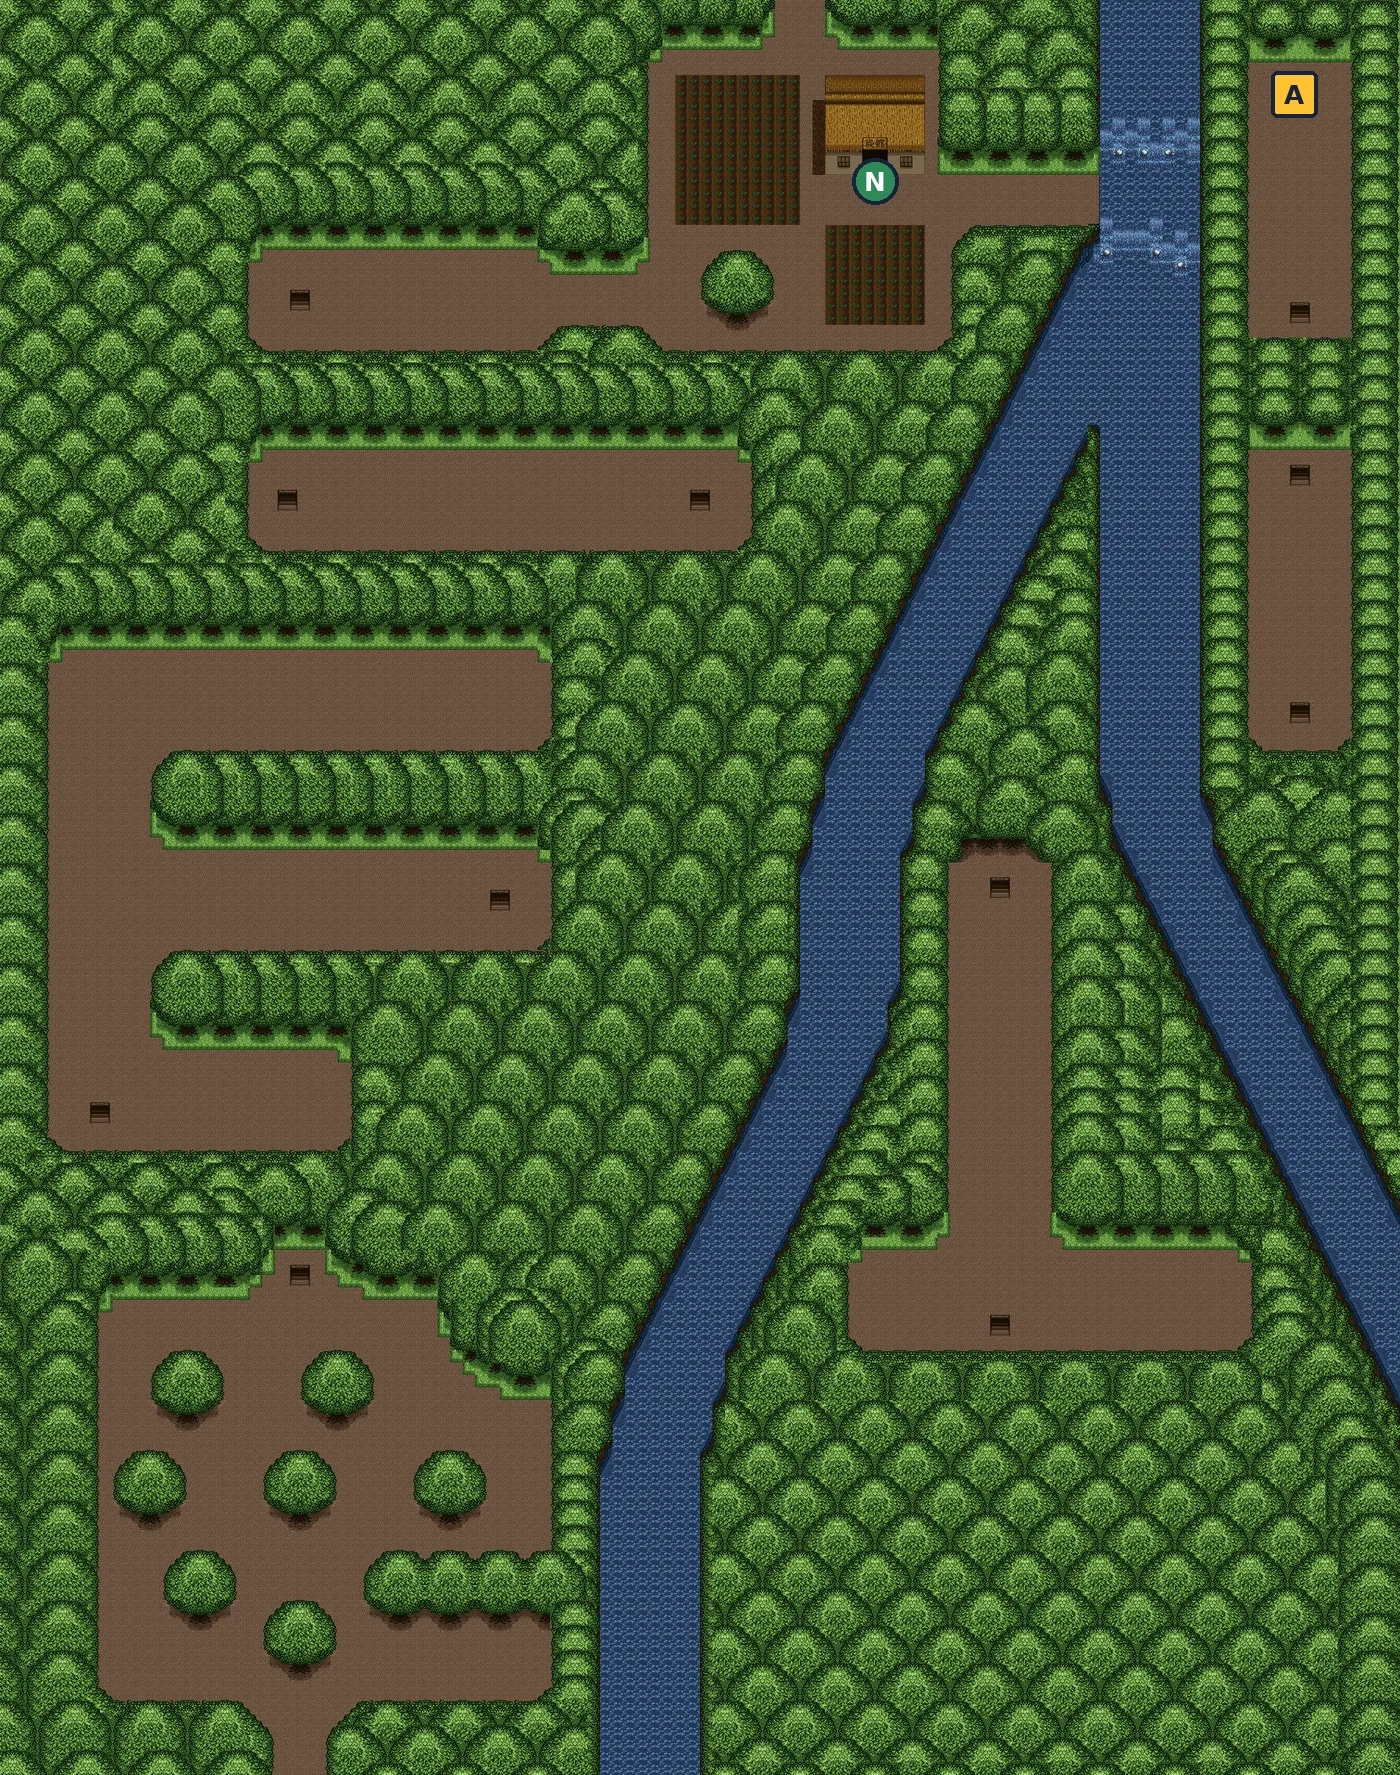
- A Drink L
- NInn: 1000 yen, full heal + save
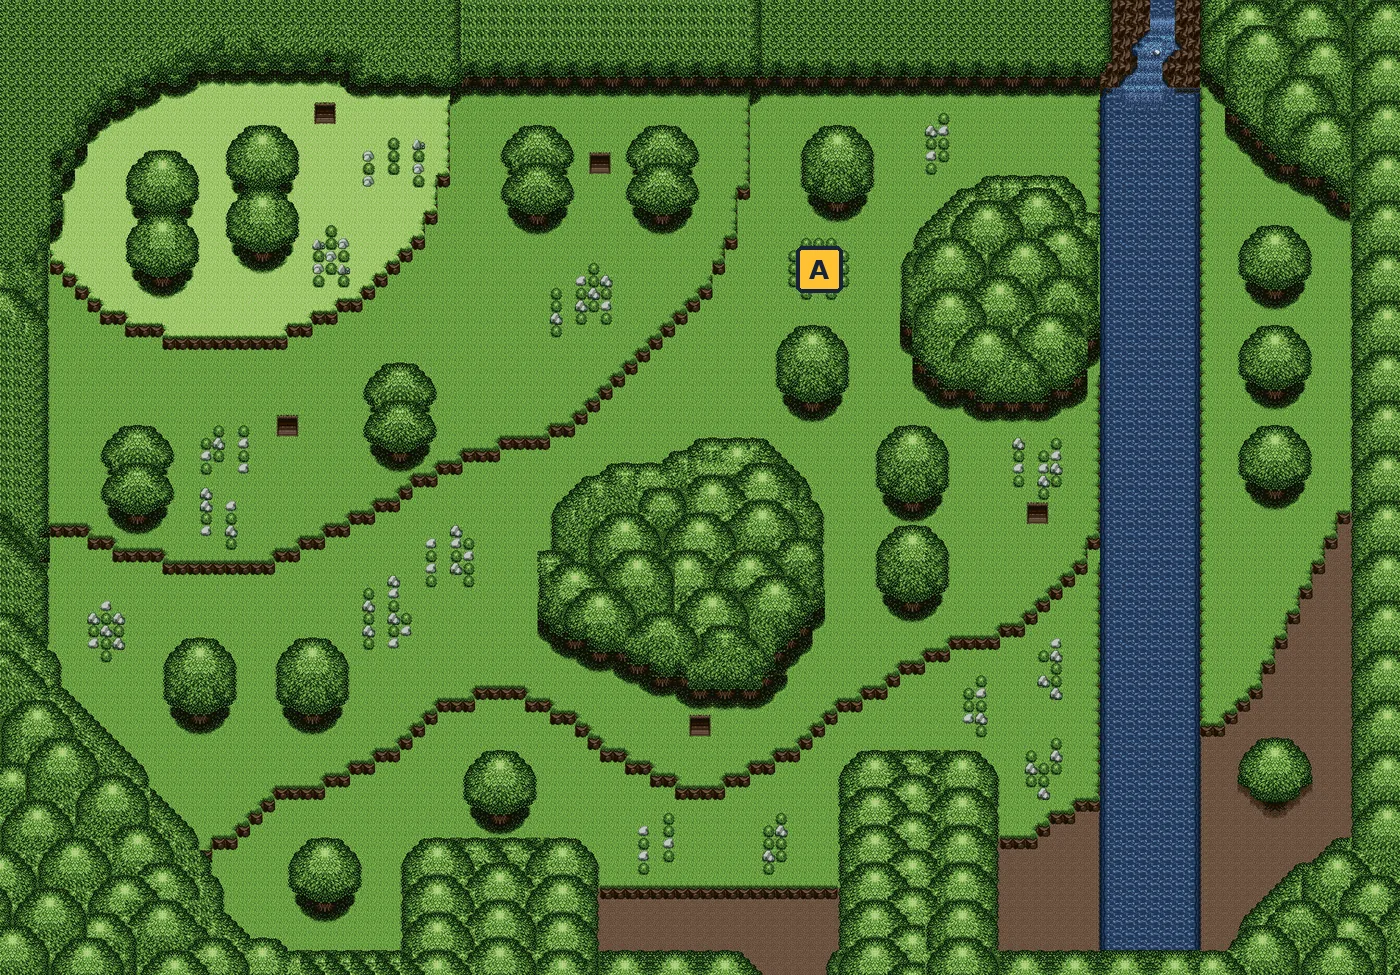
- A Pearl Orb (stone)
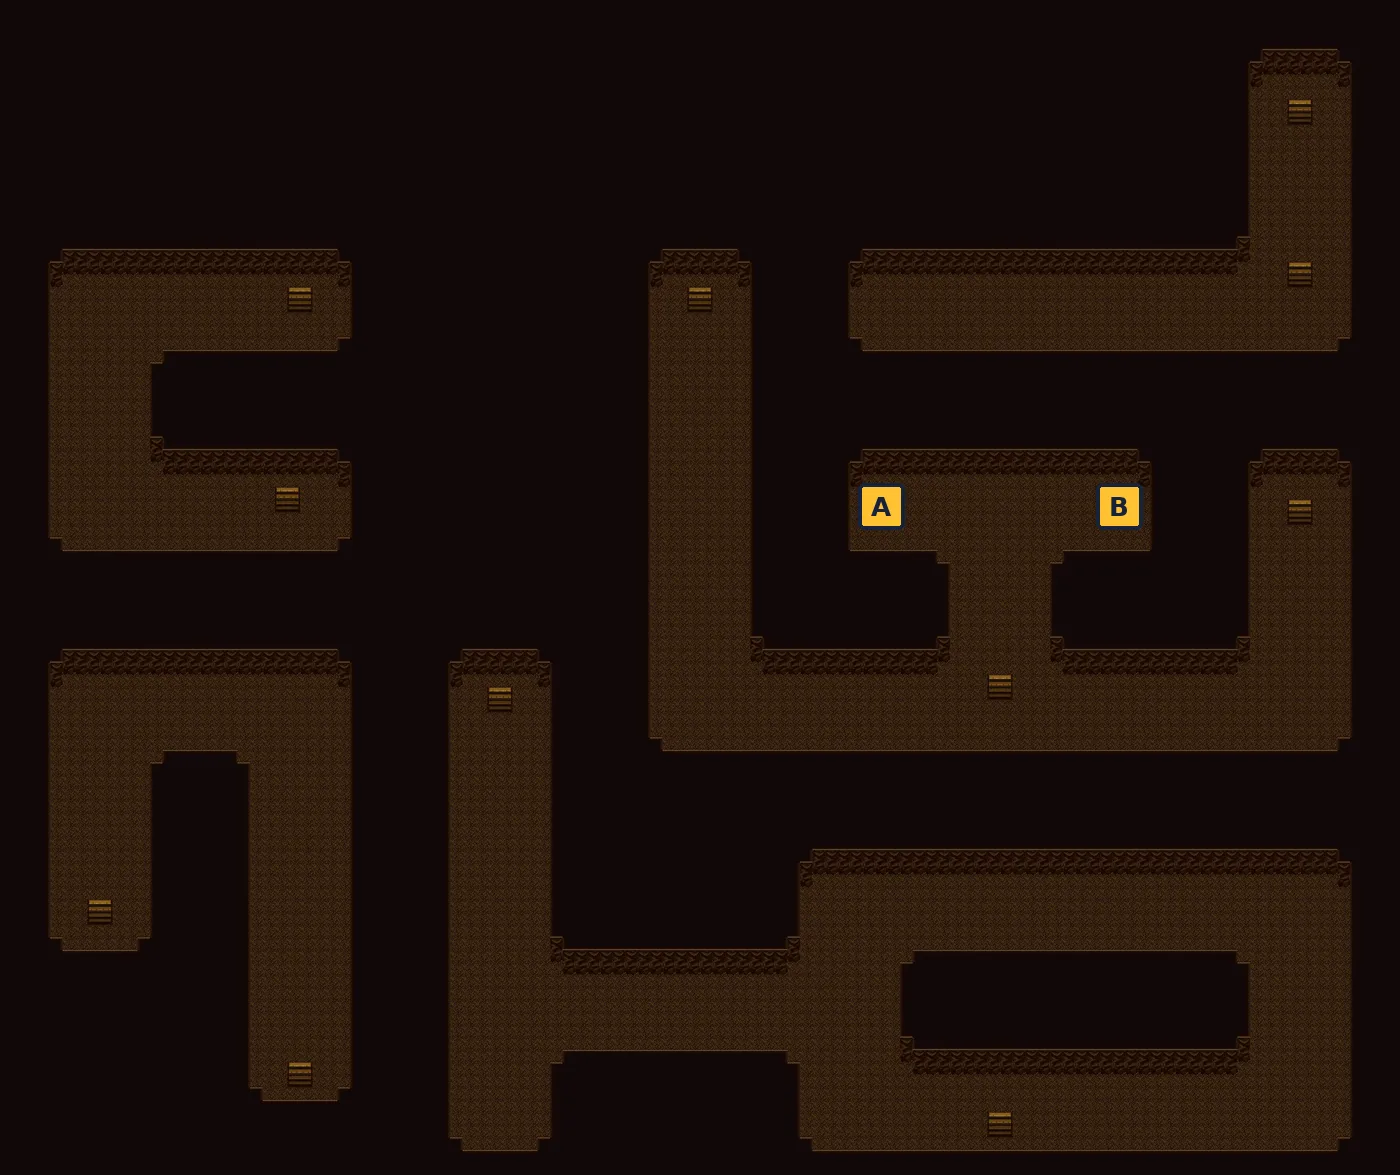
- A 1000 yen
- B 1000 yen
- A Meat
- A Fine Wakizashi
- A Rice Ball
- A Rice Ball
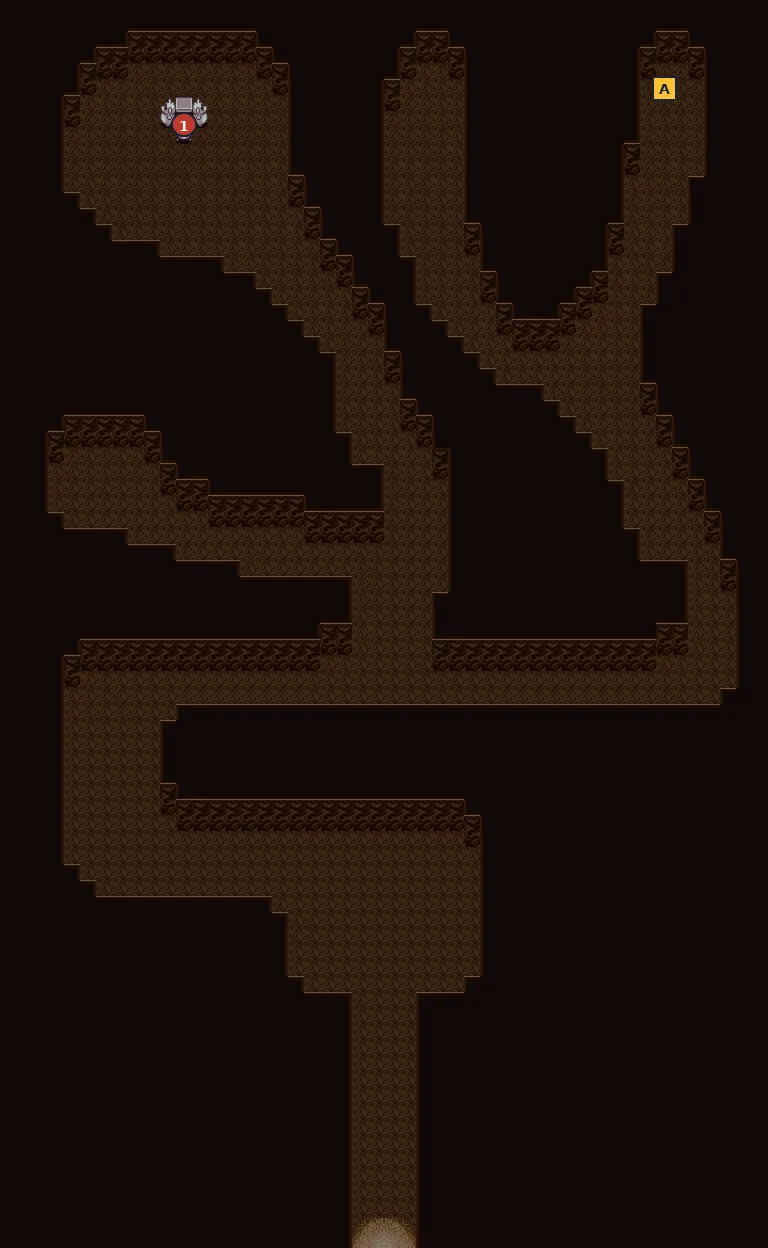
- 1Fuma Kotaro (tanuki statue)
- A Drink L
Aomori: Matsuo Basho and the Jackpot Orb
📍 Aomori · the old temple · 🎚️ Suggested level (old FAQ): about 35
Onimaru has ordered the people of Aomori not to help Yaiba: the inn turns you away. An old man offers you a bed at the temple where he is staying instead. He is Matsuo Basho, and he wants the land for himself.
Walkthrough
- SideBefore anything else, hit the sealed stone in the north-east corner of the town (C on the map): MOON ORB. Sayaka and Fuu heal 100 HP with it (50 MP). Nearby townsfolk mention “a rock where an orb is enshrined”.
- SideOther treasure: a Rice Ball (A) and Drink L (B) at the end of the two north-west paths, and a Rice Ball in the signboard-like stone (D). Watch out for the lion statues in the east: they hit hard.
- TipAomori’s armor shop sells Good and Fine Clothes, like Mt. Tsurugi’s.
- MainGo to the inn (N). The clerk refuses: “Lord Onimaru has forbidden us to put you up.” Outside, an old man invites you to the old temple where he is staying, and says it holds a legendary orb. Follow him.
- MainAt the temple he reveals himself as Matsuo Basho. Beat him for the JACKPOT ORB, a talking orb that only shouts “JACKPOOOT!!” and refuses to say more until you hold all seven.
Checklist
- Where
- Aomori, north-east corner, sealed stone
- How
- Hit the stone.
- Reward
- MOON ORB: heals 100 HP (50 MP).
- Where
- Aomori, the old temple
- How
- Beat Matsuo Basho.
- Reward
- JACKPOT ORB: story orb, cannot be used.
Treasure (4)
| Item | Map | Where | |
|---|---|---|---|
| Rice Ball | Aomori | marker A on the map | |
| Drink L | Aomori | marker B on the map | |
| Moon Orb | Aomori | marker C on the map (hidden in a stone: hit it with the attack button) | |
| Rice Ball | Aomori | marker D on the map (hidden in a stone: hit it with the attack button) |
Bosses
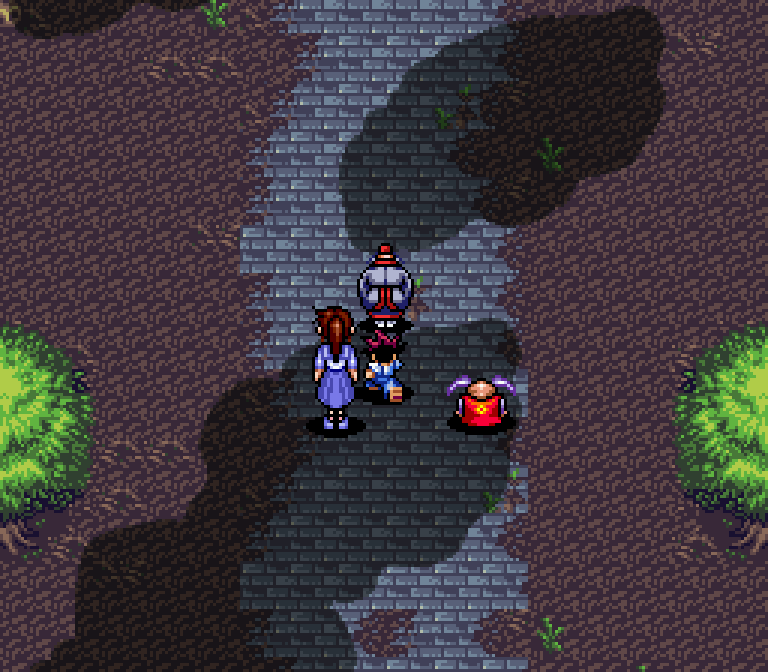 Matsuo Basho · 6000 HP · ATK 65 · DEF 40
🗺️ Maps for this part (2)
Yellow squares with letters are treasure (chests, or stones you hit with the attack button). Numbered circles mark events, bosses and orbs. White squares are shops (I item shop, D drugstore, W weapons, A armor) and green circles are places to rest or save (H Sayaka’s house, N inn, S shop with a save statue). Tap a map to open it full size.
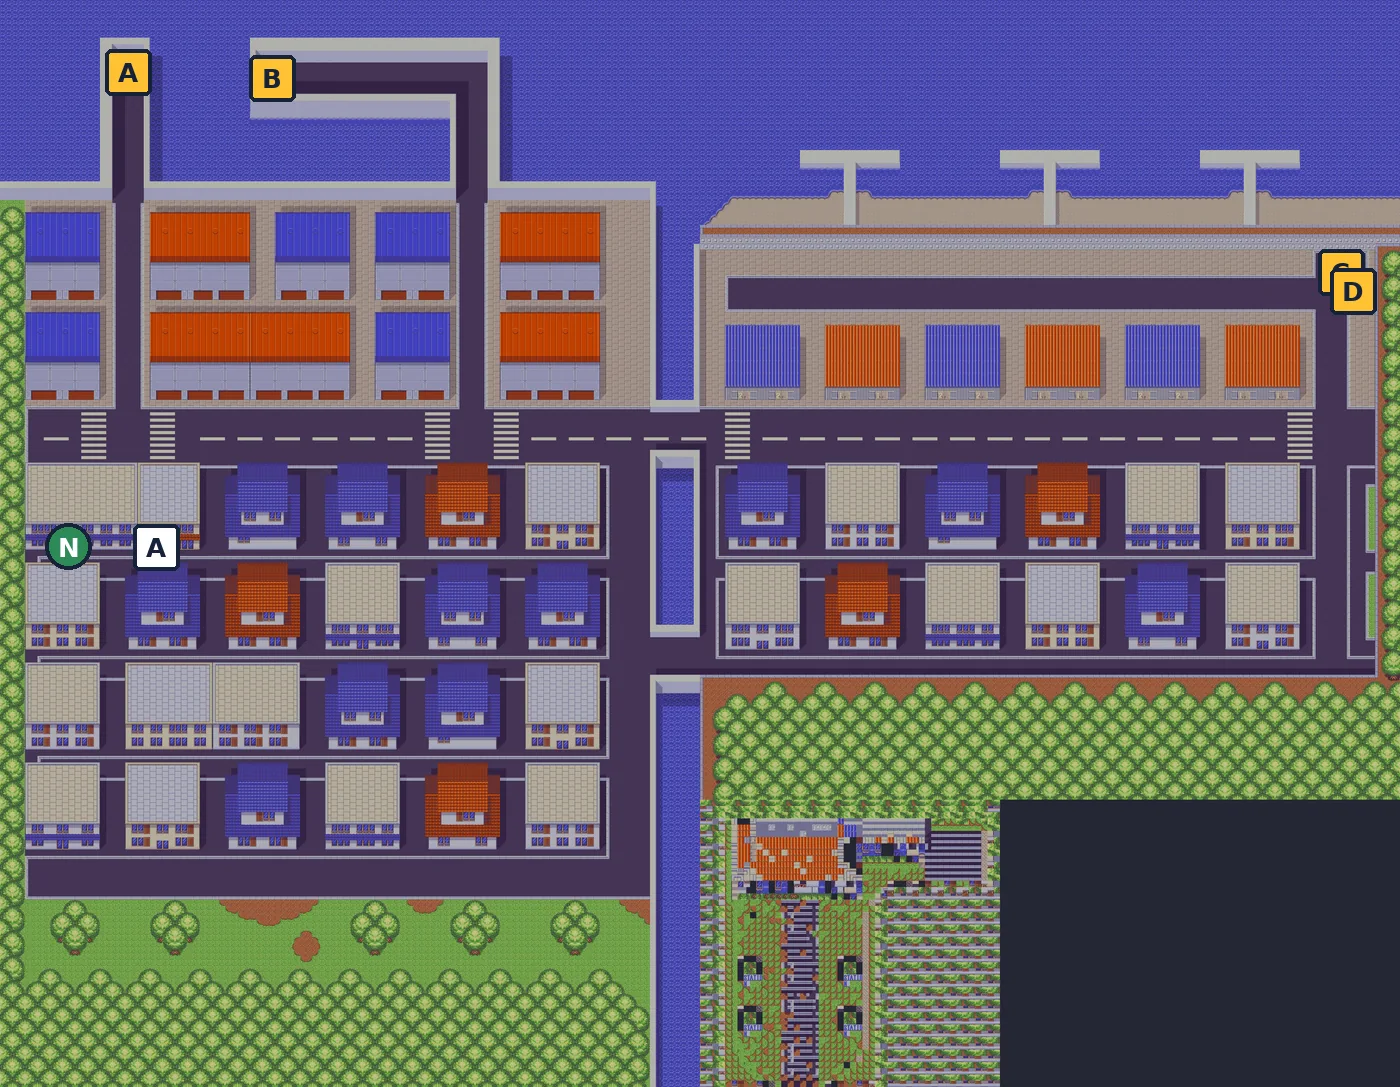
- A Rice Ball
- B Drink L
- C Moon Orb (stone)
- D Rice Ball (stone)
- NInn (refuses you on your first visit)
- AArmor shop (Good Clothes, Fine Clothes)
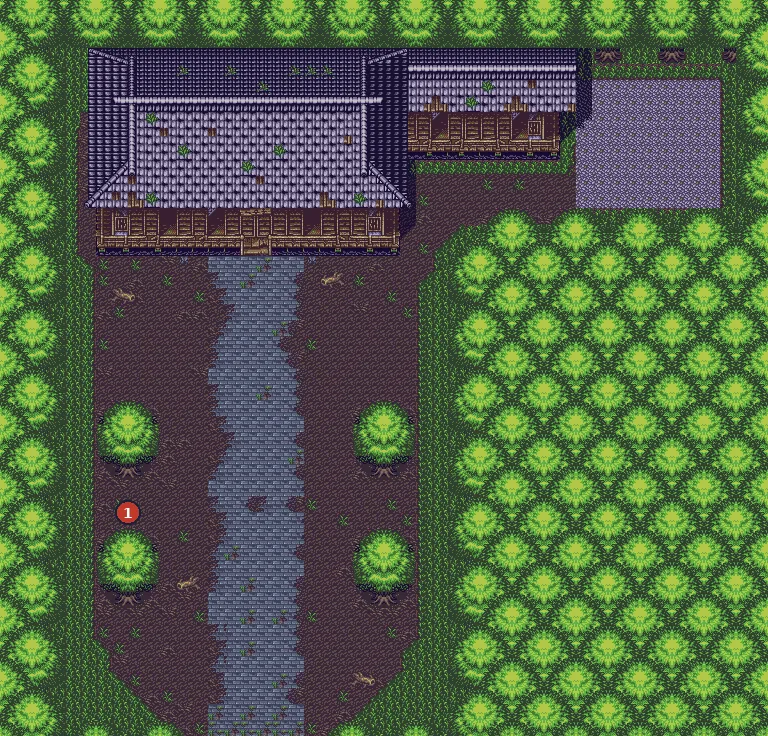
- 1Matsuo Basho
Lake Biwa: Miyoshi Seikai Nyudo and the Water Orb
📍 Lake Biwa town and station · the far shore · 🎚️ Suggested level (old FAQ): 38–39
A big lake with a town at the station. The guardian here turns into a giant octopus.
Walkthrough
- TipThe town has a weapon shop (Good Sword 6000, Fine Sword 9000, Good Axe 4000, Fine Axe 8000), an inn and a drugstore, all in the block south of the station. Yaiba’s Raijin Sword (×1.4) beats every shop sword; the shop is for your allies.
- MainTake the station to the far side of the lake, go to the north-east and onto the lake by the bridge. Miyoshi Seikai Nyudo asks if this is the orb you are after, then turns into an octopus.
- MainBeat him for the WATER ORB, which raises water pillars around you.
Checklist
- Where
- Lake Biwa
- How
- Beat Miyoshi Seikai Nyudo.
- Reward
- WATER ORB: water pillars around you (25 MP).
Bosses
🗺️ Maps for this part (2)
Yellow squares with letters are treasure (chests, or stones you hit with the attack button). Numbered circles mark events, bosses and orbs. White squares are shops (I item shop, D drugstore, W weapons, A armor) and green circles are places to rest or save (H Sayaka’s house, N inn, S shop with a save statue). Tap a map to open it full size.
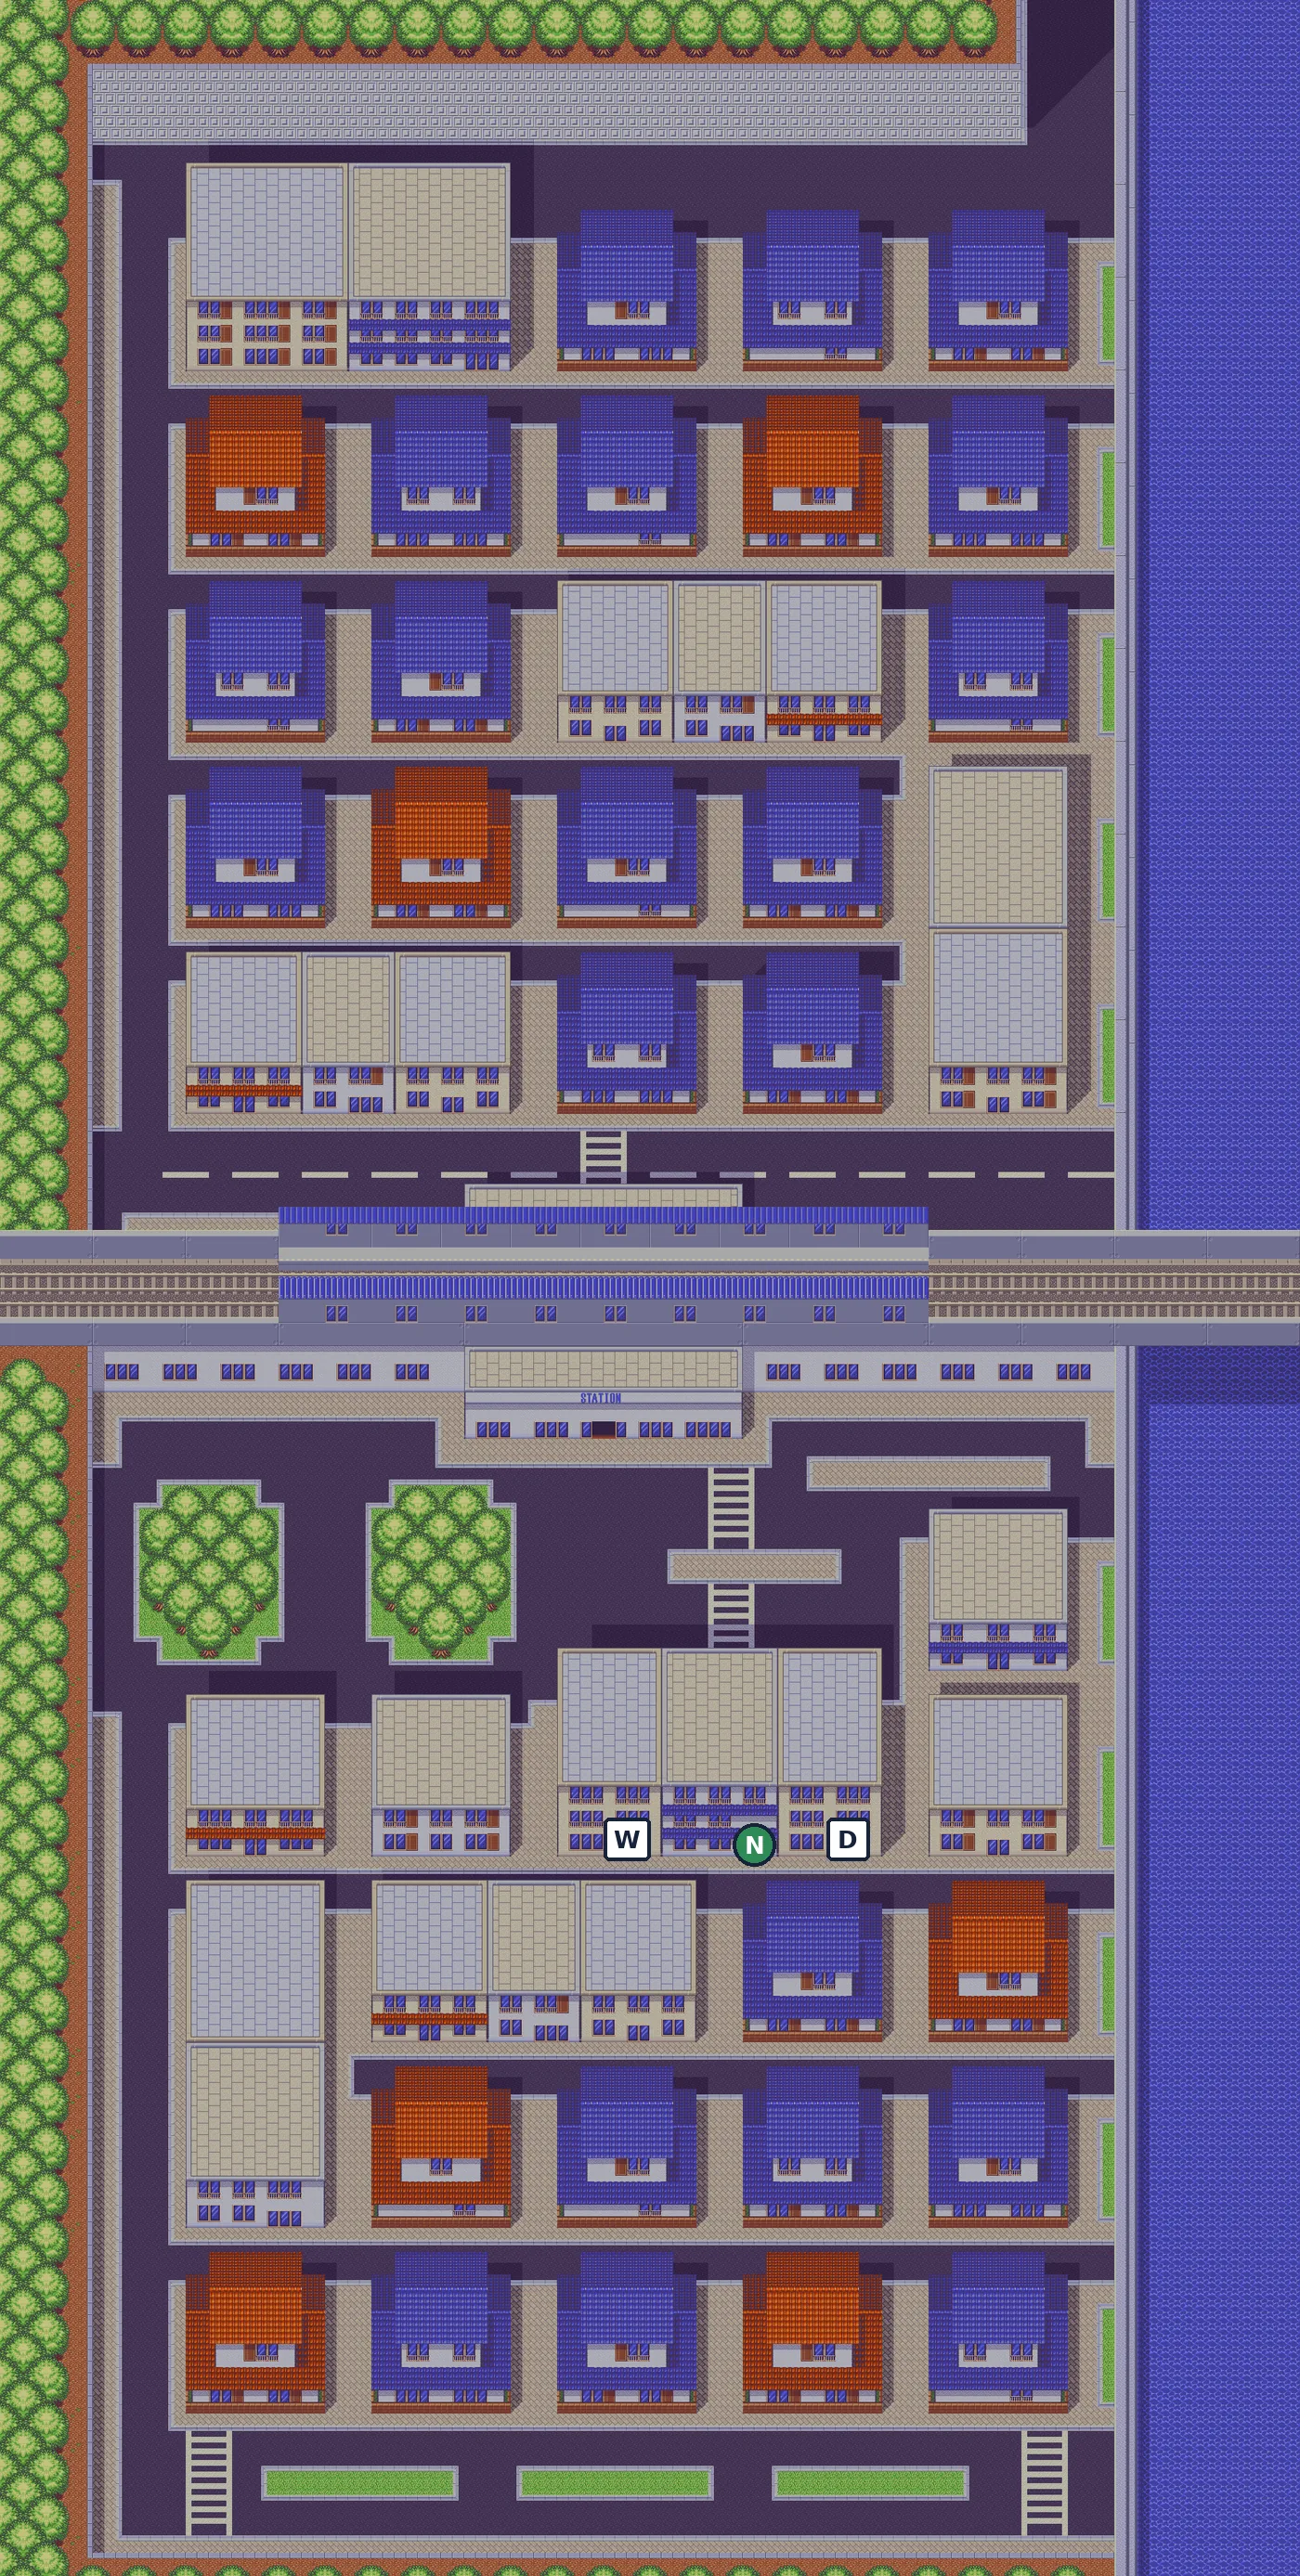
- WWeapon shop (Good/Fine Sword, Good/Fine Axe)
- NInn: 1000 yen, full heal + save
- DDrugstore (Drink S/M/L, Revival Leaf)
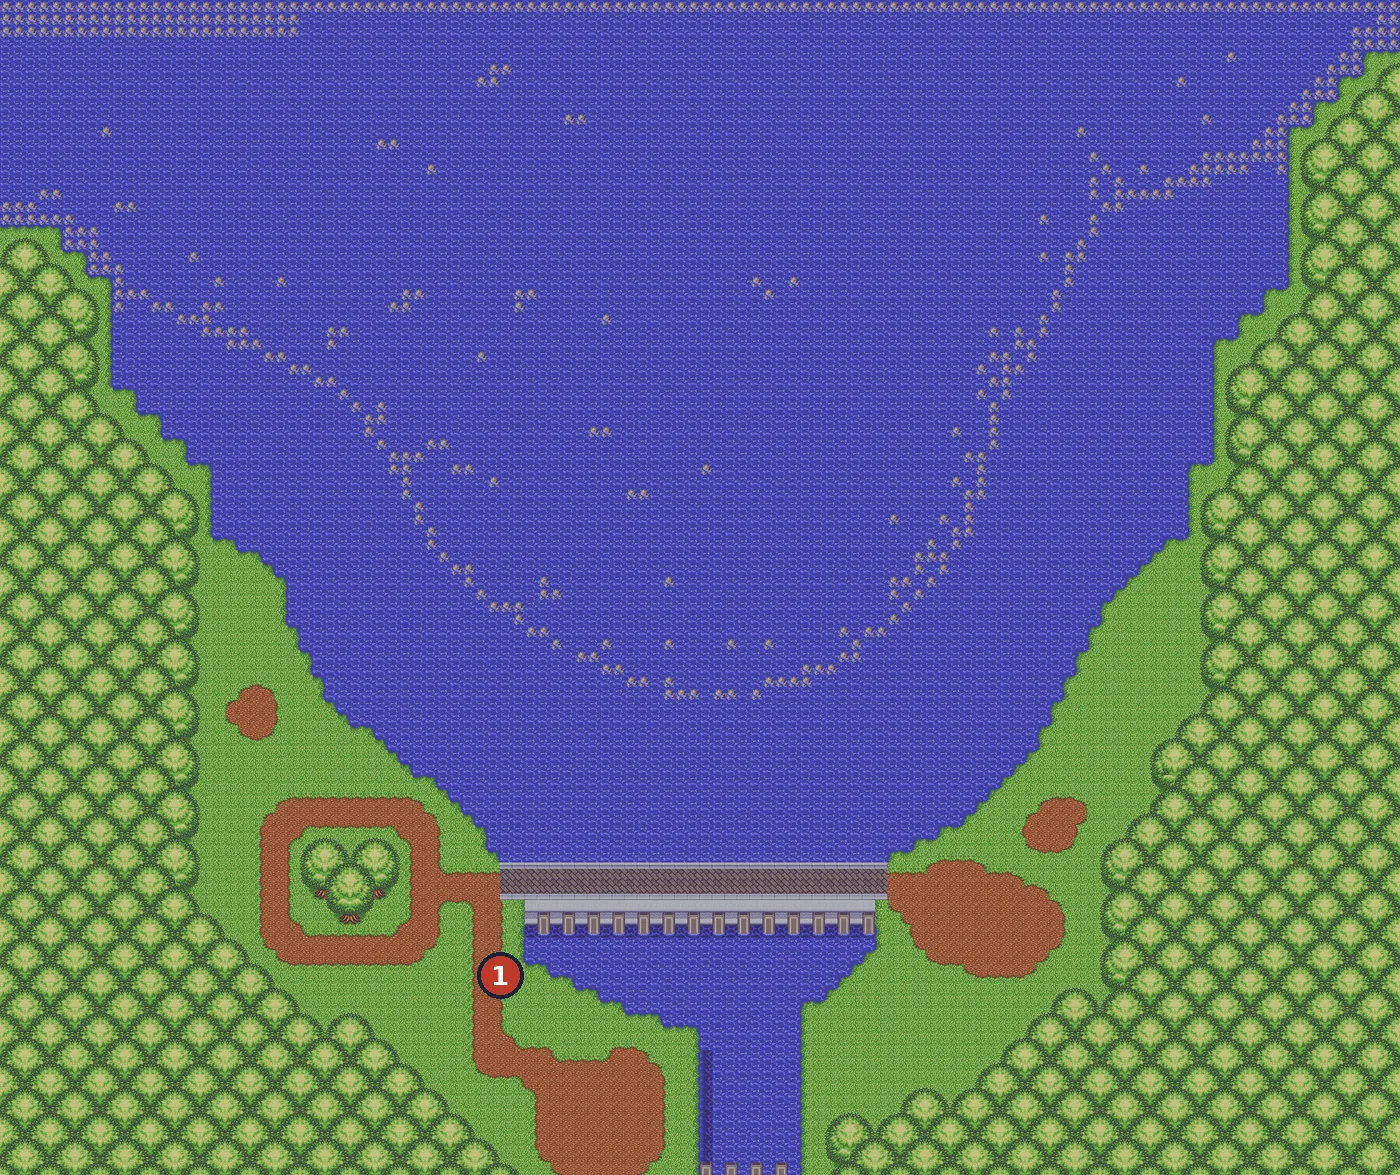
- 1Miyoshi Seikai Nyudo
Nara and Osaka: Ishikawa Goemon, the Big Orb and the Light Orb
📍 Nara · Osaka · Osaka Onimaru Castle · 🎚️ Suggested level (old FAQ): about 40
The “land’s greatest thief” Ishikawa Goemon has the orb, or says he does. Osaka also hides the game’s best healing orb, which only shows up at night.
⏳ Last chances
- The LIGHT ORB vanishes for good once you take it, so there is nothing to miss, but it only appears between 00:00 and 04:59 game time.
Walkthrough
- MainNara: walk north to the temple. Ishikawa Goemon claims the orb is already his. After a few hits he drops it and flees, but the orb is a fake glass ball.
- MainThe story moves you to Osaka. There is an inn here (N); Sayaka’s house is a free alternative via Shonosuke.
- SideLIGHT ORB: on the grass just east of the castle’s moat (purple pin), a glowing ball floats there only from 00:00 to 04:59 game time. Touch it. Sayaka and Fuu then heal 999 HP (100 MP) when you are missing 200 HP or more. A game hour is 30 real seconds, so a game day lasts 12 minutes and the window is about 2.5 minutes. Buy the CLOCK (1000 yen, home-town item shop) to see the time in the HUD. Osaka townsfolk talk about a “ghost light” after midnight.
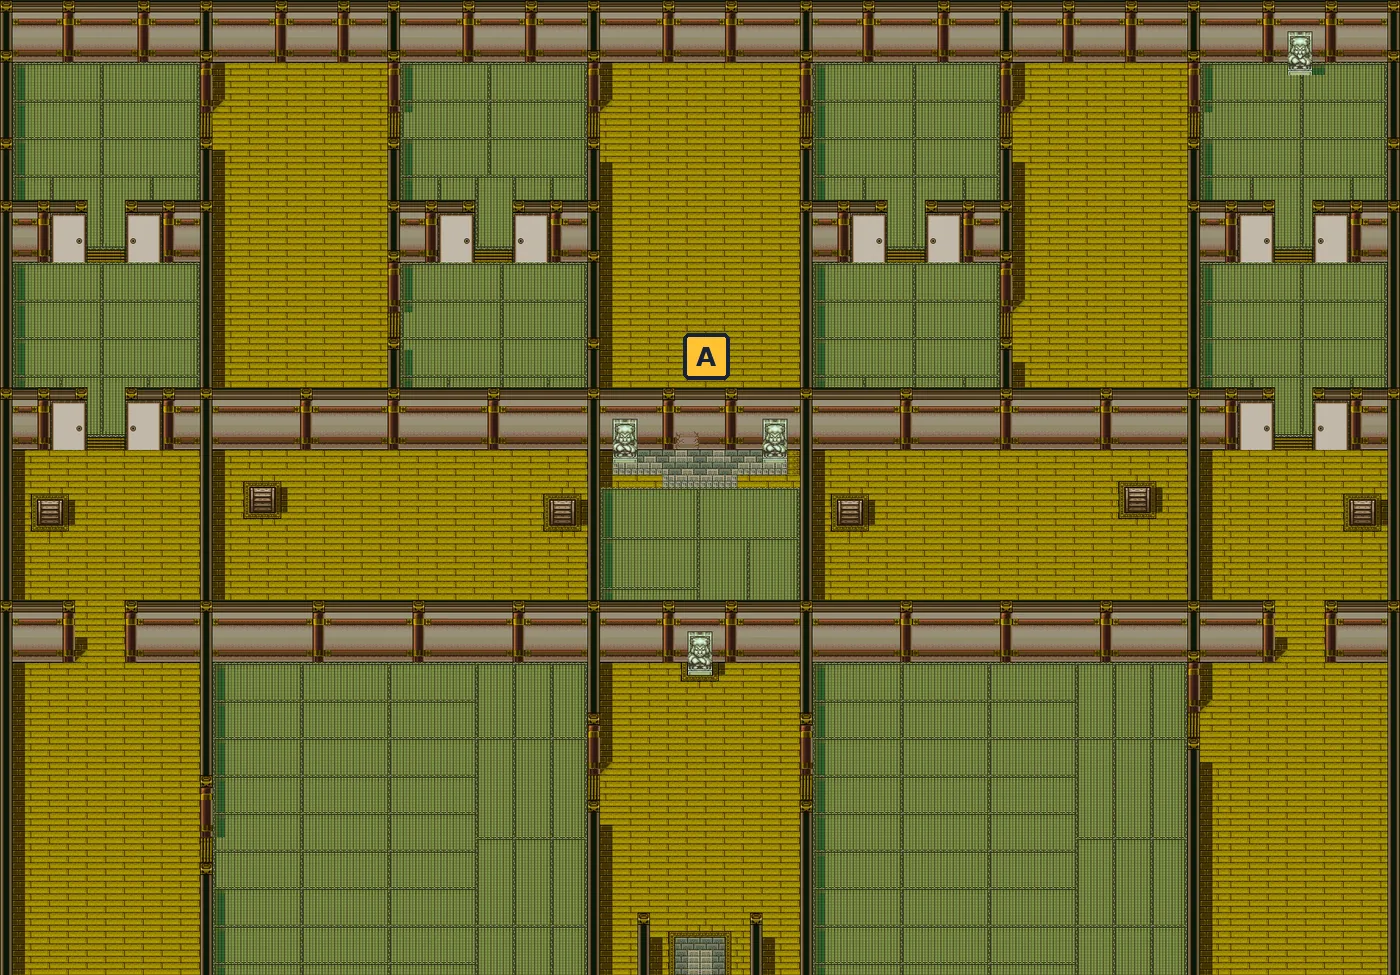
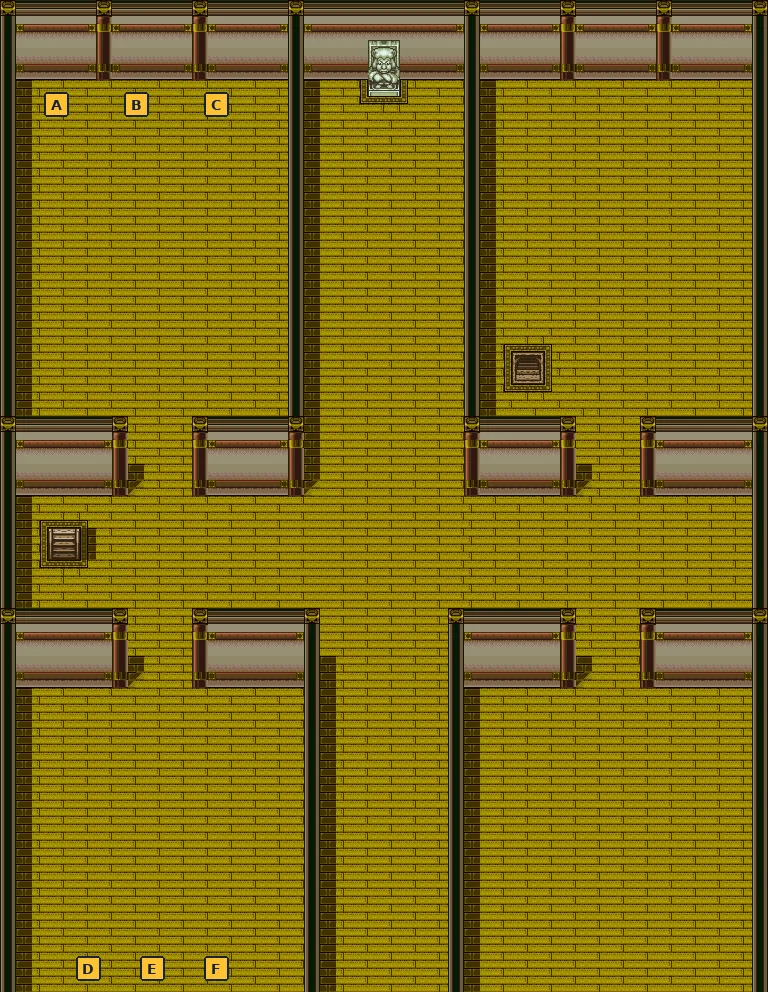
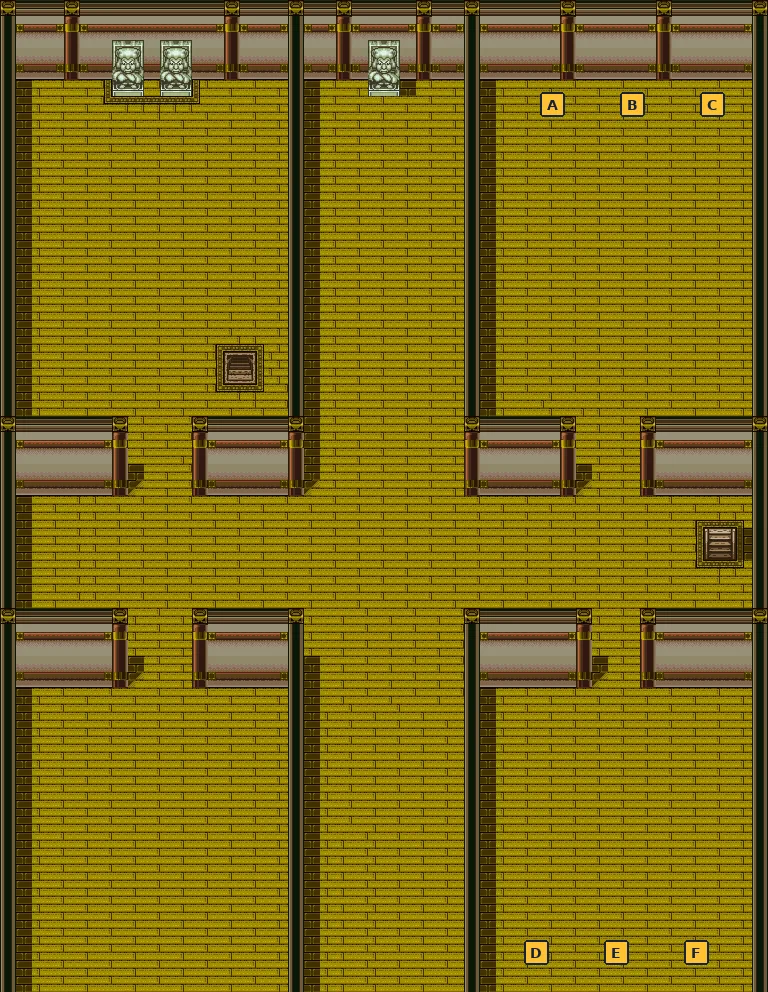
- MainGoemon told you to bring the Raijin Sword to Osaka Onimaru Castle, the castle in the north-west of Osaka. Go in. Its floors are a maze. The big treasure rooms hold 12 chests between them: Drink M, Good Sword, 100 yen, Rice Ball, Meat, 1000 yen in the first, and 1000 yen ×3, Rice Ball, 100 yen, Apple in the second. One more chest of 1000 yen is in the maze.
- MainOn the top floor a square black hole in the middle of the room drops you straight to Goemon. Collect the treasure first, then jump in. Beat Goemon for the real BIG ORB. Sadly it cannot make you big: it has no use in battle.
Checklist
- Where
- Osaka, grass east of Osaka Onimaru Castle
- How
- Touch the floating ball between 00:00 and 04:59 game time.
- Reward
- LIGHT ORB: heals 999 HP (100 MP).
- Where
- Osaka Onimaru Castle
- How
- Beat Goemon in his castle.
- Reward
- BIG ORB: story orb, cannot be used.
Treasure (13)
| Item | Map | Where | |
|---|---|---|---|
| 1000 yen | Osaka Onimaru Castle: maze | marker A on the map | |
| Drink M | Osaka Onimaru Castle: treasure room 1 | marker A on the map | |
| Good Sword | Osaka Onimaru Castle: treasure room 1 | marker B on the map | |
| 100 yen | Osaka Onimaru Castle: treasure room 1 | marker C on the map | |
| Rice Ball | Osaka Onimaru Castle: treasure room 1 | marker D on the map | |
| Meat | Osaka Onimaru Castle: treasure room 1 | marker E on the map | |
| 1000 yen | Osaka Onimaru Castle: treasure room 1 | marker F on the map | |
| 1000 yen | Osaka Onimaru Castle: treasure room 2 | marker A on the map | |
| 1000 yen | Osaka Onimaru Castle: treasure room 2 | marker B on the map | |
| 1000 yen | Osaka Onimaru Castle: treasure room 2 | marker C on the map | |
| Rice Ball | Osaka Onimaru Castle: treasure room 2 | marker D on the map | |
| 100 yen | Osaka Onimaru Castle: treasure room 2 | marker E on the map | |
| Apple | Osaka Onimaru Castle: treasure room 2 | marker F on the map |
Bosses
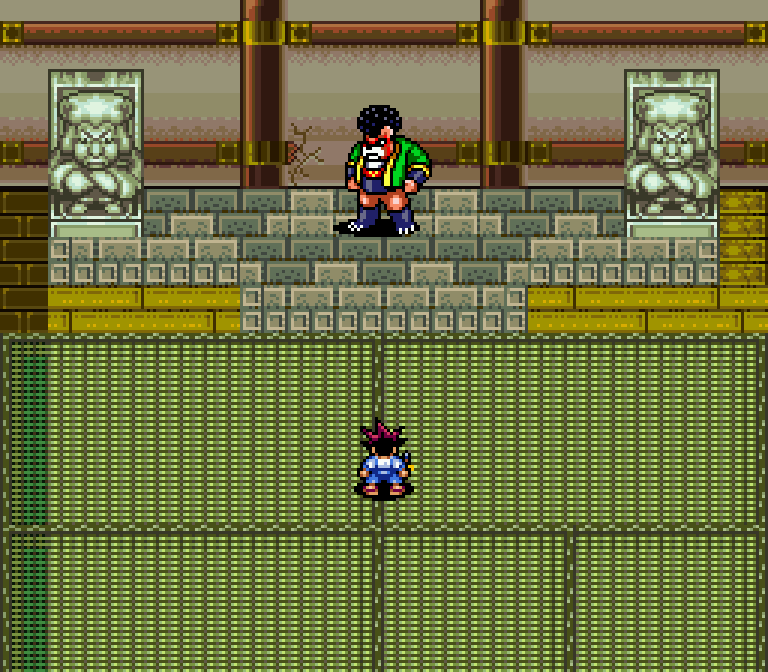 Ishikawa Goemon (castle) · 6000 HP · ATK 70 · DEF 50
🗺️ Maps for this part (5)
Yellow squares with letters are treasure (chests, or stones you hit with the attack button). Numbered circles mark events, bosses and orbs. White squares are shops (I item shop, D drugstore, W weapons, A armor) and green circles are places to rest or save (H Sayaka’s house, N inn, S shop with a save statue). Tap a map to open it full size.
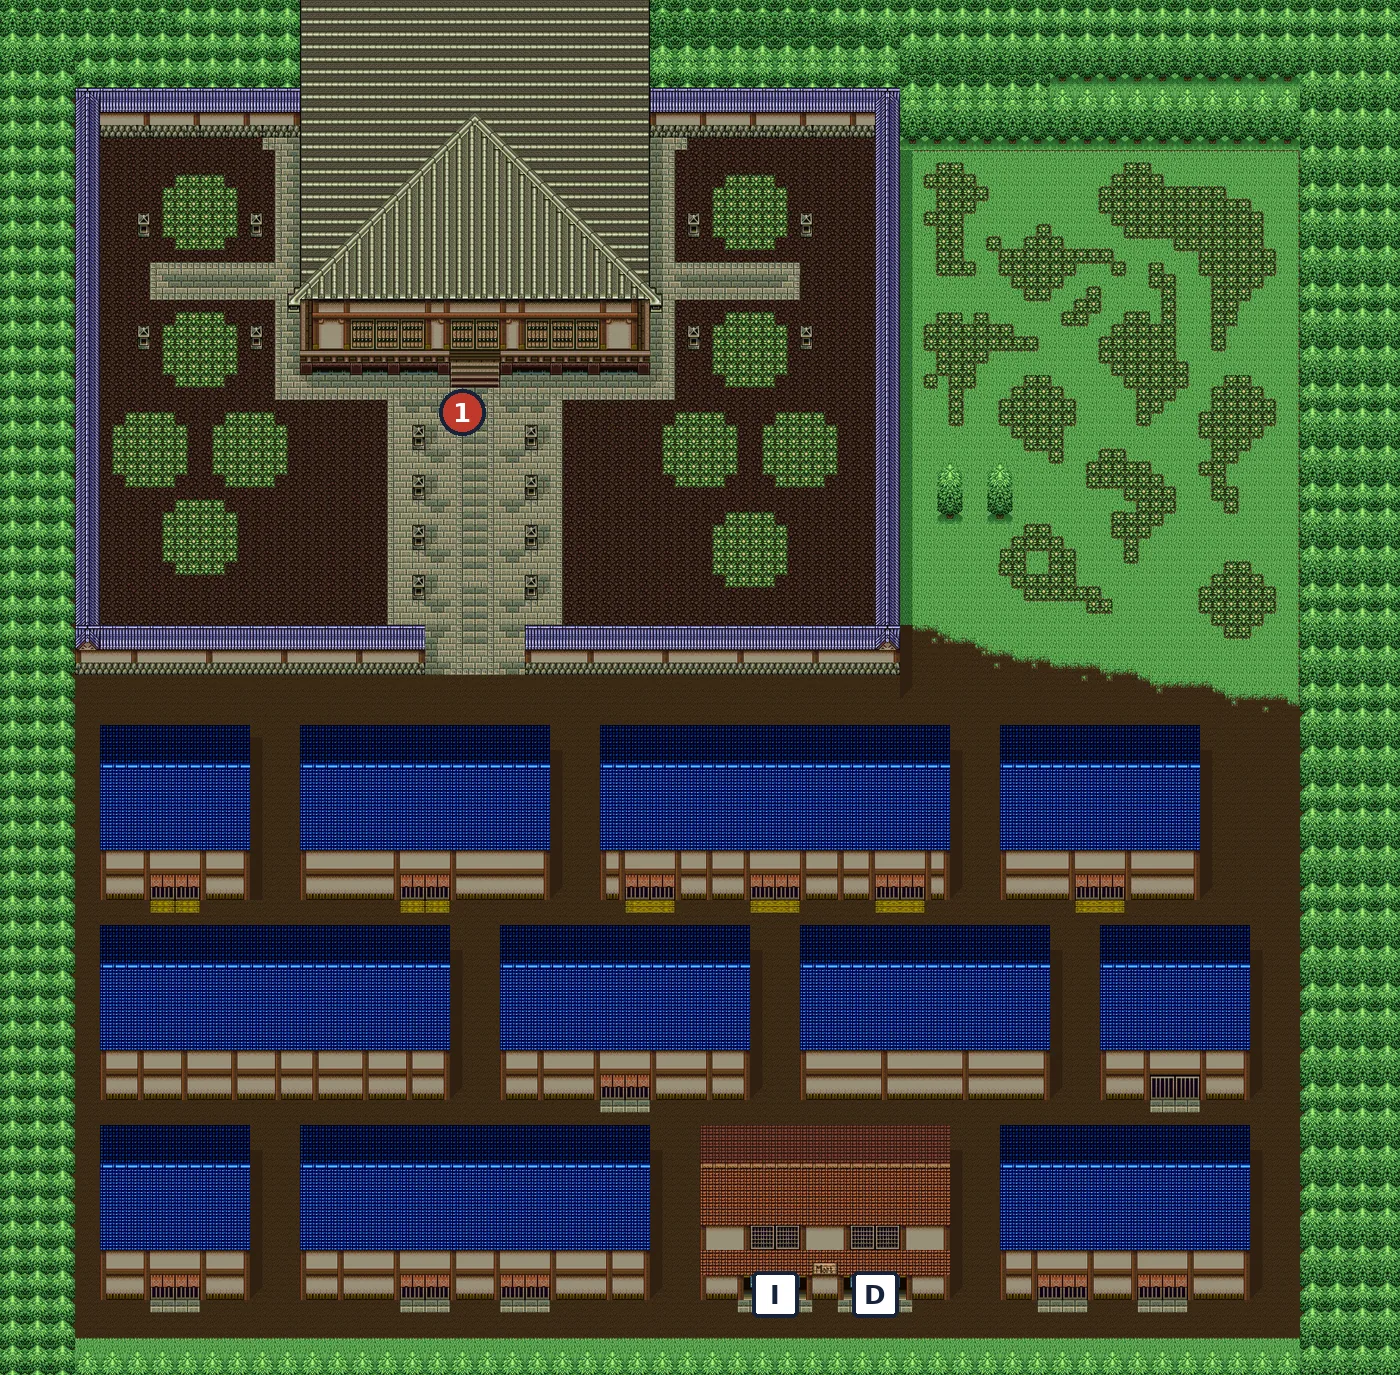
- 1Temple: Ishikawa Goemon (first meeting)
- IItem shop (Apple, Rice Ball, Meat, Map, Clock)
- DDrugstore (Drink S/M/L, Revival Leaf)
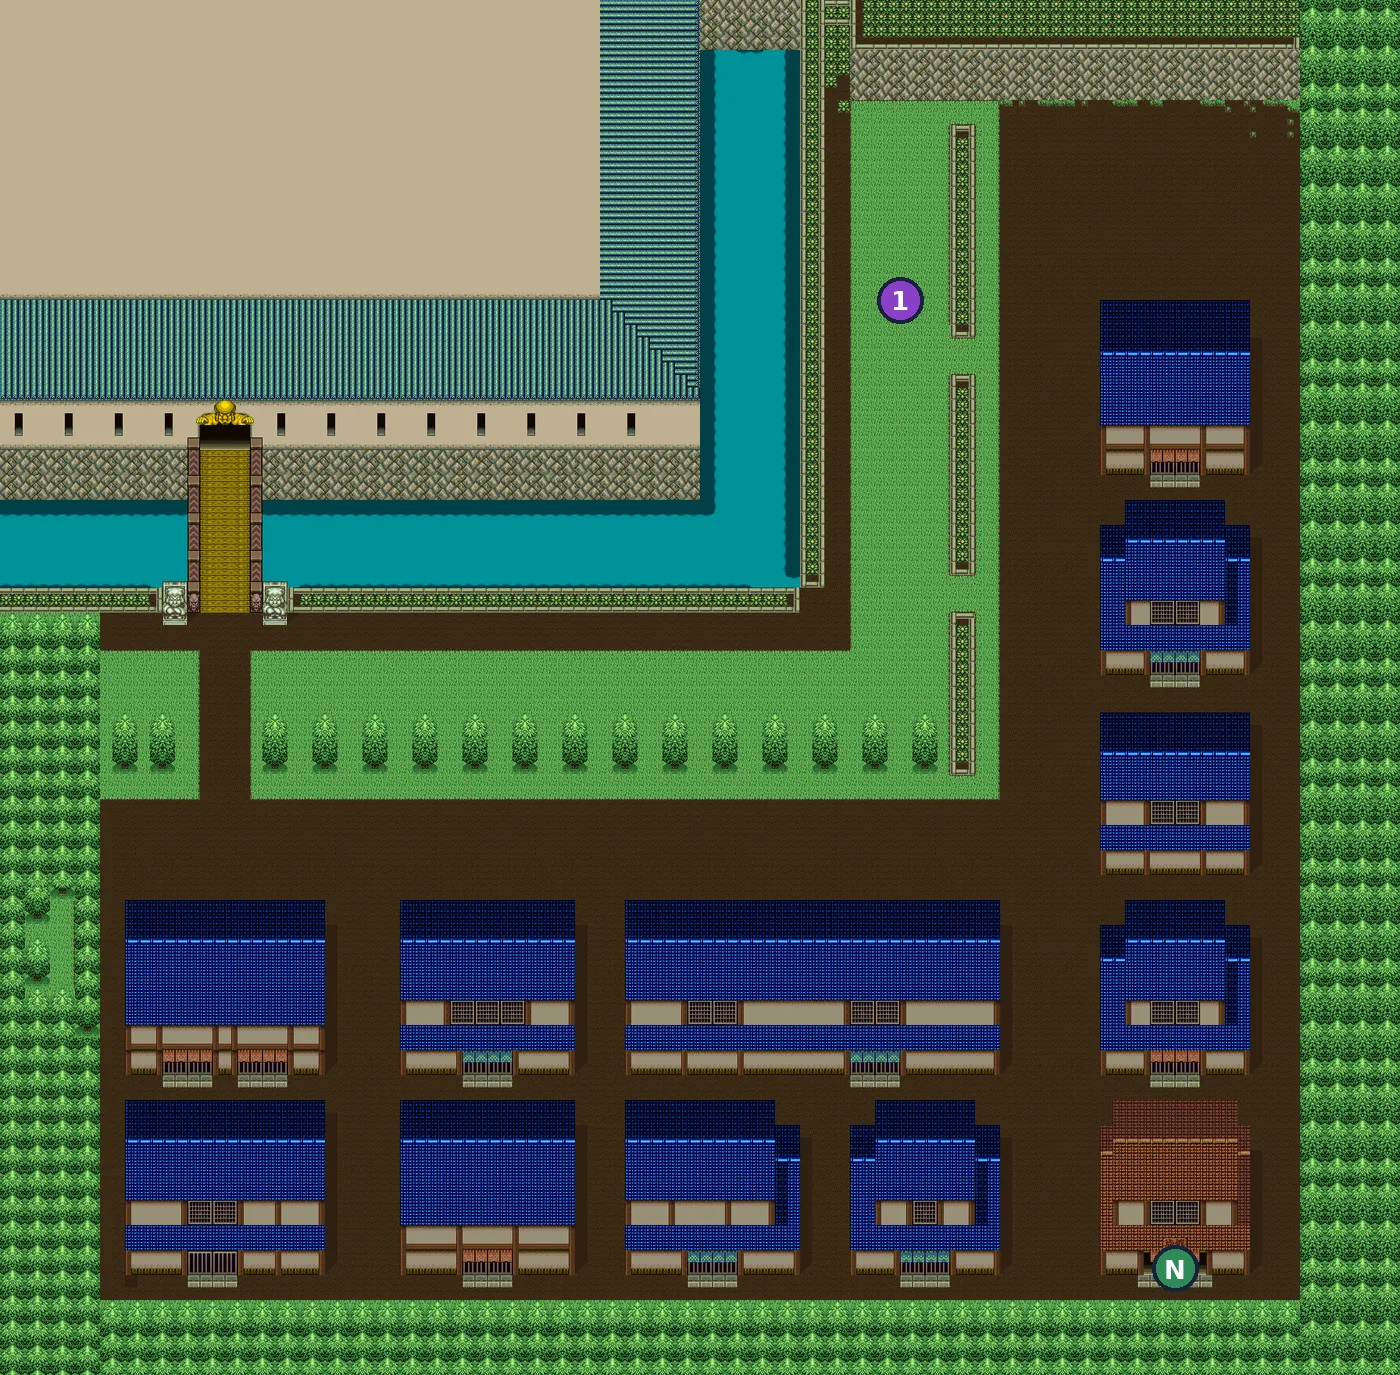
- 1LIGHT ORB (only 00:00-04:59)
- NInn: 1000 yen, full heal + save
- A 1000 yen
- A Drink M
- B Good Sword
- C 100 yen
- D Rice Ball
- E Meat
- F 1000 yen
- A 1000 yen
- B 1000 yen
- C 1000 yen
- D Rice Ball
- E 100 yen
- F Apple
Mt. Aso: Amakusa Shiro Tokisada and the Fire Orb
📍 Mt. Aso town · the path · the trail · the lava cave · the crater · 🎚️ Suggested level (old FAQ): 40–45
A volcano with a weapon shop, two inns and a familiar face: Starfish Man has gone straight and opened a shop. The FIRE ORB sits in the crater. A hidden sword is in the river on the way.
Walkthrough
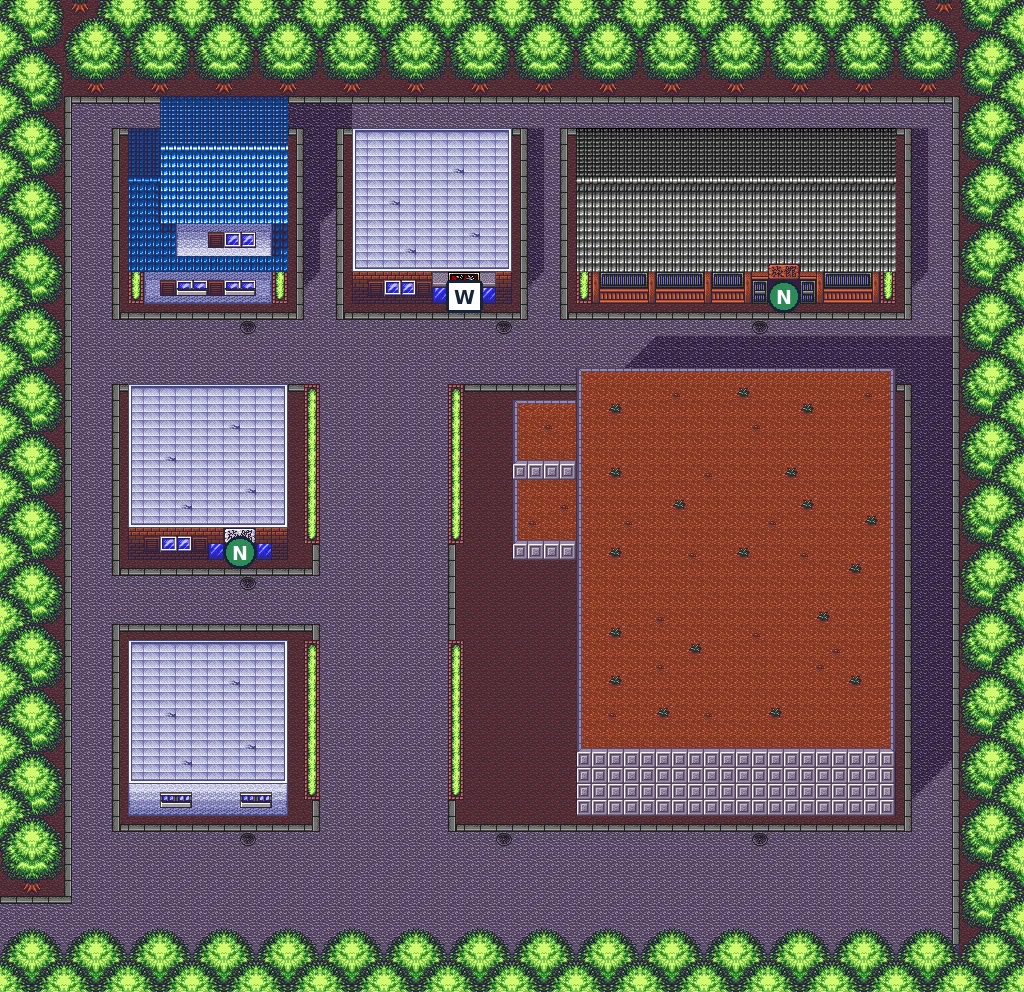
- TipThe town has a weapon shop and two inns. Townsfolk talk about a “Red Dragon Orb” in the crater, a clan treasure, and “a rock shaped like a seashell in the river”.
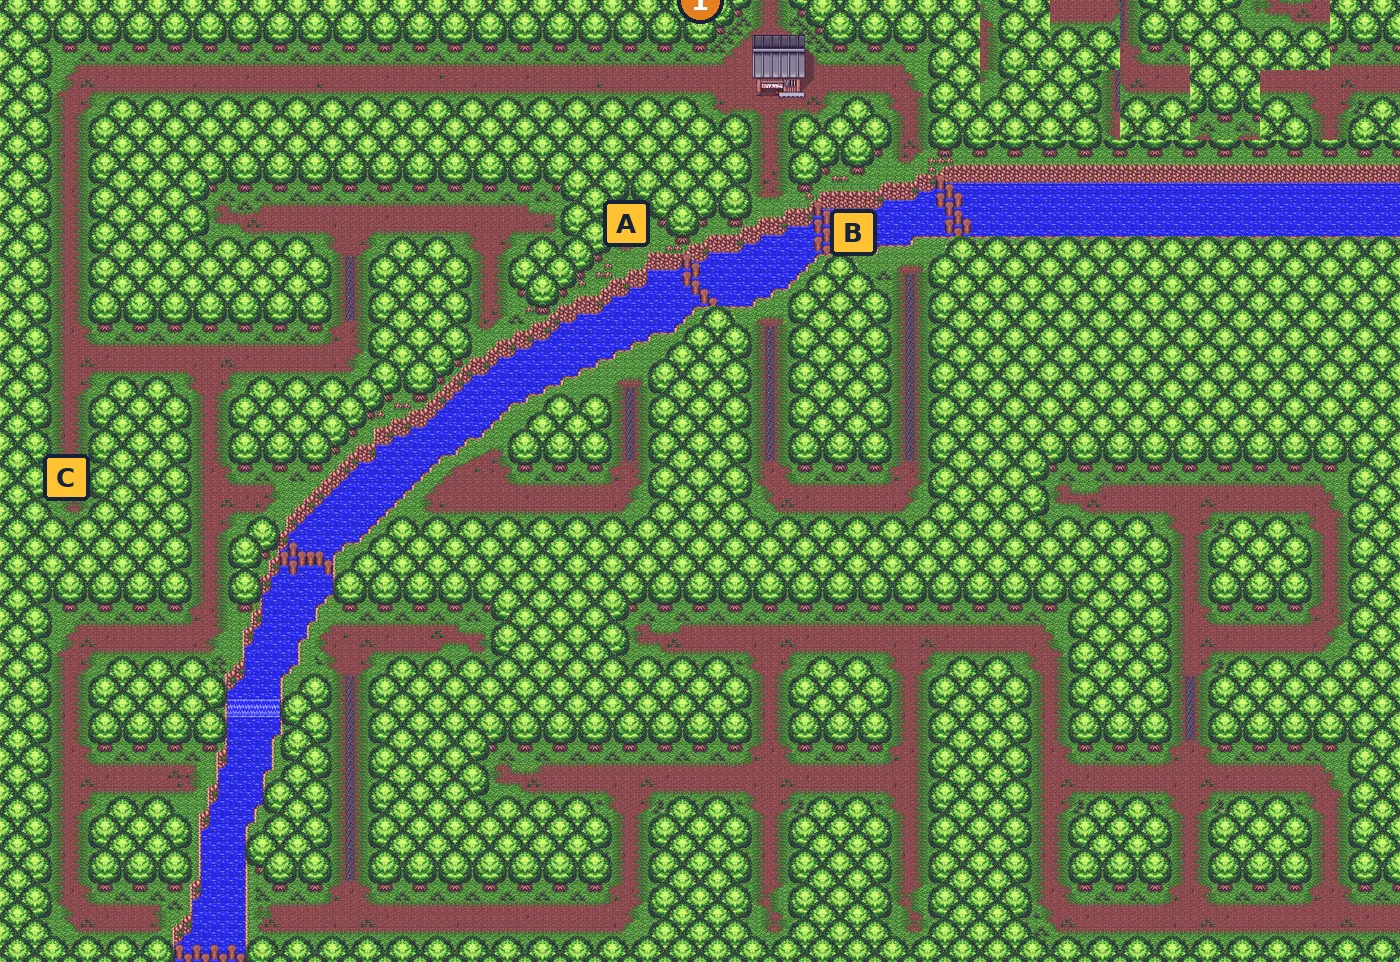
- MainFollow the path towards the volcano (use the MAP item or the SELECT map; it works here).
- SidePath treasure: a Good Axe (A) at a dead end and a Rice Ball (C) at the western dead end. The seashell-shaped rock in the river (B) is a hidden stone: hit it for a MURASAME, the best sword your allies can use (ATTACK ×1.35). The old FAQ missed this one.
- MainAt the shop at the foot of the mountain, the owner is Starfish Man, one of the three Oni from Part 3. He apologises, says he has turned over a new leaf, and tells you he has heard of an orb on Mt. Aso.
- MainThe trail is a series of ledges: jump from platform to platform and use PINWHEEL to cross the wide gaps. There is Drink L on the lower ledges and 1000 yen on the upper ones.
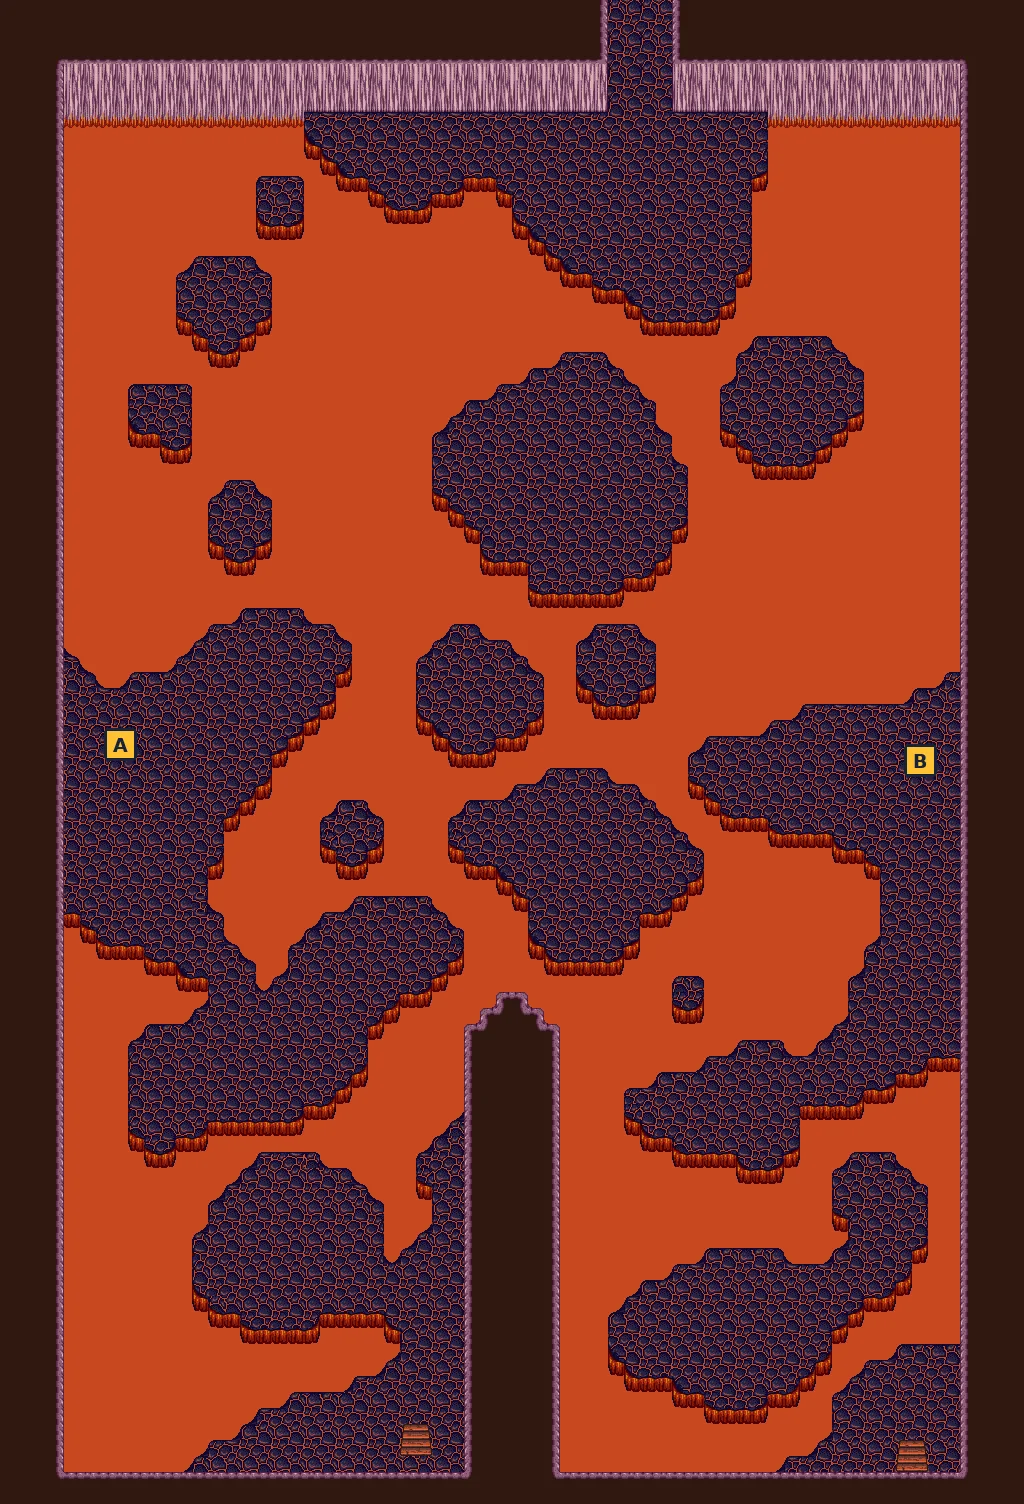
- SideIn the lava cave, a Rice Ball (A) and a Fine Sword (B) are on the side platforms. Falling into the lava costs HP.
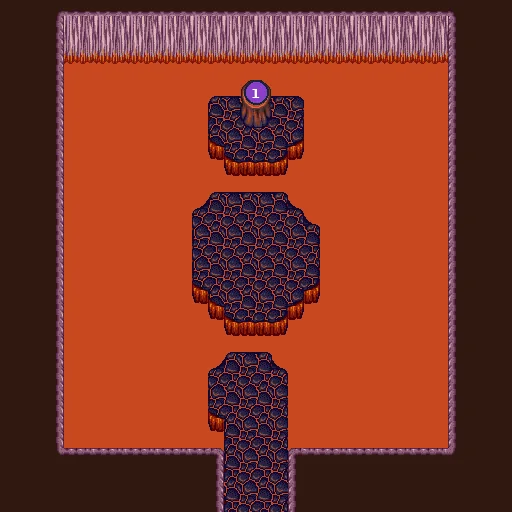
- MainIn the crater, pick up the FIRE ORB: Amakusa Shiro Tokisada appears to take it. Beat him and the FIRE ORB is yours.
- TipRain is common on outdoor maps. It is not just for show: in the rain, WATER ORB damage is ×1.4, RAIJIN and ICE ×1.2 and FIRE ×0.7. In clear weather FIRE is ×1.1 and the others are weaker. Full table on the Secrets page.
Checklist
- Where
- Mt. Aso path, the seashell-shaped rock in the river
- How
- Hit the rock with the attack button.
- Reward
- MURASAME (ATTACK ×1.35; Yaiba, Rai, Jubei, Kojiro, Musashi).
- Where
- Mt. Aso crater
- How
- Take it and beat Amakusa.
- Reward
- FIRE ORB: ring of fire (20 MP).
Treasure (7)
| Item | Map | Where | |
|---|---|---|---|
| Good Axe | Mt. Aso: the path to the volcano | marker A on the map | |
| Murasame | Mt. Aso: the path to the volcano | marker B on the map (hidden in a stone: hit it with the attack button) Not in the old walkthrough. See Secrets. | |
| Rice Ball | Mt. Aso: the path to the volcano | marker C on the map | |
| Drink L | Mt. Aso: trail (ledges) | marker A on the map | |
| 1000 yen | Mt. Aso: trail (upper ledges) | marker A on the map | |
| Rice Ball | Mt. Aso: lava cave | marker A on the map | |
| Fine Sword | Mt. Aso: lava cave | marker B on the map |
Bosses
🗺️ Maps for this part (6)
Yellow squares with letters are treasure (chests, or stones you hit with the attack button). Numbered circles mark events, bosses and orbs. White squares are shops (I item shop, D drugstore, W weapons, A armor) and green circles are places to rest or save (H Sayaka’s house, N inn, S shop with a save statue). Tap a map to open it full size.
- WWeapon shop (Good/Fine Sword, Good/Fine Axe)
- NInn: 1000 yen, full heal + save
- 1Starfish Man’s shop
- A Good Axe
- B Murasame (stone)
- C Rice Ball

- A Drink L

- A 1000 yen
- A Rice Ball
- B Fine Sword
- 1FIRE ORB, then Amakusa Shiro Tokisada
Hokkaido: Benkei and the Ice Orb
📍 Hokkaido fields · fenced pastures · town and bridge · 🎚️ Suggested level (old FAQ): 50
Long fields of forest paths lead north to a small town and a bridge guarded by Benkei, the toughest of the orb guardians.
Walkthrough
- SideFirst field: a Rice Ball chest at the end of a side path. Second field: Drink L. Most other dead ends only have golems (1000 HP, DEF 50).
- MainIn the fenced pastures, two chests inside the left fence hold 1000 yen and Drink M. Inside the right fence, walk up its left edge to the sealed stone: POWER ORB (A). Two more chests nearby hold 100 yen and Meat.
- TipThe POWER ORB (30 MP) doubles your attack for 600 frames (about 10 seconds). Because EXP equals damage, it doubles your EXP too. Combine it with THUNDER SLASH for the fastest levelling in the game. Only one of POWER/WOOD can be active at a time.
- MainThe road ends at a town with an inn and an item shop that also sells Drink L and Revival Leaves. There are chests with 1000 yen and 100 yen by the road, and a stone with an Apple in the yard beyond the bridge.
- MainBenkei blocks the bridge and demands the orb for Lord Onimaru, without knowing what it looks like. Beat him for the ICE ORB.
Checklist
- Where
- Hokkaido, inside the right-hand fenced pasture
- How
- Hit the sealed stone.
- Reward
- POWER ORB: attack ×2 for ~10 s (30 MP).
- Where
- Hokkaido bridge
- How
- Beat Benkei.
- Reward
- ICE ORB: ice blast in a straight line (25 MP).
Treasure (10)
| Item | Map | Where | |
|---|---|---|---|
| Rice Ball | Hokkaido: first field | marker A on the map | |
| Drink L | Hokkaido: second field | marker A on the map | |
| Power Orb | Hokkaido: fenced pastures | marker A on the map (hidden in a stone: hit it with the attack button) | |
| 100 yen | Hokkaido: fenced pastures | marker B on the map | |
| Meat | Hokkaido: fenced pastures | marker C on the map | |
| 1000 yen | Hokkaido: fenced pastures | marker D on the map | |
| Drink M | Hokkaido: fenced pastures | marker E on the map | |
| Apple | Hokkaido: town and the bridge (Benkei) | marker A on the map (hidden in a stone: hit it with the attack button) Not in the old walkthrough. | |
| 1000 yen | Hokkaido: town and the bridge (Benkei) | marker B on the map | |
| 100 yen | Hokkaido: town and the bridge (Benkei) | marker C on the map |
Bosses
🗺️ Maps for this part (4)
Yellow squares with letters are treasure (chests, or stones you hit with the attack button). Numbered circles mark events, bosses and orbs. White squares are shops (I item shop, D drugstore, W weapons, A armor) and green circles are places to rest or save (H Sayaka’s house, N inn, S shop with a save statue). Tap a map to open it full size.
- A Rice Ball
- A Drink L
- A Power Orb (stone)
- B 100 yen
- C Meat
- D 1000 yen
- E Drink M
- 1Benkei (on the bridge)
- A Apple (stone)
- B 1000 yen
- C 100 yen
- NInn: 1000 yen, full heal + save
- IItem shop (Apple, Rice Ball, Meat, Drink L, Revival Leaf)
Niigata and the Dark World: Jubei, Bee Man and the Water Flea
📍 Niigata station · Niigata town · the Orb shop · the Dark World · 🎚️ Suggested level (old FAQ): about 40 (more if Niigata is your last region)
An orb is for sale here, for 50 million yen. Before you can even look at it, Hachibei the Water Flea Man steals it. Yagyu Jubei joins on the way.
⏳ Last chances
- This is a good last region: the inn is close to the Orb shop, and Niigata station is the best place in the game to level up.
Walkthrough
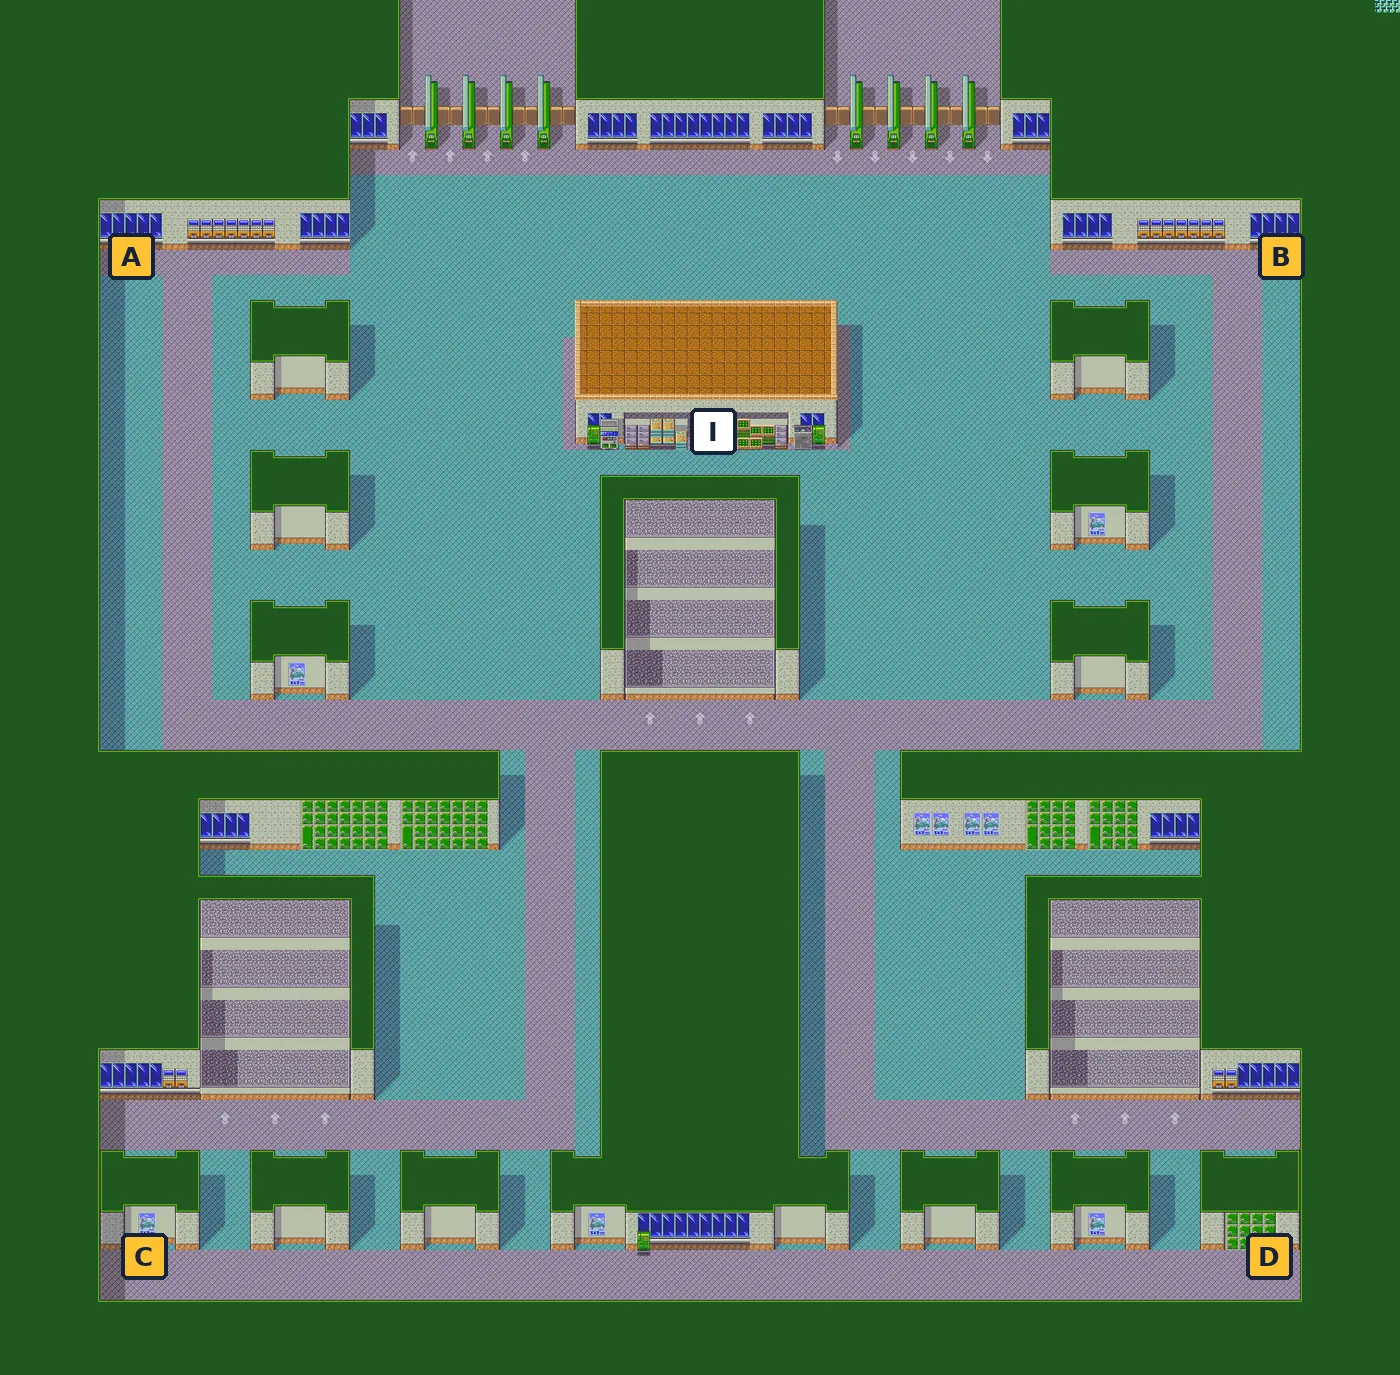
- SideNiigata station: one chest in each corner: 100 yen, 1000 yen, 1000 yen and a Fine Axe for Gerozaemon. Climb the arrow path in the middle to leave the station.
- TipLevelling: the undead samurai in the station (500 HP, DEF 15) keep chasing you even at 0 HP, and every hit still gives full EXP. Gather a few in a corner and use POWER ORB plus THUNDER SLASH.
- SideOutside the station, the thousand-year-old sacred tree stands in the plaza. Hit the marked spot at its foot: WOOD ORB (A). It doubles your DEFENSE for about 10 seconds (10 MP).
- MainOn the pedestrian bridge, Musashi recognises an old friend: Yagyu Jubei (Rai wonders whether Onimaru brought him back too). Jubei joins (Lv 12). You can do this before or after the boss.
- TipSouth of the bridge: a weapon shop (W) and an inn (N). Rest and save here before the Orb shop.
- MainWalk east from the inn to the Orb shop. The shopkeeper really does have a legendary orb, at 50 million yen, “only to look at”. The Water Flea Man snatches it and leaves Bee Man to deal with you.
- MainBeat Bee Man outside and recover the orb. When Yaiba tries to set it into the Raijin Sword, the party is sucked inside: the Dark World.
- MainYour HP is not refilled. Walk north from the hut along the river and fight the Water Flea Man. Rai knows him: Hachibei, the former guardian of the Toshin Sword. Beat him to return with the DARK ORB.
Checklist
- Where
- Niigata, the sacred tree’s marked spot
- How
- Hit it with the attack button.
- Reward
- WOOD ORB: defense ×2 for ~10 s (10 MP).
- Where
- Niigata, pedestrian bridge
- How
- Talk to him (story scene).
- Reward
- Sword fighter, Lv 12.
- Where
- The Dark World
- How
- Beat the Water Flea Man.
- Reward
- DARK ORB: story orb, cannot be used.
Treasure (5)
| Item | Map | Where | |
|---|---|---|---|
| 100 yen | Niigata station | marker A on the map | |
| 1000 yen | Niigata station | marker B on the map | |
| 1000 yen | Niigata station | marker C on the map | |
| Fine Axe | Niigata station | marker D on the map | |
| Wood Orb | Niigata town | marker A on the map (hidden in a stone: hit it with the attack button) |
Bosses
🗺️ Maps for this part (3)
Yellow squares with letters are treasure (chests, or stones you hit with the attack button). Numbered circles mark events, bosses and orbs. White squares are shops (I item shop, D drugstore, W weapons, A armor) and green circles are places to rest or save (H Sayaka’s house, N inn, S shop with a save statue). Tap a map to open it full size.
- A 100 yen
- B 1000 yen
- C 1000 yen
- D Fine Axe
- IItem shop (Apple, Rice Ball, Meat, Map, Clock)
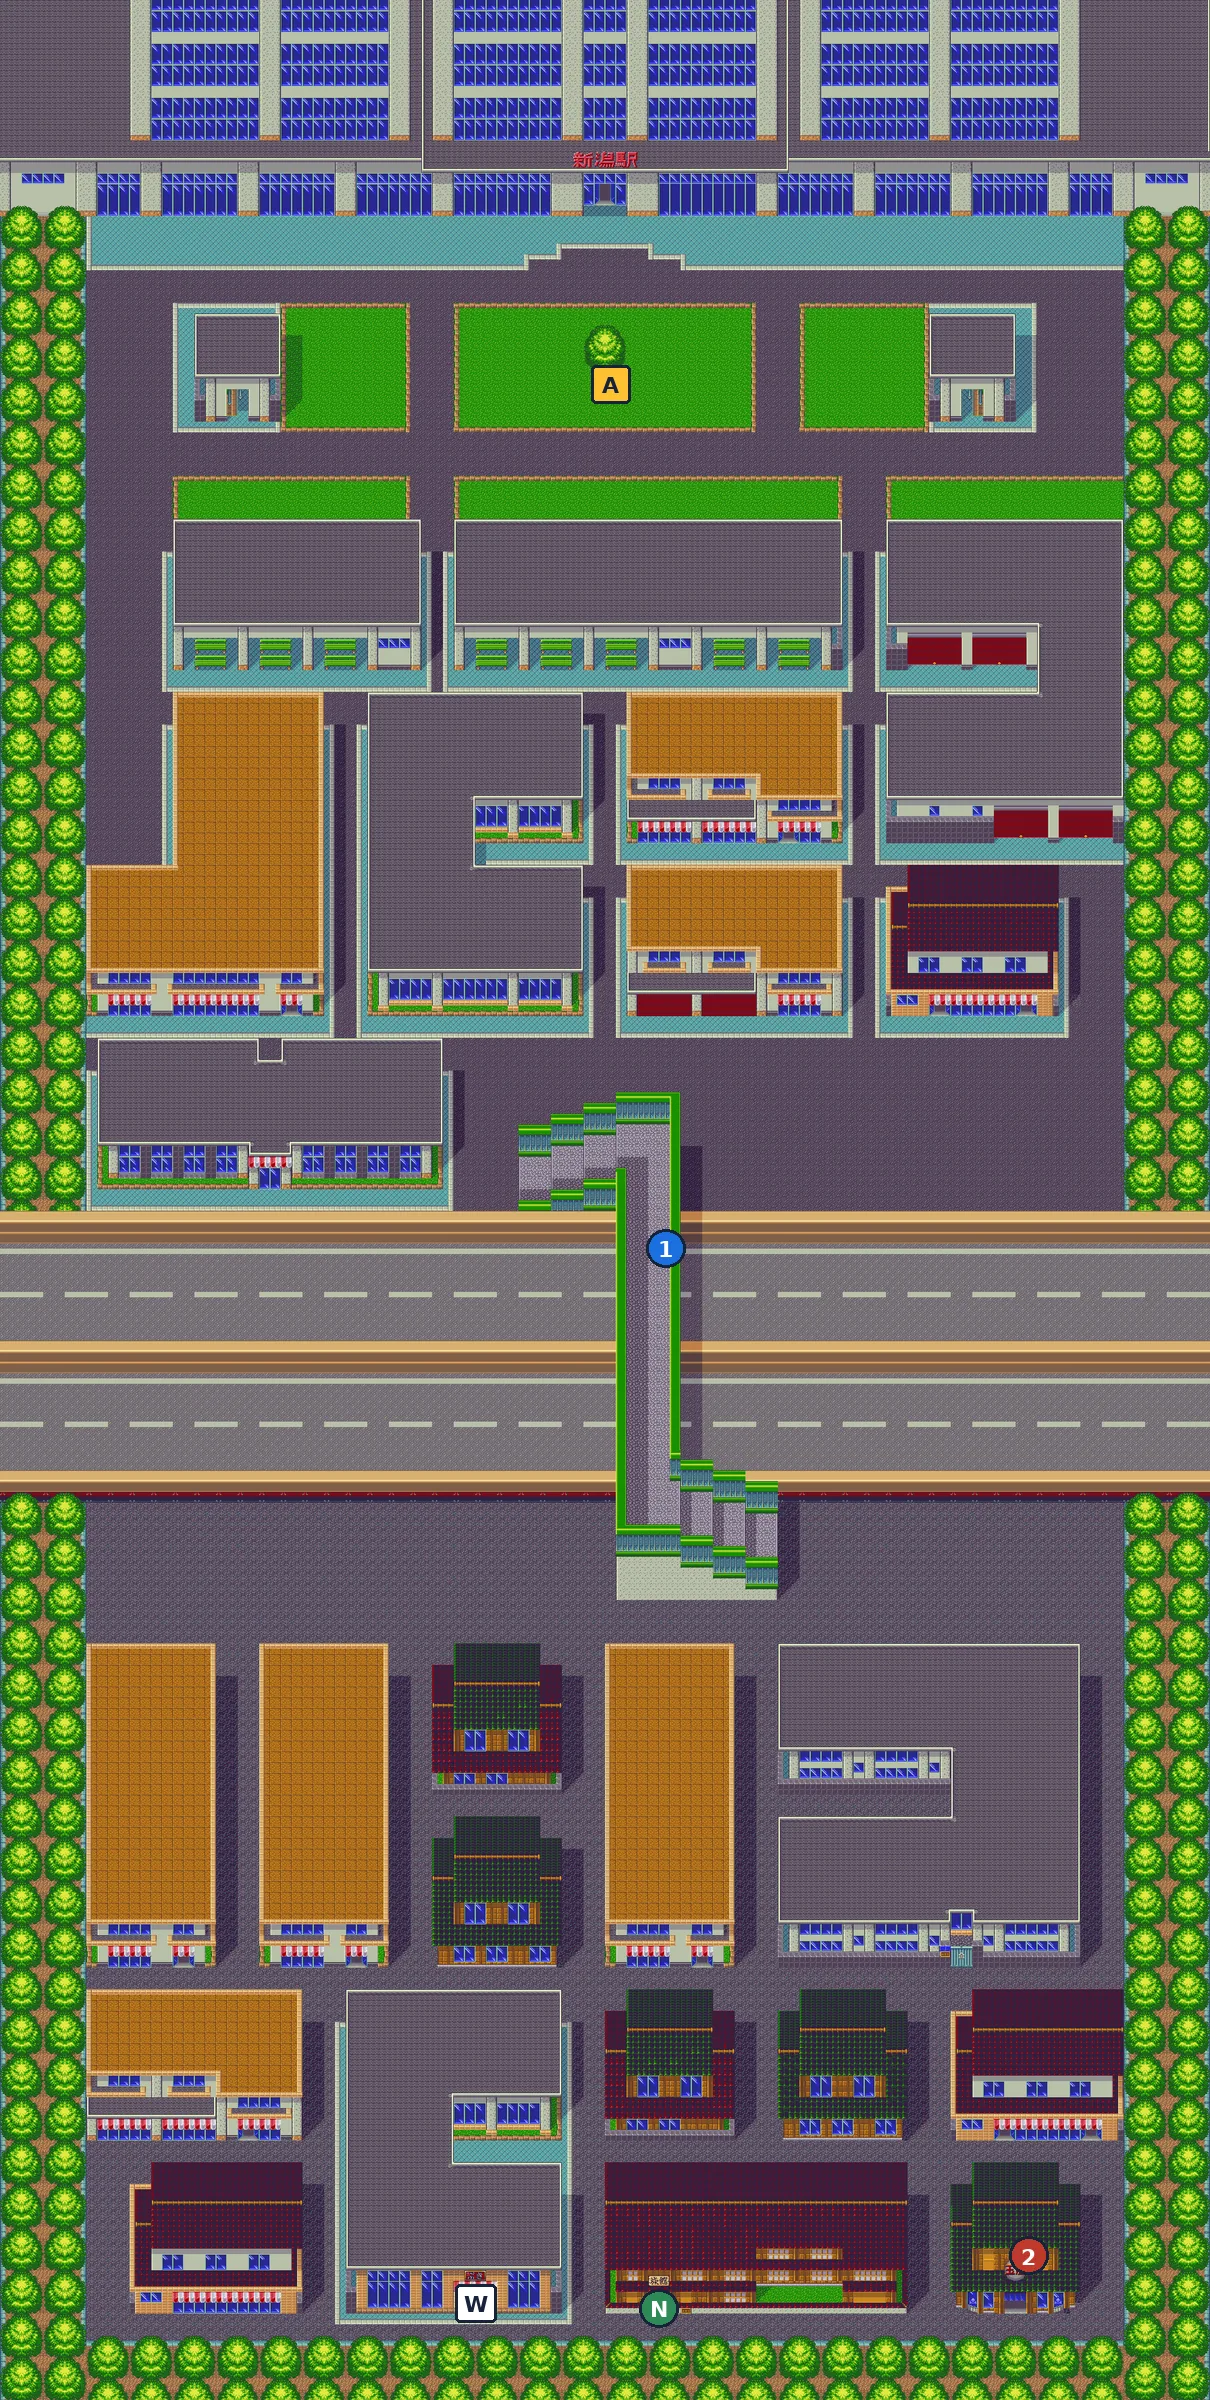
- 1Yagyu Jubei joins (pedestrian bridge)
- 2Orb shop: Water Flea Man steals the orb; Bee Man
- A Wood Orb (stone)
- WWeapon shop (Good/Fine Sword, Good/Fine Axe)
- NInn: 1000 yen, full heal + save
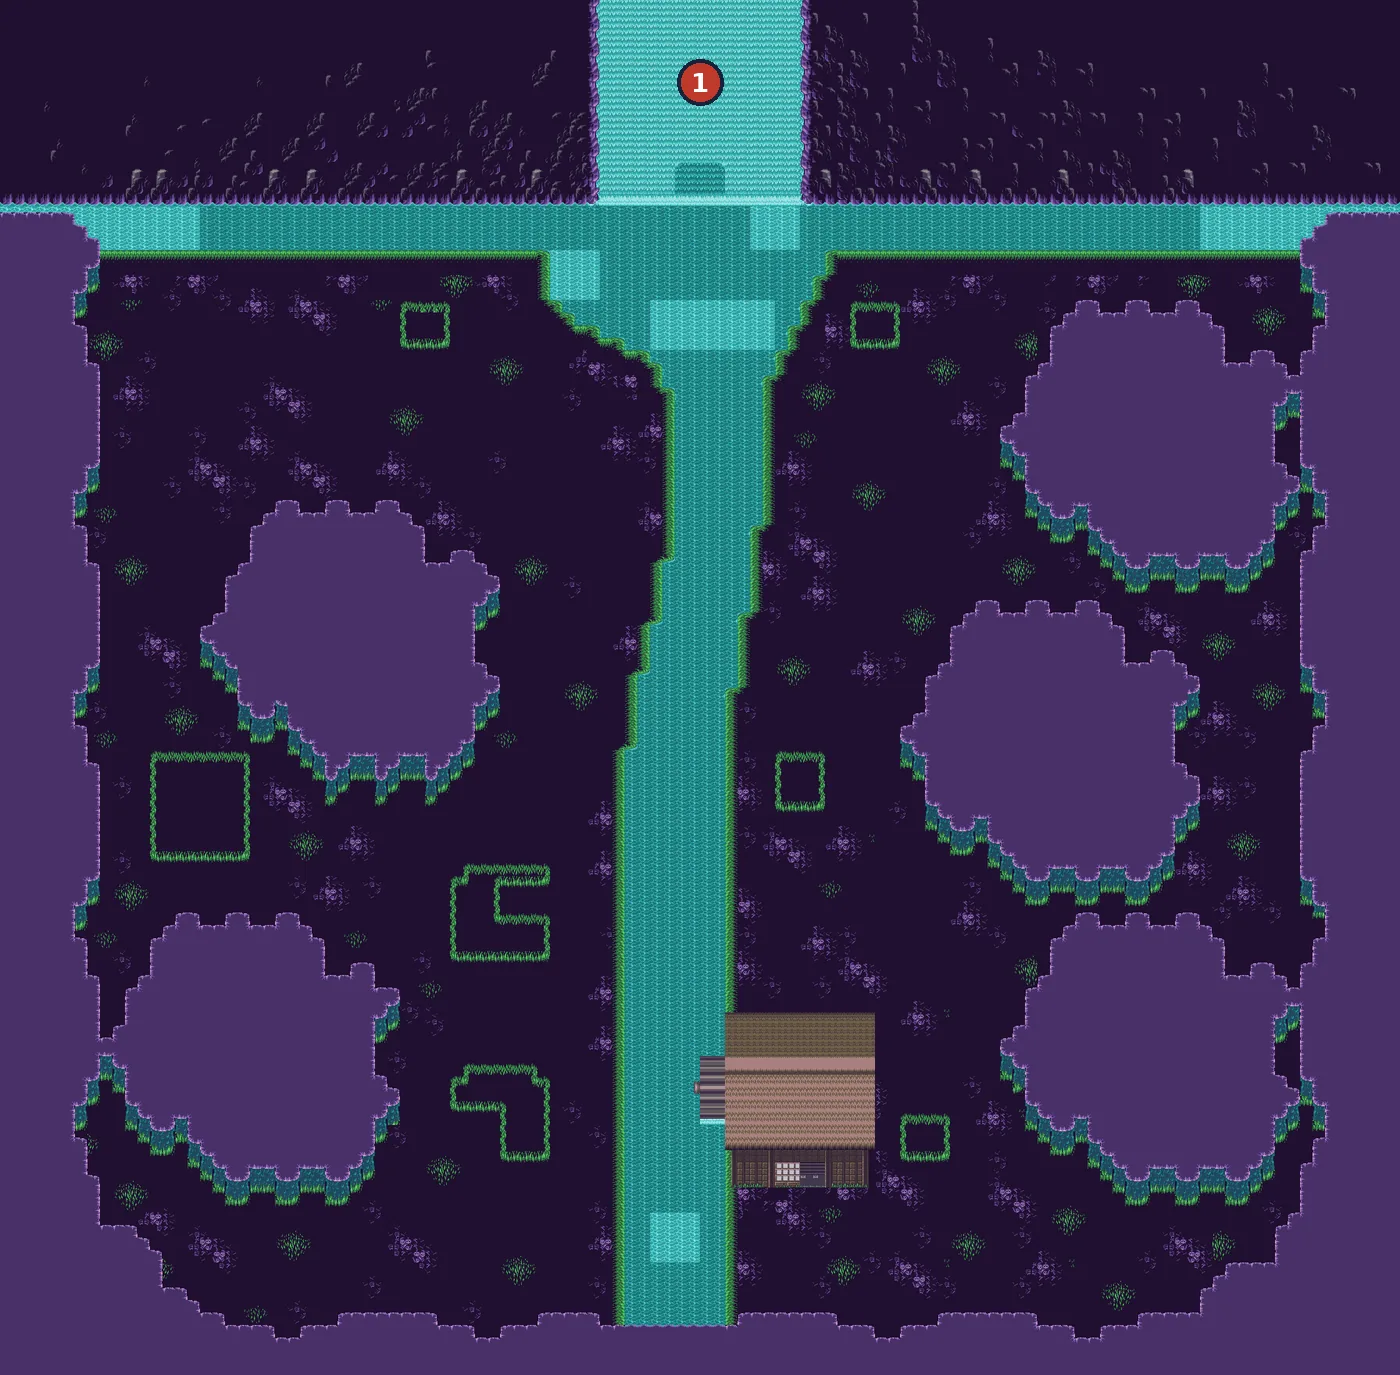
- 1Water Flea Man (Hachibei), at the north end
Mt. Fuji: Onimaru’s Sky Castle
📍 Sayaka’s house · Onimaru Sky Castle · below the castle · 🎚️ Suggested level (old FAQ): 80 or more
With all seven orbs, the Jackpot Orb finally talks: the Dragon Orb is hidden in the crater of Mt. Fuji. But Onimaru’s flying castle is sitting right on top of it.
⏳ Last chances
- From here to the end there is no way back home. The Sky Castle and the Dragon God’s Fortress each have a shop with a save statue.
- 10 treasures on this part’s maps can be missed: There is no way back up once you set the orbs in the rock below the castle.
Walkthrough
- MainBring the seventh orb home. The Jackpot Orb congratulates you as “true samurai” and reveals the crater of Mt. Fuji. The party heads there at once and charges into Onimaru’s Sky Castle.
- MainThe castle is a maze over several floors. Look for the stairs that go down: the Dragon Orb is below.
- SideTreasure (Sky Castle maps): KIKUICHIMONJI and 1000 yen in the west wing; Drink M and a Rice Ball in the south wing; Drink L on the shop floor; a second MURASAME and a Rice Ball in the lower hall; Meat and two Rice Balls on the garbage chute floor.
- MainOn the shop floor, go through the dark opening to the shop and save statue (S). Save. The statue saves but does not heal, and the shop sells Rice Balls, Meat, Drink L and Revival Leaves: stock up.
- MainThe Jackpot Orb points out a garbage chute: jump in. Below the castle he finds the rock shaped like Japan and warns that orbs set in it never come back out. Yaiba sets them in, and the Dragon God’s voice welcomes you to his fortress.
- WarningThis is where the FIRE, WATER, ICE, DARK, GOLD, BIG and JACKPOT ORBS are taken. You keep the RAIJIN, WOOD and POWER ORBS and all healing orbs.
Treasure (10)
| Item | Map | Where | |
|---|---|---|---|
| 1000 yen | Onimaru Sky Castle: west wing | marker A on the map ⚠ Missable: There is no way back up once you set the orbs in the rock below the castle. | |
| Kikuichimonji | Onimaru Sky Castle: west wing | marker B on the map ⚠ Missable: There is no way back up once you set the orbs in the rock below the castle. | |
| Drink M | Onimaru Sky Castle: south wing | marker A on the map ⚠ Missable: There is no way back up once you set the orbs in the rock below the castle. | |
| Rice Ball | Onimaru Sky Castle: south wing | marker B on the map ⚠ Missable: There is no way back up once you set the orbs in the rock below the castle. | |
| Drink L | Onimaru Sky Castle: shop floor | marker A on the map ⚠ Missable: There is no way back up once you set the orbs in the rock below the castle. | |
| Rice Ball | Onimaru Sky Castle: lower hall | marker A on the map ⚠ Missable: There is no way back up once you set the orbs in the rock below the castle. | |
| Murasame | Onimaru Sky Castle: lower hall | marker B on the map ⚠ Missable: There is no way back up once you set the orbs in the rock below the castle. | |
| Rice Ball | Onimaru Sky Castle: the garbage chute floor | marker A on the map ⚠ Missable: There is no way back up once you set the orbs in the rock below the castle. | |
| Meat | Onimaru Sky Castle: the garbage chute floor | marker B on the map ⚠ Missable: There is no way back up once you set the orbs in the rock below the castle. | |
| Rice Ball | Onimaru Sky Castle: the garbage chute floor | marker C on the map ⚠ Missable: There is no way back up once you set the orbs in the rock below the castle. |
🗺️ Maps for this part (6)
Yellow squares with letters are treasure (chests, or stones you hit with the attack button). Numbered circles mark events, bosses and orbs. White squares are shops (I item shop, D drugstore, W weapons, A armor) and green circles are places to rest or save (H Sayaka’s house, N inn, S shop with a save statue). Tap a map to open it full size.
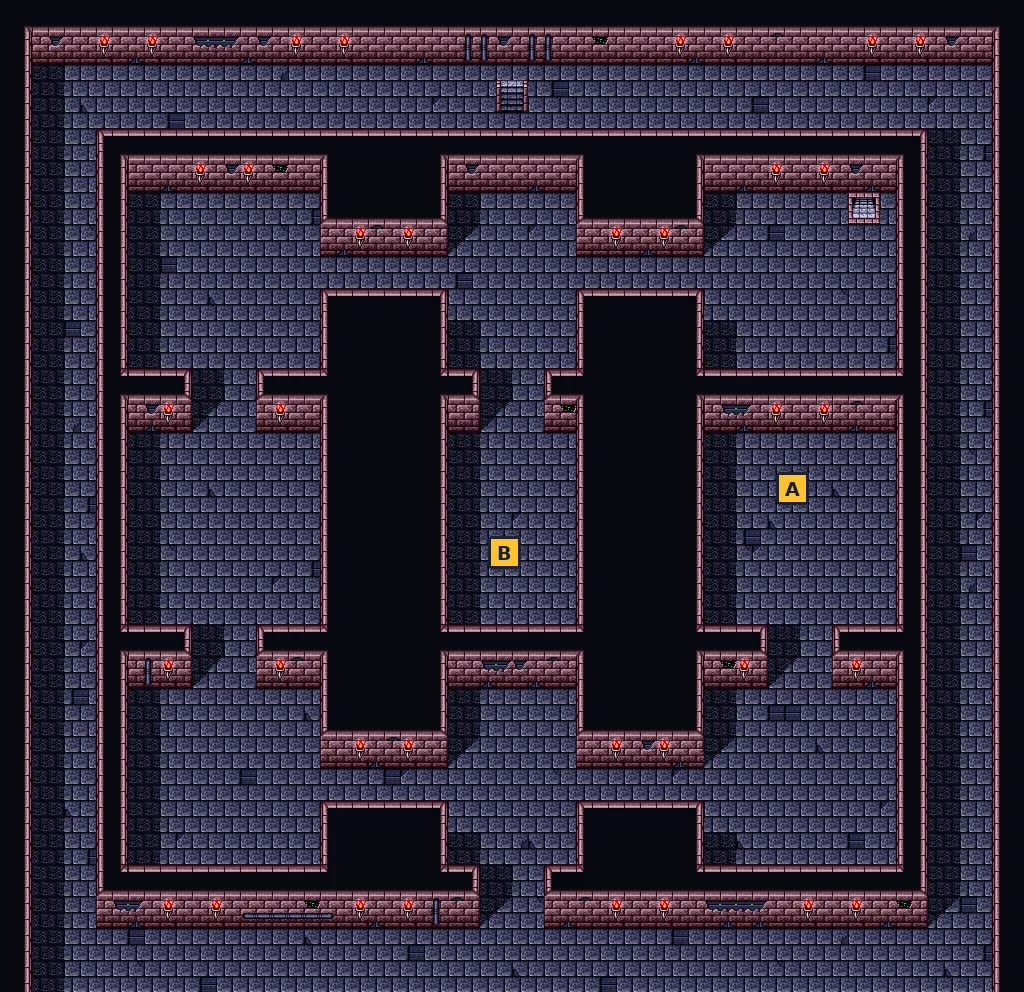
- A 1000 yen
- B Kikuichimonji
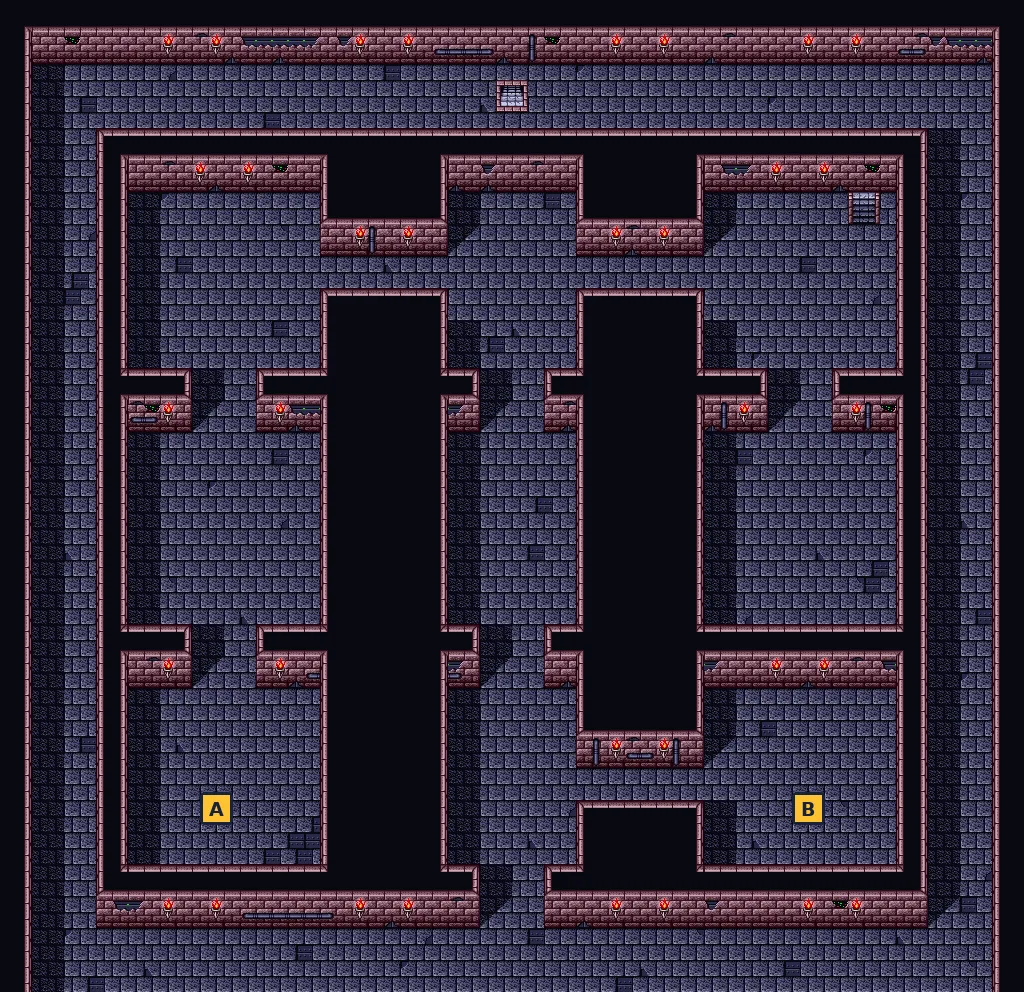
- A Drink M
- B Rice Ball
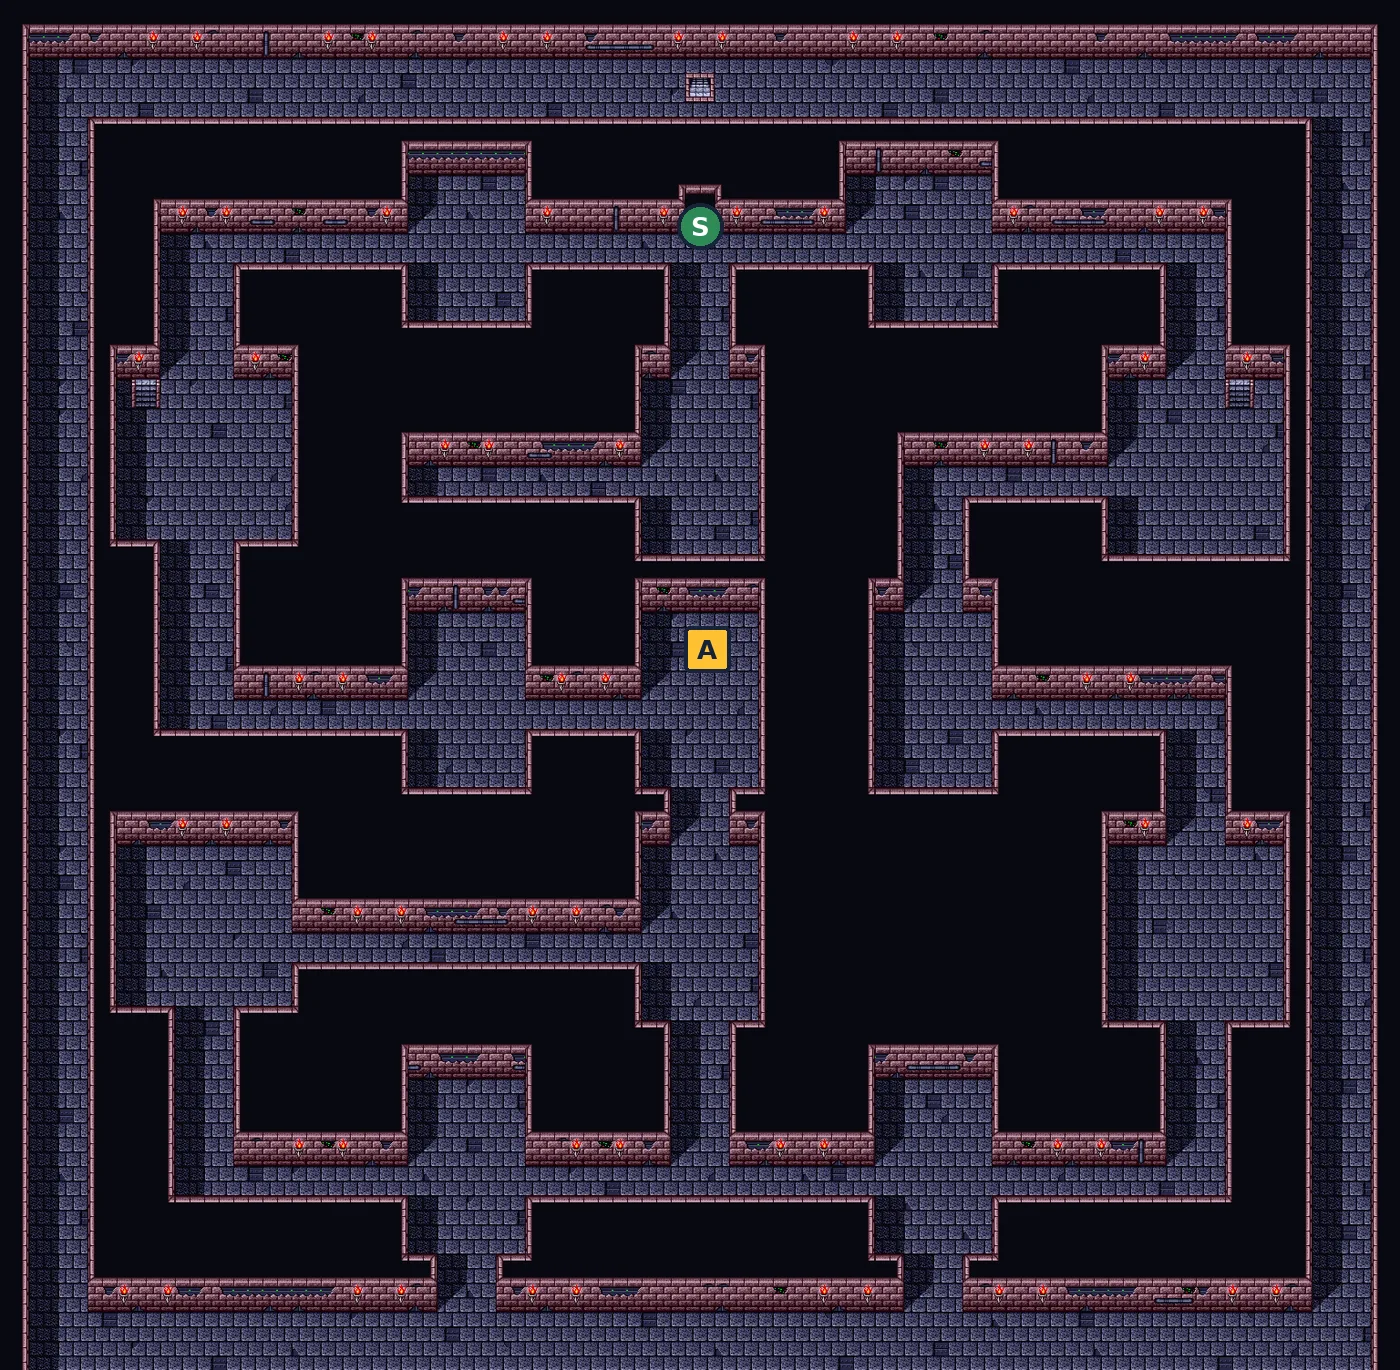
- A Drink L
- SShop + save statue (Rice Ball, Meat, Drink L, Revival Leaf)
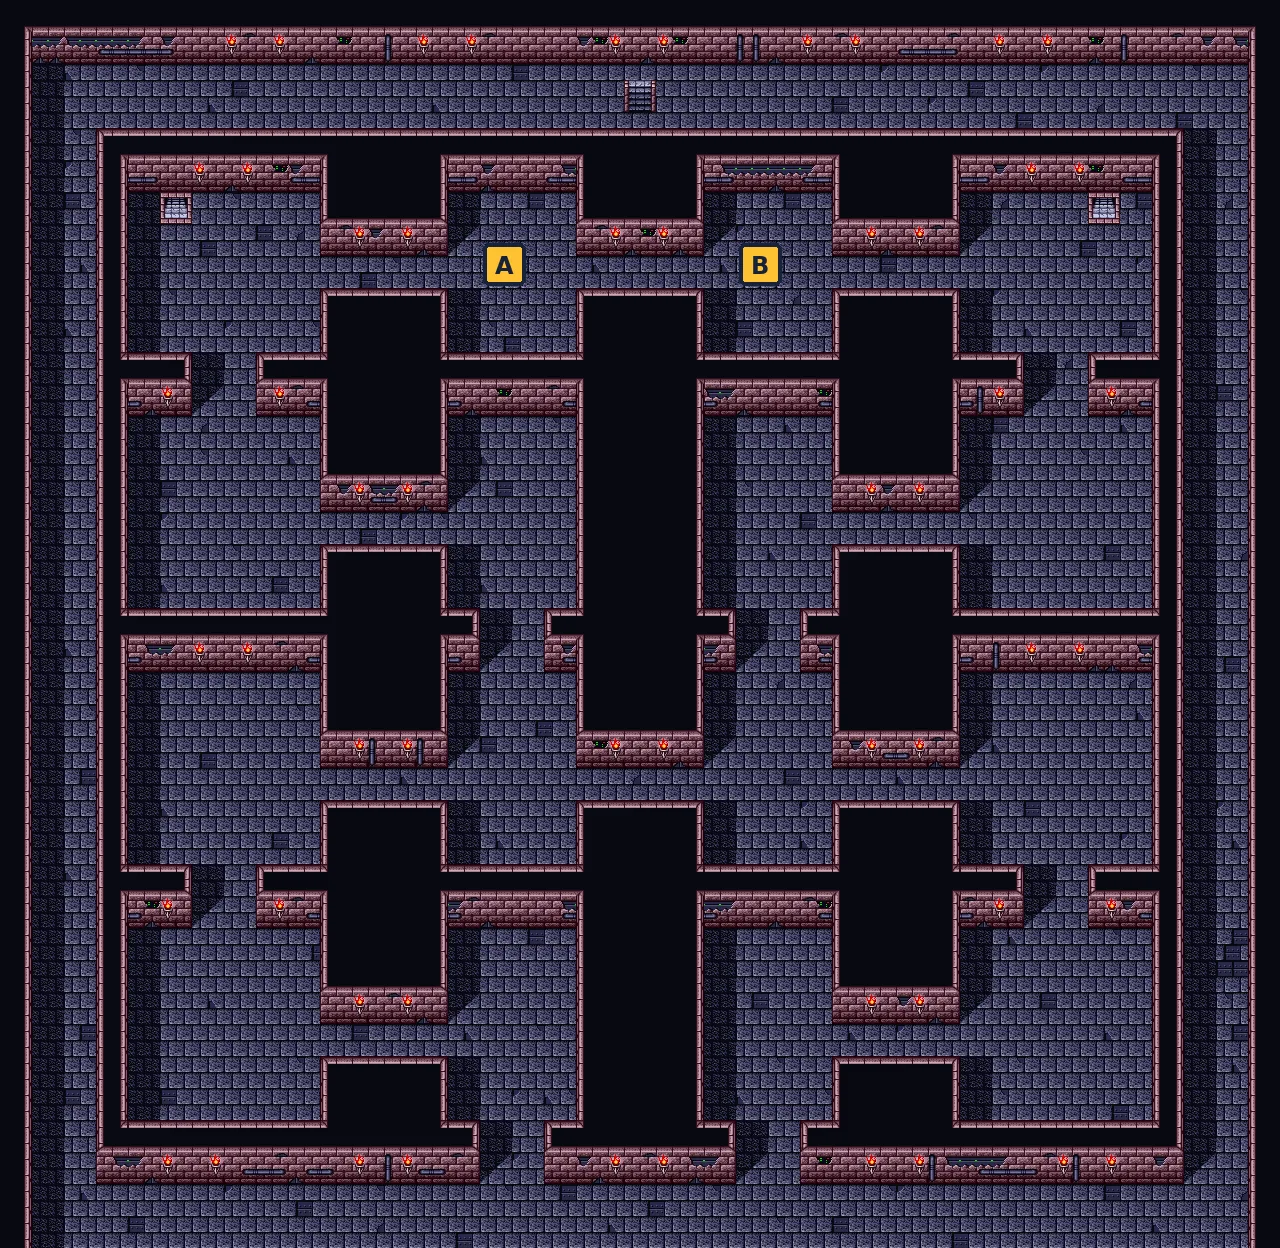
- A Rice Ball
- B Murasame
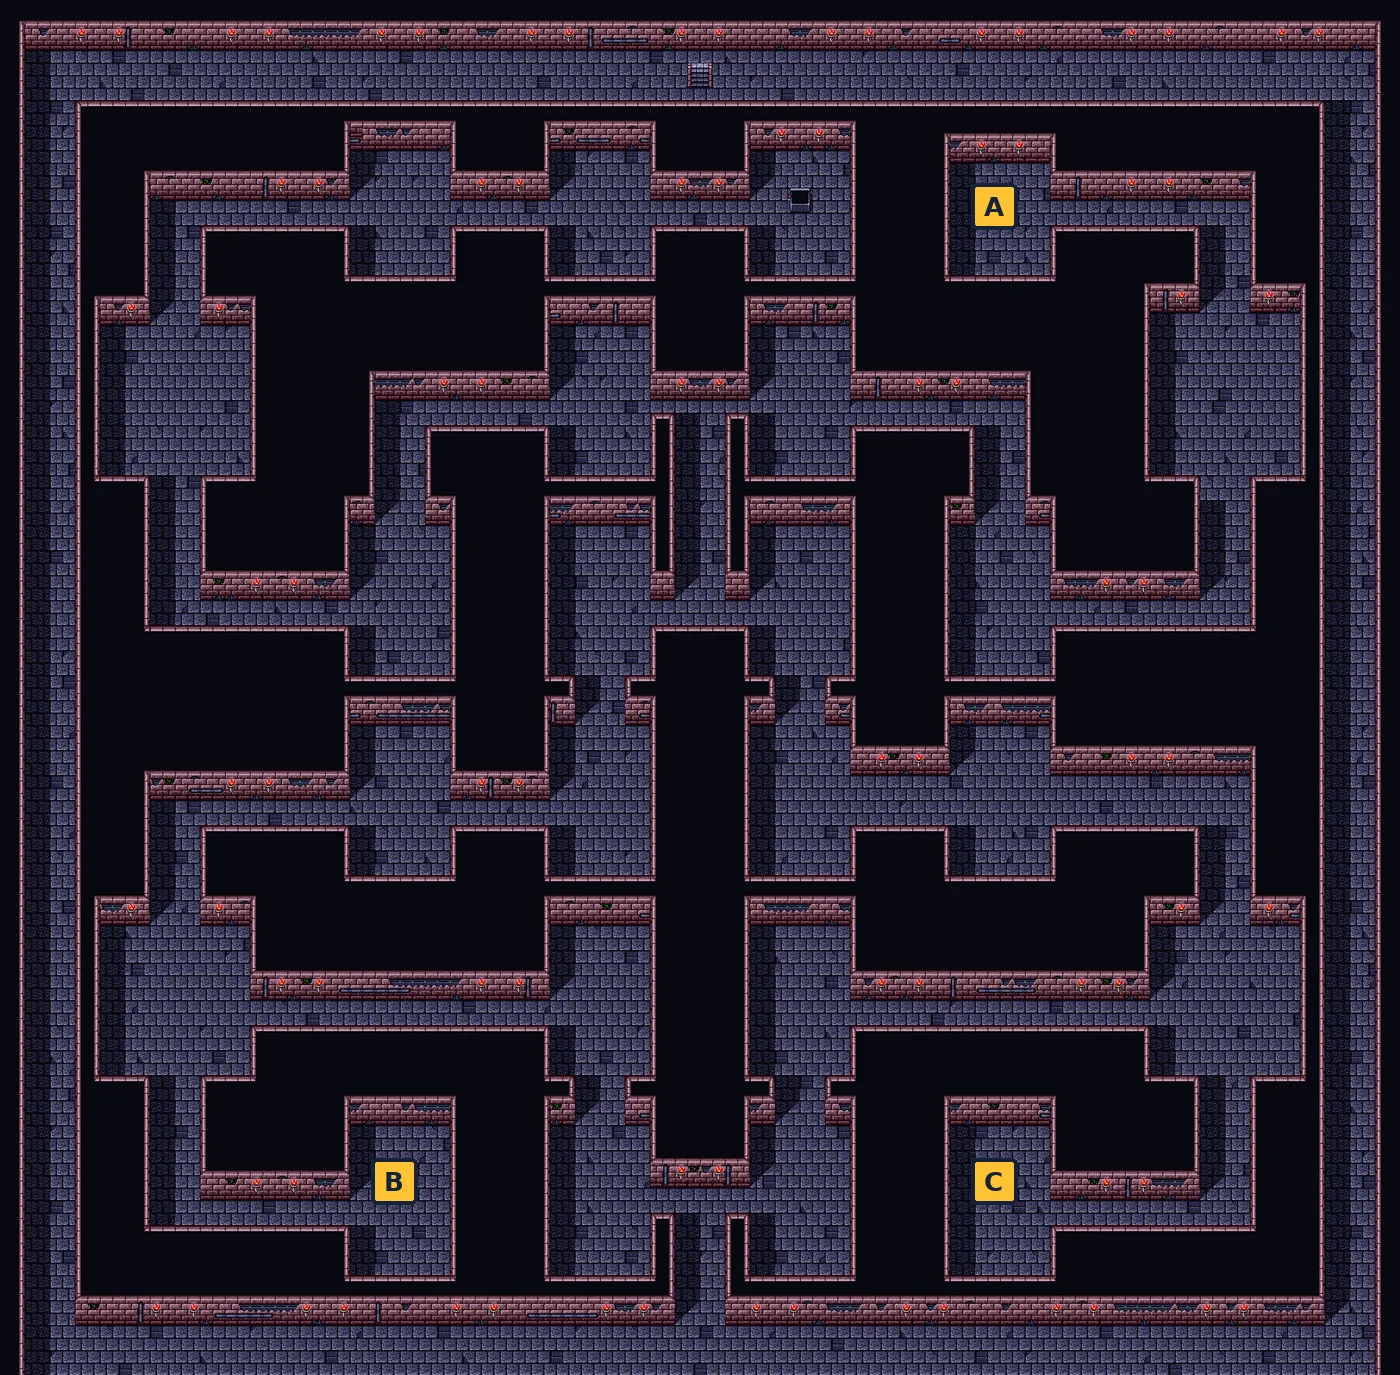
- A Rice Ball
- B Meat
- C Rice Ball
- 1The rock shaped like Japan: the orbs go in here
The Dragon God’s Fortress: Five Trials
📍 Valley of Courage · Darkness of Strength · Corridor of Wisdom · Rope of Fate · Crossroads of the Heart · 🎚️ Suggested level (old FAQ): 80 or more
The Dragon God hands Yaiba a Flame of Life: if it goes out, the Dragon Orb will be beyond his reach. One by one, your friends sacrifice themselves to get Yaiba through.
⏳ Last chances
- 7 treasures on this part’s maps can be missed: The Corridor of Wisdom collapses behind you.
Walkthrough
- MainTrial 1, the Valley of Courage: cross the long field of pillars to the far shore. Flying enemies try to knock you off. Near the end, Gerozaemon gets you across and falls himself.
- MainBefore the next door, go left into the dark opening: a shop and save statue (S). It is the last save point in the game.
- MainTrial 2, the Darkness of Strength: a hall of coffins. Defeat every enemy that appears and keep moving north; if you skip them, the scene does not advance. Kojiro falls through the floor, and on the bridge after it Jubei leaps down with the enemies.
- MainTrial 3, the Corridor of Wisdom: a maze where the wind can blow out your Flame. It collapses behind you, and Musashi stays behind so you can escape. Seven chests here: Meat ×3, Drink L ×2, a Rice Ball and 1000 yen (map).
- MainTrial 4, the Rope of Fate: one of the two ropes is fake. Sayaka grabs one and falls, and Yaiba climbs the other.
- MainTrial 5, the Crossroads of the Heart: the Dragon God shows you the Dragon Orb and your captured friends, and makes you choose. Yaiba chooses his friends, and the Dragon Orb appears in the Raijin Sword anyway. Your friends return and you receive the DRAGON ORB.
- TipThe DRAGON ORB (20 MP) is a four-in-one orb: press R to cycle it through Raijin, Fire, Water and Ice shots.
Checklist
- Where
- Dragon God’s Fortress
- How
- Pass the five trials.
- Reward
- DRAGON ORB: Raijin, Fire, Water or Ice shot for 20 MP.
Treasure (7)
| Item | Map | Where | |
|---|---|---|---|
| Meat | Dragon God’s Fortress: the Corridor of Wisdom | marker A on the map ⚠ Missable: The Corridor of Wisdom collapses behind you. | |
| Meat | Dragon God’s Fortress: the Corridor of Wisdom | marker B on the map ⚠ Missable: The Corridor of Wisdom collapses behind you. | |
| Drink L | Dragon God’s Fortress: the Corridor of Wisdom | marker C on the map ⚠ Missable: The Corridor of Wisdom collapses behind you. | |
| Rice Ball | Dragon God’s Fortress: the Corridor of Wisdom | marker D on the map ⚠ Missable: The Corridor of Wisdom collapses behind you. | |
| 1000 yen | Dragon God’s Fortress: the Corridor of Wisdom | marker E on the map ⚠ Missable: The Corridor of Wisdom collapses behind you. | |
| Meat | Dragon God’s Fortress: the Corridor of Wisdom | marker F on the map ⚠ Missable: The Corridor of Wisdom collapses behind you. | |
| Drink L | Dragon God’s Fortress: the Corridor of Wisdom | marker G on the map ⚠ Missable: The Corridor of Wisdom collapses behind you. |
🗺️ Maps for this part (5)
Yellow squares with letters are treasure (chests, or stones you hit with the attack button). Numbered circles mark events, bosses and orbs. White squares are shops (I item shop, D drugstore, W weapons, A armor) and green circles are places to rest or save (H Sayaka’s house, N inn, S shop with a save statue). Tap a map to open it full size.
- SShop + save statue (Rice Ball, Meat, Drink L, Revival Leaf)
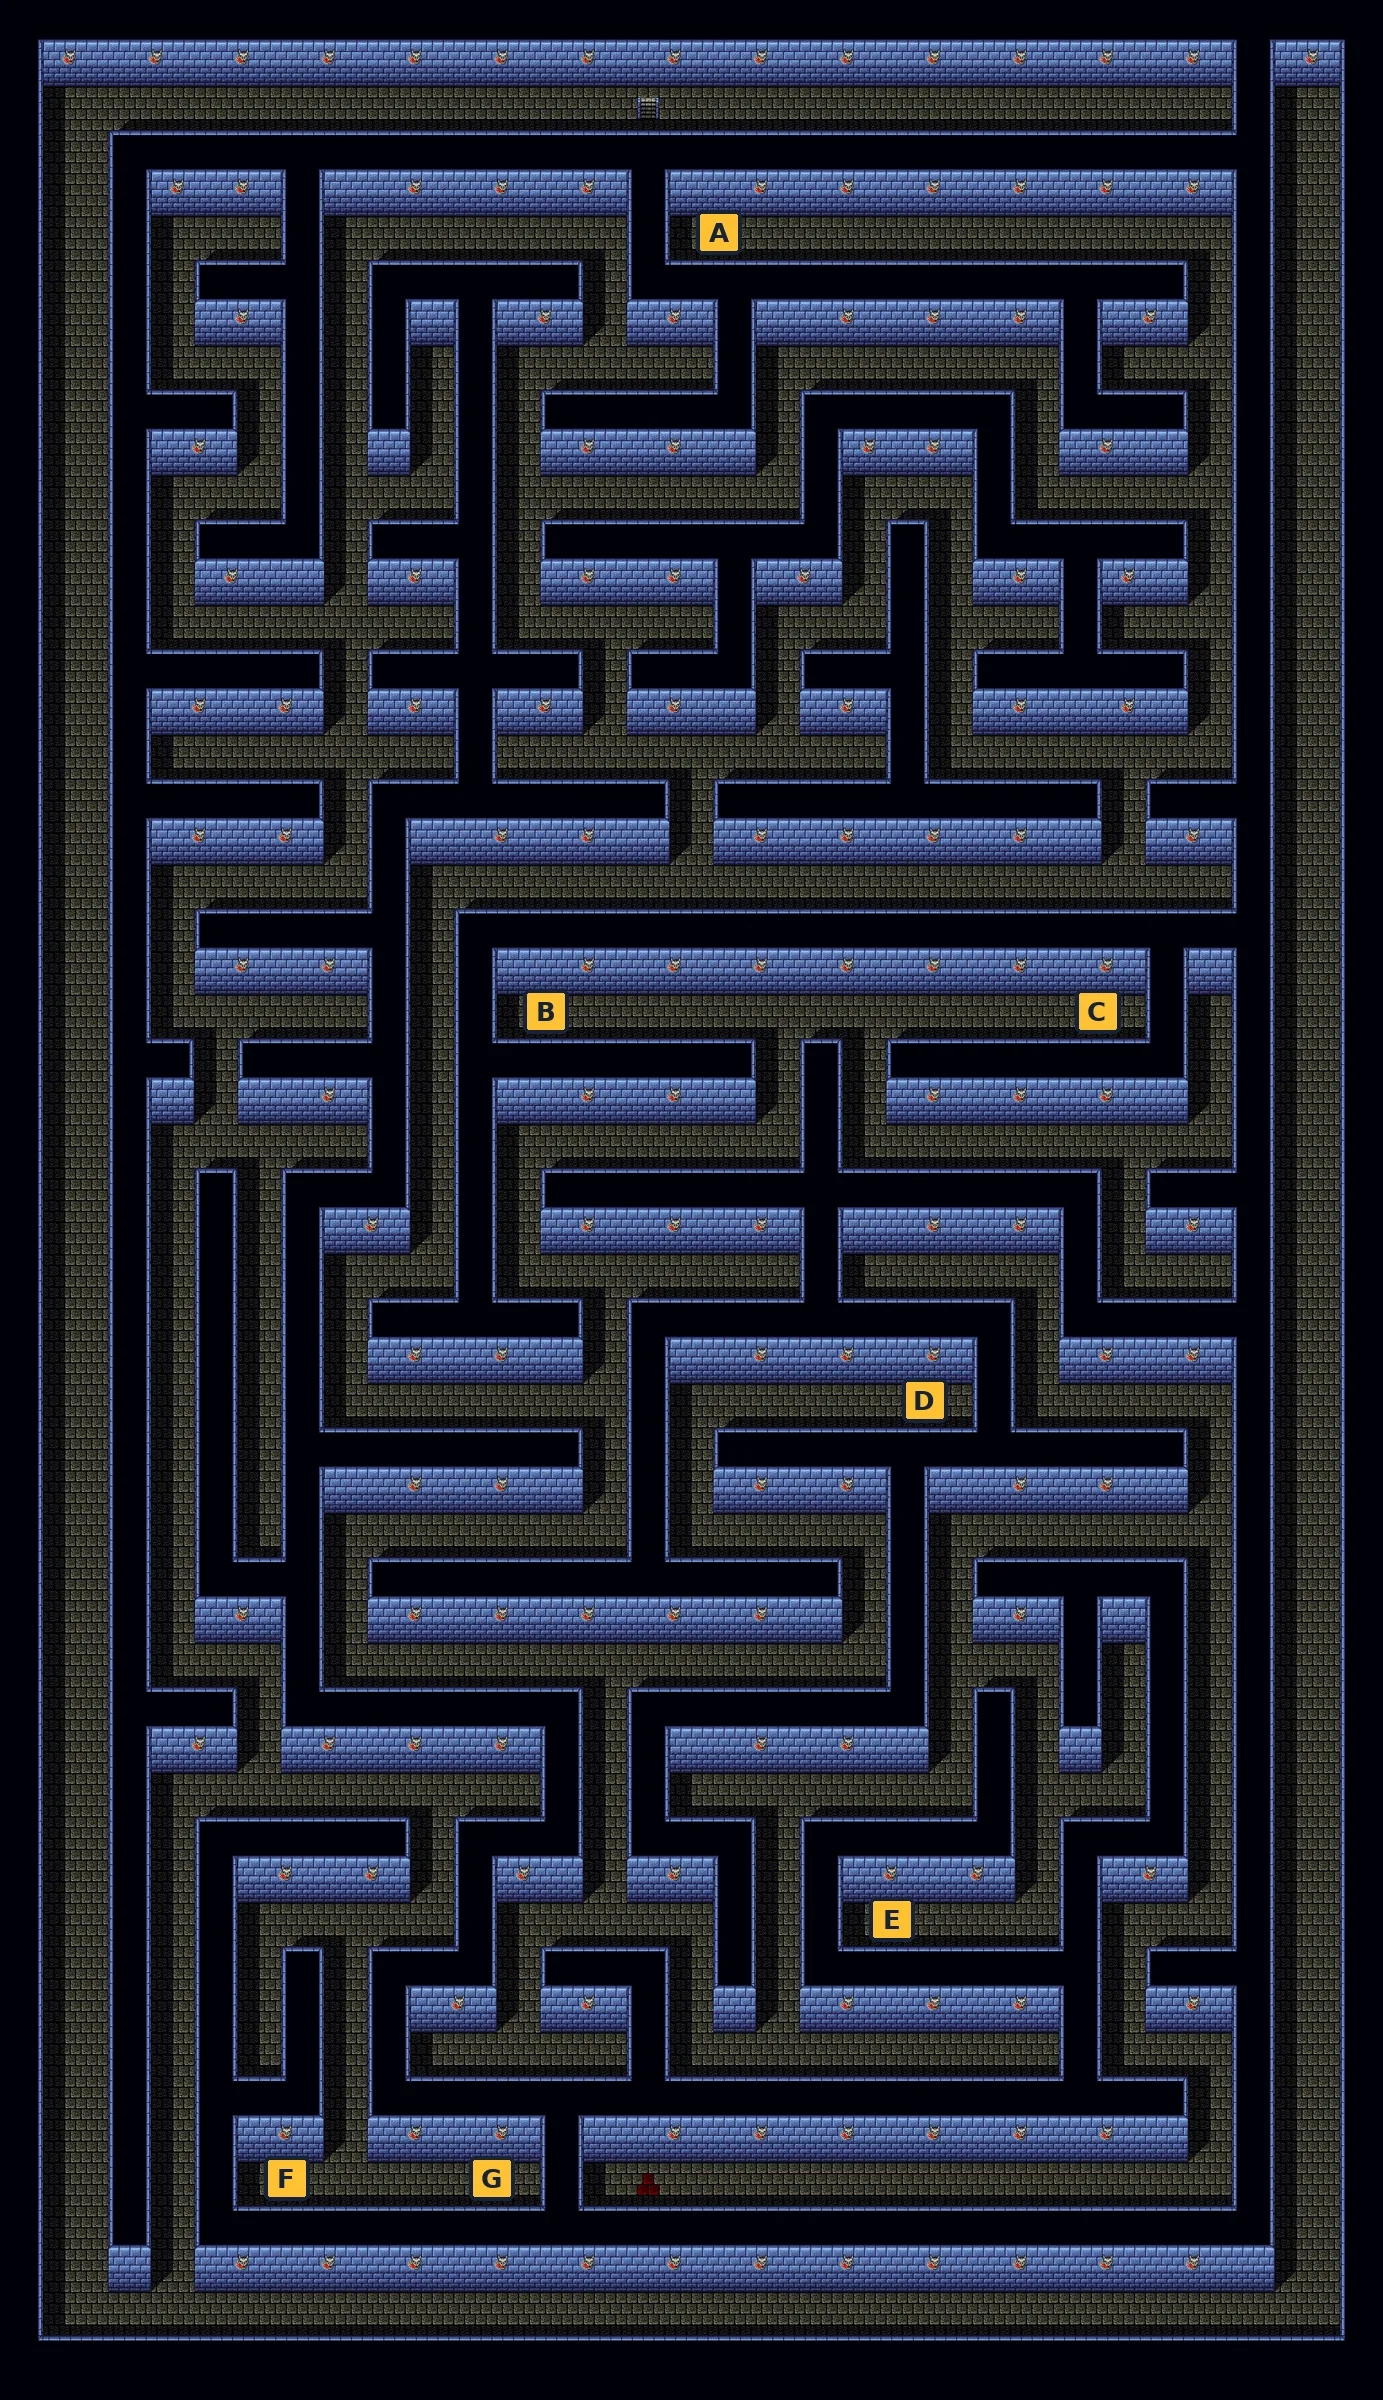
- A Meat
- B Meat
- C Drink L
- D Rice Ball
- E 1000 yen
- F Meat
- G Drink L
The Final Battle and the Ending
📍 Dragon God’s Fortress, the inner hall · 🎚️ Suggested level (old FAQ): 80–99
Onimaru is waiting: “You’re alive, Yaiba Kurogane! Rai Tatsugami!!” Yaiba answers: “Today we settle this once and for all, Onimaru!!”
Walkthrough
- MainFight Onimaru. His wind slashes hit for ATK 100 minus your DEFENSE, so wear Fine Clothes and keep Meat and Revival Leaves ready.
- TipHis DEFENSE is 50. POWER ORB plus THUNDER SLASH is the strongest combination: at Lv 60 with the Raijin Sword your ATTACK is about 110, and THUNDER SLASH and POWER each double the attack side of the sum before his DEFENSE is taken off, so each hit lands for several hundred.
- MainOnimaru falls: “I wasn’t beaten by you! I was beaten by that sword.” In the ending Yaiba is sure he is still alive, Rai and Fuu go back to sleep, and Gerozaemon has cooked for the victory party. There is one ending.
Bosses
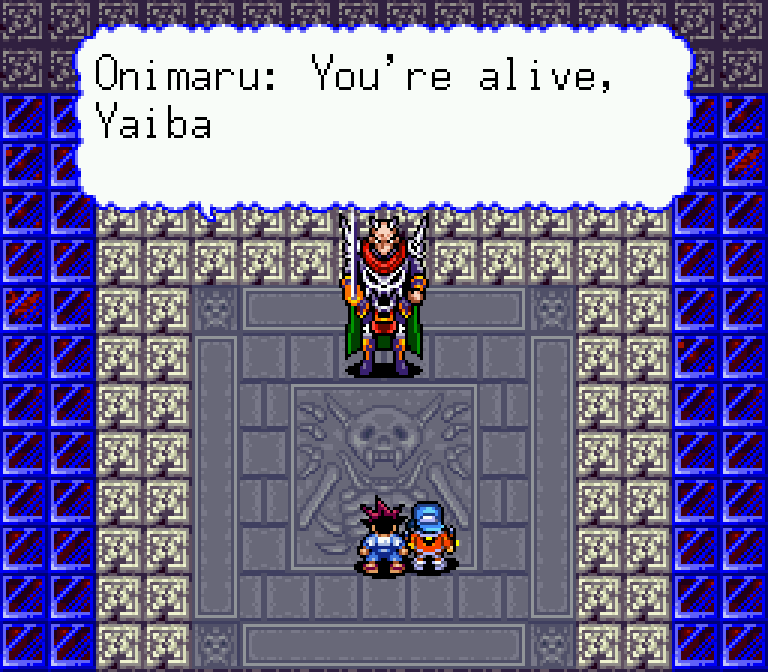 Onimaru (final) · 8000 HP · ATK 100 · DEF 50
Credits & sources
Written for Game Translate from our own decode of the game while translating it: the event script, the chest and shop tables, the item, level and boss tables, and runs of the patched game in an emulator. The maps were rendered from the game’s own map data. Structure and the suggested levels were cross-checked against the 2004 GameFAQs walkthrough by vrapong (v1.2), the first English guide to this game. Thanks to its author for charting Yaiba long before a translation existed.
Found a mistake? Leave a comment with your save point and a screenshot.