
GAME TRANSLATE · SNES GUIDE
Rejoice
Complete Walkthrough
The whole game from the prologue to the voyage to Mahal: where to go, who to talk to, every boss with its real stats, every treasure chest on annotated maps, and a warning before anything becomes missable.
Nothing on this page matches your search. Try a shorter word, or clear the box.
Before you start
💿 The patch
Apply the English patch to a clean, unheadered Japanese ROM of Rejoice: Aretha Oukoku no Kanata (Super Famicom, 1995). The ROM must match CRC32 C2413BDD before patching. The patched game is 4 MB, so use an emulator that supports large LoROM games (Mesen, bsnes, Snes9x).
🏷️ Names in this guide
Every name is written as it appears in the English patch: Treno, Doll, Mikey, Millrose, Demon King Howard, Pera. Place names in the dialogue come in double brackets (《Fern Cave》) and items in square brackets ([Torch]); the guide drops the brackets.
📜 Where the information comes from
Everything here was read from the game while we translated it: scenes and hints from the full script, chests and exits from the map data, boss HP, attack and EXP from the enemy tables, and the odds of every random event from the game’s random table. Most key points were also tested in an emulator. Where we only read something and didn’t play it, the text says so.
🗺️ The maps
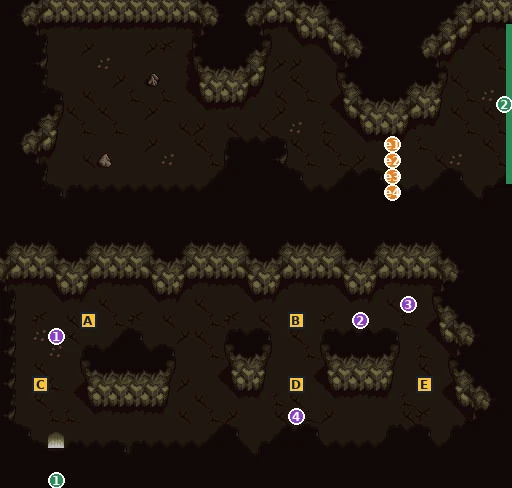
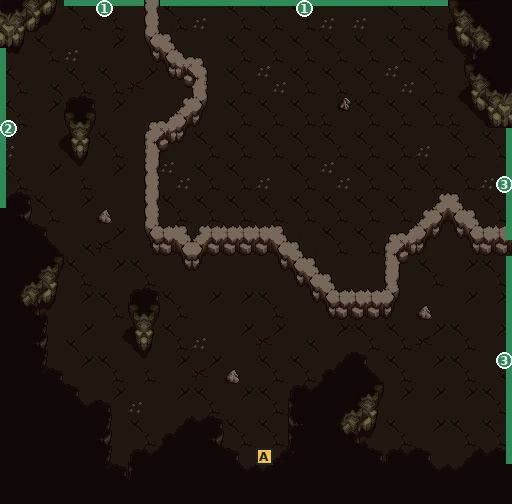
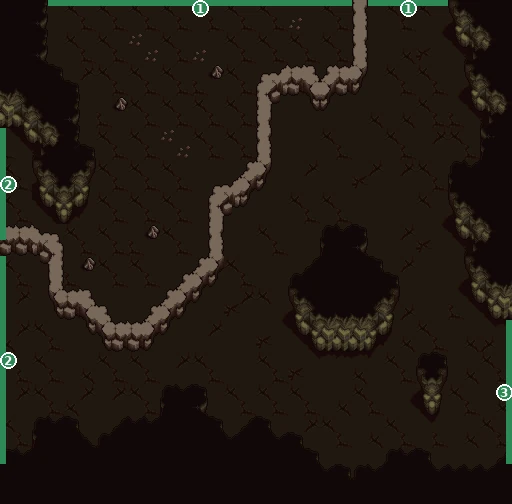
The maps were stitched from the game itself. Letters A, B, C… are treasure chests (tick them off), green numbers are exits, purple n markers are people and objects you can talk to or examine, orange e markers are spots that start a scene. In the patched game you can also press SELECT in any dungeon for an in-game map.
How the game works
- An action RPG for one or two players. You walk and fight on the field with the sword or your equipped magic stone. Enemies drop 10-Pera and 100-Pera coins that vanish if you don’t pick them up.
- Magic stones. With the Book of Force, Treno uses Force stones; Doll uses Fire stones; Mikey uses swords and Millrose sabers. Weapon shops show the list for whoever is leading.
- The X menu has Talk (your party’s comments, often a hint about what to do next), Status, System (Load, Save, Order, Rename, Config) and Exit. Press Y for the item subwindow.
- Who leads matters. Many scenes change depending on which character touches the spot. To let Doll lead, open System → Order and put her first. See Order and 2-player mode.
- 2-player mode. Press SELECT on controller 2 and a second character steps onto the field under controller 2; press it again to send them back. Some scenes need it (“Doll as player 2” in this guide). On an emulator, map a second controller.
- Materia or Chris. Fifteen small scenes with Doll decide which of her friends appears late in the game. They’re marked Materia A/B/C in the checklists. One from each group is enough. See Materia or Chris.
- Save often. There is only one inn (Cave Town). Healing comes from Machovitan drinks and medicine.
Millrose and the Demon King
📍 A forest clearing · The opening battle
The game opens away from the hero. In a forest clearing, Demon King Howard has caught up with a girl with a sword, Millrose, and calls her “the princess of my kingdom”. She refuses to come back to him, so Howard sends his ice creature after her.
⏳ Last chances in this chapter
- Nothing can be missed here. The fight is part of the story: Millrose is captured whatever happens.
Full list across the game: Missables.
Walkthrough
- MainWatch the opening. Howard orders Ice Cube to capture Millrose, and the first battle starts in a small tiled room.
- MainThis Ice Cube has 800 HP and hits for 25, and gives no experience. Whatever happens, the story has Millrose “slip up” and get captured.
- TipBefore the battle the game explains the item subwindow once: press Y to open it, choose an item with the +Pad and press A to use it.
- TipThe opening is a good moment to open the X menu once: System → Config holds the Difficulty (Easy / Normal / Hard), text speed and sound. The game starts on Normal. See Difficulty.
Bosses
🗺️ Maps for this chapter (1)
Letters mark treasure chests (tick them off as you open them), green numbers are exits, purple n markers people and objects, orange e markers scene spots. Tap a map to open it full size.
The cave job
📍 The treasure cave · Cave exit
Meet the gang. Treno leads the young thieves who call themselves [Rejoice]: the cool-headed Q, the hot-tempered Mikey and big Base. Tonight’s job is a treasure hidden deep in a cave.
⏳ Last chances in this chapter
- Nothing to miss: there are no chests in the cave.
Full list across the game: Missables.
Walkthrough
- MainWalk to the back of the cave. At the far end the gang finds a goddess statue; Base carries it.
- MainThe cave starts to collapse: “Everybody run for the exit!” Run back through the corridors. Base falls behind; go back for him, then keep running until you are outside: “We did it!!”
- MainThe gang returns to Ishu Town and you receive 10,000 Pera for the job. Pera is the game’s money.
🗺️ Maps for this chapter (4)
Letters mark treasure chests (tick them off as you open them), green numbers are exits, purple n markers people and objects, orange e markers scene spots. Tap a map to open it full size.
- e1Treno: “We finally found it!!”
- e1Treno: “We finally found it!!”
- 1Exit to Neve Town · screen 2B
- 2Exit to Neve Town · screen 2C
- 3Exit to Neve Town · screen 2D
- 4Exit to Neve Town · screen 2E
Ishu Town scams
📍 Ishu Town · Tax's House · Black Sheep Gang hideout
Back home, Treno and friends earn their living the way thieves do: a fake fire, a short-changed shopkeeper and a granny who gets robbed. A rival gang, the Black Sheep Gang, wants the town for itself.
⏳ Last chances in this chapter
- Poppin’s hidden item (Mr. Invincible 1): talk to Poppin, hidden in the trees in the south-west corner of the upper part of town, before the gang fight ends the chapter. It is also the key to the game’s hidden debug menu.
- The weapon-shop change scam must be done before the armor shop: after the armor shop it is gone, and with it 7,450 Pera.
Full list across the game: Missables.
Walkthrough
- MainEric’s house (lower town): the gang “puts out a fire” and loots the house while they’re at it. This scam is required.
- SideThe weapon shop scam (upper town): Treno confuses the shopkeeper, Fred, with a string of purchases and refunds. You end up 7,450 Pera richer. Do it now: once you have been to the armor shop, this scene is gone.
- MainThe armor shop (needs Eric’s house done; otherwise Mikey refuses): Q robs a granny and sells her a sword for 250 Pera. If you did the weapon-shop scam, the Short Sword and Knife from it are taken back here. Q also threatens Mikey: remember it.
- SidePoppin hides in the trees at the bottom-left of upper Ishu Town (object n6 on the map): “Ho ho hooo… Here’s a hidden item for you!!” You get Mr. Invincible 1. The same gift quietly unlocks the debug menu described in Secrets.
- TipTalk to the people in Tax’s house: Tax tells Treno to “learn some magic” instead of goofing off (a hint for the next chapter), Bent and Marc scold the gang, Salsa doesn’t want fights in town.
- MainBlack Sheep Gang members block the road and the gang’s leader Addis wants a word. In their hideout outside town the two gangs fight; Addis runs away.
- TipMoney check: with the weapon-shop scam you leave Ishu with about 17,700 Pera, without it about 10,250. Neither route lets you keep a weapon.
Bosses
🗺️ Maps for this chapter (5)
Letters mark treasure chests (tick them off as you open them), green numbers are exits, purple n markers people and objects, orange e markers scene spots. Tap a map to open it full size.
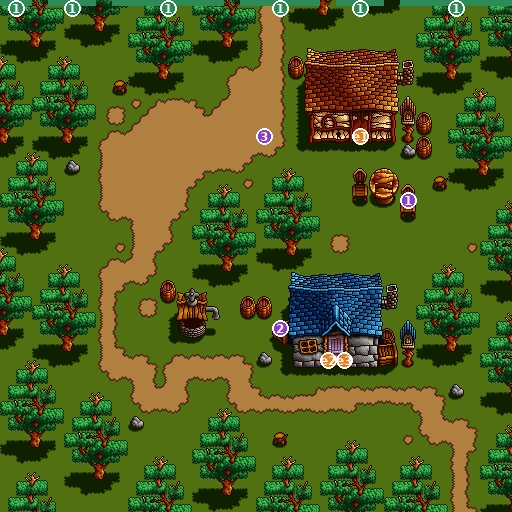
- 1Exit to Ishu Town · screen 02
- n1Granny Reiya: “Zzz… Zzz…”
- n2Treno: “Ow ow ow ow!”
- n3Treno: “Ooh… this looks useful.”
- e1Treno: “No good… it's locked.”
- e2–3Treno: “This house is too hot for us now!”
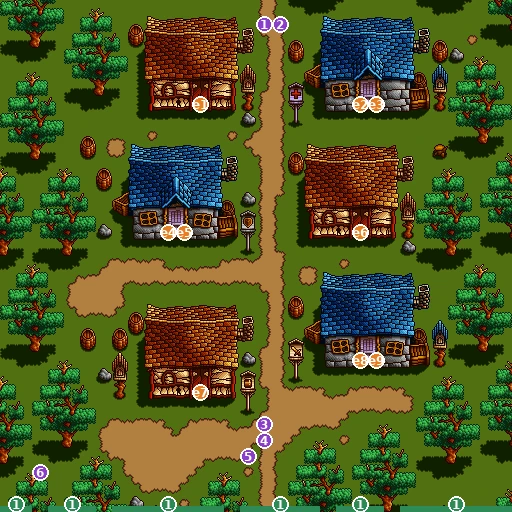
- 1Exit to Ishu Town · screen 01
- n1Black Sheep Gang: “Hmph… you bugs! Get lost before Addis finds you!”
- n2Black Sheep Gang: “Hmph… you bugs! Get lost before Addis finds you!”
- n3Treno: “If the Black Sheep Gang spots this load, we're done for.”
- n4Treno: “If the Black Sheep Gang spots this load, we're done for.”
- n5Treno: “If the Black Sheep Gang spots this load, we're done for.”
- n6Poppin: “Ho ho hooo… Here's a hidden item for you!!”
- e1Way to Tax's House
- e2–3Way to Bent's House
- e4–5Mikey: “Hold on!!”
- e6Way to Salsa's House
- e7Way to Marc's House
- e8–9Mikey: “Ah… hold on a sec!!”
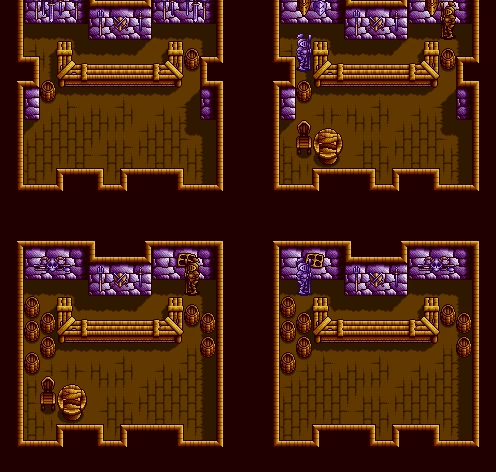
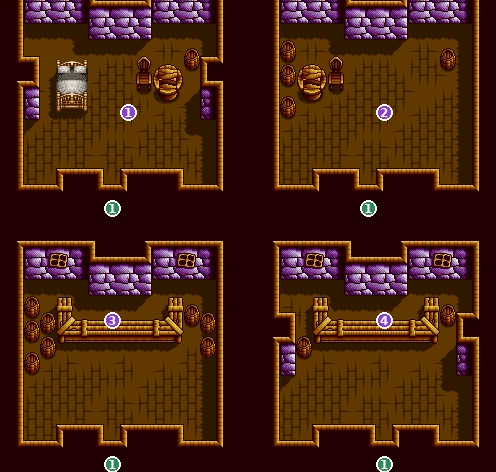
- 1Exit to Ishu Town · screen 02
- n1Tax: “Jeez…”
- n2Salsa: “If you're gonna fight, do it outside town! I won't put up with it any…”
- n3Bent: “You lot… fighting with that crowd again?”
- n4Marc: “Honestly, you lot…”
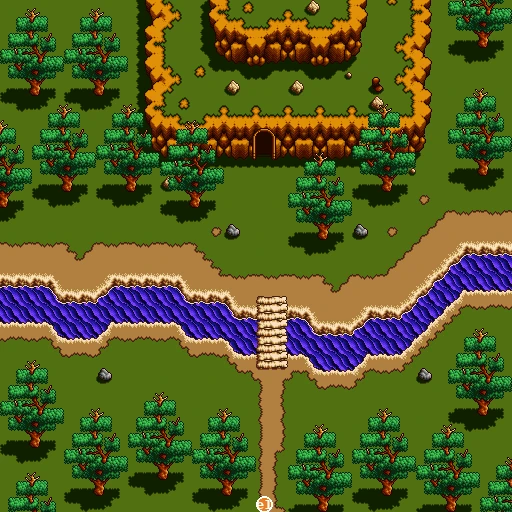
- e1Treno: “Q, hurry!! Don't let Addis escape!!”
Checklist
- Where
- Ishu Town, upper part: trees in the bottom-left corner (n6)
- How
- Walk into the trees and talk to Poppin.
- Reward
- Mr. Invincible 1 (and the debug-menu unlock)
- Opens
- Ch. 2
- Closes
- End of Ch. 2
- Where
- Ishu Town, weapon shop (upper part)
- How
- Enter the weapon shop before the armor shop and let Treno do the talking.
- Reward
- +7,450 Pera
- Opens
- Ch. 2
- Closes
- When you enter the armor shop
Ben Markist and the tidal wave
📍 Ben Markist's mansion · Base's grave · Mushroom Coast
The statue goes to its buyer, the wizard Ben Markist, who pays with a strange book. Q has his own plans, and the gang [Rejoice] will never be the same.
⏳ Last chances in this chapter
- Doll’s monologue on the coast (Materia flag, group C): after Doll joins, step on the spot where Treno washed up again with Doll as player 2. You can come back to the coast during the next chapter, before the boss.
Full list across the game: Missables.
Walkthrough
- MainDeliver the goddess statue to Ben Markist. Instead of money he hands over the [Book of Force], which holds the “spells of Mahal” and “shows its true power only to the chosen”. He also invites Q to meet Demon King Howard.
- MainQ turns the Book against his friends: Base is killed. Q leaves to join Howard, leaving the Book behind. The gang buries Base on the cliff above the sea.
- MainA tidal wave hits Ishu Town and separates Treno from Mikey. Treno wakes up on the Mushroom Coast, where a stranger called the Traveler is waiting: Doll.
- MainDoll joins and teaches you magic stones: with the Book of Force and a [Magic Stone], “even an amateur can use magic, and you can swap stones”. Treno uses Force stones, Doll uses Fire stones.
- SideMateria flag (group C): once Doll has joined, step on the wash-up spot (e2 on the Mushroom Coast map) again with Doll as player 2 (press SELECT on controller 2 to bring her in, then walk her there with controller 2). Doll talks about a friend called Materia. This counts toward the Materia ending scene; see Materia or Chris.
🗺️ Maps for this chapter (3)
Letters mark treasure chests (tick them off as you open them), green numbers are exits, purple n markers people and objects, orange e markers scene spots. Tap a map to open it full size.
- e1Mushroom Forest: “"No entry beyond this point!" ……Dokukinokon.”
- e2Traveler: “Hey, you… what's wrong? Are you all right?”
- e3–8Way to Mushroom Forest
Checklist
Mushroom Forest and Dokukinokon
📍 Mushroom Forest
Treno and Doll head inland through a forest of giant (and poisonous) mushrooms. A sign points the way to its ruler, Dokukinokon. Somewhere else, Mikey wakes up in a cell.
⏳ Last chances in this chapter
- All five chests of the forest: Mushroom Ring (07), Gale Armor (08), Machovitan A ×6 (0B), Venom Shield and Poison Killer ×10 (0C). The forest collapses after the boss and you can’t come back.
- The junk pile in the 4th screen: choose your prize with the sensor row in the 8th screen, then walk back and search the pile as Treno before the boss.
- Two Materia flags (group C): the forest sign with Doll leading, and Mikey’s Knife spot with Doll as player 2.
Full list across the game: Missables.
Walkthrough
- MainFrom the coast walk north into the forest. The screens join edge to edge (the green numbers on the maps): 04 → up 06 → up 07 → right 08 → right 09 → down 0A → down 0B → right 0C → up 0D. Screen 05, left of the first screen, is a dead end.
- WarningDon’t touch the purple poison mushrooms (“Better not touch it”); the party reminds you to watch out for the mushroom poison. Chest B in screen 0C holds Poison Killer ×10.
- SideScreen 07: the sign (e1) reads “The weak, right… the strong, left. All others, ahead… Dokukinokon.” Read it again with Doll leading (X menu → System → Order, put Doll first) for a Materia flag (group C).
- SideScreen 07, top-left (e2–e4): Mikey’s Knife lies on the ground. Step there with Doll as player 2 (press SELECT on controller 2 to bring her in, then walk her there with controller 2) for another Materia flag (group C). The cut-away shows Mikey waking up in Howard’s prison, where a prisoner talks about “the legendary heroes who beat Demon King Howard”.
- SideChest A in 07: Mushroom Ring. Chest A in 08: Gale Armor. Chest A in 0B: Machovitan A ×6. Chests in 0C: Venom Shield (A) and Poison Killer ×10 (B).
- SideThe junk pile secret. Screen 0C has an invisible sensor row across the path (row 11, columns 23–28: Treno says “Careful! I sense something!”). The game remembers every column you touch, and the lowest one decides what the junk pile in screen 08 (tile 29,22) gives: column 23 Force Inferno, 24 Premium Armor, 25 Mixdown Tect, 26 Lisa Lisa, 27–28 Mr. Invincible 2. The choice is permanent: for Mr. Invincible 2, touch only columns 27–28. Then walk back to 08 and search the pile as Treno (Doll only sees “just junk”). Full details: Secrets.
- TipWhich prize? Force Inferno is Treno’s strongest Force stone (24,800 Pera in shops later), so it saves the most money. Mr. Invincible 2 exists nowhere else in the game. Premium Armor can be won elsewhere.
- MainScreen 0D: Dokukinokon, the mushroom king: “Poison-shroom… Po-POISON-SHROOOM!!”
- MainAfter the win the ground gives way. Treno and Doll are badly hurt (“Guess I messed up a little. Man… that’s so uncool!”) and wake up in Akim’s Town.
Bosses
🗺️ Maps for this chapter (10)
Letters mark treasure chests (tick them off as you open them), green numbers are exits, purple n markers people and objects, orange e markers scene spots. Tap a map to open it full size.
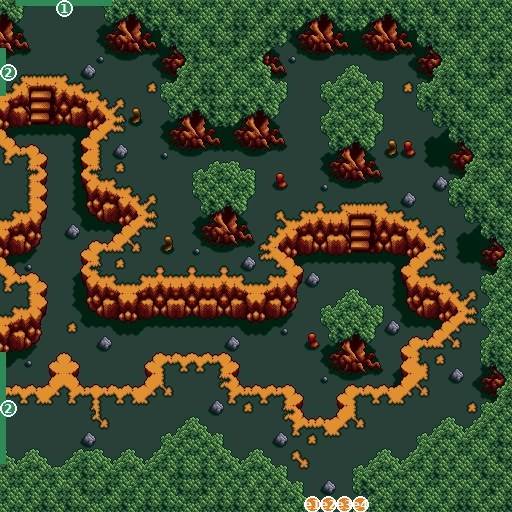
- 1Exit to Mushroom Forest · screen 06
- 2Exit to Mushroom Forest · screen 05
- e1–4Way to Mushroom Coast
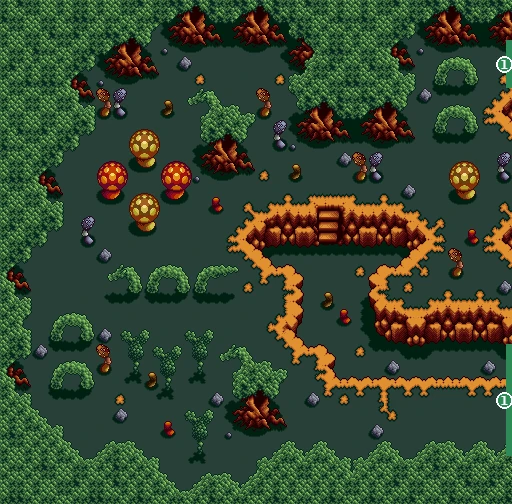
- 1Exit to Mushroom Forest · screen 04
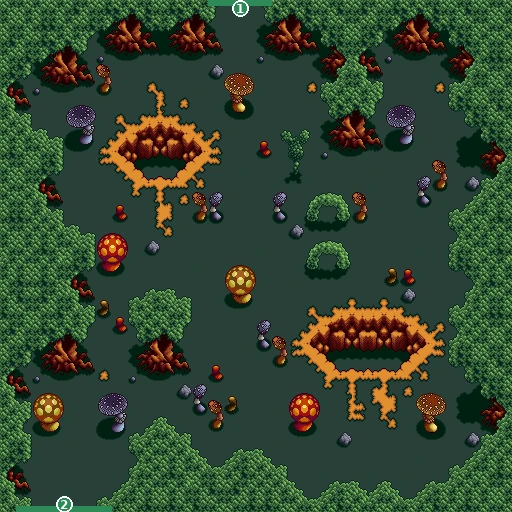
- 1Exit to Mushroom Forest · screen 07
- 2Exit to Mushroom Forest · screen 04
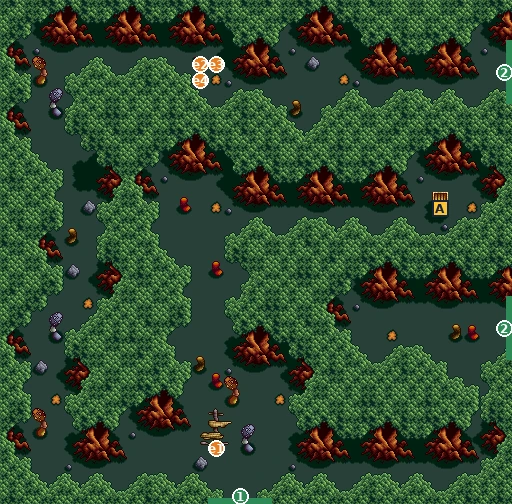
- 1Exit to Mushroom Forest · screen 06
- 2Exit to Mushroom Forest · screen 08
- e1Mushroom Forest: “The weak, right… the strong, left. All others, ahead… Dokukinokon.”
- e2–4Doll: “Heeey, Treno!! There's a [Knife] lying around here!!”
- A Mushroom Ring
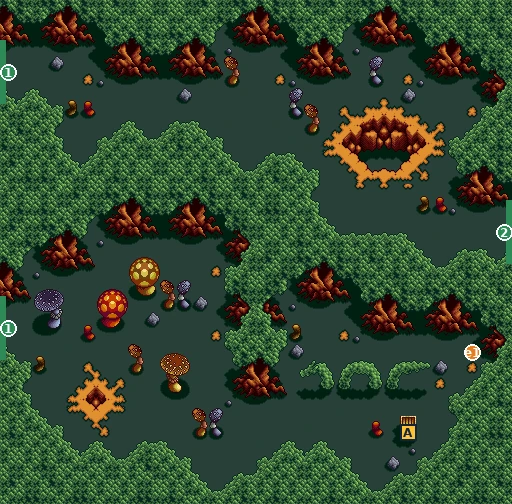
- 1Exit to Mushroom Forest · screen 07
- 2Exit to Mushroom Forest · screen 09
- e1Treno: “Hm? Wh-what's this!?”
- A Gale Armor
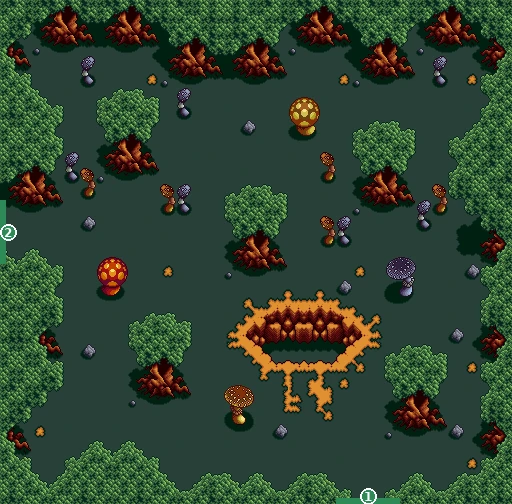
- 1Exit to Mushroom Forest · screen 0A
- 2Exit to Mushroom Forest · screen 08
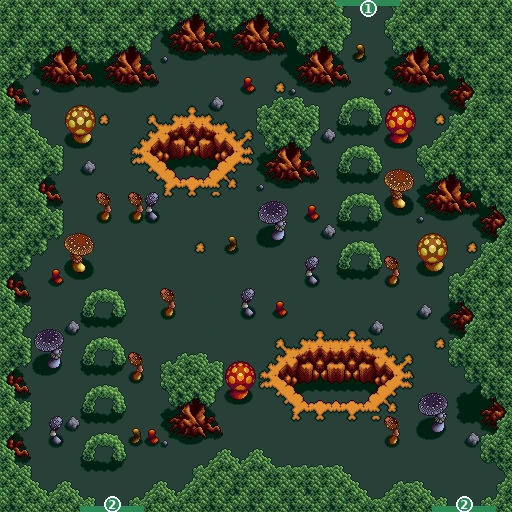
- 1Exit to Mushroom Forest · screen 09
- 2Exit to Mushroom Forest · screen 0B
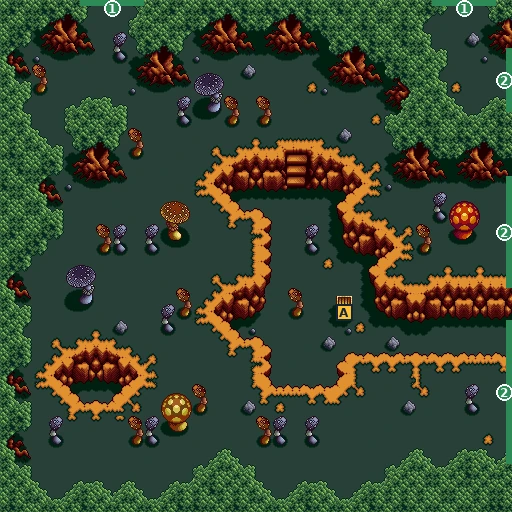
- 1Exit to Mushroom Forest · screen 0A
- 2Exit to Mushroom Forest · screen 0C
- A Machovitan A x6
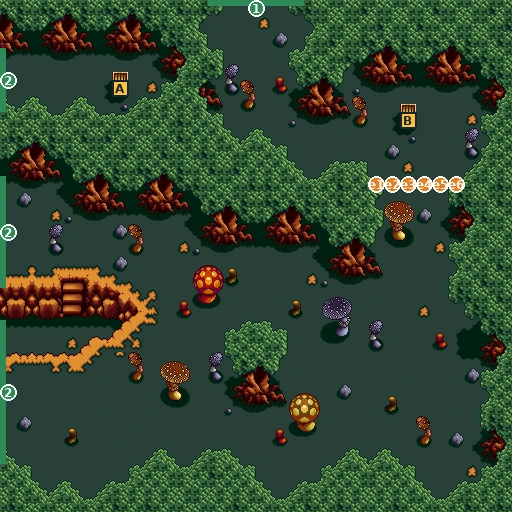
- 1Exit to Mushroom Forest · screen 0D
- 2Exit to Mushroom Forest · screen 0B
- e1–6Treno: “Careful! I sense something!”
- A Venom Shield
- B Poison Killer0
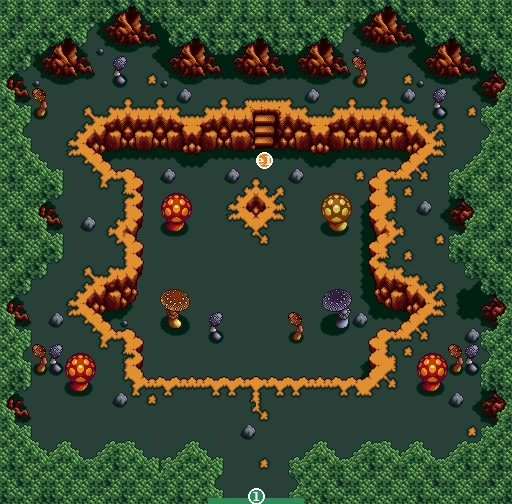
- 1Exit to Mushroom Forest · screen 0C
- e1Treno: “!?”
Checklist
- Where
- Mushroom Forest 08 (29,22); sensor row in 0C
- How
- Touch only the sensor column you want in 0C (row 11; the lowest touched wins), go back to 08 and search the pile as Treno.
- Reward
- Force Inferno / Premium Armor / Mixdown Tect / Lisa Lisa / Mr. Invincible 2
- Opens
- Ch. 4
- Closes
- Dokukinokon (the forest collapses)
- Where
- Mushroom Forest 07, sign (e1)
- How
- Read the sign with Doll leading (System → Order).
- Reward
- Materia flag FB0 (group C)
- Opens
- Ch. 4
- Closes
- Dokukinokon
- Where
- Mushroom Forest 07, top-left (e2–e4)
- How
- Walk Doll onto the spot as player 2 (2-player mode on).
- Reward
- Materia flag FAF (group C)
- Opens
- Ch. 4
- Closes
- Dokukinokon
Akim's Town and the What-You-See Door
📍 Akim's Town · Akim's House · Solam's House · Plutus's house
The villagers carried Treno and Doll to the house of old Akim. Doll is still sick, so Treno explores alone. Everyone talks about a door that opens only when you can see it: the What-You-See Door, the way into Mischief Castle where Mikey is held.
⏳ Last chances in this chapter
- Three Materia flags (group C/B) in this town only: Tinaby recognises Doll, Doll asks Akim about the door (first talk only) and Solam Mail. Each needs Doll, and each closes when the door opens.
- Do not eat the Dodomerian here. It shrinks the party, and you need it again in Cave Town.
- Tinaby can join only until both drop holes in Mischief Castle 3F have been used.
Full list across the game: Missables.
Walkthrough
- MainTalk to everyone in town, including a second talk with Tinaby, Carol, Auntie Samantha and Plutus, and look at the What-You-See Door (top-left of the upper town, n3/n4). When you have heard enough, people tell you that Akim wants to see you.
- MainGo into Akim’s House. Akim asks for help; Treno refuses, Doll accepts, and Doll rejoins (“don’t get chummy with me!!”).
- SideBefore you talk to Akim again, talk to Tinaby with Doll leading (X menu → System → Order, put Doll first): he recognises Doll. Materia flag (group C).
- SideThe first time you talk to Akim after Doll rejoins, do it with Doll as player 2 (press SELECT on controller 2 to bring her in, then walk her there with controller 2): Doll asks him about the door. Materia flag (group B). Only the first talk counts.
- MainNow the door needs seven things done, checked when you enter Akim’s House: talking to Akim again after Doll rejoins, new talks with Easy, Tinaby, Carol, Sam and Tony, plus owning the [Dodomerian].
- MainThe Dodomerian chain: Huck says the fruit is finished → Plutus offers one and Treno refuses → Huck explains it “makes your body small” → Plutus gives you the Dodomerian. Talk to Plutus with Treno leading: he hates wizards and won’t deal with Doll.
- WarningDon’t eat the Dodomerian now. The shrunk state is only cleared by a scene in Cave Town, and a shrunk party may not get the door scene in Akim’s House. You need the fruit there anyway.
- SideMaster Solam (Solam’s House): after Sam has told you his rumour, talk to Solam with Doll leading (X menu → System → Order, put Doll first) and he gives Doll the Solam Mail. Materia flag (group C). Do it before the seventh door condition.
- MainWith all seven done, enter Akim’s House: the door scene plays. Go to the What-You-See Door: “it’s open!” You enter Mischief Castle.
- SideAfter you’ve entered the castle once, its entrance door leads back to town. Talk to Tinaby with Doll as player 2 (press SELECT on controller 2 to bring her in, then walk her there with controller 2) and he joins as a temporary member (Materia flag, group B). He stays until the first drop hole on 3F.
- TipCarol’s dance on the stage (“GET FRESH CREW”) can be watched as often as you like. A party member’s tip before the castle: buy paralysis cures and antidotes first.
- TipShops: Ken-chan’s Item Shop (upper town), Arms Dealer Hardhead and Popo’s Armor Shop (middle), Granny Tsuru’s Pharmacy (right). The weapon list depends on who leads: Treno sees Force stones, Doll sees Fire stones. Full stock: Shops.
🗺️ Maps for this chapter (7)
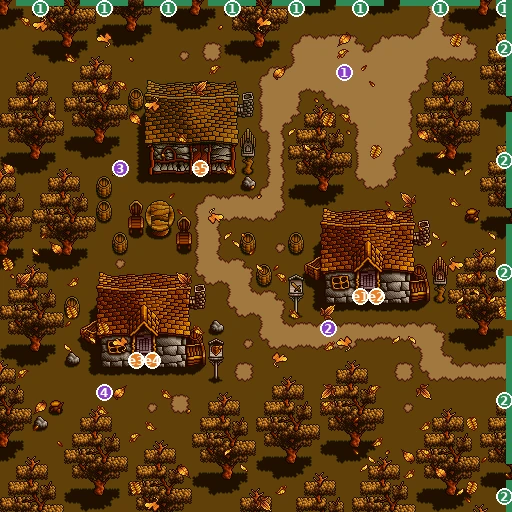
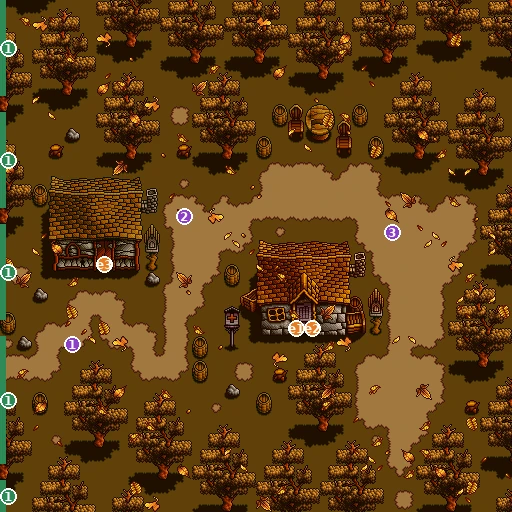
Letters mark treasure chests (tick them off as you open them), green numbers are exits, purple n markers people and objects, orange e markers scene spots. Tap a map to open it full size.
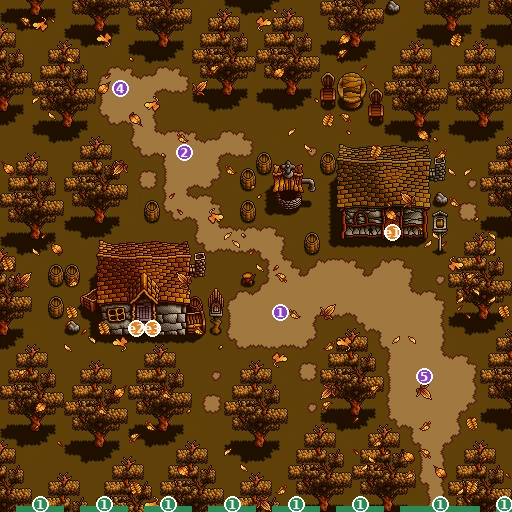
- 1Exit to Akim's Town · screen 29
- n1Easy: “Hey… you're all better now. How's your friend?”
- n2Sam: “Hey, hey… do you know the [What-You-See Door]?”
- n3What-You-See Door: “– As you can see, it's closed. –”
- n4What-You-See Door: “– As you can see, it's closed. –”
- n5Tinaby: “That's it! Now I remember!”
- e1Ken-chan's Item Shop: “Welcooome!! Everything's cheap!!”
- e2–3Akim: “Hm? Done with your walk already?”
- 1Exit to Akim's Town · screen 28
- 2Exit to Akim's Town · screen 2A
- n1Carol: “Oh? So you made it?”
- n2Huck: “What? You were alive after all?”
- n3Onji: “I don't know anything. Please… just leave me be!”
- n4Naji: “I'm in great shape! I won't lose to you youngsters yet.”
- e1–2Arms Dealer Hardhead: “………What do you want? I've got nothing to sell to brats!”
- e3–4Popo's Armor Shop: “Well, well… now there's a rare sight… a customer.”
- e5Way to Solam's House
- 1Exit to Akim's Town · screen 29
- n1Tony: “Huh? Only one of you made it?”
- n2Auntie Samantha: “Oh, my!! So you're all right?”
- n3Rin: “Akim? He's like this town's elder.”
- e1–2Granny Tsuru's Pharmacy: “Come on, get in here quick! You're letting the cold in!”
- e3Way to Plutus
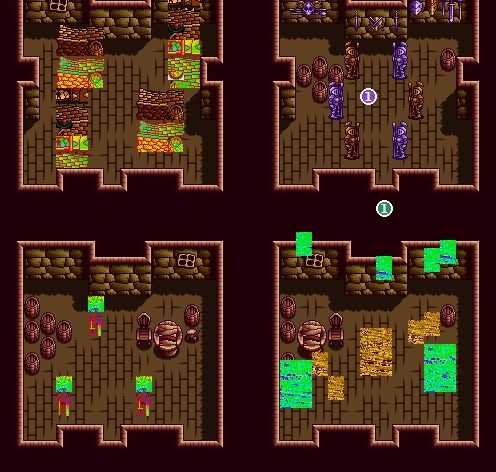
- 1Exit to Akim's Town · screen 29
- n1Master Solam: “Well? Have you seen these suits of armor?”
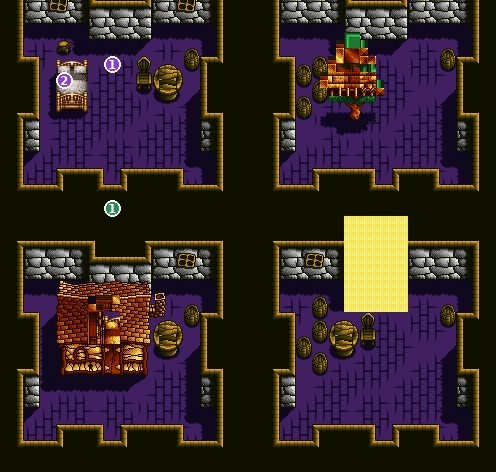
- 1Exit to Akim's Town · screen 28
- n1“What do you want?”
- n2“What're you selling?”
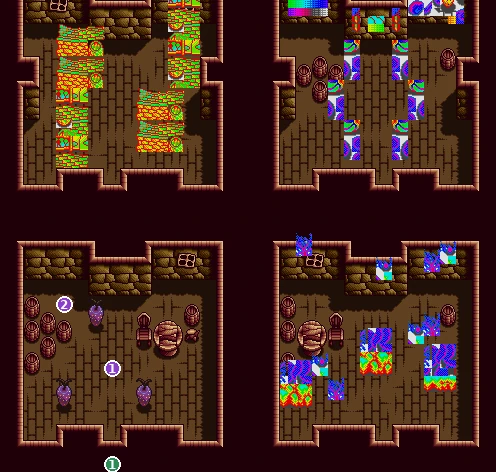
- 1Exit to Akim's Town · screen 2A
- n1Plutus: “It's almost finished!”
- n2Paco: “Heave… ho… Out of the way! You're in the way of my work!”
Checklist
- Where
- Akim's Town: Plutus's house
- How
- Huck → Plutus (refuse) → Huck → Plutus, with Treno leading.
- Reward
- Dodomerian (needed for the door and in Ch. 7)
- Opens
- Ch. 5
- Closes
- Required
- Where
- Akim's Town, Tinaby
- How
- Right after Doll rejoins, before talking to Akim again, talk to Tinaby with Doll leading.
- Reward
- Materia flag FAE (group C)
- Opens
- Ch. 5
- Closes
- Your next talk with Akim
- Where
- Akim's House
- How
- First talk with Akim after Doll rejoins, with Doll as player 2.
- Reward
- Materia flag FAC (group B)
- Opens
- Ch. 5
- Closes
- That first talk
- Where
- Solam's House
- How
- After Sam's rumour, talk to Solam with Doll leading.
- Reward
- Solam Mail + Materia flag FAD (group C)
- Opens
- Ch. 5
- Closes
- The seventh door condition
- Where
- Akim's Town, after entering Mischief Castle once
- How
- Talk to Tinaby with Doll as player 2.
- Reward
- Tinaby (temporary) + Materia flag FAB (group B)
- Opens
- Ch. 6
- Closes
- Using both 3F drop holes in Mischief Castle
Mischief Castle
📍 Mischief Castle 1F–3F · Chapel · Mischief Castle B1
Howard’s castle of tricks: card ropes and card doors, two libraries full of guards, drop holes, a living stained-glass window and a dungeon full of corpses. Mikey is in a cell somewhere below, and he is not the only prisoner.
⏳ Last chances in this chapter
- 33 chests, the most of any dungeon so far. The floor collapses after the last boss and you land in another region.
- Two Materia flags (group B): the Chapel “locked in” line and the headless skeleton, both with Doll leading.
- Tinaby leaves for good at the first 3F drop hole.
Full list across the game: Missables.
Walkthrough
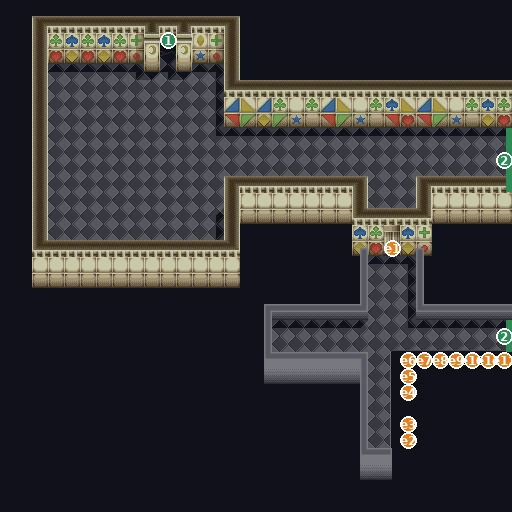
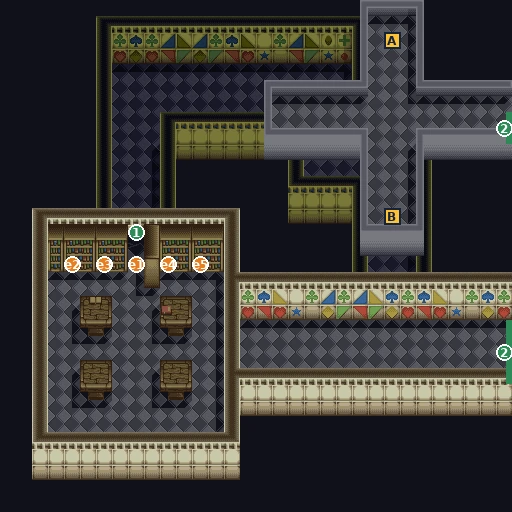
- MainThe castle has four floors joined by screen edges and doors (the green numbers say where each exit goes). The entrance (11) leads up to the hub (12).
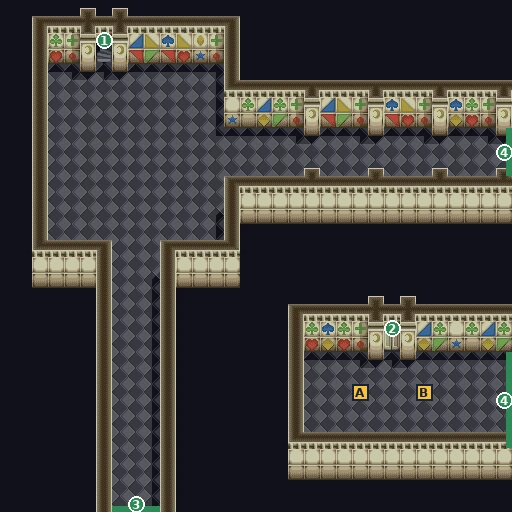
- MainCard ropes and doors. Four ropes hang in the castle: the Heart Rope (12, near the top), Diamond Rope (13), Clover Rope (14) and Spade Rope (15). Each opens one of the four card doors (Heart Door in 15, Diamond Door in 1C, Clover Door in 13, Spade Door in 1A), which say “Closed, as you can see!” until then. Examine a rope to pull it.
- WarningThe Heart and Clover ropes are linked: whichever of the two you pull second is recorded differently by the game. We did not play through which door each rope opens; if a door stays shut, pull the remaining ropes.
- MainThe libraries (3F, 1B and 1D): stepping into each one starts an ambush by four guards (325 HP each). Two separate battles.
- TipSearch the bookshelves with Doll leading (X menu → System → Order, put Doll first): now and then she finds “a ‘Rejoice Strategy Guide’? What kind of book is that?”
- MainDrop holes (3F, 1C and 1A): a line of holes drops you to 1F. Tinaby refuses to jump and is left behind.
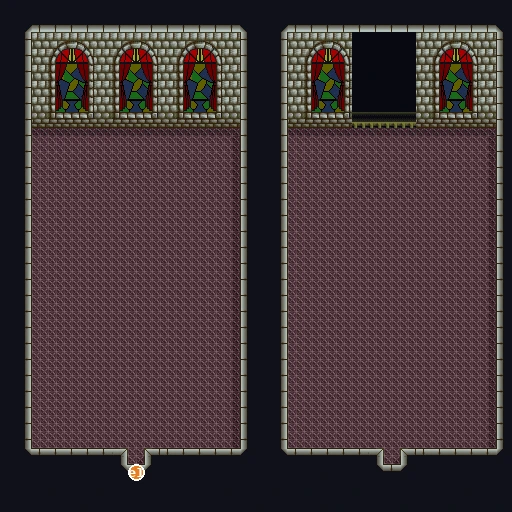
- MainThe Chapel (doors from 12 and 14): walking in locks you inside (“We’re locked in!”); a step near the window at the top (tile 8,8) wakes the Stained Glass Knight (“I’ve gotta kill you to-KNIGHT… get it?!”). After the win you drop into the dungeon, B1.
- SideWalk into the Chapel with Doll leading (X menu → System → Order, put Doll first) so Doll is the one who says “We’re locked in!”: Materia flag (group B). The same line plays in the B1 cell corridor (1E, bottom right).
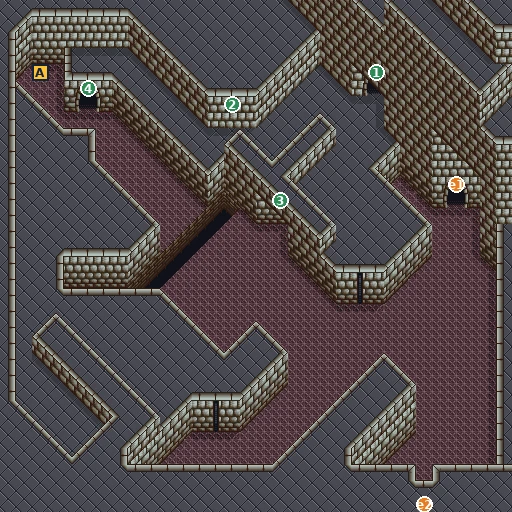
- MainB1 stone doors in the hub (1E) need the Aqua Stone (chest A in 1E; door on the left side) and the Flame Stone (chest D in 25; door at the right).
- SideThe headless skeleton (26, n5/n6) is the only body missing its head. The Skeleton Head is chest D in 24 (reach 24 by the top edge of 23). Use it on the skeleton with Doll leading (X menu → System → Order, put Doll first): Materia flag (group B).
- TipFour monsters in 24 trigger a small event each when they die; all four together set a flag that nothing else uses. Just fight them.
- MainMikey’s cell (1E → 1F): the friends are reunited and Doll gives Mikey his Knife. Find the Key (chest A in 23). Use the Key at the cell: it doesn’t fit. The prisoner in the next cell warns that the castle’s master is here, and Ice Cube attacks (“Ice… rock ice… baby!!”).
- MainAfter the battle Mikey’s door opens by pulling, and the Key opens the other cell: the prisoner is Millrose, and she’s free. The floor collapses and everyone jumps.
- TipIf 2-player mode is on when you use the Key, Doll lands with Treno and Mikey in the next scene; otherwise she lands elsewhere and rejoins soon. This changes only the landing scene.
Bosses
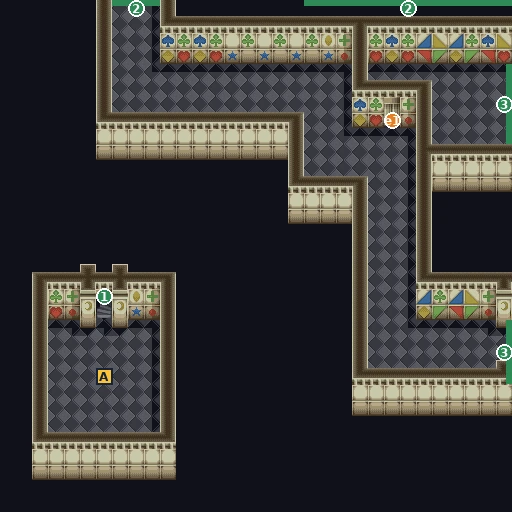
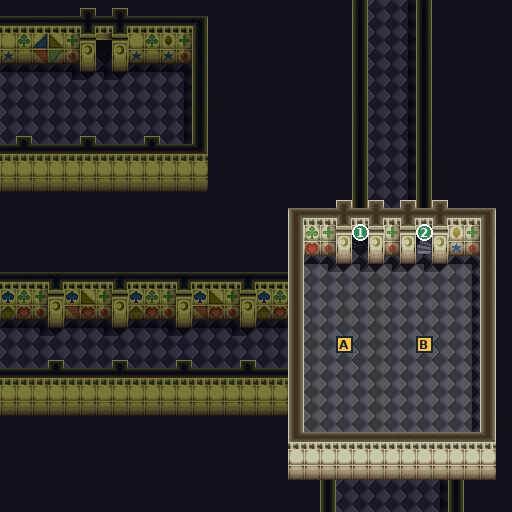
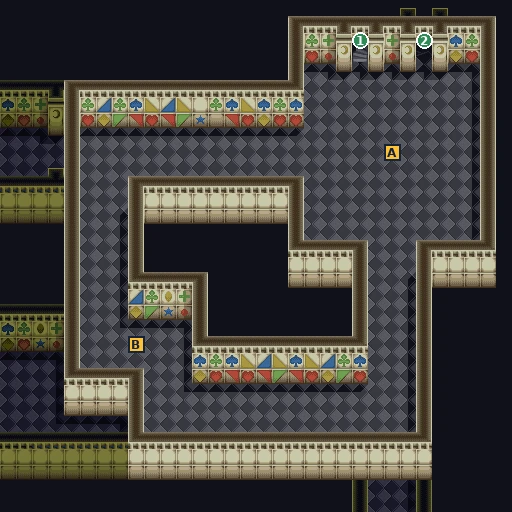
🗺️ Maps for this chapter (23)
Letters mark treasure chests (tick them off as you open them), green numbers are exits, purple n markers people and objects, orange e markers scene spots. Tap a map to open it full size.
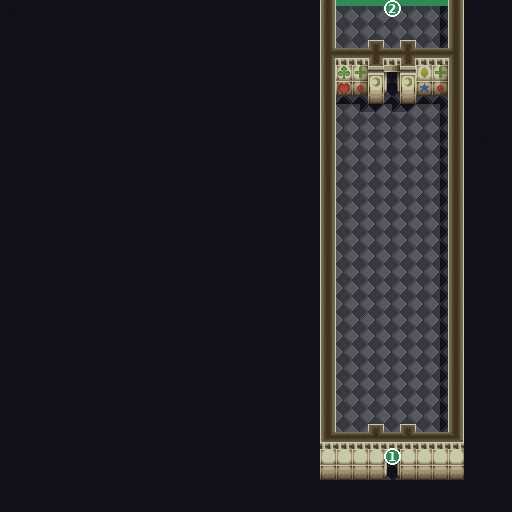
- 1Exit to Akim's Town · screen 28
- 2Exit to Mischief Castle [1F] · screen 12
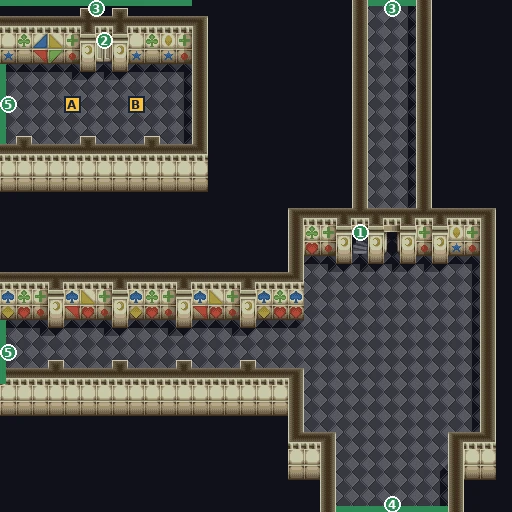
- 1Exit to Mischief Castle [2F] · screen 16
- 2Exit to Chapel
- 3Exit to Mischief Castle [3F] · screen 13
- 4Exit to Mischief Castle [1F] · screen 11
- 5Exit to Mischief Castle [1F] · screen 15
- A Machovitan C
- B Unclose
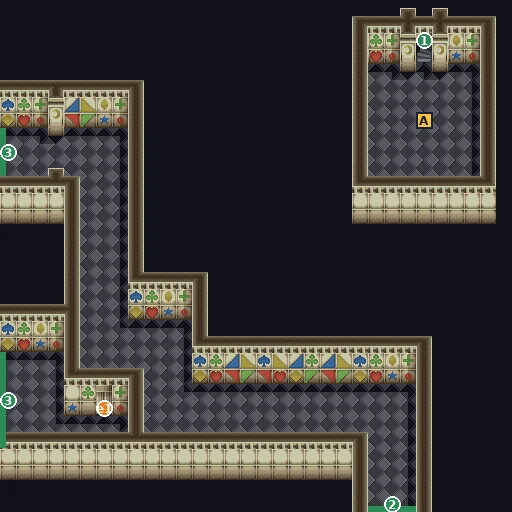
- 1Exit to Mischief Castle [2F] · screen 17
- 2Exit to Mischief Castle [1F] · screen 12
- 3Exit to Mischief Castle [1F] · screen 14
- e1Clover Door: “–Closed, as you can see!–”
- A L-Up x2
- 1Exit to Mischief Castle [2F] · screen 18
- 2Exit to Chapel
- 3Exit to Mischief Castle [1F] · screen 15
- 4Exit to Mischief Castle [3F] · screen 13
- A Refresh Arrow
- B L-Up x2
- 1Exit to Mischief Castle [2F] · screen 19
- 2Exit to Mischief Castle [1F] · screen 14
- 3Exit to Mischief Castle [1F] · screen 12
- e1Heart Door: “–Closed, as you can see!–”
- A P-Up
- 1Exit to Mischief Castle [1F] · screen 12
- 2Exit to Mischief Castle [3F] · screen 1A
- A 1000 Pera
- B L-Up x2
- 1Exit to Mischief Castle [3F] · screen 1B
- 2Exit to Mischief Castle [3F] · screen 13
- A Para-B-Gone x2
- B Fire Hawk
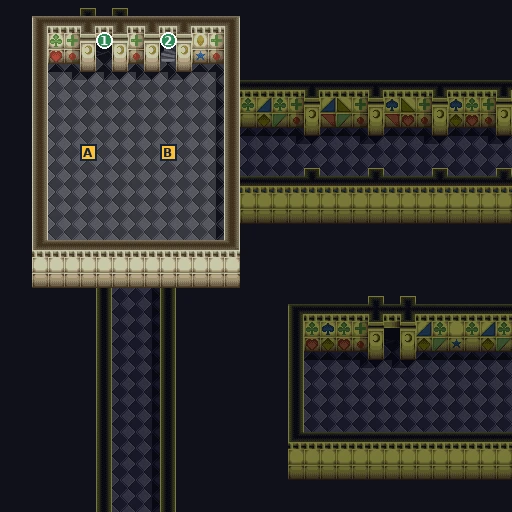
- 1Exit to Mischief Castle [1F] · screen 14
- 2Exit to Mischief Castle [3F] · screen 1C
- A Unclose
- B Para-B-Gone x2
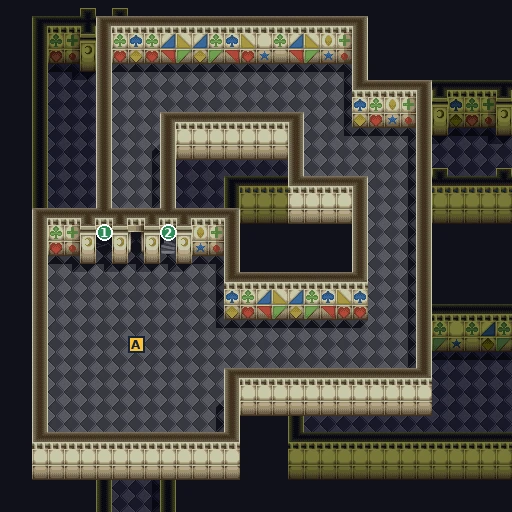
- 1Exit to Mischief Castle [1F] · screen 15
- 2Exit to Mischief Castle [3F] · screen 1D
- A 2000 Pera
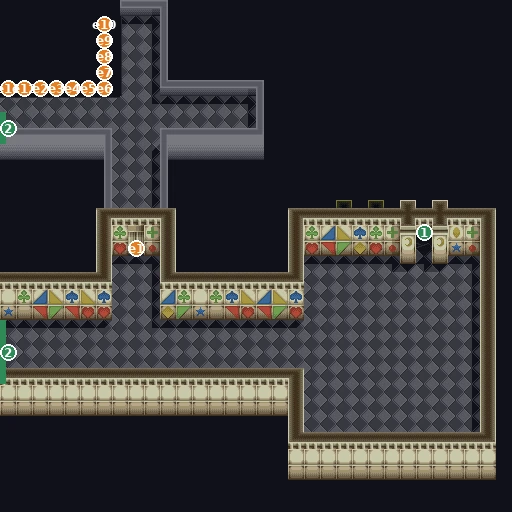
- 1Exit to Mischief Castle [2F] · screen 16
- 2Exit to Mischief Castle [3F] · screen 1D
- 3Exit to Mischief Castle [3F] · screen 1B
- e1Spade Door: “–Closed, as you can see!–”
- e2–12Tinaby: “W-wait… I can't believe this!!”
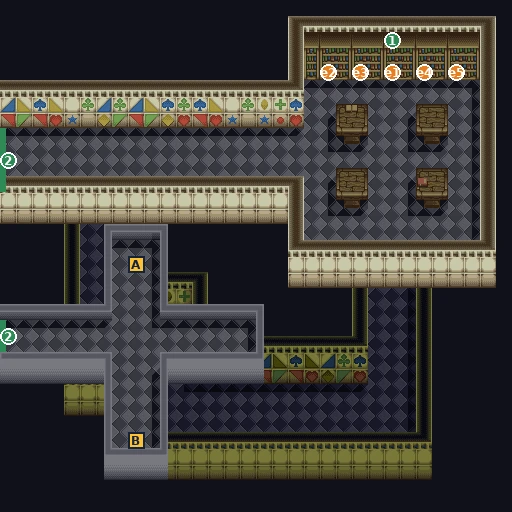
- 1Exit to Mischief Castle [2F] · screen 17
- 2Exit to Mischief Castle [3F] · screen 1C
- e1Library entrance: ambush by four guards (boss battle)
- e2–5Treno: “Hmm… nothing but difficult books.”
- A Macchon EX
- B L-Up x2
- 1Exit to Mischief Castle [2F] · screen 18
- 2Exit to Mischief Castle [3F] · screen 1B
- e1Diamond Door: “–Closed, as you can see!–”
- e2–12Tinaby: “H-hey, wait a sec!!”
- 1Exit to Mischief Castle [2F] · screen 19
- 2Exit to Mischief Castle [3F] · screen 1A
- e1Library entrance: ambush by four guards (boss battle)
- e2–5Treno: “Hmm… nothing but difficult books.”
- A Con Guard
- B P-Up x2
- e1Treno: “Damn!! We're locked in!”
- 1Exit to Mischief Castle [B1] · screen 23
- 2Exit to Mischief Castle [B1] · screen 25
- 3Exit to Mischief Castle [B1] · screen 20
- 4Exit to Mischief Castle [B1] · screen 22
- e1Treno: “Whoops… no time to mess around with a body like this…”
- e2Treno: “No good!! Locked in again!”
- A Aqua Stone
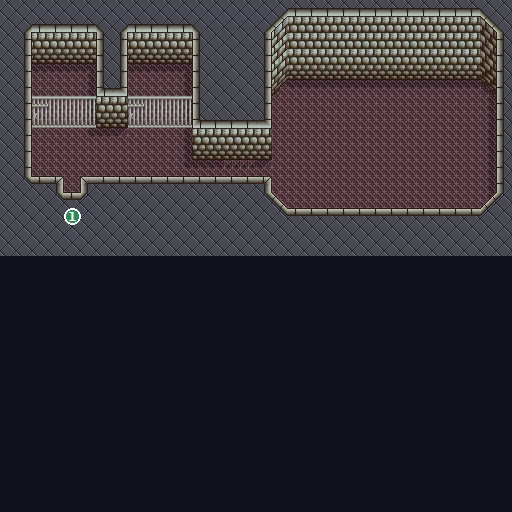
- 1Exit to Mischief Castle [B1] · screen 1E
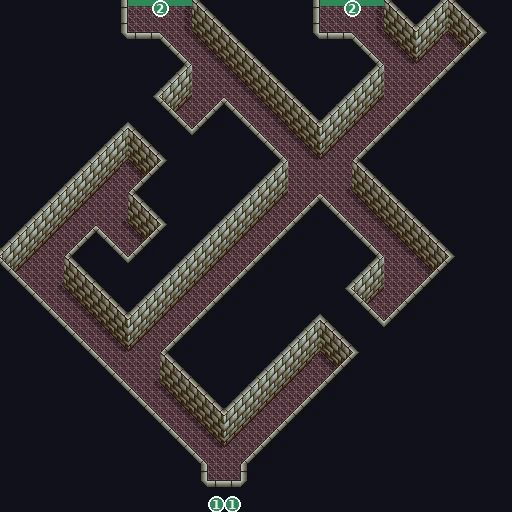
- 1Exit to Mischief Castle [B1] · screen 1E
- 2Exit to Mischief Castle [B1] · screen 21
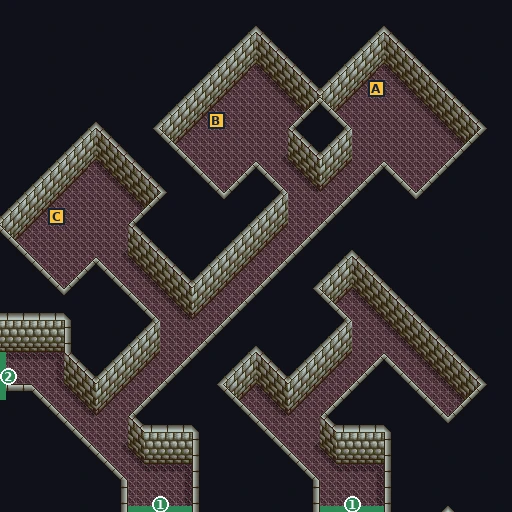
- 1Exit to Mischief Castle [B1] · screen 20
- 2Exit to Mischief Castle [B1] · screen 22
- A Para Guard
- B Lisa Lisa
- CEmpty slot in the chest list (no item)
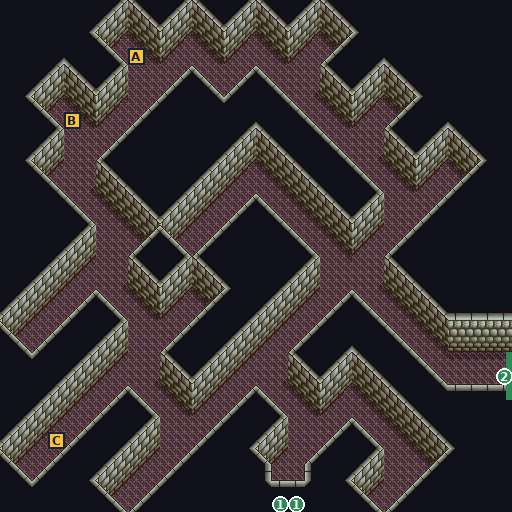
- 1Exit to Mischief Castle [B1] · screen 1E
- 2Exit to Mischief Castle [B1] · screen 21
- A Machovitan D
- B Para-B-Gone x2
- C L-Up x2
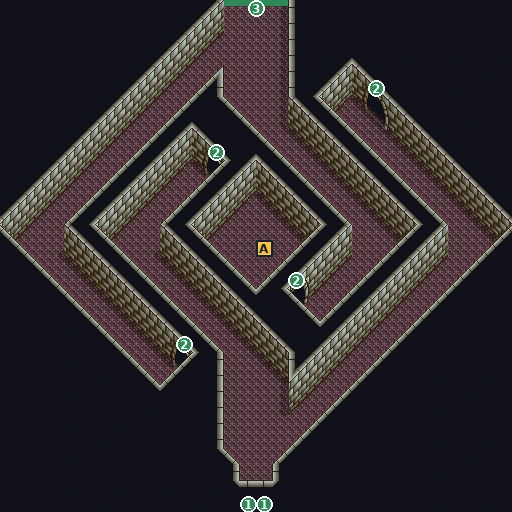
- 1Exit to Mischief Castle [B1] · screen 1E
- 2Exit to Mischief Castle [B1] · screen 26
- 3Exit to Mischief Castle [B1] · screen 24
- A Key
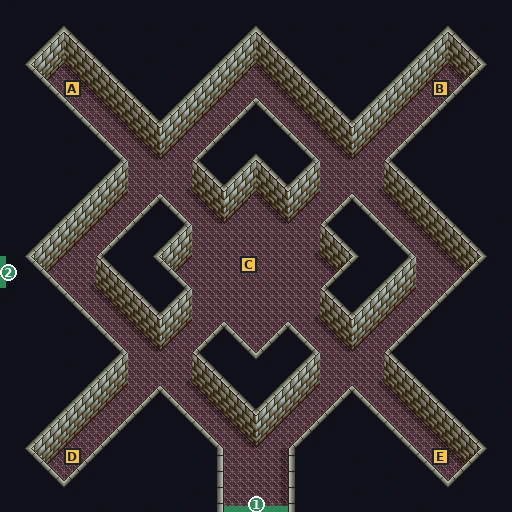
- 1Exit to Mischief Castle [B1] · screen 23
- 2Exit to Mischief Castle [B1] · screen 25
- A Para-B-Gone x2
- B Machovitan B
- C Machovitan B
- D Skeleton Head
- E Para-B-Gone x2
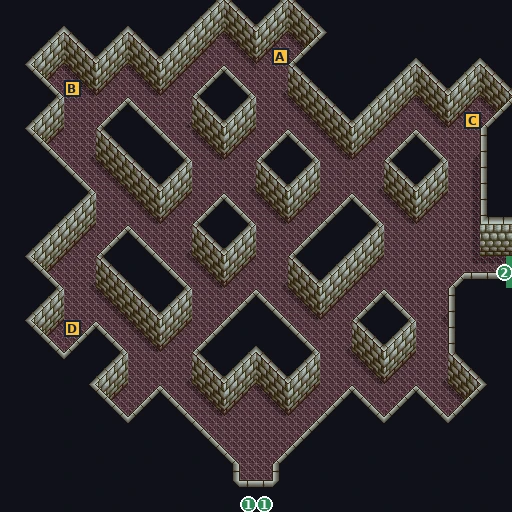
- 1Exit to Mischief Castle [B1] · screen 1E
- 2Exit to Mischief Castle [B1] · screen 24
- A 3000 Pera
- B Venom Shield
- C L-Up
- D Flame Stone
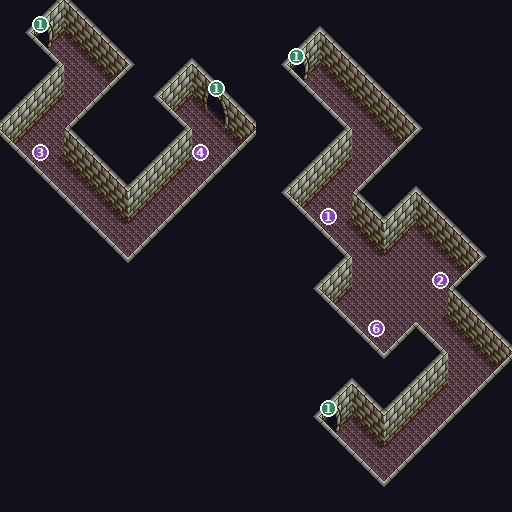
- 1Exit to Mischief Castle [B1] · screen 23
- n1Treno: “Yeesh… this is awful.”
- n2Treno: “Jeez… I'd hate to end up like this.”
- n3Treno: “Why'd he die in a place like this? What on earth… happened here?”
- n4Treno: “This is… a mummy, right? Even knowing that, it's creepy!”
- n5Treno: “Huh? This one's the only one… with no head?”
- n6Treno: “Huh? This one's the only one… with no head?”
Checklist
- Where
- Chapel entrance, or B1 corridor (1E)
- How
- Walk in with Doll leading.
- Reward
- Materia flag FAA (group B)
- Opens
- Ch. 6
- Closes
- Leaving Mischief Castle
- Where
- Mischief Castle B1, map 26 (n5/n6); head in chest 24 D
- How
- Use the Skeleton Head on it with Doll leading.
- Reward
- Materia flag FA9 (group B)
- Opens
- Ch. 6
- Closes
- Leaving Mischief Castle
- Where
- B1, chest A in 23
- How
- Open the chest.
- Reward
- Key: frees Millrose
- Opens
- Ch. 6
- Closes
- Required
Cave Town, the Queen's Hot Spring and the Honey Factory
📍 Cave Town · Queen's Hot Spring · Queen's Palace · Honey Factory
Treno and Mikey land in an underground town of soldier ants and grasshoppers. The way on is the Queen Ant’s Honey Factory, guarded by antlions, and getting permission takes a long chain of favours.
⏳ Last chances in this chapter
- Four Materia flags here, the easiest set in the game: the strange rock (group B), and the customs room, the customs key and the cloth cover in the Honey Factory (group A). They stay available until you leave by minecart.
- The Immortal Jewel (Hot Spring 3A, chest E) and the Staff of Madness (Honey Factory 4D, chest C) exist nowhere else.
- You can’t come back to Cave Town after the next chapter. Use the shops and the inn now.
Full list across the game: Missables.
Walkthrough
- MainIf 2-player mode was off at the cell, Doll landed elsewhere. She rejoins the first time you call player 2 (SELECT on controller 2: “Doll!! You’re okay!!”), or later at 3F with Gitchon.
- SideThe strange rock (a step spot at the top-left of the first Cave Town screen, 36, tile 3,5): look at it with Doll leading (X menu → System → Order, put Doll first) for a Materia flag (group B), and again with Mikey leading, who finds the grasshoppers’ stash. Both work, in any order.
- MainPermission chain. Talk to Parson and pick all three topics (This town / Soldier ants / Grasshoppers) → a Red Soldier Ant tells you the Queen lives beyond the hot spring → another Red Soldier Ant says to ask Parson about a guide → Parson again, all three topics (The Shrike / Gitchon / The Queen).
- MainThe gatekeepers refuse. The Ant Captain is drunk. Chi-chan gives you [Chi-chan’s Letter]. Put the Letter in a character’s item slot and talk to the Captain again: he takes it and the gatekeepers let you through to the Queen’s Hot Spring.
- MainHot Spring: talk to the antlion at the entrance (3A), walk over the marked spots on screens 41 and 3E, then go back to 3A and set the two upside-down turtles, Tartaruga and Tortue, back on their feet (“Someday, we will repay you”). Remember them.
- MainGitchon, a grasshopper, joins on hot-spring screen 3F as your guide (with Doll, or brought along by her).
- MainAt the top (44) the Queen Ant lets you into the Honey Factory. The Palace Guard on 43 now lets you pass.
- MainHoney Factory. Before the depot plan can start you need: the Key (4A, left side), the customs room on 48, the antlions, the spot on 48’s left, the track switch (4B) and the cloth cover (45, top right). The customs door on 48 takes the Key.
- SideDo these with Doll leading (X menu → System → Order, put Doll first): take the Key (4A) and enter the customs room (48): one Materia flag each (group A). Then look at the cloth cover (45) with Doll as player 2 (press SELECT on controller 2 to bring her in, then walk her there with controller 2) (Gitchon as player 2 works too): a third flag (group A). None of them has a one-time limit.
- SideHoney pot puzzle (49): push the five honey pots onto the five mats. “All the honey pots… perfect!” It’s optional.
- MainTreno muses that you’d have to be really tiny to get in (Gitchon says it in the 2-player version). Eat the Dodomerian now, scout the depot, and the effect wears off at the minecart (“[Dodomerian]’s fading!”). Gitchon goes to work the track switch and Doll goes with him.
- TipParson’s tips for the next boss: “When the [Shrike] gets angry, they say it turns hard as stone… attacking it then is no use.” And: for the trip, a minecart’s best.
- TipCave Town has the only inn in the game, Hotel Lord Hopper (it refuses if you’re already healthy). Shops: Weapon Shop Katydeal, Armor Shop Rip-Hopper, Hopper Bargains and Quackhopper Drugs.
🗺️ Maps for this chapter (25)
Letters mark treasure chests (tick them off as you open them), green numbers are exits, purple n markers people and objects, orange e markers scene spots. Tap a map to open it full size.
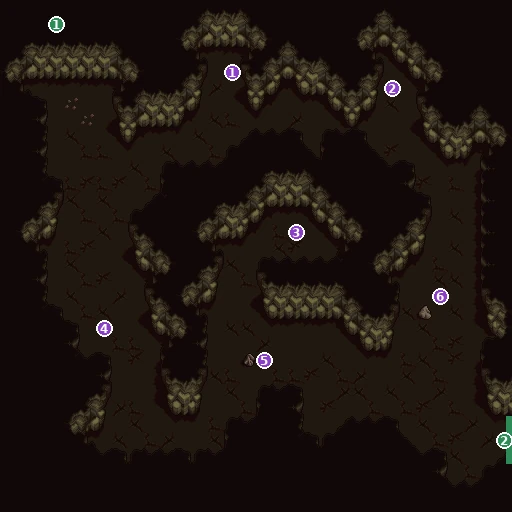
- 1Exit to Queen's Hot Spring · screen 3A
- 2Exit to Cave Town · screen 37
- n1Blue Soldier Ant: “Who are you-ant? Never seen you around here-ant.”
- n2Red Soldier Ant: “The war with the antlions… goes on with no end in sight-ant.”
- n3Red Soldier Ant: “Antlions are cold-blooded-ant! Once they find you, you get eaten-ant.”
- n4Red Soldier Ant: “Honestly, the [Shrike] is such a pain-ant.”
- n5Blue Soldier Ant: “I work and work and work… why won't my debt shrink-ant?”
- n6Blue Soldier Ant: “Grasshoppers are a pain-ant! They don't get what work is-ant.”
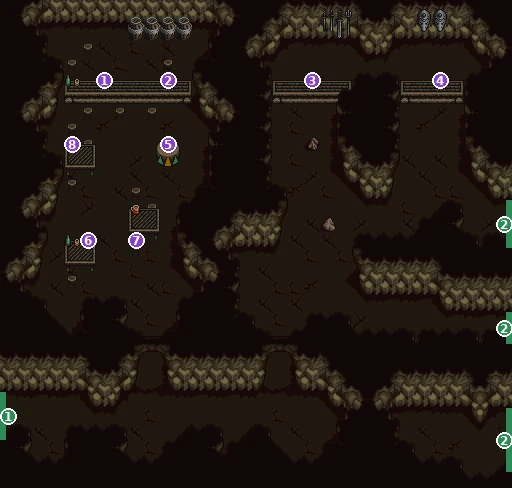
- 1Exit to Cave Town · screen 36
- 2Exit to Cave Town · screen 38
- n1Parson: “Welcome-hop! Your question-hop?”
- n2Chi-chan: “My… what a handsome man!!”
- n3Weapon Shop Katydeal: “Hmmm… I can't go any lower-hop!”
- n4Armor Shop Rip-Hopper: “Welcome-hop! Hop, hop, hop on in to Rip-Hopperrr!!”
- n5Cricket: “Hello… I'm Cricket the cricket.”
- n6Red Soldier Ant: “Heeey!! Bring us honey-ant!!”
- n7Red Soldier Ant: “Heeey!! My butterfly legs-ant?”
- n8Ant Captain: “Hic… I'm the captain-ant, y'hear!!”
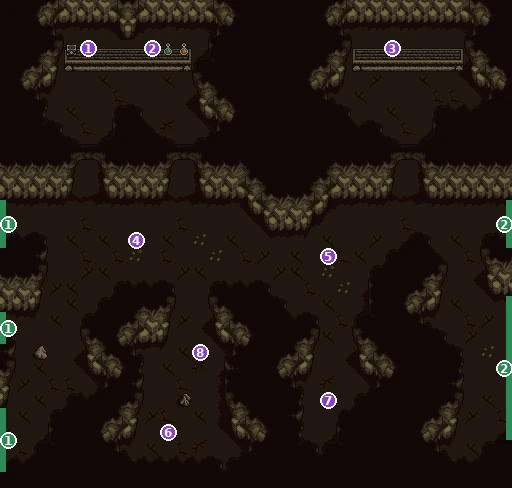
- 1Exit to Cave Town · screen 37
- 2Exit to Cave Town · screen 39
- n1Hopper Bargains: “50 or 60% off is a given!! Anyway, it's cheap-hop!!”
- n2Quackhopper Drugs: “We'll take you far, far away! That's Quackhopper Drugs-hop.”
- n3Hotel Lord Hopper: “Welcome… staying the night-hop?”
- n4Red Soldier Ant: “You know about the [Shrike]-ant? The villain who rules here-ant.”
- n5Blue Soldier Ant: “Wow, today was my lucky day-ant!”
- n6Red Soldier Ant: “Where's honey made? Honey Factory, of course-ant.”
- n7Blue Soldier Ant: “Seven parts in ten of our honey get taken by the antlions-ant!”
- n8Red Soldier Ant: “Yo… a new recruit-ant? Watch out for the antlions-ant!!”
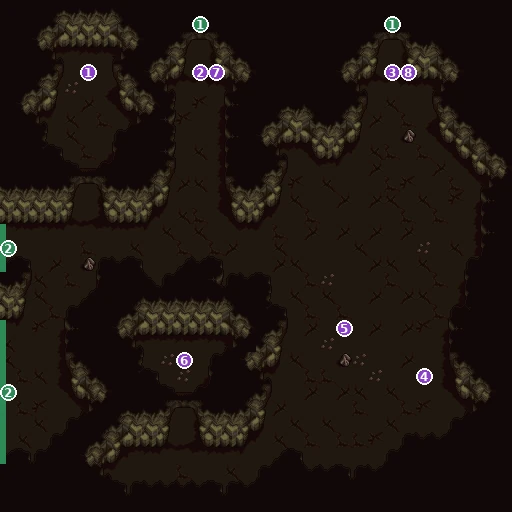
- 1Exit to Queen's Hot Spring · screen 3D
- 2Exit to Cave Town · screen 38
- n1Red Soldier Ant: “Honestly, you're only worth the work you do-ant!”
- n2Gatekeeper Ant: “Hm? No good-ant… you need the captain's permission-ant!”
- n3Gatekeeper Ant: “Going to Queen's Hot Spring? No, the captain must OK it-ant!”
- n4Red Soldier Ant: “Do you know about the Queen? They say she's beyond the hot spring-ant!”
- n5Blue Soldier Ant: “As long as we give them honey, the antlions stay quiet-ant.”
- n6Blue Soldier Ant: “Hey, hey… did you know? Grasshoppers have a secret-ant.”
- n7Gatekeeper Ant: “Hm? No good-ant… you need the captain's permission-ant!”
- n8Gatekeeper Ant: “Going to Queen's Hot Spring? No, the captain must OK it-ant!”
- 1Exit to Cave Town · screen 36
- 2Exit to Queen's Hot Spring · screen 3B
- n1Piggyback Grasshopper: “Yikes… you found me-hop.”
- n2Wheel Grasshopper: “Leave a little for us-hop.”
- n3Fake Grasshopper: “Tch, after all our hard work!! You're taking all of it-hop?”
- n4Flea Grasshopper: “That's awful, awful-hop! …You'd go that far-hop?”
- e1–4Treno: “Hey… Gitchon! Is this queen of yours really this way?”
- A Antipoison
- B Merica Armor
- C Flame Bird
- D Para-B-Gone x2
- E Immortal Jewel
- 1Exit to Queen's Hot Spring · screen 3E
- 2Exit to Queen's Hot Spring · screen 3A
- 3Exit to Queen's Hot Spring · screen 3C
- A Para-B-Gone x2
- 1Exit to Queen's Hot Spring · screen 3F
- 2Exit to Queen's Hot Spring · screen 3B
- 3Exit to Queen's Hot Spring · screen 3D
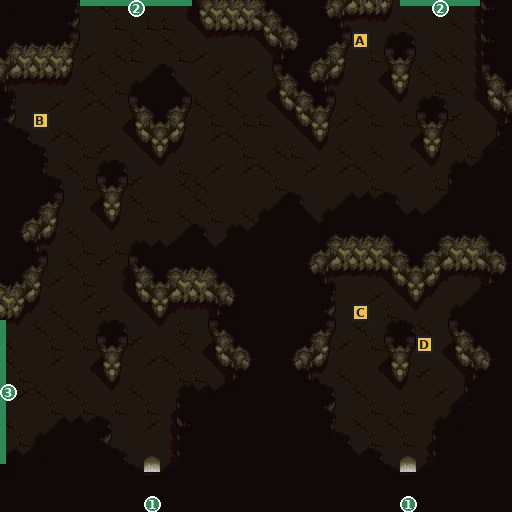
- 1Exit to Cave Town · screen 39
- 2Exit to Queen's Hot Spring · screen 40
- 3Exit to Queen's Hot Spring · screen 3C
- AEmpty slot in the chest list (no item)
- B Unclose
- C Con Guard
- D Para-B-Gone
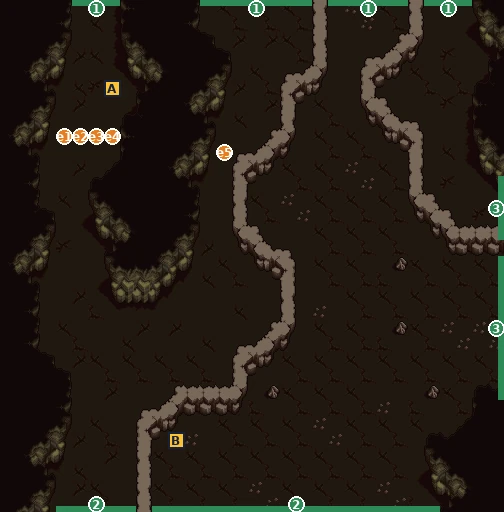
- 1Exit to Queen's Hot Spring · screen 41
- 2Exit to Queen's Hot Spring · screen 3B
- 3Exit to Queen's Hot Spring · screen 3F
- e1–5Treno: “Hey, Mikey… sure it's this way?”
- AEmpty slot in the chest list (no item)
- B Machovitan B
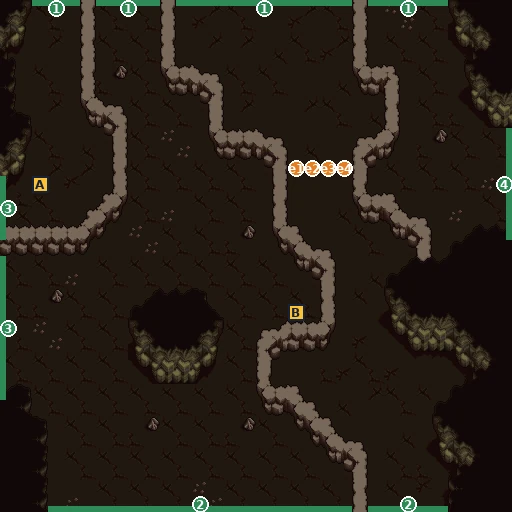
- 1Exit to Queen's Hot Spring · screen 42
- 2Exit to Queen's Hot Spring · screen 3C
- 3Exit to Queen's Hot Spring · screen 3E
- 4Exit to Queen's Hot Spring · screen 40
- e1–4Treno: “Hey, Doll!! What about Millrose…”
- A Machovitan C
- BEmpty slot in the chest list (no item)
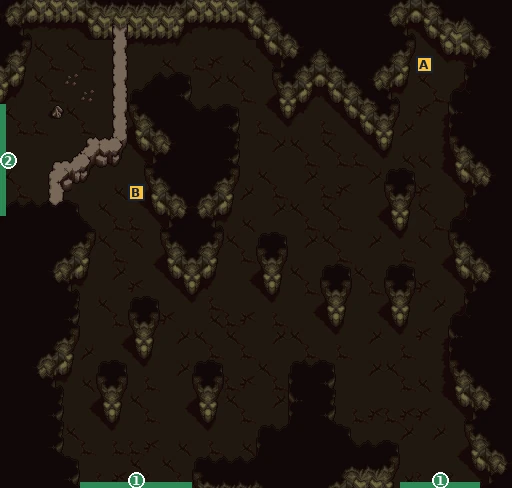
- 1Exit to Queen's Hot Spring · screen 3D
- 2Exit to Queen's Hot Spring · screen 3F
- A Machovitan B
- BEmpty slot in the chest list (no item)
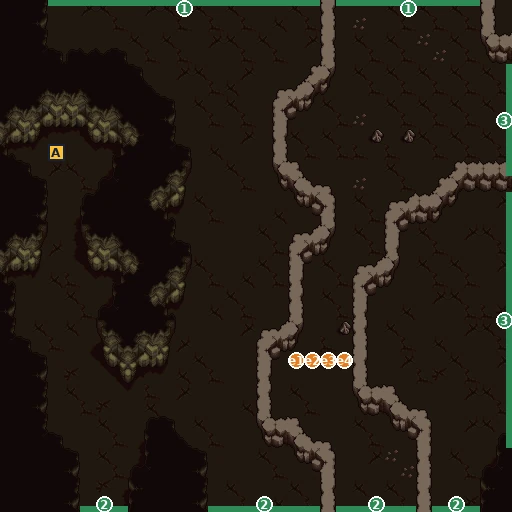
- 1Exit to Queen's Hot Spring · screen 43
- 2Exit to Queen's Hot Spring · screen 3E
- 3Exit to Queen's Hot Spring · screen 42
- e1–4Treno: “Hey… how far do we have to go? I'm tired of walking.”
- A L-Up x2
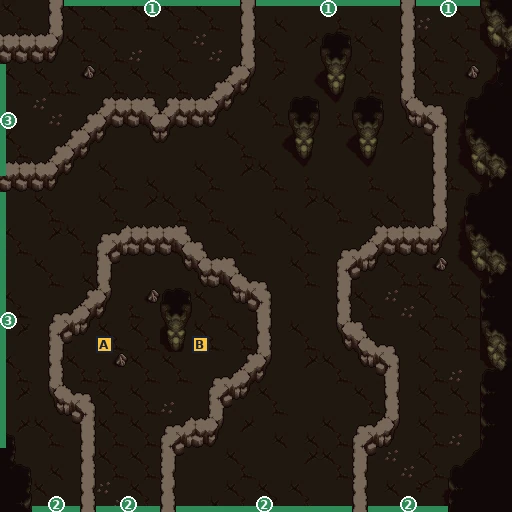
- 1Exit to Queen's Hot Spring · screen 44
- 2Exit to Queen's Hot Spring · screen 3F
- 3Exit to Queen's Hot Spring · screen 41
- A Seirozon
- B P-Up x2
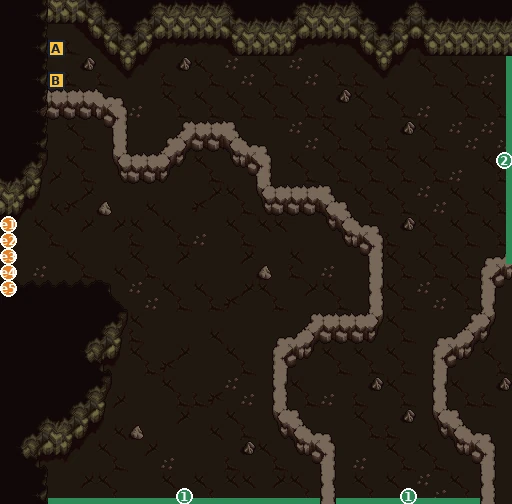
- 1Exit to Queen's Hot Spring · screen 41
- 2Exit to Queen's Hot Spring · screen 44
- e1–5Palace Guard: “No… none may enter without the Queen's permission.”
- A Refresh Arrow
- B Mega Flash B x2
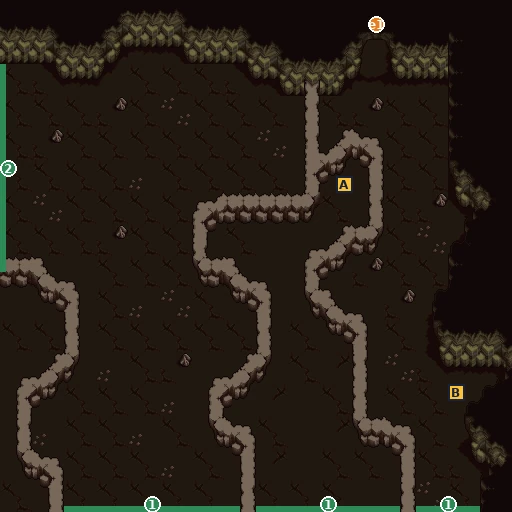
- 1Exit to Queen's Hot Spring · screen 42
- 2Exit to Queen's Hot Spring · screen 43
- e1Treno: “There's an entrance here! All right, let's go in…”
- A L-Up x2
- BEmpty slot in the chest list (no item)
- n1Queen Ant: “I beg of you… please.”
- n2Palace Guard: “Good luck.”
- n3Palace Guard: “Please… take care.”
- e1Queen Ant: “I beg of you… please.”
- e2Way to Queen's Hot Spring
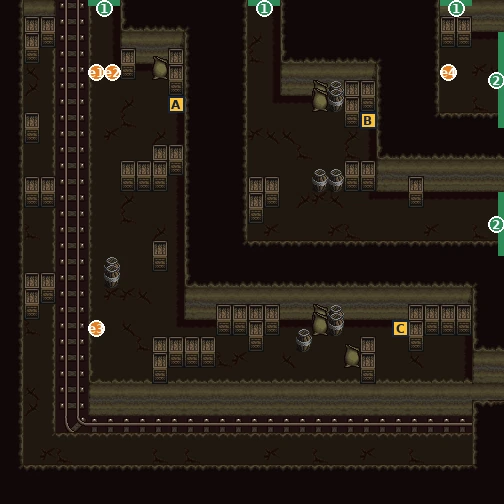
- 1Exit to Honey Factory · screen 48
- 2Exit to Honey Factory · screen 46
- e1–2Treno: “Mikey, careful!”
- e3Treno: “Ooh… this minecart looks usable!”
- e4Treno: “Whoa, this is!?”
- AEmpty slot in the chest list (no item)
- BEmpty slot in the chest list (no item)
- C Lisa Lisa
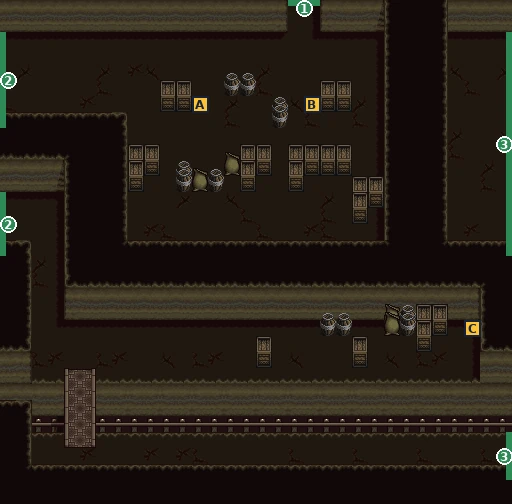
- 1Exit to Honey Factory · screen 49
- 2Exit to Honey Factory · screen 45
- 3Exit to Honey Factory · screen 47
- A L-Up
- B P-Up x2
- C Macchon EX
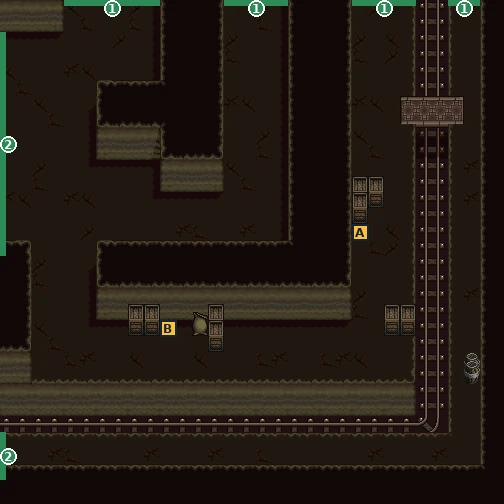
- 1Exit to Honey Factory · screen 4A
- 2Exit to Honey Factory · screen 46
- AEmpty slot in the chest list (no item)
- BEmpty slot in the chest list (no item)
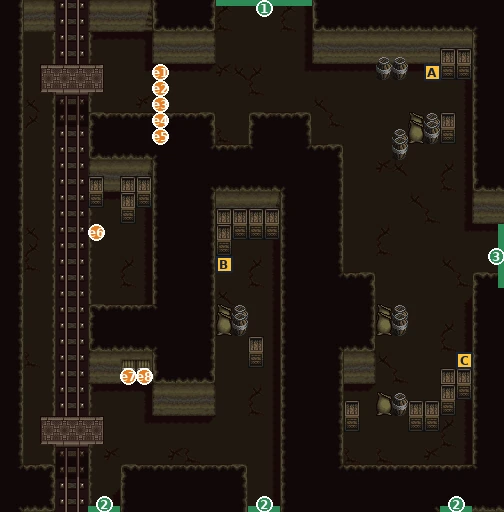
- 1Exit to Honey Factory · screen 4B
- 2Exit to Honey Factory · screen 45
- 3Exit to Honey Factory · screen 49
- e1–5Mikey: “For now, let's search inside the factory.”
- e6Treno: “What on earth… is this place?”
- e7–8Customs: “–It's locked.–”
- AEmpty slot in the chest list (no item)
- B Con Guard
- C Refresh Arrow
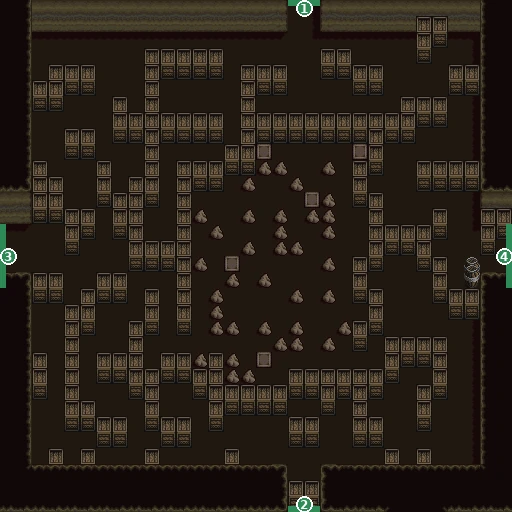
- 1Exit to Honey Factory · screen 4C
- 2Exit to Honey Factory · screen 46
- 3Exit to Honey Factory · screen 48
- 4Exit to Honey Factory · screen 4A
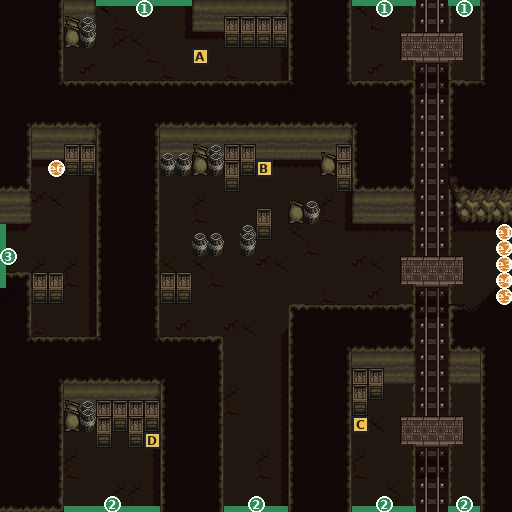
- 1Exit to Honey Factory · screen 4D
- 2Exit to Honey Factory · screen 47
- 3Exit to Honey Factory · screen 49
- e1–5Way to Queen's Hot Spring
- e6Treno: “What's this… a key to what?”
- A Nice Bomber
- B P-Up
- C Seirozon
- D L-Up x2
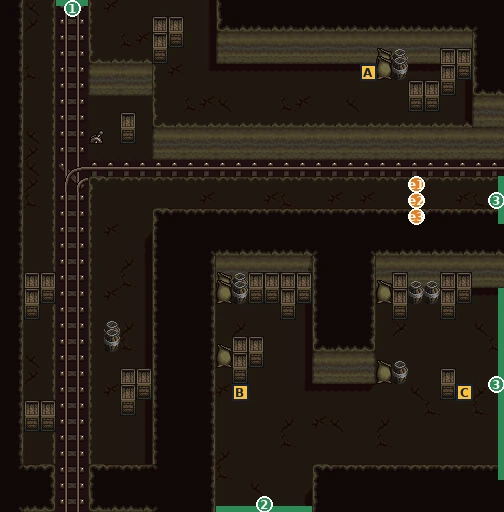
- 1Exit to Honey Factory: minecart route
- 2Exit to Honey Factory · screen 48
- 3Exit to Honey Factory · screen 4C
- e1–3Treno: “Oh… Doll! You're safe.”
- AEmpty slot in the chest list (no item)
- BEmpty slot in the chest list (no item)
- CEmpty slot in the chest list (no item)
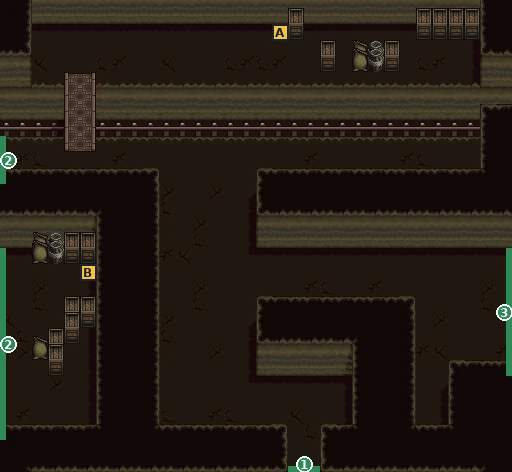
- 1Exit to Honey Factory · screen 49
- 2Exit to Honey Factory · screen 4B
- 3Exit to Honey Factory · screen 4D
- A Tim Mail
- B Machovitan C
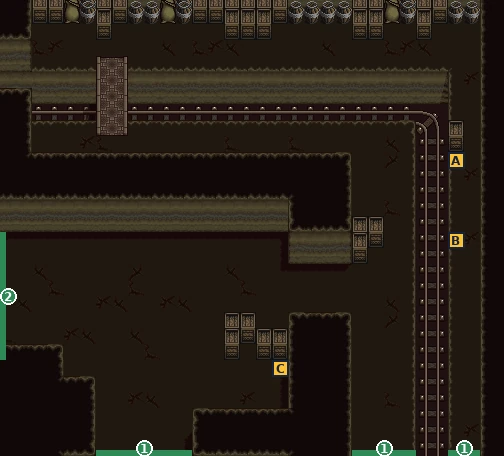
- 1Exit to Honey Factory · screen 4A
- 2Exit to Honey Factory · screen 4C
- A Lisa Lisa
- B Machovitan D
- C Staff of Madness
Checklist
- Where
- Cave Town 36, tile (3,5)
- How
- Look at it with Doll leading (and again with Mikey for the stash scene).
- Reward
- Materia flag FA8 (group B)
- Opens
- Ch. 7
- Closes
- The minecart (end of Ch. 7)
- Where
- Honey Factory 4A (left side, e6)
- How
- Pick it up with Doll leading.
- Reward
- Key + Materia flag FA7 (group A)
- Opens
- Ch. 7
- Closes
- The minecart
- Where
- Honey Factory 48 (e6)
- How
- Enter with Doll leading.
- Reward
- Materia flag FA5 (group A)
- Opens
- Ch. 7
- Closes
- The minecart
- Where
- Honey Factory 45, top right (e4)
- How
- Look at it with Doll (or Gitchon) as player 2.
- Reward
- Materia flag FA6 (group A)
- Opens
- Ch. 7
- Closes
- The minecart
- Where
- Cave Town
- How
- After both Parson menus and the drunk Captain, talk to Chi-chan. Put the Letter in an item slot, then talk to the Captain.
- Reward
- Passage to the Hot Spring
- Opens
- Ch. 7
- Closes
- Required
- Where
- Queen's Hot Spring 3A, chest E
- How
- Open the chest.
- Reward
- Immortal Jewel (only one in the game)
- Opens
- Ch. 7
- Closes
- End of Ch. 7
The Shrike and the Sea of Lava
📍 Antlion customs · The Shrike's lair · Sea of Lava
Under the cloth cover the minecart rolls past the antlion customs. Then everything goes wrong: someone is waiting at the other end, a friend turns traitor, and the Shrike guards the only way out.
⏳ Last chances in this chapter
- Nothing to collect here, and no way back: once the door shuts behind you in the Shrike’s lair, Cave Town is behind you for good.
Full list across the game: Missables.
Walkthrough
- MainFight the antlions at the start (one escapes), then ride the minecart under the cloth through customs.
- MainTreno is knocked out and wakes to Millrose: “how long are you gonna sleep!?” Millrose joins the party. She fights with sabers and rapiers.
- MainThe Palace Guard Captain escorts you, but Gitchon betrays the party and is dragged off by Howard Castle’s guards. The Captain dies at the Shrike’s door, and the way back shuts (“we’re trapped!”).
- MainChase the escaped antlion into the lair: the Shrike appears (“Gimme honey-shriiike!!”).
- MainTreno storms back to the Queen: only the gold and silver turtles can cross the Sea of Lava. You get two [Hebo], a honey that lets you breathe underwater. The turtles you saved repay you.
- MainTurtle ride: dodge the rocks on the lava. On the other side lies the Cascal Sea.
Bosses
🗺️ Maps for this chapter (3)
Letters mark treasure chests (tick them off as you open them), green numbers are exits, purple n markers people and objects, orange e markers scene spots. Tap a map to open it full size.
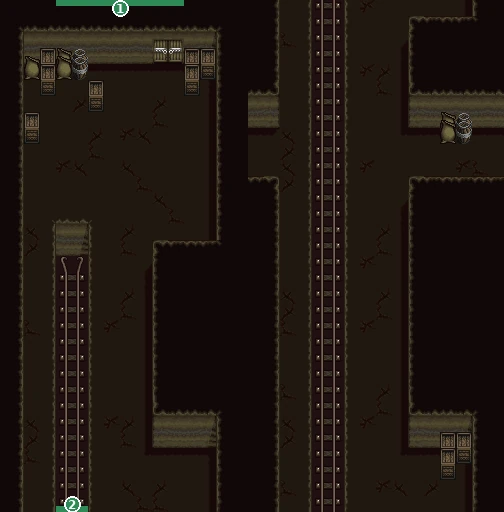
- 1Exit to The Shrike's lair
- 2Exit to Honey Factory · screen 4B
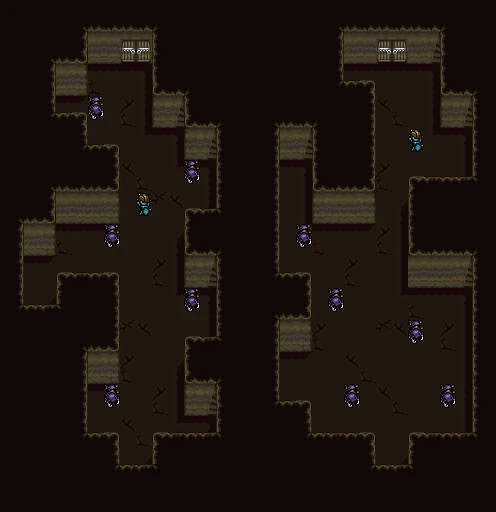
- n1Treno: “Damn… don't let it get away!! After it!!”
- n2Treno: “Damn… we're trapped!”
- n3Treno: “Damn… we're trapped!”
- e1–2Treno: “Damn… we're trapped!”
Cascal Sea, the Kitten and the Ghost Ship
📍 Cascal Sea (under water) · The Kitten · Pirate Ship · Ghost Ship
At the bottom of the Cascal Sea lies a sunken pirate ship, the Kitten, with its crew still aboard and very much alive. Captain Rock and his sister Terra will sail you to Howard Castle, if you can help raise their ship.
⏳ Last chances in this chapter
- Both chest swords, Jasmine Saga (9A) and Starleen (A9), are only here. Terra’s cheaper sword shop is only here too (Neve sells the same swords later at list price).
- One Materia flag (group A): Pirate Rich’s treasure room with Doll leading.
- The free Fire Sword from Terra (only if 2-player mode was off the first time you met Rock).
- 40 chests under the sea and in the two wrecks. The Kitten sinks for good at the end of the chapter.
Full list across the game: Missables.
Walkthrough
- WarningEat your [Hebo] before anything else: the crew won’t even talk to you until you do (“Eat some [Hebo] or you’ll die!”).
- MainUnder-sea route: from the arrival screen (65) go right to 66, down to 67, right to 68 and up to 69. The upper branch (65 up to 6A → 6B → 6C) leads to the screens with most chests (95–99) and, at 97 → up, to the Kitten (9A). The bottom edge of 65 is the Sea of Lava, closed now.
- MainEnter the Kitten by the hull door (9A) and find Captain Rock and Terra in the cabin (A5). Their ship was sunk by Captain Zoro. The deal: help raise the Kitten, and they’ll take you to Howard Castle. They need parts from another wreck.
- SideFire Sword: if 2-player mode is off the first time you enter the cabin, Terra gives Millrose a Fire Sword. Otherwise you can buy one later for 1,980 Pera.
- MainPick up the Key (6D or B9, tile 23,25). The rotten fence on 69 (top right) now breaks: enter the Pirate Ship (9B).
- MainReport to Rock: “Could it be… that ship is Pirate Rich’s Ghost Ship…” The Ghost Ship’s entrance (9C) opens only after that report.
- MainGhost Ship seal doors take the Key: the door on AB leads to B6, the left door at the top of the treasure decks (7–8,3) leads to AC, and the right one (23–24,3) is the last: “the key’s stuck, I can’t get it out!” Clear B6 and AC first, because after the right door the Key is gone.
- MainAC: the Shoreweed Lizard waits at the top (“Gaaah… gaaah… blub blub blub…”). It’s optional: nothing in the story needs it, but it gives 30,000 EXP.
- SidePirate Rich’s treasure can’t be taken: reach for it and the exit shuts, step away and it opens. Walk onto the exit tiles at the bottom of the treasure room with Doll leading (X menu → System → Order, put Doll first) for a Materia flag (group A).
- SideTerra’s sword shop (talk to Terra with Millrose leading, 10,000 Pera per sword): first Rapier and Cardtail, then Jasmine Saga or Starleen, then the Darkness Sword. One sale per talk. The chest swords count as owned: Jasmine Saga is chest A in 9A, Starleen chest C in A9. If you already hold both chest swords when you reach the second step, Terra won’t sell the Darkness Sword. Open one chest, buy the other sword from Terra, then buy the Darkness Sword (40,000 Pera in all). Or skip Terra: Kon-chan’s Weapon Shop in Neve Town (Ch. 10) sells the Darkness Sword for 14,800.
- MainThe Kitten is raised. At sea, the night conversations reveal who Doll really is (“The legendary hero… Doll… it was you!”) and what Millrose is (“I’m a magic doll!”).
- MainZoro’s dragon ship attacks, with Gitchon aboard. The powder magazine catches fire and the Kitten sinks. You come ashore near the Fern Cave; Rock and Terra stay behind. Advice: “If the giant spots you, it’s bad! Don’t take any detours.”
Bosses
🗺️ Maps for this chapter (35)
Letters mark treasure chests (tick them off as you open them), green numbers are exits, purple n markers people and objects, orange e markers scene spots. Tap a map to open it full size.
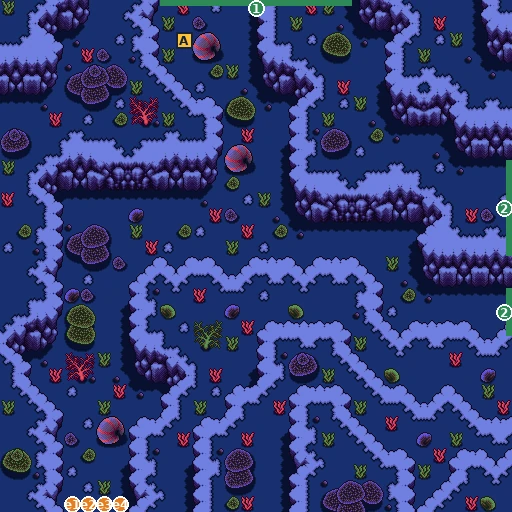
- 1Exit to Cascal Sea · screen 6A
- 2Exit to Cascal Sea · screen 66
- e1–4Treno: “Whoa… this way's the Sea of Lava…”
- AEmpty slot in the chest list (no item)
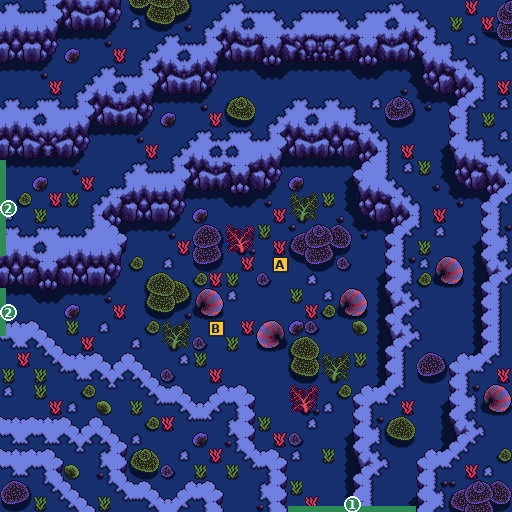
- 1Exit to Cascal Sea · screen 67
- 2Exit to Cascal Sea · screen 65
- A Machovitan B x2
- BEmpty slot in the chest list (no item)
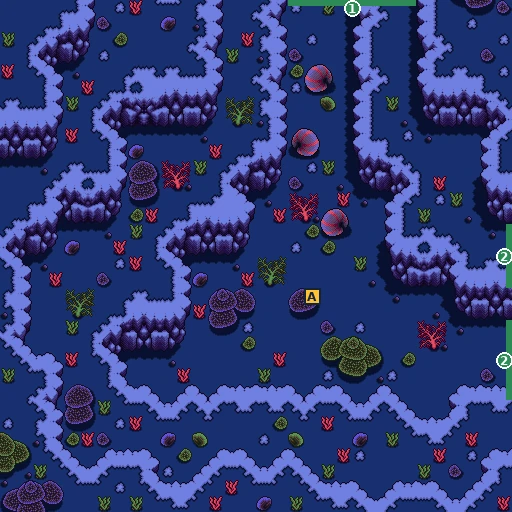
- 1Exit to Cascal Sea · screen 66
- 2Exit to Cascal Sea · screen 68
- AEmpty slot in the chest list (no item)
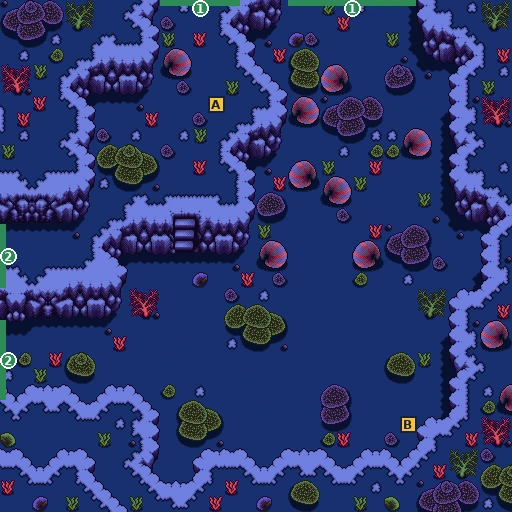
- 1Exit to Cascal Sea · screen 69
- 2Exit to Cascal Sea · screen 67
- AEmpty slot in the chest list (no item)
- BEmpty slot in the chest list (no item)
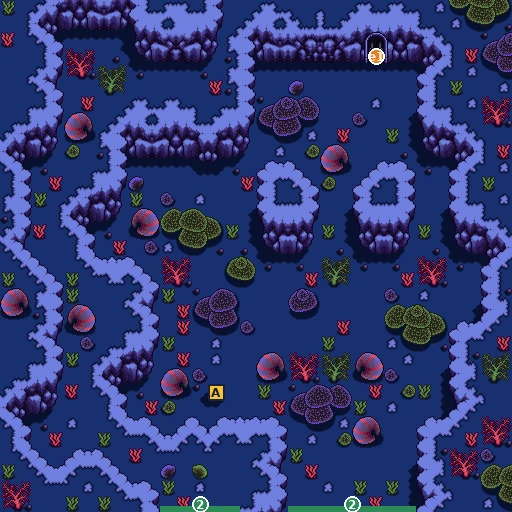
- 1Exit to Pirate Ship · screen 9B
- 2Exit to Cascal Sea · screen 68
- e1Millrose: “Hey… we can get in here! The tide's eaten away the wooden bars.”
- A No-Rise Protect
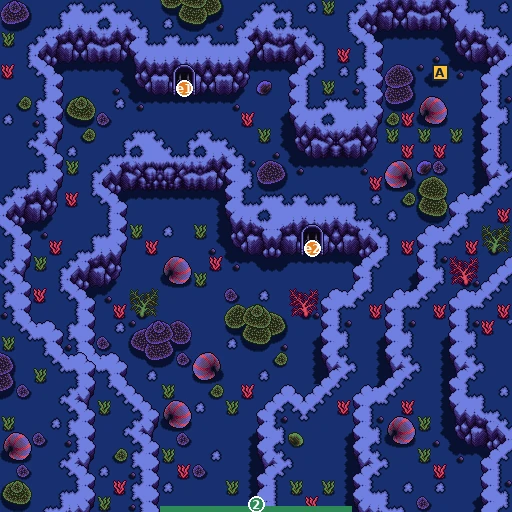
- 1Exit to Cascal Sea · screen 6B
- 2Exit to Cascal Sea · screen 65
- e1Mikey: “Hey, this fence… it's gone brittle! We can get in here!!”
- e2Millrose: “Hey… we can get in here! The tide's eaten away the wooden bars.”
- A Machovitan C x2
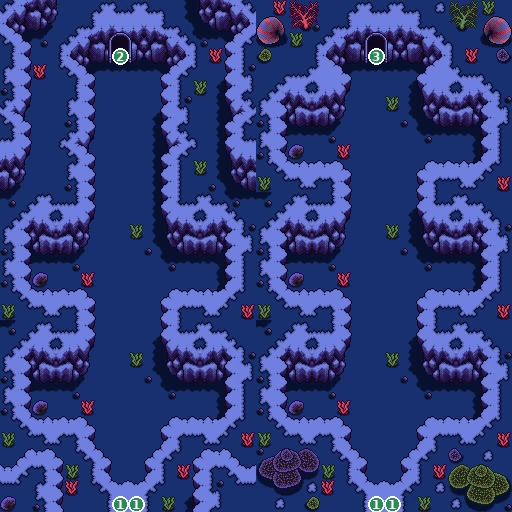
- 1Exit to Cascal Sea · screen 6A
- 2Exit to Cascal Sea · screen AF
- 3Exit to Cascal Sea · screen 6C
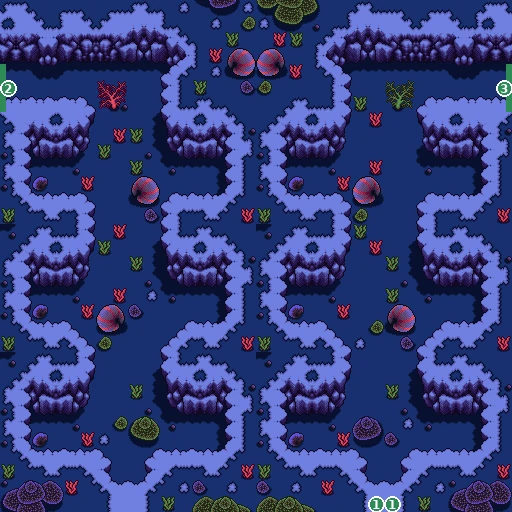
- 1Exit to Cascal Sea · screen 6B
- 2Exit to Cascal Sea · screen 95
- 3Exit to Cascal Sea · screen 6D
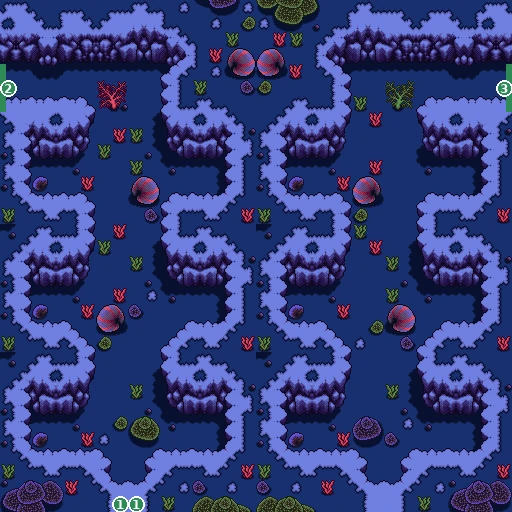
- 1Exit to Cascal Sea · screen 6B
- 2Exit to Cascal Sea · screen 95
- 3Exit to Cascal Sea · screen 6D
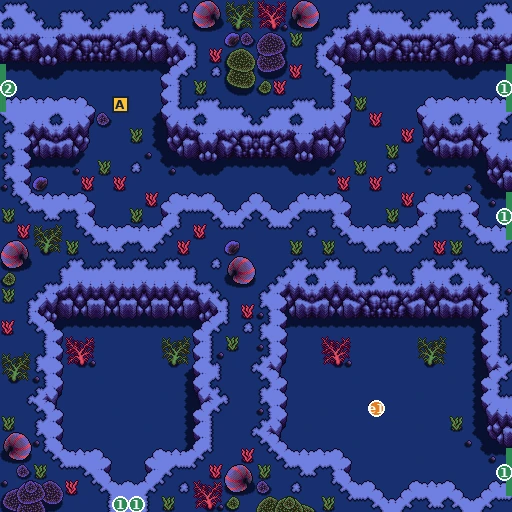
- 1Exit to Cascal Sea · screen 6E
- 2Exit to Cascal Sea · screen 6C
- e1The Key (picked up without a message)
- A Machovitan C x2
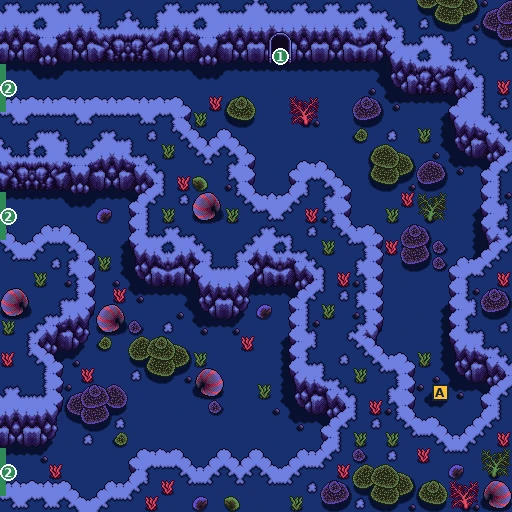
- 1Exit to Cascal Sea · screen B9
- 2Exit to Cascal Sea · screen 6D
- A Poison Shield
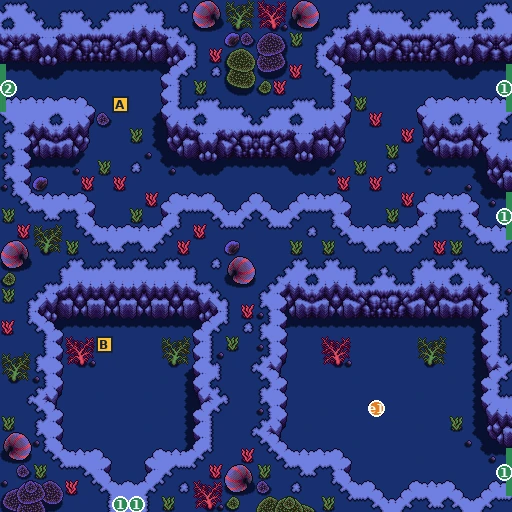
- 1Exit to Cascal Sea · screen 6E
- 2Exit to Cascal Sea · screen 6C
- e1The Key (picked up without a message)
- A Machovitan C x2
- B Flying Drop
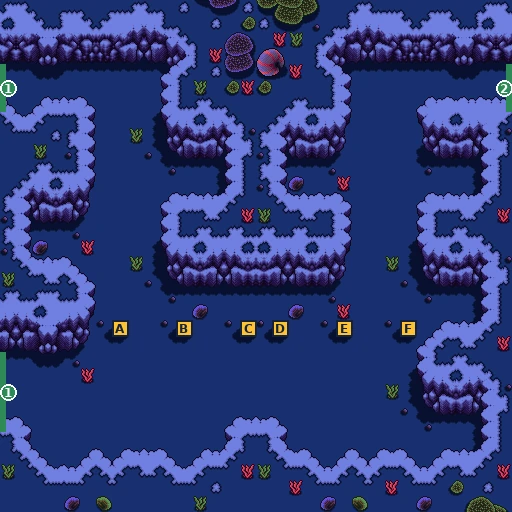
- 1Exit to Cascal Sea · screen 96
- 2Exit to Cascal Sea · screen AF
- A Machovitan B x3
- B Unclose
- C Mixdown Tect
- D Merica Armor
- E Seirozon x2
- F L-Up x4
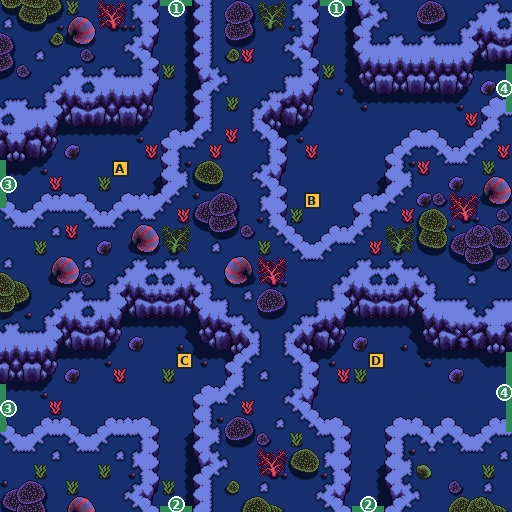
- 1Exit to Kitten [Below Deck] · screen 97
- 2Exit to Cascal Sea · screen 98
- 3Exit to Cascal Sea · screen 99
- 4Exit to Cascal Sea · screen 95
- AEmpty slot in the chest list (no item)
- BEmpty slot in the chest list (no item)
- CEmpty slot in the chest list (no item)
- D Machovitan B x2
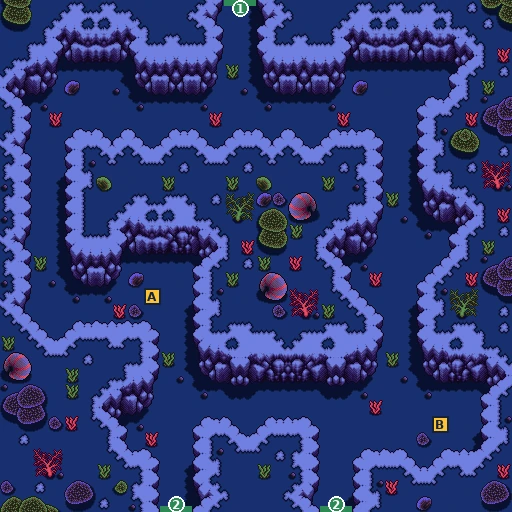
- 1Exit to Kitten [Below Deck] · screen 9A
- 2Exit to Cascal Sea · screen 96
- A Machovitan D x2
- BEmpty slot in the chest list (no item)
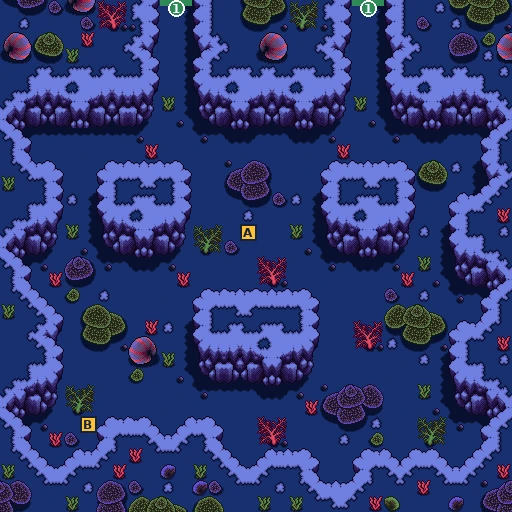
- 1Exit to Cascal Sea · screen 96
- AEmpty slot in the chest list (no item)
- BEmpty slot in the chest list (no item)
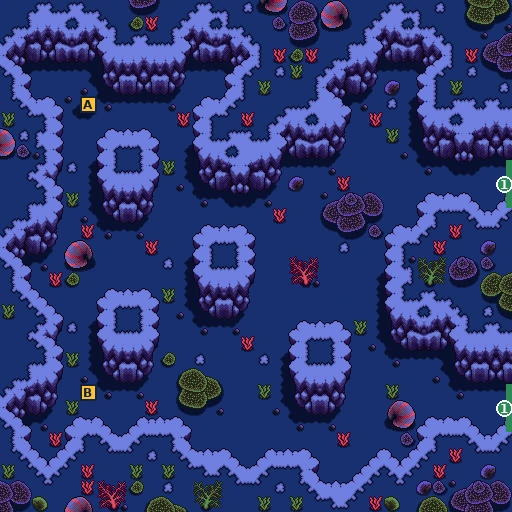
- 1Exit to Cascal Sea · screen 96
- A Machovitan B x2
- B Machovitan B
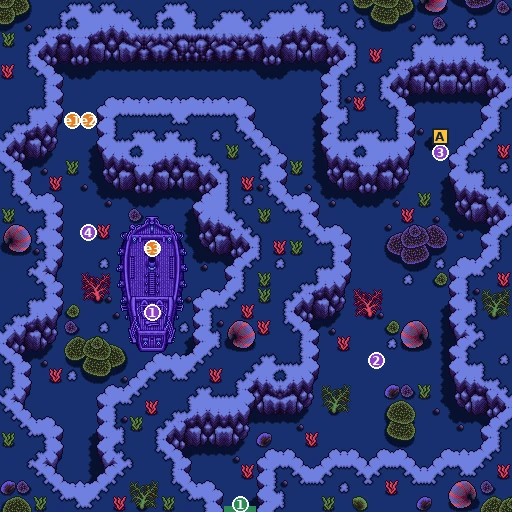
- 1Exit to Kitten [Below Deck] · screen 97
- n1Tyler: “Hey! Eat some [Hebo] or you'll die!”
- n2Asis: “Hey, listen to me! Eat your [Hebo]!”
- n3Sobra: “You're alive without [Hebo]? Can you even breathe?”
- n4Silk: “What? You don't have any [Hebo]?”
- e1–2Doll: “What… so this is where you were?”
- e3Way to Kitten [Below Deck]
- A Jasmine Saga
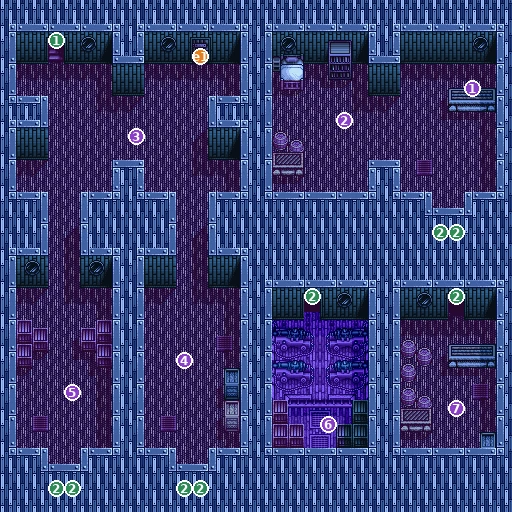
- 1Exit to Kitten [Below Deck] · screen 9A
- 2Exit to Kitten [Below Deck] · screen A5
- n1Rock: “Find anything?”
- n2Terra: sword shop for Millrose
- n3Kamiyan: “If you don't want to die… use [Hebo]!”
- n4Mock: “Underwater, you use [Hebo]! Every sailor knows that!”
- n5Kimchi: “Hey, hey, are you amateurs? You don't even know [Hebo]?”
- n6Torf: “Value your life! And that means eating your [Hebo].”
- n7Kid: “It's not too late! Come on, eat some [Hebo].”
- e1Doll: “Heeey… Treno! How'd it go?”
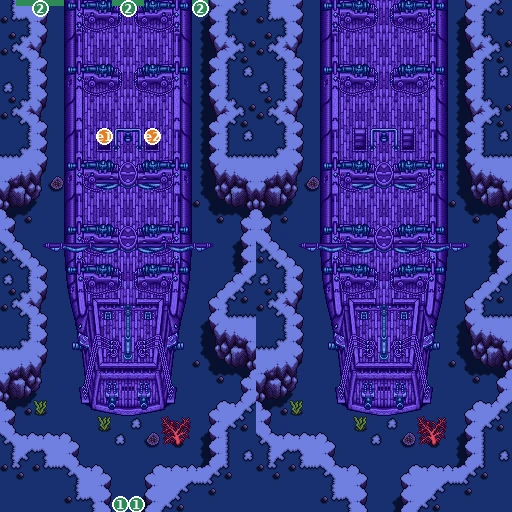
- 1Exit to Cascal Sea · screen 69
- 2Exit to Pirate Ship · screen 9C
- e1–2Way to Pirate Ship
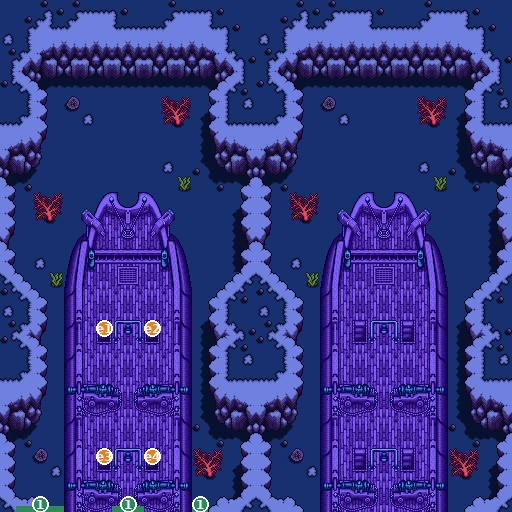
- 1Exit to Pirate Ship · screen 9B
- e1–2Way to Pirate Ship
- e3–4Way to Pirate Ship
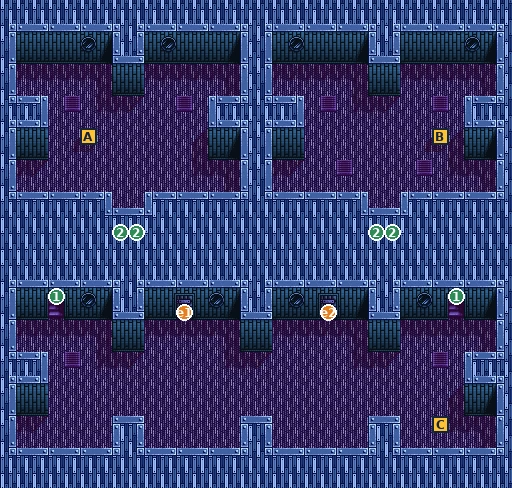
- 1Exit to Pirate Ship · screen 9C
- 2Exit to Pirate Ship · screen A6
- e1–2Way to Pirate Ship
- A Machovitan B x2
- B Machovitan B x2
- CEmpty slot in the chest list (no item)
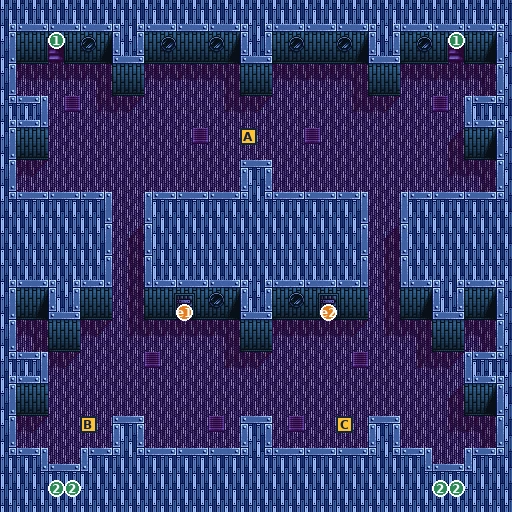
- 1Exit to Pirate Ship · screen 9C
- 2Exit to Pirate Ship · screen A8
- e1–2Way to Pirate Ship
- A Seirozon
- B Machovitan B
- C Lisa Lisa
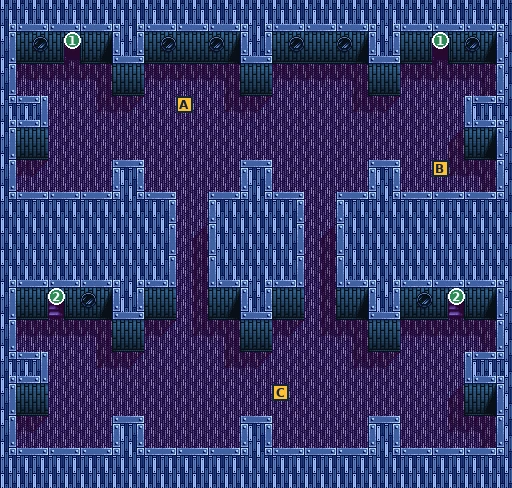
- 1Exit to Pirate Ship · screen A7
- 2Exit to Pirate Ship · screen 9B
- A Unclose
- B Misty Bomb
- C Machovitan C x2
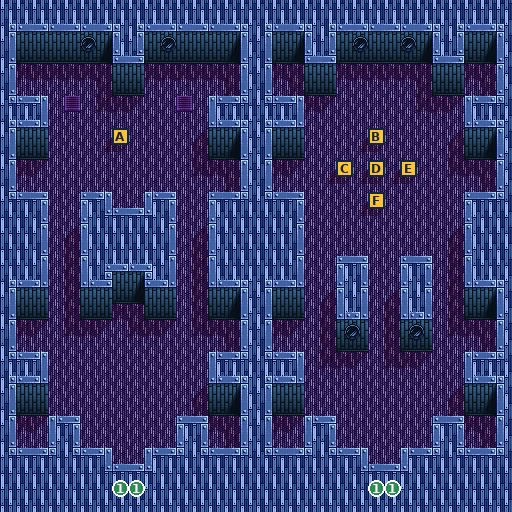
- 1Exit to Pirate Ship · screen A7
- A Lisa Lisa
- B Seirozon
- C Starleen
- D Refresh Arrow
- E 5000 Pera
- F Seirozon
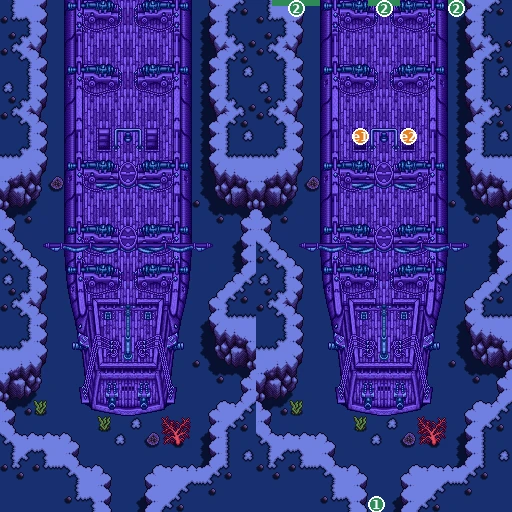
- 1Exit to Cascal Sea · screen 69
- 2Exit to Ghost Ship · screen 9E
- e1–2Way to Ghost Ship
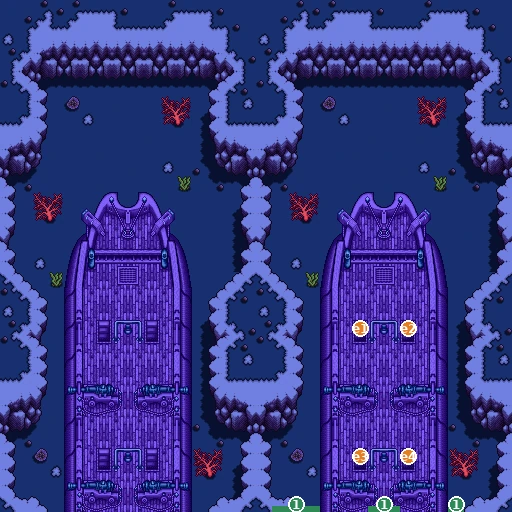
- 1Exit to Ghost Ship · screen 9D
- e1–4Way to Ghost Ship
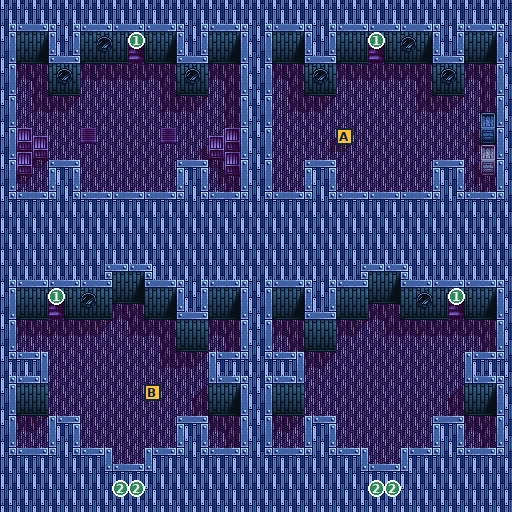
- 1Exit to Ghost Ship · screen 9E
- 2Exit to Ghost Ship · screen AB
- A Machovitan B x2
- B Machovitan B x2
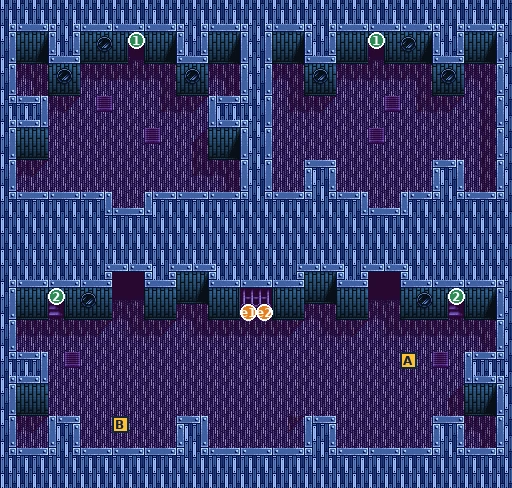
- 1Exit to Ghost Ship · screen AA
- 2Exit to Ghost Ship · screen 9D
- e1–2Ghost Seal: “–It's locked!–”
- A Poison Shield
- B L-Up
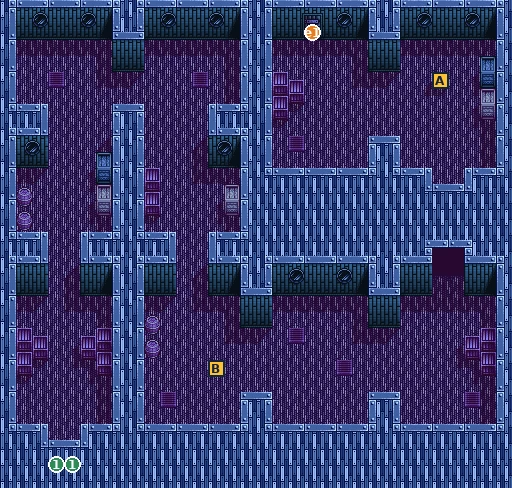
- 1Exit to Ghost Ship · screen B6
- e1Shoreweed Lizard: “Gaaah… gaaah… blub blub blub…”
- A Parapa Shield
- B Machovitan B
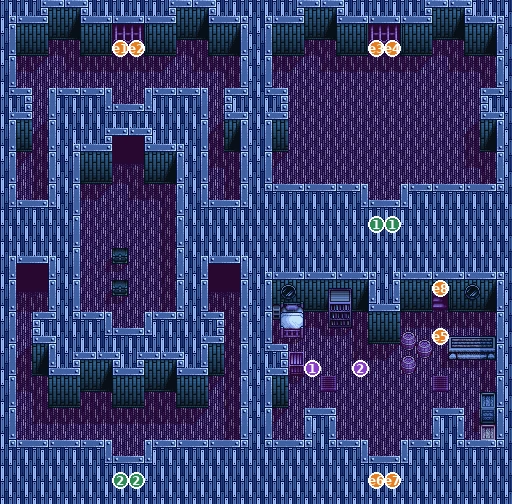
- 1Exit to Ghost Ship · screen AC
- 2Exit to Ghost Ship · screen AB
- 3Exit to Ghost Ship · screen AD
- n1Rich's Treasure: “–It's Pirate Rich's treasure.–”
- n2Pirate Rich: “………”
- e1–2Ghost Seal: “–It's locked!–”
- e3–4Treno: “Uh-oh… the key's stuck, I can't get it out!”
- e5Treasure-room exit
- e6–7Millrose: “Tch… they got us!! We're locked in!”
- e8Way to Pirate Ship
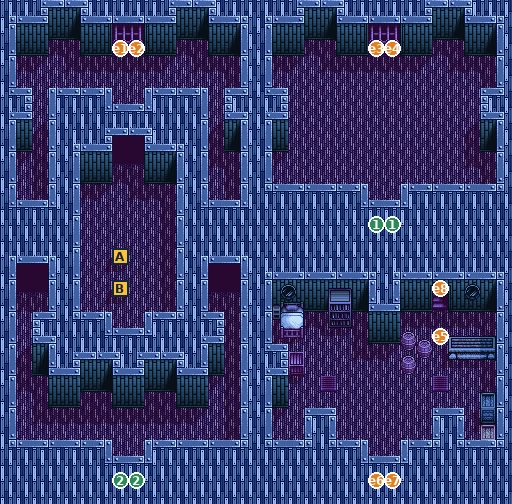
- 1Exit to Ghost Ship · screen AC
- 2Exit to Ghost Ship · screen AB
- 3Exit to Ghost Ship · screen AD
- e1–2Ghost Seal: “–It's locked!–”
- e3–4Treno: “Uh-oh… the key's stuck, I can't get it out!”
- e5Treasure-room exit
- e6–7Millrose: “Tch… they got us!! We're locked in!”
- e8Way to Pirate Ship
- A Lisa Lisa
- B Machovitan C x2
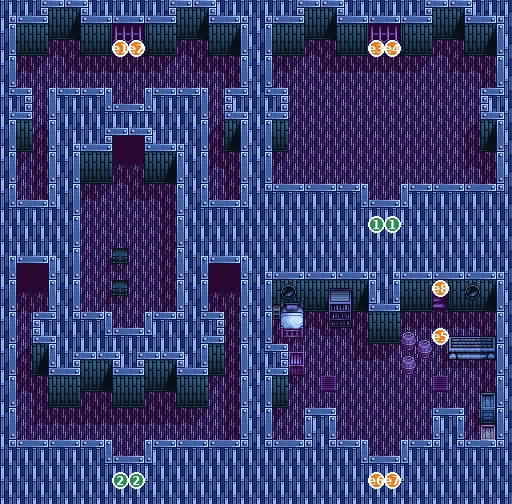
- 1Exit to Ghost Ship · screen AC
- 2Exit to Ghost Ship · screen AB
- 3Exit to Ghost Ship · screen AD
- e1–2Ghost Seal: “–It's locked!–”
- e3–4Treno: “Uh-oh… the key's stuck, I can't get it out!”
- e5Treasure-room exit
- e6–7Millrose: “Tch… they got us!! We're locked in!”
- e8Way to Pirate Ship
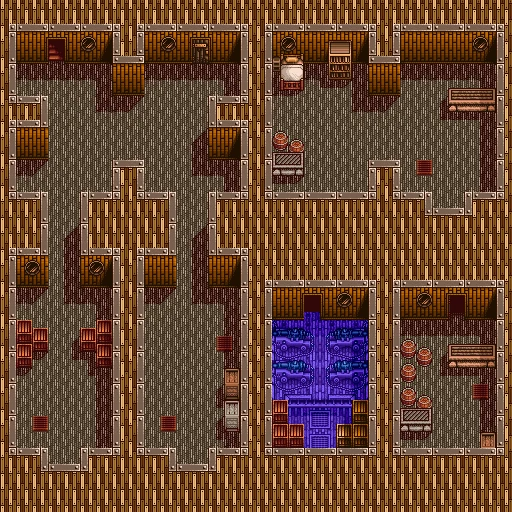
Checklist
- Where
- From the Queen Ant (Ch. 8)
- How
- Eat it from the item subwindow (Y) as soon as you arrive.
- Reward
- Breathe and talk under water
- Opens
- Ch. 9
- Closes
- Required
- Where
- Kitten cabin (A5)
- How
- Enter the cabin the first time with 2-player mode off.
- Reward
- Fire Sword (Millrose)
- Opens
- Ch. 9
- Closes
- First cabin visit
- Where
- Terra (Kitten cabin), or Kon-chan's Weapon Shop in Neve Town
- How
- Easiest: buy it in Neve for 14,800 with Millrose leading. At Terra: Rapier, Cardtail, one tier-2 sword, then the Darkness Sword; never hold both chest swords at the tier-2 step.
- Reward
- Darkness Sword (Millrose's best)
- Opens
- Ch. 9
- Closes
- Galt's House (Millrose leaves, Ch. 10)
- Where
- Ghost Ship treasure decks, exit tiles at the bottom
- How
- Step on them with Doll leading.
- Reward
- Materia flag FA3 (group A)
- Opens
- Ch. 9
- Closes
- The Kitten sinks
- Where
- Ghost Ship AC
- How
- Use the left top seal door first; walk up to it.
- Reward
- 30,000 EXP
- Opens
- Ch. 9
- Closes
- Using the last seal door
Giant's Forest, Neve Town and Galt's House
📍 Giant's Forest · Great Magella River · Neve Town · Galt's House · Will's House
Through the giant’s forest to a snowy town where it’s almost Christmas. In Neve Town the mayor’s son, Galt, knows more about Millrose than she does.
⏳ Last chances in this chapter
- First snow: the first time you step on the snow at the river (8E), have Doll or Millrose leading: Materia flag (group A). It plays only once.
- Talk to Chihiro before you take the boat if you want Santa’s gift later.
- Will’s Premium Armor and the secret studio: easier now, while you have time to spare in Neve.
Full list across the game: Missables.
Walkthrough
- MainFrom the shore cave (91) go east through Giant’s Forest (8B → 8C → 8D) to the Great Magella River [Upper] (8E), then east into Neve Town. The fairies in the forest give hints.
- SideThe first step on the snow at the river (8E, e15/e16) plays a short scene once. with Doll leading (X menu → System → Order, put Doll first), or with Millrose leading, it gives a Materia flag (group A).
- MainNeve Town: talk to Rott about Fairy Forest’s beauty and how the bird Dodora carries people there, then to Orjas (Dodora flies over the river when it’s dark). Talk to everyone: the mayor wants to see you.
- MainGalt’s House: Galt is Akim’s son. Gitchon is there and apologises. The truth comes out: Millrose is Howard’s prototype magic doll, his “daughter”, kept in Mischief Castle. Millrose runs away and Doll goes after her. Treno and Mikey continue alone; Gitchon is turned away. Galt’s tip: “Fairy Forest is the shortcut! Take a ship as far as the forest.”
- MainBefore the boat, talk to Rott (a woman is looking for Doll) and Kurt (“Isn’t your group smaller?”). Then the sign at Auntie Ketch’s Pier says: “The boat has now arrived. Please move the pier.” Push the movable pier section into place on that screen (2D) and board the boat. (This is one of the game’s push puzzles; we read it in the data but didn’t play it.)
- SideChihiro (2C) says she talked to Santa Claus. Talk to her after Galt’s House and before boarding, and Santa visits you at the river in the next chapter. See Santa’s gifts.
- SideWill’s House (2D, a door in the middle): a house inside a house. Step on the inner doorway, talk to Ail, step again, talk to Oil, step again, talk to Will. Each step can lose the progress, and Will gives the Premium Armor only about 1 time in 4: expect around 25 talks. Full odds in Secrets.
- SideAfter the armor, the inner doorway sometimes (21%) sends you to A Studio in Akasaka, a hidden radio studio with a real 1990s radio DJ. See Secrets.
- TipNeve has the best shops so far: Kon-chan’s Weapon Shop (Force stones, Fire stones, Mikey’s swords and Millrose’s sabers, by whoever leads), Shin-chan’s Item Shop, Old Onba’s Pharmacy, Dave’s Armor, Tia’s Special Weapons and Kay’s Special Armor.
🗺️ Maps for this chapter (15)
Letters mark treasure chests (tick them off as you open them), green numbers are exits, purple n markers people and objects, orange e markers scene spots. Tap a map to open it full size.
- e1–5Way to Giant's Plain
- e6–10Way to Giant's Forest
- 1Exit to Giant's Forest · screen 8C
- n1Flame Fairy: “We are… among the oldest of all the fairies.”
- n2Rain Fairy: “Hey… do you know what shape a raindrop is?”
- n3Yolanta: “Don't go near Giant's Plain.”
- n4Smithson: “Yorda Tree is 10000 years old. It knows everything!”
- e1–7Treno: “Oh, right… past here lies Great Magella River [Lower].”
- 1Exit to Giant's Forest · screen 8B
- 2Exit to Giant's Forest · screen 8D
- n1Flower Fairy: “Lululun… lunlun. We are children of the flowers.”
- n2Green Fairy: “Our job is… to keep the trees of the forest green.”
- n3Patty: “Huh, to Howard Castle? I think… you'd better not.”
- n4Windy: “There's Howard Castle… and there's Clockwork Castle…”
- 1Exit to Giant's Forest · screen 8C
- n1Poison Fairy: “Ah, don't run away!”
- n2Snow Fairy: “Is it almost our turn? I'll make lovely snow fall for you!”
- n3Peshari: “Hee hee… want to know? You want to go, right?”
- e1–7Way to Great Magella River [Upper]
- e1–7Way to Giant's Forest
- e8–14Way to Neve Town
- e15–16Mikey: “Hey, Treno… is this snow?”
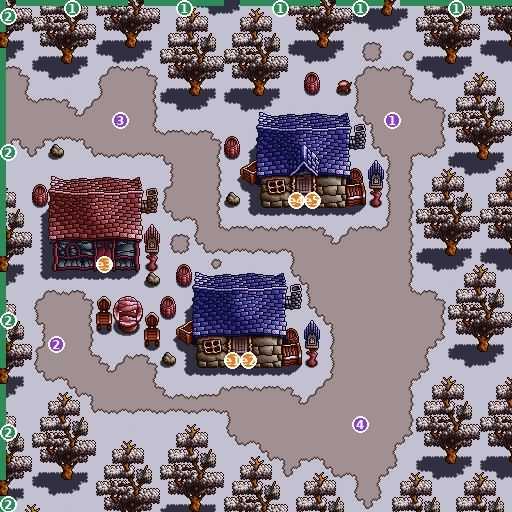
- 1Exit to Neve Town · screen 2E
- 2Exit to Neve Town · screen 2C
- n1Auntie Mary: “Hm, what's that? I look like Samantha?”
- n2Mondo: “Whoa-whoa-whoa… wh-what!?”
- n3Orjas: “Brrr… it's cold.”
- n4Quori: “Huh!? From Giant's Forest?”
- e1–2Way to Tia's Special Weapons
- e3Way to Pinoko's House
- e4–5Way to Gable & Yonna's House
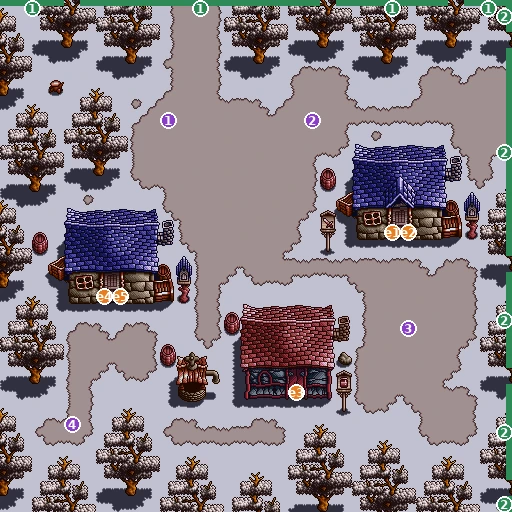
- 1Exit to Neve Town · screen 2D
- 2Exit to Neve Town · screen 2B
- n1Kurt: “Huh, I haven't seen your face around.”
- n2Chihiro: “Hey… will you believe what I tell you?”
- n3Aron: “Lately… it's, you know. It's kind of… like that… really.”
- n4Pirolo: “My! Aren't you cold in clothes like that?”
- e1–2Kon-chan's Weapon Shop: “Yo… welcome! I've got it all, so buy, buy, buy!”
- e3Shin-chan's Item Shop: “Welcooome!! We're not just cheap!!”
- e4–5Way to Jada's House
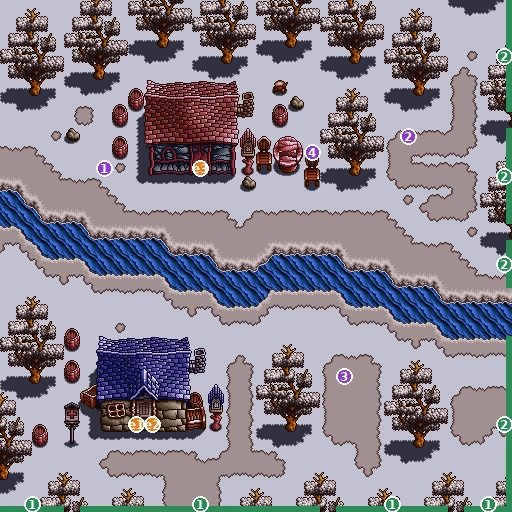
- 1Exit to Neve Town · screen 2C
- 2Exit to Neve Town · screen 2E
- n1Poppo: “Want to go to Giant's Forest? You can't without a boat-poppo!”
- n2Choro: “Oh? Have we… met before?”
- n3Ate: “Brrr… it's really gotten chilly.”
- n4Rott: “Do you know Fairy Forest? There's a real beauty there!”
- e1–2Old Onba's Pharmacy: “Eh… what's that? Sorry, dearie… I'm hard of hearing.”
- e3Way to Will's House
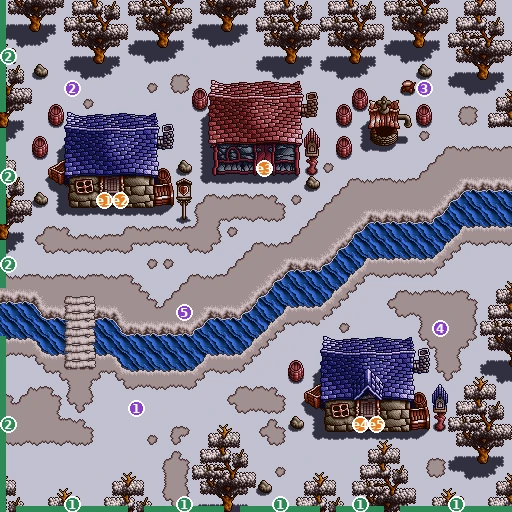
- 1Exit to Neve Town · screen 2B
- 2Exit to Neve Town · screen 2D
- n1Jessica: “Christmas is almost here. This year, with whom… hee hee.”
- n2Anna: “Santa Claus… I wonder if he'll come to our house this year?”
- n3Nario: “I am a traveler of time… I will knock upon your heart.”
- n4Gucci: “Hmmm… what should I do?”
- n5Yobo: “Oh dear… I've dropped my reading glasses.”
- e1–2Dave's Armor: “Ho ho ho… you're in luck.”
- e3Way to Galt's House
- e4–5Way to Kay's Special Armor
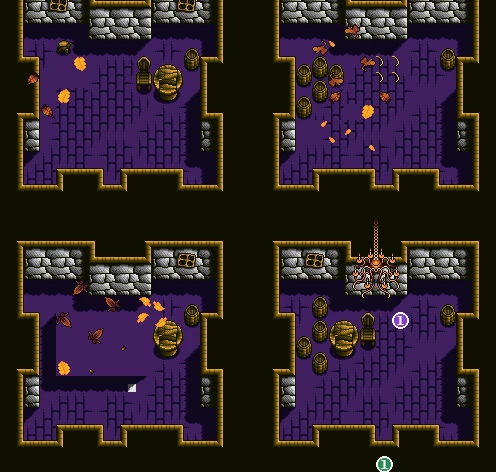
- 1Exit to Neve Town · screen 2E
- n1Galt: “Ahem… I am this town's mayor.”
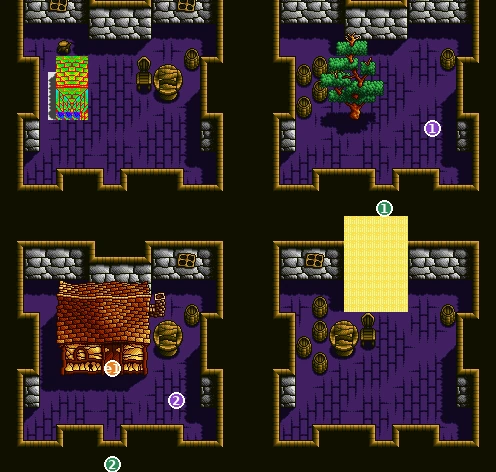
- 1Exit to Neve Town · screen 2C
- 2Exit to Neve Town · screen 2D
- n1Jada: “Well? Isn't it a splendid bonsai?”
- n2Will: “Ha ha ha… you look surprised.”
- e1Way to Will's House
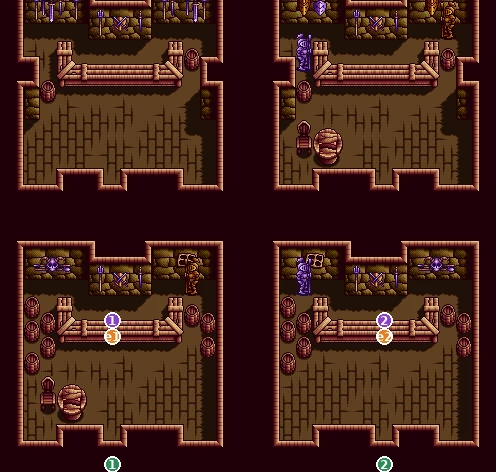
- 1Exit to Neve Town · screen 2B
- 2Exit to Neve Town · screen 2E
- n1Sam: “You met Master Solam?”
- n2Onji: “Wh-what? What's the idea?”
- e1Tia's Special Weapons: “Welcome! We've got stuff no one else has!”
- e2Kay's Special Armor: “Welcome… please, take your time.”
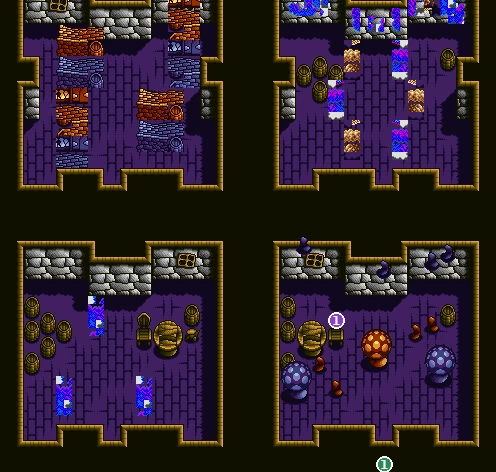
- 1Exit to Neve Town · screen 2B
- n1Pinoko: “I picked these… in Mushroom Forest. Amazing, right?”
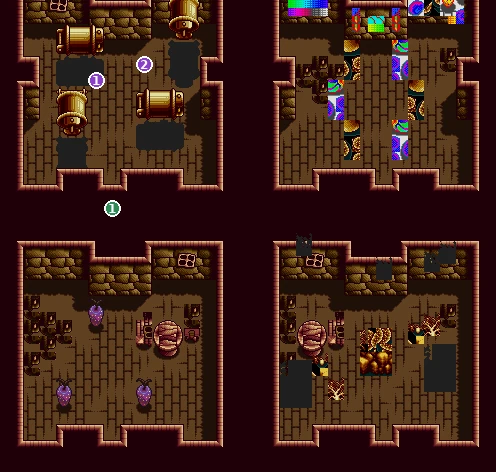
- 1Exit to Neve Town · screen 2B
- n1Gable: “Well? This is the body of my darling dragon.”
- n2Yonna: “Haaah… my husband is such a handful.”
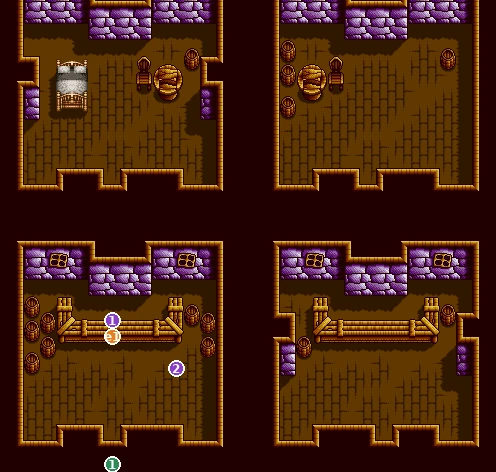
- 1Exit to Neve Town · screen 2D
- n1Manami Komori, radio DJ
- n2Minky Yasu, anime reporter
- e1Manami Komori: “A little message from me!”
Checklist
- Where
- Great Magella River [Upper] (8E), the snow tiles
- How
- The very first step on the snow, with Doll or Millrose leading.
- Reward
- Materia flag FA4 (group A)
- Opens
- Ch. 10
- Closes
- Your first step there
- Where
- Neve Town 2C
- How
- Talk to Chihiro after Galt's House, before you take the boat.
- Reward
- Santa's gifts at the river (Ch. 11)
- Opens
- Ch. 10
- Closes
- The boat
- Where
- Neve Town, Will's House (33)
- How
- Step, Ail, step, Oil, step, Will. Repeat until he hands it over.
- Reward
- Premium Armor
- Opens
- Ch. 10
- Closes
- Probably none (Neve can be walked back to)
Fairy Forest, the Man-Eating Giant and the Yorda Stone
📍 Fairy Forest · Bazel's House · Giant's Plain · Yorda Tree
Dodora drops Treno and Mikey in the forest of the fairies. Doll is here, hurt; Millrose has been taken; and the way to Howard Castle lies under a stone nobody can lift.
⏳ Last chances in this chapter
- Take the Torch from Haichi before you go down into the Fern Cave. If you forget it, you can walk back here from the cave entrance.
- Fairy Forest’s shops are the last before the Clockwork Castle. You will pass through again.
Full list across the game: Missables.
Walkthrough
- MainKetch drops you at the river (“Next time, I’m charging you!”). Step on the snow again: Dodora carries you to Fairy Forest. If you talked to Chihiro, Santa Claus turns up the first time instead; step on the snow once more for the ride.
- MainExamine the Yorda Stone at the Yorda Tree (8F, n1): “A big, heavy stone!” Elena, the tree fairy, says you need the [Yorda Ring]; Malena says it’s on the giant’s finger.
- MainAt Gemini’s (the house with three doors, BA): Doll lies wounded, and her companion has been carried off.
- MainLeave Fairy Forest by the east edge to the Giant’s Plain: the Man-Eating Giant (“…HUMAN… TASTY.”). After the win you take the Yorda Ring.
- MainBack at Gemini’s: Q, now the Dark Prince, took Millrose. Doll has to stay in bed. “We’re… a team!”
- MainTalk to Malena, then Haichi gives you the [Torch].
- MainUse the Yorda Ring on the stone. The ring falls into the hole, and Toto, Treno’s small companion everyone had forgotten about (“You never called on me, not even once”), goes down to fetch it for some peanuts. The way into the Fern Cave opens.
- SideGo, Go, Oink-Oink! Bookie Bazel (Bazel’s House, BB) runs a pig race. Stand on two of the numbered floor tiles to pick a pair, then talk to him with at least 1,000 Pera. The average win is about 72,000 Pera, and every pair pays off on average; pair 1-4 is the best bet. See Secrets.
- TipFairy Forest shops: Mash’s Shop (weapons for whoever leads, plus special weapons) and Veara’s Shop (armor, including Solam Mail for 8,200) at Gemini’s; Nasty’s Shop (medicine including Machovitan D, and special items) at Bazel’s, after the giant.
Bosses
🗺️ Maps for this chapter (7)
Letters mark treasure chests (tick them off as you open them), green numbers are exits, purple n markers people and objects, orange e markers scene spots. Tap a map to open it full size.
- 1Exit to Fairy Forest · screen 94
- n1Elm: “Going into Yorda Tree? Without a [Torch], you won't come back alive.”
- n2Kuri: “Eeeh!! You're fighting the giant?”
- n3Light Fairy: “If it weren't for us… this world would be swallowed by darkness.”
- n4Love Fairy: “My job is… making love potions. Would you care for one, too?”
- e1–7Way to Yorda Tree
- e8Way to Veara & Mash's Shop
- e9Way to Orba's House
- e10Way to Malena's House
- 1Exit to Fairy Forest · screen 93
- n1Dream Fairy: “Giving everyone dreams is my job. What kind of dream do you want?”
- n2Corina: “Howard Castle?”
- n3Sista: “My house looks odd, you say?”
- n4Spring Fairy: “This forest… has plenty of water, thanks to the Great Magella River.”
- e1–7Way to Giant's Plain
- e8Way to Elena's House
- e9Way to Bazel's House [Bookie]
- e10Way to Nasty & Patty's Shop
- e11Way to Haichi's House
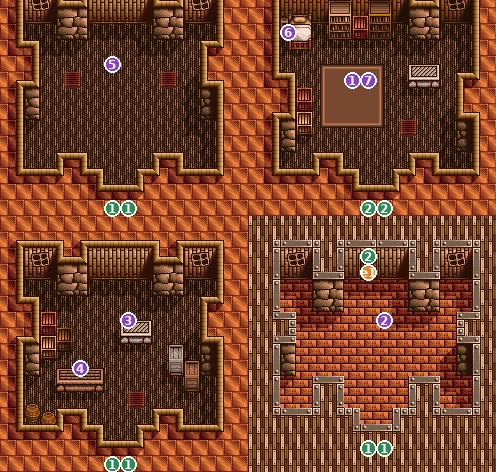
- 1Exit to Fairy Forest · screen 93
- 2Exit to Fairy Forest: Gemini's, Malena's and Mash & Veara's
- n1Gemini: “Please… stay safe. I shall be waiting for good news.”
- n2Orba: “Oh my, oh my… are you friends of my daughter?”
- n3Mash's Shop: “Hey there… kid. Got some good stuff, how 'bout it?”
- n4Veara's Shop: “Just between us… I've got better goods than Mash.”
- n5Malena: “Oh dear… oh dear… that giant is such a nuisance!”
- n6Doll: “………”
- n7Mikey: “I'm sorry… I couldn't help you when it mattered…”
- e1Way to Mushroom Coast
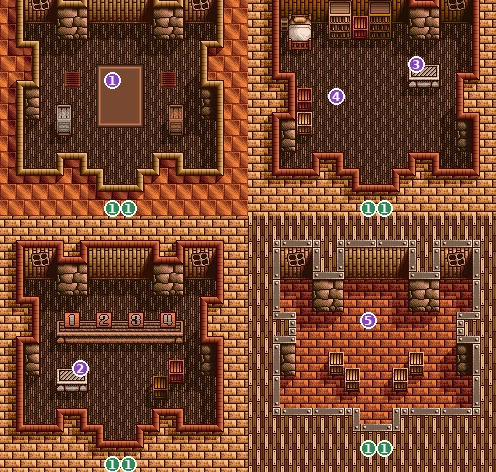
- 1Exit to Fairy Forest · screen 94
- n1Haichi: “Yorda Tree? It's a Sigillaria!”
- n2Bookie Bazel: the pig race
- n3Nasty: “Hey, hey… tell me about the human world.”
- n4Patty: “Don't deal with Bazel! He's famous for cheating…”
- n5Elena: “I am the tree fairy. I know all there is to know about trees.”
- e1–7Way to Fairy Forest
- n1The Yorda Stone
- e1–7Way to Fairy Forest
- e8Way to Fern Cave
Checklist
- Where
- Giant's Plain
- How
- Defeat the Man-Eating Giant.
- Reward
- Yorda Ring
- Opens
- Ch. 11
- Closes
- Required
- Where
- Fairy Forest: Malena, then Haichi (Bazel's House)
- How
- Talk to Malena, then Haichi.
- Reward
- Torch (lights the Fern Cave)
- Opens
- Ch. 11
- Closes
- Required (you can walk back for it)
- Where
- Bazel's House (BB)
- How
- Pick two tiles, pay 1,000 Pera, watch the race.
- Reward
- Up to 500,000 Pera
- Opens
- Ch. 11
- Closes
- Probably none
Fern Cave and Howard Castle
📍 Fern Cave · Howard Castle · Backstage Hall · Archfiend's Hall
Below the Yorda Tree a dark fern cave leads straight to Demon King Howard’s castle. Inside, the Dark Prince is waiting, and so is the truth about Q.
⏳ Last chances in this chapter
- No chests in the cave or the castle. Shop in Fairy Forest first: the cave entrance (5D) leads back to the Yorda Tree.
Full list across the game: Missables.
Walkthrough
- MainFern Cave: the screens run 5D → 5E → 5F/B5 → B0 → B1 → B2 → B3 → B4. It’s pitch dark: use the [Torch], as Snoop at the entrance insists (“You have to use the [Torch]!”).
- MainFrom B4 you come out at Howard Castle [Gate] (57). Inside: Great Hall (58) → Black Knight’s Hall (59, then 5B) → Lesser Palace (5C). The Marble Hall (5A) comes later. The guards make fun of Toto (“monkey”, “bear”).
- MainLesser Palace (5C, n2): Gigas. Doll arrives. Gigas says Millrose will “surely become Bamboo Dragon food” and calls the Dark Prince a “human bomb”. With 2-player mode off, Treno takes Gigas on alone while Mikey and Doll run ahead (“Toto, let’s go wild!”); with it on, the partner stays. You get a Key.
- MainMarble Hall (5A, top): the Stage Hall door takes the Key → Backstage Hall → Archfiend’s Hall.
- MainDemon King Howard and the Dark Prince. Q turns against Howard and is mortally wounded. He gives Treno a Key (“to get to Clockwork Castle”) and asks him to end it. Q dies. In a flashback the four boys of Ishu Town decide on their name: “We are [Rejoice]“.
- MainHoward leaves the Balloon Dragon behind. After the fight Mikey goes back to Fairy Forest to protect Gemini; Treno and Doll go on together to the castle’s Villa.
- TipIf you talk to the Dark Prince with Treno leading before the scene, you get a short extra exchange (“What’s with that getup?”).
Bosses
🗺️ Maps for this chapter (23)
Letters mark treasure chests (tick them off as you open them), green numbers are exits, purple n markers people and objects, orange e markers scene spots. Tap a map to open it full size.
- 1Exit to Fern Cave · screen 5E
- 2Exit to Yorda Tree
- n1Snoop: “No good, no good! You have to use the [Torch]!”
- e1Way to Yorda Tree
- 1Exit to Fern Cave · screen 5F
- 2Exit to Fern Cave · screen 5E
- 3Exit to Fern Cave · screen B5
- 4Exit to Fern Cave · screen 5D
- 1Exit to Fern Cave · screen B0
- 2Exit to Fern Cave · screen 5F
- 3Exit to Fern Cave · screen B5
- 4Exit to Fern Cave · screen 5E
- 1Exit to Fern Cave · screen 5E
- 2Exit to Fern Cave · screen 5F
- 1Exit to Fern Cave · screen B1
- 2Exit to Fern Cave · screen 5F
- 3Exit to Fern Cave · screen B3
- 1Exit to Fern Cave · screen B0
- 2Exit to Fern Cave · screen B2
- 1Exit to Fern Cave · screen B1
- 2Exit to Fern Cave · screen B2
- 3Exit to Fern Cave · screen B3
- 1Exit to Fern Cave · screen B4
- 2Exit to Fern Cave · screen B2
- 3Exit to Fern Cave · screen B0
- 1Exit to Fern Cave · screen B3
- 2Exit to Howard Castle [Gate]
- e1Way to Howard Castle [Gate]
- 1Exit to Howard Castle [Great Hall]
- e1Way to Fern Cave
- e2Way to Howard Castle [Villa]
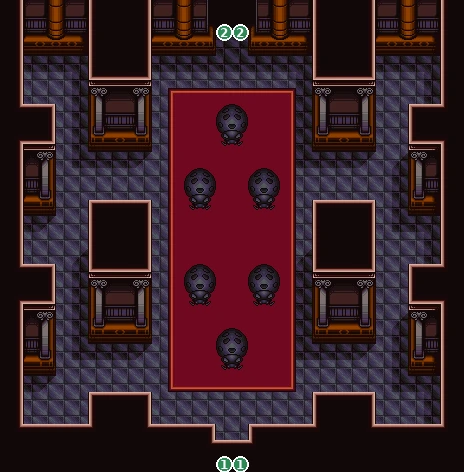
- 1Exit to Howard Castle [Gate]
- 2Exit to Black Knight's Hall · screen 59
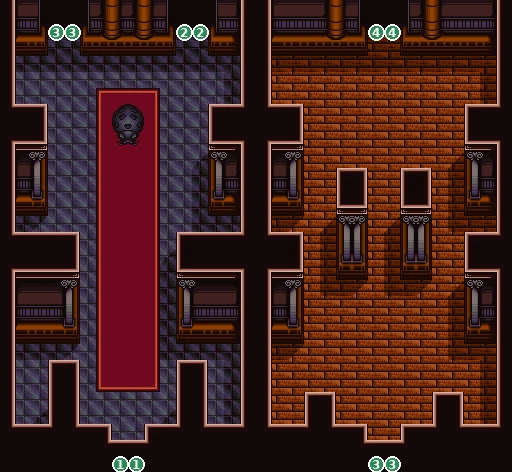
- 1Exit to Howard Castle [Great Hall]
- 2Exit to Marble Hall
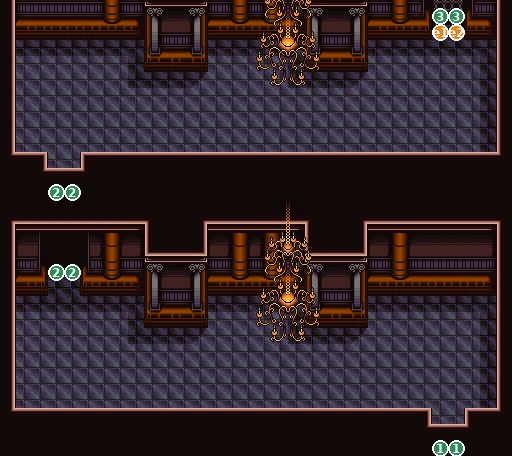
- 3Exit to Black Knight's Hall · screen 59
- 4Exit to Black Knight's Hall · screen 5B
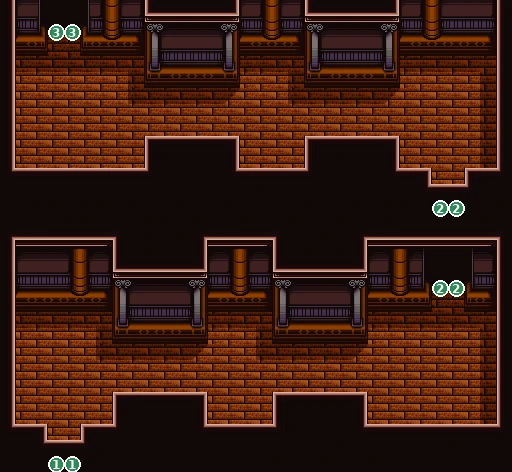
- 1Exit to Black Knight's Hall · screen 59
- 2Exit to Marble Hall
- 3Exit to Backstage Hall · screen 53
- e1–2Howard Castle [Stage Hall]: “–It's locked!–”
- 1Exit to Black Knight's Hall · screen 59
- 2Exit to Black Knight's Hall · screen 5B
- 3Exit to Howard Castle [Lesser Palace]
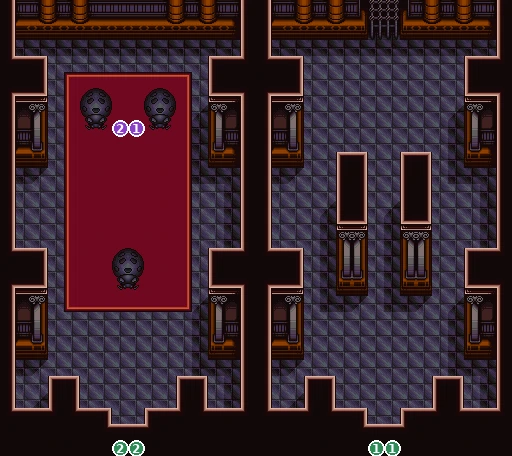
- 1Exit to Howard Castle [Gate]
- 2Exit to Black Knight's Hall · screen 5B
- n1Howard Castle Guard: “"Like moths to a flame"… Ha ha ha… that's you lot exactly!”
- n2Gigas (boss)
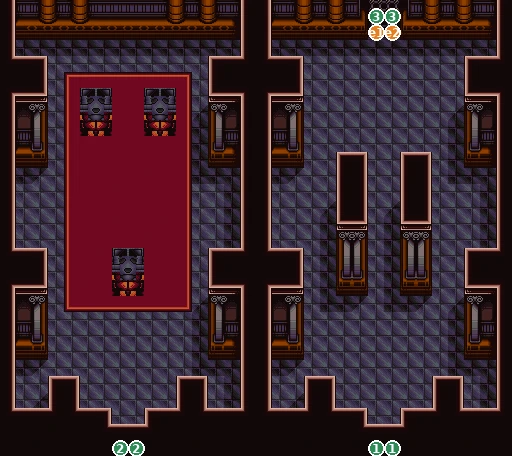
- 1Exit to Howard Castle [Gate]
- 2Exit to Black Knight's Hall · screen 5B
- 3Exit to Clockwork Castle [1F] · screen 76
- e1–2Clockwork Castle [—]: “–It's locked!–”
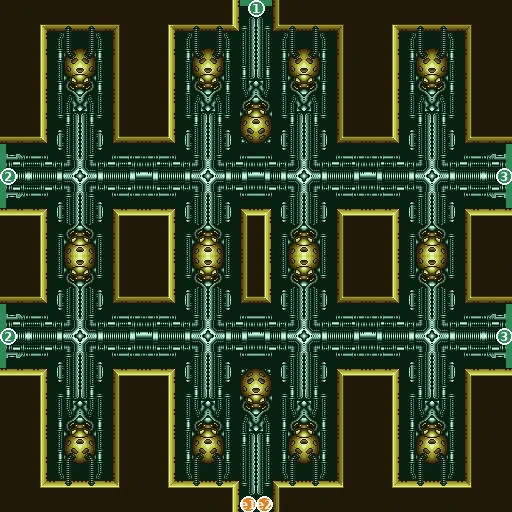
- 1Exit to Backstage Hall · screen 51
- 2Exit to Backstage Hall · screen 52
- 3Exit to Backstage Hall · screen 54
- e1–2Way to Marble Hall
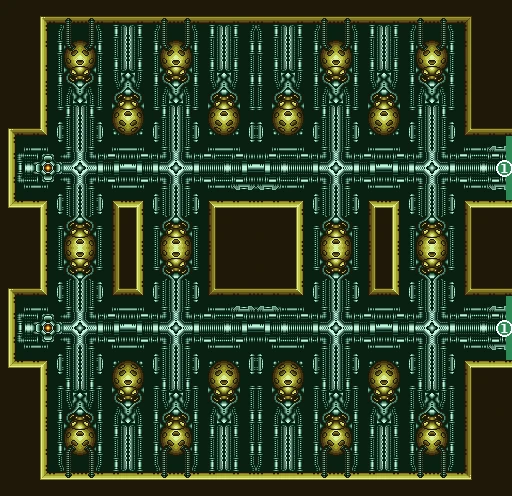
- 1Exit to Backstage Hall · screen 53
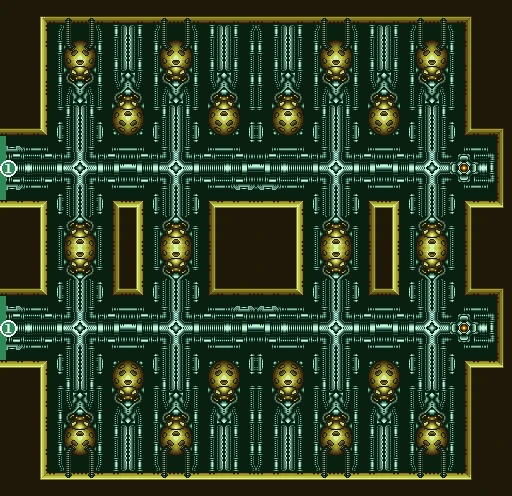
- 1Exit to Backstage Hall · screen 53
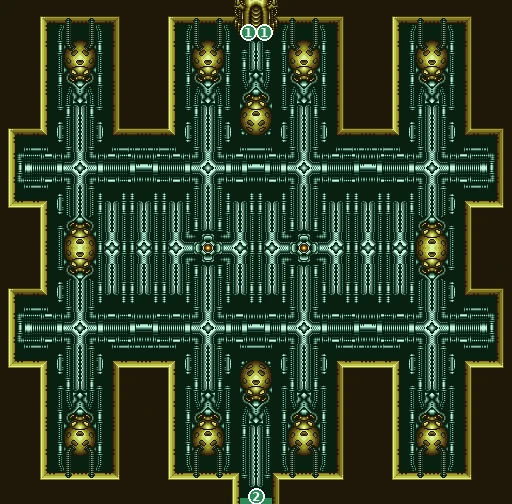
- 1Exit to Archfiend's Hall · screen 55
- 2Exit to Backstage Hall · screen 53
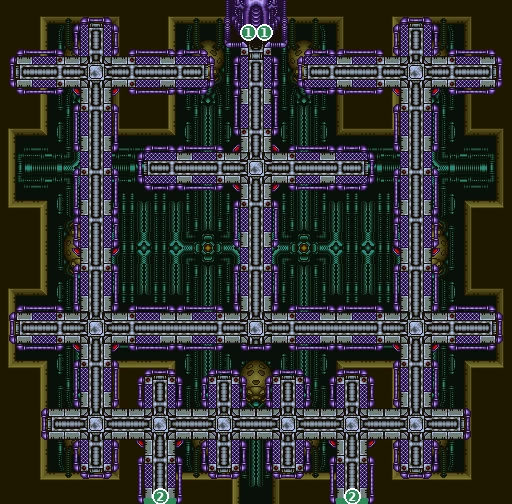
- 1Exit to Backstage Hall · screen 51
- 2Exit to Archfiend's Hall · screen 56
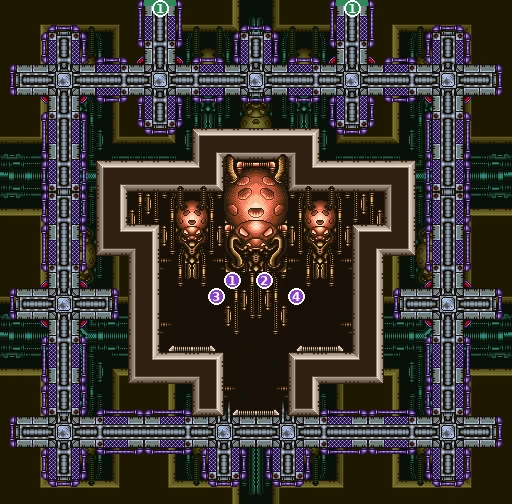
- 1Exit to Archfiend's Hall · screen 55
- n1Treno: “Mikey… Doll!!”
- n2Treno: “Q!!”
- n3Howard Castle Guard: “Ha ha ha… what's this? The monkey's along too?”
- n4Howard Castle Guard: “What, the bear's along too? Gonna put on a circus for us?”
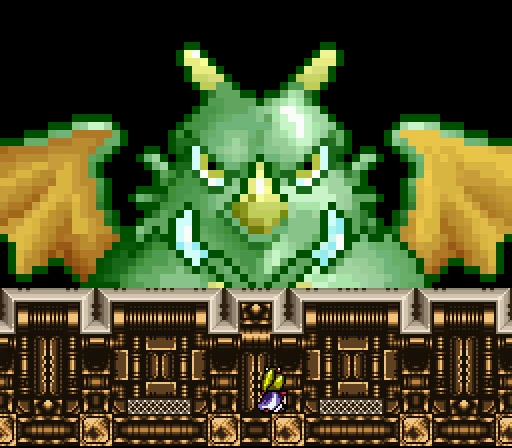
Clockwork Castle
📍 Howard Castle [Villa] · Clockwork Castle 1F–10F
Behind the Villa stands the second half of Howard’s fortress, a tower of gears. Two coloured gears turn the lock in the basement; teleporters lead to the top.
⏳ Last chances in this chapter
- Shop before 10F. When you reach the 10th floor there is no way back: the radio DJ’s hint (“At [?F] of Clockwork Castle… there’s no leaving the castle”) is about this floor. The last shops are in Fairy Forest (walk back through the Villa and Howard Castle).
- Chests: Premium Armor and Catfish Extract (B1, 78). 10F’s chests can also be opened later on the tower climb.
Full list across the game: Missables.
Walkthrough
- MainThe Villa’s “Clockwork Castle [—]” door takes Q’s Key and lets you into 1F (76).
- MainRed Gear (2F, 77): walk onto the marked spot on the left (e1–e3); a short scene plays and a guardian appears below it (800 HP). Defeat it and it drops the Red Gear. The Blue Gear works the same way on the right side (e4–e6). Tested in the emulator for the Red Gear.
- TipIf a gear guardian is defeated again after you already have its gear, it gives a Machovitan A instead (read in the script, not tested).
- MainB1 (78): put the blue and red gears into the two mechanisms; the Clockwork Door opens. Chests here: Premium Armor (A) and Catfish Extract (B).
- MainClimb 79 → 7A … 80. 8F/9F (A1, A2) use teleporters: try all four; the door at the top (25,1) leads to 10F.
- WarningBefore you step onto 10F (86): this is the point of no return. Shop and stock up first.
Bosses
🗺️ Maps for this chapter (14)
Letters mark treasure chests (tick them off as you open them), green numbers are exits, purple n markers people and objects, orange e markers scene spots. Tap a map to open it full size.
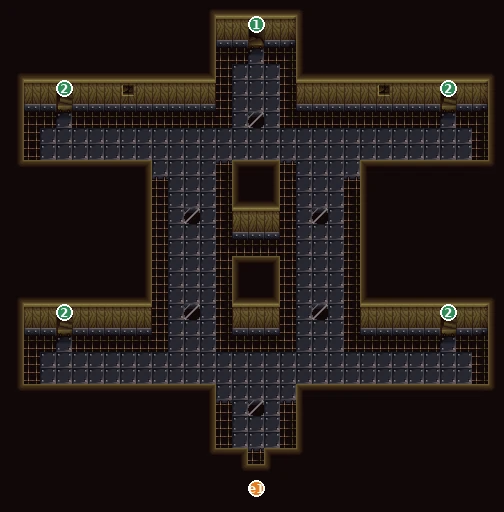
- 1Exit to Clockwork Castle [B1] · screen 78
- 2Exit to Clockwork Castle [2F] · screen 77
- e1Way to Howard Castle [Villa]
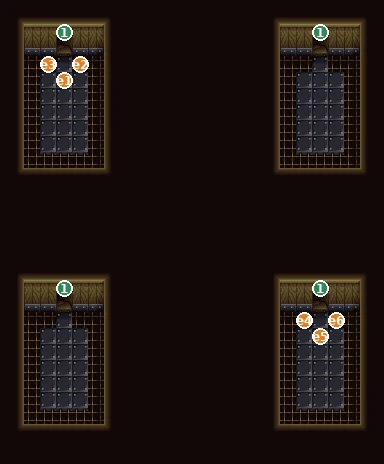
- 1Exit to Clockwork Castle [1F] · screen 76
- e1–3Red Gear spot: a short scene, then defeat the guardian below for the Red Gear
- e4–6Blue Gear spot: a short scene, then defeat the guardian for the Blue Gear
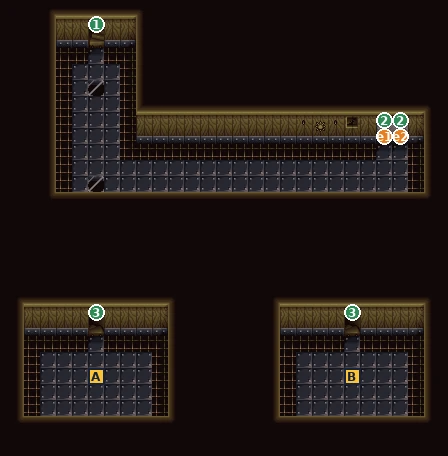
- 1Exit to Clockwork Castle [1F] · screen 76
- 2Exit to Clockwork Castle [B1] · screen 79
- 3Exit to Clockwork Castle [6F]
- e1–2Clockwork Door: “–It has a tricky mechanism!–”
- A Premium Armor
- B Catfish Extract
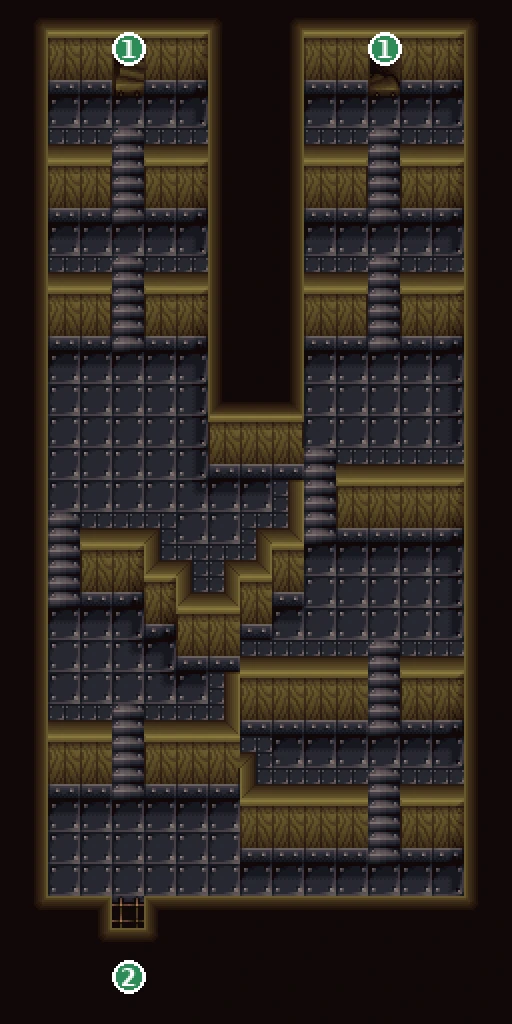
- 1Exit to Clockwork Castle [1F] · screen 7A
- 2Exit to Clockwork Castle [B1] · screen 78
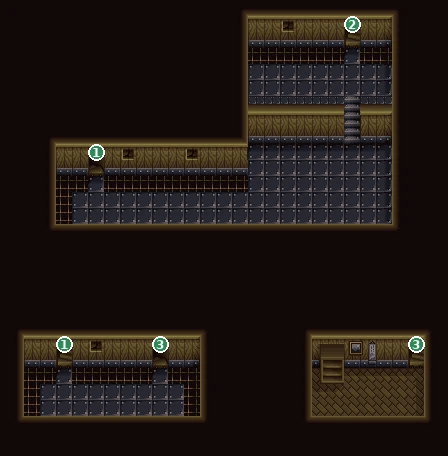
- 1Exit to Clockwork Castle [B1] · screen 79
- 2Exit to Clockwork Castle [2F] · screen 7B
- 3Exit to Clockwork Castle [1F] · screen 7A
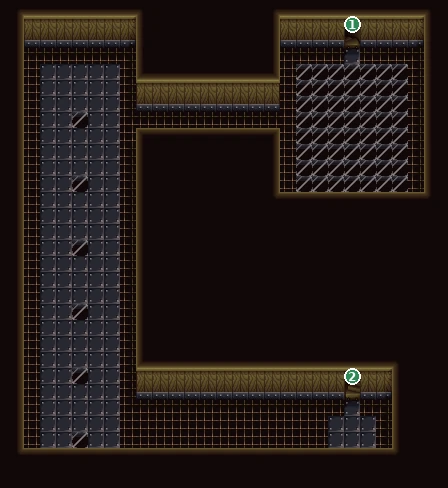
- 1Exit to Clockwork Castle [1F] · screen 7A
- 2Exit to Clockwork Castle [3F]
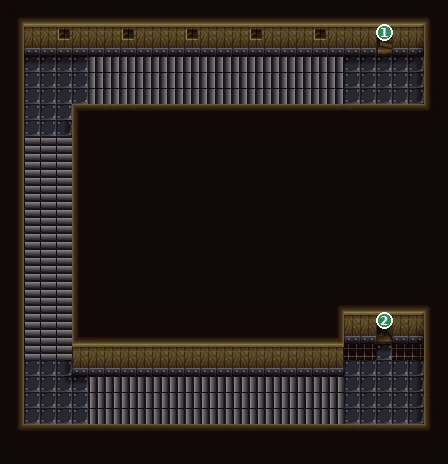
- 1Exit to Clockwork Castle [4F]
- 2Exit to Clockwork Castle [2F] · screen 7B
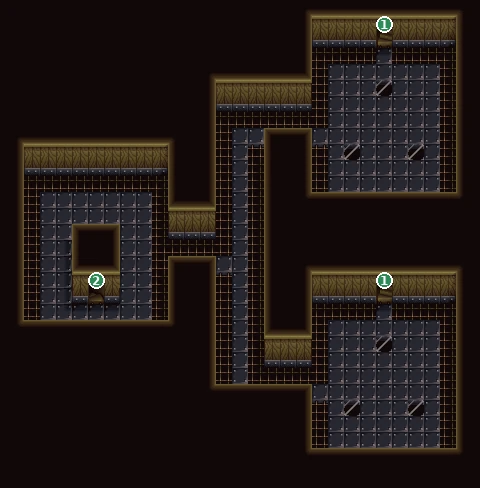
- 1Exit to Clockwork Castle [5F]
- 2Exit to Clockwork Castle [3F]
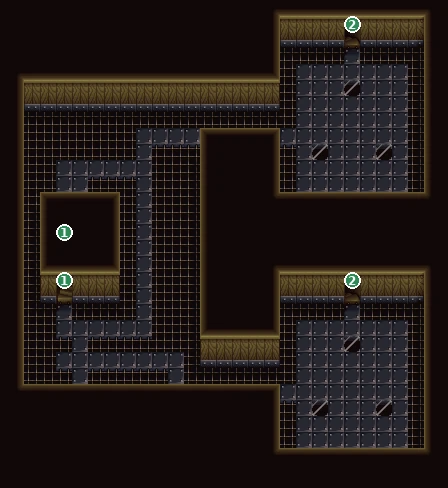
- 1Exit to Clockwork Castle [6F]
- 2Exit to Clockwork Castle [4F]
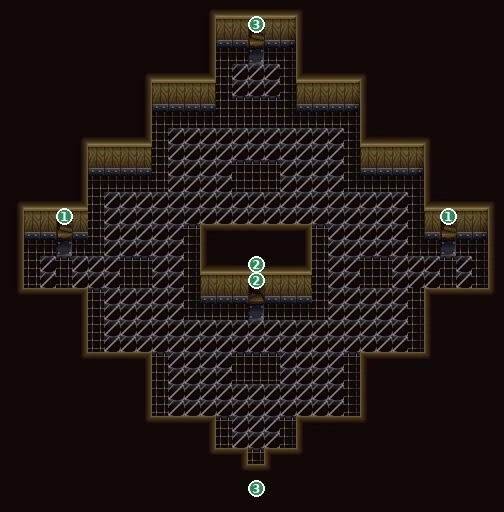
- 1Exit to Clockwork Castle [7F]
- 2Exit to Clockwork Castle [5F]
- 3Exit to Clockwork Castle [B1] · screen 78
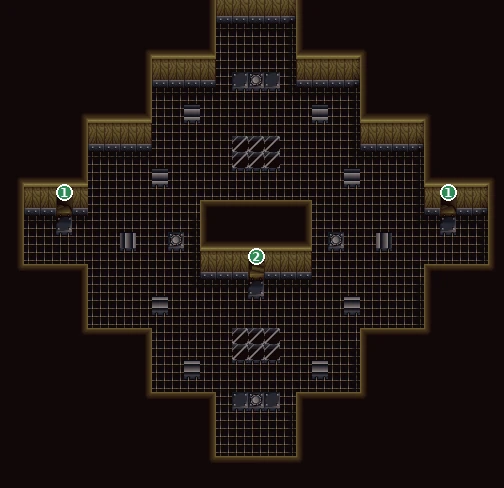
- 1Exit to Clockwork Castle [6F]
- 2Exit to Clockwork Castle [8F]
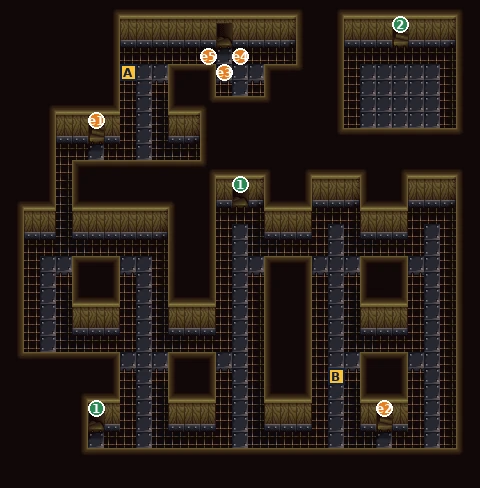
- 1Exit to Clockwork Castle [9F]
- 2Exit to Clockwork Castle 10F (= Archfiend's Tower 8F)
- e1–2Way to Clockwork Castle [9F]
- e3–5Scene spot (no text)
- A Lisa Lisa
- B Machovitan D
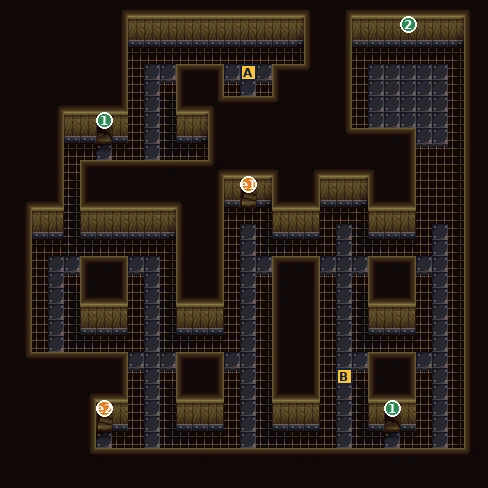
- 1Exit to Clockwork Castle [8F]
- 2Exit to Clockwork Castle 10F (= Archfiend's Tower 8F)
- e1–2Way to Clockwork Castle [8F]
- A Lisa Lisa
- B Machovitan D
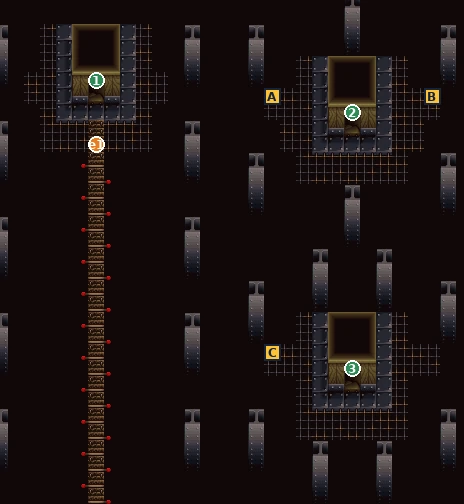
- 1Exit to Clockwork Castle [8F]
- 2Exit to Archfiend's Tower [7F]
- 3Exit to Archfiend's Tower: 9F annex
- e1Doll: “Hey, well? Did you find Demon King Howard?”
- A Lisa Lisa
- B Dynamond
- C Premium Armor
Checklist
- Where
- Clockwork Castle 2F (77), left
- How
- Step on the marked spot, then defeat the guardian.
- Reward
- Red Gear
- Opens
- Ch. 13
- Closes
- Required
- Where
- Clockwork Castle 2F (77), right
- How
- Step on the marked spot, then defeat the guardian.
- Reward
- Blue Gear
- Opens
- Ch. 13
- Closes
- Required
- Where
- Fairy Forest shops
- How
- Buy what you need before stepping onto 10F.
- Reward
- —
- Opens
- Ch. 13
- Closes
- 10F (86)
Materia or Chris, and the burning bridge
📍 Clockwork Castle 10F · The bridge · Clockwork Castle 1F (lower)
On the 10th floor Doll meets an old friend from her home town, sent by Ben Markist. Which friend it is depends on what Doll did along the way.
⏳ Last chances in this chapter
- This is where the Materia flags are checked. After this scene the result can’t change.
Full list across the game: Missables.
Walkthrough
- MainOn 10F Doll asks Treno about Howard. Then a friend from Halo-Halo Town appears: Materia if Doll earned at least one flag in each of the three groups A, B and C, otherwise Chris. See Materia or Chris.
- MainEither friend says Ben Markist brought her here. Treno is furious with Ben, who sank their town, and the pieces fall into place: Ishu Town was the downtown of Mahal, the land Doll has been searching for. Chris also says that Howard and Barbara had come back to life.
- MainHoward Castle’s guards force Gitchon to set the bridge on fire. He comes back: “Cross over me!!” The party crosses on his back as the bridge burns, and Gitchon is lost from sight.
- MainBelow waits the Bamboo Dragon (“Bang-clang… tootle-ooo…”). After the win you reach the Archfiend’s Tower.
Bosses
🗺️ Maps for this chapter (1)
Letters mark treasure chests (tick them off as you open them), green numbers are exits, purple n markers people and objects, orange e markers scene spots. Tap a map to open it full size.
Archfiend's Tower and Demon King Howard
📍 Archfiend's Tower 1F–9F
The last climb. Nine floors of tower and Howard at the top, with the power of Mahal.
⏳ Last chances in this chapter
- The tower’s 16 chests are the last in the game, and the three chests of Clockwork Castle 10F (Lisa Lisa, Dynamond, Premium Armor) can be reached again, since it is the tower’s 8F.
Full list across the game: Missables.
Walkthrough
- MainClimb: 1F (81) → 2F → 3F → 4F → door → 5F (A3; any screen edge leads to the other half, A4) → door → 6F (85) ↔ 7F (88) → 8F (= the Clockwork Castle’s 10F) → 9F annex (87) → door → 9F.
- TipChests worth the detour: Mega Fall and Mixdown Tect (3F), Barrage Shot and No-Rise Protect (4F).
- Main9F (9F, e1): with 2-player mode off, Treno asks to go on alone (“Wait for me at Yorda Tree!”); with it on, Doll insists on coming. Only the dialogue changes.
- MainDemon King Howard: “This, too, is the [Power of Mahal]!!”
Bosses
🗺️ Maps for this chapter (10)
Letters mark treasure chests (tick them off as you open them), green numbers are exits, purple n markers people and objects, orange e markers scene spots. Tap a map to open it full size.
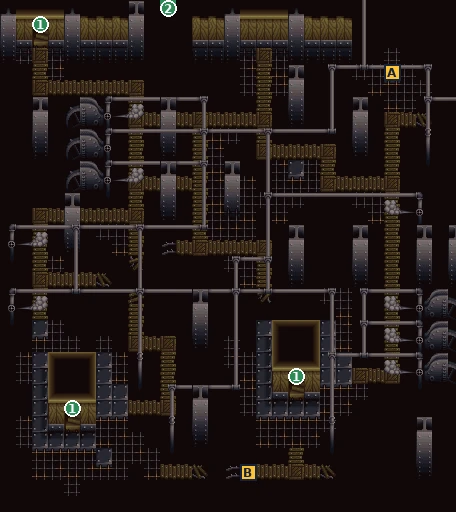
- 1Exit to Archfiend's Tower [2F]
- 2Exit to Archfiend's Tower: 9F annex
- A Machovitan D
- B Seirozon x2
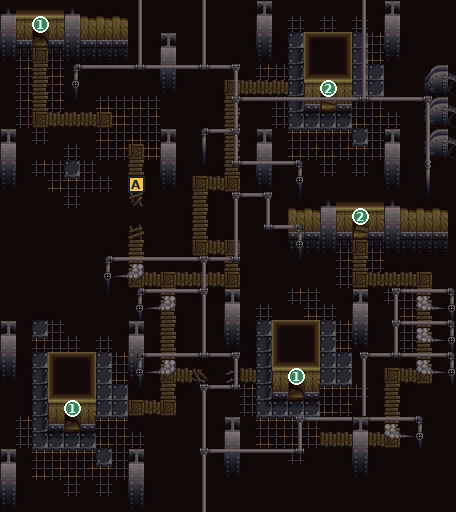
- 1Exit to Archfiend's Tower [1F]
- 2Exit to Archfiend's Tower [3F]
- A Machovitan D x2
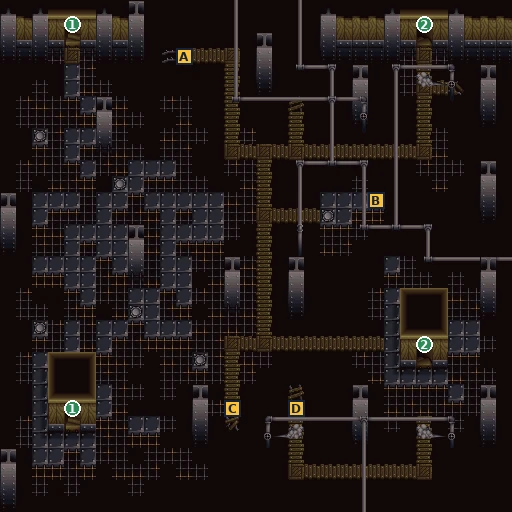
- 1Exit to Archfiend's Tower [4F]
- 2Exit to Archfiend's Tower [2F]
- A Mega Fall
- B Machovitan B x2
- C Mixdown Tect
- D Machovitan B x2
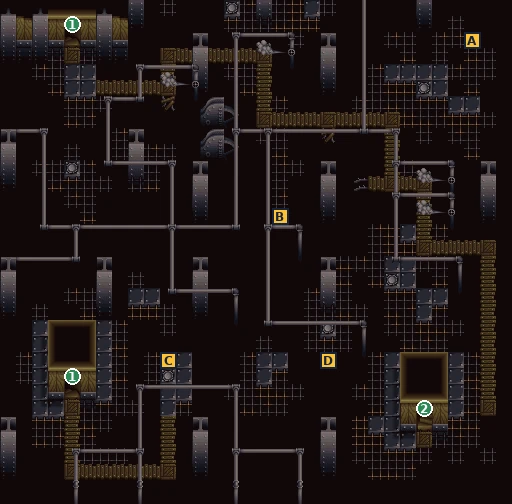
- 1Exit to Archfiend's Tower [3F]
- 2Exit to Archfiend's Tower [5F] · screen A3
- A No-Rise Protect
- B Barrage Shot
- C L-Up
- D L-Up
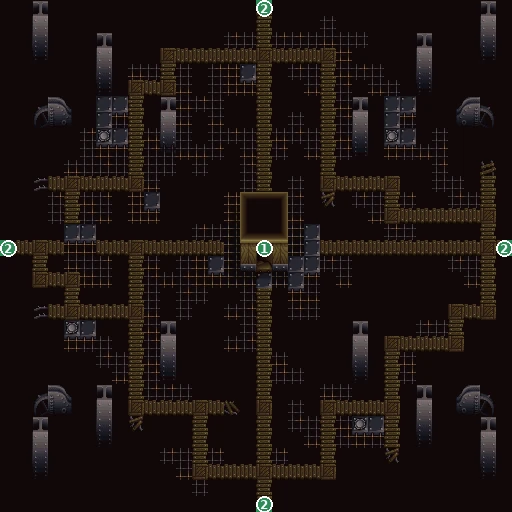
- 1Exit to Archfiend's Tower [4F]
- 2Exit to Archfiend's Tower [5F] · screen A4
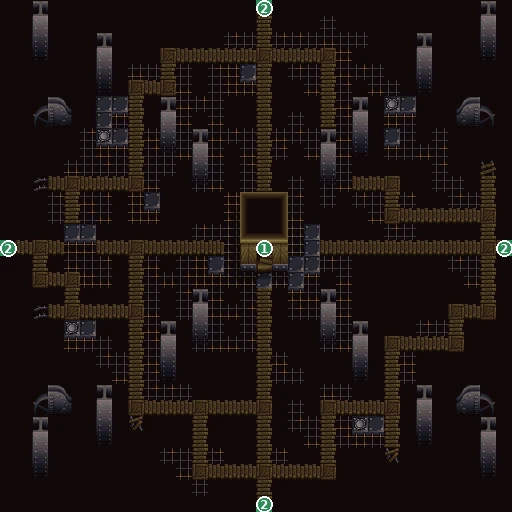
- 1Exit to Archfiend's Tower [6F]
- 2Exit to Archfiend's Tower [5F] · screen A3
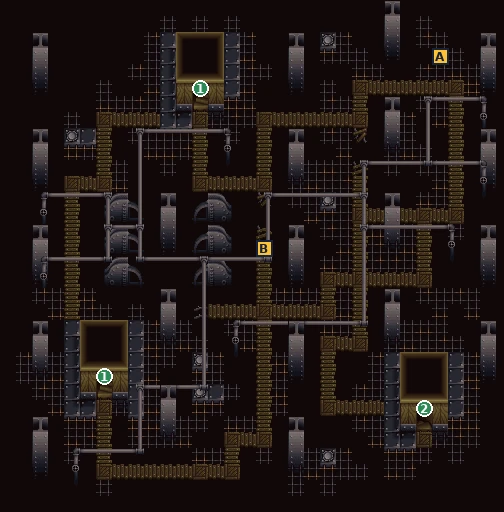
- 1Exit to Archfiend's Tower [7F]
- 2Exit to Archfiend's Tower [5F] · screen A4
- A Machovitan C
- B Machovitan C
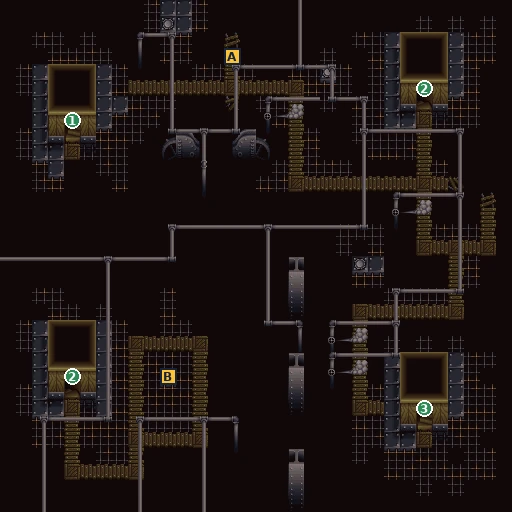
- 1Exit to Clockwork Castle 10F (= Archfiend's Tower 8F)
- 2Exit to Archfiend's Tower [6F]
- 3Exit to Archfiend's Tower: 9F annex
- A Refresh Arrow
- B Lisa Lisa
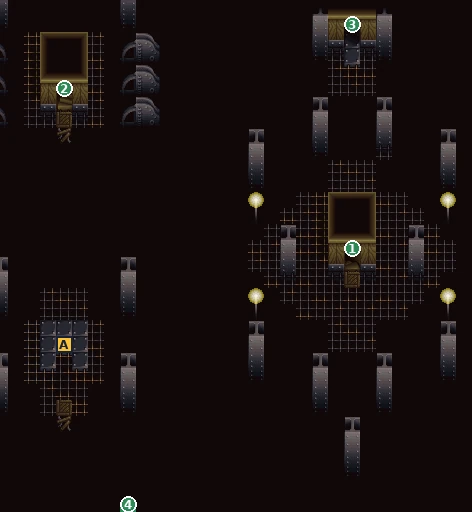
- 1Exit to Archfiend's Tower [7F]
- 2Exit to Clockwork Castle 10F (= Archfiend's Tower 8F)
- 3Exit to Archfiend's Tower 9F
- 4Exit to Archfiend's Tower [1F]
- A Lisa Lisa
- e1Treno: “Everyone… thanks for coming this far with me.”
The voyage to Mahal
📍 Yorda Tree · The Kitten, at sea · A small island
Howard is beaten. All that’s left is to find Millrose, and maybe the land everyone has been looking for.
⏳ Last chances in this chapter
- The ending: one ending, with one line that depends on Materia or Chris.
Full list across the game: Missables.
Walkthrough
- MainAt the Yorda Tree Millrose is safe. She’s looking for Mahal too, but Doll says “Mahal doesn’t exist anymore!”
- MainRock arrives with the repaired Kitten; Terra and Millrose come along, and Mikey is aboard. On deck the two magic dolls talk about becoming human.
- MainA strait of small islands and reefs, a warning from Kamiyan (“We’ve got trouble!!”), and the ship runs aground. The island turns out to be their own town, with “our friend’s grave”: the continent of Mahal didn’t all sink.
- MainThe last line belongs to Materia (“Doll, congratulations!!”) or Chris (“Doll, that’s wonderful.”). Then the ending and the staff roll with the profile cards.
🗺️ Maps for this chapter (1)
Letters mark treasure chests (tick them off as you open them), green numbers are exits, purple n markers people and objects, orange e markers scene spots. Tap a map to open it full size.
Party members
Names as shown in the menus. Who travels with you follows the story; see each chapter.
| Name | Who | With you |
|---|---|---|
| Treno | Leader of the thief gang [Rejoice]; uses Force stones with the Book of Force | The whole game |
| Q | Gang member, later the Dark Prince | Ch. 1–3; leaves to join Howard |
| Mikey | Gang member; swords and the Knife | Ch. 1–3; Ch. 6–12; aboard for the epilogue |
| Base | Gang member | Ch. 1–3 |
| Doll | The Traveler, a magic doll and a legendary hero; Fire stones | Ch. 3–6 (sick for part of Ch. 5); Ch. 7–10; Ch. 12 to the end |
| Millrose | Howard's first magic doll; sabers and rapiers | Prologue; Ch. 8–10; the epilogue |
| Tinaby | Lives in Akim's Town; he knew Doll before | Optional, Ch. 6 until the first 3F drop hole |
| Gitchon | A grasshopper guide | Ch. 7–8 |
| Toto | Treno's small companion ("-toto") | Seen from Ch. 11 |
| Materia / Chris | Doll's friend from Halo-Halo Town (one of the two) | Ch. 14 to the end |
All 136 treasure chests
Every treasure chest placed on a map, read from the game data, in the game’s own order. Ticks here and on the maps are the same. Money chests hold 1,000, 2,000, 3,000 or 5,000 Pera.
Credits & sources
Written for Game Translate from our own work on the game while translating it. The scenes, choices and hints come from the full script of our English patch; chests, exits, map objects, boss and enemy statistics, shop lists and random odds were read from the ROM; the maps were stitched from the game itself; and the key mechanics (2-player mode, Order, the difficulty setting, boss HP, the Red Gear, the debug menu, every random event) were tested in an emulator. Release facts were checked against Japanese Wikipedia. We found no English walkthrough of this game, so this one was built from the data.
Found a mistake? Leave a comment with your save point and a screenshot.