
GAME TRANSLATE · SNES GUIDE
Granhistoria
Complete Walkthrough
Every year from 805 to 825, step by step: where to go, who to talk to, every choice and every treasure chest, with a warning before anything becomes missable.
Nothing on this page matches your search. Try a shorter word, or clear the box.
Before you start
💿 The patch
Apply the English patch to a clean, unheadered Japanese ROM of Granhistoria: Genshi Sekaiki (Super Famicom, Banpresto 1995, Rev 1). The ROM must match CRC32 27EB2CF0 before patching.
🏷️ Names in this guide
Every name is written as it appears in the English patch: Tor, Lou, Tand, the World Chronicle, Za and Ge, Nel. Item names match the menus; when a scene calls an item something slightly different, both names are given (Auto Gun = “Automatic Gun”).
📜 Where the information comes from
Chest contents, map exits and history entries were read from the game’s data; scenes, choices and NPC hints come from the full script we translated. Boss HP figures are marked public guides: they come from Japanese fan guides and the official guidebook, not from our own measurements.
🗺️ The maps
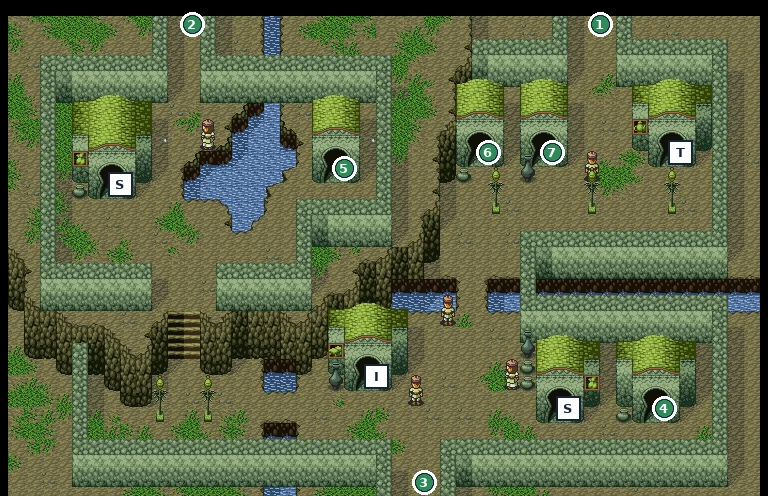
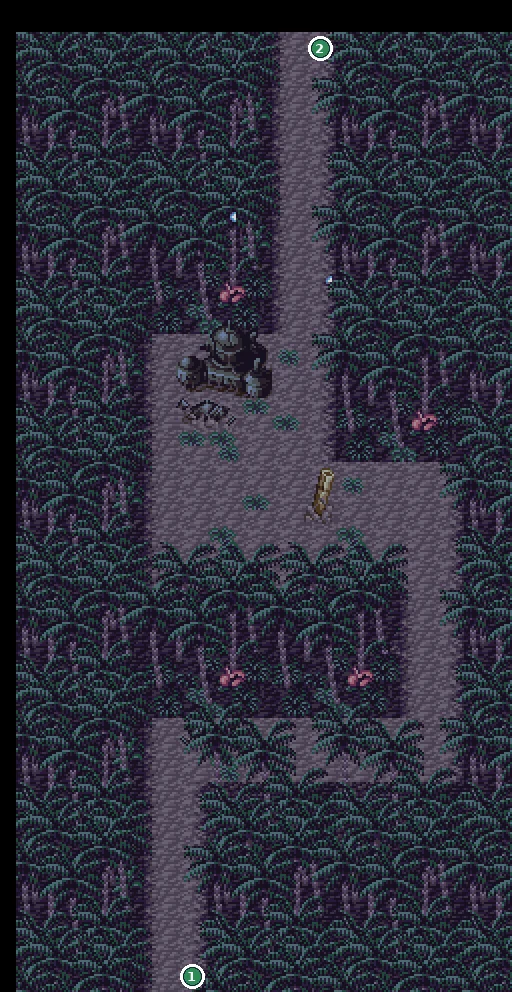
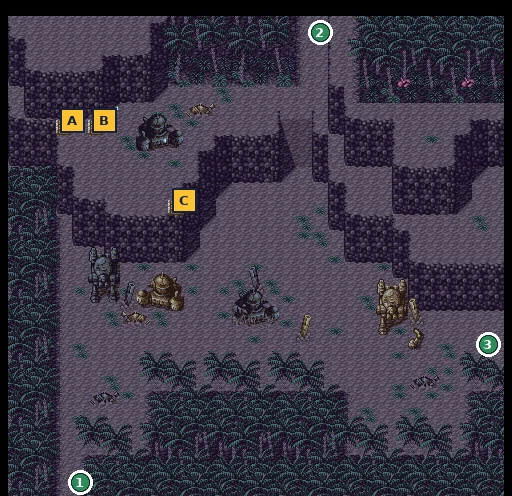
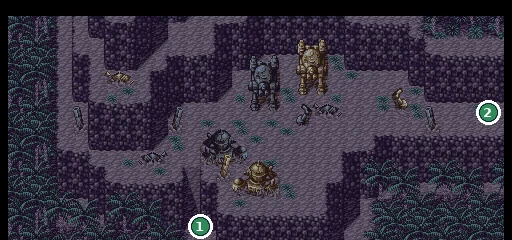
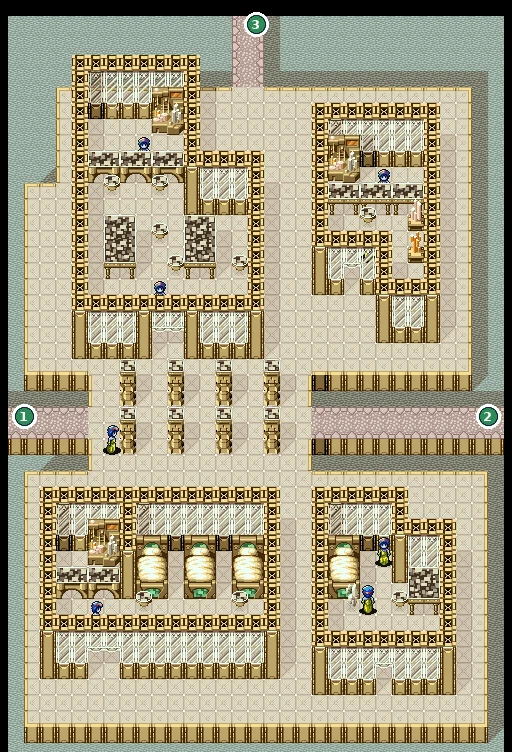
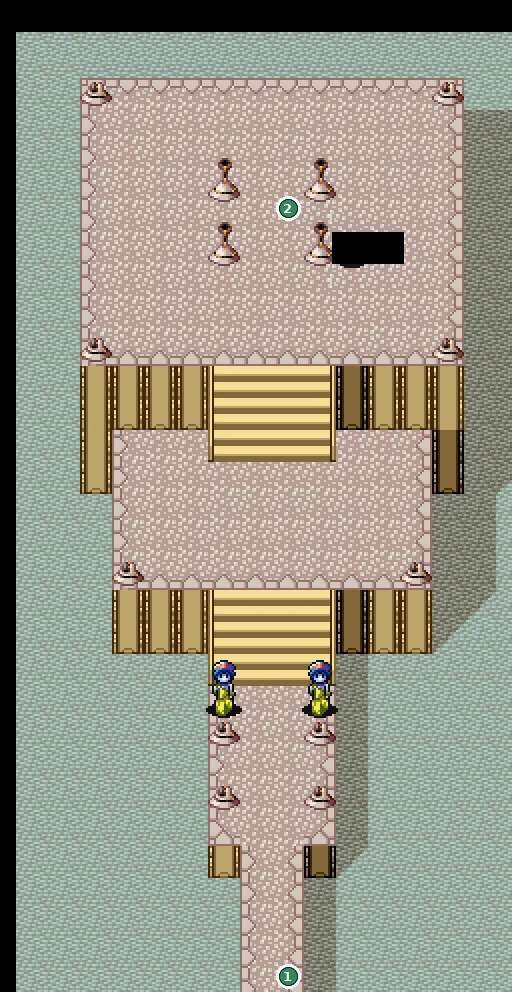
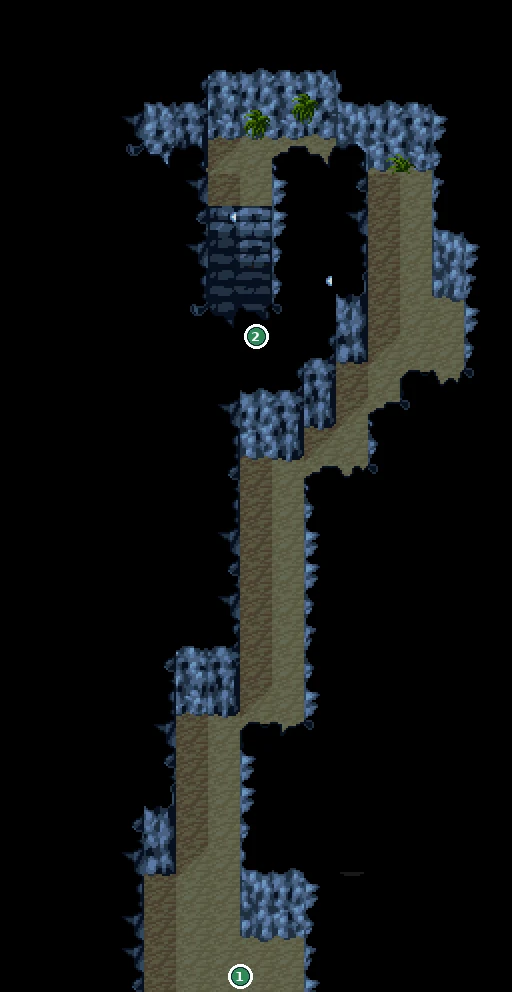
The maps were stitched from the game itself. Letters A, B, C… are treasure chests, green numbers are exits (the legend says where they lead), white squares are shops: I inn, S general store, T tavern, W weapons, G guns, P pub, R restaurant. People move around with the story, so they are described in the steps rather than pinned. In the patched game you can also press SELECT in any dungeon for an in-game map.
How the game works
- Twenty years, one body at a time. You are a soul sent into Gran by the World Chronicle and the Red Orb. The story jumps forward a year at a time from 805 to 825. Each year has a crisis that the Chronicle says will push Gran toward ruin. Change it, and the history entry changes with it.
- The World Chronicle is in the field menu under Chronicle: History lists what has happened (and what will happen) year by year; People describes everyone you have met, and those descriptions change too. See the World Chronicle Guide.
- Za and Ge are the two powers of Gran: Za, the god of the temples and angels; Ge, the gods of nature and creatures. Party members use Za skills, Ge skills or both (the skill menu has a Za / Ge choice). What your hero can use changes with the story: Ge power in 805, Za power in 817, both from 818.
- Party members come and go. Almost everyone joins only for one episode. Public guides report that members who leave take what they wear with them, and that rejoining members come back with default equipment: take gear off before someone is about to leave.
- Keep inventory slots free. Several key items (Angel Bell, Soul Orb, seeds, the large orb, Demon Vajra) and gifts (Bomb Gun, armory gifts) have a “You can’t carry any more” message.
- Stuck? Talk to Alruna in the royal capital’s Hall of the Second Coming: she tells you what to do next.
Irai: the night before the wedding
📍 Irai
A young man of Irai named Tor is killed by the Heretic Bandits the night before he marries Lou. The World Chronicle and the Red Orb bring you, a soul from outside this world, into Tor’s body. You have twenty years, until 825, to rewrite the history of the Gran continent before it ends in ruin.
⏳ Last chances in this chapter
- Nothing in Irai can be lost yet. Explore freely: the village returns later in the story.
Full list across the game: Missables.
Walkthrough
- MainThe opening plays at the Irai graveyard: Tor and Lou find a crest of Ge dropped by the bandits, the bandits come back for it and Tor is struck down. The World Chronicle explains your task and sends you into Tor’s body. Before that, the Chronicle tells you to send Lou home first, and the Time-Crossing Mizuchi is named as your escort. Then enter your name. Remember it: much later the game uses this first name for someone else, and you will not be allowed to pick it again.
- MainTalk to Lou in the village. If you ask, she says the priest’s house is to the right of the temple (marker 1 on the Irai map).
- MainVisit the Priest of Za’s House (marker 1) and ask about tomorrow’s wedding. He tells you not to worry and to go home. The temple itself (marker 3) is closed until the ceremony.
- TipIrai has an Inn (I) and a General Store (S: one counter sells weapons, the other items). You start at level 1 with 100 Nel and one Earth Pill (public guides). Lou’s House (2), the Tavern (T) and the houses have only small talk now.
- MainGo home to Tor’s House (marker 5, south-east) and sleep. On the wedding morning everyone sends you to the priest. In the Altar Room of Za the Heretic Bandits (Gainaster and Tand) storm the ceremony looking for a relic called the False Star. Tand takes Lou hostage and you are killed.
- MainThe World Chronicle tells you that you chose wrongly and turns time back once, to the night before. This time you won’t be killed, but the attack on Irai still has to be stopped. The bandits’ hideout lies beyond the Bandit Forest, and tonight they are all out scouting.
- MainLeave Irai by the south exit (marker 7) to the world map and walk to the Bandit Forest.
Bosses
🗺️ Maps for this chapter (1)
Letters mark treasure chests (tick them off as you open them), green numbers are exits, white squares are shops. Tap a map to open it full size.
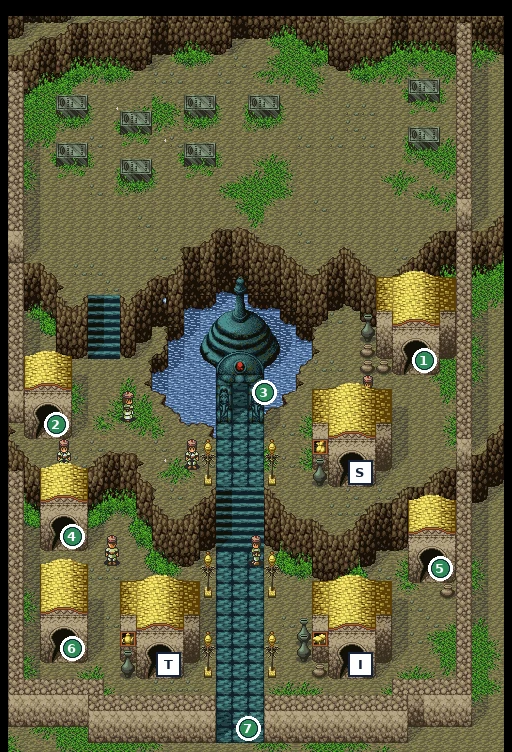
- 1Exit to Priest of Za’s House
- 2Exit to Lou’s House
- 3Exit to Temple of Za 1F
- SGeneral Store
- TTavern
- 4Exit to House
- 5Exit to Tor’s House
- 6Exit to House
- IInn
- 7Exit to World map
Bandit Forest & the Bandit Hideout
📍 Bandit Forest · Bandit Hideout
To stop the raid on Irai you meet the bandits on their way through the forest. Their chief, Gainaster, is curious about you, and you end up joining the Heretic Bandits from the inside.
⏳ Last chances in this chapter
- The four chests of the Bandit Forest ambush area (Earth Pill, 20, 40 and 50 Nel) are easy to grab now; we could not confirm whether the forest stays open after 805, so take them on this visit.
- Leave at least one inventory slot free before the armory: if your bag is full the bandit can’t hand over the gifts.
Full list across the game: Missables.
Walkthrough
- MainWalk east through the Bandit Forest. In the narrow area with four chests (Bandit Forest, map 25) you run into bandits heading for Irai: fight them (Bandit ×3, public guides).
- SideChests in that area: Earth Pill, 20 Nel, 40 Nel, 50 Nel (A–D on the map).
- MainTand freezes you with the power of Ge, but Gainaster spares you out of curiosity and Tand makes a prophecy: you will bring both prosperity and chaos. The attack on Irai is called off. You decide to join the bandits and follow them to the hideout.
- MainIn the Bandit Hideout, Gainaster asks your name and offers to take you in. Your one condition: never attack Irai. As a man of Irai you believe in Za, and as you are you can’t become one of them, so you go through the brotherhood ritual at the Statue of Ge (top of the hideout). You come through it in one go and gain the power of Ge.
- WarningThe power of Ge has a cost later: in 806 you can’t follow Mijua into the palace Temple of Za. Rizara replaces it with Za’s power in 817.
- MainGainaster gives you orders one at a time. Go back to his room (Gainaster’s Room) after each one:
- MainArmory: a bandit hands over the boss’s gifts: Auto Gun (“Automatic Gun”), Leather (“Leather Charm”) and an Earth Pill. The armory also works as a shop afterwards.
- MainDining Hall: the cook wants horare flowers, the yellow flowers they use for seasoning, from the spring in the forest. If you already picked them on the way in, he takes them at once.
- MainMessenger duty at the hideout entrance: you bring Gainaster news twice (a prince has been born; the Rubel gold convoy is late). Then he sends you to the Hideout Barracks to sleep. There is no bed for a new recruit: you sleep on the floor.
- MainNext morning the scouts report that the convoy is near. Gainaster’s plan: ambush the “Fengshui Gold” shipment from the Rubel gold mine at the western mountain summit. The convoy travels by elephant cart; the World Chronicle files the event as Railway Raid.
- TipBandit chatter in the side room explains the Ge ritual: men who fail it go mad or turn into monsters. Tand’s Room has only a hostile Tand (“you reek of Za”).
Bosses
🗺️ Maps for this chapter (4)
Letters mark treasure chests (tick them off as you open them), green numbers are exits, white squares are shops. Tap a map to open it full size.
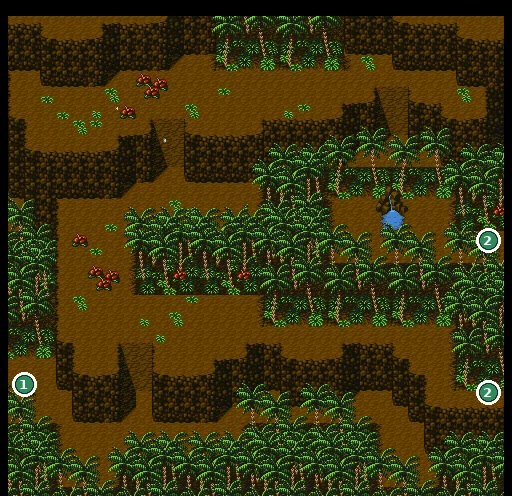
- 1Exit to Bandit Forest: area 3 (the ambush)
- 2Exit to Bandit Forest: area 2
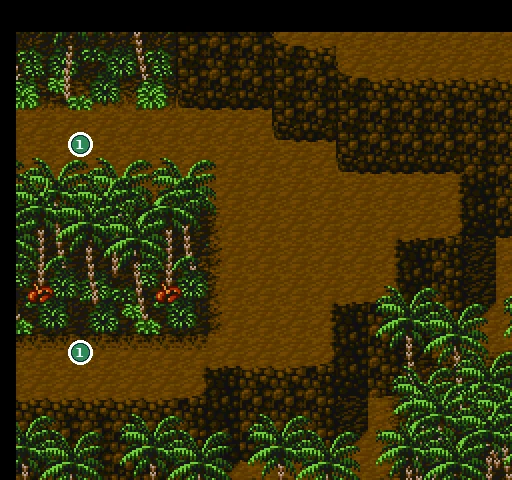
- 1Exit to Bandit Forest: area 1
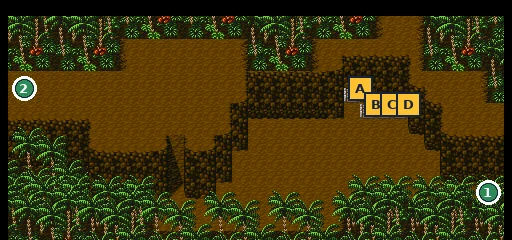
- 1Exit to Bandit Forest: area 1
- 2Exit to Bandit Hideout (805)
- A Earth Pill
- B 20 Nel
- C 40 Nel
- D 50 Nel
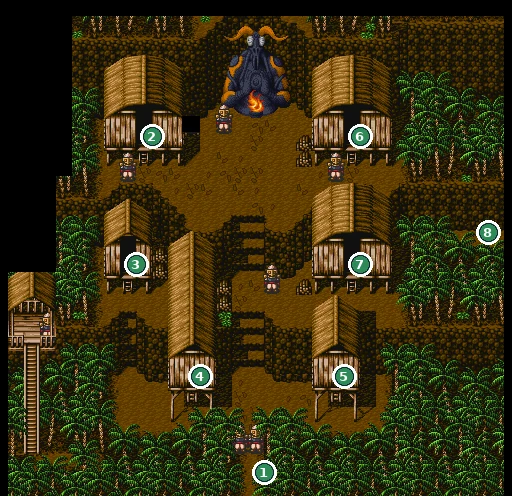
- 1Exit to World map
- 2Exit to Gainaster’s Room
- 3Exit to Tand’s Room
- 4Exit to Barracks Entrance
- 5Exit to Side Room Entrance
- 6Exit to Bandit Armory
- 7Exit to Dining Hall
- 8Exit to Bandit Forest: area 3 (the ambush)
Checklist
- Where
- Bandit Hideout: Bandit Armory
- How
- Talk to the armory bandit when Gainaster sends you there. Keep a slot free.
- Reward
- Auto Gun, Leather, Earth Pill
- Opens
- Ch. 2
- Closes
- Story; given once
- Where
- Bandit Hideout: Dining Hall; flowers at the forest spring
- How
- Pick the yellow horare flowers at the spring in the Bandit Forest and give them to the cook.
- Reward
- Story progress
- Opens
- Ch. 2
- Closes
- Story (required)
The Mountain Path: the Fengshui Gold ambush
📍 Mountain Path · ambush site
The bandits wait for the gold convoy from Rubel on the mountain path west of the hideout. The convoy is guarded by Mikene and the royal capital’s knights, with an angel of Za. Here you choose a side for the first time.
⏳ Last chances in this chapter
- The three chests on the Mountain Path (Earth Pill, Armlet, 100 Nel) are on the way to the ambush; open them before the fight starts.
- Your side in the raid decides who joins you for a short while and which bosses you fight. Both routes lead to the royal capital.
Full list across the game: Missables.
Walkthrough
- MainClimb the Mountain Path. Chests: Earth Pill, and a pair holding an Armlet and 100 Nel (A–C).
- MainAt the ambush site Gainaster, Tand and the bandits face Mikene, his Royal Knights and the angel Sleep Drive. The World Chronicle states the rule: attack the knights and you are a bandit; fight the bandits and you side with the knights.
- MainRoyal Army route (side with the knights): you fight the bandits (Bandit ×3), then Gainaster and Tand. Mikene fights with you as a temporary member. Gainaster and Tand flee, and Gainaster swears you’ll never escape the curse of Ge. Mikene asks your name; you warn him about danger to the newborn prince and even say the prince’s name, Kunon, which hasn’t been announced yet. He invites you to the capital.
- MainBandit route (stay with Gainaster): you fight the knights and Sleep Drive, with Gainaster as a temporary member. Gainaster takes Mikene prisoner and reveals the real plan: attack the capital during the prince’s birth celebrations and destroy the Temple of Za. Shout your warning about Prince Kunon to Mikene anyway. The Chronicle points you north-east to the capital.
- TipYour warning about Kunon is what earns Mikene’s trust later on either route.
Bosses
🗺️ Maps for this chapter (2)
Letters mark treasure chests (tick them off as you open them), green numbers are exits, white squares are shops. Tap a map to open it full size.
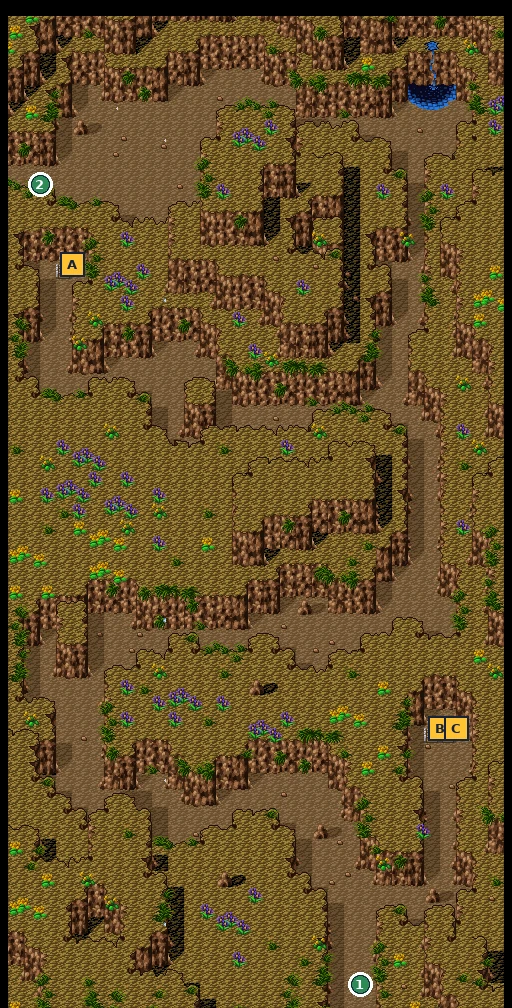
- 1Exit to World map
- 2Exit to Mountain (below the Mountain of Ge): area 1
- A Earth Pill
- B Armlet
- C 100 Nel
Checklist
- Where
- Mountain Path ambush site
- How
- Fight the bandits (Royal Army route) or the knights (bandit route).
- Reward
- Mikene or Gainaster joins for the fight; different bosses
- Opens
- Ch. 3
- Closes
- Decided at the ambush
The Royal Capital of Asashina
📍 Royal Capital · Palace · Prison
The royal capital celebrates the birth of Prince Kunon, but the High Priest who must bless the baby has vanished. A pickpocket girl, a prison cell and an angry vice-captain stand between you and an audience with the king.
⏳ Last chances in this chapter
- Forgive Saman in the prison. It’s the only way to get her gift later (a gun, at the capital inn).
- Before you leave for Sanzakal, look around the palace: the Hall of the Second Coming (Alruna), the museum and the detached palace only have lore now, but Alruna becomes important.
Full list across the game: Missables.
Walkthrough
- MainRoyal Army route: at the Royal Capital Entrance Mikene shows you around and asks you to visit the palace. You get the option to warn him about the bandits’ attack on the capital. The Chronicle notes that the chronology of the capital battle is unchanged either way.
- MainIn the Tavern: The Angel’s Rest (T on the capital map) a girl named Saman picks a guest’s wallet. Later, strange men chase her and she asks for help. Yes or No, you end up blamed as her accomplice and thrown into the Prison.
- MainIn the prison, Mikene asks if you object to letting Saman go now that the stolen goods are back. Agree to let her go. She walks free (“Lucky!”) and remembers it.
- MainIn the palace Antechamber the vice-captain Zenobia blocks you. Without Mikene she asks if you want to fight (No is fine; she calls you a coward). With Mikene, he reminds her that you foretold the prince’s name, and she lets you pass, though she won’t forget the grudge of her men. The optional fight is Royal Knights ×2 (about 79–80 HP each, public guides).
- MainStraight ahead is the Government Hall: King Asashinea VI, the chancellor Kaiser (also a priest of Za) and the official Eldas. The prince is too weak to travel and High Priest Mijua is missing together with Deputy Priest Rody. You say you know where he is. Mikene will go with you.
- MainMikene tells you to rest in the Barracks (right of the antechamber): use the bed farthest to the right. He comes for you in the morning.
- TipPalace layout from the antechamber: straight on = Government Hall; right = barracks; left across the courtyard = Temple of Za and the detached palace (Queen Remnu and Kunon). Paradoc’s Room (the king’s younger brother) has a scene with Zenobia, who is smitten with him.
- SideHall of the Second Coming (marker 6, just below the Government Hall in town): the angel Alruna. From now on she can show you what to do next whenever you are lost. She also restores the party in the final year.
- SideThe Royal Capital Museum (marker 7) has lore about angels: Light Tripod, the Twin Angels, and a miniature of Sleep Drive’s “father”. The War Vault has Hepainas, who looks after the capital’s angels.
- MainBandit route: the bandits’ attack on the capital fails. In prison the knights call you a Heretic Bandit, then a fellow bandit breaks in on the boss’s orders; Saman asks to escape with you (say Yes). Afterwards Mikene treats you as a prophet because of your warnings, and every knight in town sends you to the Government Hall.
- MainRest in the barracks to start the new year, 806. The World Chronicle now shows that Mikene Bach dies on this journey. Warn him: he goes anyway, on the king’s orders.
Bosses
🗺️ Maps for this chapter (4)
Letters mark treasure chests (tick them off as you open them), green numbers are exits, white squares are shops. Tap a map to open it full size.
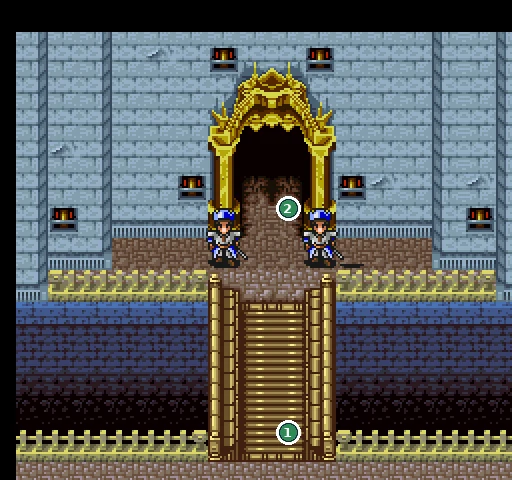
- 1Exit to World map
- 2Exit to Royal Capital
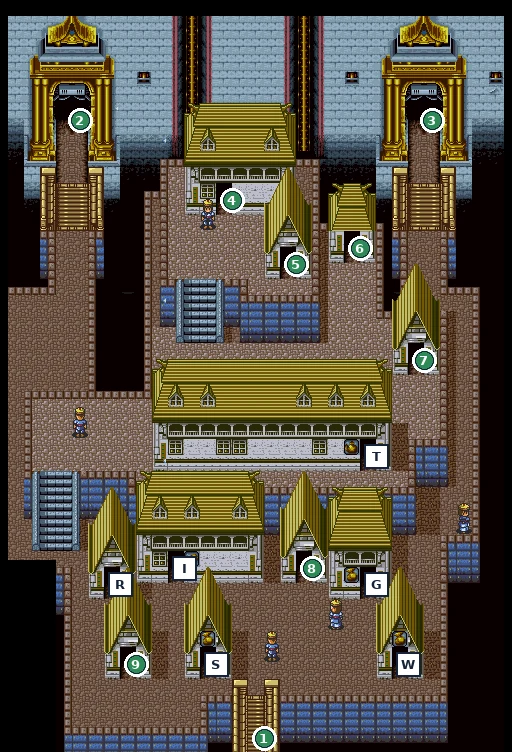
- 1Exit to Royal Capital Entrance
- 2Exit to Antechamber
- 3Exit to Antechamber
- 4Exit to Tavern Owner’s House
- 5Exit to House
- 6Exit to Hall of the Second Coming
- 7Exit to Royal Capital Museum
- TTavern: The Angel’s Rest
- RRestaurant
- IInn
- 8Exit to Schwank’s House
- GGun Shop
- 9Exit to House
- SItem Shop
- WWeapon Shop
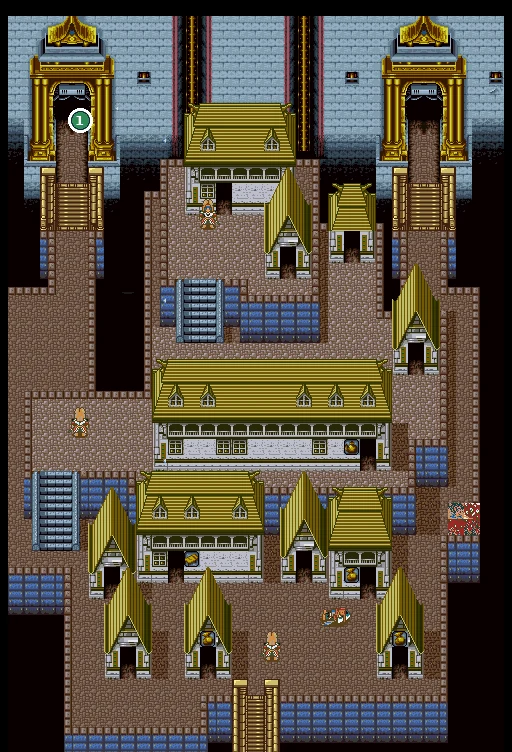
- 1Exit to Antechamber
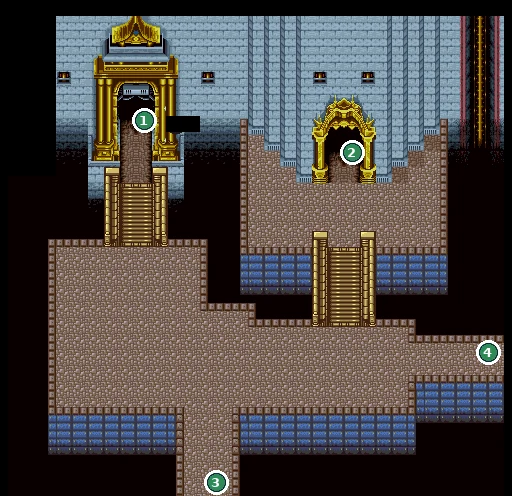
- 1Exit to Altar Room of Za
- 2Exit to Detached Palace
- 3Exit to Antechamber
- 4Exit to Prison
Checklist
- Where
- Royal Capital: Prison
- How
- When Mikene asks whether you object to releasing Saman, agree. On the bandit route, take her with you when you escape.
- Reward
- Later: Bomb Gun (“Blast Gun”) from Saman at the capital inn (Ch. 5)
- Opens
- Ch. 4
- Closes
- Decided in the prison
- Where
- Royal Capital: Hall of the Second Coming
- How
- Talk to her and answer Yes to “Shall I show you what you must do?”
- Reward
- A hint for your current goal, any time
- Opens
- Ch. 4
- Closes
- Never
Bekano & Sanzakal: rescuing the High Priest
📍 Bekano · Sanzakal Tunnel · Old Sanzakal Mine
The High Priest is held in the old Sanzakal mines south of the capital. Prince Kunon will die without Za’s blessing, so once Mijua is safe the clock is running.
⏳ Last chances in this chapter
- Kunon’s deadline: after rescuing Mijua, walk straight back to the capital, with no detours or extra fights. The official guidebook puts the limit at about 150 steps; Alruna’s hint says only “take no detours”. If you are too late, Kunon dies later (his People entry changes) and he can never join you.
- Take Rody’s equipment off before the Old Sanzakal Mine: he leaves the party for good there and anything he wears is lost (public guides).
- Eight chests in the Sanzakal area (see the maps). Grab them on the way in, before Mijua is rescued, so the trip back is short.
Full list across the game: Missables.
Walkthrough
- MainGo south from the capital to Bekano, the mining village at the foot of the Old Sanzakal Mine. A man in black, Kain, warns you to leave Sanzakal alone and not to defy history.
- MainAt the Bekano inn (I): a priest found collapsed at the village entrance is Rody, the deputy priest. He says the High Priest is held in Sanzakal and begs to come; Mikene agrees and Rody joins. A girl, Faru, begs you to save her brother, who is “possessed by Ge” and kidnapped the High Priest. Rody brushes her off.
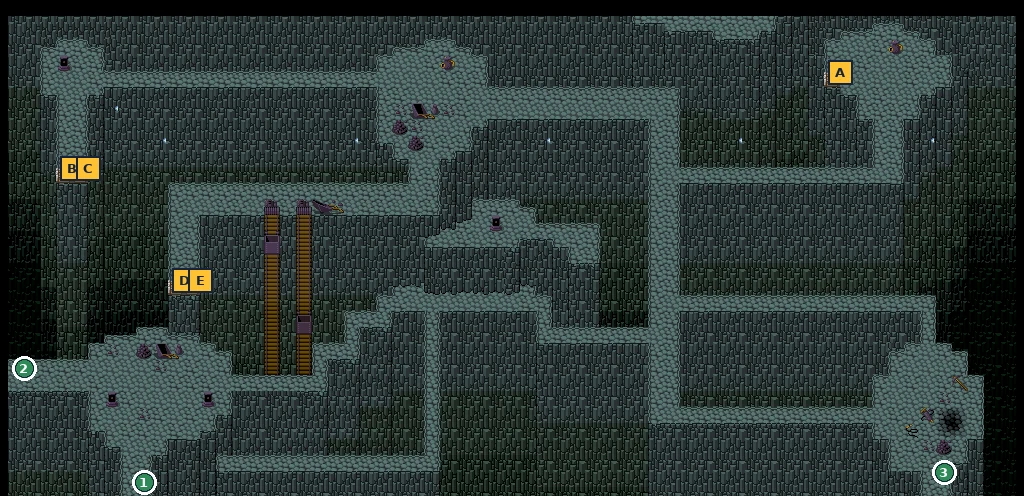
- MainEnter the Sanzakal Tunnel. Chests: Boots, 180 Nel, 120 Nel, Earth Pill and 150 Nel in the far north-east (A–E). Gainaster turns up in the tunnel, says he only “cooperated” and pulls out: the real enemy is deeper in.
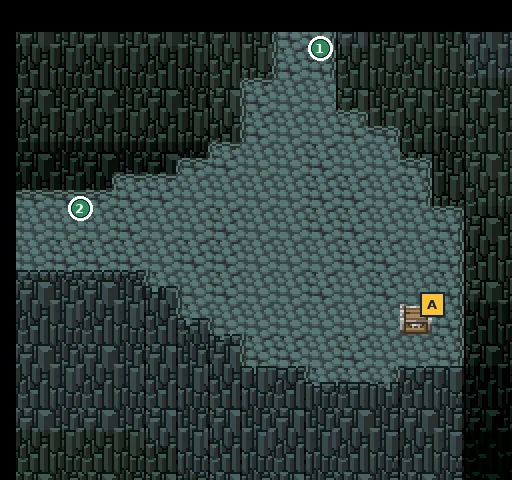
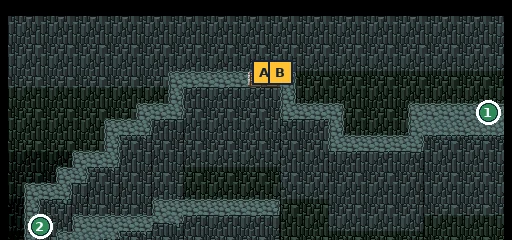
- MainOld Sanzakal Mine Entrance: chest with 150 Nel. Secret Passage: Earth Pill and 200 Nel.
- MainDeep in the Old Sanzakal Mine Rody betrays you. Faru’s brother reveals himself as Asashinea Ibusuki, heir of the old royal house, and claims the present king is a usurper (Denikes) who killed Asashinea V. Beat the Statues of Ge, then Rody and his knights. Rody dies, Ibusuki escapes and Mijua is safe. The Chronicle rewrites Mikene’s death in Sanzakal as Rody’s.
- WarningNow go straight back to the capital, without detours. See the deadline above.
- MainIn the Palace Courtyard Mijua hurries into the temple, but you can’t follow because you carry the power of Ge: you wait outside. In the Altar Room of Za, Mijua blesses Kunon and Za’s voice “registers” the child: Za behaves more like a machine than a god. Kunon is saved.
- MainMikene makes you a knight of Asashina anyway. Then a man in black, Kain, appears: the Chronicle has no record of him, he notices the Chronicle on your shoulder and knows you aren’t from this world, and he bars you from the temple as a believer in Ge.
- SideIf you let Saman go in 805, sleep at the capital inn (I): Saman visits and gives you the Bomb Gun (the “Blast Gun”) as thanks. Keep a slot free.
- MainThe king now sends you to inspect the Eastern Autonomous Region, beyond the checkpoint south-east of the capital. He also mentions that the new capital is finally complete.
Bosses
🗺️ Maps for this chapter (5)
Letters mark treasure chests (tick them off as you open them), green numbers are exits, white squares are shops. Tap a map to open it full size.
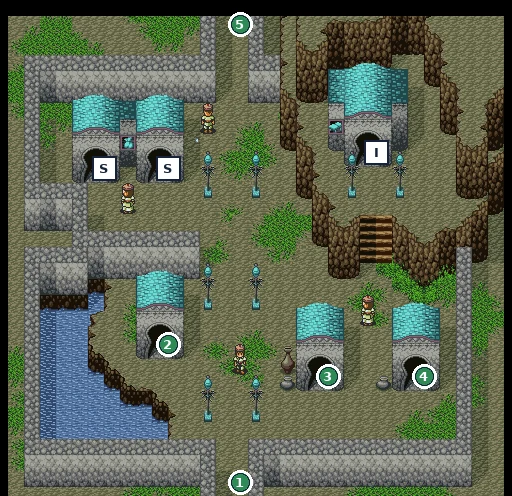
- 1Exit to World map
- 2Exit to House
- 3Exit to House
- 4Exit to House
- SGeneral Store
- SGeneral Store
- 5Exit to Sanzakal Tunnel
- IInn
- 1Exit to Old Sanzakal Mine Entrance
- 2Exit to Secret Passage (Sanzakal)
- 3Exit to Bekano
- A 150 Nel
- B Boots
- C 180 Nel
- D 120 Nel
- E Earth Pill
- 1Exit to Sanzakal Tunnel
- 2Exit to Old Sanzakal Mine
- A 150 Nel
- 1Exit to Sanzakal Tunnel
- 2Exit to Old Sanzakal Mine
- A Earth Pill
- B 200 Nel
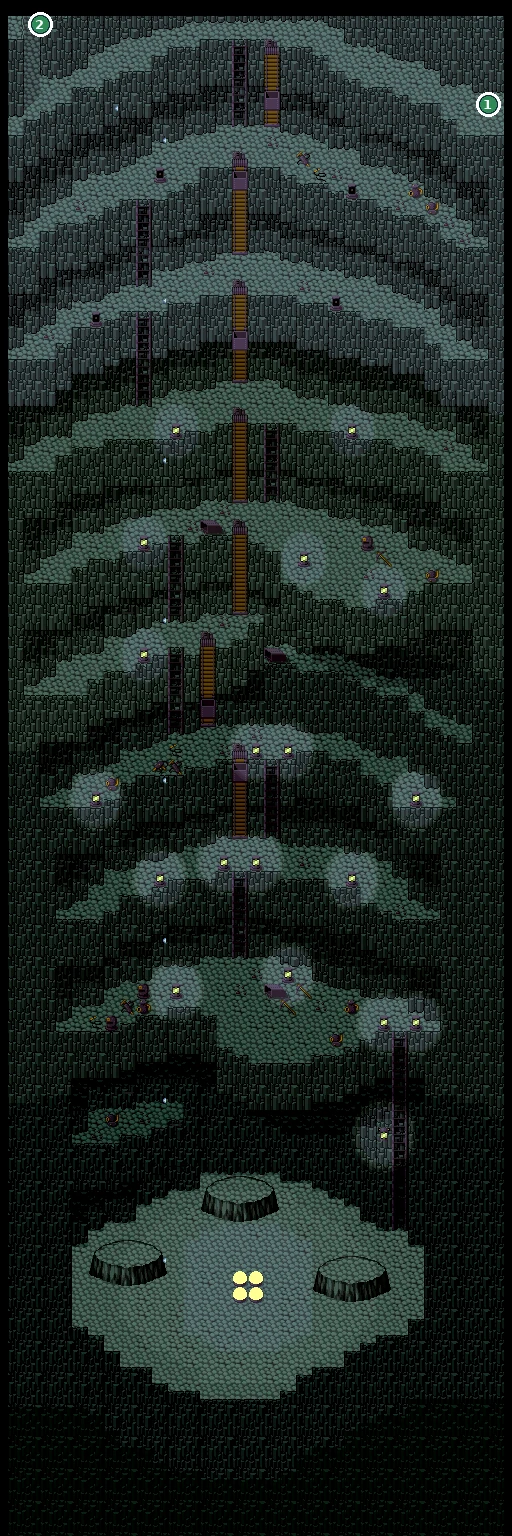
- 1Exit to Old Sanzakal Mine Entrance
- 2Exit to Secret Passage (Sanzakal)
Checklist
- Where
- Old Sanzakal Mine → palace Altar Room
- How
- After Mijua is rescued, return to the capital with no detours (official guide: about 150 steps).
- Reward
- Kunon lives; he can join in 817 and appears in later events
- Opens
- Ch. 5
- Closes
- Fails if you dawdle
- Where
- Royal Capital: Inn
- How
- Let Saman go in 805, then sleep at the capital inn with a free slot.
- Reward
- Bomb Gun (called the “Blast Gun” in the scene)
- Opens
- Ch. 5
- Closes
- Needs the 805 choice
- Where
- Before the Old Sanzakal Mine
- How
- Unequip Rody before the betrayal; he never returns.
- Reward
- Keep the gear
- Opens
- Ch. 5
- Closes
- Rody leaves in the mine
The Eastern Region, the Yukumo & Druk
📍 Eastern Autonomous Region · Yukumo · Druk · Angel Graveyard
Angels are running wild in the Eastern Autonomous Region, and the World Chronicle warns that a priestess named Rizara will be murdered on the liaison ship Yukumo. Her death would start a hunt for Ge’s followers across the land.
⏳ Last chances in this chapter
- Lend 500 Nel to the man at the East Region port before you board: he gives you a Soul Orb (“spirit-summoning orb”), which you hand to Rizara on the Yukumo. Public guides say it is what lets every passenger survive. Have 500 Nel and a free slot.
- Keep a free slot for the Angel Bell as well.
- Angel Graveyard chests: 300 Nel, Gloves, Crusher.
Full list across the game: Missables.
Walkthrough
- MainPass the checkpoint south of the capital into the Eastern Autonomous Region. Angels (Angel, Rogue Angel) are running wild and a Rogue Angel blocks the road onwards.
- MainZanya’s House: the angel master Zanya rules the region for the king. At first she says her angels are under control; later she admits the Angel Bell that commands them is gone, and a suspicious man in black was seen around her house.
- MainSaman shows up with a twisted ankle. Mikene asks you to escort her to Druk and leaves to report to the king: Mikene leaves, Saman joins.
- MainIn the region’s Tavern (T) a man has been making speeches against Za. Confront him: he stole the Angel Bell to make people fear angels and turn to Ge. Beat the Mystery Man and you get the Angel Bell. Zanya calms the angels.
- MainEast Region Port: a man who lost his money asks to borrow 500 Nel. Say Yes: he gives you the Soul Orb. Kain is here too and wishes you a safe voyage. The Chronicle says Rizara’s fate will change history: stop the assassination. Board the Yukumo.
- MainAboard the Yukumo: Rizara asks you to look after Saman. Saman runs into Rizara and calls her “Big sister!”; Rizara thanks you for looking after her sister. As you point out later, the Chronicle had no record of this. Choose to lie in wait for the assassin.
- MainA man plants a blast bulb, a Ge creature that will explode. Only a spirit-summoning orb can delay it, and Rizara’s was stolen: hand her your Soul Orb. Then convince Rizara to change cabins and wait in her empty cabin: the Assassin comes. History is rewritten.
- MainAt Druk Port the Yukumo explodes anyway. Rizara used the power of Za, and a spirit-summoning stone that breaks after one use, to move those near her to safety. The World Chronicle has two versions of this event: all passengers escape, or Rizara escapes but many passengers die; public guides say the Soul Orb from the loan decides which. Either way the Yukumo never sails again.
- MainDruk: Rizara invites everyone to her house. Saman stays with her sister here. Druk has a General Store (S), an Inn (I) and a Tavern; the temple of Za is where Rizara usually serves.
- MainThe only way back to Asashina by land is the Angel Graveyard north-east of Druk. Chests (map 120): 300 Nel, Gloves, Crusher. In the last area a Broken Angel attacks (“INTRUDER DETECTED”). Destroying it opens the road between Druk and Asashina (Graveyard Way Open).
- MainReport to the king in the Government Hall. He asks you to serve as head of the Eastern Autonomous Region (Zanya would act for you). Yes or No makes no visible difference.
Bosses
🗺️ Maps for this chapter (10)
Letters mark treasure chests (tick them off as you open them), green numbers are exits, white squares are shops. Tap a map to open it full size.
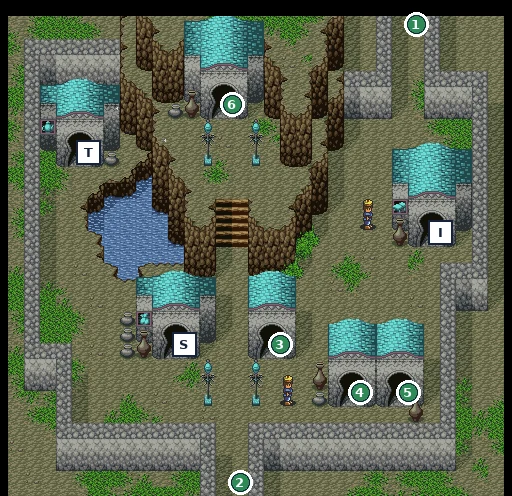
- 1Exit to World map
- 2Exit to East Region Port
- SGeneral Store
- IInn
- TTavern
- 3Exit to House
- 4Exit to House
- 5Exit to House
- 6Exit to Zanya’s House
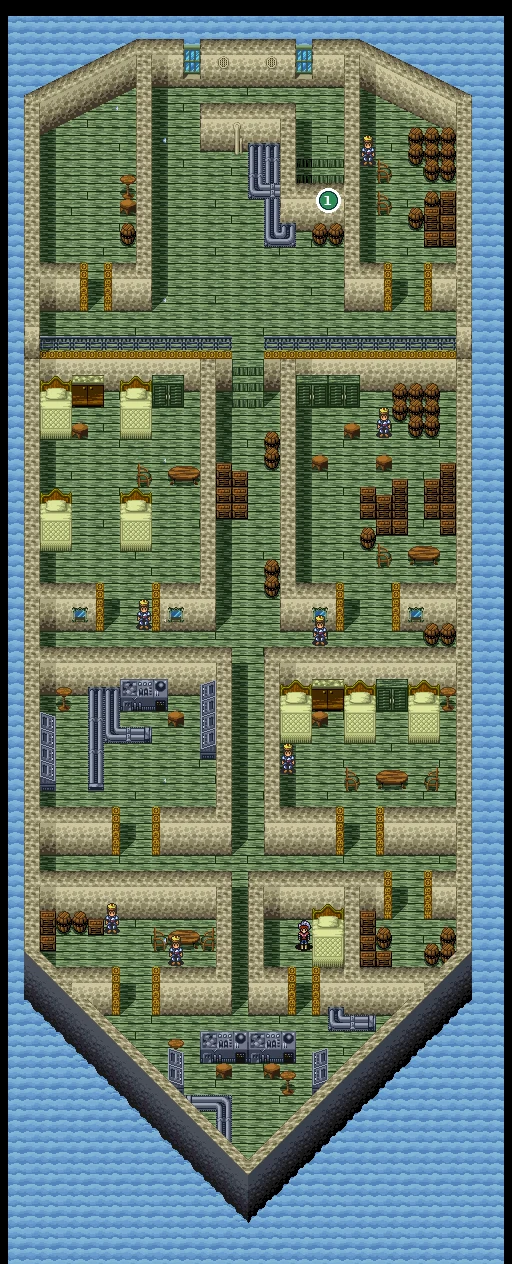
- 1Exit to Aboard the Yukumo: cabins
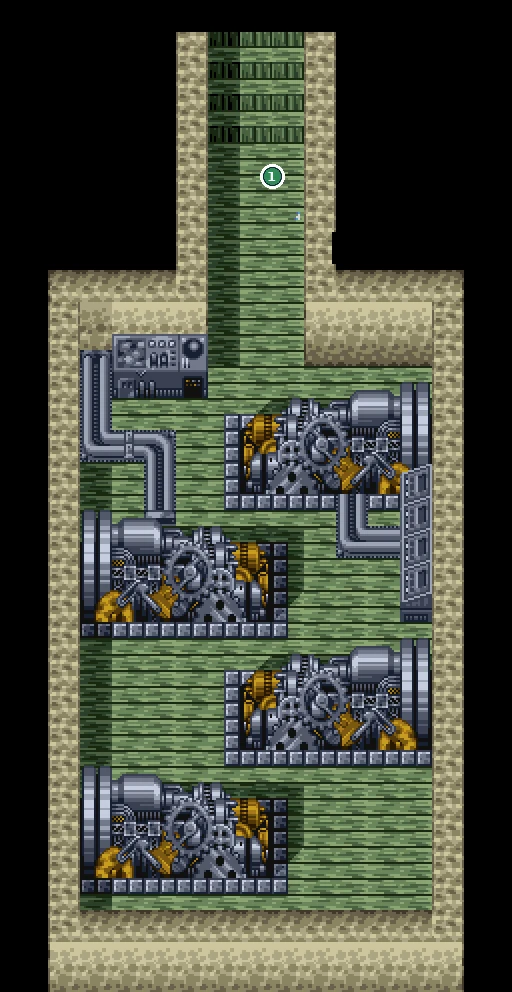
- 1Exit to Aboard the Yukumo: deck
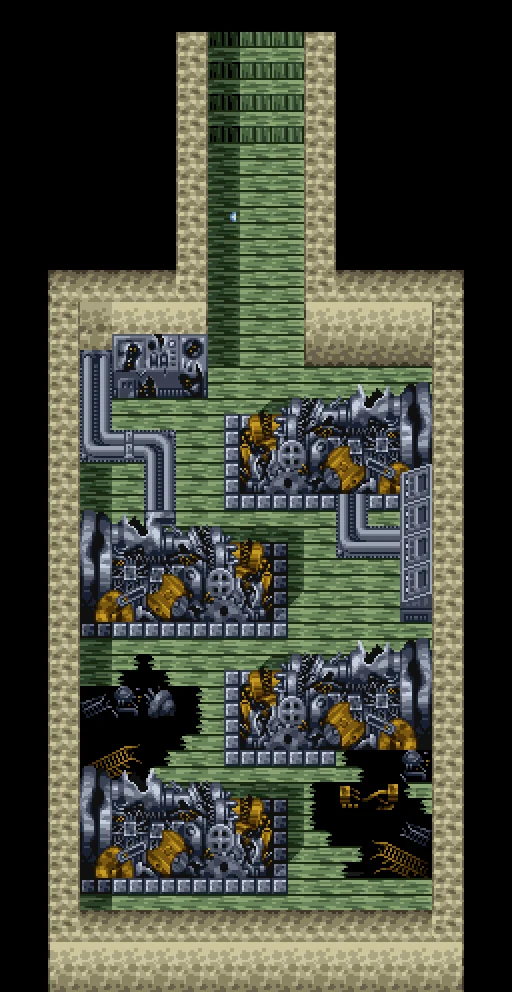
- 1Exit to World map
- 2Exit to Temple of Za
- 3Exit to Druk Port
- SGeneral Store
- IInn
- 4Exit to Rizara’s House
- SGeneral Store
- 5Exit to House
- 6Exit to House
- 7Exit to House
- TTavern
- 1Exit to World map
- 2Exit to Angel Graveyard: area 2
- 1Exit to Angel Graveyard: area 1
- 2Exit to Angel Graveyard: area 3
- 3Exit to Angel Graveyard: area 4
- A 300 Nel
- B Gloves
- C Crusher
- 1Exit to Angel Graveyard: area 2
- 2Exit to Angel Graveyard: area 5 (Broken Angel)
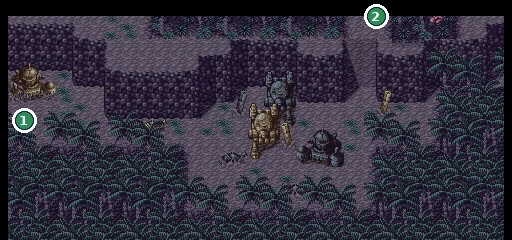
- 1Exit to Angel Graveyard: area 2
- 2Exit to Angel Graveyard: area 5 (Broken Angel)
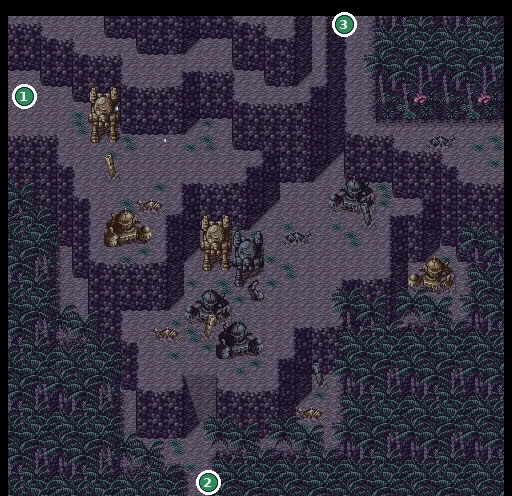
- 1Exit to Angel Graveyard: area 3
- 2Exit to Angel Graveyard: area 4
- 3Exit to World map
Checklist
- Where
- Eastern Autonomous Region: Tavern
- How
- Defeat the Mysterious Man. Keep a slot free.
- Reward
- Angel Bell (calms the angels)
- Opens
- Ch. 6
- Closes
- Story
- Where
- East Region Port
- How
- Answer Yes to the man who lost his money. Needs 500 Nel and a free slot.
- Reward
- Soul Orb (public guides: all Yukumo passengers survive)
- Opens
- Ch. 6
- Closes
- Once you board the Yukumo
- Where
- Government Hall, after the report
- How
- Accept or decline the post.
- Reward
- No visible effect found
- Opens
- Ch. 6
- Closes
- Answered once
Escorting Princess Donea
📍 Royal Capital · Galamania · Secret Passage · Druk
Paradoc, the king’s brother, is to marry Princess Donea of Galamania, the cold northern kingdom. You lead the escort, together with a young soldier named Schwank. In Galamania the princess turns out not to want the marriage at all.
⏳ Last chances in this chapter
- Mikene will ask you what happened to Schwank before the escort mission in 809.
Full list across the game: Missables.
Walkthrough
- MainIn the Government Hall the king orders you to fetch Princess Donea for Paradoc. A young soldier, Schwank, is assigned to you for his first big job. At the capital entrance he asks to say goodbye to his parents: visit Schwank’s House (marker 8), where his mother offers you a meal, and set off.
- MainGo round by the east and far to the north, through the checkpoint west to Galamania, the northernmost land. Galamania now worships Ge as its state religion, its king is “away”, and it’s cold.
- MainIn the palace antechamber a knight says the princess is still preparing and lodging is arranged at the inn: stay at the Galamania inn (I). That night Schwank says he’d rather be a scholar than a knight, and coughs. In the morning the innkeeper tells you the princess is waiting.
- MainDonea has never met Paradoc. Her court ladies beg you to take her away in secret. Agree and they lead you to a secret route.
- MainIn the Secret Passage Schwank starts acting strangely: Tand has taken over his body. Fight him. As he falls, Tand casts the Curse of Ge on you, but Donea throws herself in front of you and becomes a monster. She joins as Ge Donea, who can only say “Gigi…”. Oddly, Tand called her “Your Highness”.
- MainThe Chronicle: a curse of Ge can only be lifted with the power of Za. Take Donea to Rizara at the Druk temple (through the Angel Graveyard). Donea can’t enter the altar room and waits in the antechamber; Rizara lifts the curse and Donea is human again. Head for the new capital.
- TipRizara mentions here that Ge’s power seems to be growing, and that the seals on Za’s temples might have to be broken. Remember this in 811.
Bosses
🗺️ Maps for this chapter (2)
Letters mark treasure chests (tick them off as you open them), green numbers are exits, white squares are shops. Tap a map to open it full size.
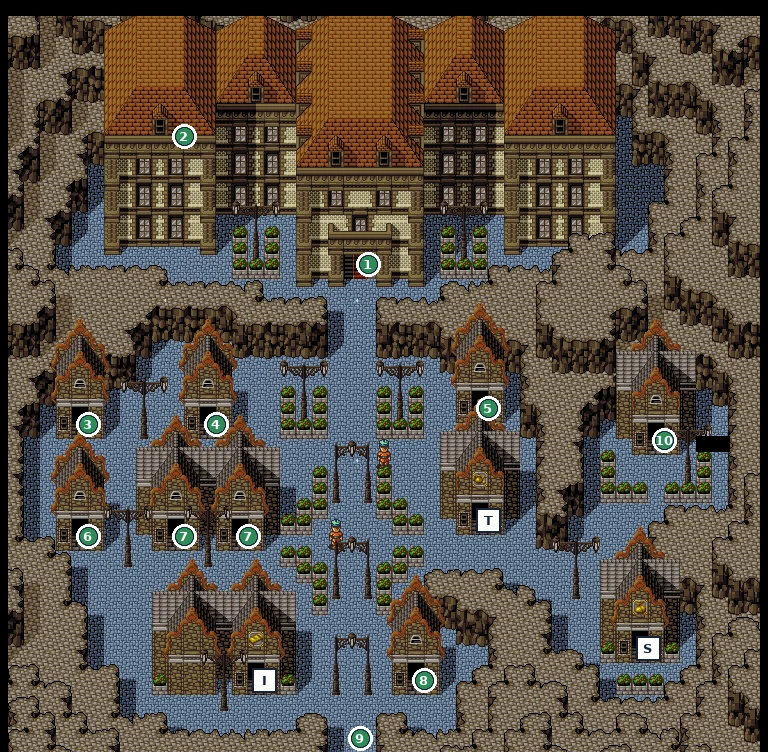
- 1Exit to Antechamber
- 2Exit to Secret Passage (Galamania)
- 3Exit to House
- 4Exit to House
- 5Exit to House
- 6Exit to House
- 7Exit to House
- TTavern
- IInn
- 8Exit to House
- 9Exit to World map
- 10Exit to House
- SGeneral Store
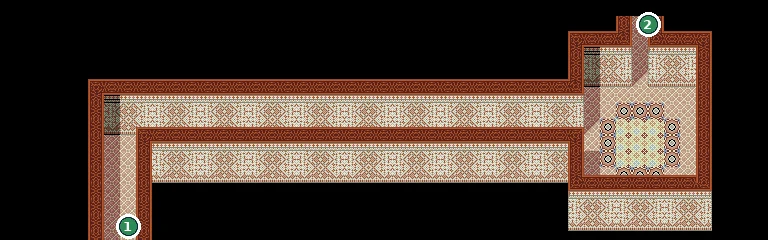
- 1Exit to Council Room
- 2Exit to Galamania
Checklist
- Where
- Galamania Government Hall
- How
- Agree to the court ladies’ request.
- Reward
- Story continues through the secret passage
- Opens
- Ch. 7
- Closes
- Answered once
The new capital: murder and a crown
📍 New capital · old capital · Capital Underground
The court has moved to the new capital in the west. Paradoc rules for his sick brother, Zenobia hates the foreign bride, and the World Chronicle says the king will be murdered. By the end of the year you are king of Asashina.
⏳ Last chances in this chapter
- Spare Zenobia if you want her later: alive, she can rescue you from prison, join from the War Vault and be chosen in 817.
- Asking Mikene to watch Paradoc makes him the one who frees you from prison.
- Capital Underground chests: Water Pill, 800 Nel, Mega Water, Slayer.
Full list across the game: Missables.
Walkthrough
- MainArrive at the new capital with Donea. Paradoc scolds you for being late and sends Donea to the detached palace and you back to the barracks. You are still a knight.
- SideIn the Government Hall, ask Mikene to keep an eye on Paradoc because the king’s life depends on it. He takes it as one of your prophecies.
- MainMikene then asks what happened to Schwank. Tell the truth (Tand took over his body and he died) and Mikene proposes condolence money for his family. Say he “just disappeared” and Mikene brands him a deserter and has his family banished from Asashina.
- MainThe Chronicle warns that Donea will be assassinated and that you must find Zenobia quickly. Go to Donea: in the Corridor Zenobia attacks her, calling her unfit for Lord Paradoc. Beat Zenobia.
- MainZenobia tells you to kill her. Spare her (you tell her Asashina needs her strength) and she follows you, since your prophecies came true. Killing her ends her story here (Chronicle: Zenobia Executed).
- MainParadoc orders you to bring the king, Queen Remnu and Kunon from the old capital. In the old Government Hall, knights “on Paradoc’s orders” kill Asashinea VI and cut you down. You wake up in the old-capital prison, accused of the murder.
- MainYou are rescued by Mikene (if you warned him about Paradoc) or by Zenobia (if you spared her). Paradoc has gone underground beneath the old capital, into the Za ruins.
- MainCapital Underground: chests Water Pill, 800 Nel, Mega Water, Slayer. Paradoc is trying to wake the giant King of the Za gods sleeping under the city. If Zenobia is with you, Paradoc reveals she once told him he deserved to be king. Fight Paradoc and two knights.
- MainBack in the new capital, Donea has heard you are to become king. In the King’s Room she asks to stay at your side. Yes: she waits in the detached palace. No: you ask her to go home for both nations’ sake, and she returns to Galamania.
- MainHigh Priest Mijua waits in the temple and welcomes you as the new king: Kunon and Queen Remnu themselves recommended you. Rest, then answer Yes to “Are you ready?” at the coronation in the Altar Room of Za. Za transfers the authority over Asashina from Denikes to you.
Bosses
🗺️ Maps for this chapter (3)
Letters mark treasure chests (tick them off as you open them), green numbers are exits, white squares are shops. Tap a map to open it full size.
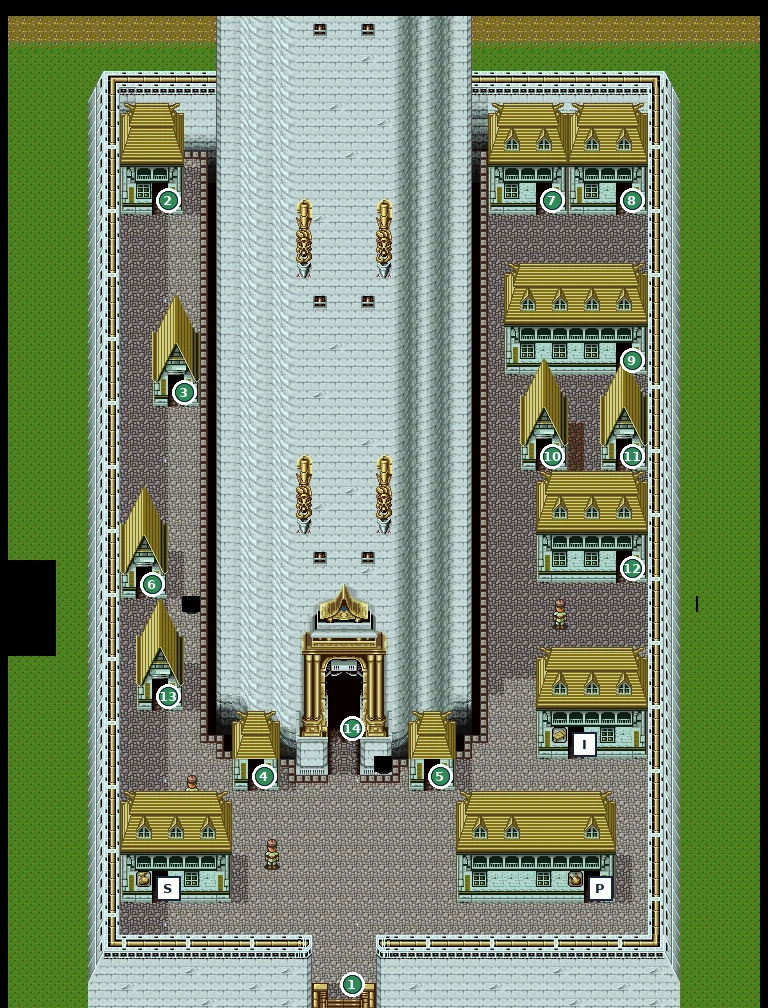
- 1Exit to World map
- 2Exit to House
- 3Exit to House
- 4Exit to Guardhouse
- 5Exit to Guardhouse
- 6Exit to House
- 7Exit to House
- 8Exit to House
- 9Exit to House
- 10Exit to House
- 11Exit to House
- 12Exit to House
- 13Exit to House
- SGeneral Store
- IInn
- PPUB
- 14Exit to Antechamber
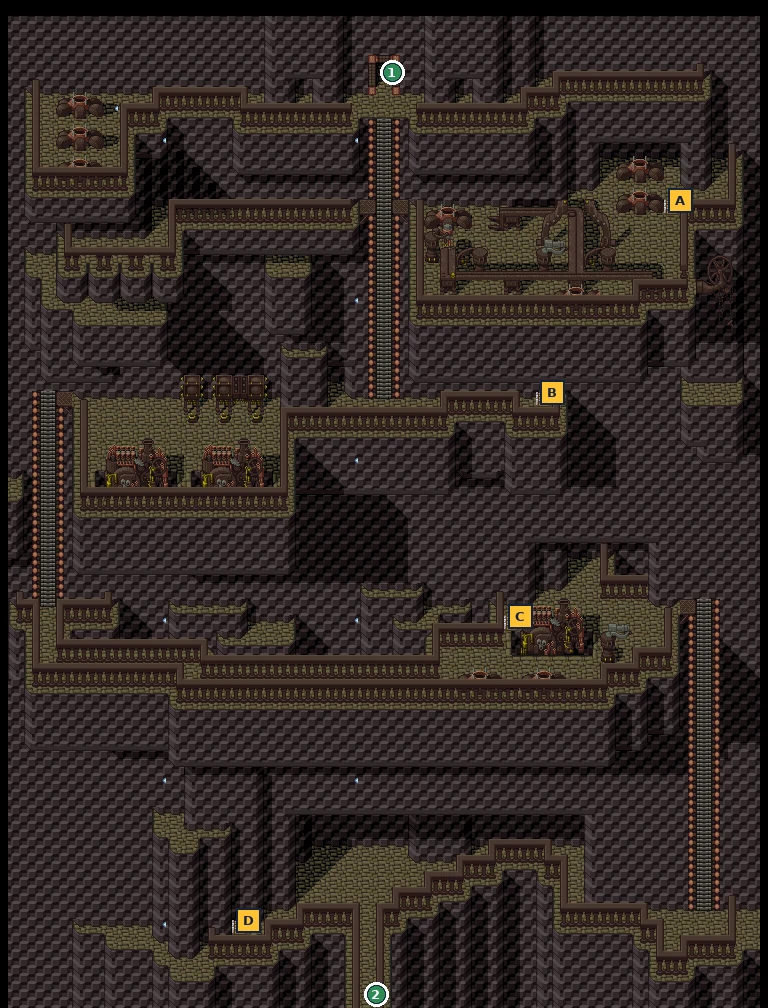
- 1Exit to Underground Entrance
- 2Exit to Capital Underground: lower level
- A Water Pill
- B 800 Nel
- C Mega Water
- D Slayer
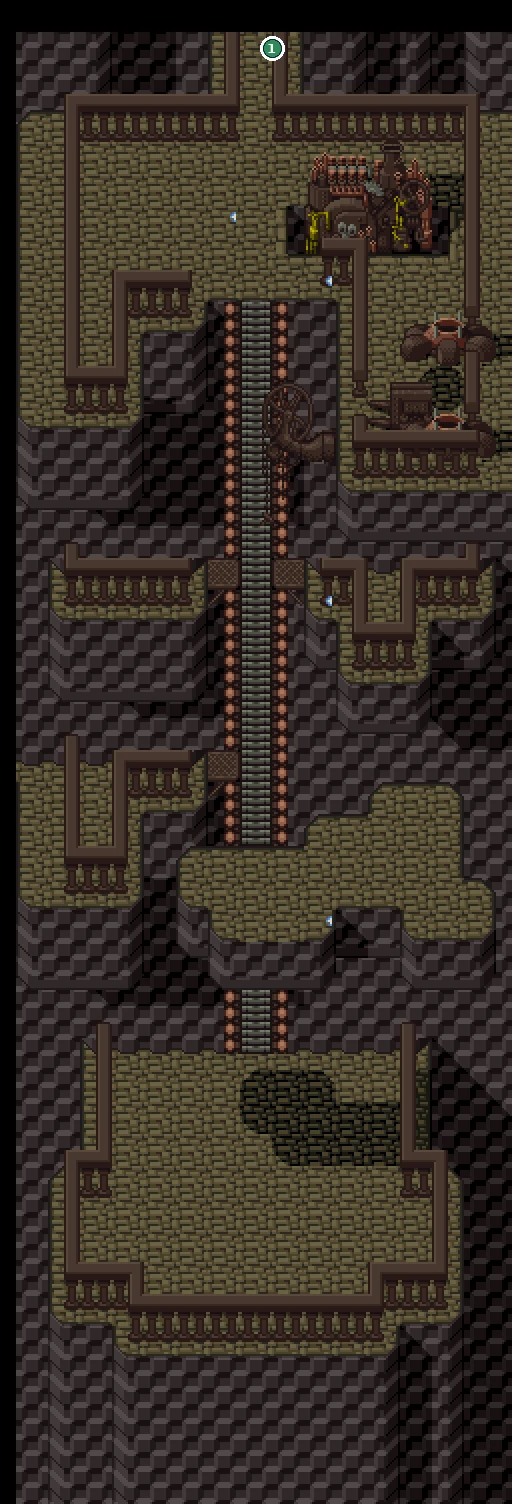
- 1Exit to Capital Underground (809)
Checklist
- Where
- New capital: Corridor
- How
- After beating her, refuse to kill her.
- Reward
- Zenobia can rescue you, join from the War Vault (810+) and be picked in 817
- Opens
- Ch. 8
- Closes
- Decided after the fight
- Where
- New capital: Government Hall
- How
- Answer Yes to telling Mikene his body was taken over.
- Reward
- Schwank’s family gets condolence money instead of being banished
- Opens
- Ch. 8
- Closes
- Answered once
- Where
- New capital: Government Hall
- How
- Talk to Mikene before the escort mission.
- Reward
- Mikene frees you from prison
- Opens
- Ch. 8
- Closes
- The king is murdered
- Where
- New capital: King’s Room
- How
- Yes = she stays at your side; No = she returns to Galamania.
- Reward
- Changes where Donea lives and her People entry
- Opens
- Ch. 8
- Closes
- Answered once
King of Asashina & the Manamigal Pass
📍 New capital · Manamigal Pass
As king you suddenly have money, a chancellor with his own plans, and a deadline: Kaiser has banished Queen Remnu and Prince Kunon, and the Chronicle says they will be murdered on the Manamigal Pass.
⏳ Last chances in this chapter
- Spend much of the 1,000,000 Nel on equipment now: a late harvest in 812 and Gainaster’s demand in 814 can each cost you half your money.
- The War Vault lets you take one extra fighter.
Full list across the game: Missables.
Walkthrough
- MainKaiser entrusts you with the nation’s funds: 1,000,000 Nel. Buy the best equipment the new capital’s General Store (S) and other shops offer.
- MainThe Chronicle: Remnu and Kunon will be murdered on the Manamigal Pass; leave now to make it in time. Kaiser tells you he has banished them and claims it is Za’s decree; you object, but he insists.
- SideWar Vault (new palace): a knight offers you one companion: Mikene, a Knight, the angel Light Tripod (“ACTIVATE THE SYSTEM?”), or Zenobia if you spared her. Talk to the knight again to swap or dismiss.
- MainOn the Manamigal Pass mountain bandits attack the queen and the prince. Queen Remnu is killed, but Kunon survives. He refuses to come back and take the throne, asks you to look after Asashina and heads for Juzaria, his mother’s homeland. Escort him until the Juzarian escort meets you.
- TipThe Chronicle has a version of this event where both Remnu and Kunon die (Manamigal Ambush), and one where Kunon just disappears. Hurrying is the safe bet; we have not pinned down the exact condition.
Bosses
🗺️ Maps for this chapter (3)
Letters mark treasure chests (tick them off as you open them), green numbers are exits, white squares are shops. Tap a map to open it full size.
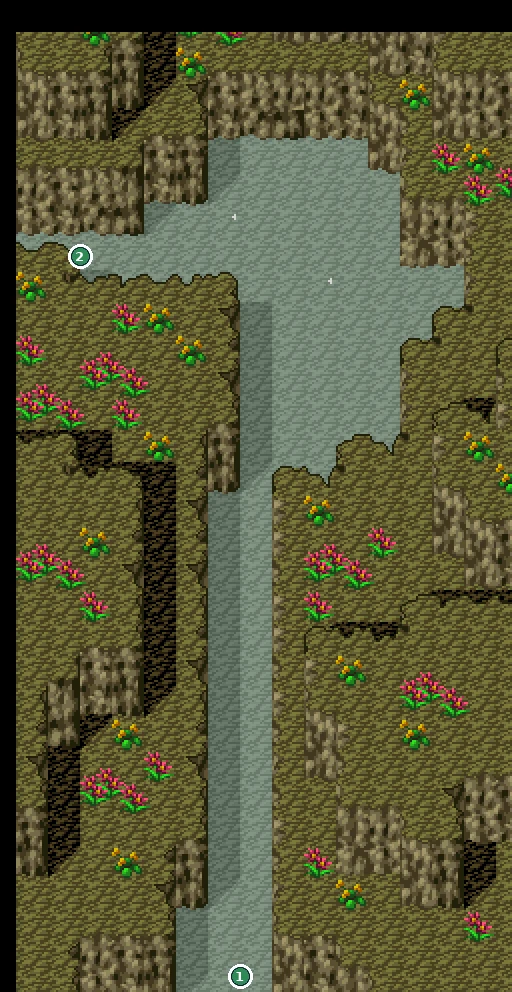
- 1Exit to Checkpoint
- 2Exit to Manamigal Pass: area 2
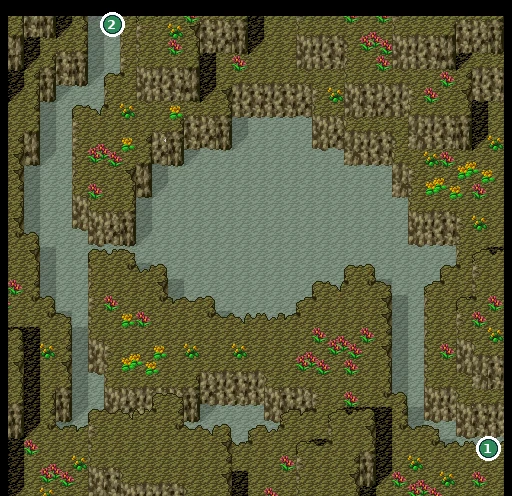
- 1Exit to Manamigal Pass: area 1
- 2Exit to Manamigal Pass: area 3
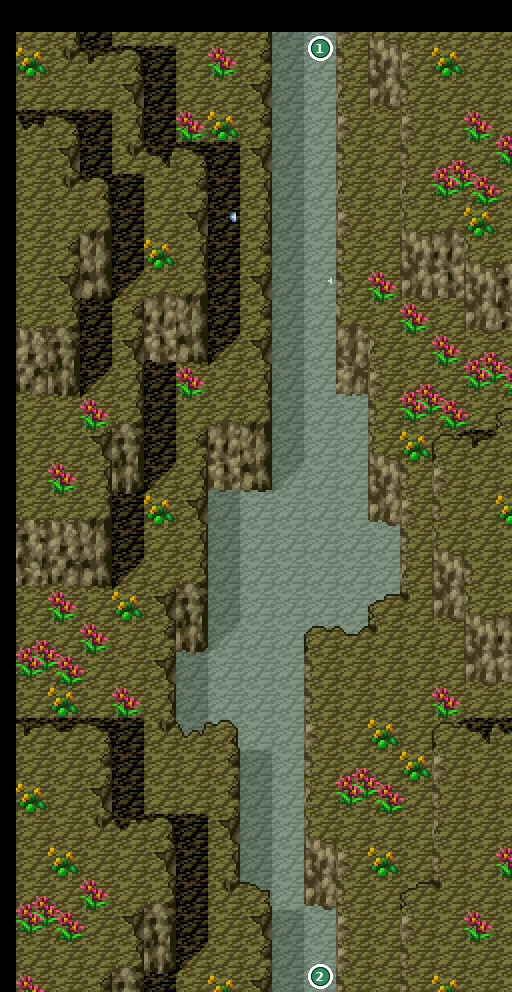
- 1Exit to World map
- 2Exit to Manamigal Pass: area 2
Checklist
- Where
- New capital: Government Hall
- How
- Given automatically when you become king.
- Reward
- 1,000,000 Nel
- Opens
- Ch. 9
- Closes
- Story
- Where
- New palace: War Vault
- How
- Pick Mikene, a Knight, Light Tripod or (if alive) Zenobia.
- Reward
- Fourth party member
- Opens
- Ch. 9
- Closes
- Until 816
Kain and the Temple Unsealing Decree
📍 New capital
A quiet year: the Chronicle notes no events connected with the ruin in 811. Kain, the man in black, visits the new king with a suggestion about Za’s temples.
⏳ Last chances in this chapter
- Use the quiet year to level up and shop. The next two years have deadlines.
Full list across the game: Missables.
Walkthrough
- MainKain visits you in the new capital, surprised that you became king. He says Za only shows its true power if the temples of the seals are unsealed, four in all. Choice: issue the Temple Unsealing Decree or not.
- MainIf you refuse, Kaiser issues the decree himself later, in the name of the late king (Chronicle: Unsealing Decree, Kaiser version). Either way the seals start to fall: Irai Unsealed, Druk Unsealed and, later, the Green Sea.
- TipWe did not find a later scene that depends only on who issued the decree, apart from the Chronicle entry and a remark in Hendarai in 813 if Kaiser issued it. Treat it as a story choice.
Checklist
- Where
- New capital (Kain)
- How
- Issue it yourself or refuse; Kaiser issues it if you refuse.
- Reward
- Changes the Chronicle entry
- Opens
- Ch. 10
- Closes
- Answered once
Seeds or the Rubel gold mine?
📍 Mountain east of the Eastern Region · Rubel Gold Mine
Two crises at once: the clan lords are about to riot at the Rubel gold mine, and an abnormal year is coming that will ruin the harvest. Mijua knows of seeds that can survive it, but they must be sown this spring.
⏳ Last chances in this chapter
- Get the seeds first. If they arrive too late, a great famine strikes and Kaiser takes half of your money to buy food.
- Free a slot for the seeds.
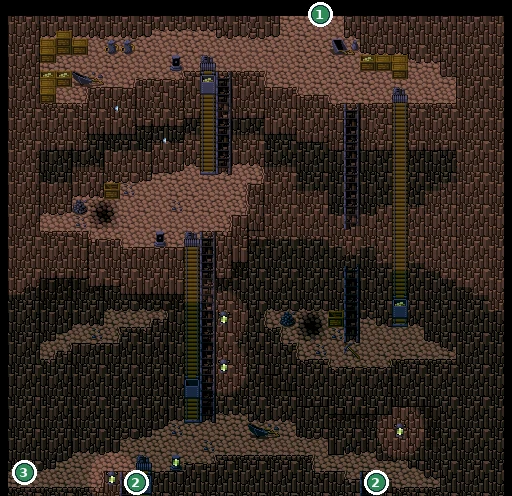
- Chests: Mountain (1000 Nel, Water Pill, Wildstep, Vortex) and Rubel Gold Mine (1200 Nel, ScaleGlv, Unbroken).
Full list across the game: Missables.
Walkthrough
- MainKaiser reports a barricade at the Rubel gold mine. Knights pass on Mijua’s advice: plague-resistant seeds grow in the mountains east of the Eastern Autonomous Region. The Rubel gold mine is south of the western checkpoint. The Chronicle: spring is coming, decide which comes first.
- MainAnswer Yes to “Go and look for the plague-resistant seeds?”
- MainMountain (east of the Eastern Region): chests 1000 Nel, Water Pill, Wildstep, Vortex. Guardians of Ge block the way at first. The Nozuchi of Ge question you; say that what you want to save is the whole world. Defeat them and they give you the seeds, saying their king trusts you.
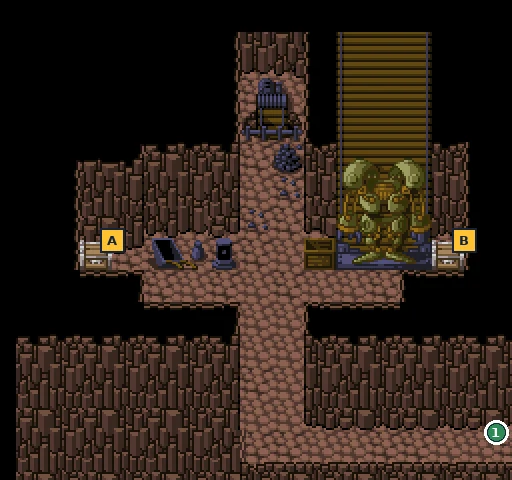
- MainThen go through the western checkpoint to the Rubel Gold Mine. Chests: 1200 Nel (first area), ScaleGlv and Unbroken (last area). A clan lord leads the revolt; his powerful allies, men in black, have taken all his spirit-summoning stones. Beat the clan lord and his two men (Chronicle: Revolt Crushed).
- MainIn 813 Kaiser reports the result: with the seeds, the harvest survives and there is food for next year. Too late: “Handed half of your money to Kaiser” (Chronicle: Great Famine, paid from the royal treasury).
Bosses
🗺️ Maps for this chapter (4)
Letters mark treasure chests (tick them off as you open them), green numbers are exits, white squares are shops. Tap a map to open it full size.
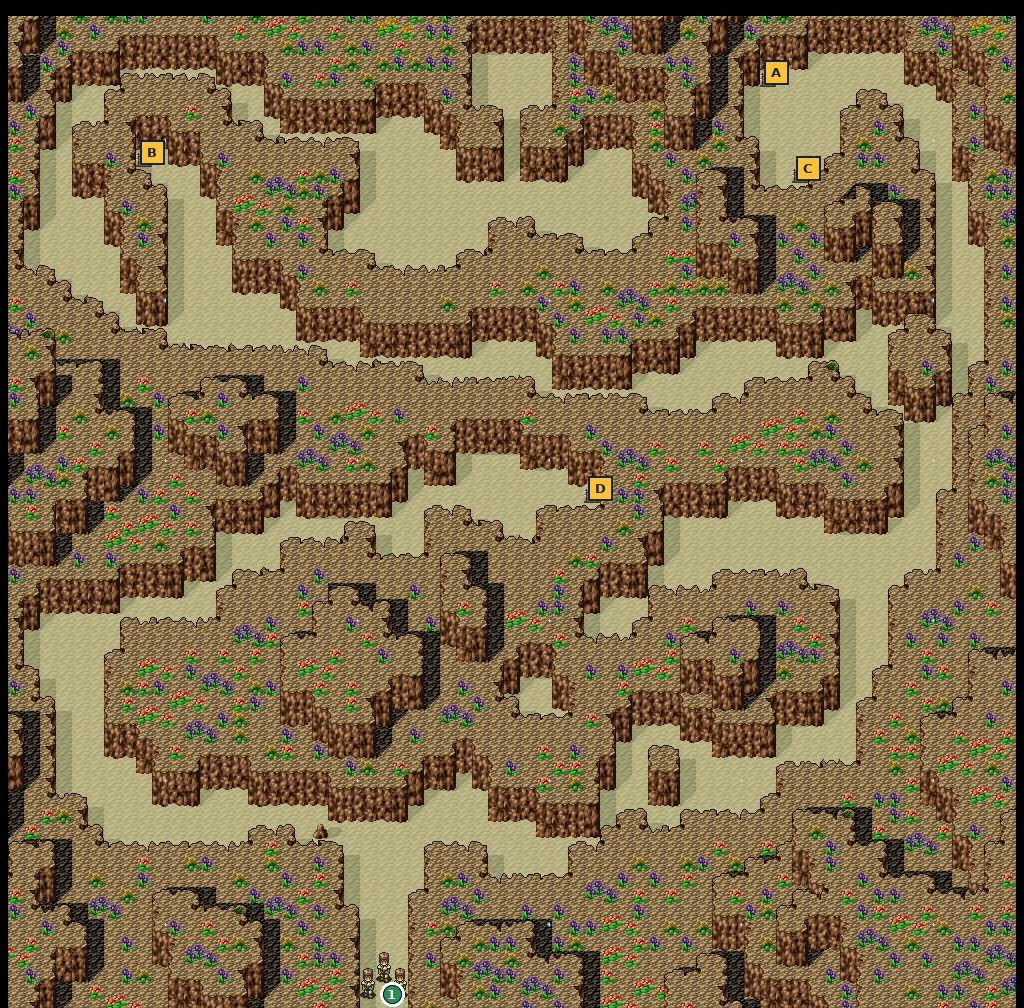
- 1Exit to World map
- A Water Pill
- B 1000 Nel
- C Wildstep
- D Vortex
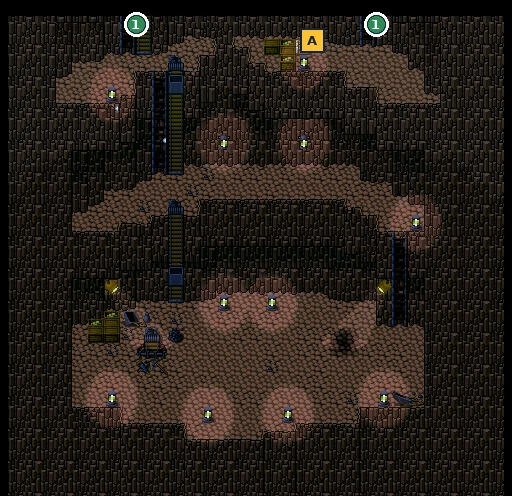
- 1Exit to Rubel Gold Mine: area 2
- A 1200 Nel
- 1Exit to World map
- 2Exit to Rubel Gold Mine: area 1
- 3Exit to Rubel Gold Mine: area 3
- 1Exit to Rubel Gold Mine: area 2
- A ScaleGlv
- B Unbroken
Checklist
- Where
- New capital, spring 812
- How
- Choose to look for the seeds first and bring them back in time.
- Reward
- No famine; you keep your money
- Opens
- Ch. 11
- Closes
- The harvest in 813
- Where
- Mountain east of the Eastern Region
- How
- Defeat the Nozuchi of Ge. Keep a slot free.
- Reward
- Seeds
- Opens
- Ch. 11
- Closes
- Story
Ibusuki and the Plague Ship
📍 Hendarai · Plague Ship
Asashinea Ibusuki, the survivor of the old royal house, comes to court with an offer: his family’s treasure, hidden in the Sea of Death, if the king comes to fetch it himself. The Chronicle says a plague will break out unless you go.
⏳ Last chances in this chapter
- Plague Ship chests: Gauntlet, Barrage, Mega Fire.
- Faru’s question at Hendarai port is answered only once.
Full list across the game: Missables.
Walkthrough
- MainIn the Government Hall, Ibusuki congratulates you on the crown and offers his house’s treasure in the Sea of Death. Answer Yes to going with him. In the antechamber Hepainas lends you an angel: W. Angel (Water Angel) and Ibusuki join.
- MainGo to Hendarai, the Ge-worshipping village just east of the new capital, on the shore of the Sea of Death. The villagers talk of a “plague ship”; the tavern talks about a suspicious ship drifting offshore. The Chronicle also tells you here if Kaiser issued the Unsealing Decree behind your back.
- MainPlague Ship: chests Gauntlet, Barrage, Mega Fire. Ibusuki admits there’s no treasure: he wants the throne back for his family and turns the Water Angel against you. After the first fight, the ship’s swarm of tiny Ge creatures takes over Ibusuki (he dies) and the angel, and you fight it again.
- MainAt Hendarai Port you meet Faru, who came looking for her brother, with Kain. She asks if her brother said anything about her. You can say he was very worried about her, or answer honestly. Kain urges you again to unseal the temples. The Chronicle: the plague was stopped. Return to the new capital.
Bosses
🗺️ Maps for this chapter (2)
Letters mark treasure chests (tick them off as you open them), green numbers are exits, white squares are shops. Tap a map to open it full size.
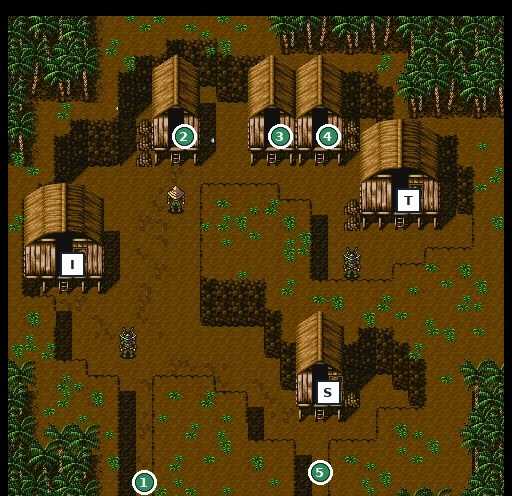
- 1Exit to World map
- 2Exit to House
- 3Exit to House
- 4Exit to House
- TTavern
- IInn
- SGeneral Store
- 5Exit to Hendarai Port
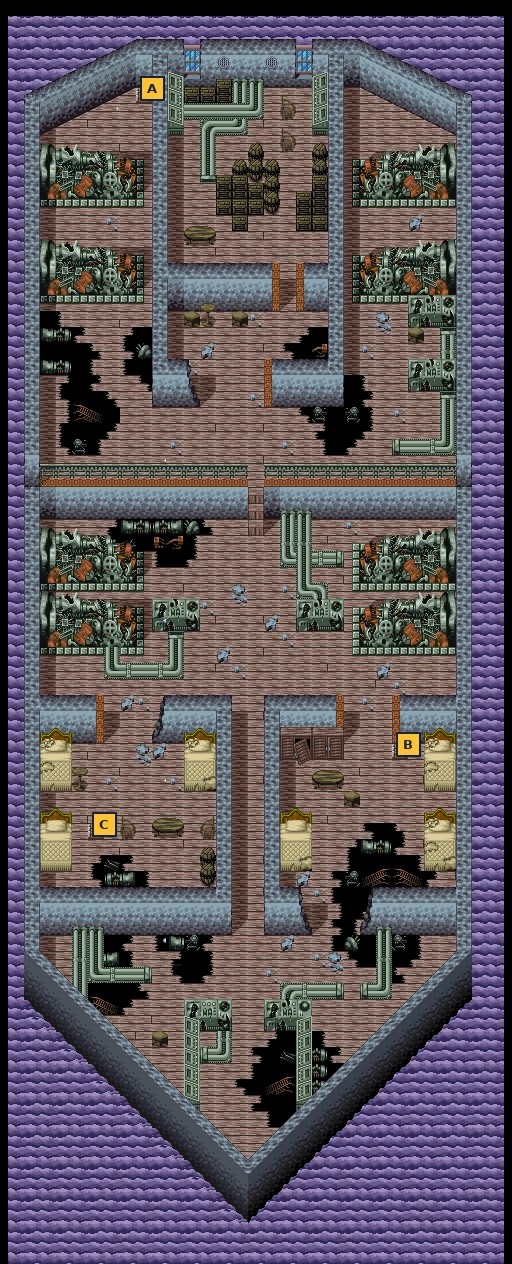
- A Mega Fire
- B Barrage
- C Gauntlet
Checklist
- Where
- Hendarai Port
- How
- Say her brother was worried about her, or tell the truth.
- Reward
- Faru thanks you (kind answer). A later effect is not confirmed.
- Opens
- Ch. 12
- Closes
- Answered once
Galamania threatens war
📍 Galamania · Irai
Galamania suffers a deadly cold wave and marches on Asashina. In its Government Hall you learn who its king really is.
⏳ Last chances in this chapter
- Spend your Nel before reporting back to Gainaster. After you bring the priest, he adds one more condition: nine years ago you betrayed him and Tand died in Galamania. Half of your money is taken, with no choice.
- Irai’s villagers are hostile now, but the village has the scene you need for Galamania.
Full list across the game: Missables.
Walkthrough
- MainThe Chronicle: Galamania is attacking Asashina; go to Galamania yourself to learn why. In the Galamania Government Hall you meet King Gainaster, the bandit chief, and his queen, Lou. The Za priests he banished took Za’s weather control with them, and the cold is killing his people.
- MainLou’s condition for stopping the attack: bring back the chief priest of Za, who should be in Irai. Gainaster agrees to wait.
- MainIn Irai the villagers shun “Tor”, who vanished before his wedding. In Tor’s House you find the chief priest from Galamania. He agrees to go back if Lou asks, and leaves the next day with the other priests. A note on the wall from Lou to Tor says she has gone travelling and hopes to see him again.
- TipIrai’s temple is unsealed this year (Chronicle: Irai Unsealed). In the Altar Room of Za, Kain speaks of the sealed temples and the true power of Za.
- MainReport back to Gainaster. Galamania holds off for now, but Gainaster reminds you that you betrayed him nine years ago and that Tand died here: half of your money is taken. The Chronicle: go back to the new capital.
Manamigal: a palace without men
📍 Manamigal Pass · Manamigal
Galamania, Manamigal and Juzaria are holding secret talks against Asashina in Manamigal. Using the army would only give them a reason for war, so the king goes alone. One problem: the queen’s palace admits only women.
⏳ Last chances in this chapter
- Barcurea charges 10000 Nel. Saman’s body costs nothing.
Full list across the game: Missables.
Walkthrough
- MainCross the Manamigal Pass and the checkpoint south of it into Manamigal. Queen Elyuse can’t stand men, and the palace guards turn you away.
- MainSaman works at the Manamigal General Store and has heard you became king. She offers a “perfect disguise” and tells you to say you’re on an errand for her. The guards see through it and throw you out. Saying No to her disguise offends her.
- MainThe World Chronicle has a better idea: borrow a woman’s body for a short time. Use Saman‘s (free) or hire the mercenary Barcurea in the Manamigal Tavern for 10000 Nel. Guards greet both by name and let you in.
- MainIn the inner palace, knight captain Karia lets you through because it’s urgent. In the King’s Hall, Galamania’s envoy is Queen Lou; she recognises you as an Asashinan spy but lets you go. These talks were only a decoy: the real meeting is in Galamania, and a prophet in black is behind it.
- MainKaria asks whether it’s true that the king of Asashina doesn’t want war, then accuses him of wanting Za’s power for himself. Answer as you like; the visible result is the same.
- MainIn Manamigal Government Hall, Kain appears inside a barrier as the envoy “of a certain person” and pitches the alliance to Queen Elyuse. In town, Black Child soldiers confront the “false king of Asashina”. The Chronicle reports an earthquake in Galamania. Hurry home.
🗺️ Maps for this chapter (1)
Letters mark treasure chests (tick them off as you open them), green numbers are exits, white squares are shops. Tap a map to open it full size.
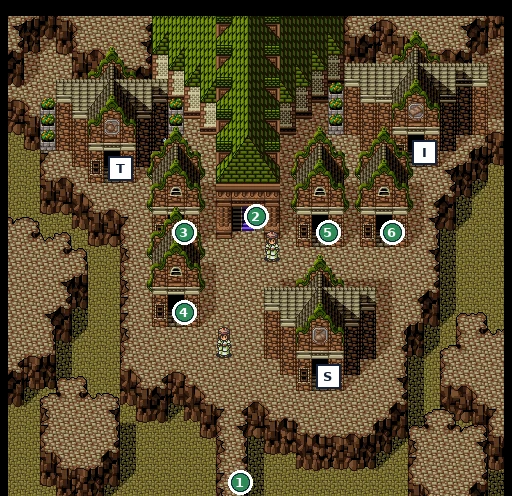
- 1Exit to World map
- 2Exit to Antechamber
- IInn
- TTavern
- SGeneral Store
- 3Exit to House
- 4Exit to House
- 5Exit to House
- 6Exit to House
Checklist
- Where
- Manamigal: General Store (Saman) or Tavern (Barcurea)
- How
- Borrow Saman’s body for free, or pay Barcurea 10000 Nel.
- Reward
- Entry to the women-only palace
- Opens
- Ch. 14
- Closes
- Story
Kaiser’s revolt
📍 New capital
The three nations besiege the new capital, Kaiser turns on you, and the man in black finally makes his move.
⏳ Last chances in this chapter
- In 817 you start over in a new body. The script doesn’t say what happens to your money and gear, so don’t count on keeping them.
- At “Look for another body?” answer Yes. No ends the game.
Full list across the game: Missables.
Walkthrough
- MainKaiser reports Galamania’s collapse after the earthquake and urges you to invade. In the branch we traced, the allied armies of Galamania, Manamigal and Juzaria then surround the new capital. Kaiser declares he no longer recognises you as king and has you seized.
- MainIn the King’s Room Kaiser hands you to Kain, who kills Kaiser (“a rat who got too greedy”) and, with his Black Child soldiers, takes your body. The fight can’t be won.
- WarningThe Chronicle asks: “Look for another body?” Answer Yes. If you say No, the Chronicle tells you that you can only exist in that world: the game does not go on.
- MainKain now rules Asashina in your body and under your first name. The World Chronicle escapes with you.
Bosses
A second life in Druk
📍 Druk · Juzaria · Keminu · Mountain of Ge
About a year later you wake in a new body in Rizara’s house in Druk. Kain is king under your old name, the land is the Asashina Empire, and newborn babies are dying because even Za’s ritual no longer protects them.
⏳ Last chances in this chapter
- Your new name can’t be the one you entered at the start.
- Free slots for the large spirit-summoning orb (from the Dragon of Ge).
- Companion choice: at Rizara’s house you may take one extra companion, and you can’t remove them later.
- Mountain of Ge chests: see the maps. There is a hidden passage through the rocks on the left side of the mountain (public guides).
Full list across the game: Missables.
Walkthrough
- MainYou wake in Rizara’s House in Druk. Your new body washed up at Druk and was regenerated. Enter a new name (your first one is now Kain’s).
- MainRizara gives you the power of Za. The power of Ge leaves you, and from now on you can enter Za temples.
- MainMikene has quit the knights to bring down the king. He doesn’t recognise you. Mijua is here too. Babies weaken and die even after the Za ritual; Mijua needs an unusually large spirit-summoning orb, and Saman has heard the Juzarian palace got one. Answer Yes to going with Mikene: Mikene joins.
- MainThe Chronicle warns that High Priest Mijua will be assassinated in the Druk temple. Stay at the Druk inn to wait for the next day, then stop the Assassin in the temple. Then Kain arrives with Black Child soldiers, demands the World Chronicle and takes it, telling you to rot away in this world (the Chronicle is with you again later in the story).
- MainGo south through the checkpoint to Juzaria. In the palace, the king is in the room on the right. King Ribolgan used all his orbs on sick babies; Sanzakal is mined out and Rubel is lost. If Kunon is alive he is here; he (or Ribolgan, if Kunon died) points you to a rumoured orb deep in the mountain behind Keminu, north of Juzaria.
- TipIn Keminu the villagers are unfriendly. The shopkeeper tells you to come round to the front of the counter if you want to buy. The inn is a good place to rest before the mountain.
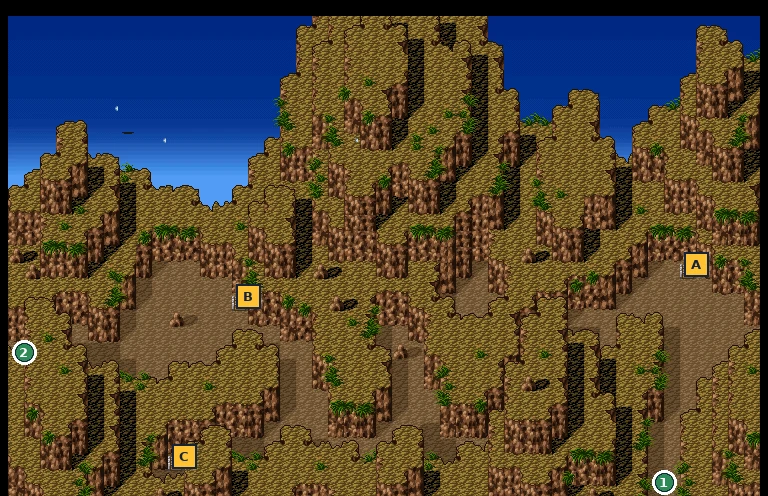
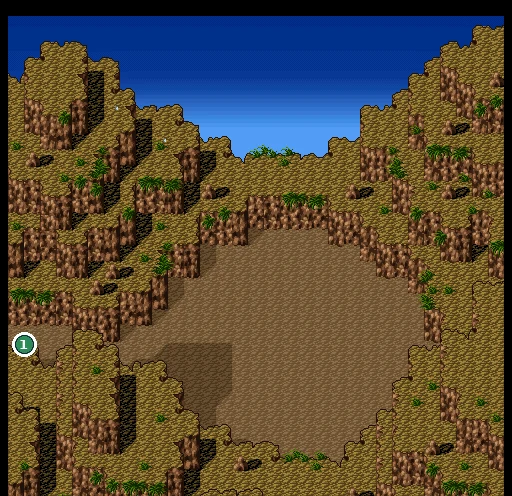
- MainMountain of Ge: the lower Mountain areas hold 2500 Nel, Manstep, Cryo Gun, Mega Fire. The Mountain of Ge itself holds 1500 Nel, 2200 Nel, 1800 Nel, Homura, Fire Pill, 2000 Nel and Ravager.
- MainAt the top waits the Dragon of Ge, wounded by the “black humans”. It mistakes you for one of them. When it falls you get the spirit-summoning orb (Soul Orb). The dragon also tells you the King of Ge waits as a stone statue in the forest, and that Kain has led the black humans to a temple of the seals deep in the Green Sea. It sends you to the village at the foot of the mountain.
- MainBack in Druk, hand the orb over: Rizara performs the ritual and the baby is saved. You decide to reach the last seal in the Green Sea before the usurper does. Rizara joins.
- MainAt Rizara’s House, people who doubt the king have gathered: Zenobia, Karia, Barcurea and Kunon (and others, depending on your history) each ask to come. Pick one. Donea is here too but can’t fight.
Bosses
🗺️ Maps for this chapter (10)
Letters mark treasure chests (tick them off as you open them), green numbers are exits, white squares are shops. Tap a map to open it full size.
- 1Exit to World map
- 2Exit to Temple of Za
- 3Exit to Druk Port
- SGeneral Store
- IInn
- 4Exit to Rizara’s House
- SGeneral Store
- 5Exit to House
- 6Exit to House
- 7Exit to House
- TTavern
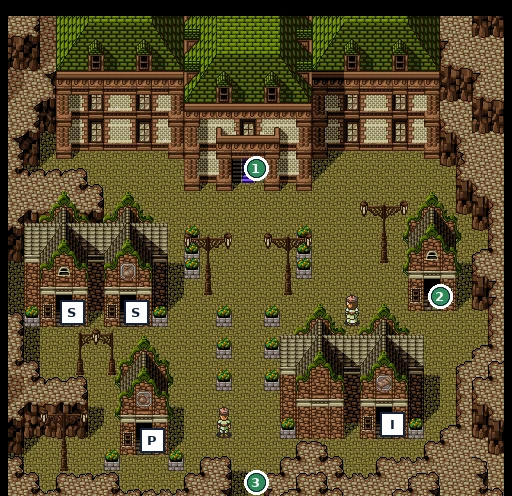
- 1Exit to Audience Hall
- SGeneral Store
- SGeneral Store
- PPUB
- 2Exit to House
- IInn
- 3Exit to World map
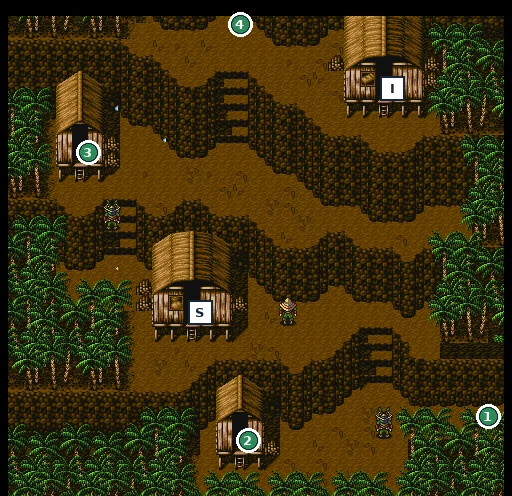
- 1Exit to World map
- 2Exit to House
- SGeneral Store
- 3Exit to House
- IInn
- 4Exit to Mountain of Ge: area 1
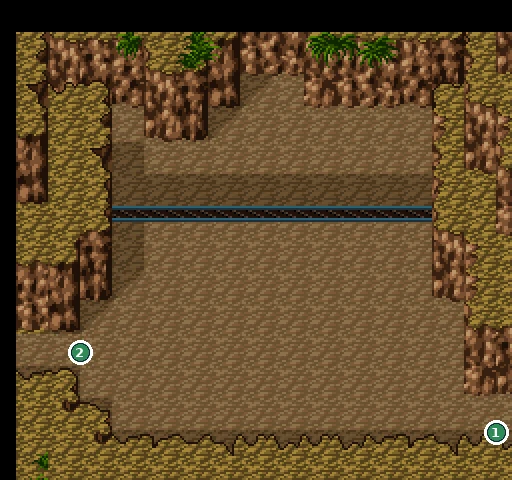
- 1Exit to Mountain Path
- 2Exit to Mountain Path (later years)
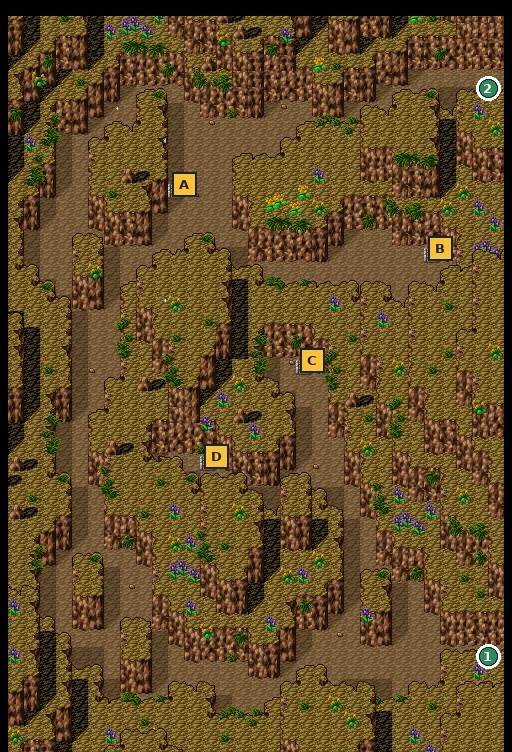
- 1Exit to Mountain of Ge: area 4
- 2Exit to Mountain of Ge: summit
- A Manstep
- B 2500 Nel
- C Cryo Gun
- D Mega Fire
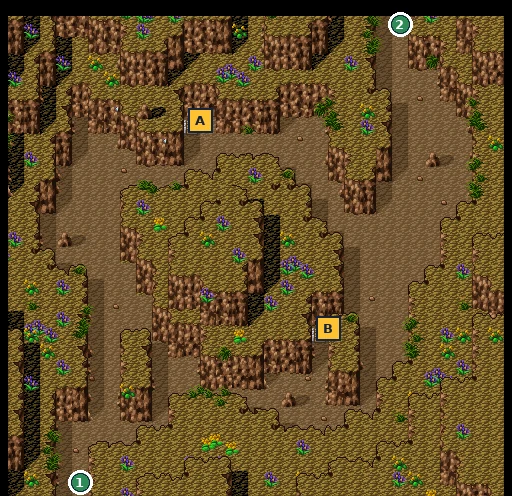
- 1Exit to Keminu
- 2Exit to Mountain of Ge: area 2
- A 2200 Nel
- B 1500 Nel
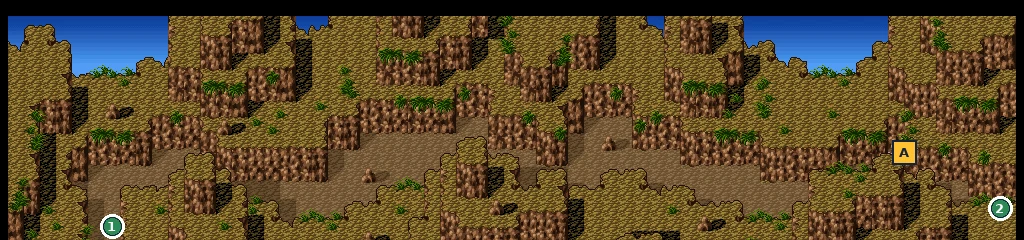
- 1Exit to Mountain of Ge: area 1
- 2Exit to Mountain of Ge: area 3
- A 1800 Nel
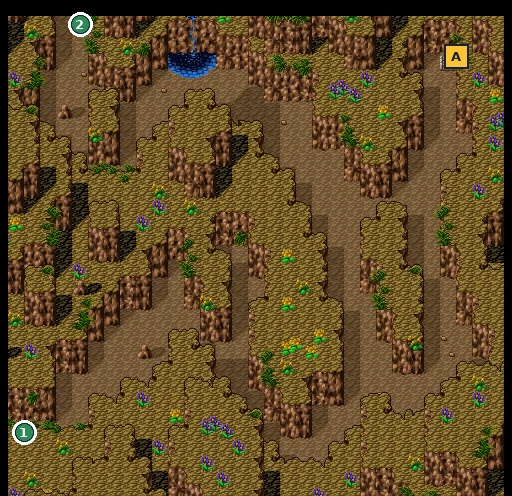
- 1Exit to Mountain of Ge: area 2
- 2Exit to Mountain of Ge: area 4
- A Homura
- 1Exit to Mountain of Ge: area 3
- 2Exit to Mountain (below the Mountain of Ge): area 2
- A 2000 Nel
- B Ravager
- C Fire Pill
Checklist
- Where
- Mountain of Ge: summit
- How
- Defeat the Dragon of Ge with a slot free.
- Reward
- Orb for the baby in Druk
- Opens
- Ch. 16
- Closes
- Story
- Where
- Druk: Rizara’s House
- How
- Talk to the candidates and answer Yes to one.
- Reward
- Zenobia, Karia, Barcurea, Kunon, … (depends on history)
- Opens
- Ch. 16
- Closes
- Locked once chosen
The Green Sea & the King of Ge
📍 Green Sea · Bandit Hideout
Kain reaches the last seal before you. With Za’s temples falling one by one and Rizara drawn to Kain, you go back to where it all began: the bandits’ statue of Ge.
⏳ Last chances in this chapter
- Green Sea chests: Gold Arm, Silencer.
- Rizara leaves the party in the Green Sea temple.
Full list across the game: Missables.
Walkthrough
- MainEnter the Green Sea, a forest full of fallen angels that cuts the continent in two (one entrance lies east of Manamigal). Chests: Gold Arm and Silencer. Faru appears deeper in, calling for her brother.
- MainA tremor: the temple’s seal has already been broken. In the Altar Room Kain explains that the unsealing brings the ruin that lets everything begin again, through the great god Ma. Fight Kain and the Black Child soldiers. Rizara reveals that Ma created Za and, curious about Ma’s technology, leaves with Kain.
- MainThe Chronicle: Green Sea Unsealed, then Sky Ship Crashes: the ship of the sky people falls on the old capital’s temple, and a barrier now seals the city.
- MainBack in Druk, tell Saman what happened. You decide to get the King of Ge’s power from the statue in the bandit hideout. Go by the Graveyard road and enter by the western mountain path, where the Fengshui Gold ambush took place.
- MainBandit Hideout: Gainaster still leads the bandits. He warns that most men die receiving the King of Ge’s final power, and only the man now ruling Asashina has done it in one go. You volunteer and succeed: you now hold both Za and Ge. Gainaster joins.
Bosses
🗺️ Maps for this chapter (7)
Letters mark treasure chests (tick them off as you open them), green numbers are exits, white squares are shops. Tap a map to open it full size.
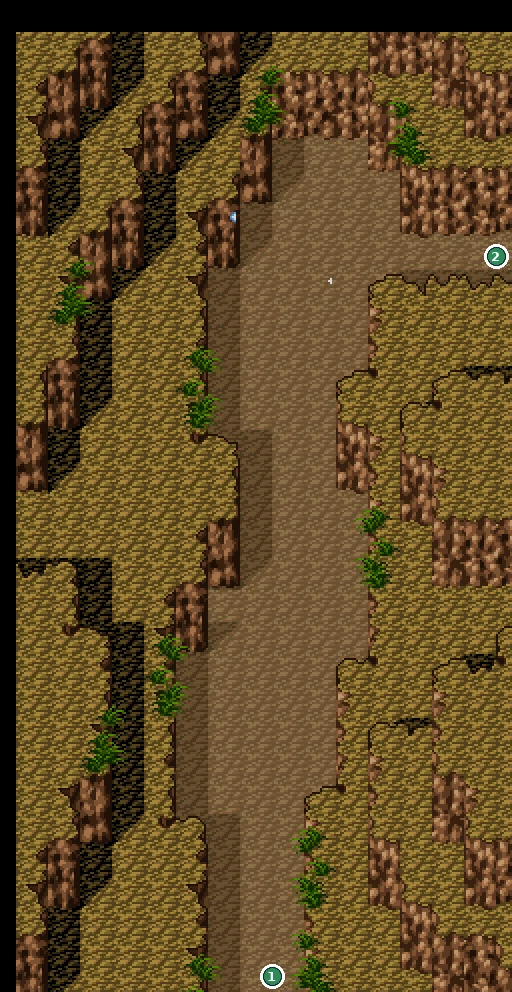
- 1Exit to World map
- 2Exit to Mountain (below the Mountain of Ge): area 1
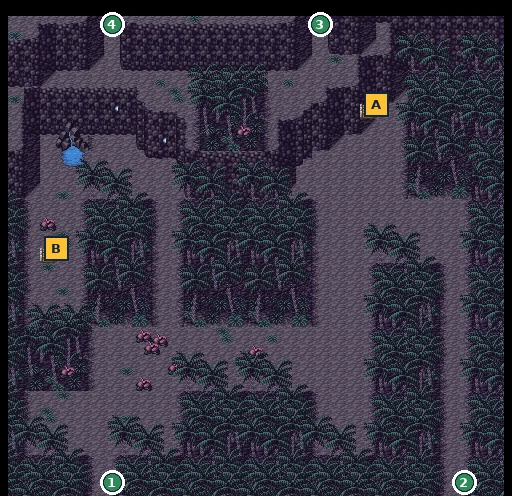
- 1Exit to World map
- 2Exit to Green Sea: area 2
- 3Exit to Green Sea: area 4
- 4Exit to Altar Room of Za
- A Silencer
- B Gold Arm
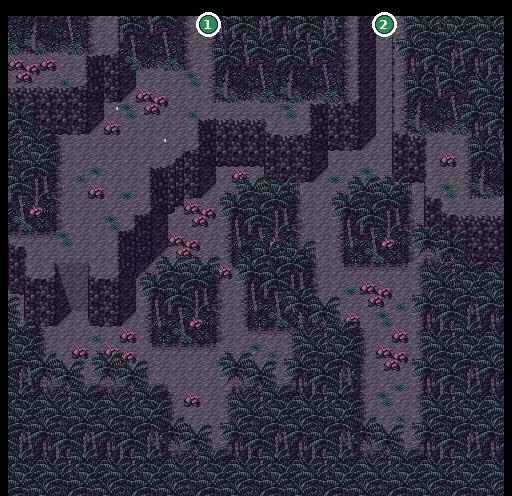
- 1Exit to Green Sea: area 1
- 2Exit to Green Sea: area 3
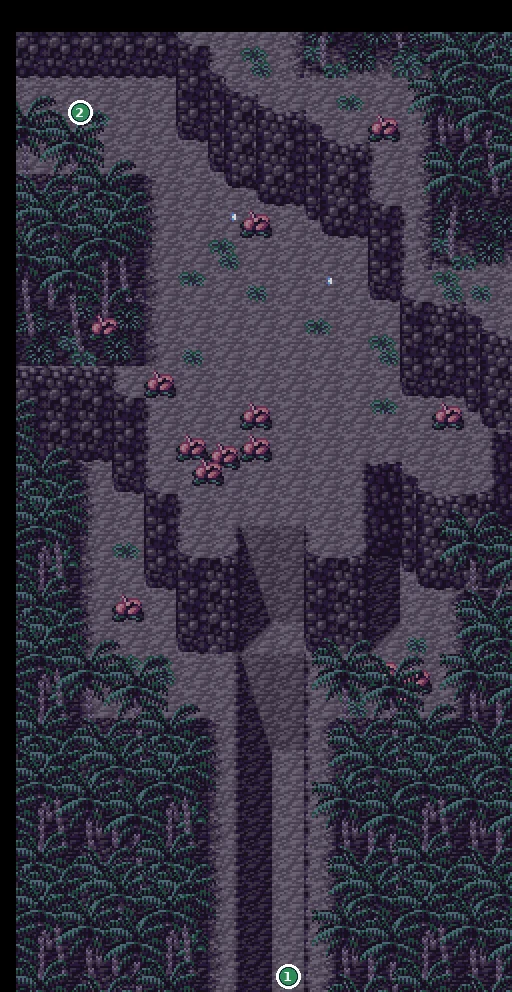
- 1Exit to Green Sea: area 2
- 2Exit to Green Sea: area 4
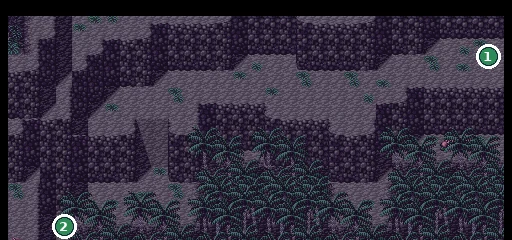
- 1Exit to Green Sea: area 3
- 2Exit to Green Sea: area 1
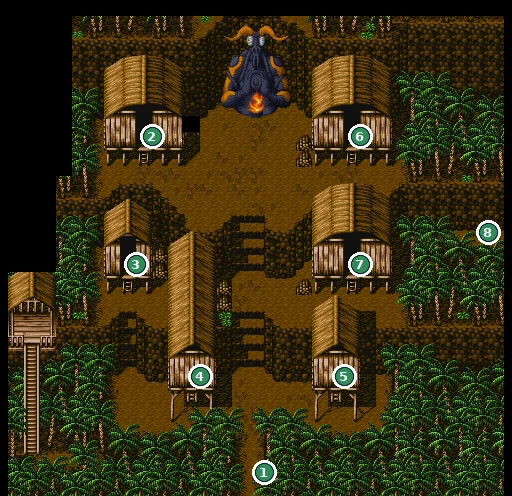
- 1Exit to World map
- 2Exit to Gainaster’s Room
- 3Exit to Tand’s Room
- 4Exit to Barracks Entrance
- 5Exit to Side Room Entrance
- 6Exit to Bandit Armory
- 7Exit to Dining Hall
- 8Exit to Bandit Forest: area 3 (the ambush)
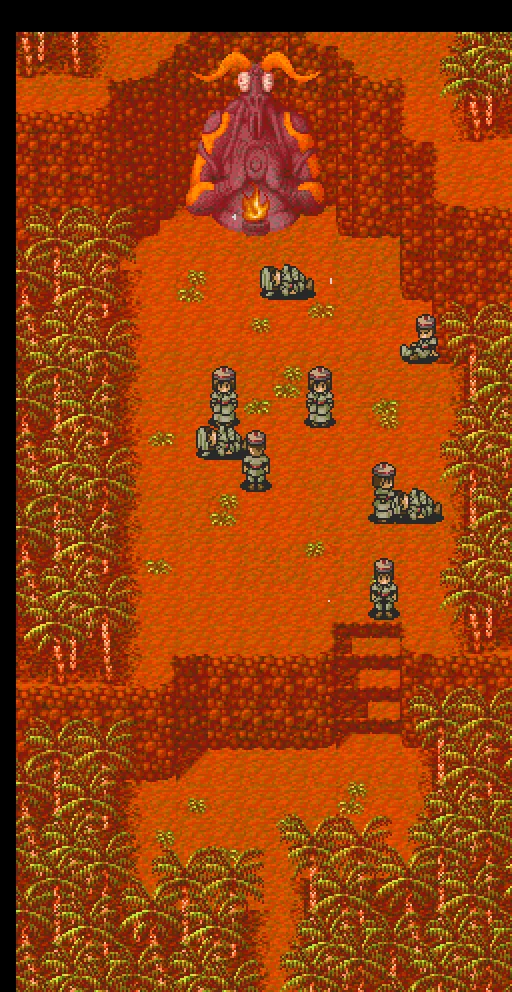
The Sky Ship, the Sky Kingdom & Nikura
📍 old capital · Sky Ship · Sky Kingdom · Nikura (805) · Demon Vajra Cave
With the King of Ge’s power you break the barrier over the old capital and board the fallen ship of the sky people. Their Elder sends you back in time to 805, to fetch the one key that can control the power sleeping under Asashina.
⏳ Last chances in this chapter
- The Sky Ship has 18 chests (mostly 3000–5000 Nel). See the maps.
- Keep a slot free for the Demon Vajra before its cave.
- Get ready before you answer Yes in the transfer room: you won’t come back to this year.
Full list across the game: Missables.
Walkthrough
- MainAt the Royal Capital Entrance use the King of Ge’s power to break the barrier. In the Palace Courtyard Mikene and Gainaster stare at the huge ship lying there. Go inside.
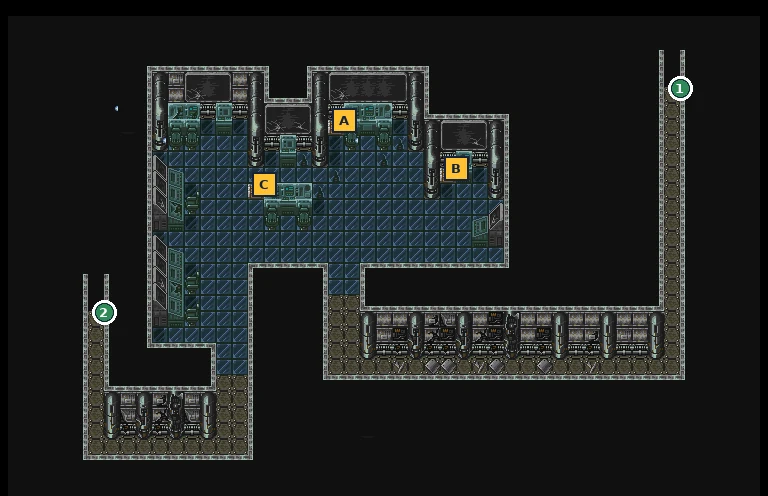
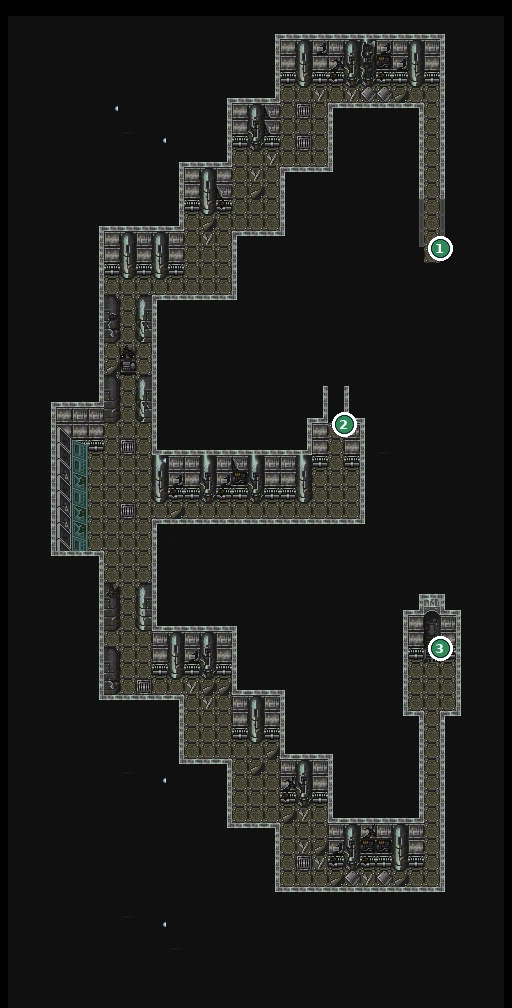
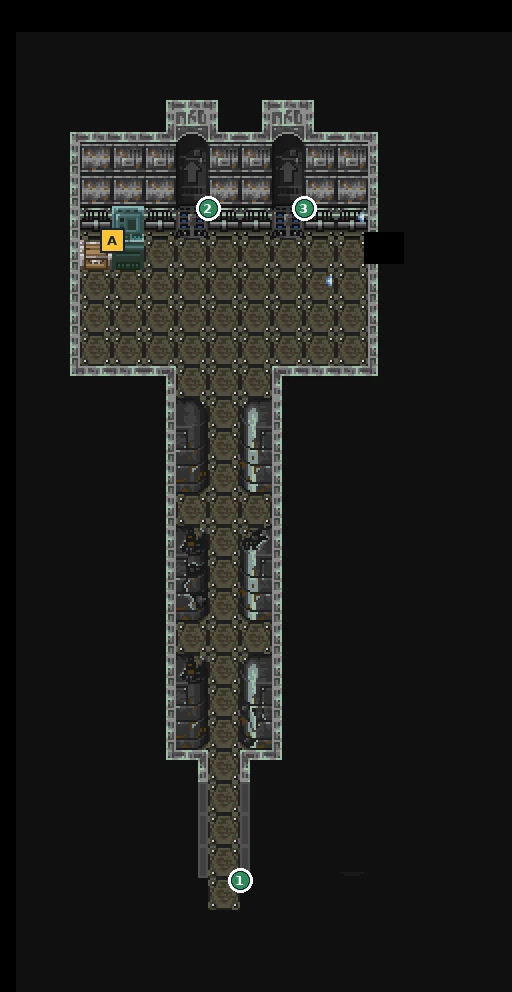
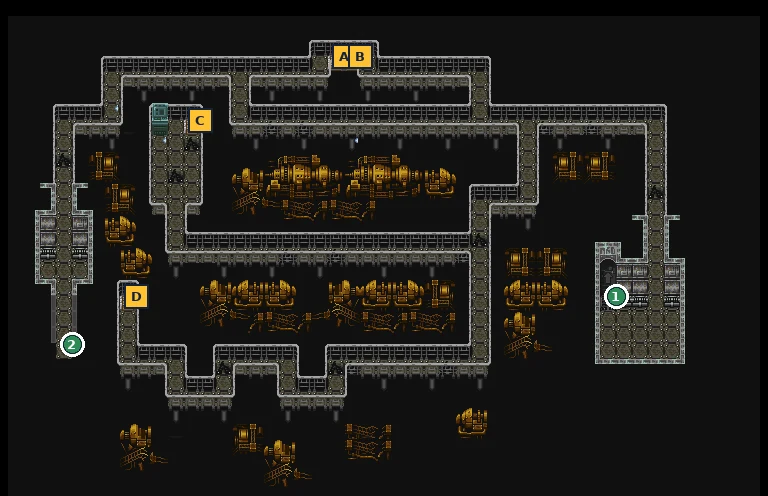
- MainSky Ship (16 areas): chests with 3000, 3200, 3500, 3600, 3700, 3800 ×2, 4000 ×2, 4200, 4300, 4600, 4800 and 5000 Nel, two Wind Pills, a Mega Wind and Darkness.
- MainAt the end Kain welcomes you to “the Government Hall of the Asashina Empire”. Rizara tells Mikene and Gainaster who you really are: the true owner of the king’s body. She leaves again with Kain, asking you to look after Saman.
- MainThe ship carries you to the Sky Kingdom. Sky City has a shop and a place to rest. In the Sky Temple the Elder explains: the sky people descend from Ma, who made the Za gods; the Black Child soldiers were made by the sky people’s own ancestors; Kain serves the last pure-blood of Ma, who wants to wake the power under Asashina. From now on your Chronicle is the Chronicle of Ruin.
- MainThe Elder’s plan: go to Nikura beyond the Sea of Flames, where a key to the ancestors’ power may lie. He will send you into the past. In the transfer room answer Yes to “Are you ready?”. Okuyaram, a man from Nikura, greets you like an old friend.
- Main805 again. At the bandit hideout the King of Ge gives you his power a third time, and Gainaster comes along. With it you cross the Sea of Flames to Nikura (public guides: on the back of the Time-Crossing Mizuchi).
- MainNikura: the people are cold to outsiders, but the Elder hears you out. The Demon Vajra is a key that can change the world’s fate; it sleeps in the cave beyond the altar. A man going by your first name (Kain) failed even to touch it and left Black Child soldiers around Nikura. Agree to defeat him and the Elder lets you into the cave. A locked-up prisoner, the last of Ma’s blood, taunts you that your arrival in 805 nearly broke the barrier; the Chronicle tells you not to believe him, and he is immortal.
- MainDemon Vajra Cave: chests 6000 Nel, Wind Pill, Mega Sky, Blizzard (large area) and 8000 Nel, Sutra. At the bottom, Kain’s shadow attacks. Win and you get the Demon Vajra.
- MainBring the Vajra to the Elder of Nikura, who sends you home. Kain’s ally interferes with the return, so you arrive years later than planned: in 824–825, with the end very close.
Bosses
🗺️ Maps for this chapter (27)
Letters mark treasure chests (tick them off as you open them), green numbers are exits, white squares are shops. Tap a map to open it full size.
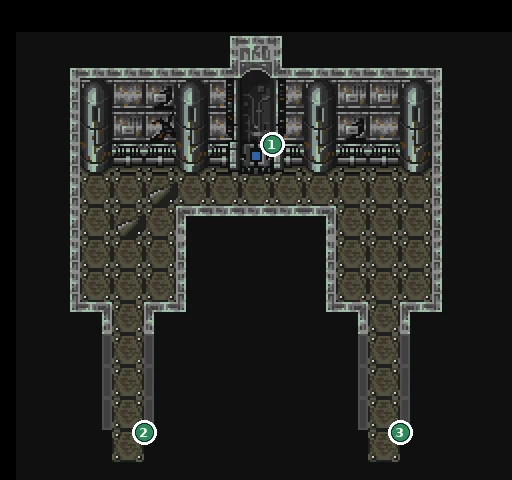
- 1Exit to Palace Courtyard
- 2Exit to Sky Ship: area 3
- 3Exit to Sky Ship: area 9
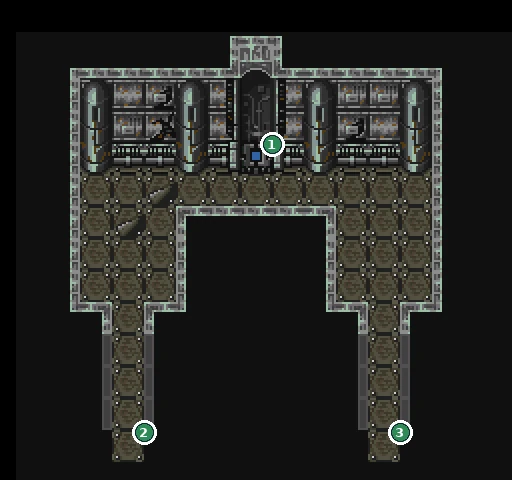
- 1Exit to Palace Courtyard
- 2Exit to Sky Ship: area 3
- 3Exit to Sky Ship: area 9
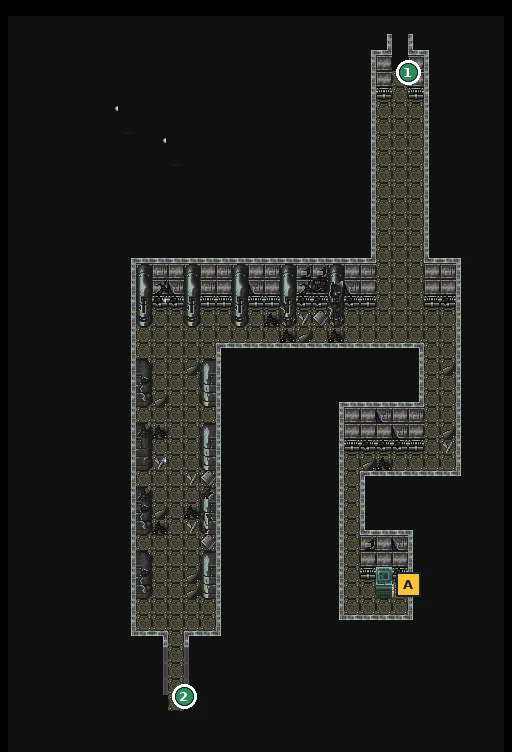
- 1Exit to Sky Ship: area 2
- 2Exit to Sky Ship: area 4
- A 3000 Nel
- 1Exit to Sky Ship: area 3
- 2Exit to Sky Ship: area 5
- A 3600 Nel
- B 3500 Nel
- C Wind Pill
- 1Exit to Sky Ship: area 4
- 2Exit to Sky Ship: area 6
- 3Exit to Sky Ship: area 7
- 1Exit to Sky Ship: area 5
- 2Exit to Sky Ship: area 11
- 3Exit to Sky Ship: area 10
- A 3800 Nel
- 1Exit to Sky Ship: area 5
- 2Exit to Sky Ship: area 8
- A Wind Pill
- B 3200 Nel
- C 3700 Nel
- D 4000 Nel
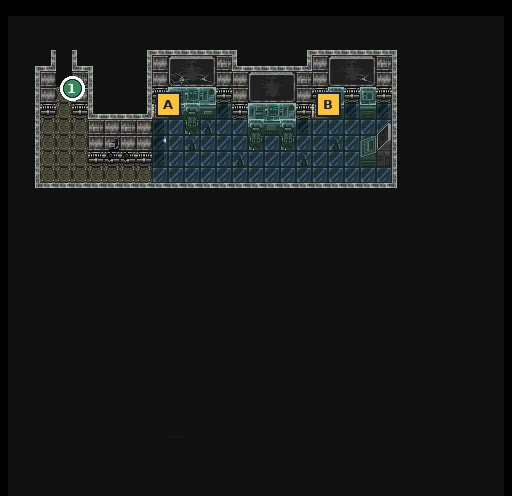
- 1Exit to Sky Ship: area 7
- A Mega Wind
- B 4200 Nel
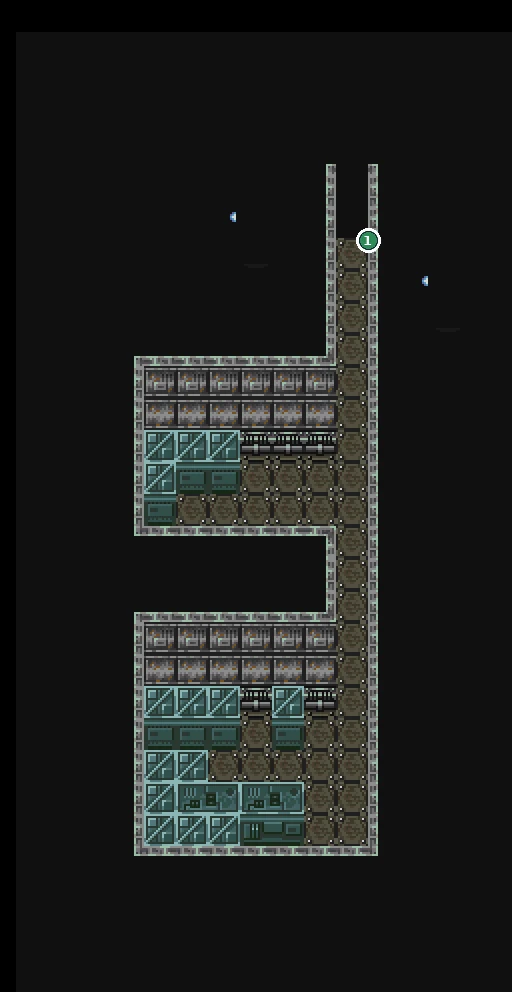
- 1Exit to Sky Ship: area 2
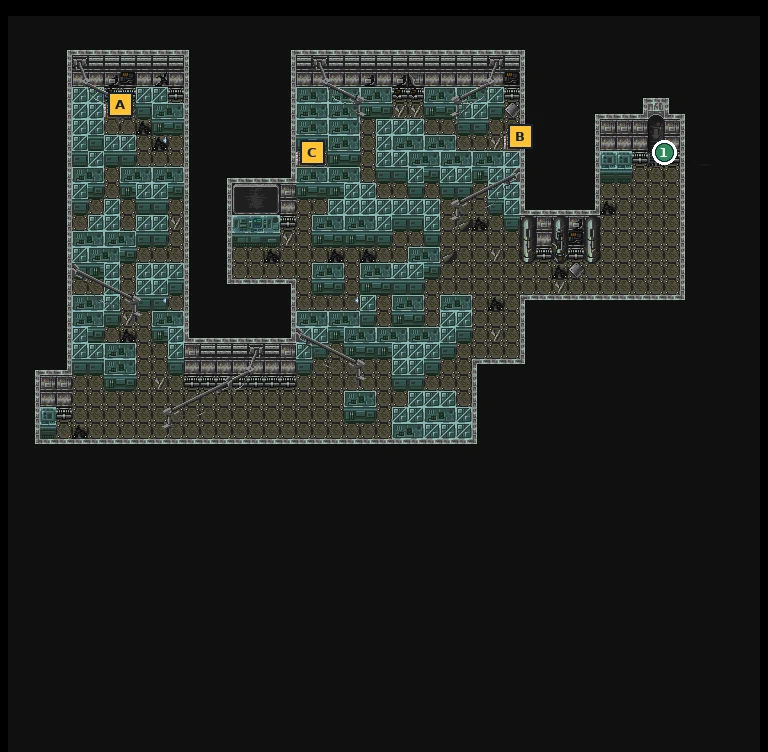
- 1Exit to Sky Ship: area 6
- A 4000 Nel
- B 3800 Nel
- C 4300 Nel
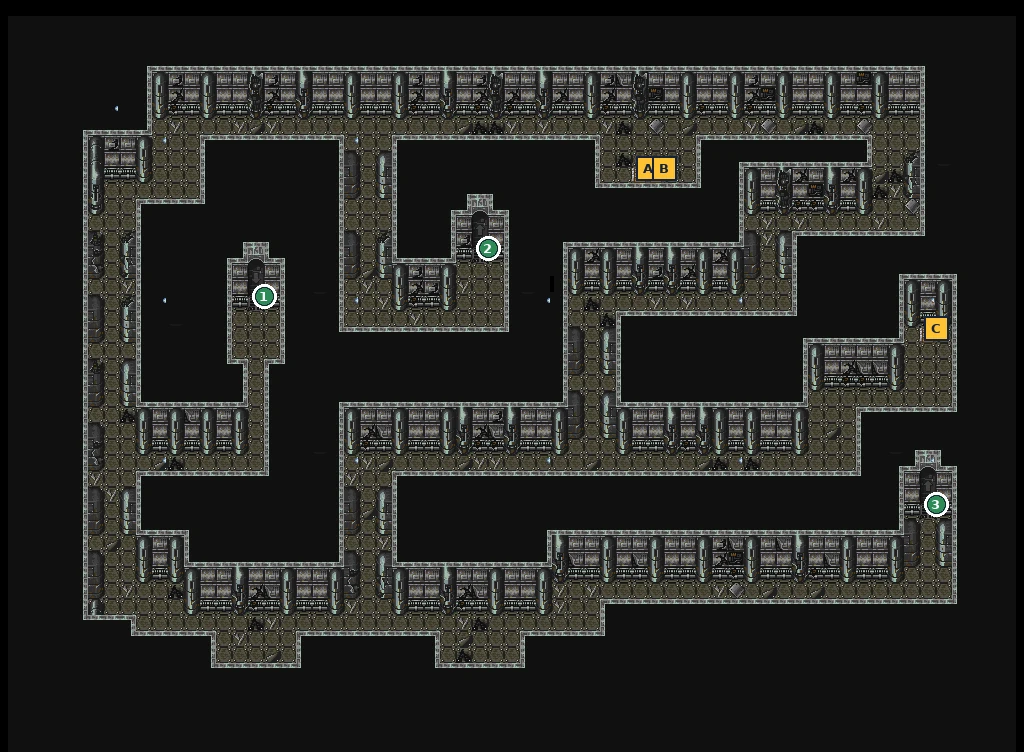
- 1Exit to Sky Ship: area 6
- 2Exit to Sky Ship: area 12
- 3Exit to Sky Ship: area 13
- A 4600 Nel
- B 4800 Nel
- C 5000 Nel
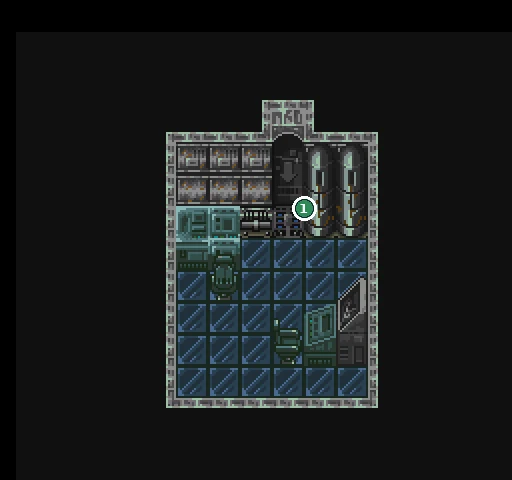
- 1Exit to Sky Ship: area 11
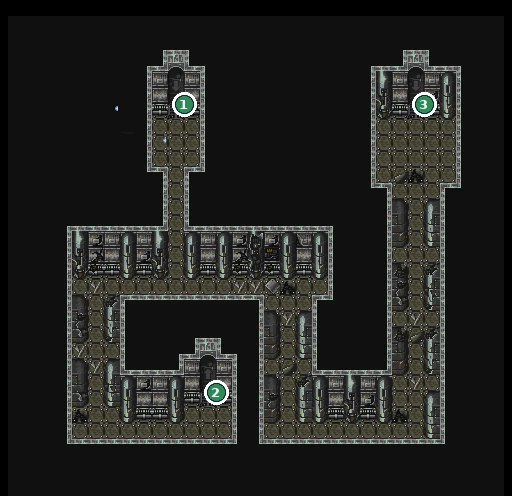
- 1Exit to Sky Ship: area 11
- 2Exit to Sky Ship: area 15
- 3Exit to Sky Ship: area 14
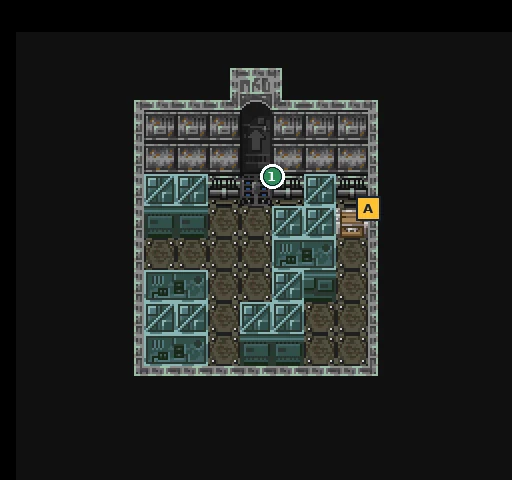
- 1Exit to Sky Ship: area 13
- A Darkness
- 1Exit to Sky Ship: area 13
- 2Exit to Sky Ship: area 16
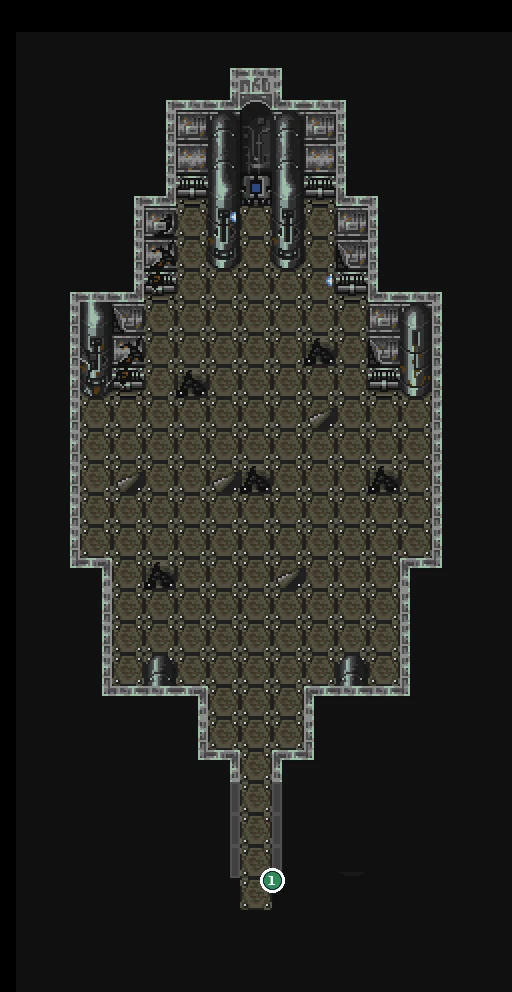
- 1Exit to Sky Ship: area 15
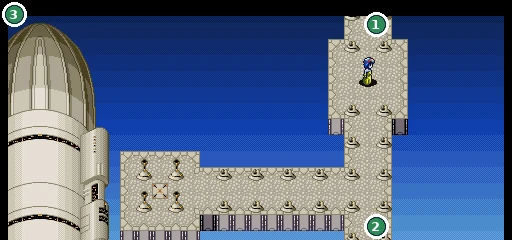
- 1Exit to Sky Temple
- 2Exit to Sky City
- 3Exit to Irai
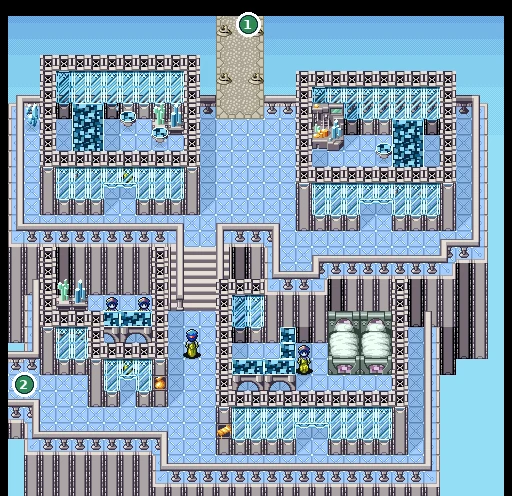
- 1Exit to Sky Kingdom: transfer room
- 2Exit to Sky Kingdom
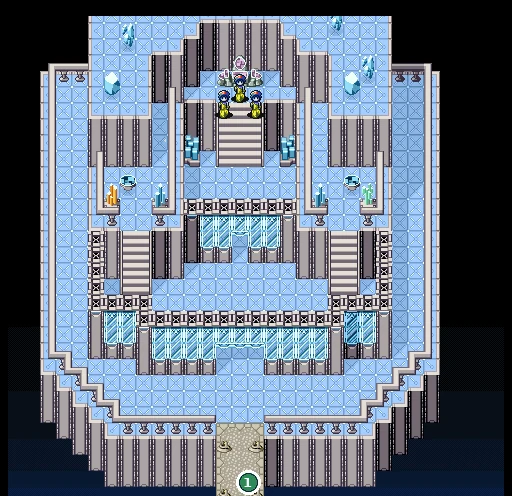
- 1Exit to Sky Kingdom: transfer room
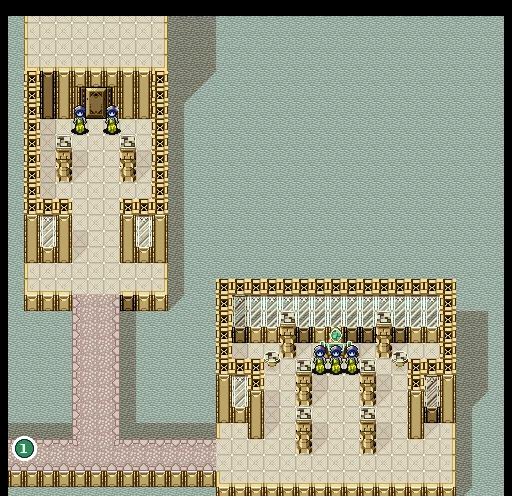
- 1Exit to Nikura town
- 1Exit to World map
- 2Exit to Nikura: the Elder’s hall
- 3Exit to Demon Vajra Altar
- 1Exit to Nikura town
- 2Exit to Demon Vajra Cave: area 1
- 1Exit to Demon Vajra Altar
- 2Exit to Demon Vajra Cave: area 2
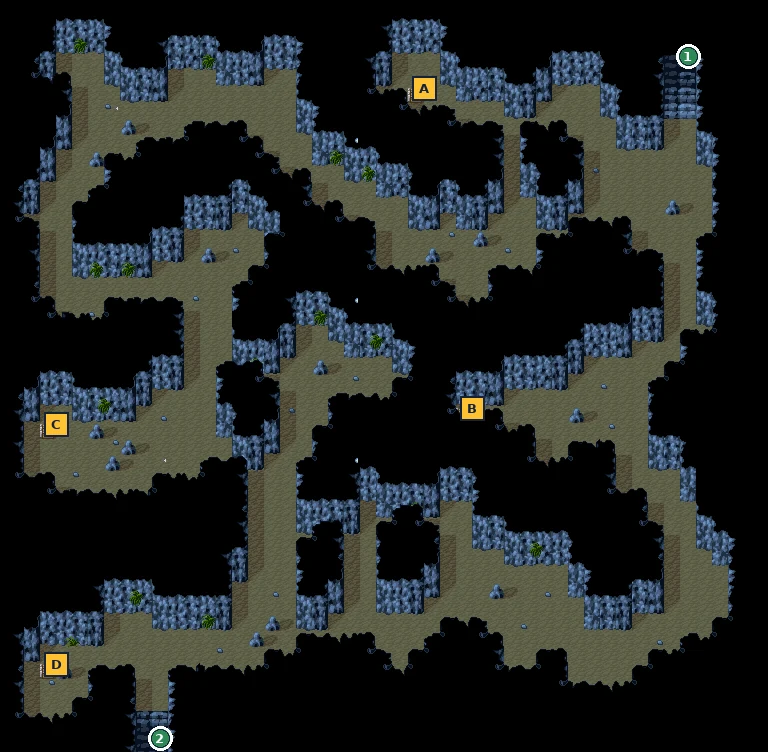
- 1Exit to Demon Vajra Cave: area 1
- 2Exit to Demon Vajra Cave: area 3
- A 6000 Nel
- B Wind Pill
- C Mega Sky
- D Blizzard
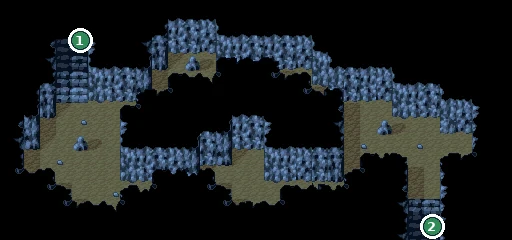
- 1Exit to Demon Vajra Cave: area 2
- 2Exit to Demon Vajra Cave: area 4
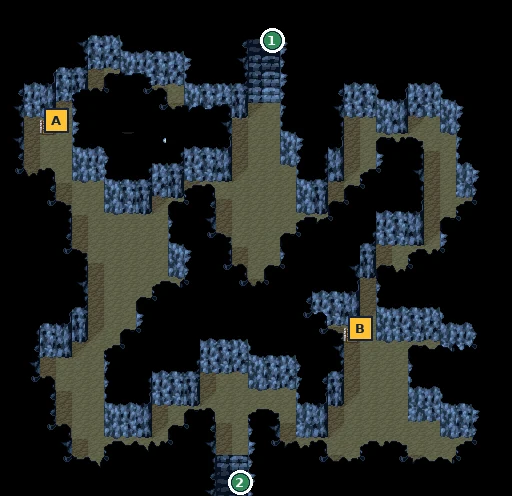
- 1Exit to Demon Vajra Cave: area 3
- 2Exit to Demon Vajra Cave: area 5 (Kain’s shadow)
- A 8000 Nel
- B Sutra
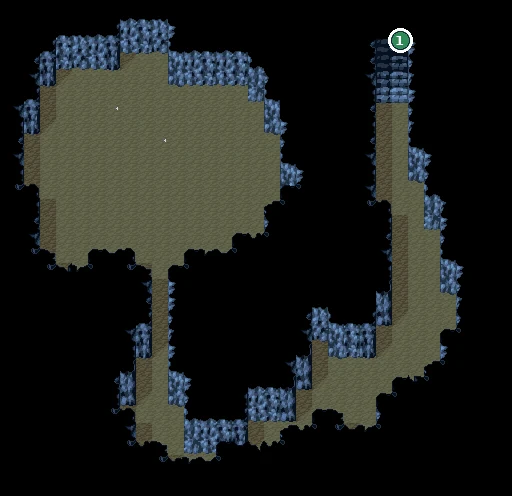
- 1Exit to Demon Vajra Cave: area 4
Checklist
- Where
- Nikura (805): Demon Vajra Cave
- How
- Defeat Kain’s shadow with a slot free.
- Reward
- Demon Vajra (needed for the ending)
- Opens
- Ch. 18
- Closes
- Story
The last year: Rizara, Kain and Ma
📍 Druk · old capital · Capital Underground · Underground Ruins · Key Room
Twenty years after you arrived, Gran is almost gone: the Sky Kingdom fell into the sea in 822 and Nikura was destroyed in 823. Saman leads the resistance in Druk, and the god Ma waits under Asashina.
⏳ Last chances in this chapter
- Underground Ruins chests: Sky Pill, Terror, Phantom (B2) and Marvel, Atomic, Lethal (B4). The lava in the red area hurts.
- Alruna restores your strength: use her before the Capital Underground.
Full list across the game: Missables.
Walkthrough
- MainIn Druk, Saman now leads the resistance against the Empire. At Rizara’s house she asks you to stop her sister, and to kill her if it comes to that. Mikene notes it has been seven years since the Green Sea.
- MainIn the old capital, Alruna in the Hall of the Second Coming restores your party and explains the missing years. She asks you to stop Rizara, and seems almost to cry.
- MainA new hole has opened in the Capital Underground. Gainaster goes in first. Kain tells you Rizara is an angel who answers only to him. Rizara says she wanted peace through Ma, but Kain and Ma want only power and revenge. Fight Rizara. She dies asking you to look after Saman; Kain escapes.
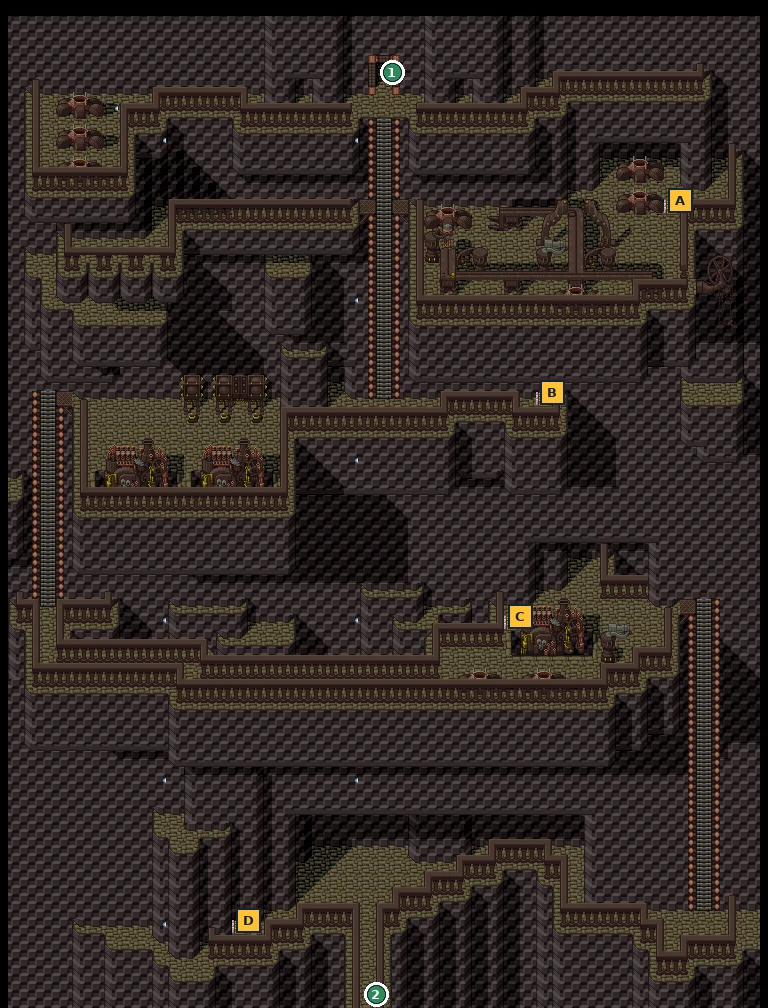
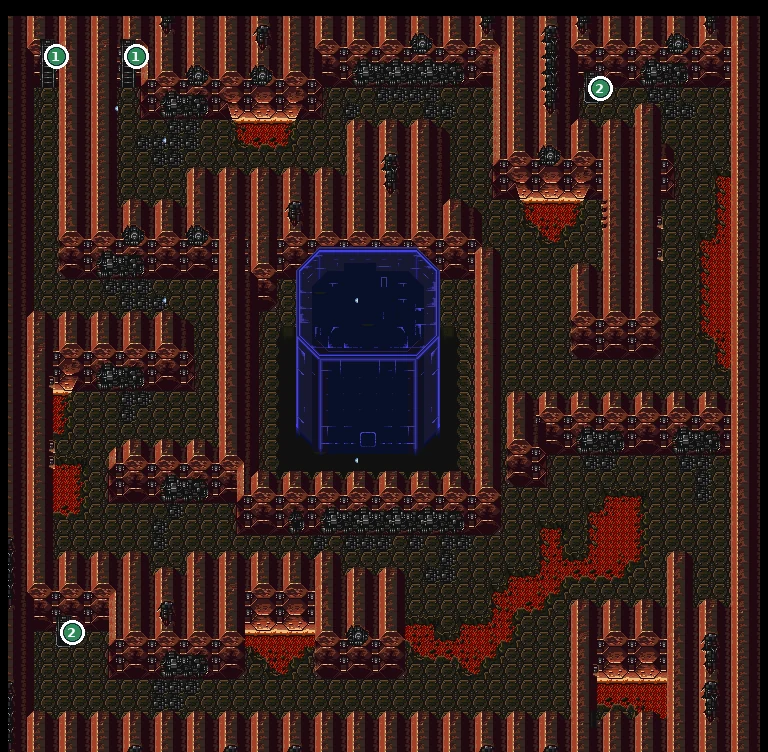
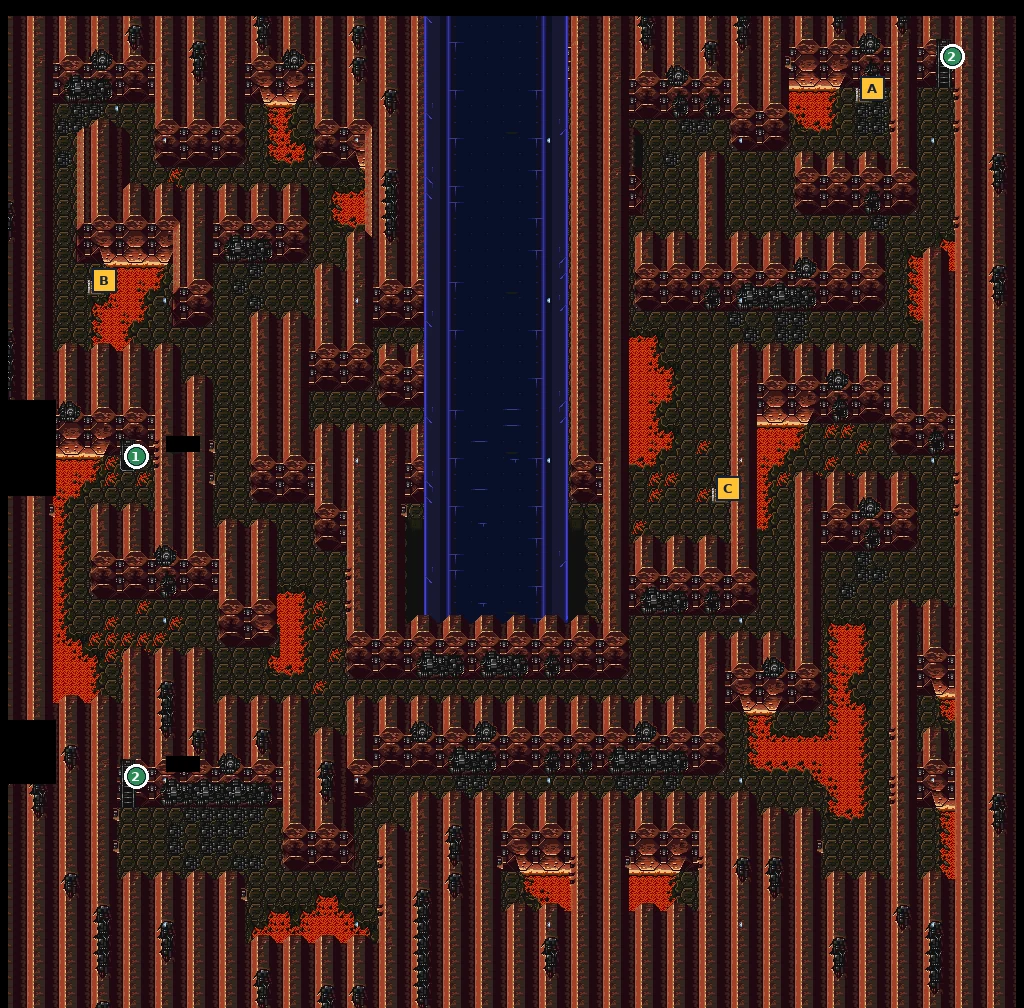
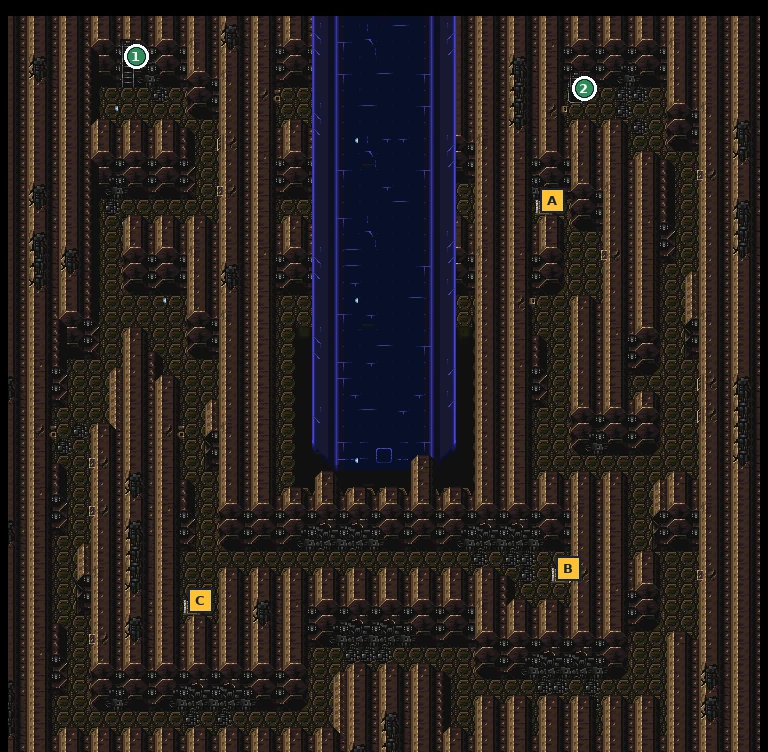
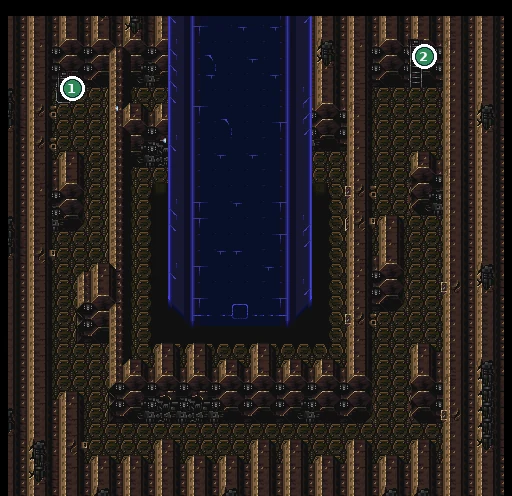
- MainUnderground Ruins (7 areas): chests Sky Pill, Terror, Phantom in the large red area, and Marvel, Atomic, Lethal further down. In the last area Kain blocks the way to stop you using the Vajra.
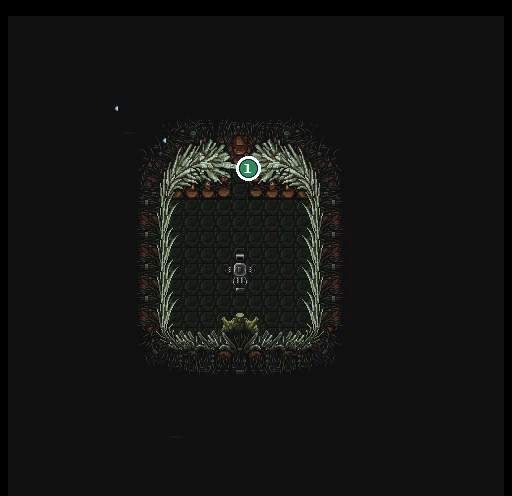
- MainMa waits in the deepest chamber. He tells Mikene you are not a human of this world; Mikene and Gainaster stand by you anyway. Ma fights in three phases. In the second, kill the three False Stars first.
- MainMa’s energy runs wild. Climb to the final control room, the Key Room. The World Chronicle shows two places to insert the Demon Vajra:
- MainLeft slot: stops the energy completely. Every angel stops, Za is gone and the ruin of Gran vanishes from history (Chronicle: Za Extinguished). Right slot: returns the energy to normal; the ruin is avoided but the turmoil may last longer, and a ship from the stars is found beneath Asashina (Chronicle: Star Ship Found). Walk to a slot and confirm “Insert the Demon Vajra?”. Neither ending is called good or bad by the game.
- MainYour twenty years are over and you can’t stay. Say goodbye to Mikene and Gainaster. Later, Saman lives on in Druk, in the world you protected.
Bosses
🗺️ Maps for this chapter (11)
Letters mark treasure chests (tick them off as you open them), green numbers are exits, white squares are shops. Tap a map to open it full size.
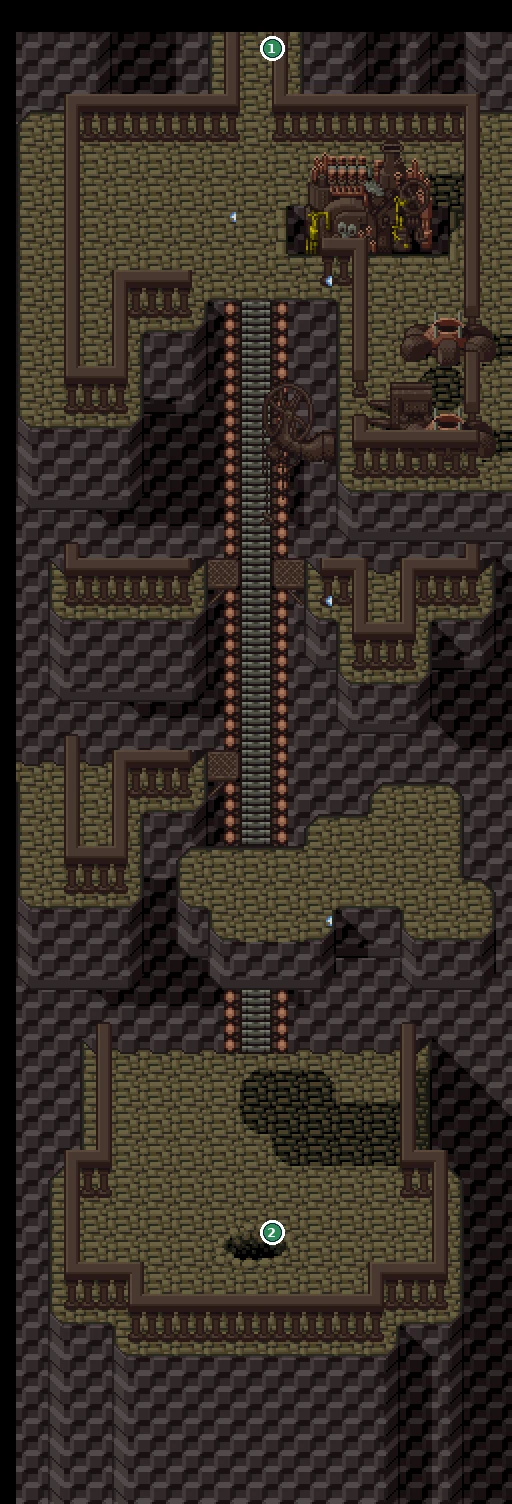
- 1Exit to Capital Underground (825)
- 2Exit to Underground Ruins: area 1
- 1Exit to Underground Entrance
- 2Exit to Capital Underground: the new hole (825)
- A Water Pill
- B 800 Nel
- C Mega Water
- D Slayer
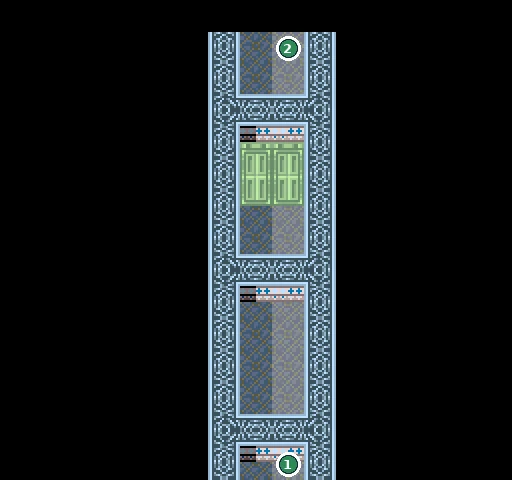
- 1Exit to Prison
- 2Exit to Capital Underground (809)
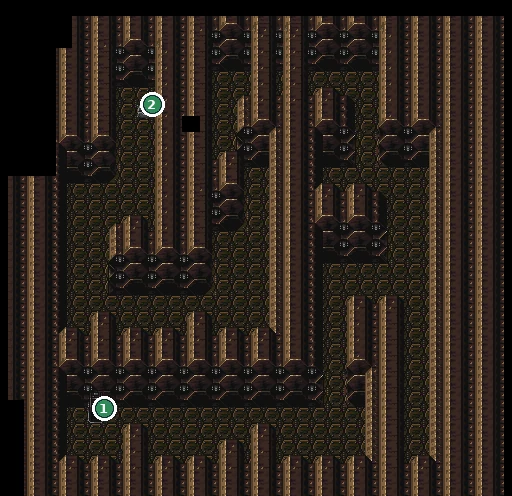
- 1Exit to Underground Ruins: area 2
- 2Exit to Capital Underground: the new hole (825)
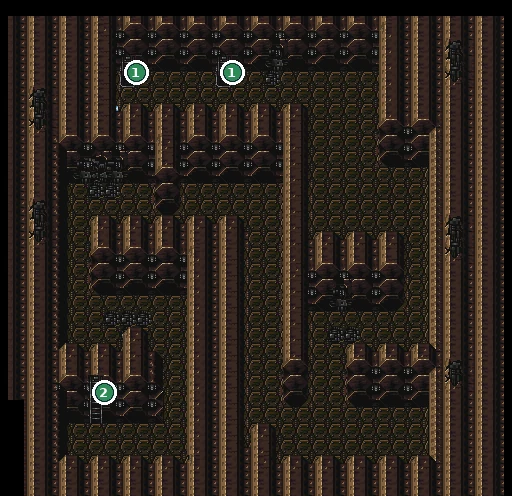
- 1Exit to Underground Ruins: area 3
- 2Exit to Underground Ruins: area 1
- 1Exit to Underground Ruins: area 2
- 2Exit to Underground Ruins: area 4
- 1Exit to Underground Ruins: area 5
- 2Exit to Underground Ruins: area 3
- A Terror
- B Sky Pill
- C Phantom
- 1Exit to Underground Ruins: area 4
- 2Exit to Underground Ruins: area 6
- A Lethal
- B Atomic
- C Marvel
- 1Exit to Underground Ruins: area 7
- 2Exit to Underground Ruins: area 5
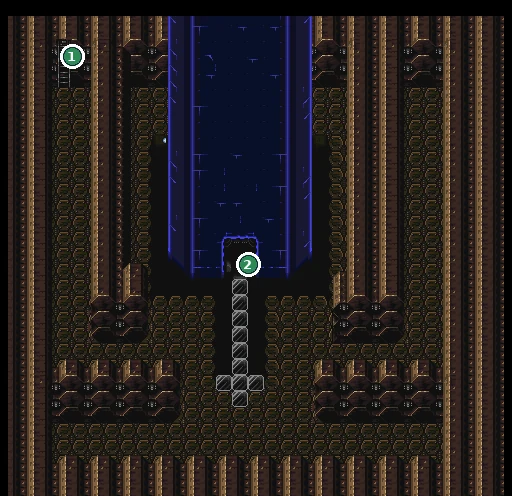
- 1Exit to Underground Ruins: area 6
- 2Exit to Underground Ruins: Ma’s chamber
- 1Exit to Underground Ruins: area 7
Checklist
- Where
- Key Room
- How
- Insert the Demon Vajra on the left or the right.
- Reward
- Za Extinguished (left) or Star Ship Found (right)
- Opens
- Ch. 19
- Closes
- The ending
Party members
The names in the first column are the ones shown in the status menu. Joining and leaving follow the story; see each chapter for details.
| Menu name | Who | With you |
|---|---|---|
| Gainaster | Bandit chief, later King of Galamania | 805 (bandit route, the Fengshui Gold ambush only); 818 at the Bandit Hideout, to the end |
| Mikene | Captain of the royal capital’s knights | 805 (Royal Army route, the Fengshui Gold ambush); 806 Sanzakal trip to 807; 810+ War Vault option; 817 at Druk, to the end |
| Saman | Thief girl, Rizara’s sister | 807: Eastern Region → Druk |
| Shwank | Schwank, a young soldier (menu spelling: Shwank) | 808 escort, until Tand takes his body |
| Ge Donea | Donea under the Curse of Ge | 808: Secret Passage → Druk temple |
| Donea | Princess of Galamania | 808, after the curse is lifted |
| Zenobia | Vice-captain of the knights | Only if spared (809): War Vault option 810+; 817 candidate |
| Tripod | Light Tripod, an angel of Za | War Vault option, 810+ |
| Knight | A knight of Asashina | War Vault option, 810+ |
| Rody | Deputy Priest of Za | 806: Bekano → Old Sanzakal Mine (betrays you) |
| Mijua | High Priest of Za | 806 after the rescue; 817 at Rizara’s house |
| Ibusuki | Heir of the old royal house | 813: Plague Ship |
| W. Angel | Water Angel, lent by Hepainas | 813: Plague Ship (turns against you) |
| Rizara | Priestess of Za in Druk | 817 after the orb → 818 Green Sea temple |
| Karia | Knight Captain of Manamigal | 817 candidate |
| Barcurea | Famous mercenary | 817 candidate |
| Kunon | Prince of Asashina | 817 candidate, if he survived 806 and 810 |
| Faru | Princess of the House of Ibusuki | 817 candidate (depends on history) |
All 75 treasure chests
Every treasure chest placed on a map, read from the game data. Ticks here and on the maps are the same.
Credits & sources
Written for Game Translate from our own work on the game while translating it: chest contents, map exits and World Chronicle entries were read from the ROM, the maps were stitched from the game itself, and every scene, choice and hint comes from the full script of our English patch. The order of events and some boss notes were cross-checked against two GameFAQs guides: the 1999 guide and walkthrough by SBruck and the 2008 walkthrough by Ritchie. Boss HP figures, the step limit for Prince Kunon and the experience rules marked public guides come from Japanese fan guides and the official Japanese strategy guide. Thanks to all of them for mapping this game long before a translation existed.
Found a mistake? Leave a comment with your save point and a screenshot.